
要使用自行架設完成的 CentOS Linux Mirror 站台,必須要修改更新來源的設定檔案
底下是設定方式
1. 先備份原設定檔
# mv /etc/yum.repos.d/CentOS-Base.repo /etc/yum.repos.d/CentOS-Base.repo.`date +%F`
2. 進行修改
將 mirrorlist 那一行的前面加上 # 註解
# sed -i ‘s,mirrorlist=http://mirrorlist.centos.org,#mirrorlist=http://mirrorlist.centos.org,’ /etc/yum.repos.d/CentOS-Base.repo
把 #baseurl 前面的 # 去除
# sed -i ‘s,#baseurl=http://mirror.centos.org,baseurl=http://mirror.centos.org,’ /etc/yum.repos.d/CentOS-Base.repo
將 http://mirror.centos.org/centos/ 替換成 ftp://140.111.74.109/CentOS/
# sed -i ‘s,http://mirror.centos.org/centos/,ftp://140.111.74.109/CentOS/,’ /etc/yum.repos.d/CentOS-Base.repo
3. 去除舊的 yum cache
# yum clean all
4. 開始進行更新
# yum update
[@more@]也可以下載已經修改的設定檔
底下是設定步驟:
1. 先備份原設定檔
# mv /etc/yum.repos.d/CentOS-Base.repo /etc/yum.repos.d/CentOS-Base.repo.`date +%F`
2. 下載已經修改好的設定檔
以 CentOS Linux 6.x 為例
# wget ftp://140.111.74.109/Linux/CentOS-Base.repo.6
# mv CentOS-Base.repo.6 /etc/yum.repos.d/CentOS-Base.repo
以 CentOS Linux 5.x 為例
# wget ftp://140.111.74.109/Linux/CentOS-Base.repo.5
# mv CentOS-Base.repo.5 /etc/yum.repos.d/CentOS-Base.repo
3. 去除舊的 yum cache
# yum clean all
4. 開始進行更新
# yum update
Mirror CentOS Linux 終於完成
從 10/2(三) 早上到 10/6(日) 早上,一共花了將近五天的時間,終於將 CentOS Linux 全部 Mirror 完成了,原本以為可能二到三天就可以完成,沒想到時間要這麼長。
檔案將近用掉了 118G,不算太大,因為 Scientific Linux 一個版本 6.x 就用掉了 36xG,而 CentOS Linux 則是包含了 5.x/6.x 版本。

刪除 Windows 8.1 微軟注音輸入法
Windows 8 已經釋出一段時間了,但自己一直沒有轉移到 Windows 8,大部分的時間還是使用 Windows 7,偶爾也會用 Apple Mac OSX 或是 Ubuntu Linux,最主要是 Windows 8 新的介面有些難以適應,再加上中文輸入法有些難用,和之前的 Windows 7 相差很多,最近 Windows 8.1 也快要正式釋出了,於是就下載下來安裝看看。
安裝起來的介面和 Windows 8 相去不遠。 
但輸入法一樣難用,一般來說,我都是直接切換到桌面模式,但系統都會預設安裝微軟注音輸入法,可是我是習慣使用行列輸入法,每次由英文鍵盤切換到中文鍵盤,又要多切換一次,可是預設安裝的微軟注音輸入法又不能移除,後來在網路上搜尋了一下,找到了這一篇, 如何刪除 Windows 8 的微軟新注音輸入法 @ 呆丸北拜 痞客邦 PIXNET ,可是執行後,好像還是無法刪除,經仔細比對後,發現 Windows 8 和 Windows 8.1 的位置似乎有了不同。[@more@]下面這一個檔案是修改自 呆丸北拜 的檔案,只是路徑不同而已,有須要的人可以由 此處 下載。
解壓縮後,以 系統管理員身份執行 即可。
選擇 移除 即可!

如果要還原的話,請下載下面的登錄檔案,再匯入即可!
Microsoft Bopomofo
Mirror CentOS
原本縣網有 Mirror CentOS,學校的伺服器更新時非常方便,但這一台 Mirror 的伺服器,因為硬碟損毀,而暫時無法提供服務了,與其等縣網修好,倒不如自行動手架設,因為機器都有,自行購買容量大的硬碟即可。
目前使用的是這一顆硬碟,共有二顆,有三年保固。
目前正在努力 Mirror 中,預計要一、二天才能完成 Mirror。
Security-Enhanced Linux & Samba
好久沒碰 SELinux(Security-Enhanced Linux) 了,加上以前為了麻煩,大部分都是直接關掉,最近重新安裝了幾台伺服器,在學校授權光碟伺服器上,吃了 SELinux 很大的苦頭。
安裝好系統之後,首先是做 Samba Server 的設定,接著在防火牆上也進行連線來源的管制設定,但在連線時,卻都是可以看的到,但無法存取,重覆檢查 Samba 和防火牆上的設定,也都沒有問題,百思不得其解。 [@more@]後來想到,是不是 SELinux 的問題,執行下面的指令,果然就可以正常存取了!
# setsebool -P samba_enable_home_dirs=1
新增一台學校授權光碟伺服器
因為放置原本學校授權光碟的伺服器,之前出現不穩定的狀況,加上伺服器用的硬碟是 SCSI 的,擴充不易,也難以自行處理,所以新增一台伺服器備用。
使用方式:
開啟檔案總管,在上方式輸入 school 即可。(只能在校內使用)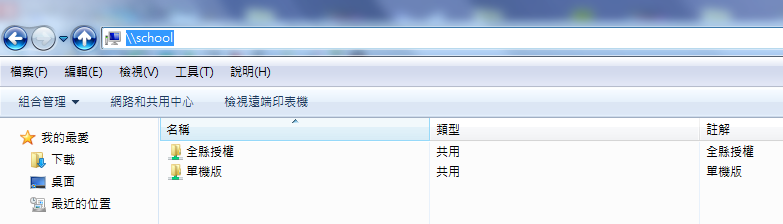
MySQL Server 安裝後的設定
MySQL Server 安裝之後,除了要設定管理者 root 的密碼外,最好也要把一些用不到的資料庫 / 表加以移除,並加上一些權限的設定,這些繁雜的設定,可以使用 mysql_secure_installation 來解決。[@more@]# /usr/bin/mysql_secure_installation
NOTE: RUNNING ALL PARTS OF THIS SCRIPT IS RECOMMENDED FOR ALL MySQL
SERVERS IN PRODUCTION USE! PLEASE READ EACH STEP CAREFULLY!
In order to log into MySQL to secure it, we’ll need the current
password for the root user. If you’ve just installed MySQL, and
you haven’t set the root password yet, the password will be blank,
so you should just press enter here.
# 輸入 root 的密碼,如果沒有設定過,直接按 Enter 鍵即可
Enter current password for root (enter for none):
OK, successfully used password, moving on…
Setting the root password ensures that nobody can log into the MySQL
root user without the proper authorisation.
# 設定 root 的密碼
Set root password? [Y/n] y
New password:
Re-enter new password:
Password updated successfully!
Reloading privilege tables..
… Success!
By default, a MySQL installation has an anonymous user, allowing anyone
to log into MySQL without having to have a user account created for
them. This is intended only for testing, and to make the installation
go a bit smoother. You should remove them before moving into a
production environment.
# 移除 anonymous 使用者
Remove anonymous users? [Y/n] y
… Success!
Normally, root should only be allowed to connect from ‘localhost’. This
ensures that someone cannot guess at the root password from the network.
# 取消 root 遠端登入
Disallow root login remotely? [Y/n] y
… Success!
By default, MySQL comes with a database named ‘test’ that anyone can
access. This is also intended only for testing, and should be removed
before moving into a production environment.
# 移除 test 資料表
Remove test database and access to it? [Y/n] y
– Dropping test database…
… Success!
– Removing privileges on test database…
… Success!
Reloading the privilege tables will ensure that all changes made so far
will take effect immediately.
# 重新載入資料表權限
Reload privilege tables now? [Y/n] y
… Success!
Cleaning up…
All done! If you’ve completed all of the above steps, your MySQL
installation should now be secure.
Thanks for using MySQL!
啟動 squid Proxy Server 出現的錯誤訊息
最近重新安裝一台 Server,安裝好 squid Proxy Server,按照之前的設定方式做了設定,啟動時卻一直出現錯誤。
# service squid start
正在啟動 squid:……………….. [失敗]
檢視 /var/log/message 中的訊息,發現如下的錯誤訊息
Sep 30 11:05:39 free squid[16500]: Squid Parent: child process 16516 started
Sep 30 11:05:39 free (squid): commonUfsDirOpenSwapLog: Failed to open swap log.
Sep 30 11:05:39 free squid[16500]: Squid Parent: child process 16516 exited with status 1
Sep 30 11:05:42 free squid[16500]: Squid Parent: child process 16522 started
Sep 30 11:05:43 free (squid): commonUfsDirOpenSwapLog: Failed to open swap log.
Sep 30 11:05:43 free squid[16500]: Squid Parent: child process 16522 exited with status 1
Sep 30 11:05:46 free squid[16500]: Squid Parent: child process 16529 started
Sep 30 11:05:46 free (squid): commonUfsDirOpenSwapLog: Failed to open swap log.
Sep 30 11:05:46 free squid[16500]: Squid Parent: child process 16529 exited with status 1
Sep 30 11:05:46 free squid[16500]: Exiting due to repeated, frequent failures
[@more@]解決的方式如下:
# vim /etc/squid/squid.conf
加入下面一行
cache_swap_log /var/log/squid/swap.log squid
重新啟動 squid Proxy Server
# service squid start
正在啟動 squid:. [ 確定 ]
安裝 EPSON Stylus Photo 1390 Series 噴墨網路印表機
學校辦公室使用的 EPSON Stylus Photo 1390 Series 噴墨印表機原本是接一台電腦上,然後用分享的方式來使用,但如果分享的電腦沒有開機,就會無法列印,而且分享的電腦主機執行速度會變慢,所以改用網路印表機的方式。
於是決定購買了零壹的 PU201 印表伺服器,來改善這樣的狀況。
底下是安裝的方式: [@more@]
以 Windows 7 為例:
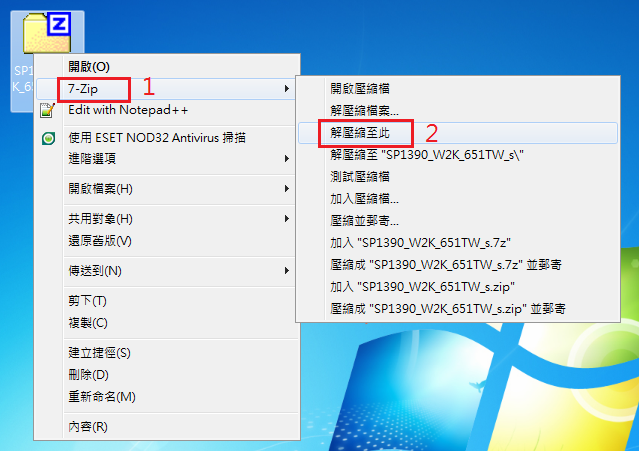
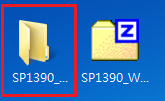
1. 請下載公告上的EPSON Stylus Photo 1390 Series 驅動程式附檔,有分給 x86 和 x64,下載到桌面並解壓縮
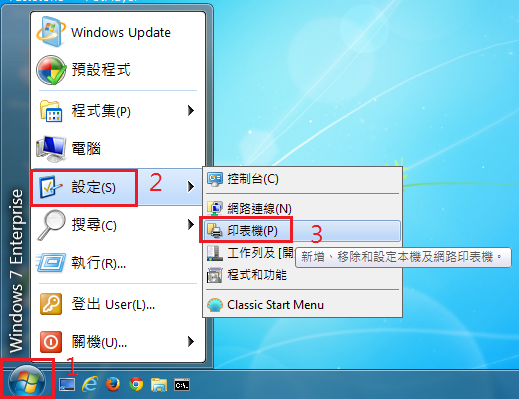
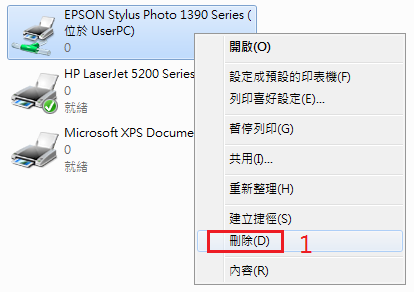
2. 按 開始 / 設定 / 印表機
3. 在原本的印表機上 按滑鼠右鍵 ,選擇 刪除
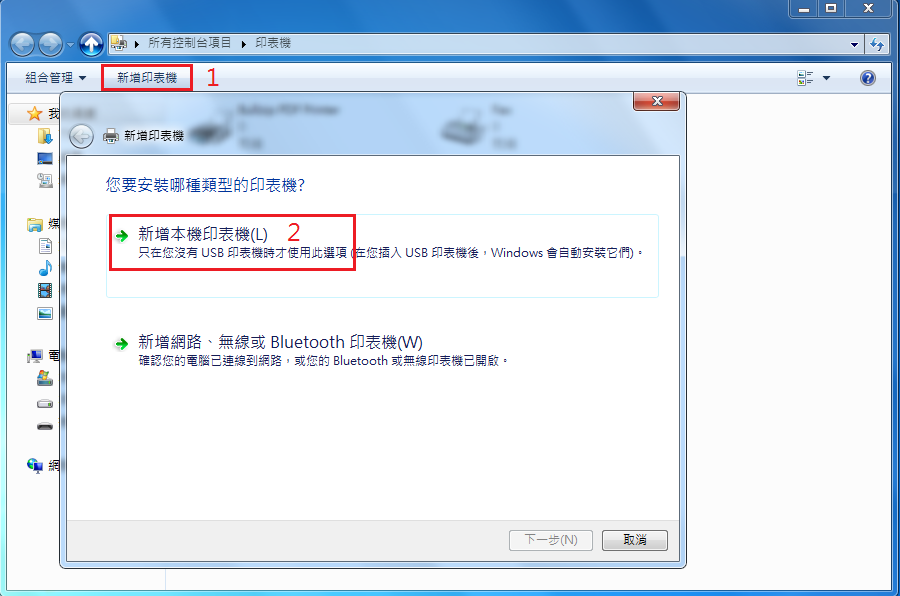
4. 選擇 新增印表機 / 新增本機印表機
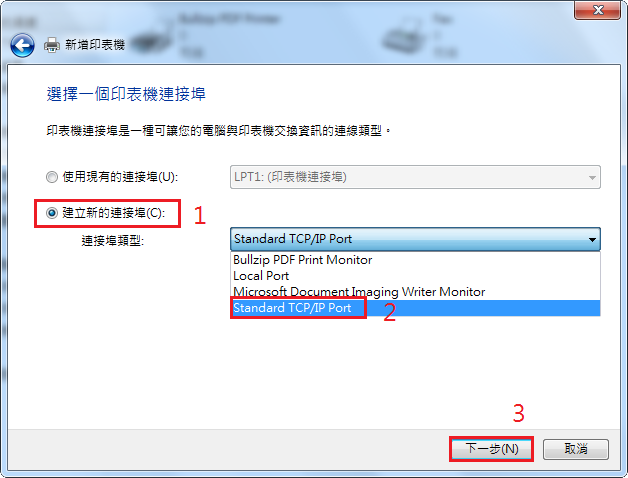
5. 選擇 建立新的連接埠 / Standard TCP/IP Port / 下一步
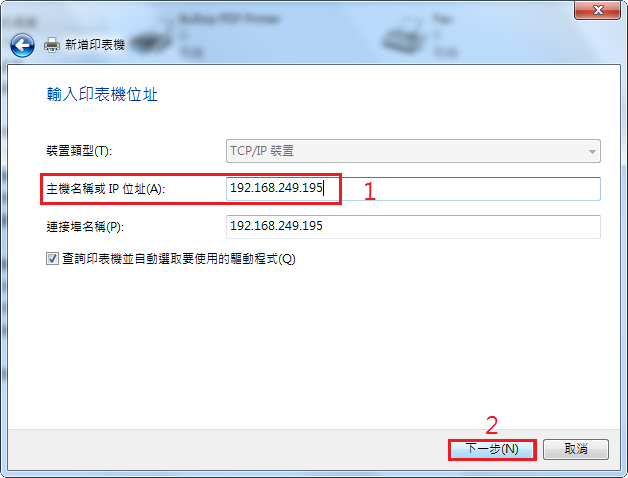
6. 在主機名稱或 IP 位址中,輸入 192.168.249.195 ,然後 下一步
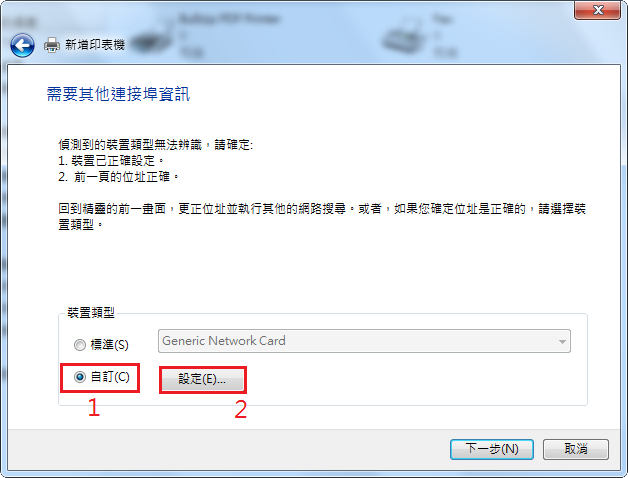
7. 選擇 自訂 / 設定
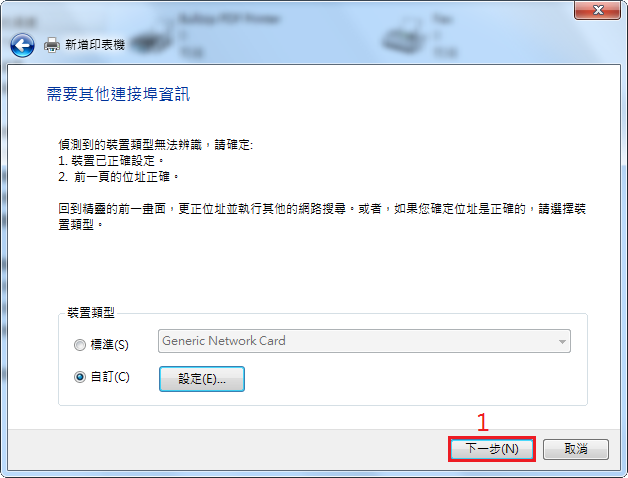
8. 選擇 下一步
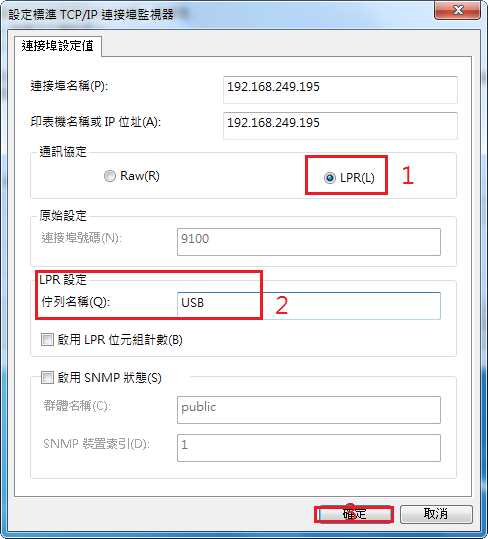
9.通訊協定選擇 LPR(L) ,佇列名稱輸入 USB ,最後按 確定
10. 選擇 下一步
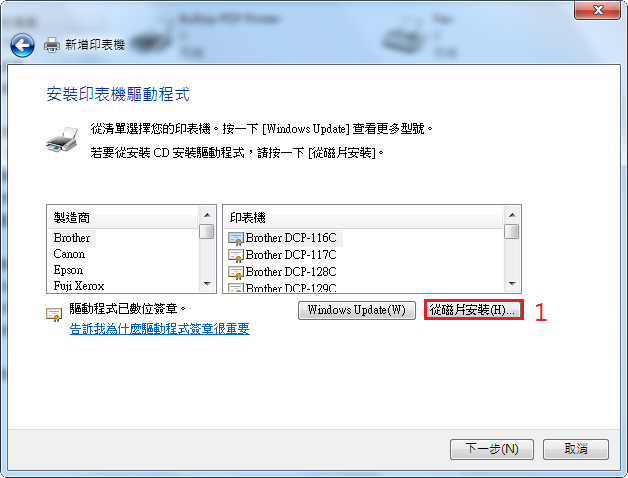
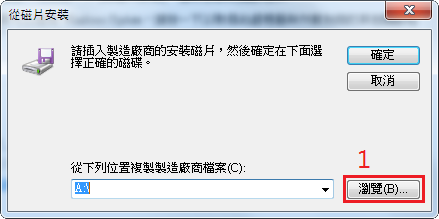
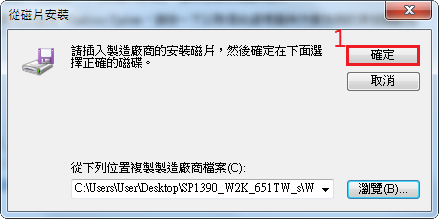
11. 選擇 從磁片安裝
12. 選擇 瀏覽
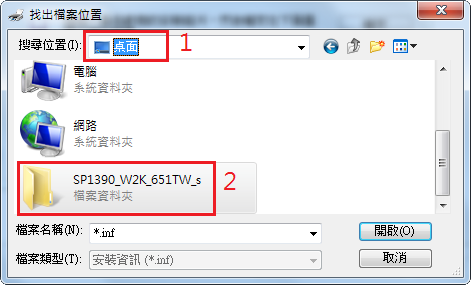
13. 搜尋位置請選擇 桌面 ,在解壓縮出來的 目錄上按滑鼠二下
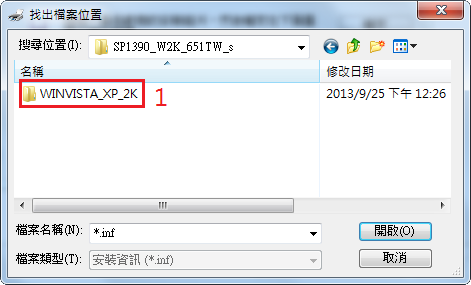
14. 目錄按二下
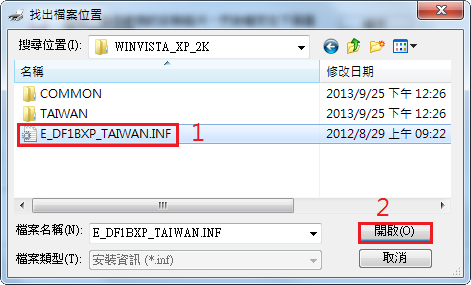
15. 選擇 E_DF1BXP_TAIWAN.IN F,然後 開啟
16. 按 確定
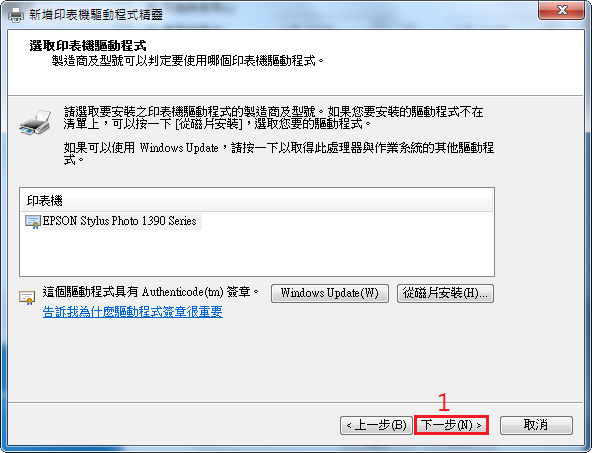
17. 選擇 下一步
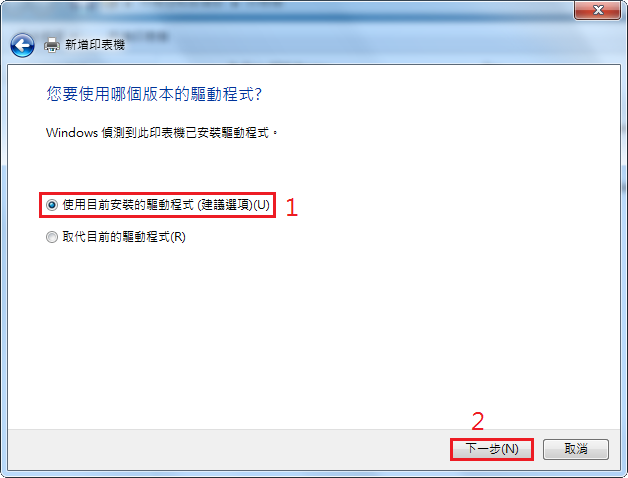
18. 選擇 使用目前安裝的驅動式 / 下一步
19. 下一步
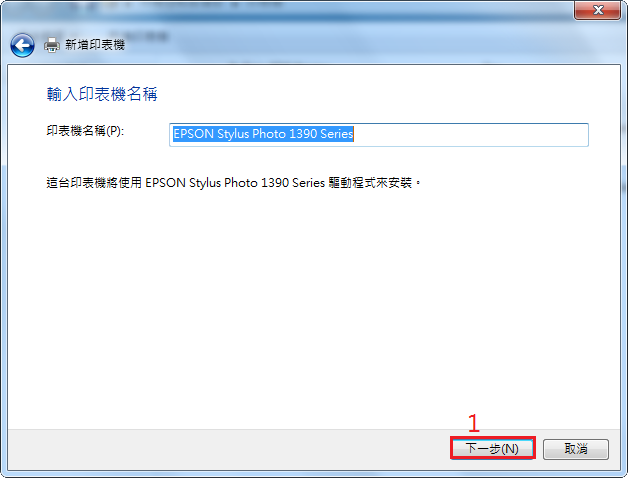
20. 下一步
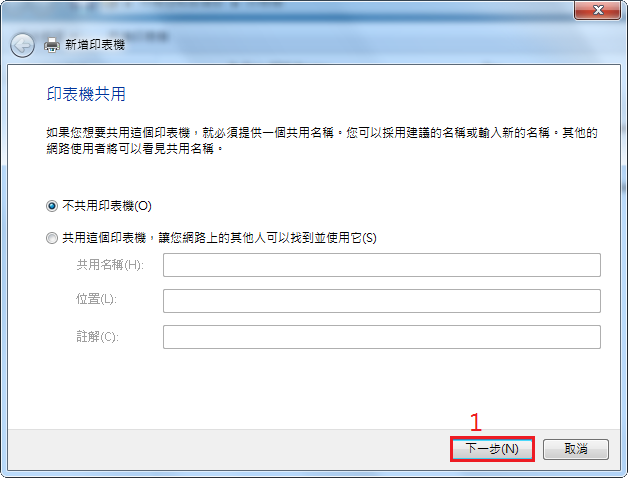
22. 終於完成
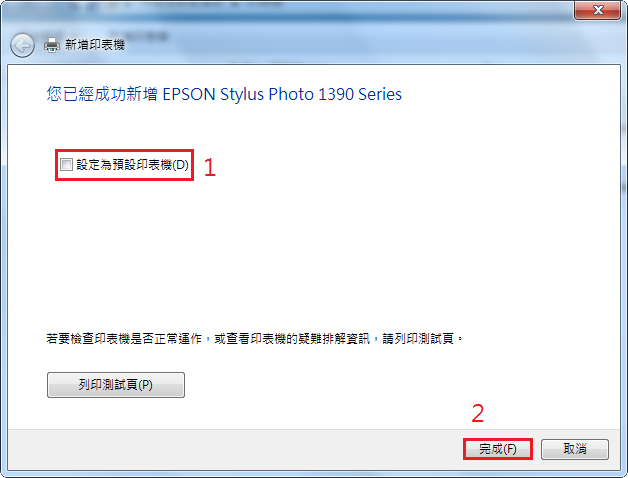
安裝手續繁雜,如果有安裝上的問題,請洽資訊組代為協助,造成不便,請見諒!
安裝好 Linux Server 後畫面一直出現的訊息
最近因為之前的 Linux Server 硬碟似乎有些問題,所以安裝了硬碟,重新安裝作業系統,原本這一台 lvnovo Server 在 CentOS 5.x 時,會因為硬碟介面卡比較特別,所以會抓不到硬碟,所以用了一些很特殊的方式,才安裝好 CentOS 5,害我一直不敢升級核心及作業系統到 CentOS 6.x。
不過,在 CentOS 6.x 之後,似乎已經解決掉這個問題了,整個安裝都沒有問題,但安裝完之後,螢幕上卻一直出現如下的訊息:
drivers/hid/usbhid/hid-core.c: can’t reset device, 0000:00:1d.0-1.1.3/input0, status -71
在 Console 和遠端一直出現,讓我根本無法操作,原本以為是我安裝的問題,又重新安裝了一次,問題還是一樣,於是就到網路上找了一下,果然也有人和我一樣,碰到相同的問題。[@more@]解決方式:
# echo -1 >/sys/module/usbcore/parameters/autosuspend
加入到 /etc/rc.d/rc.local
# vim /etc/rc.d/rc.local
echo -1 >/sys/module/usbcore/parameters/autosuspend
後記:
後來發現一直出現錯誤訊息的原因,有可能是 Server 上同時接著 USB 和 PS2 的鍵盤,移除 USB 的鍵盤後,似乎就恢復正常了!