關閉 CentOS 7 上的 Firewall

查看目前系統上的 Firewall Rule
# iptables -L INPUT -n
Chain INPUT (policy ACCEPT)
target     prot opt source               destination
ACCEPT     all  —  0.0.0.0/0            0.0.0.0/0            ctstate RELATED,ESTABLISHED
ACCEPT     all  —  0.0.0.0/0            0.0.0.0/0
INPUT_direct  all  —  0.0.0.0/0            0.0.0.0/0
INPUT_ZONES_SOURCE  all  —  0.0.0.0/0            0.0.0.0/0
INPUT_ZONES  all  —  0.0.0.0/0            0.0.0.0/0
ACCEPT     icmp —  0.0.0.0/0            0.0.0.0/0
REJECT     all  —  0.0.0.0/0            0.0.0.0/0            reject-with icmp-host-prohibited

因為預設的防火牆規則很難修改並處理,所以想先關閉預設的 Firewall Rules
[@more@]
關閉 Firewall
# systemctl stop firewalld

預設不啟動 Firewall
# systemctl disable firewalld
rm ‘/etc/systemd/system/dbus-org.fedoraproject.FirewallD1.service’
rm ‘/etc/systemd/system/basic.target.wants/firewalld.service’

之後就可以使用 Scripts 的方式來設定要使用的 Firewall Rules

關閉 CentOS 7 上的 IPv6

因為測試的 CentOS 7 是在家裡使用,所以 IPv6 應該是使用不到的
# ifconfig eth0
eth0: flags=4163<UP,BROADCAST,RUNNING,MULTICAST>  mtu 1500
        inet 192.168.1.109  netmask 255.255.255.0  broadcast 192.168.1.255
        inet6 fe80::20c:29ff:fea6:2215  prefixlen 64  scopeid 0x20<link>
        ether 00:0c:29:a6:22:15  txqueuelen 1000  (Ethernet)
        RX packets 462  bytes 41942 (40.9 KiB)
        RX errors 0  dropped 0  overruns 0  frame 0
        TX packets 356  bytes 46939 (45.8 KiB)
        TX errors 0  dropped 0 overruns 0  carrier 0  collisions 0
[@more@]修改方式
修改 /etc/default/grub
GRUB_CMDLINE_LINUX 後加上 ipv6.disable=1
# vim /etc/default/grub
GRUB_TIMEOUT=5
GRUB_DISTRIBUTOR=”$(sed ‘s, release .*$,,g’ /etc/system-release)”
GRUB_DEFAULT=saved
GRUB_DISABLE_SUBMENU=true
GRUB_TERMINAL_OUTPUT=”console”
GRUB_CMDLINE_LINUX=”rd.lvm.lv=centos/swap vconsole.font=latarcyrheb-sun16 rd.lvm.lv=centos/root crashkernel=auto  vconsole.keymap=us rhgb quiet net.ifnames=0 biosdevname=0 ipv6.disable=1
GRUB_DISABLE_RECOVERY=”true”

產生新的 grub 設定檔
# grub2-mkconfig -o /boot/grub2/grub.cfg
Generating grub configuration file …
Found linux image: /boot/vmlinuz-3.10.0-123.el7.x86_64
Found initrd image: /boot/initramfs-3.10.0-123.el7.x86_64.img
Warning: Please don’t use old title `CentOS Linux, with Linux 3.10.0-123.el7.x86_64′ for GRUB_DEFAULT, use `Advanced options for CentOS Linux>CentOS Linux, with Linux 3.10.0-123.el7.x86_64′ (for versions before 2.00) or `gnulinux-advanced-caeda11c-71b9-4cc4-961b-b4541b247804>gnulinux-3.10.0-123.el7.x86_64-advanced-caeda11c-71b9-4cc4-961b-b4541b247804′ (for 2.00 or later)
Found linux image: /boot/vmlinuz-0-rescue-07f9be0c0fc843ce885a7539150c8e55
Found initrd image: /boot/initramfs-0-rescue-07f9be0c0fc843ce885a7539150c8e55.img
done

重新開機
# sync;sync;sync;sync;shutdown -r

IPv6 已經關閉
# ifconfig eth0
eth0: flags=4163<UP,BROADCAST,RUNNING,MULTICAST>  mtu 1500
        inet 192.168.1.109  netmask 255.255.255.0  broadcast 192.168.1.255
        ether 00:0c:29:a6:22:15  txqueuelen 1000  (Ethernet)
        RX packets 83  bytes 8436 (8.2 KiB)
        RX errors 0  dropped 0  overruns 0  frame 0
        TX packets 73  bytes 10238 (9.9 KiB)
        TX errors 0  dropped 0 overruns 0  carrier 0  collisions 0

更改 CentOS 7 的網路卡代號

CentOS 7 的網路卡代號捨棄了原本熟悉的 ethx
# ls -l /etc/sysconfig/network-scripts/ifcfg-*
-rw-r–r–. 1 root root 326  7月 10 19:24 /etc/sysconfig/network-scripts/ifcfg-eno16777736
-rw-r–r–. 1 root root 254  4月  2 23:30 /etc/sysconfig/network-scripts/ifcfg-lo

網路卡設定
# cat /etc/sysconfig/network-scripts/ifcfg-eno16777736
HWADDR=”00:0C:29:A6:22:15″
TYPE=”Ethernet”
BOOTPROTO=”dhcp”
DEFROUTE=”yes”
PEERDNS=”yes”
PEERROUTES=”yes”
IPV4_FAILURE_FATAL=”no”
IPV6INIT=”yes”
IPV6_AUTOCONF=”yes”
IPV6_DEFROUTE=”yes”
IPV6_PEERDNS=”yes”
IPV6_PEERROUTES=”yes”
IPV6_FAILURE_FATAL=”no”
NAME=”eno16777736″
UUID=”7e2c54c0-a09d-45ca-a074-7ed5d5d8ed32″
ONBOOT=”yes”[@more@]修改方式:參考 Change default network name to old “eth0″ on RHEL 7 / Fedora 19 above | eSuarez Notes
修改 /etc/default/grub
GRUB_CMDLINE_LINUX 後加上 net.ifnames=0 biosdevname=0
# vim /etc/default/grub
GRUB_TIMEOUT=5
GRUB_DISTRIBUTOR=”$(sed ‘s, release .*$,,g’ /etc/system-release)”
GRUB_DEFAULT=saved
GRUB_DISABLE_SUBMENU=true
GRUB_TERMINAL_OUTPUT=”console”
GRUB_CMDLINE_LINUX=”rd.lvm.lv=centos/swap vconsole.font=latarcyrheb-sun16 rd.lvm.lv=centos/root crashkernel=auto  vconsole.keymap=us rhgb quiet net.ifnames=0 biosdevname=0
GRUB_DISABLE_RECOVERY=”true”

產生新的 grub 設定檔
# grub2-mkconfig -o /boot/grub2/grub.cfg
Generating grub configuration file …
Found linux image: /boot/vmlinuz-3.10.0-123.el7.x86_64
Found initrd image: /boot/initramfs-3.10.0-123.el7.x86_64.img
Warning: Please don’t use old title `CentOS Linux, with Linux 3.10.0-123.el7.x86_64′ for GRUB_DEFAULT, use `Advanced options for CentOS Linux>CentOS Linux, with Linux 3.10.0-123.el7.x86_64′ (for versions before 2.00) or `gnulinux-advanced-caeda11c-71b9-4cc4-961b-b4541b247804>gnulinux-3.10.0-123.el7.x86_64-advanced-caeda11c-71b9-4cc4-961b-b4541b247804′ (for 2.00 or later)
Found linux image: /boot/vmlinuz-0-rescue-07f9be0c0fc843ce885a7539150c8e55
Found initrd image: /boot/initramfs-0-rescue-07f9be0c0fc843ce885a7539150c8e55.img
done

直接把 ifcfg-enoxxx 改成 ifcfg-eth0
# mv /etc/sysconfig/network-scripts/ifcfg-eno16777736 /etc/sysconfig/network-scripts/ifcfg-eth0

修改網路卡代號
# sed -i ‘s/eno16777736/eth0/g’ /etc/sysconfig/network-scripts/ifcfg-eth0

NAME=eth0 
DEVICE=eth0

重新開機
# sync;sync;sync;sync;shutdown -r

網路卡代號已更改
# ifconfig eth0
eth0: flags=4163<UP,BROADCAST,RUNNING,MULTICAST>  mtu 1500
        inet 192.168.1.109  netmask 255.255.255.0  broadcast 192.168.1.255
        inet6 fe80::20c:29ff:fea6:2215  prefixlen 64  scopeid 0x20<link>
        ether 00:0c:29:a6:22:15  txqueuelen 1000  (Ethernet)
        RX packets 128  bytes 12595 (12.2 KiB)
        RX errors 0  dropped 0  overruns 0  frame 0
        TX packets 125  bytes 16864 (16.4 KiB)
        TX errors 0  dropped 0 overruns 0  carrier 0  collisions 0

關閉或啟用 CentOS 7 上的 Service

以 postfix 為例
關閉 postfix
# service postfix stop
Redirecting to /bin/systemctl stop  postfix.service

預設不啟用 postfix
# chkconfig postfix off
注意:正在轉送請求至「systemctl disable postfix.service」。
rm ‘/etc/systemd/system/multi-user.target.wants/postfix.service’

啟動 postfix
# service postfix start
Redirecting to /bin/systemctl start  postfix.service

預設啟用 postfix
# chkconfig postfix on
注意:正在轉送請求至「systemctl enable postfix.service」。
ln -s ‘/usr/lib/systemd/system/postfix.service’ ‘/etc/systemd/system/multi-user.target.wants/postfix.service’
由上面可以發現 CentOS 7.x 和之前的 CentOS 6.x/5.x 處理方式有些不同[@more@]使用 service 時已經改用 systemctl 來做處理
使用 chkconfig 時,是把在 /usr/lib/systemd/system 目錄下的 service 服務名稱 在 /etc/systemd/system/multi-user.target.wants 目錄之下做建立連結或刪除連結

直接使用 systemctl 來做處理

啟動 postfix
# systemctl start postfix
# systemctl start postfix.service

關閉 postfix
# systemctl stop postfix
# systemctl stop postfix.service

預設啟用 postfix
# systemctl enable postfix
# systemctl enable postfix.service
ln -s ‘/usr/lib/systemd/system/postfix.service’ ‘/etc/systemd/system/multi-user.target.wants/postfix.service’

預設不啟用 postfix
# systemctl disable postfix
rm ‘/etc/systemd/system/multi-user.target.wants/postfix.service’
# systemctl disable postfix.service
rm ‘/etc/systemd/system/multi-user.target.wants/postfix.service’

列出所有 service 的啟用狀態
# systemctl list-unit-files
UNIT FILE                                   STATE
proc-sys-fs-binfmt_misc.automount           static
dev-hugepages.mount                         static
dev-mqueue.mount                            static
proc-fs-nfsd.mount                          static
proc-sys-fs-binfmt_misc.mount               static
sys-fs-fuse-connections.mount               static
sys-kernel-config.mount                     static
sys-kernel-debug.mount                      static
tmp.mount                                   disabled
var-lib-nfs-rpc_pipefs.mount                static
brandbot.path                               disabled
systemd-ask-password-console.path           static
systemd-ask-password-plymouth.path          static
systemd-ask-password-wall.path              static
session-1.scope                             static
session-2.scope                             static
session-4.scope                             static
abrt-ccpp.service                           enabled
abrt-oops.service                           enabled
abrt-pstoreoops.service                     disabled
abrt-vmcore.service                         enabled
abrt-xorg.service                           enabled
abrtd.service                               enabled
arp-ethers.service                          disabled
atd.service                                 enabled
auditd.service                              enabled
autovt@.service                             disabled

CentOS 7.x 第三方套件庫

RPMForge
http://pkgs.repoforge.org/
http://packages.sw.be/
x86_64 – http://pkgs.repoforge.org/rpmforge-release/rpmforge-release-0.5.3-1.el7.rf.x86_64.rpm

安裝方式:
下載 rpmforge-release 套件
# wget http://pkgs.repoforge.org/rpmforge-release/rpmforge-release-0.5.3-1.el7.rf.x86_64.rpm

安裝 DAG 的 GPG 金鑰
# rpm –import http://apt.sw.be/RPM-GPG-KEY.dag.txt

安裝套件
# rpm -ivh rpmforge-release-0.5.3-1.el7.rf.x86_64.rpm
# sed -i ‘s/enabled = 1/enabled = 0/g’ /etc/yum.repos.d/rpmforge.repo[@more@]

EPEL 全名叫做 Extra Packages for Enterprise Linux,有許多可以安裝的套件
http://fedoraproject.org/wiki/EPEL

CentOS 7.x
# wget http://dl.fedoraproject.org/pub/epel/7/x86_64/e/epel-release-7-5.noarch.rpm
# rpm –import http://dl.fedoraproject.org/pub/epel/RPM-GPG-KEY-EPEL-7
# rpm -ivh epel-release-7-5.noarch.rpm
# sed -i ‘s/enabled=1/enabled=0/g’ /etc/yum.repos.d/epel.repo

ELRepo http://elrepo.org/tiki/tiki-index.php
# rpm –import https://www.elrepo.org/RPM-GPG-KEY-elrepo.org
# rpm -Uvh http://www.elrepo.org/elrepo-release-7.0-2.el7.elrepo.noarch.rpm

Remi:http://rpms.famillecollet.com/
CentOS 7.x
要先安裝 EPEL
# rpm -Uvh http://rpms.remirepo.net/enterprise/remi-release-7.rpm

# wget http://rpms.famillecollet.com/enterprise/remi-release-7.rpm
# rpm -ivh remi-release-7.rpm

列出支援的套件庫
# yum repolist
Loaded plugins: fastestmirror, langpacks
Loading mirror speeds from cached hostfile
 * base: ftp.isu.edu.tw
 * epel: ftp.cuhk.edu.hk
 * epel-debuginfo: ftp.cuhk.edu.hk
 * epel-source: ftp.cuhk.edu.hk
 * extras: ftp.isu.edu.tw
 * rpmforge: mirrors.digipower.vn
 * rpmforge-extras: mirrors.digipower.vn
 * rpmforge-testing: mirrors.digipower.vn
 * updates: ftp.isu.edu.tw
repo id                                                                                           repo name                                                                                                                            status
base/7/x86_64                                                                                     CentOS-7 – Base                                                                                                                      8,465
epel/x86_64                                                                                       Extra Packages for Enterprise Linux 7 – x86_64                                                                                       4,715
epel-debuginfo/x86_64                                                                             Extra Packages for Enterprise Linux 7 – x86_64 – Debug                                                                               1,154
epel-source/x86_64                                                                                Extra Packages for Enterprise Linux 7 – x86_64 – Source                                                                                  0
extras/7/x86_64                                                                                   CentOS-7 – Extras                                                                                                                       30
rpmforge                                                                                          RHEL 7 – RPMforge.net – dag                                                                                                            245
rpmforge-extras                                                                                   RHEL 7 – RPMforge.net – extras                                                                                                          10
rpmforge-testing                                                                                  RHEL 7 – RPMforge.net – testing                                                                                                          4
updates/7/x86_64                                                                                  CentOS-7 – Updates                                                                                                                     326
repolist: 14,949

systemctl 指令

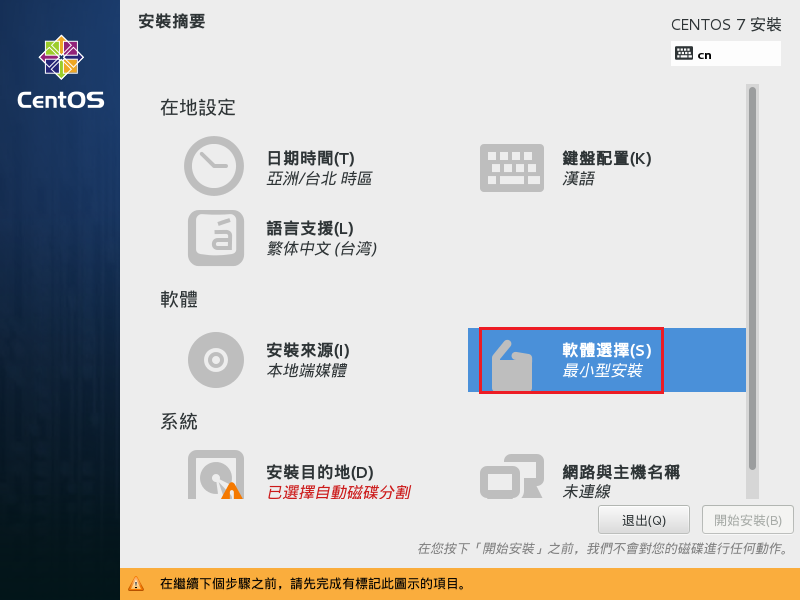
之前使用 CentOS 時,安裝伺服器套件後,大部分都是使用 chkconfig 來啟動預設要啟動的服務,或是直接到 /etc/init.d 目錄之下,去啟動要使用的服務,可是安裝 CentOS 7 之後,發現 /etc/init.d 目錄下的檔案非常的少,似乎新版本的 CentOS 服務,都不是使用這樣的啟動方式。
# ls /etc/init.d
functions  iprdump  iprinit  iprupdate  netconsole  network  README

後來在網路搜尋了一下,才發現好像是改用 systemctl 指令來做控制。[@more@]systemctl 指令參數
# systemctl –help
systemctl [OPTIONS…] {COMMAND} …

Query or send control commands to the systemd manager.

  -h –help           Show this help
     –version        Show package version
  -t –type=TYPE      List only units of a particular type
     –state=STATE    List only units with particular LOAD or SUB or ACTIVE state
  -p –property=NAME  Show only properties by this name
  -a –all            Show all loaded units/properties, including dead/empty
                      ones. To list all units installed on the system, use
                      the ‘list-unit-files’ command instead.
     –reverse        Show reverse dependencies with ‘list-dependencies’
  -l –full           Don’t ellipsize unit names on output
     –fail           When queueing a new job, fail if conflicting jobs are
                      pending
     –irreversible   When queueing a new job, make sure it cannot be implicitly
                      cancelled
     –ignore-dependencies
                      When queueing a new job, ignore all its dependencies
     –show-types     When showing sockets, explicitly show their type
  -i –ignore-inhibitors
                      When shutting down or sleeping, ignore inhibitors
     –kill-who=WHO   Who to send signal to
  -s –signal=SIGNAL  Which signal to send
  -H –host=[USER@]HOST
                      Show information for remote host
  -P –privileged     Acquire privileges before execution
  -q –quiet          Suppress output
     –no-block       Do not wait until operation finished
     –no-wall        Don’t send wall message before halt/power-off/reboot
     –no-reload      When enabling/disabling unit files, don’t reload daemon
                      configuration
     –no-legend      Do not print a legend (column headers and hints)
     –no-pager       Do not pipe output into a pager
     –no-ask-password
                      Do not ask for system passwords
     –system         Connect to system manager
     –user           Connect to user service manager
     –global         Enable/disable unit files globally
     –runtime        Enable unit files only temporarily until next reboot
  -f –force          When enabling unit files, override existing symlinks
                      When shutting down, execute action immediately
     –root=PATH      Enable unit files in the specified root directory
  -n –lines=INTEGER  Number of journal entries to show
  -o –output=STRING  Change journal output mode (short, short-monotonic,
                      verbose, export, json, json-pretty, json-sse, cat)
     –plain          Print unit dependencies as a list instead of a tree

Unit Commands:
  list-units                      List loaded units
  list-sockets                    List loaded sockets ordered by address
  start [NAME…]                 Start (activate) one or more units
  stop [NAME…]                  Stop (deactivate) one or more units
  reload [NAME…]                Reload one or more units
  restart [NAME…]               Start or restart one or more units
  try-restart [NAME…]           Restart one or more units if active
  reload-or-restart [NAME…]     Reload one or more units if possible,
                                  otherwise start or restart
  reload-or-try-restart [NAME…] Reload one or more units if possible,

啟動 vsftpd FTP Server
# systemctl start vsftpd

顯示 vsftpd FTP Server 狀態
# systemctl status vsftpd
vsftpd.service – Vsftpd ftp daemon
   Loaded: loaded (/usr/lib/systemd/system/vsftpd.service; disabled)
   Active: active (running) since 四 2014-07-10 20:34:41 CST; 41s ago
  Process: 34160 ExecStart=/usr/sbin/vsftpd /etc/vsftpd/vsftpd.conf (code=exited, status=0/SUCCESS)
 Main PID: 34161 (vsftpd)
   CGroup: /system.slice/vsftpd.service
           └─34161 /usr/sbin/vsftpd /etc/vsftpd/vsftpd.conf

 7月 10 20:34:41 localhost.localdomain systemd[1]: Starting Vsftpd ftp daemon…
 7月 10 20:34:41 localhost.localdomain systemd[1]: Started Vsftpd ftp daemon.

關閉 vsftpd FTP Server
# systemctl stop vsftpd

列出 vsftpd FTP Server 啟動狀態
# systemctl list-unit-files | grep vsftpd
vsftpd.service                              disabled
vsftpd@.service                             disabled
vsftpd.target                               disabled

開機時啟動 vsftpd FTP Serve
# systemctl enable vsftpd
ln -s ‘/usr/lib/systemd/system/vsftpd.service’ ‘/etc/systemd/system/multi-user.target.wants/vsftpd.service

檢查是否有設定成功
# systemctl list-unit-files | grep vsftpd
vsftpd.service                              enabled
vsftpd@.service                             disabled
vsftpd.target                               disabled

# systemctl is-active vsftpd
inactive

開機時關閉 vsftpd FTP Serve
# systemctl disable vsftpd
rm ‘/etc/systemd/system/multi-user.target.wants/vsftpd.service’

檢查是否有設定成功
# systemctl list-unit-files | grep vsftpd
vsftpd.service                              disabled
vsftpd@.service                             disabled
vsftpd.target                               disabled

顯示目前系統預設運作層級
# systemctl get-default
multi-user.target

切換運作層級至 GUI 模式(runlevel 5)
# systemctl isolate graphical.target

切換運作層級至文字模式(runlevel 3)
# systemctl isolate multi-user.target

設定開機啟動至文字模式(runlevel 3)
# systemctl set-default multi-user.target

設定開機啟動至 GUI 模式(runlevel 5)
# systemctl set-default graphical.target

列出可用的層級
# systemctl list-units –type target
UNIT                  LOAD   ACTIVE SUB    DESCRIPTION
basic.target          loaded active active Basic System
cryptsetup.target     loaded active active Encrypted Volumes
getty.target          loaded active active Login Prompts
local-fs-pre.target   loaded active active Local File Systems (Pre)
local-fs.target       loaded active active Local File Systems
multi-user.target     loaded active active Multi-User System
network-online.target loaded active active Network is Online
network.target        loaded active active Network
nss-lookup.target     loaded active active Host and Network Name Lookups
paths.target          loaded active active Paths
remote-fs.target      loaded active active Remote File Systems
slices.target         loaded active active Slices
sockets.target        loaded active active Sockets
sound.target          loaded active active Sound Card
swap.target           loaded active active Swap
sysinit.target        loaded active active System Initialization
timers.target         loaded active active Timers

LOAD   = Reflects whether the unit definition was properly loaded.
ACTIVE = The high-level unit activation state, i.e. generalization of SUB.
SUB    = The low-level unit activation state, values depend on unit type.

17 loaded units listed. Pass –all to see loaded but inactive units, too.
To show all installed unit files use ‘systemctl list-unit-files’.

試裝 CentOS 7.0.1406 版

光碟開機畫面,選擇 Install CentOS 7
[@more@]選擇 中文語系,然後按 繼續

安裝來源設定

支援網路安裝

選擇安裝的軟體

視需求安裝所需軟體

最後按 完成

硬碟分割

硬碟分割畫面

網路設定

網路設定畫面

選擇 開始安裝

設定 root 密碼

root 密碼設定畫面

安裝完成,按 重新開機

感覺新版本的 CentOS 7 和之前的版本相差很多,整個安裝方式,雖然還是使用 anaconda,但覺得很難用,尤其是軟體安裝的部分,沒有自定安裝的部分,資料庫部分改成了 MariaDB資料庫。
安裝完成之後,可能還要花一些時間移除一些不須要的程式,和加裝一些自己習慣的程式。

CentOS 7.0.1406 版

CentOS 7.0.1406 版,目前只有 x86_64 版本
CentOS 官方網站:https://www.centos.org/
更多關於 CentOS 7 的介紹:CentOS 7 首个版本发布——Docker强势来袭
[@more@]
點選 DVD ISO

下載網站
http://ftp.nsysu.edu.tw/CentOS/7.0.1406/isos/x86_64/CentOS-7.0-1406-x86_64-DVD.iso
http://ftp.tc.edu.tw/Linux/CentOS/7.0.1406/isos/x86_64/CentOS-7.0-1406-x86_64-DVD.iso
http://mirror01.idc.hinet.net/CentOS/7.0.1406/isos/x86_64/CentOS-7.0-1406-x86_64-DVD.iso
http://ftp.isu.edu.tw/pub/Linux/CentOS/7.0.1406/isos/x86_64/CentOS-7.0-1406-x86_64-DVD.iso
http://ftp.stu.edu.tw/Linux/CentOS/7.0.1406/isos/x86_64/CentOS-7.0-1406-x86_64-DVD.iso
http://ftp.stust.edu.tw/pub/Linux/CentOS/7.0.1406/isos/x86_64/CentOS-7.0-1406-x86_64-DVD.iso

Adobe Flash Player 14.0.0.145

Adobe Flash Player 更新到 14.0.0.145 版

Windows 平台
Internet Explorer:
http://download.macromedia.com/pub/flashplayer/current/support/install_flash_player_ax.exe
Windows 8  8.1 版則要從 Windows Update 中更新

All Other Browsers(Firefox,Safari & Opera):
http://download.macromedia.com/pub/flashplayer/current/support/install_flash_player.exe

Mac 版本:
http://download.macromedia.com/pub/flashplayer/current/support/install_flash_player_osx.dmg