1. 執行桌面上的 Tera Term 圖示
2. 出現 建立新連線 的視窗,輸入連線主機,然後按 確定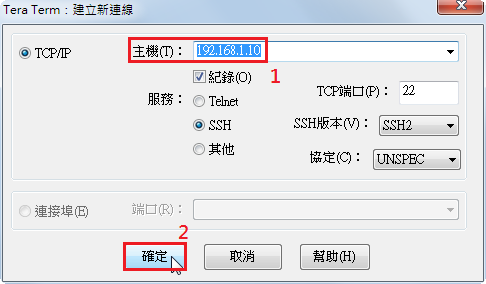 [@more@]3. 金鑰加入本機,請按 繼續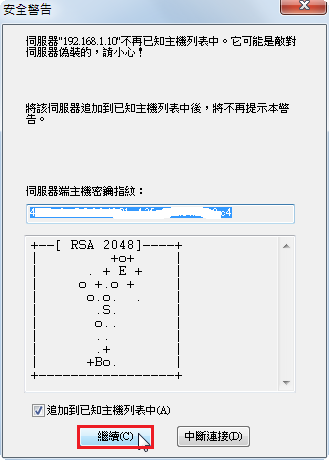
4. 輸入要登入的使用者帳號及密碼,並按 確定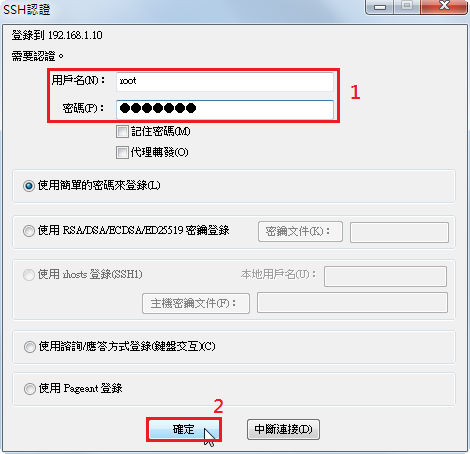
5. 登入成功
6. 不過顯示的字有些小,選擇 設定 / 字型
7. 字型 Consolas,大小 12
8. 字型就比較大一些了!
更多的操作可以參考:Cooper Maa: Tera Term 簡介

全新的繁體中文 WordPress 網站《宜蘭部落格教育平台 網站》
1. 執行桌面上的 Tera Term 圖示
2. 出現 建立新連線 的視窗,輸入連線主機,然後按 確定[@more@]3. 金鑰加入本機,請按 繼續
4. 輸入要登入的使用者帳號及密碼,並按 確定
5. 登入成功
6. 不過顯示的字有些小,選擇 設定 / 字型
7. 字型 Consolas,大小 12
8. 字型就比較大一些了!
更多的操作可以參考:Cooper Maa: Tera Term 簡介
本來一直都是使用 Pietty / Putty 來做為 SSH Client,因為它的程式很小,又不用安裝,尤其是 Pietty 與中文的相容性非不錯。但最近再與 Banana Pi 做 ssh 連線時,常常會出現下圖的錯誤訊息,造成無法連線,有些困擾,所以想找一套 SSH Client 程式來使用。 [@more@]
Tera Term 是一套開放原始碼的 SSH Client,看起來應該是日本人所開發的。
Tera Term 官方網站:http://ttssh2.sourceforge.jp/
Tera Term 下載網頁:http://en.sourceforge.jp/projects/ttssh2/releases/
1. 執行下載下來的 Tera Term 應用程式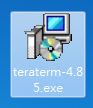
2. 選擇 Next 繼續
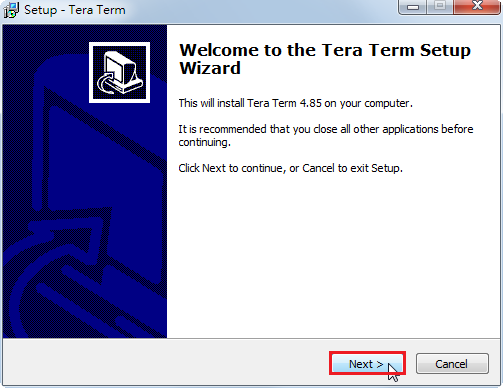
3. 選擇 I accept the agreement,並選擇 Next 繼續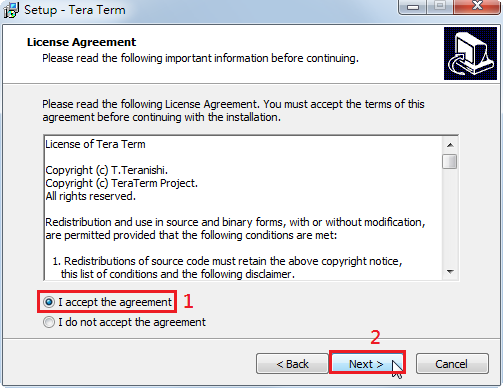
4. 程式安裝路徑,選擇 Next 繼續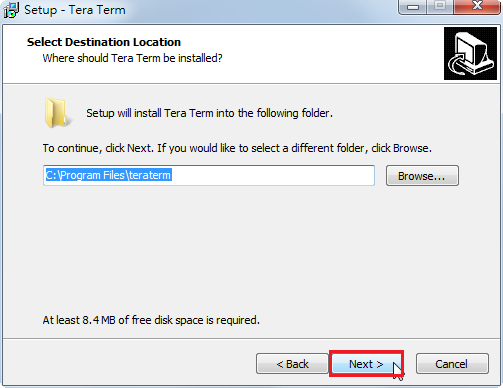
5. 選擇要安裝的程式,選擇 Next 繼續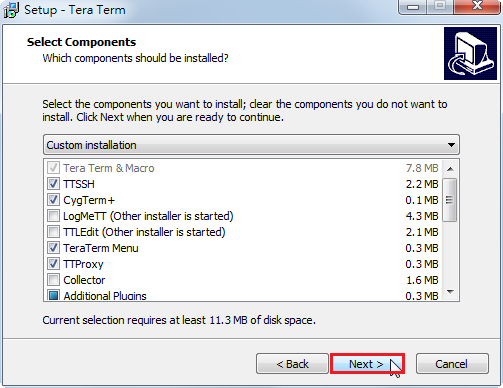
6. 選擇 Chinese(Tradition)正體中文,選擇 Next 繼續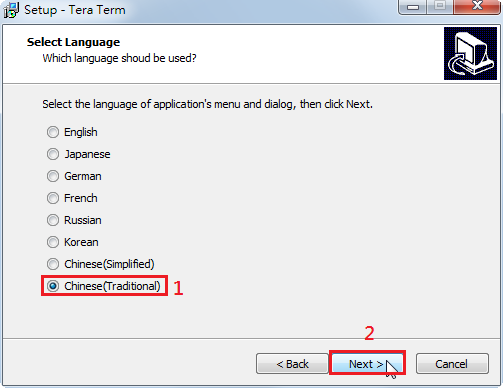
7. 選擇 Next 繼續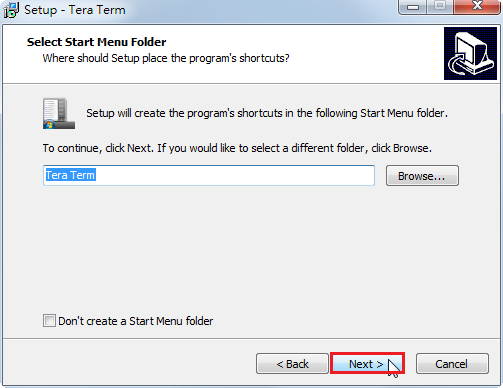
8. 程式安裝選項,選擇 Next 繼續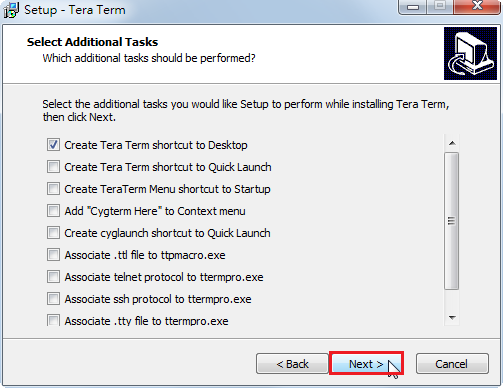
9. 選擇 Install 開始安裝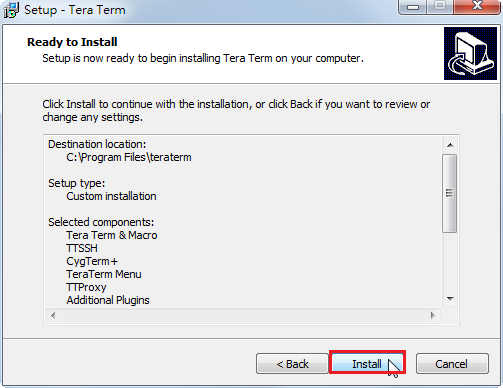
10. 選擇 Finish 完成安裝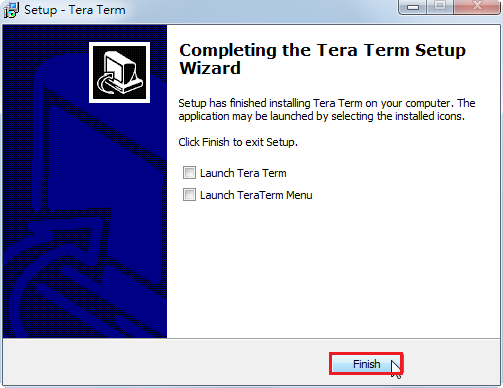
11. 桌面上會出現 Tera Term 圖示
Firefox 36.0.4 版釋出,主要是修正安全性上的漏洞,詳細請參考:Firefox — Notes (36.0.4) — Mozilla
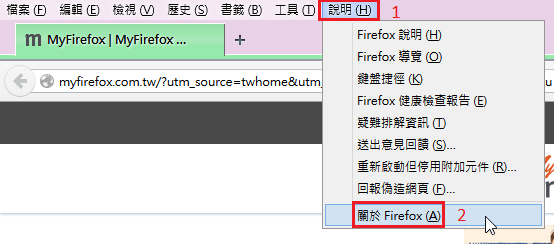
可以使用功能表上的 說明(H)/ 關於 Firefox(A),來檢查新版本下載並安裝
 [@more@]
Mac 版本
ftp://ftp.mozilla.org/pub/mozilla.org/firefox/releases/36.0.4/mac/zh-TW/Firefox%2036.0.4.dmg
雖然自己使用的行列輸入法中可以很方便輸入標點符號,但在資訊課教學生時,學生在輸入標點符號時,就會遇到一些困擾,這時如果有標點符號工具列就方便多了!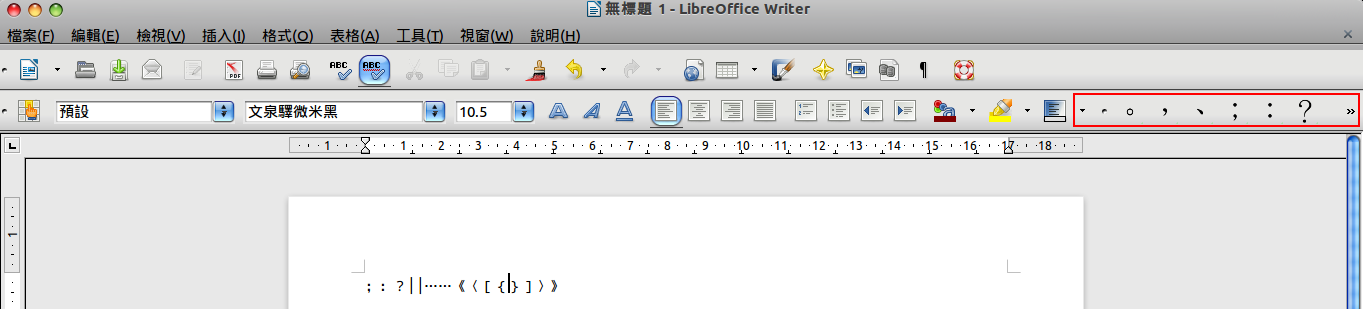 [@more@]在 LibreOffice 中可以使用的標點符號工具列有二套,
漢文標點符號(台灣)工具列
中華民國臺灣正體中文標點符號工具列
1. 首先先使用 中華民國臺灣正體中文標點符號工具列
選擇 Download extension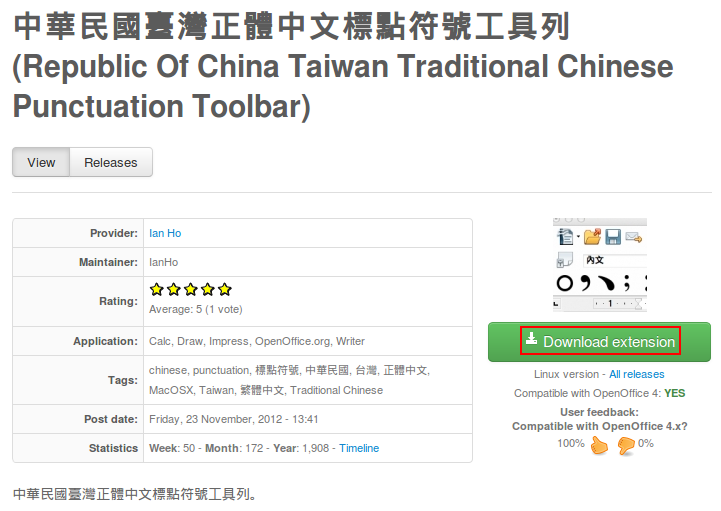
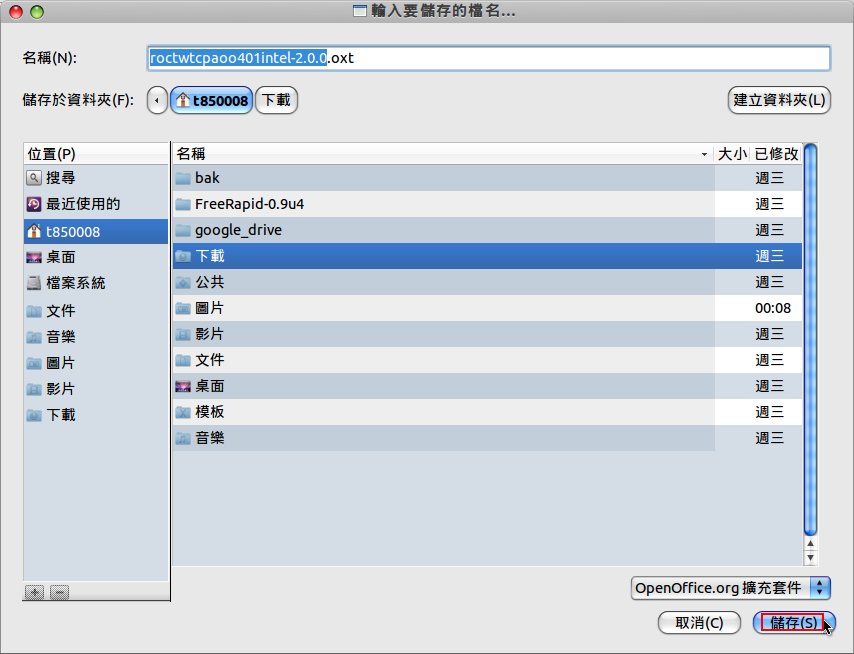
2. 將下載下來的檔案儲存起來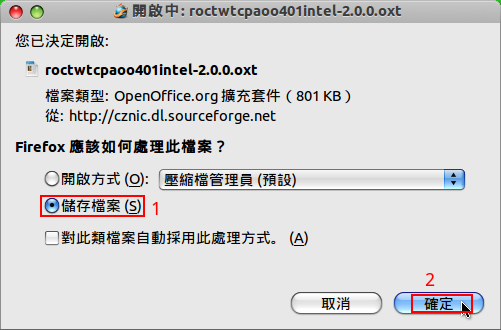
3. 開啟 LibreOffice Writer,選擇 檔案 / 開啟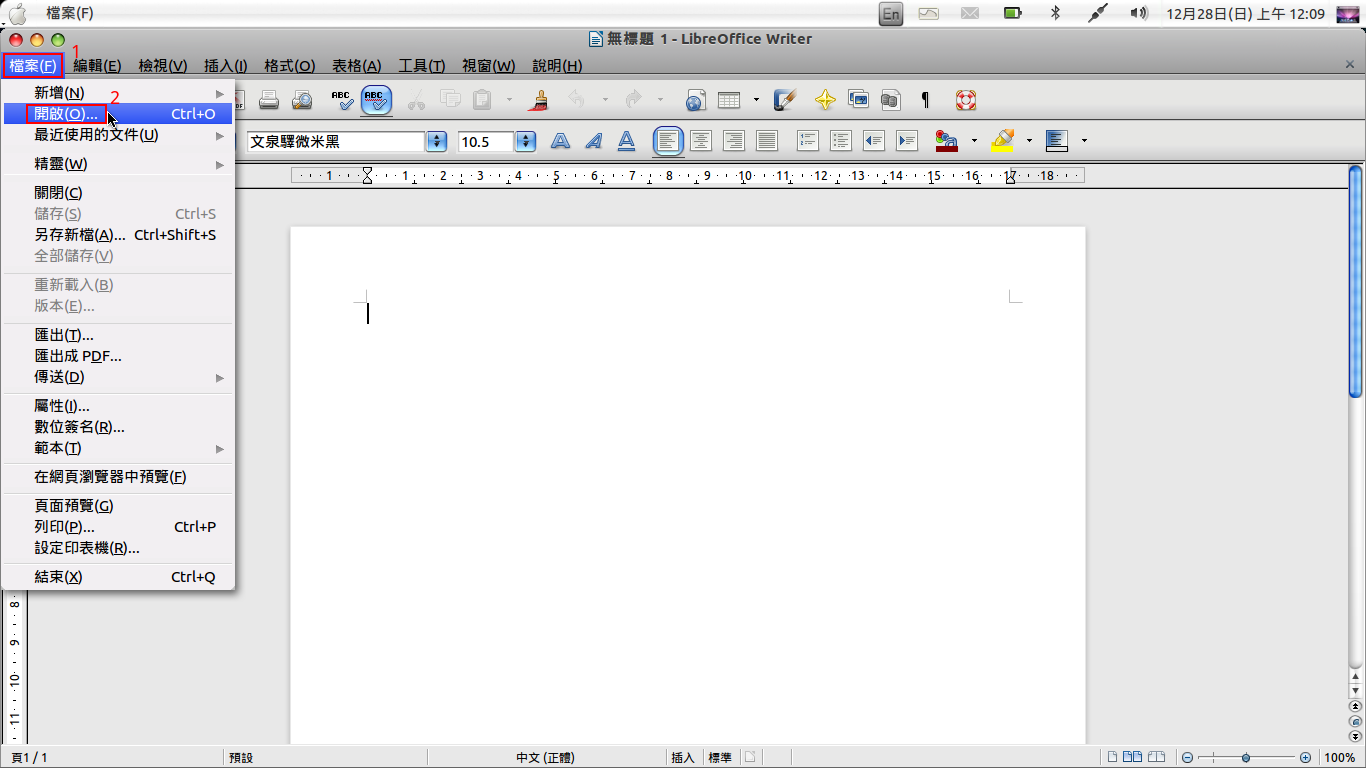
4. 選擇下來下來的檔案 roctwtcpaoo401intel-2.0.0.oxt,然後按 開啟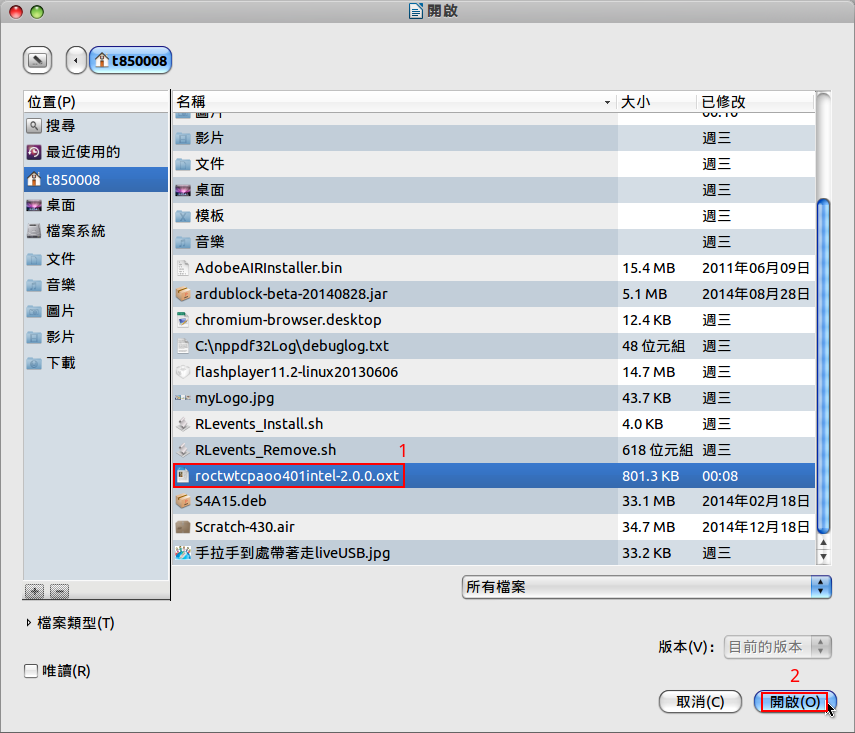
5. 按 確定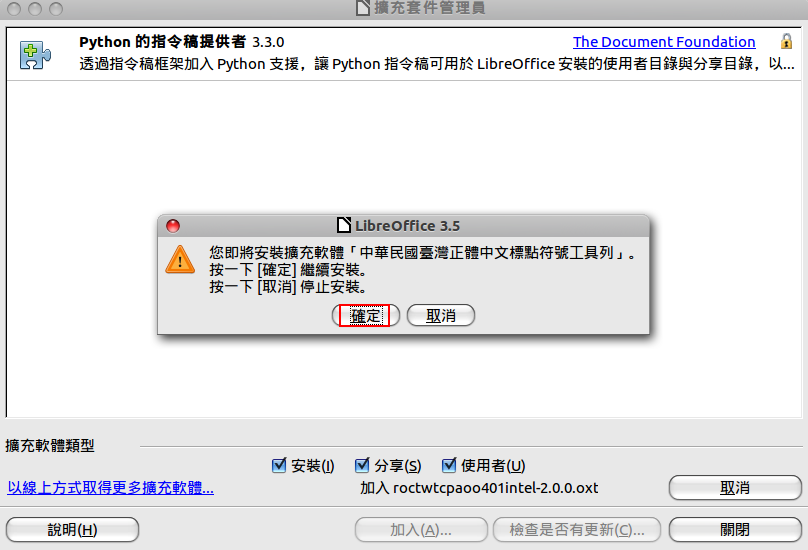
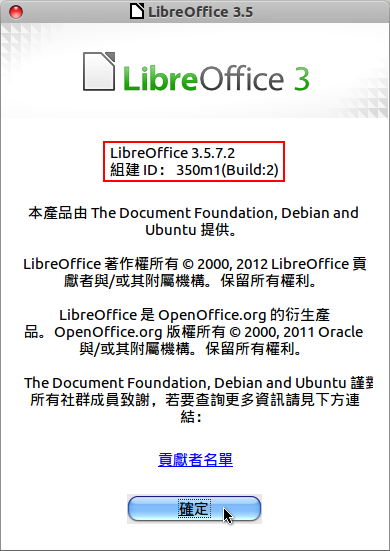
6. 無法安裝,因為我的 LibreOffice 版本過舊,要 4.x 版才安裝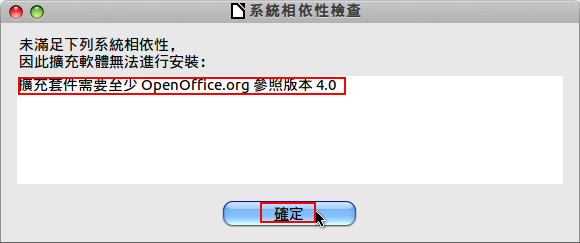
7. 改安裝 漢文標點符號(台灣)工具列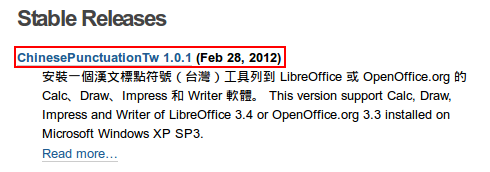
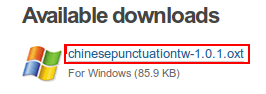
8. 將下載下來的檔案儲存起來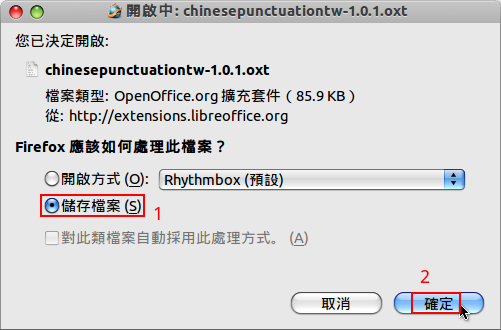
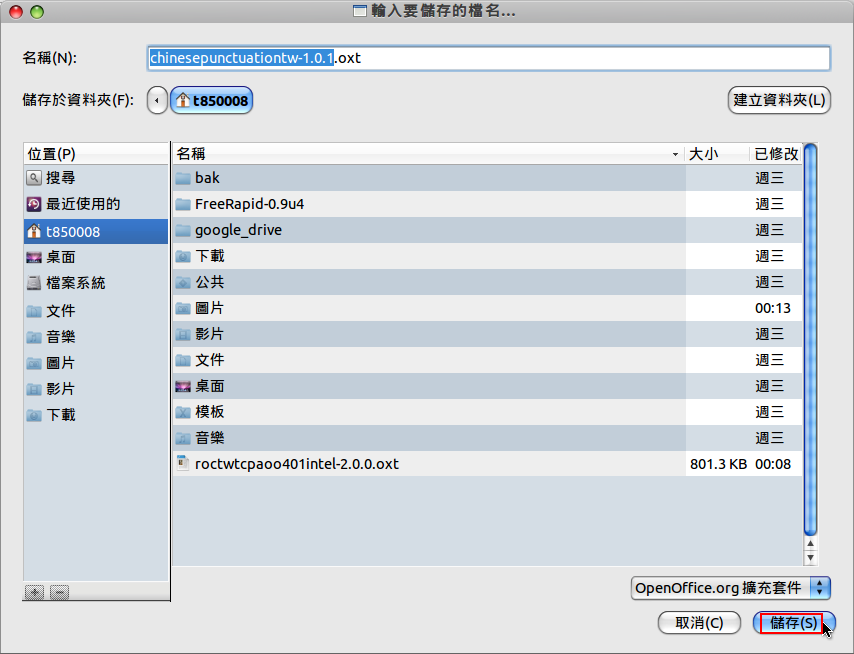
9. 開啟 LibreOffice Writer,選擇 檔案 / 開啟
10. 選擇 chinesepunctuationtw-1.0.1.oxt,並按 開啟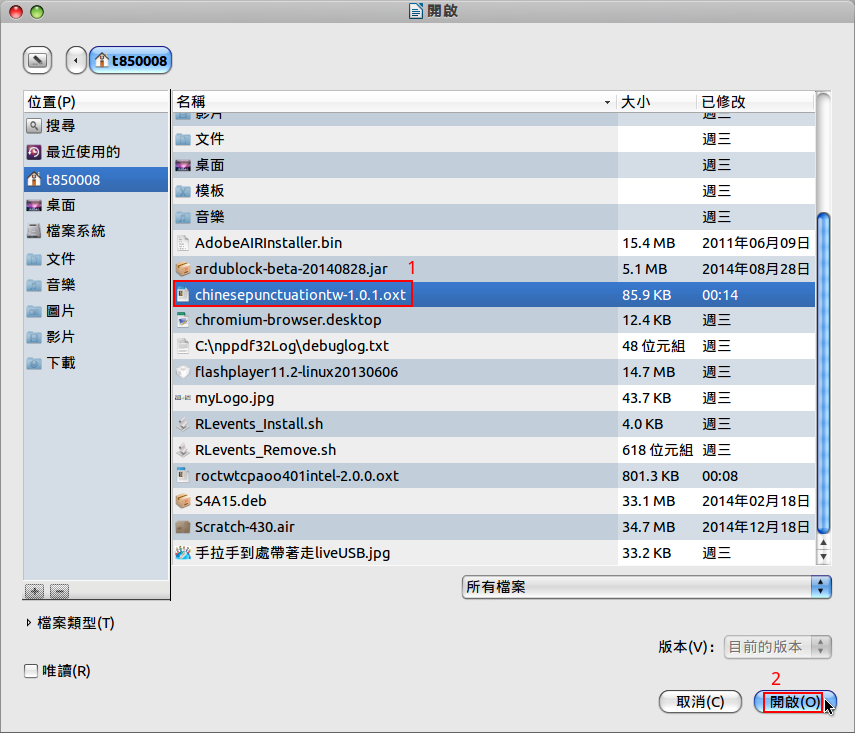
11. 選擇 確定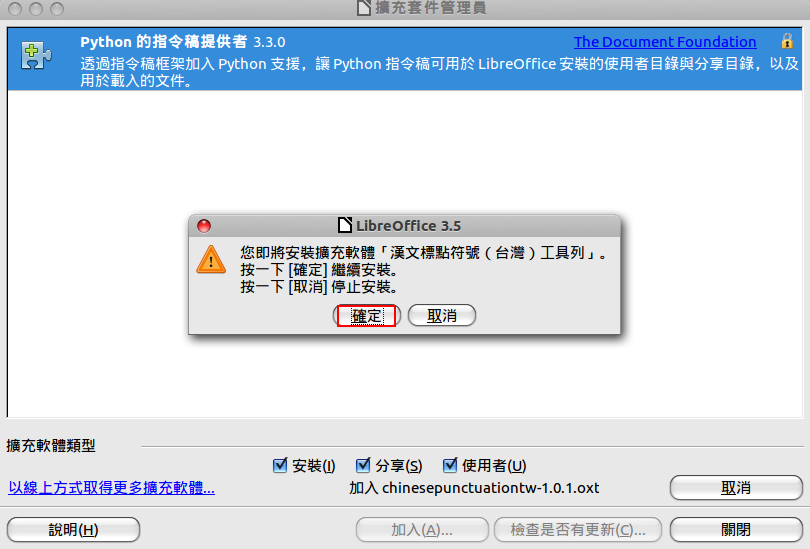
12. 授權合約,請按 向下捲動(S),最後按 接受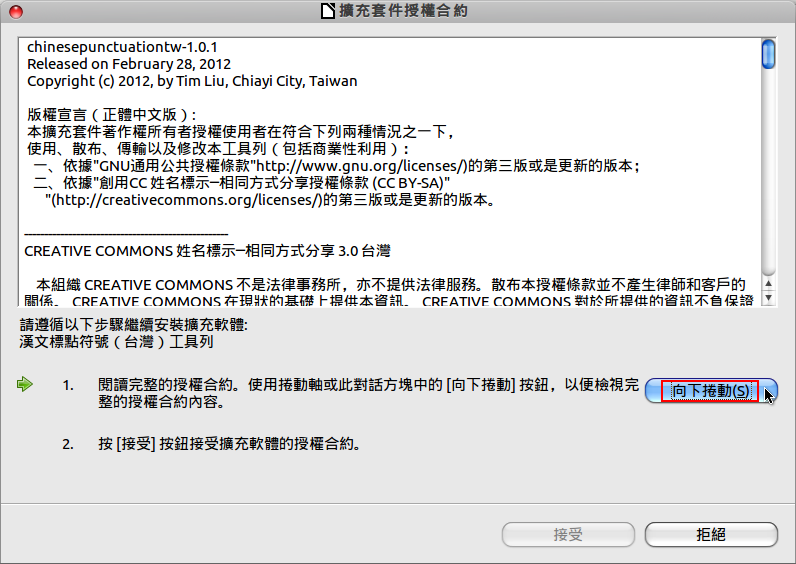
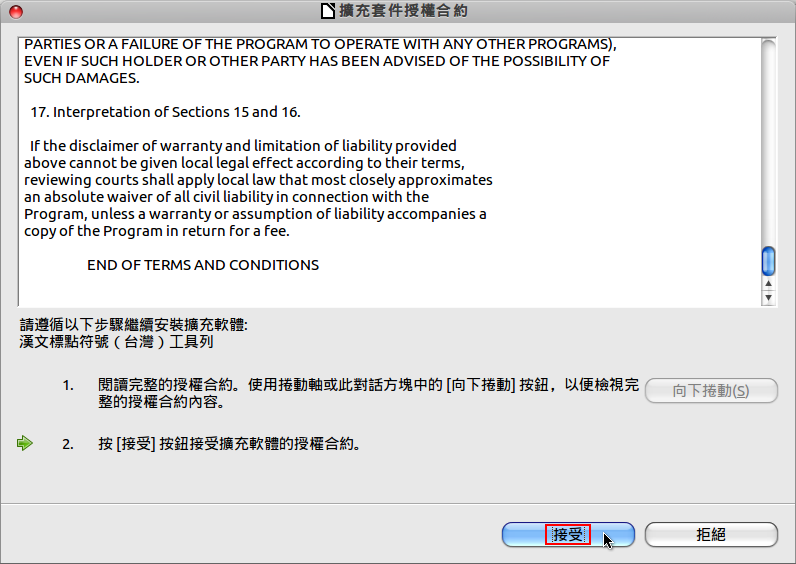
13. 選擇 關閉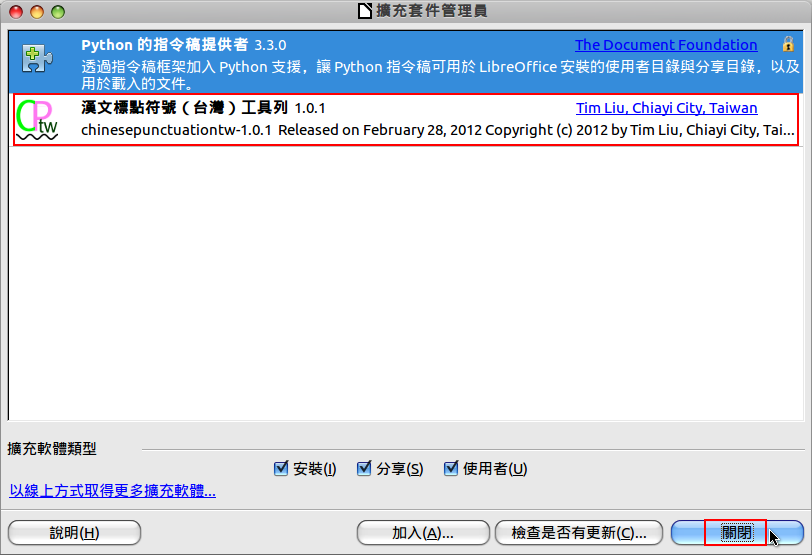
14. 出現浮動的標點符號工具列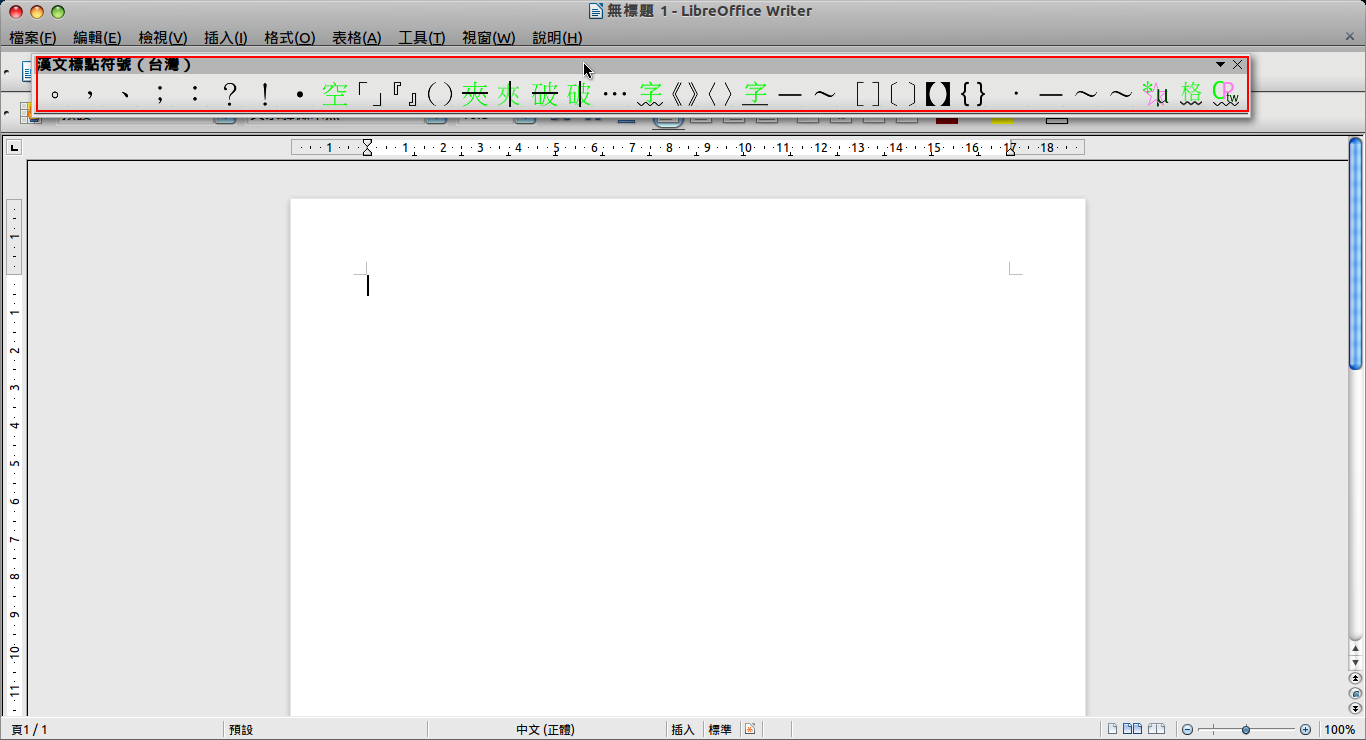
15. 也可以拉動固定在工具列上
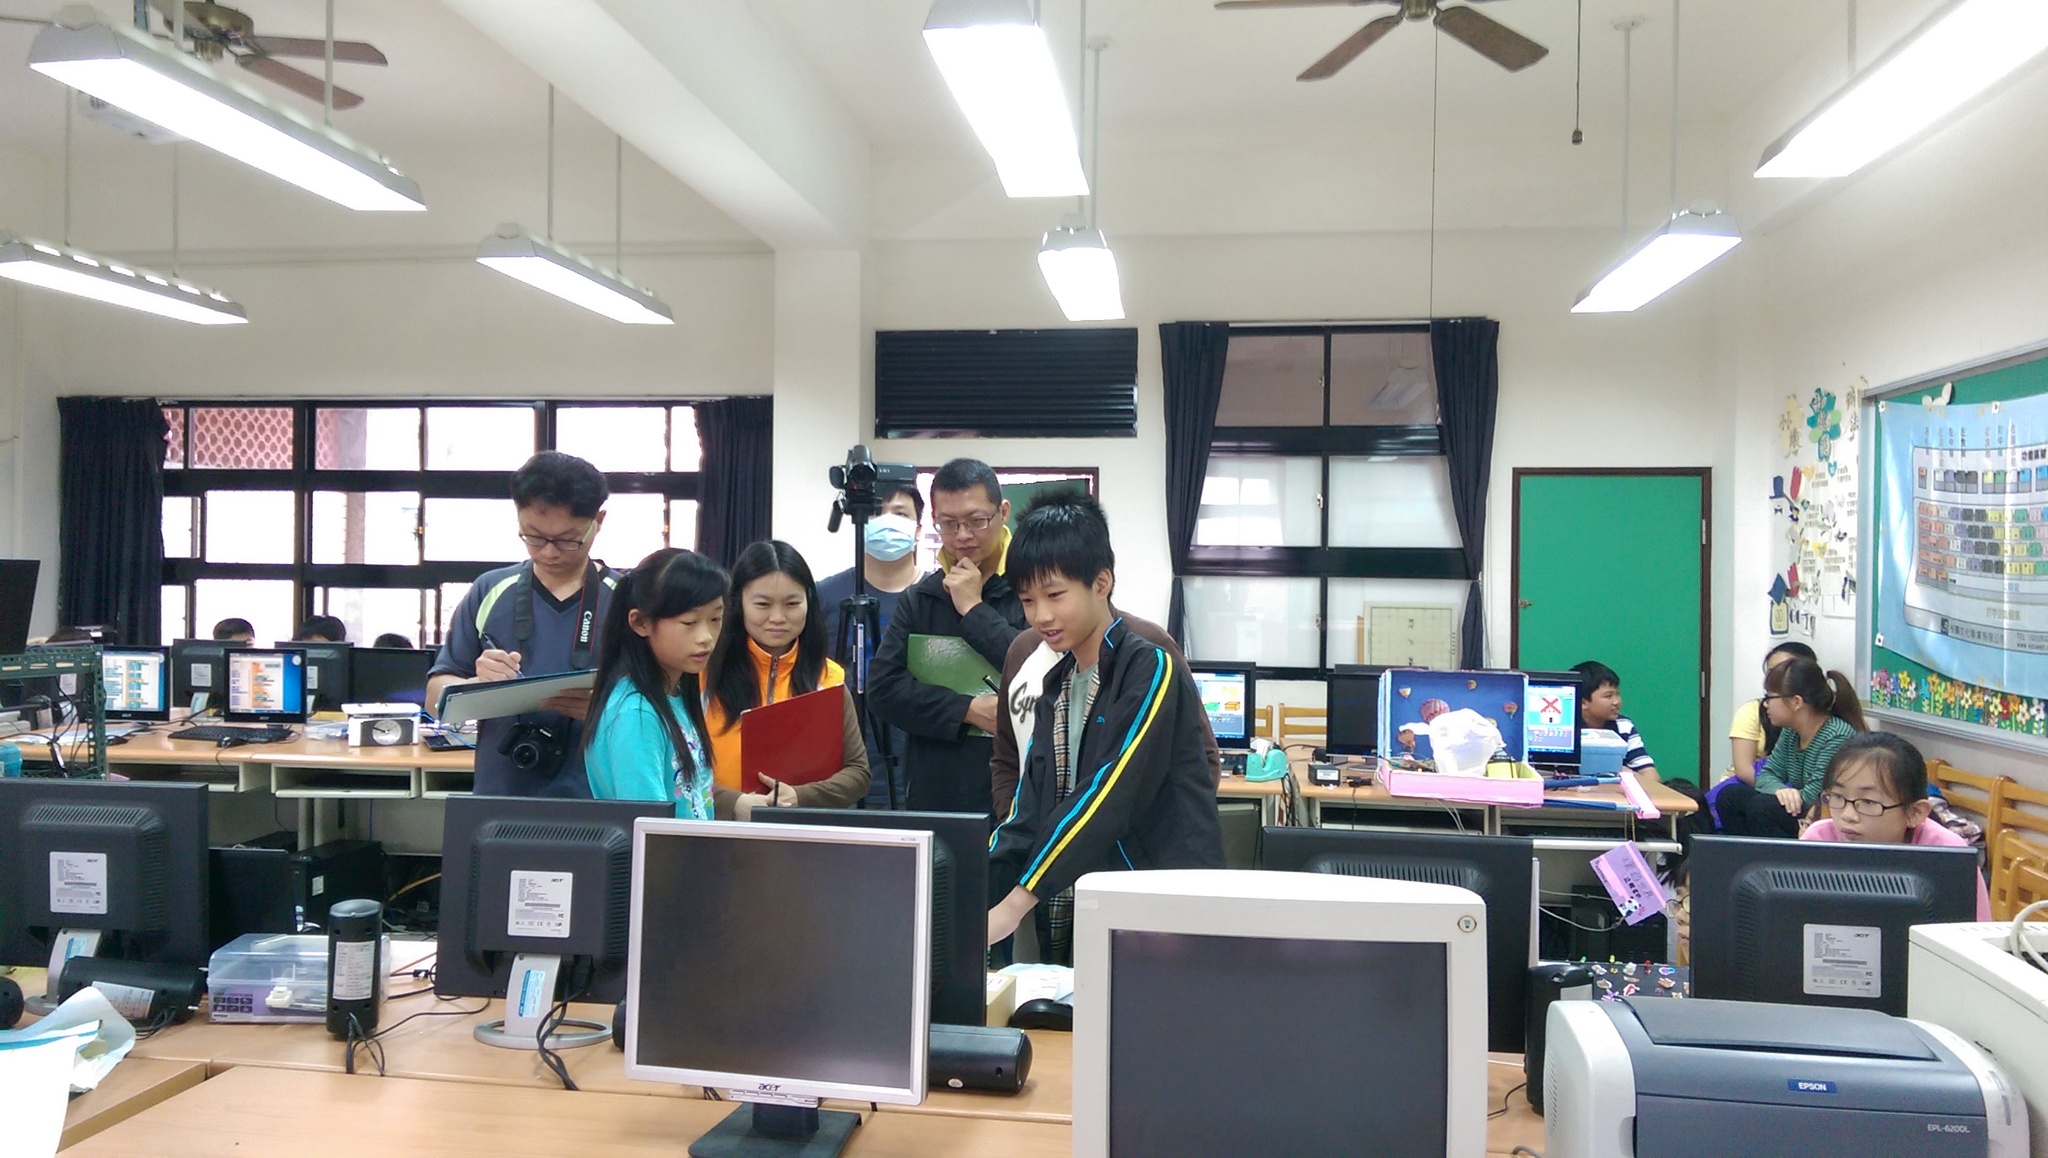
感謝學生 宇騰、湧宣、羽希,辛苦參加競賽,也感謝六仁育伶老師、六愛惠珠老師的協助。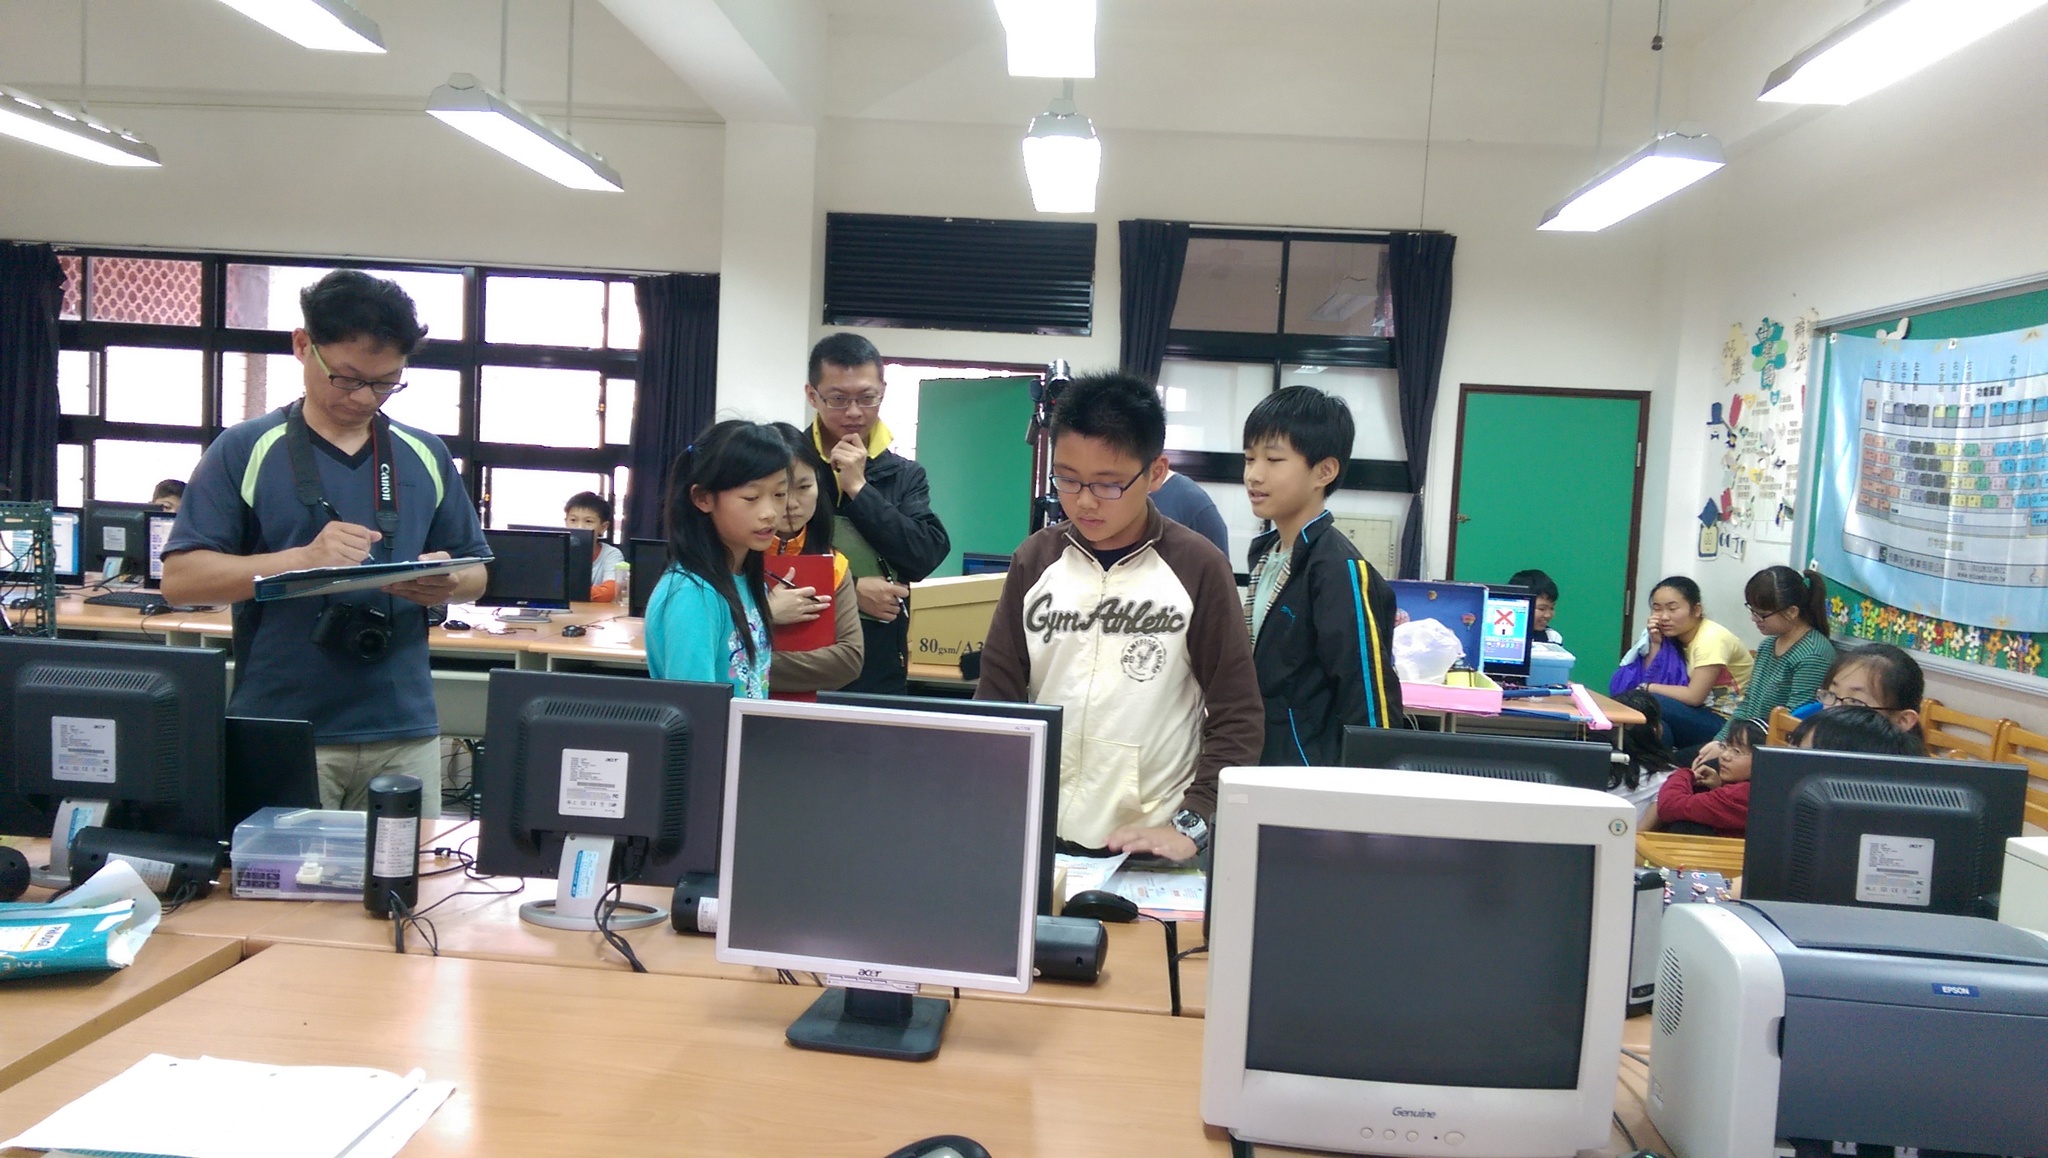
一直以來都是使用 gcin 為主要的中文輸入法,但 gcin 在 Ubuntu 14.04 上右上角的圖示一直無法正常顯示,加上不太習慣使用 ibus,所以就改用了 fcitx。
1. 安裝 fcitx
$ sudo apt-get install fcitx fcitx-table-array30
2. 使用 im-config 來設定預設的中文輸入法
$ /usr/bin/im-config
3. 登出後重新登入
4. 在右上角的圖示,按滑鼠右鍵選擇 設定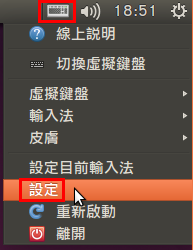 [@more@]5. 選擇要安裝的輸入法,然後按 確定(O)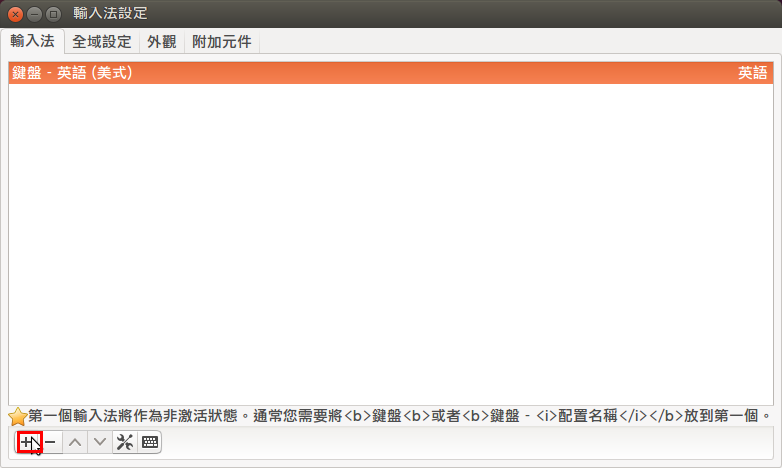
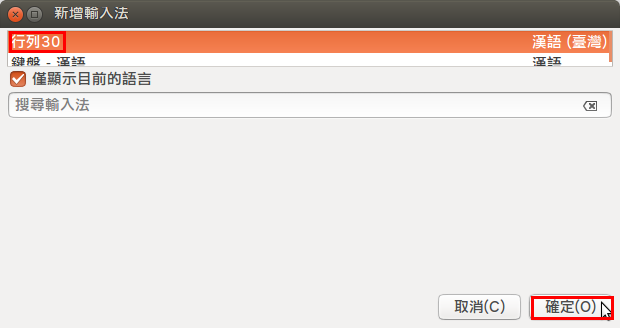
6. 按 Ctrl+Space 鍵可以切換到行列輸入法,右上角也會出現行列輸入法圖示
7. 但 fcitx 裡面的行列輸入法是有一點怪怪的,其中最大的問題就是,原本使用w+(1~0)可以輸入標點符號的功能,竟然不見了!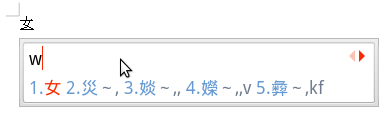
8. 參考 夢幻天地blog: fcitx行列輸入法問題 網站上的設定也是不行,所以只好把 fcitx 給移除了!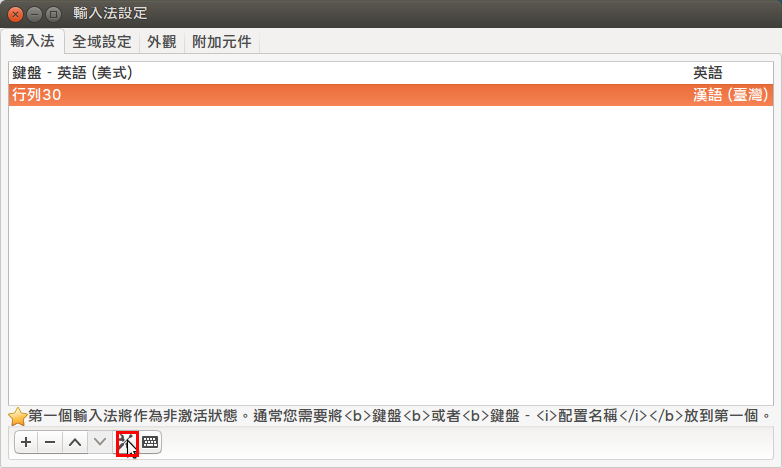
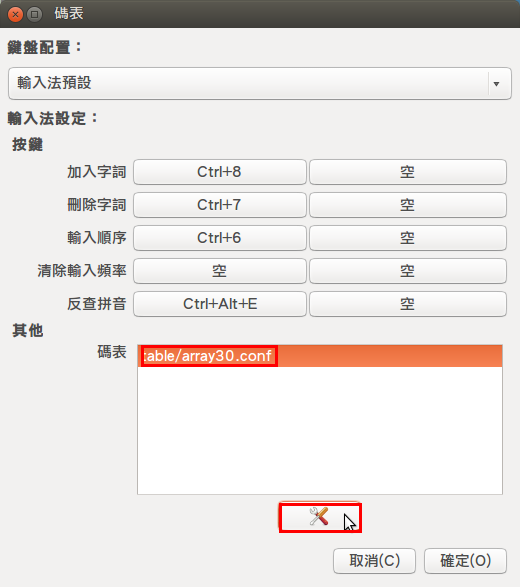
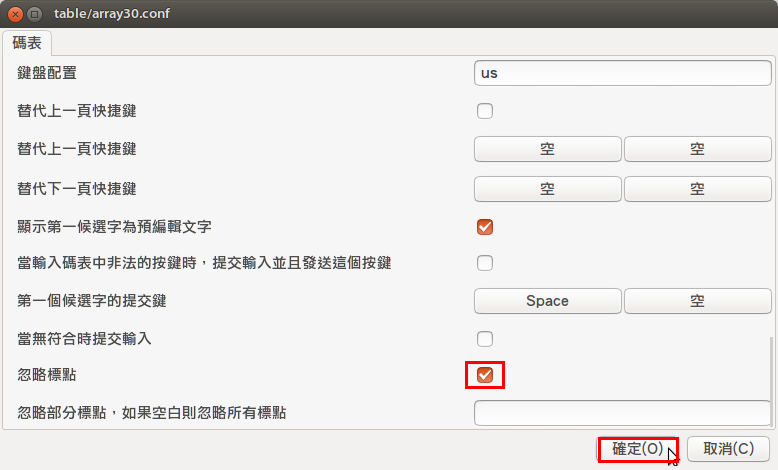
9. 移除 fcitx
$ sudo apt-get remove –purge fcitx fcitx-bin fcitx-config-common fcitx-config-gtk fcitx-data fcitx-frontend-all fcitx-frontend-gtk2 fcitx-frontend-gtk3 fcitx-frontend-qt4 fcitx-libs fcitx-libs-gclient fcitx-libs-qt fcitx-module-dbus fcitx-module-kimpanel fcitx-module-lua fcitx-module-x11 fcitx-modules fcitx-pinyin fcitx-table fcitx-table-array30 fcitx-ui-classic liblua5.2-0
在 Ubuntu 安裝的 LibreOffice 預設安裝二組的圖示與樣式,分別是 銀河和 Human。
銀河
Human
[@more@]另外增加幾組
$ sudo apt-get install libreoffice-style-tango libreoffice-style-crystal libreoffice-style-hicontrast libreoffice-style-oxygen libreoffice-style-sifr
使用方式:
在 LibreOffice 選擇 工具 / 選項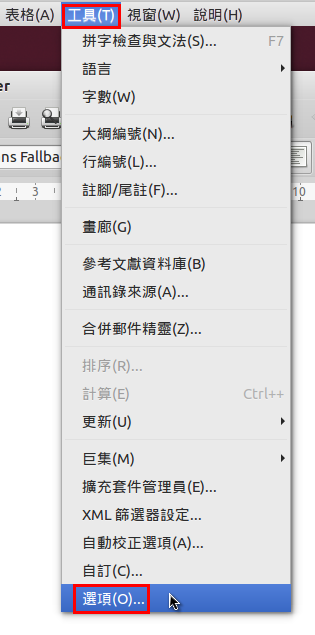
選擇 檢視 / 圖示大小與樣式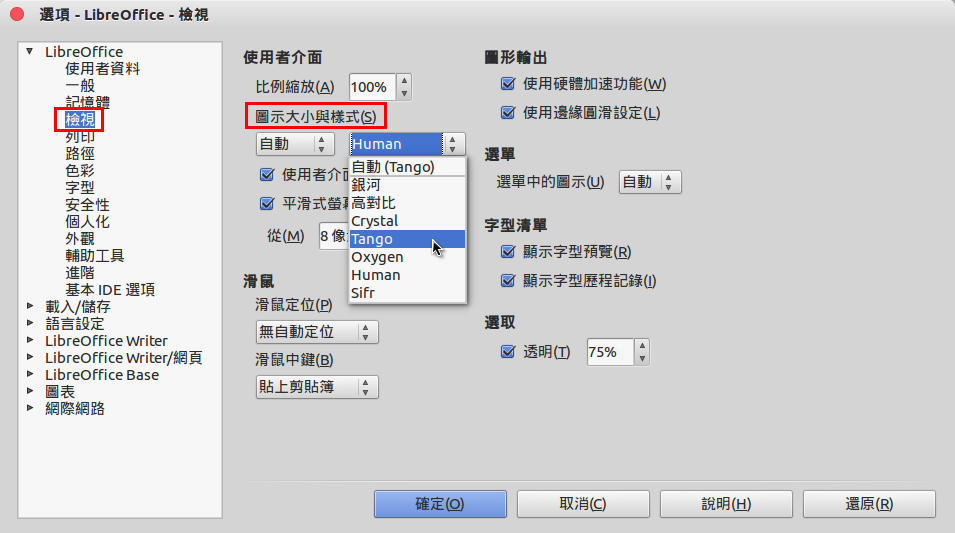
高對比
Crystal
Tango
Oxygen
Sifr
加入 add-apt-repository 指令
$ sudo apt-get install software-properties-common python-software-properties
加入套件庫來源
$ sudo add-apt-repository ppa:noobslab/apps
更新套件庫
$ sudo apt-get update
搜尋套件
$ sudo apt-cache search slidewall
slidewall – Let Slidewall to change your wallpapers.[@more@]移除套件庫來源
$ sudo add-apt-repository -r ppa:noobslab/apps
更新套件庫
$ sudo apt-get update
已經找不到套件
$ sudo apt-cache search slidewall
縣網可能因為資安的因素,所以預設並不允許 Server 可以外送信件,如果要打開這一項功能,要與資網聯繫,有些麻煩,因為學校的這些 Server,並沒有擔任 Mail Server 的工作,只是純粹要把系統的 log 檔案彙整到外部的信箱而已,所以改用 Google Mail 來外送信件。
參考網頁:
透過ssmtp與Gmail帳戶來做Mail自動通知 on CentOS 5.x | IT水電工-哆啦胖虎
Linux 使用 SSMTP 與 GMail 以指令或程式自動寄信教學 – G. T. Wang
1. 安裝 ssmtp 及 logwatch
# apt-get install ssmtp logwatch
2. 備份原設定檔 /etc/ssmtp/ssmtp.conf
# cp /etc/ssmtp/ssmtp.conf /etc/ssmtp/ssmtp.conf.$(date +%F)
[@more@]
3. 修改設定檔 /etc/ssmtp/ssmtp.conf
# vim /etc/ssmtp/ssmtp.conf
#root=postmaster
# The place where the mail goes. The actual machine name is required
# no MX records are consulted. Commonly mailhosts are named mail.domain.com
# The example will fit if you are in domain.com and you mailhub is so named.
mailhub=smtp.gmail.com:587
# Where will the mail seem to come from?
#rewriteDomain=y
# The full hostname
#hostname=root-chroot-copy
# 寄件者帳號
AuthUser=xxxx@gmail.com
# 寄件者密碼
AuthPass=xxxx
UseSTARTTLS=YES
FromLineOverride=yes #enables to use mail -r option
4. 更改檔案權限
# chmod 0600 /etc/ssmtp/ssmtp.conf
5. 備份原設定檔 /usr/share/logwatch/default.conf/logwatch.conf
# cp /usr/share/logwatch/default.conf/logwatch.conf /usr/share/logwatch/default.conf/logwatch.conf.$(date +%F)
6. 進行修改
# sed -i ‘s/MailTo = root/MailTo = xxxx@gmail.com/’ /usr/share/logwatch/default.conf/logwatch.conf
# sed -i ‘s/MailFrom = Logwatch/MailFrom = Logwatch@nxi.test.ilc.edu.tw/’ /usr/share/logwatch/default.conf/logwatch.conf
# sed -i ‘s/Output = stdout/Output = mail/’ /usr/share/logwatch/default.conf/logwatch.conf
# sed -i ‘s/Detail = Low/Detail = Med/’ /usr/share/logwatch/default.conf/logwatch.conf
7. 執行 logwatch 測試是否能收到信件
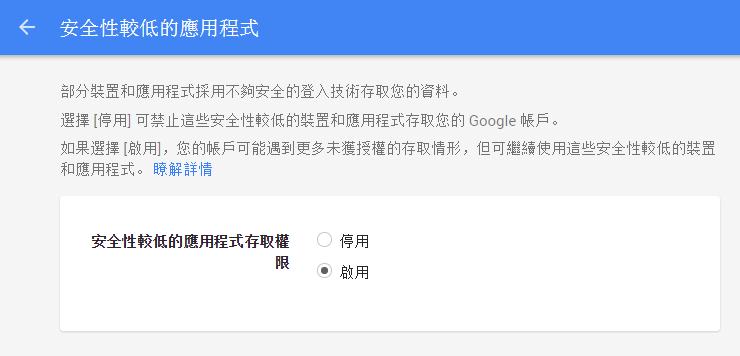
如果有無法收到信件,可要啟用 安全性較低的應用程式存取權