詳細請參考:
[三週年] Ubuntu MAC Style 三代 (12.04LTS) 2015-04 隆重更新! [論壇 – Ubuntu@TW LiveCD] | Ubuntu 正體中文站
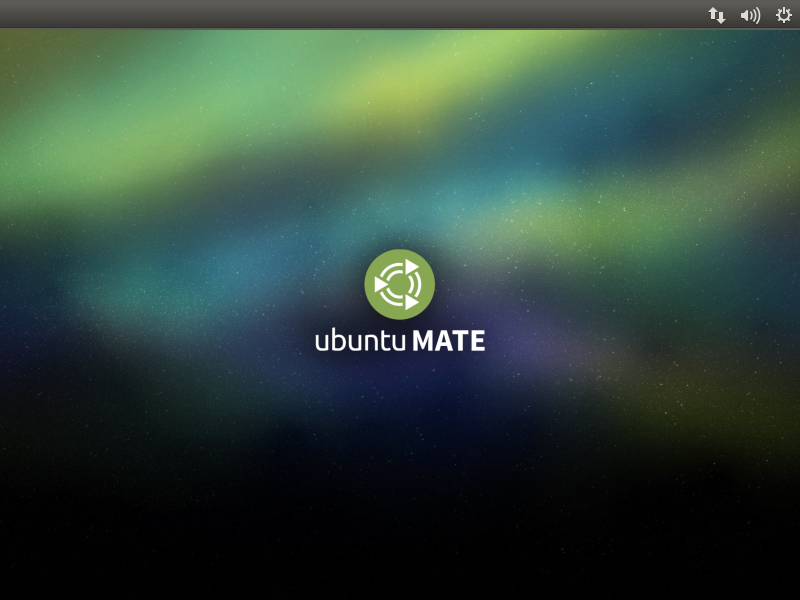
開機畫面
登入畫面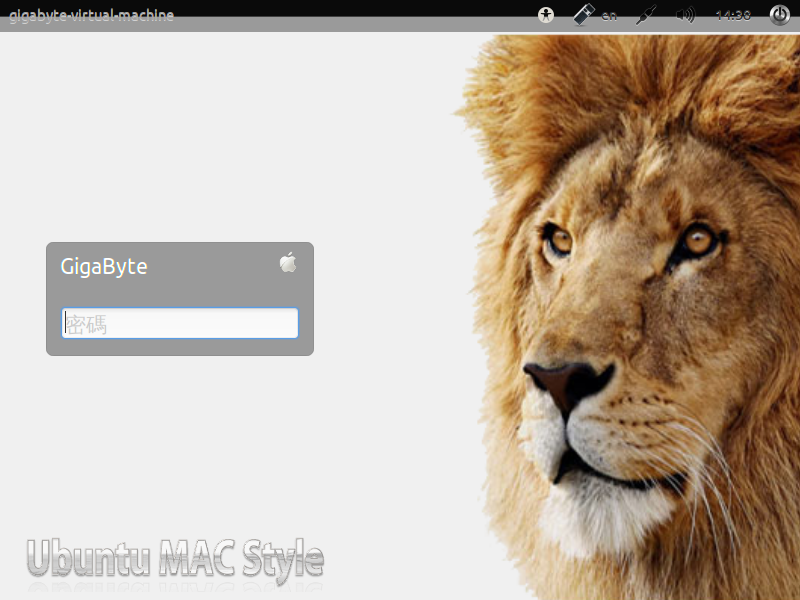
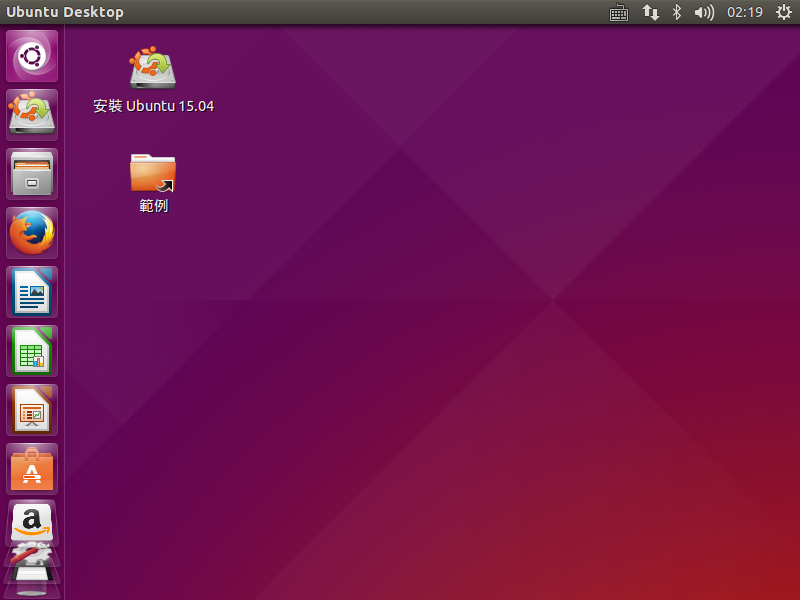
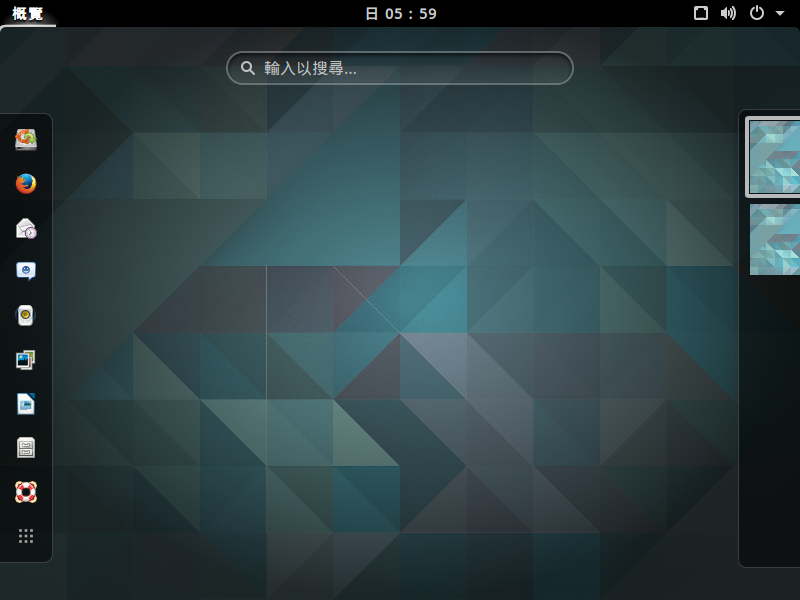
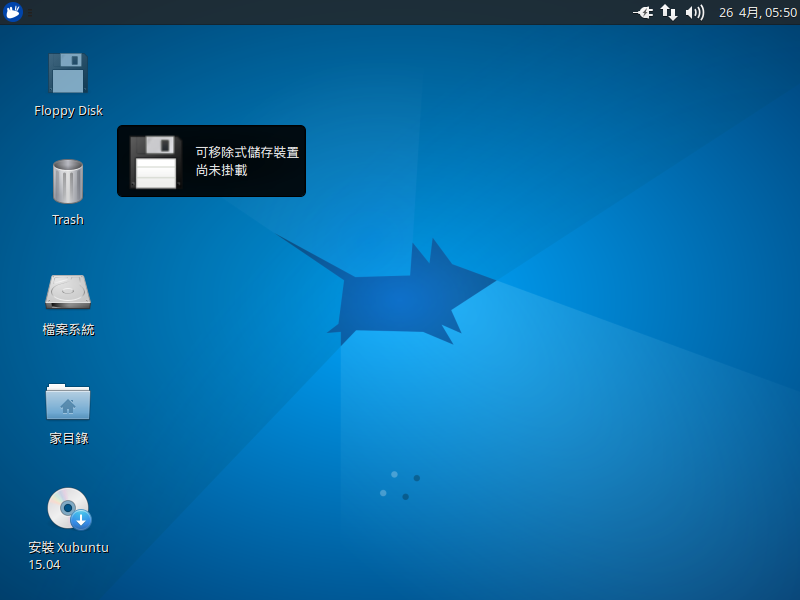
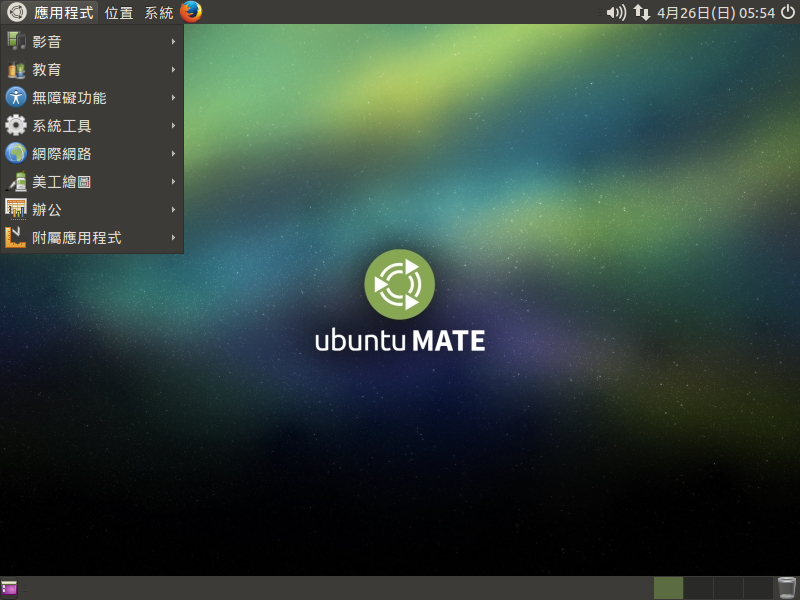
桌面環境

全新的繁體中文 WordPress 網站《宜蘭部落格教育平台 網站》
關於 elementary OS 的介紹,可以參考:
elementary (作業系統) – 維基百科,自由的百科全書
elementary OS 官方網站:https://elementary.io/zh_TW/
elementary OS下載網站:http://sourceforge.net/projects/elementaryos/files/stable/
目前最新的版本是 20150411 所釋出,版本代號是 Freya
1. 光碟開機畫面 [@more@]
2. 進行安裝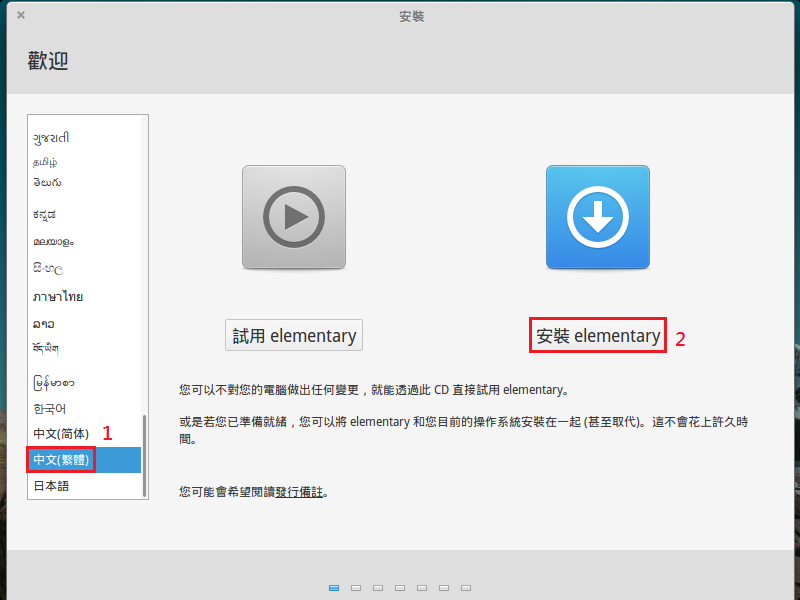
3. 安裝設定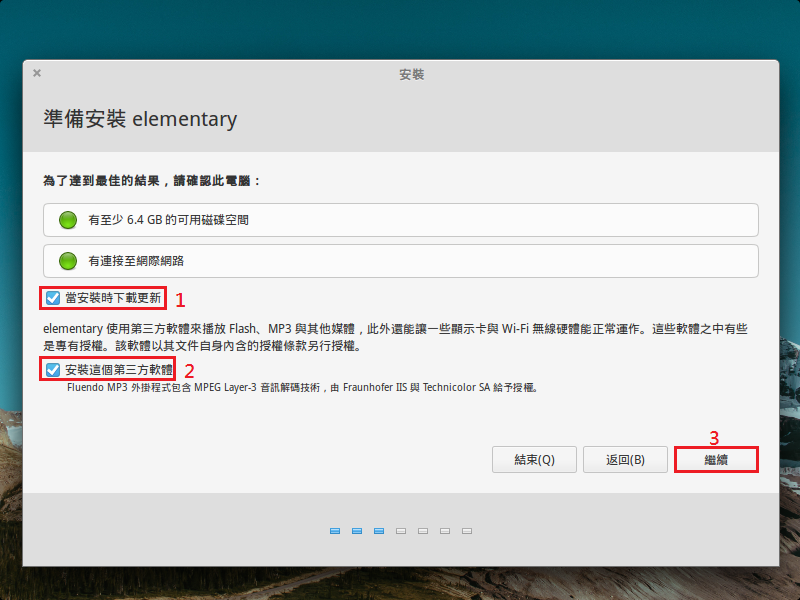
4. 立刻安裝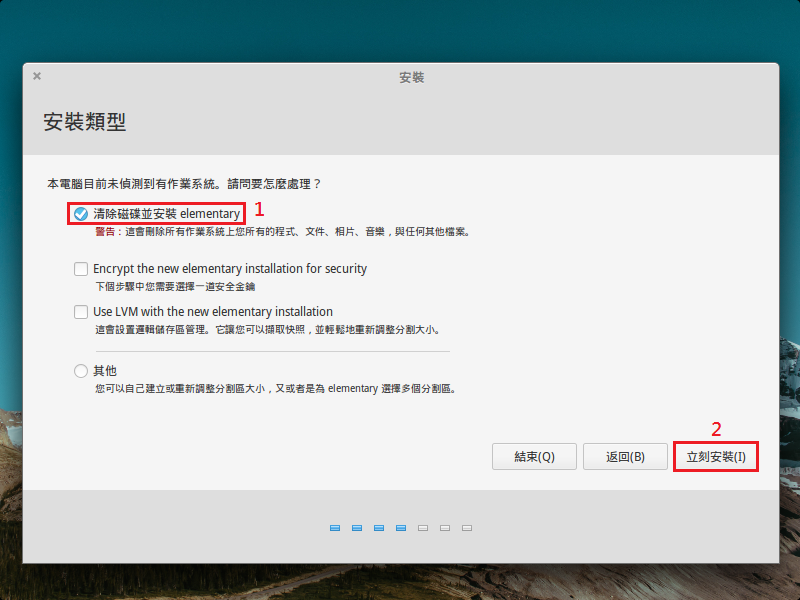
5. 繼續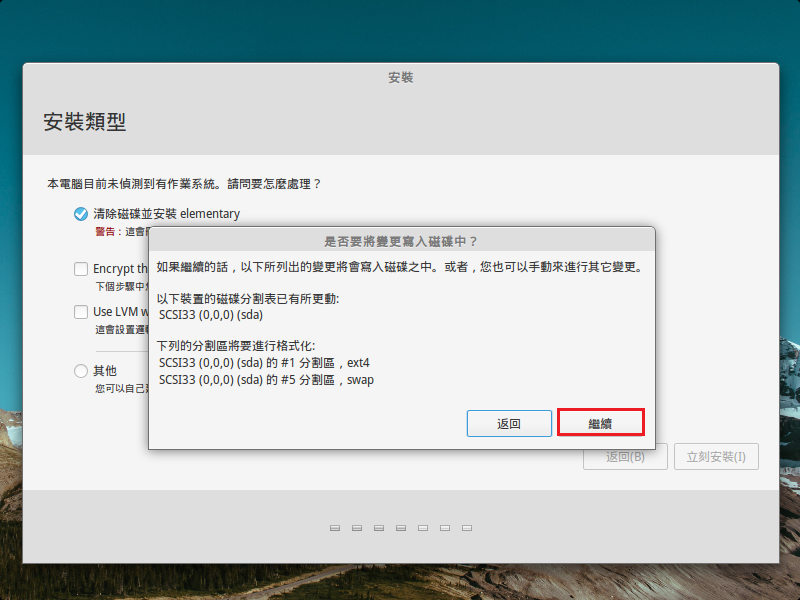
6. 時區設定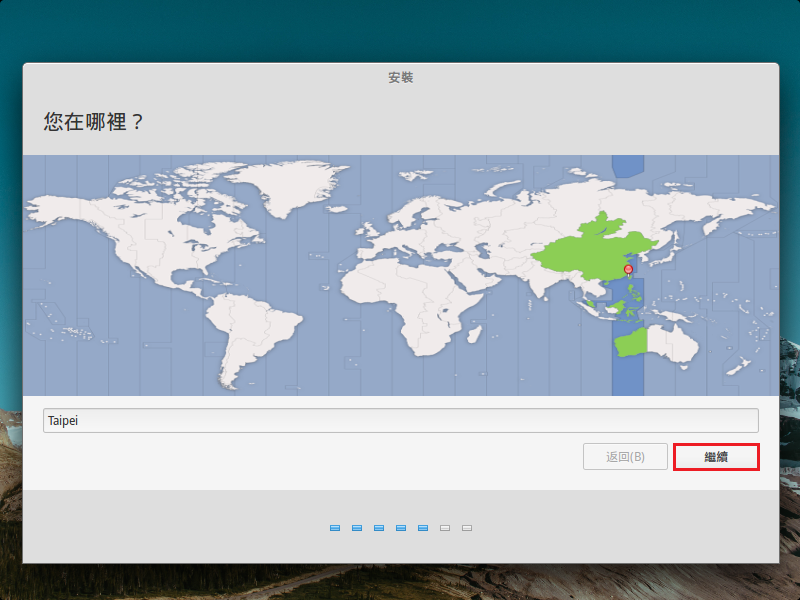
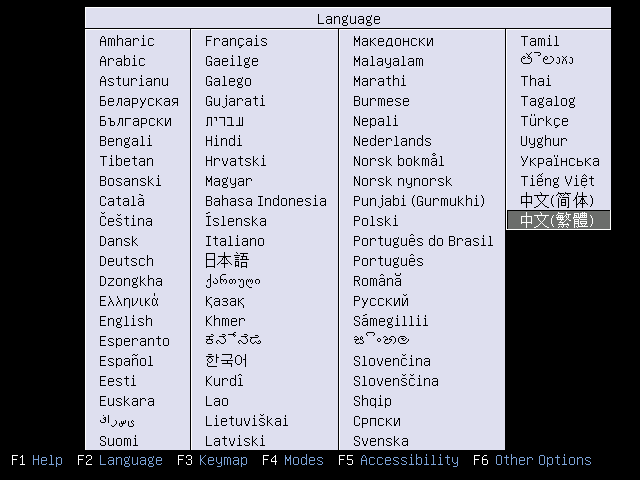
7. 鍵盤選擇
8. 帳號及密碼設定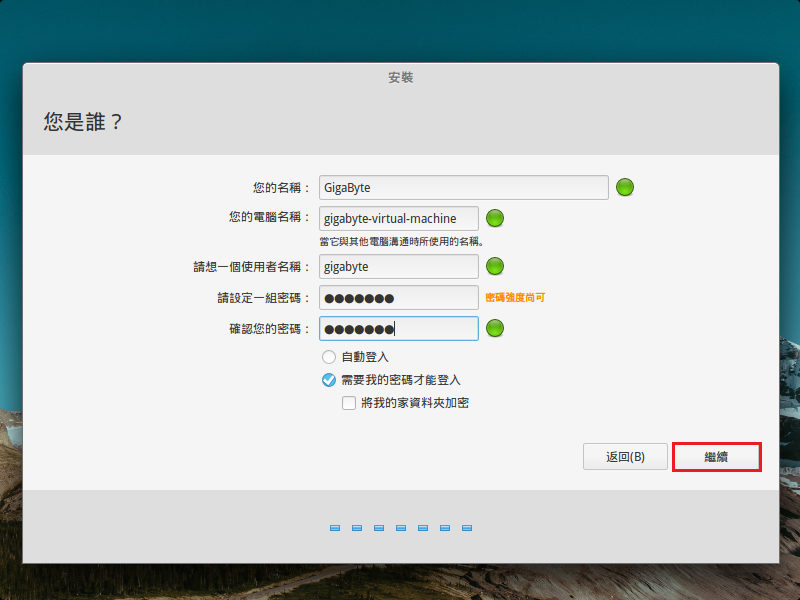
9. 安裝中
10. 安裝完成,重新啟動電腦
11. 登入畫面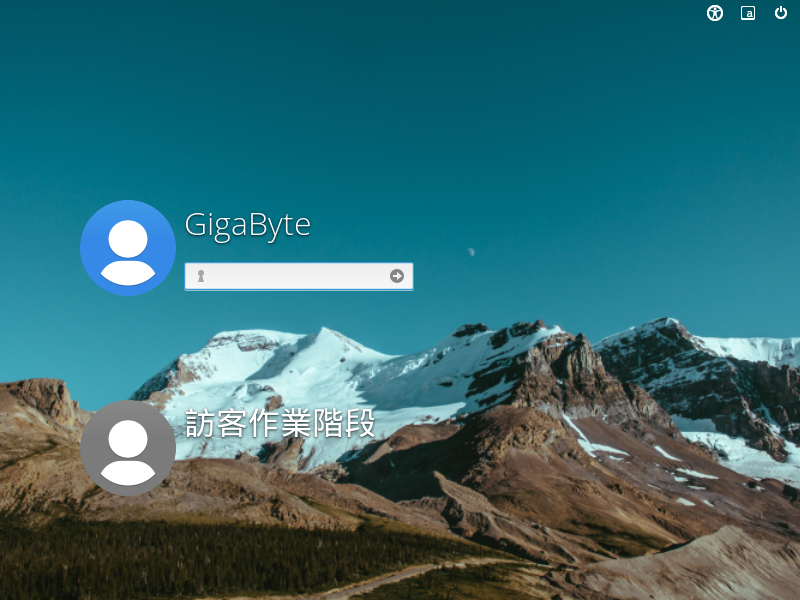
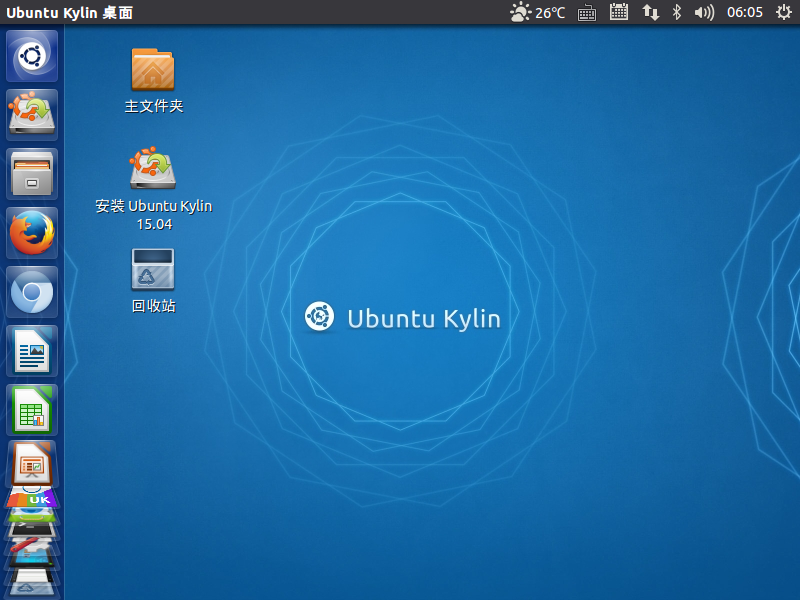
12. 桌面環境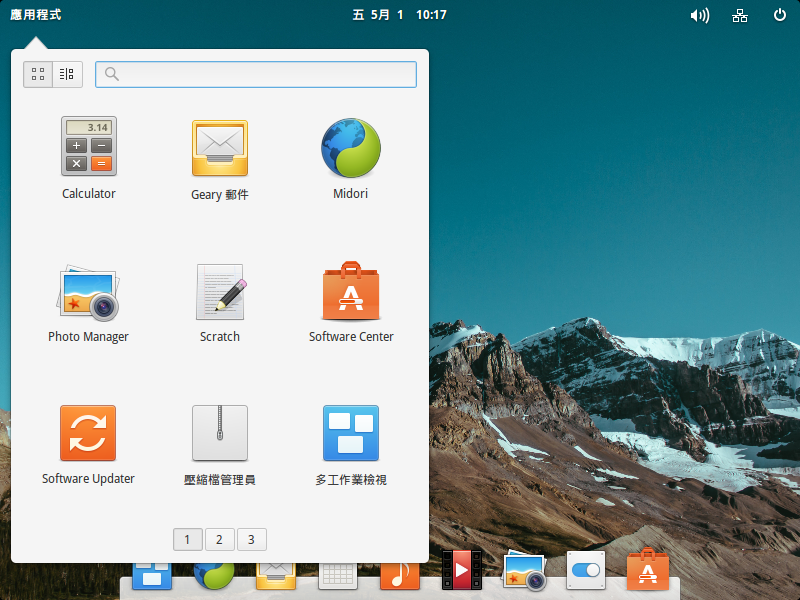
現在 Linux 的安裝幾乎比 Windows 7/8.1 還要簡單快速,不會像以前那樣難以安裝,使用起來的感覺也不遜於 Windows。
參考網頁:Using PsShutdown and Shutdown Commands in Corporate Networks – Tips & Tricks
1. 關閉 192.168.1.112 和 192.168.1.116
start /min psshutdown -f 192.168.1.112,192.168.1.116 -u administrator -p 123456 -t 1
2. 關閉檔案列表中的電腦 192.168.1.17~20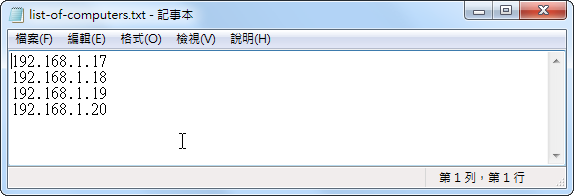 [@more@]建立批次檔
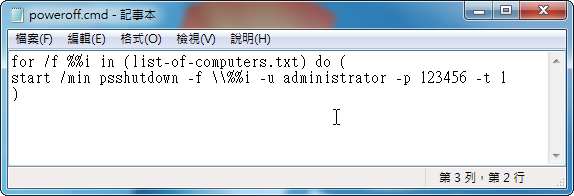
將列表和批次檔放在同一個目錄下
以系統管理員身份執行命令提示字元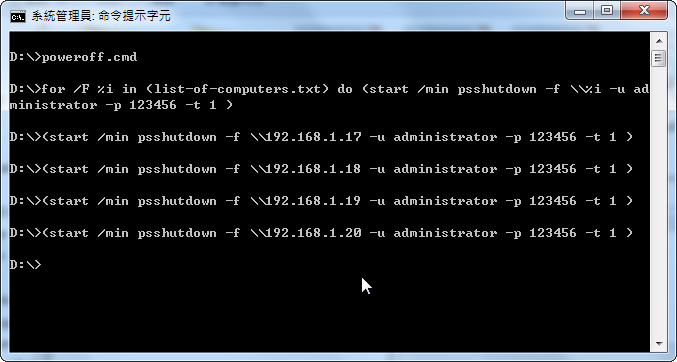
或改用主機名稱也是可以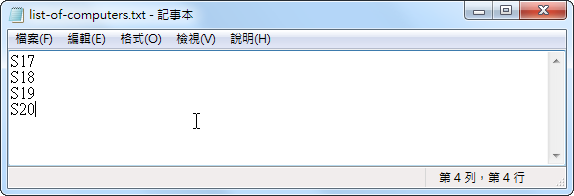
直接用一行完成
start /min psshutdown -f %%i -u administrator -p 123456 -t 1 @list-of-computers.txt
用主機名稱的速度會比慢一些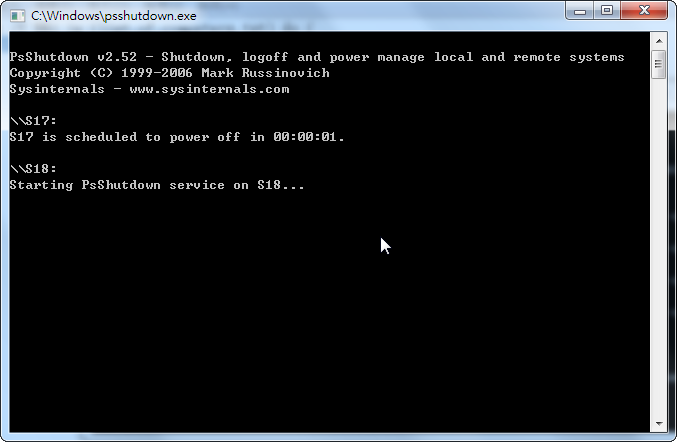
指定時間關機 中午 12:00
start /min psshutdown -f %%i -u administrator -p 123456 -t 12:00 @list-of-computers.txt
關閉所有的電腦
start /min psshutdown -f * -u administrator -p 123456 -t 1
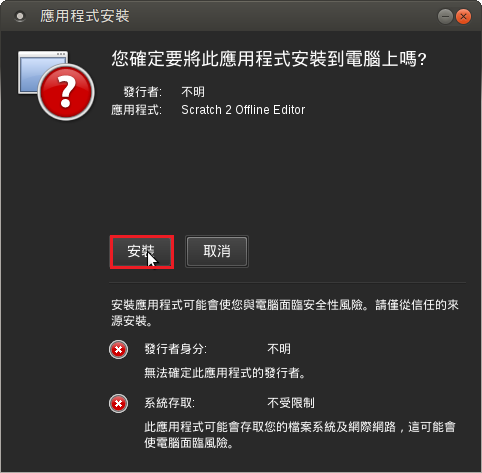
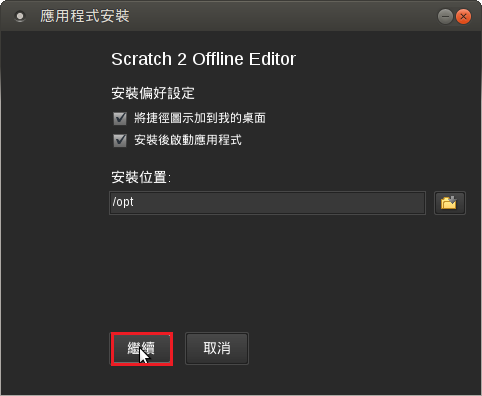
因為之前在 Ubuntu Linux 安裝 Adobe Air / Scratch 2 時,都是在 x86 平台上安裝,特地在 Ubuntu MATE 14.04-2 x64 平台試試!
加入 i386 平台
$ sudo dpkg –add-architecture i386
$ dpkg –print-architecture
amd64
$ dpkg –print-foreign-architectures
i386
進行套件庫更新及安裝套件
$ sudo apt-get update
$ sudo apt-get install lib32bz2-1.0 lib32ncurses5 lib32tinfo5 lib32z1 libc6-i386
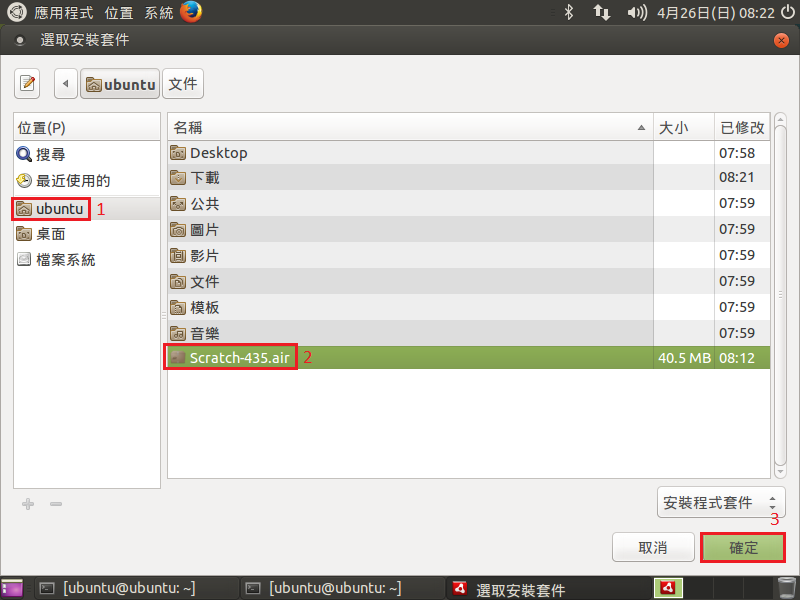
$ sudo dpkg -i adobeair_2.6.0.19170-franklin_amd64.deb[@more@]開始安裝 Scratch 2.x 及解決錯誤訊息
$ sudo /etc/alternatives/airappinstaller ./Scratch-435.air
/etc/alternatives/airappinstaller: error while loading shared libraries: libstdc++.so.6: cannot open shared object file: No such file or directory
$ sudo apt-get install libstdc++6:i386
$ sudo /etc/alternatives/airappinstaller ./Scratch-435.air
Error loading the runtime (libgtk-x11-2.0.so.0: cannot open shared object file: No such file or directory)
$ sudo apt-get install libgtk2.0-0:i386
$ sudo /etc/alternatives/airappinstaller ./Scratch-435.air
Error loading the runtime (libxml2.so.2: cannot open shared object file: No such file or directory)
$ sudo apt-get install libxml2:i386
$ sudo /etc/alternatives/airappinstaller ./Scratch-435.air
Error loading the runtime (libnss3.so: cannot open shared object file: No such file or directory)
$ sudo apt-get install libnss3:i386
$ /usr/bin/Adobe AIR Application Installer ./Scratch-435.air
Gtk-Message: Failed to load module “gail”
Gtk-Message: Failed to load module “atk-bridge”
Gtk-Message: Failed to load module “canberra-gtk-module”
unexpected error: ArgumentError: Absolute path of the air file needs to be specified.
$ sudo apt-get install libatk-adaptor:i386 libgail-common:i386
$ /usr/bin/Adobe AIR Application Installer ./Scratch-435.air
Gtk-Message: Failed to load module “canberra-gtk-module”
unexpected error: ArgumentError: Absolute path of the air file needs to be specified.
$ sudo apt-get install libcanberra-gtk-module:i386
出現
(Adobe AIR Application Installer:9911): Gtk-WARNING **: 無法在 module_path 中找出佈景主題引擎:‘murrine’
$ sudo apt-get install gtk2-engines-murrine:i386
以圖形模式安裝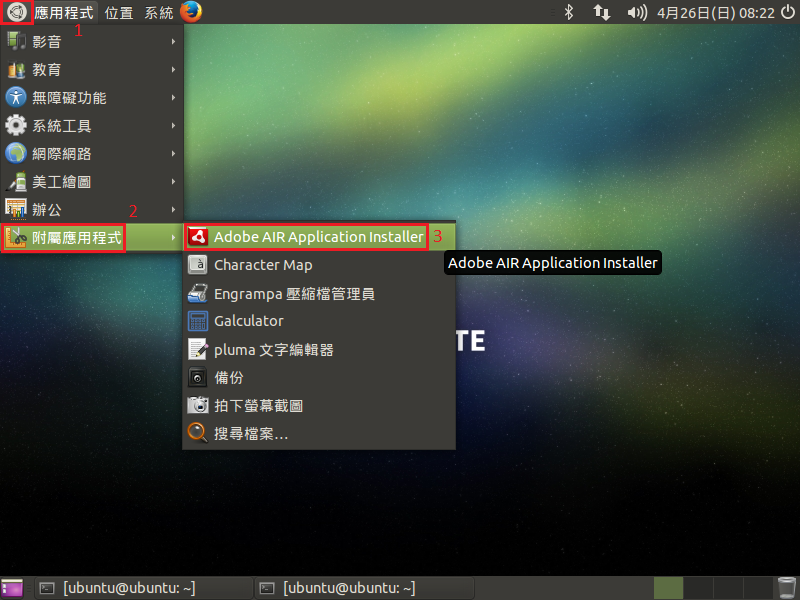
就卡在這裡!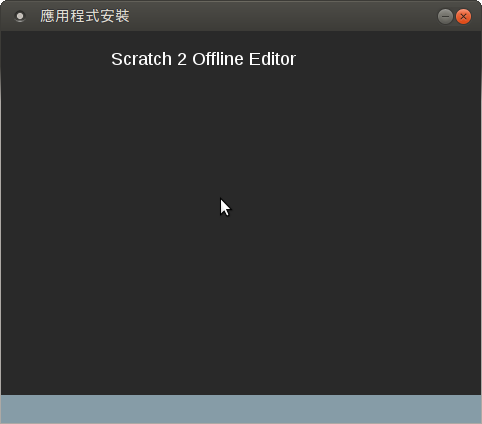
可能是軟體安裝到一半時臨時暫停,所以 Launchpad 出現一個 已暫停 的程式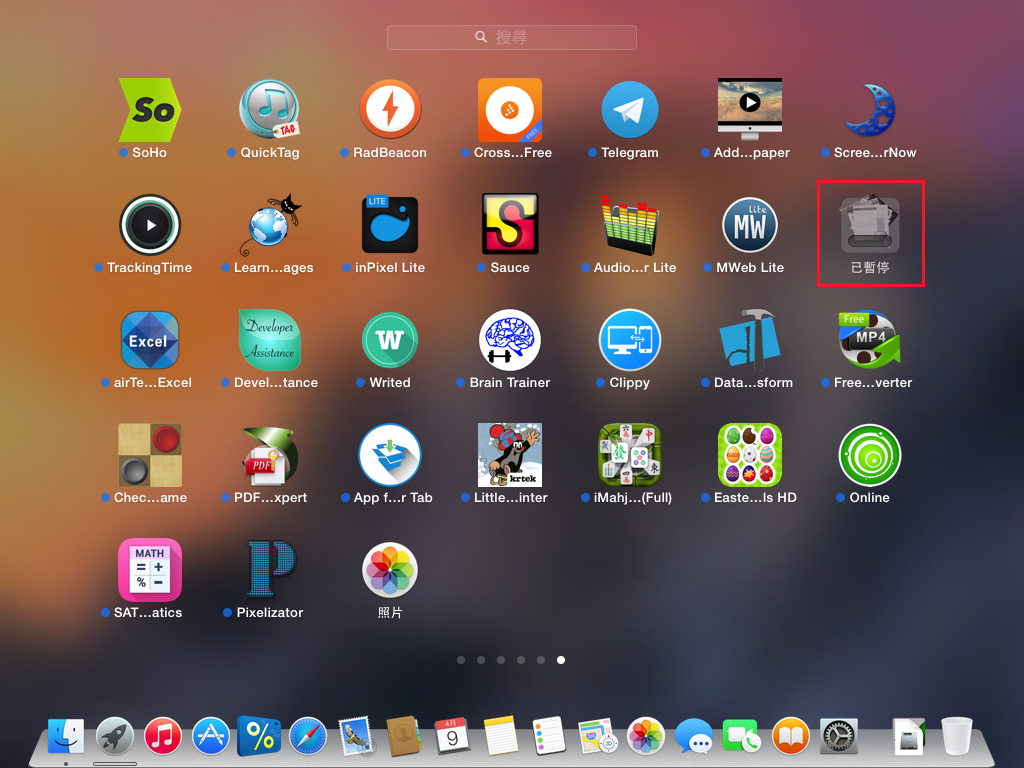 [@more@]繼續安裝或刪除的方式
在已暫停的程式按滑鼠左鍵久一點,或按  鍵
鍵
程式在左上角就會出現一個 X
這時候再點選一下程式,就可以繼續安裝
按一下左上角的 X,就可以刪除這個程式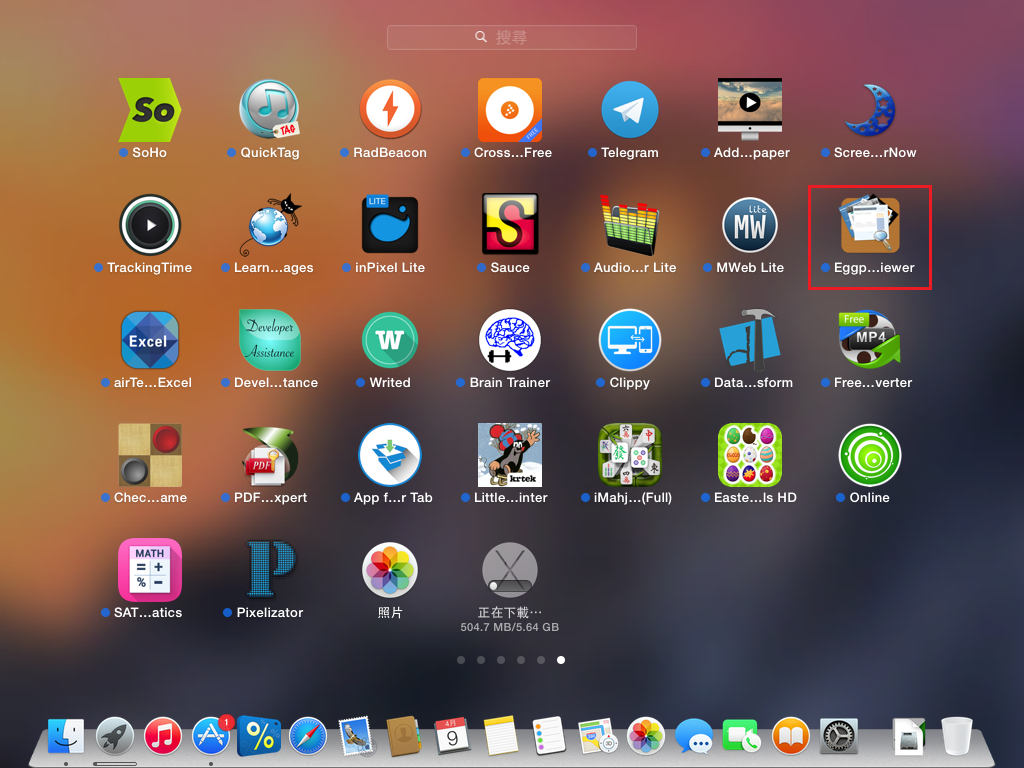
PsShutdown 是由 Microsoft 所推出的程式,它可以在命令提示字元下,對區域網路中的電腦,進行關機、登出、重新啟動的動作。
PsShutdown 下載網址:https://technet.microsoft.com/en-us/sysinternals/bb897541.aspx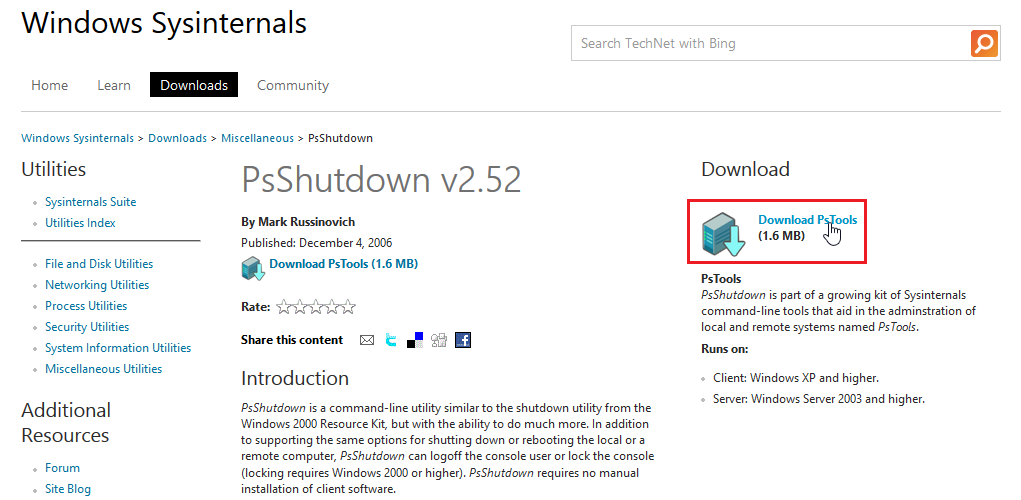
PsShutdown 包含在 PsTools 中,是其中的一個小程式,目前最新版本是 2.52 版。[@more@]1. 下載 PsTools 之後,目前只用到 PsShutdown,所以只解壓縮 PsShutdown 到 c:Windows 目錄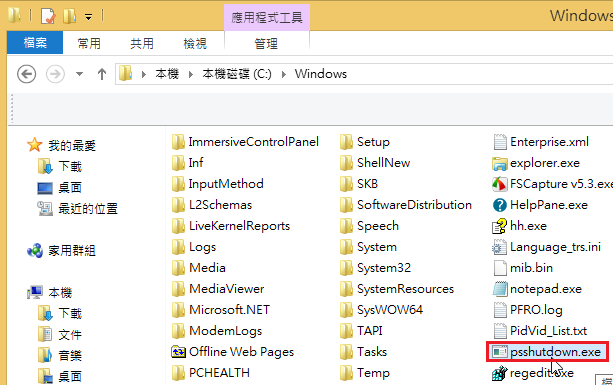
2. PsShutdown 指令使用語法
列出幾個常用的指令
強制關機
start /min psshutdown -f 192.168.1.112 -u administrator -p 123456 -t 1
關機
start /min psshutdown -k 192.168.1.112 -u administrator -p 123456 -t 1
重新啟動電腦
start /min psshutdown -r 192.168.1.112 -u administrator -p 123456 -t 1
關機
start /min psshutdown -s 192.168.1.112 -u administrator -p 123456 -t 1
不需要 Ubuntu 15.04 的訪客作業階段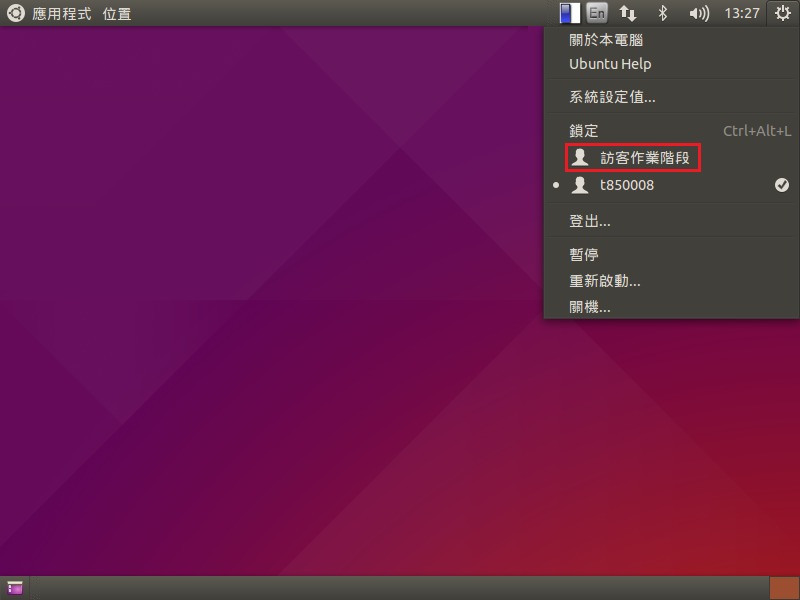 [@more@]解決方式:
1. 備份原檔
$ sudo cp /usr/share/lightdm/lightdm.conf.d/50-ubuntu.conf /usr/share/lightdm/lightdm.conf.d/50-ubuntu.conf.$(date +%F)
2. 進行設定
$ sudo sed -i ‘$aallow-guest=false’ /usr/share/lightdm/lightdm.conf.d/50-ubuntu.conf
重新啟動電腦
或重新啟動 lightdm
$ sudo /etc/init.d/lightdm restart
[ ok ] Restarting lightdm (via systemctl): lightdm.service.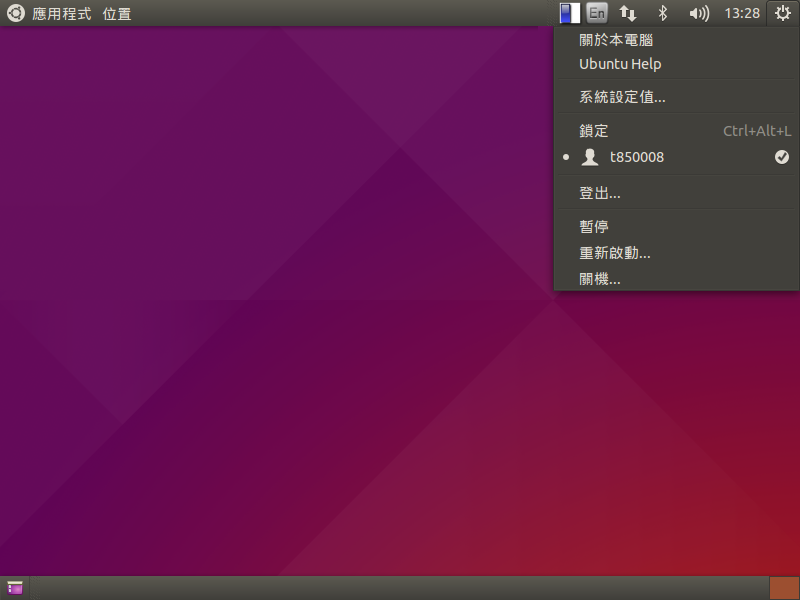
稍微理了一下 Ubuntu 15.04 下載網址:
Ubuntu 15.04
下載位址:http://releases.ubuntu.com/15.04/

 [@more@]
Ubuntu GNOME 15.04
下載位址:http://cdimage.ubuntu.com/ubuntu-gnome/releases/15.04/release/
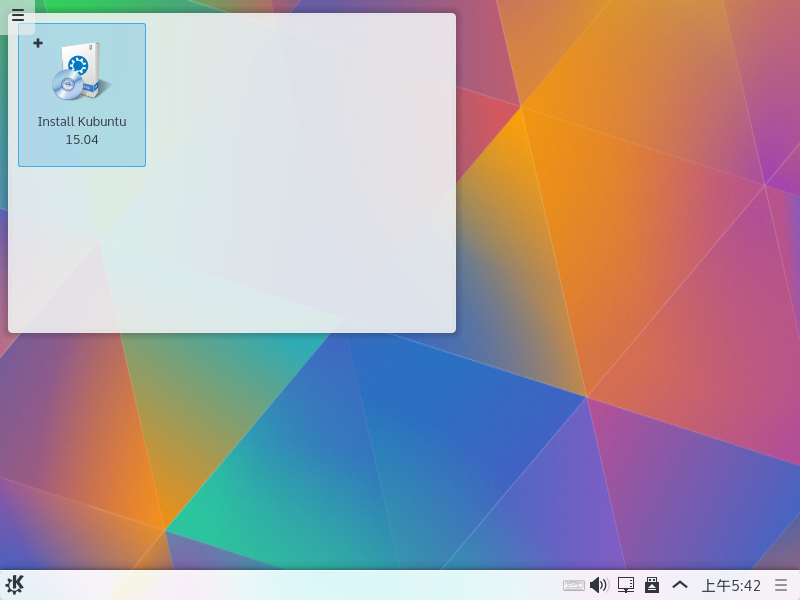
Kubuntu 15.04
下載位址:http://cdimage.ubuntu.com/kubuntu/releases/15.04/release/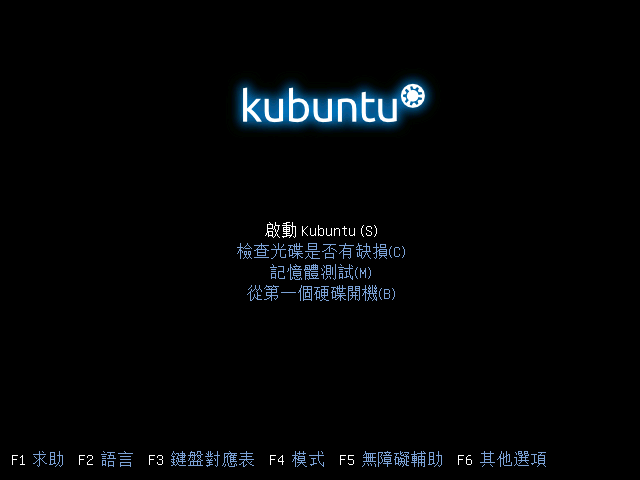

Lubuntu 15.04 LXDE
下載位址:http://cdimage.ubuntu.com/lubuntu/releases/15.04/release/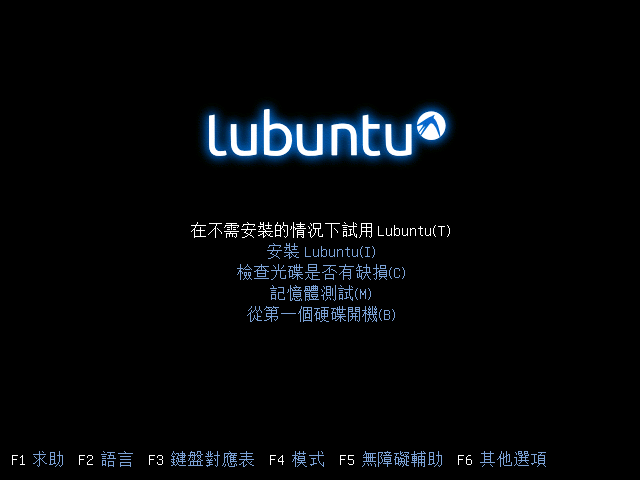

Xubuntu 15.04 XFCE
下載位址:http://cdimage.ubuntu.com/xubuntu/releases/15.04/release/
Ubuntu MATE 15.04
下載網址:https://ubuntu-mate.org/vivid/
Ubuntu Studio 15.04
下載位址:https://ubuntustudio.org/download/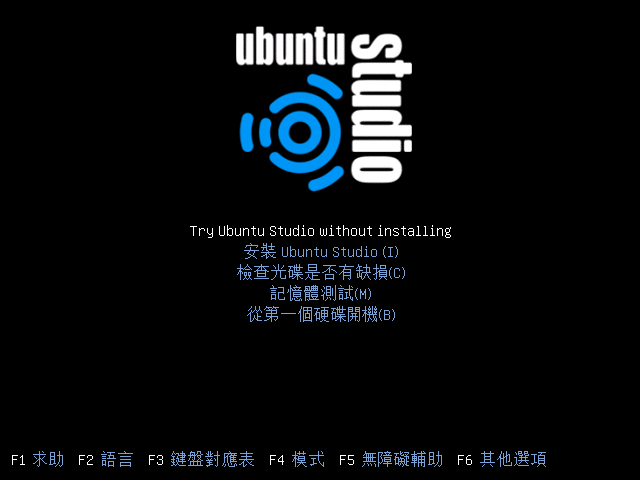

Ubuntu Kylin 15.04 for China
下載位址:http://www.ubuntukylin.com/downloads/

至於 Edubuntu 和 Mythbuntu 因為沒有 14.10 / 15.04 版,所以就不特別列出!
偶然發現在 Windows 8.1 安裝完 DRBL-winroll 後,主機名稱不會自動更改。 [@more@]解決的方式:參考:Google 網上論壇
1. 切換到 C:cygwindrbl_winroll-config 目錄,並修改 hosts.conf 和 winroll.conf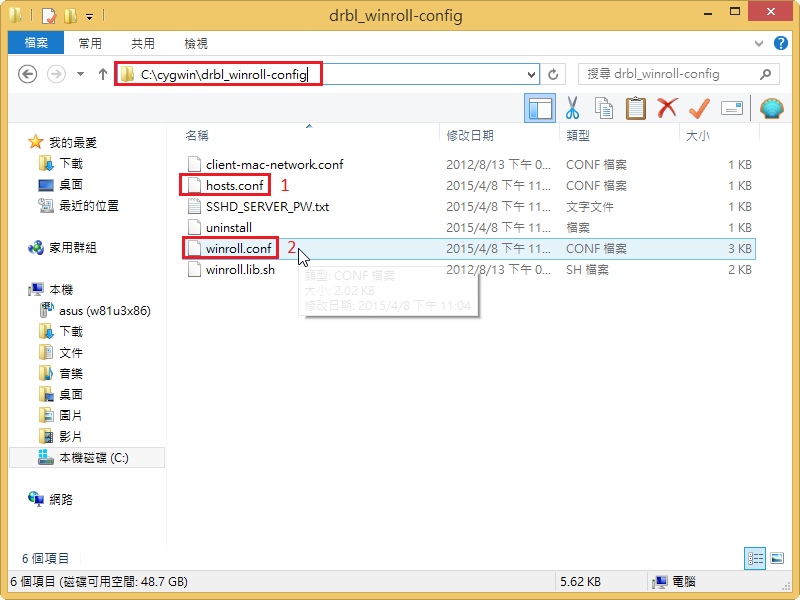
2. 修改 hosts.conf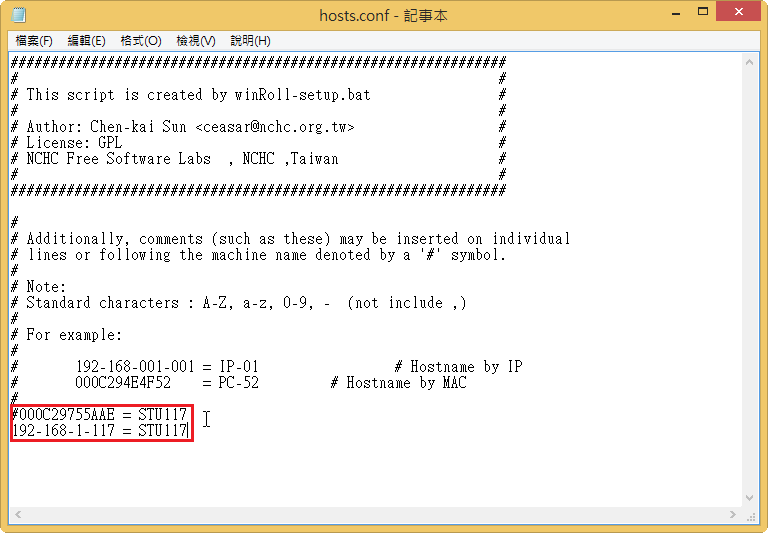
3. 修改 winroll.conf
把原先設定檔中的
HN_WSNAME_PARAM = /RDF:C:cygwindrbl_winroll-confighosts.conf /DFK:$MAC
改成
HN_WSNAME_PARAM = /RDF:C:cygwindrbl_winroll-confighosts.conf /DFK:$IP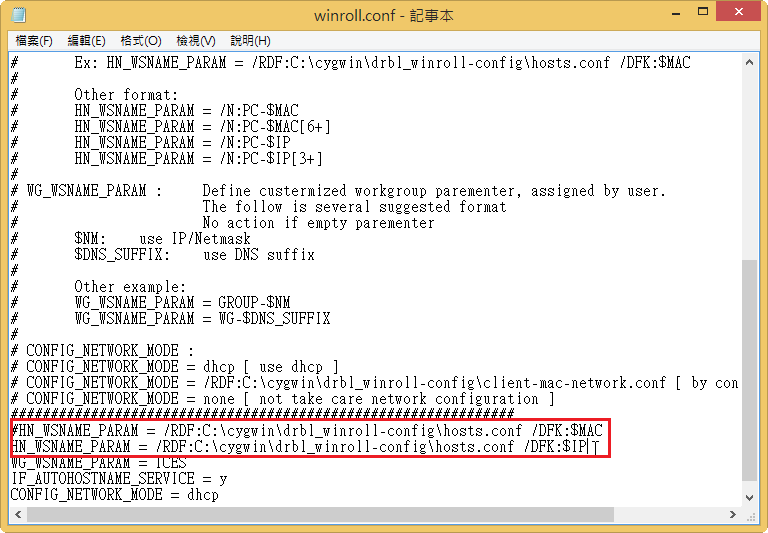
4. 重新啟動電腦後,可以發現電腦主機名稱已經可以自動更改了!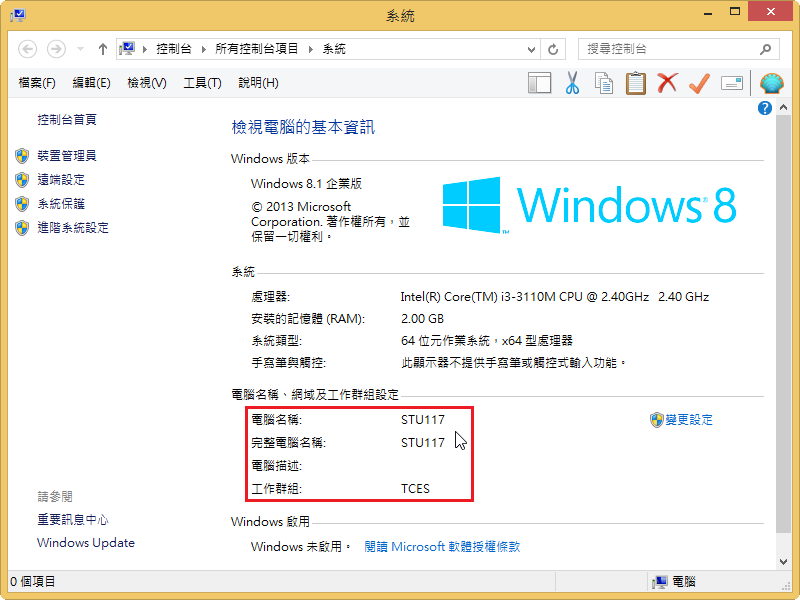
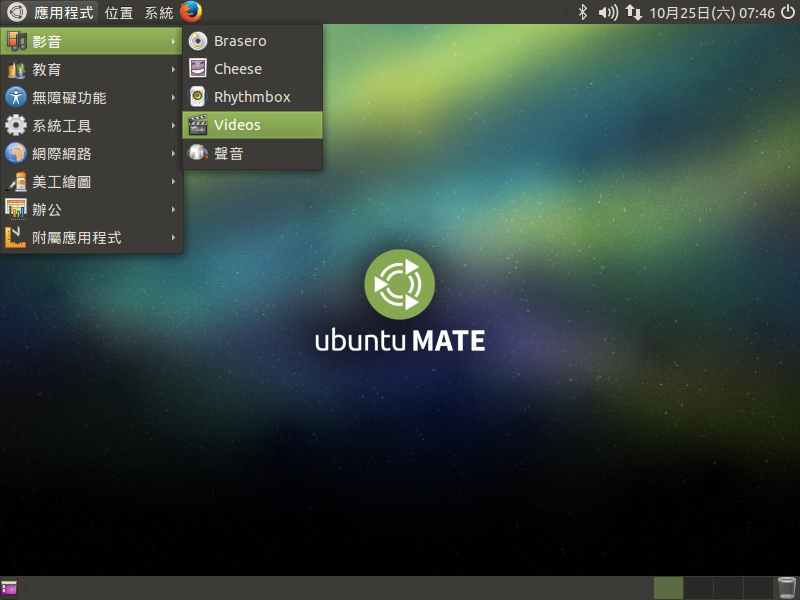
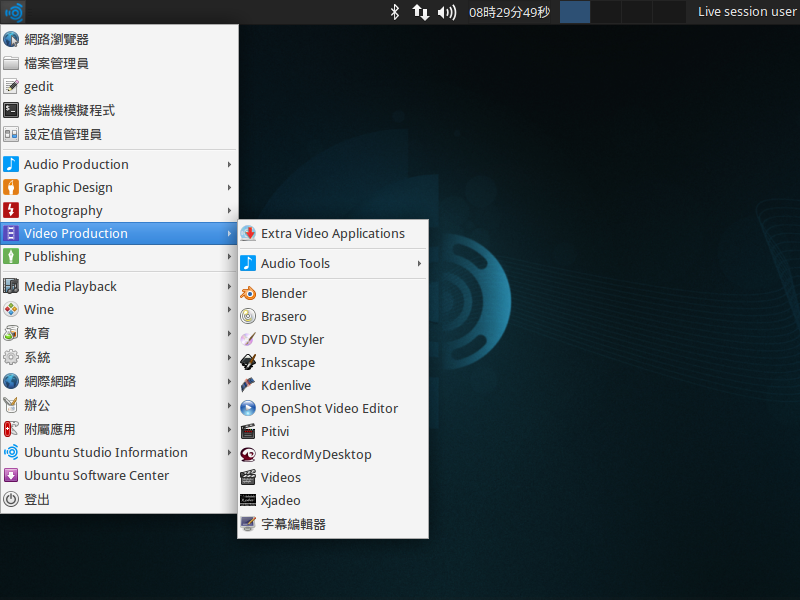
預設桌面[@more@]預設安裝的中文輸入法架構是 fcitx 企鵝輸入法
但內定並沒有安裝任何的輸入法,在這裡加裝行列30輸入法
$ sudo apt-get install fcitx-table fcitx-table-array30
加裝輸入法之後,在 fcitx 企鵝輸入法並不會自動啟用
在 fcitx 輸入法圖示上按滑鼠右鍵,選擇 Configurefcitx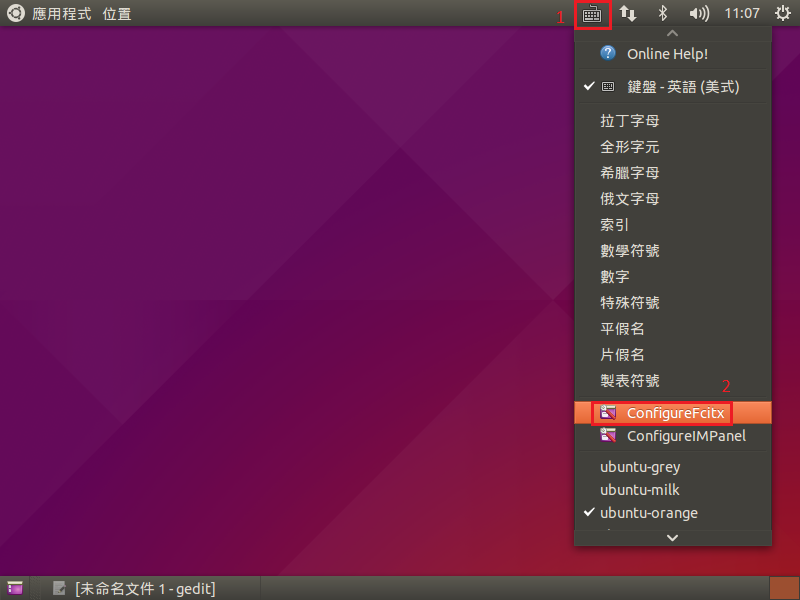
選擇下方的 +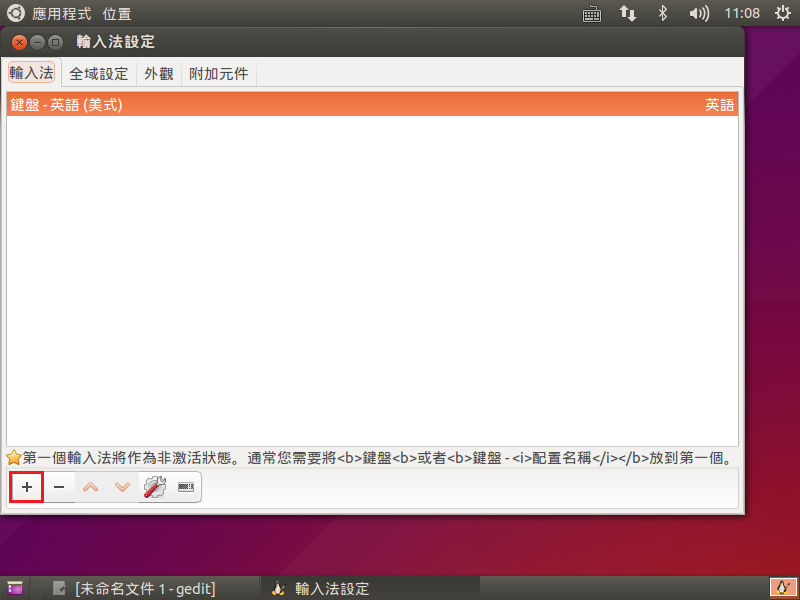
選擇新增加的輸入法,然後按 確定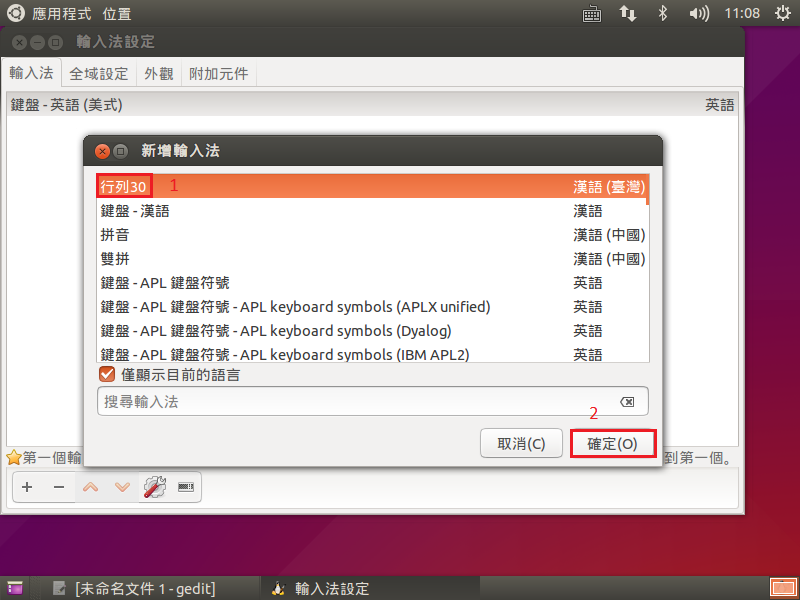
但又發生之前 行列輸入法在 fcitx 上的問題
頭城國小資訊組 | Ubuntu 14.04 上安裝 fcitx 小企鵝輸入法
移除 fcitx 輸入法架構
$ sudo apt-get remove –purge `sudo dpkg -l | awk ‘{print $2}’ | grep ^fcitx`
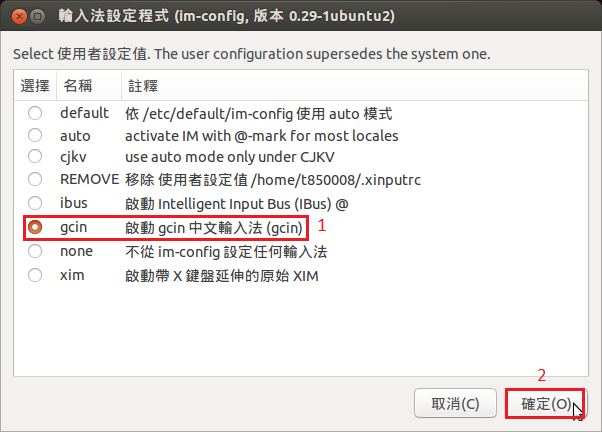
改安裝 gcin
$ sudo apt-get install gcin
更改輸入法架構為 gcin
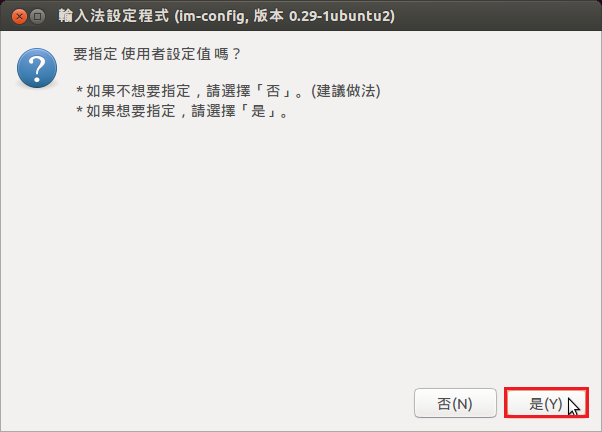
執行 im-config 來進行設定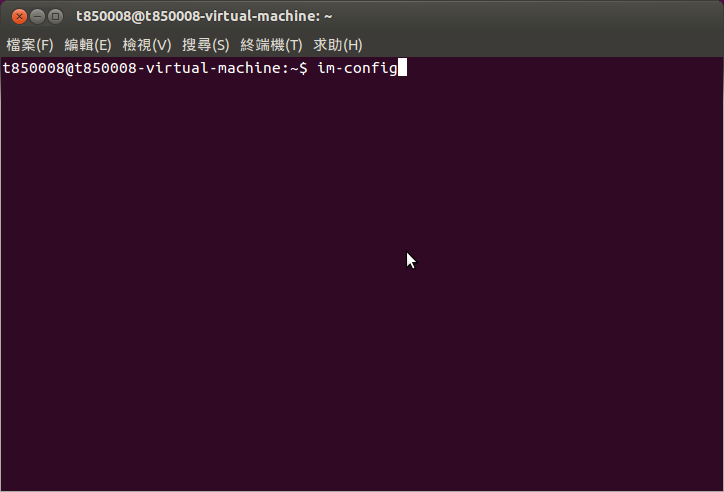
設定過程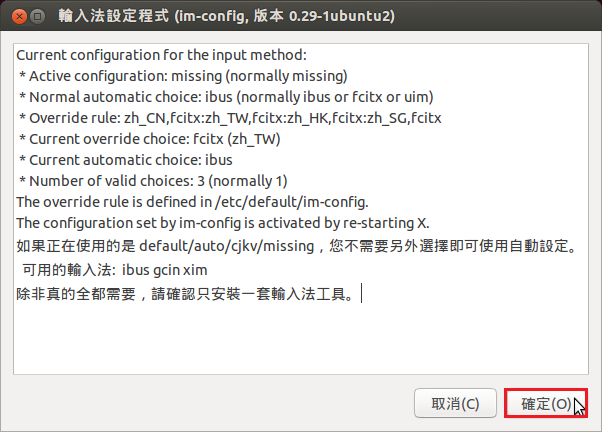
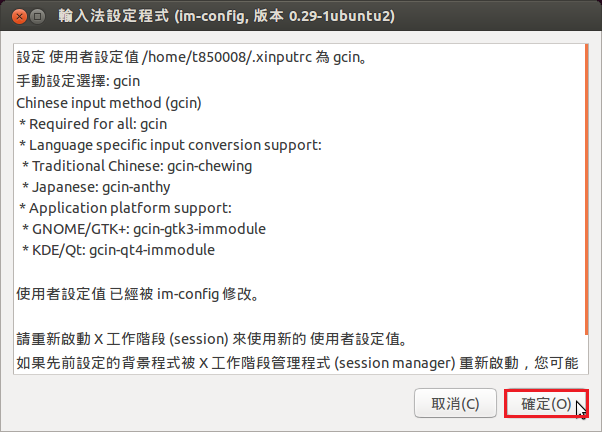
設定完成之後,登出再登入即可!
gcin 又無法出現圖示,解決方式:
頭城國小資訊組 | Ubuntu Desktop 14.10 – 解決 gcin 的圖示無法出現在工作列
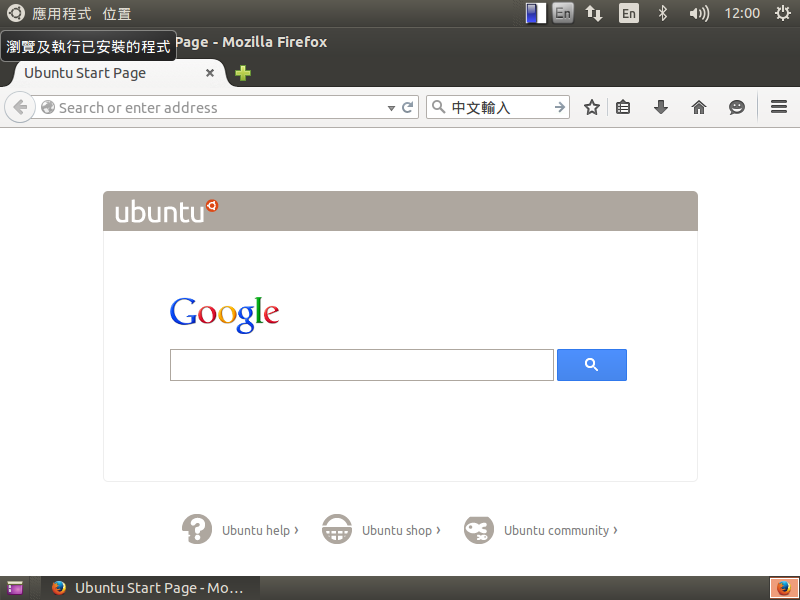
中文輸入也沒有問題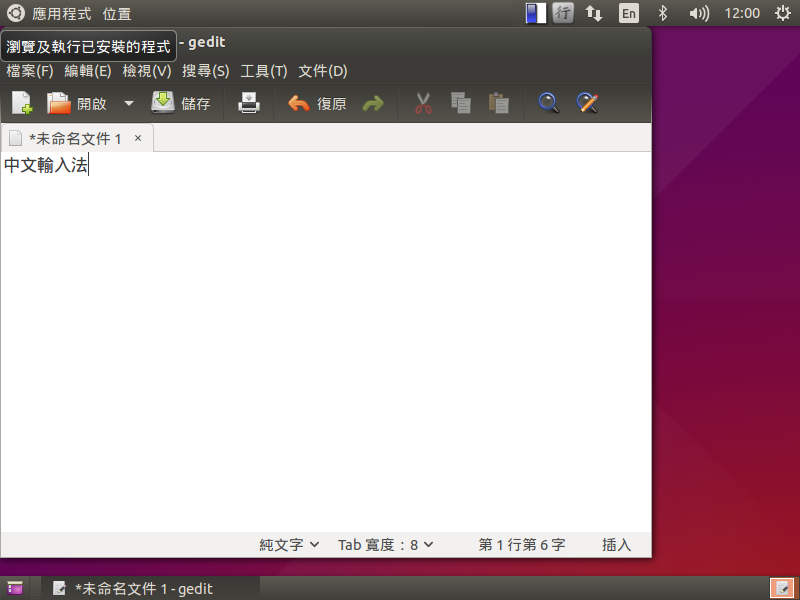
切換回傳統介面
安裝 gnome-session-flashback 套件
$ sudo apt-get install gnome-session-flashback
重新登出再登入或重新啟動後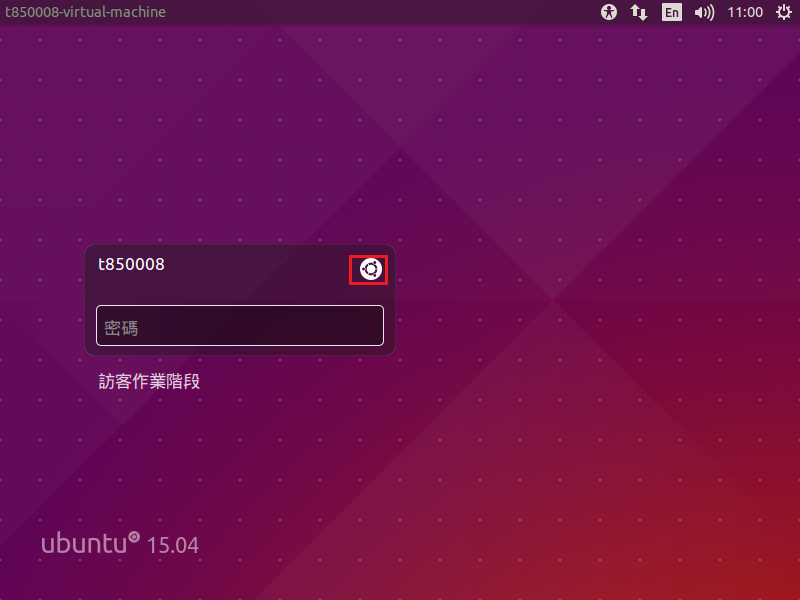
選擇 GNOME Flashback(Compiz) 或 GNOME Flashback(Metacity) 即可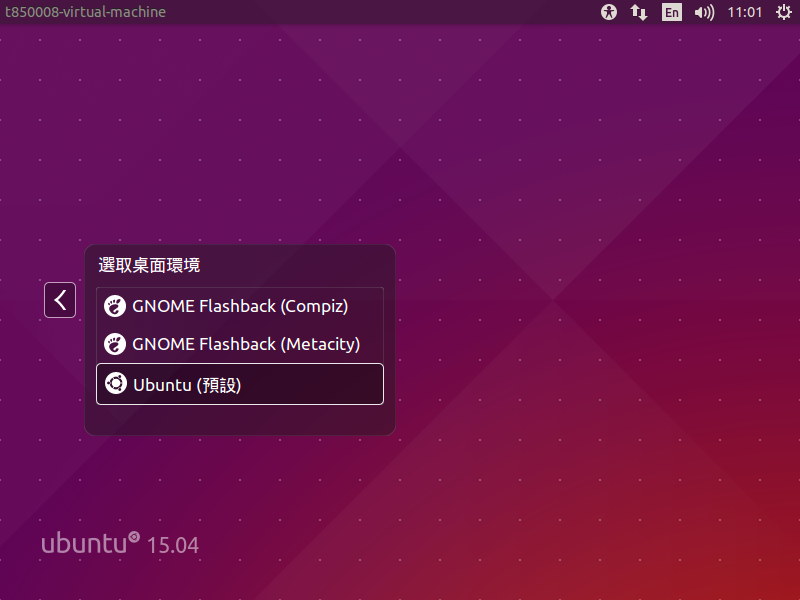
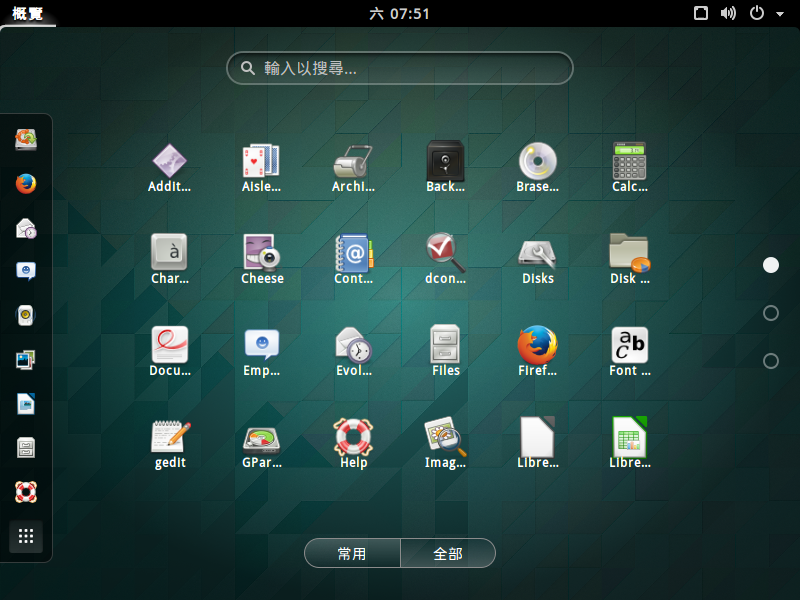
傳統介面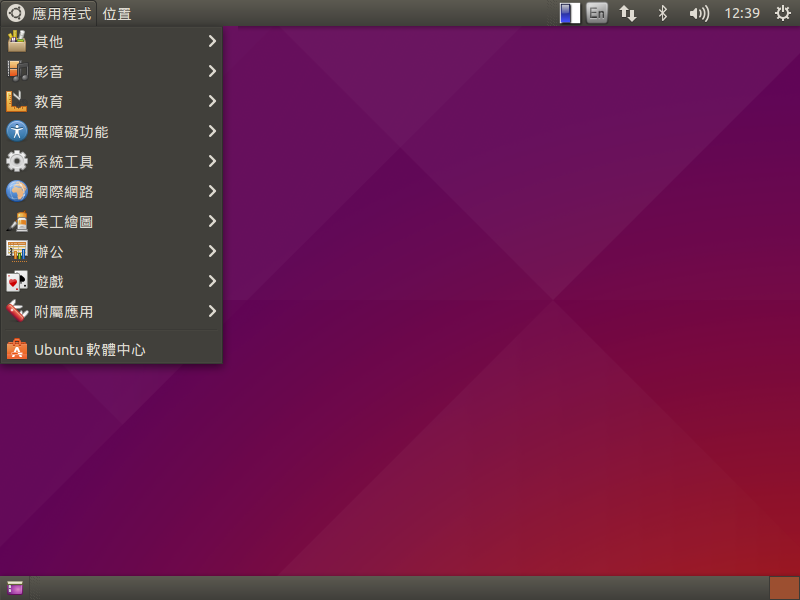
底下稍做調整
1. 移除遊戲
$ sudo apt-get remove –purge aisleriot gnome-mahjongg gnome-mines gnome-sudoku
2. 移除 Brasero 光碟燒錄程式
$ sudo apt-get remove –purge brasero-cdrkit brasero-common
3. 移除 掃描易
$ sudo apt-get remove –purge simple-scan
4. 移除 Thunderbird 郵件
$ sudo apt-get remove –purge thunderbird thunderbird-gnome-support thunderbird-locale-en thunderbird-locale-en-us thunderbird-locale-zh-hant thunderbird-locale-zh-tw
5. 移除 Transmission
$ sudo apt-get remove –purge transmission-common transmission-gtk
6. 移除 掃描易
$ sudo apt-get remove –purge simple-scan
7. 移除 Empthy
$ sudo apt-get remove –purge empathy empathy-common
8. 移除 amazon
$ sudo apt-get remove –purge unity-webapps-service
9. 移除 Evolution
$ sudo apt-get remove –purge evolution
10. 移除無障礙功能
$ sudo apt-get remove –purge onboard onboard-data gnome-orca
11. 移除 Ubuntu 網頁瀏覽器
$ sudo apt-get remove –purge webbrowser-app
12. 清除用不到的套件
$ sudo apt-get autoremove
13. 安裝 Chromium 瀏覽器及 Flash Player
$ sudo apt-get install chromium-browser chromium-browser-l10n pepperflashplugin-nonfree
大概試用了一下,個人應該不會把系統移轉到 Ubuntu 15.04,因為它的支援期只有 9 個月,目前還是使用 14.04 LTS 版本,除非有什麼特別的因素。
以前 Ubuntu Linux 釋出新的版本都是一件很轟動的大事,甚至還有倒數,現在就比較冷清了,大家也應該麻痺了。

