解決 Nagios 出現 “Is This Service Flapping” 的提示訊息

在 Debian / Ubuntu Linux 使用 Nagios 來偵測 SNMP 時出現了一個特別的狀況
偵測項目 SNMP 上出現一個汽泡提示和向上的黑色三角形

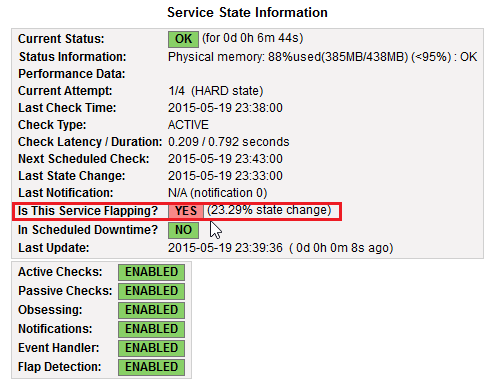
點選 SNMP 項目會出現 “Is This Service Flapping” 的提示訊息
[@more@]在網路上搜尋了一下,找到了這一篇:
nagios报警延迟的解决–flapping state – abnerfrmh的专栏 – 博客频道 – CSDN.NET

解決方式:
1. 修改 /etc/nagios3/nagios.cfg
$ sudo sed -i ‘s/enable_flap_detection=1/enable_flap_detection=0/’ /etc/nagios3/nagios.cfg

2. 重新啟動 Nagios 3
$ sudo /etc/init.d/nagios3 restart
 * Restarting nagios3 monitoring daemon nagios3
                                                                                     [ OK ]

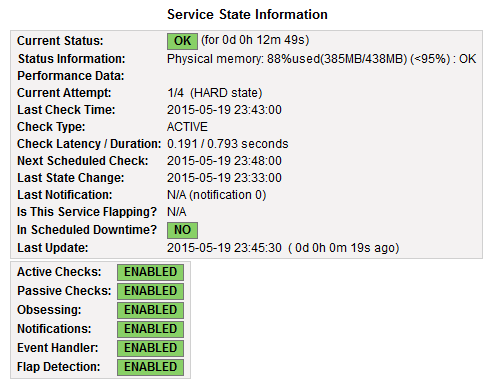
就不會再出現 “Is This Service Flapping” 的提示訊息

會出現這個提示訊息,猜想應該是偵測使用 SNMP 去檢測實體記憶體的使用量,變動性比較大。

解決 Nagios 出現 CRITICAL – Could not interpret output from ping command 的錯誤訊息

在 Ubuntu Server 上建置 Nagios 3 和 Cacti 來監測學校 Server 的一些狀態。
不過在 Nagios 3 上卻出現下圖的錯誤訊息
[@more@]可是明明就是本機,竟出現這種訊息,依 “CRITICAL – Could not interpret output from ping command” 訊息,在 Google 搜尋了一下,找到了這一篇:
Could not interpret output from ping command – View topic • Nagios Support Forum

解決方式:
1. 更改 ping 的執行權限
原本
# ls -l /bin/ping
-rwxr-xr-x 1 root root 34820 Mar 15  2014 /bin/ping

更改成
# chmod u+s /bin/ping
更改後
# ls -l /bin/ping
-rwsr-xr-x 1 root root 34820 Mar 15  2014 /bin/ping

2. 重新啟動 Nagios 3
# /etc/init.d/nagios3 restart
 * Restarting nagios3 monitoring daemon nagios3
                                                                                        [ OK ]

3. 系統就正常了!

在 Ubuntu MATE 14.04.2 上安裝 VMware Tools

1. 切換目錄
$ cd /media/gigabyte/VMware Tools/

2. 查看目錄內容
$ ls
manifest.txt     VMwareTools-9.6.1-1378637.tar.gz  vmware-tools-upgrader-64
run_upgrader.sh  vmware-tools-upgrader-32
[@more@]
3. 解壓縮 VMwareTools-9.6.1-1378637.tar.gz 到 /tmp 目錄
$ tar xvzf VMwareTools-9.6.1-1378637.tar.gz -C /tmp

4. 切換目錄
$ cd /tmp/vmware-tools-distrib

5. 進行安裝,一直按 Enter 鍵即可
$ sudo ./vmware-install.pl
Creating a new VMware Tools installer database using the tar4 format.

Installing VMware Tools.

In which directory do you want to install the binary files?
[/usr/bin]
What is the directory that contains the init directories (rc0.d/ to rc6.d/)?
[/etc]

What is the directory that contains the init scripts?
[/etc/init.d]

In which directory do you want to install the daemon files?
[/usr/sbin]

The configuration of VMware Tools 9.6.1 build-1378637 for Linux for this
running kernel completed successfully.

You must restart your X session before any mouse or graphics changes take
effect.

You can now run VMware Tools by invoking “/usr/bin/vmware-toolbox-cmd” from the
command line.

To enable advanced X features (e.g., guest resolution fit, drag and drop, and
file and text copy/paste), you will need to do one (or more) of the following:
1. Manually start /usr/bin/vmware-user
2. Log out and log back into your desktop session; and,
3. Restart your X session.

Enjoy,

–the VMware team

完成安裝,重新啟動電腦即可!

清理 Windows 7

因為 Windows 7 無法使用 頭城國小資訊組 | 在 Windows 8.1 清理 WinSxS 資料夾 這種方式來清理

會出現錯誤訊息
[@more@]
所以參考 Win7無人值守光碟製作補完說明 @ 無病呻吟 :: 隨意窩 Xuite日誌,改用 Windows Update Clean Tool
Windows Update Clean Tool 下載網址:請按 這裡

1. 解壓縮後目錄

2. 清理前,可用 27.3GB

3. 以系統管理員身份執行

4. 組建應該是錯的,是 x86,選擇 掃描垃圾

5. 掃描之後可以清理的部份,請按 開始清理

6. 警告有風險性

7. 清理出 1.88GB

8. 清理完畢之後,按右上角關閉

9. 按右上角關閉

10. 結束程式

11. 可以刪除 C:Test.log

12. 清理之後可用空間 29.2GB

在 Windows 8.1 清理 WinSxS 資料夾

在做 Windows Update 更新時,都會在 WinSxS 資料夾留下一份備份檔,隨著更新次數增加,也累積了非常多的備份檔,但 Windows 內附的磁碟清理並沒有辦理清理這些備份檔案,這時候可以利用 dism 指令來做清理的動作。

本文參考網頁:清理 WinSxS 資料夾
1. 以系統管理員身份執行命令提示字元
[@more@]2. 清理之前,可用空間是 92.4GB

3. 執行下面的指令
Dism /online /Cleanup-Image /StartComponentCleanup /ResetBase

4. 清理中

5. 經過一段很長的時間,終於完成

6. 成果,可用空間 94.1GB

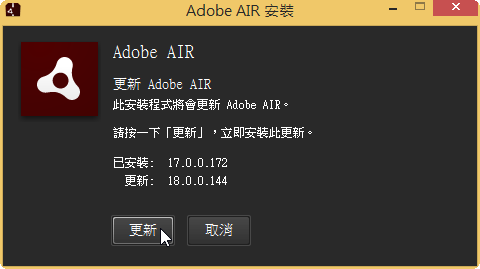
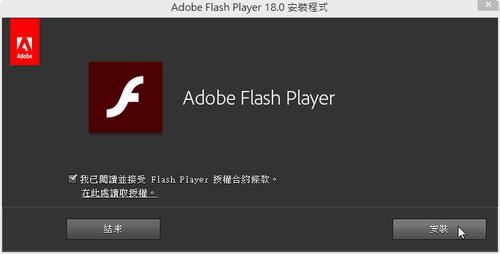
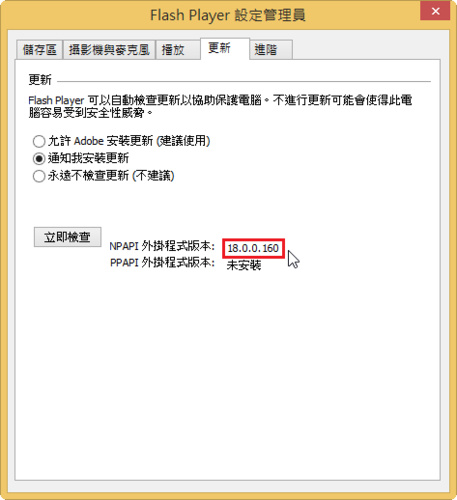
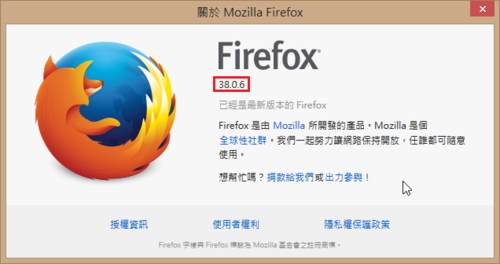
Adobe Flash Player 18.0.0.160

Adobe Flash Player 18.0.0.160
檢查安裝版本:https://www.adobe.com/tw/software/flash/about/

[@more@]Windows 平台
Internet Explorer:
http://fpdownload.macromedia.com/get/flashplayer/current/licensing/win/install_flash_player_18_active_x.exe
Windows 8 / 8.1 / Server 2012 / Server 2012 R2 要從 Windows Update 更新

x86
https://www.microsoft.com/zh-TW/download/details.aspx?id=47459
x64
https://www.microsoft.com/zh-TW/download/details.aspx?id=47433

All Other Browsers(Firefox,Safari & Opera):
http://fpdownload.macromedia.com/get/flashplayer/current/licensing/win/install_flash_player_18_plugin.exe

Mac 平台:
http://fpdownload.adobe.com/get/flashplayer/pdc/18.0.0.160/install_flash_player_osx.dmg

關閉 Windows 10 的 Windows Defender

Windows Defender 是 Windows 作業統剛安裝好時,系統內附的一個簡單防毒軟體,一般的人大都還會安裝第三方的防毒軟體,所以都會把 Windows Defender 關閉。
本篇文章參考網頁:Disable or enable Windows Defender in Windows 10
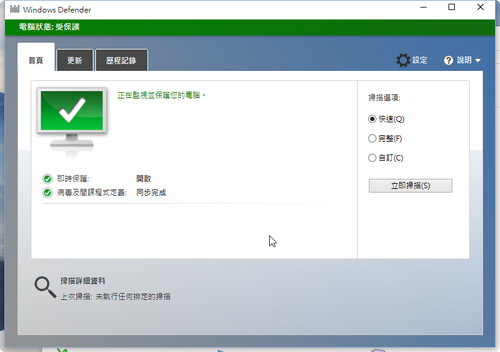
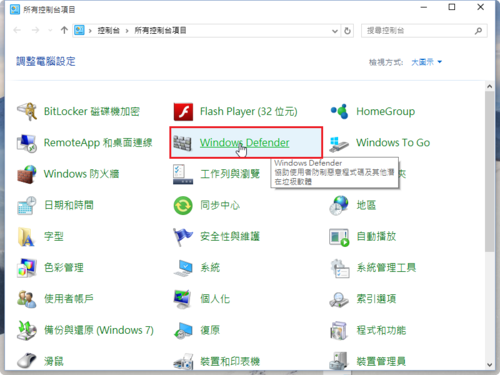
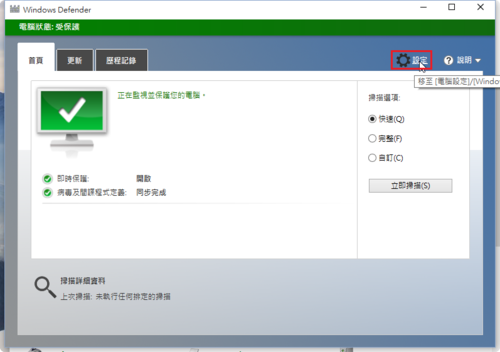
[@more@]1. 開啟控制台,執行 Windows Defender

2. 選擇’右上角的 設定

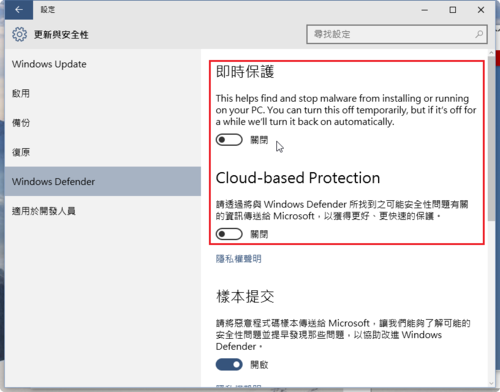
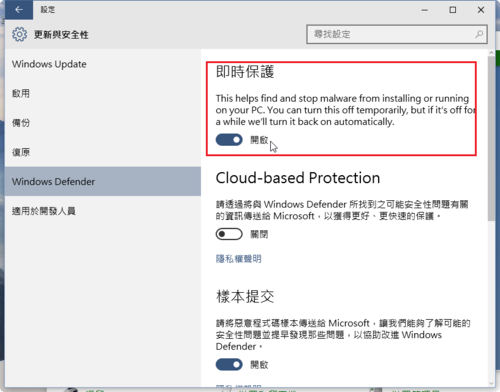
3. 關閉 即時保護Cloud-base Protection

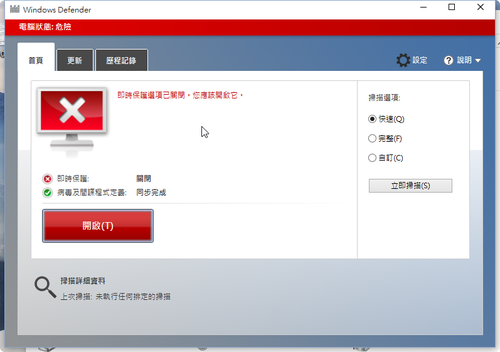
4. Windows Defender 會出現警告訊息

5. 但重新啟動電腦後,Windows Defender 又會自動開啟

6. 解決方式,使用登錄檔來處理,以 x64 版本為例
關閉 Windows Defender 登錄檔:下載

Windows Registry Editor Version 5.00

[HKEY_LOCAL_MACHINESOFTWAREPoliciesMicrosoftWindows Defender]
“DisableAntiSpyware”=dword:00000001

[HKEY_LOCAL_MACHINESOFTWAREPoliciesMicrosoftWindows DefenderReal-Time Protection]
“DisableBehaviorMonitoring”=dword:00000001
“DisableOnAccessProtection”=dword:00000001
“DisableScanOnRealtimeEnable”=dword:00000001

開啟 Windows Defender 登錄檔:下載

Windows Registry Editor Version 5.00

[-HKEY_LOCAL_MACHINESOFTWAREPoliciesMicrosoftWindows Defender]

關閉後如果要執行 Windows Defender 會出現下面的畫面