OS:Debian 8.0 jessie
cacti:0.8.8b
安裝完 cacti 之後發現無法呈現中文,輸入中文之後,都會變成 ??

在網路上搜尋了一下,找到下面的文章:
在 Cacti 中顯示中文 | .K.T.’s Blog
電腦中心 | 讓cacti的圖正常出現中文[@more@]底下是設定的步驟:
1. 修改 /usr/share/cacti/site/lib/functions.php
# vim /usr/share/cacti/site/lib/functions.php
在 <?php 下方加入下面一行
setlocale(LC_CTYPE,”zh_TW.UTF-8″);
2. 安裝中文字形
# apt-get install ttf-wqy-microhei ttf-wqy-zenhei fonts-arphic-bkai00mp fonts-arphic-bsmi00lp
3. 加入字型的支援
# /usr/bin/fc-cache -v -f
做了以上的設定還是不行
4. 檢查 MySQL Server 的編碼設定
# /usr/bin/mysql -u root -p
Enter password:
Welcome to the MySQL monitor. Commands end with ; or g.
Your MySQL connection id is 124
Server version: 5.5.44-0+deb8u1 (Raspbian)
Copyright (c) 2000, 2015, Oracle and/or its affiliates. All rights reserved.
Oracle is a registered trademark of Oracle Corporation and/or its
affiliates. Other names may be trademarks of their respective
owners.
Type ‘help;’ or ‘h’ for help. Type ‘c’ to clear the current input statement.
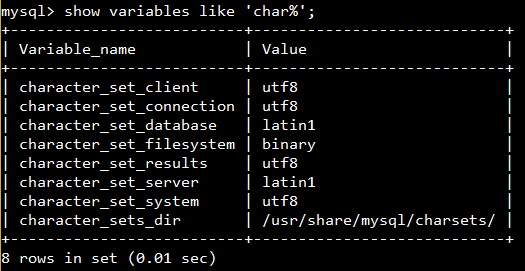
mysql> show variables like ‘char%’;
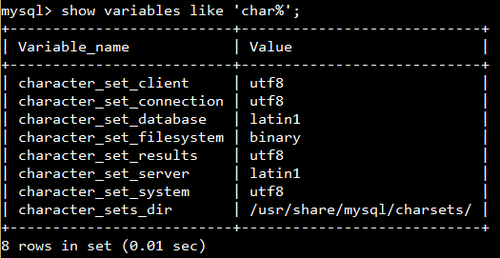
如果發現有 latin1,代表資料庫編碼要做設定
5. 修改 MySQL Server 設定,加入以下的設定
# vim /etc/mysql/my.cnf
[client]
default-character-set=utf8
[mysqld]
character-set-server=utf8
collation-server=utf8_general_ci
init-connect=’SET NAMES utf8′
[mysql]
default-character-set=utf8
6. 重新啟動 MySQL Server
# systemctl restart mysql
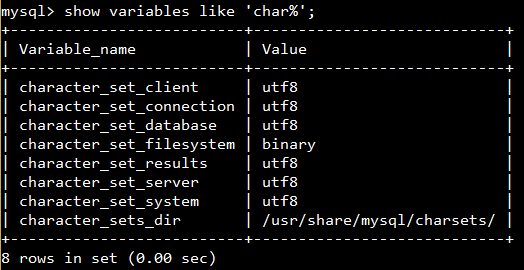
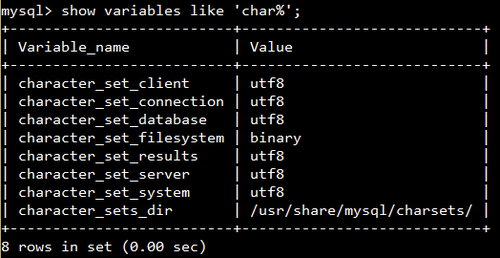
7. 重新檢查 MySQL Server 資料庫編碼
# /usr/bin/mysql -u root -p
Enter password:
Welcome to the MySQL monitor. Commands end with ; or g.
Your MySQL connection id is 124
Server version: 5.5.44-0+deb8u1 (Raspbian)
Copyright (c) 2000, 2015, Oracle and/or its affiliates. All rights reserved.
Oracle is a registered trademark of Oracle Corporation and/or its
affiliates. Other names may be trademarks of their respective
owners.
Type ‘help;’ or ‘h’ for help. Type ‘c’ to clear the current input statement.
mysql> show variables like ‘char%’;
8. 匯出原 cacti 資料庫
# /usr/bin/mysqldump -u root -p cacti > /root/cacti.sql –default-character-set=latin1
9. 將匯出檔案的 latin1 全部改成 utf8
# sed -i ‘s/latin1/utf8/’ /root/cacti.sql
10. 重新匯入
# /usr/bin/mysql -u root -p /root/cacti < cacti.sql –default-character-set=utf8
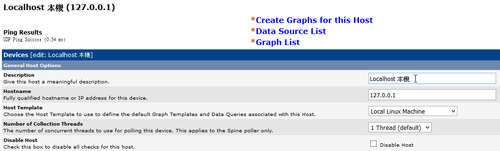
終於可以正常顯示中文了!