VLOOKUP 函數

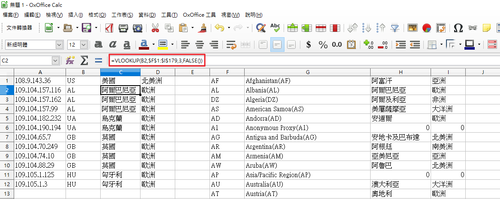
利用 VLOOKUP 函數來幫助使用者快速從表格中找出特定欄位的資料,可以減少很多重複輸入資料的時間。

[@more@]VLOOKUP 函數用法:
VLOOKUP(搜尋值,參考的陣列,陣列的第幾欄,搜尋方式)
     搜尋值:搜尋的資料必須與參考陣列第一欄含有共同資料
     參考的陣列:陣列的第一欄必須包含搜尋對象之特質
     陣列的第幾欄:要顯示的是參考陣列中的哪一個欄位
     搜尋方式:FALSE 為精確搜尋,TRUE 為近似搜尋

OpenOffice Calc
=VLOOKUP(B1,$F$1:$I$179,3,FALSE())
Microsoft Excel
=VLOOKUP(B1,$F$1:$I$179,3,FALSE)

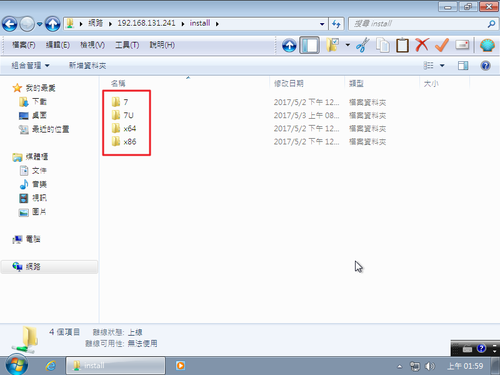
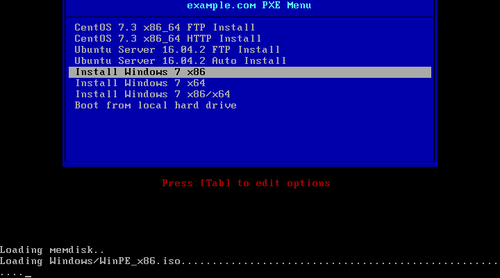
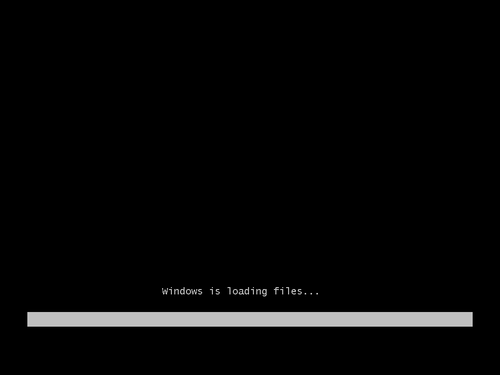
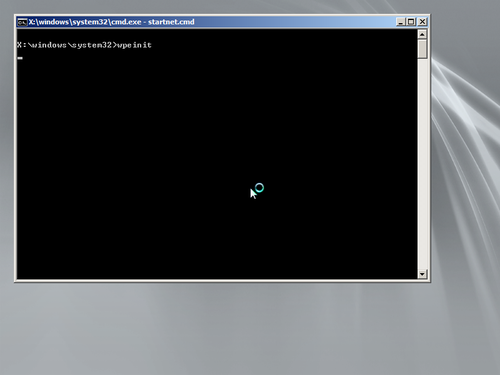
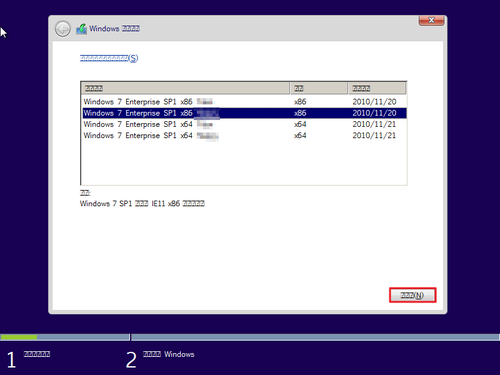
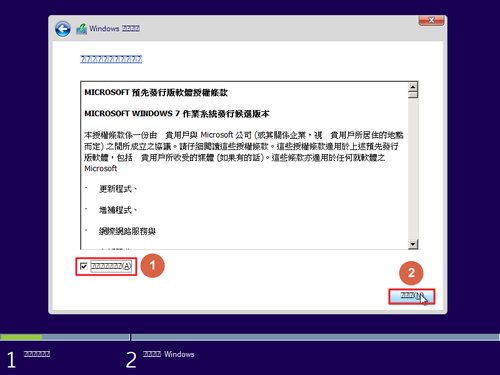
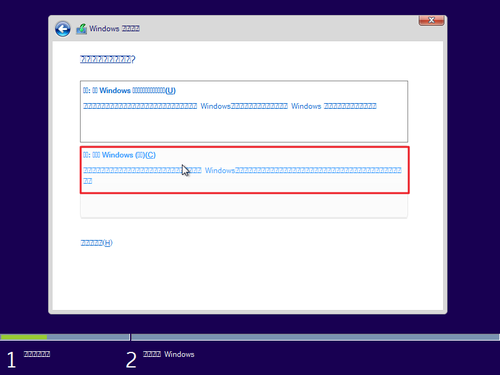
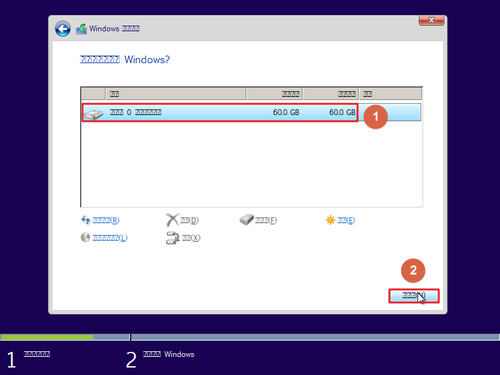
使用 PXE Server 來安裝 Windows

參考網站:
Setting Up Prerequisites to ‘Install Windows 7’ over ‘PXE Network Boot Server’ on RHEL/CentOS 7 – Part 1
SANDeploy iSCSI Boot – Diskless Boot of Windows 7 from SANDeploy iSCSI Boot SAN
用Ubuntu建立一個由網路開機「載入WinPE 自動化安裝Windows OS」的環境 | Jerry-Yang’s Log

1. 安裝 Samba Server
# yum install samba samba-winbind

2. 備份 Samba Server 設定檔
# cp /etc/samba/smb.conf /etc/samba/smb.conf.$(date +%F)

[@more@]3. 修改 Samba Server 設定檔 /etc/samba/smb.conf
# vim /etc/samba/smb.conf
[global]
workgroup = PXISSERVER
server string = Samba Server Version %v
log file = /var/log/samba/log.%m
max log size = 50
idmap config * : backend = tdb
cups options = raw
netbios name = pxis
map to guest = bad user
dns proxy = no
public = yes
## For multiple installations the same time – not lock kernel
kernel oplocks = no
nt acl support = no
security = user
guest account = nobody
[install]
comment = Windows 7 Image
path = /Windows
read only = no
browseable = yes
public = yes
printable = no
guest ok = yes
oplocks = no
level2 oplocks = no
locking = no

4. 檢查設定檔
# /usr/bin/testparm
Load smb config files from /etc/samba/smb.conf
rlimit_max: increasing rlimit_max (1024) to minimum Windows limit (16384)
Processing section “[install]”
Loaded services file OK.
Server role: ROLE_STANDALONE

Press enter to see a dump of your service definitions

# Global parameters
[global]
        netbios name = PXIS
        server string = Samba Server Version %v
        workgroup = PXISSERVER
        log file = /var/log/samba/log.%m
        max log size = 50
        map to guest = Bad User
        security = USER
        dns proxy = No
        idmap config * : backend = tdb
        cups options = raw
        nt acl support = No
        guest ok = Yes

[install]
        comment = Windows 7 Image
        path = /Windows
        level2 oplocks = No
        locking = No
        oplocks = No
        read only = No

5. 建立所須目錄
# mkdir -p /Windows/{7,x86,x64}

6. 將 Windows 7 安裝光碟上傳到 Server,並掛載在 /mnt 目錄
# mount -o loop tw_windows_7_Enterprise_IE11_Update_with_SP1_x86_x64_dvd_20170425.iso /mnt
mount: /dev/loop0 is write-protected, mounting read-only

7. 將檔案複製到 /Windows/7,然後卸載光碟
# cp -rf /mnt/* /Windows/7
# umount /mnt

8. 修改檔案擁有者及權限
# chown -R 755 /Windows
# chown -R nobody:nobody /Windows

9. 處理 SELinux
# /usr/sbin/semanage fcontext -a -t samba_share_t ‘/Windows(/.*)?’
# /usr/sbin/restorecon -R -F -v /Windows

10. 防火牆設定
# firewall-cmd –permanent –add-service=samba
success
# firewall-cmd –reload
success

11. 啟用 Samba Server 相關服務
# systemctl enable smb.service
Created symlink from /etc/systemd/system/multi-user.target.wants/smb.service to /usr/lib/systemd/system/smb.service.
# systemctl start smb.service
# systemctl enable nmb.service
Created symlink from /etc/systemd/system/multi-user.target.wants/nmb.service to /usr/lib/systemd/system/nmb.service.
# systemctl start nmb.service
# systemctl enable winbind.service
Created symlink from /etc/systemd/system/multi-user.target.wants/winbind.service to /usr/lib/systemd/system/winbind.service.
# systemctl start winbind.service

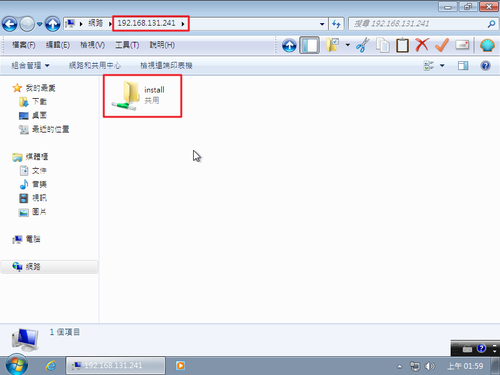
12. 測試是否能存取 Samba Server 分享的資源
13. 下載 Windows 7 Automated Installation Kit
下載網頁:https://www.microsoft.com/zh-tw/download/details.aspx?id=5753
請參考 頭城國小資訊組 | 建立 Windows 7 / 10 PE 光碟 完成 Windows PE 的製作

14. 建立目錄
# mkdir /var/lib/tftpboot/Windows

15. 將建立好的 Windows PE ISO 上傳到 /var/lib/tftpboot/Windows 目錄
# ls -l /var/lib/tftpboot/Windows/*.iso
-rw-r–r–. 1 nobody nobody 280020992  5月  2 21:09 /var/lib/tftpboot/Windows/Win10PE_amd64.iso
-rw-r–r–. 1 nobody nobody 226654208  5月  2 21:09 /var/lib/tftpboot/Windows/Win10PE_x86.iso
-rw-r–r–. 1 nobody nobody 217577472  5月  2 12:52 /var/lib/tftpboot/Windows/WinPE_amd64.iso
-rw-r–r–. 1 nobody nobody 192131072  5月  2 12:52 /var/lib/tftpboot/Windows/WinPE_x86.iso

16. 處理 SELinux 設定
# /usr/sbin/restorecon -R -F -v /var/lib/tftpboot/Windows

17. 修改 PXE Server 開機功能表
# vim /var/lib/tftpboot/pxelinux.cfg/default
加入
LABEL Install Windows 7 x86
MENU LABEL Install Windows 7 x86
KERNEL memdisk
INITRD Windows/WinPE_x86.iso
APPEND iso raw

LABEL Install Windows 7 x64
MENU LABEL Install Windows 7 x64
KERNEL memdisk
INITRD Windows/WinPE_amd64.iso
APPEND iso raw

18. 設定使用網路開機,進行 Windows 7 安裝
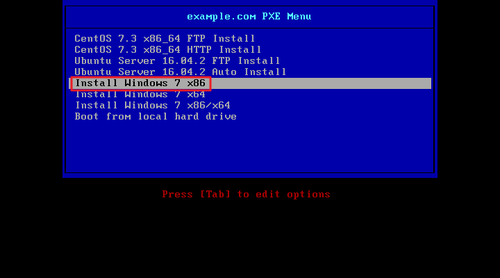
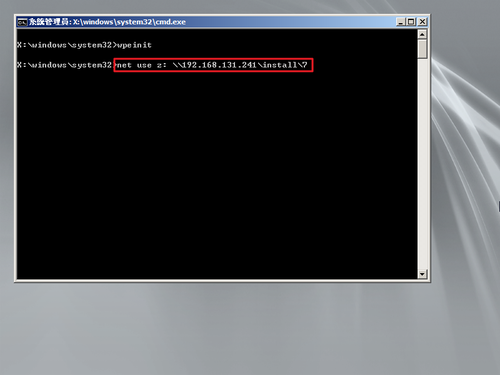
將 Windows 7 安裝目錄掛載成 z 磁碟機
net use z: 192.168.131.241install7
切換到 z 磁碟機並執行 setup.exe 進行安裝
z:
setup.exe
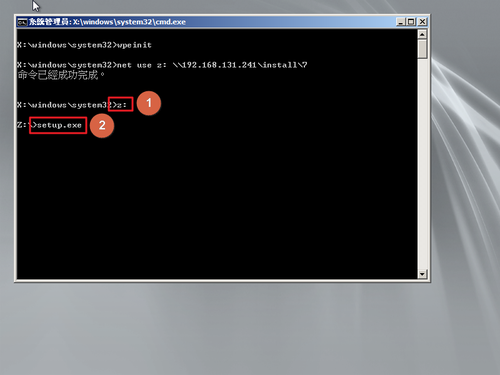
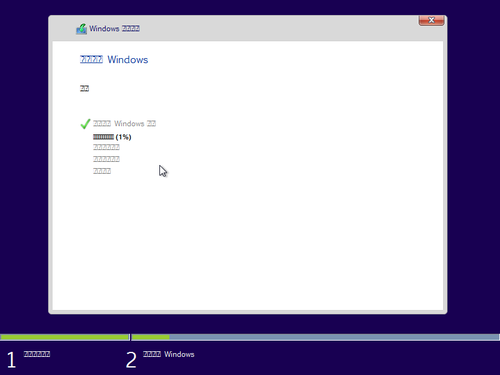
安裝光碟為縮減容量已改用以 Windows 10 為底,中文字的部份會出現亂碼
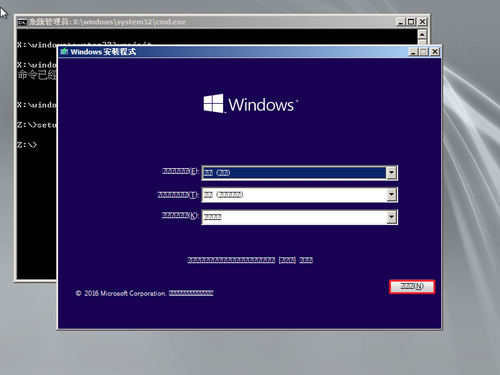
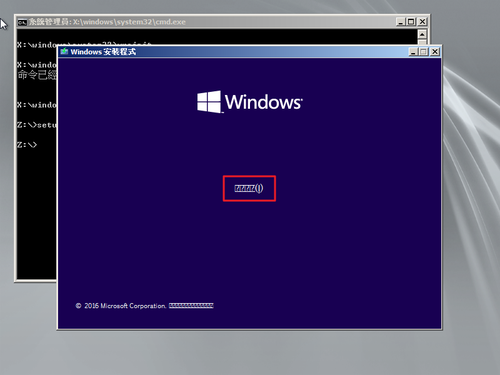
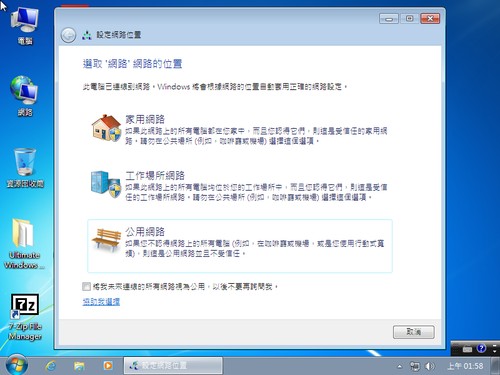
終於安裝完成!
建立 Windows 7 / 10 PE 光碟

這裡所謂的 Windows PE 光碟只是用來安裝 Windows 時使用,不是那種包山包海的 Windows 工具光碟。
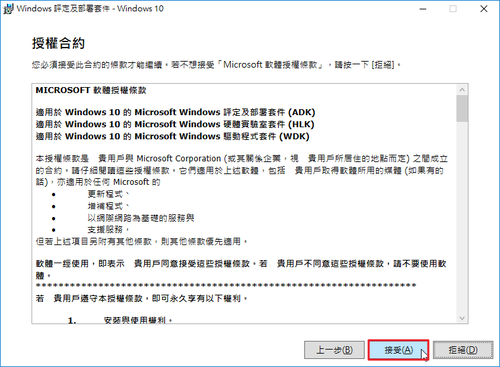
1. 下載 Windows 7 及 Windows 10 的 Automated Installation Kit
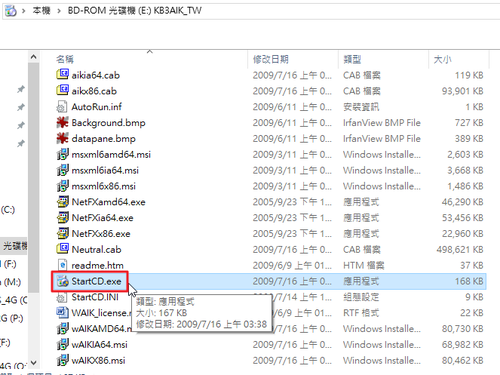
下載 Windows 7 Automated Installation Kit
下載網頁:https://www.microsoft.com/zh-tw/download/details.aspx?id=5753

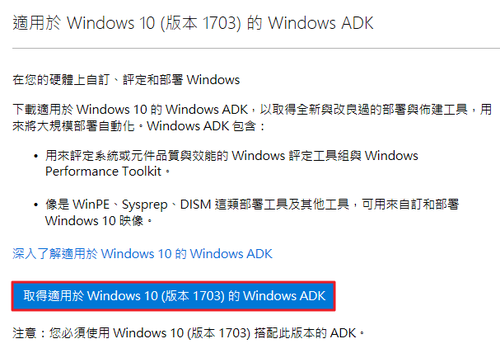
下載 Windows 10 1703 Automated Installation Kit
下載網頁:https://developer.microsoft.com/zh-tw/windows/hardware/windows-assessment-deployment-kit

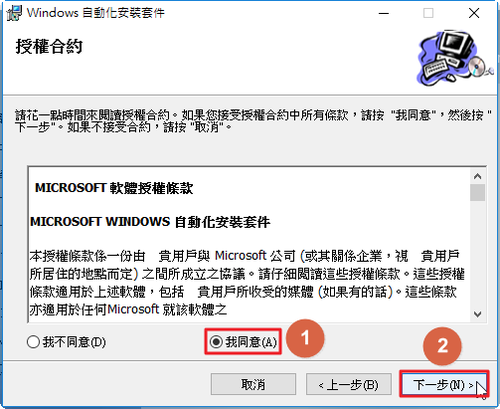
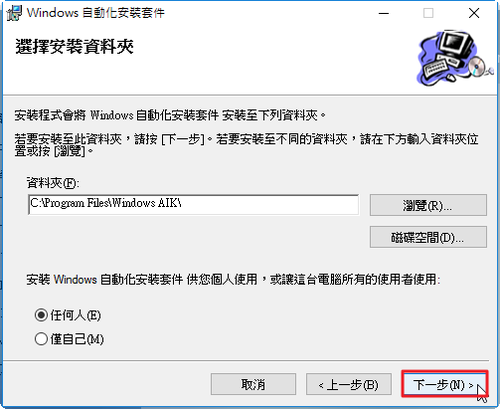
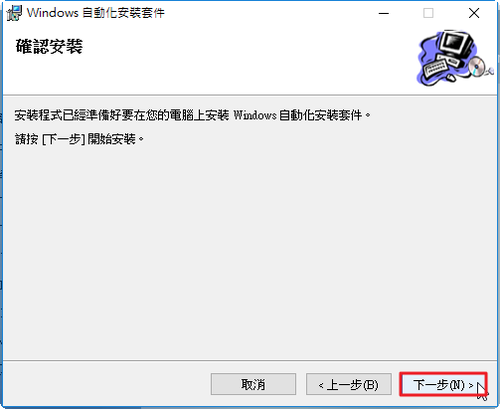
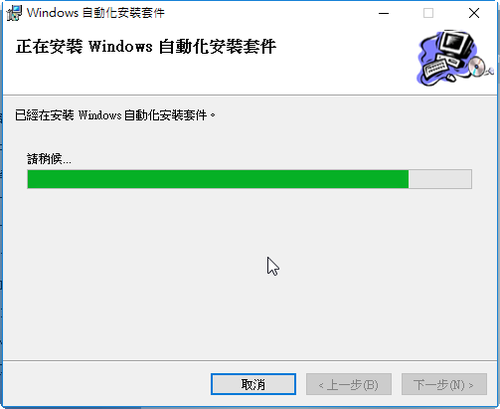
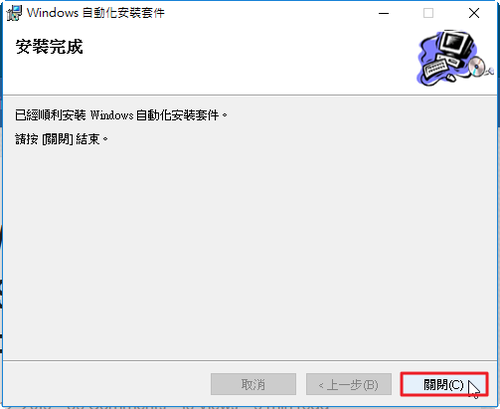
[@more@]2. Windows 7 Automated Installation Kit 安裝

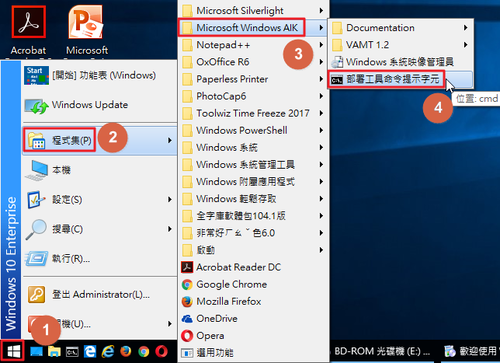
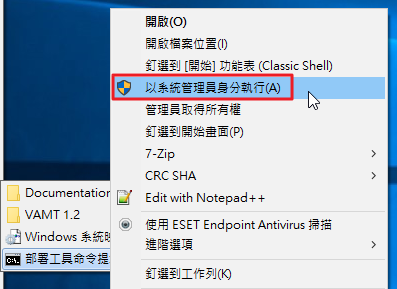
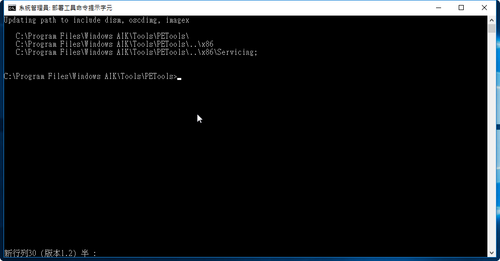
3. 製作 Windows 7 PE 光碟

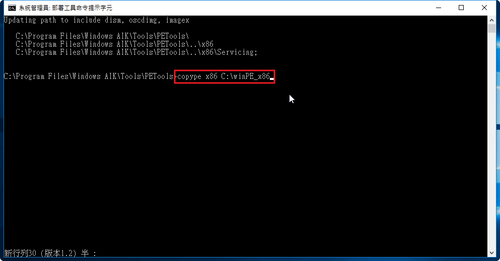
copype x86 C:winPE_x86

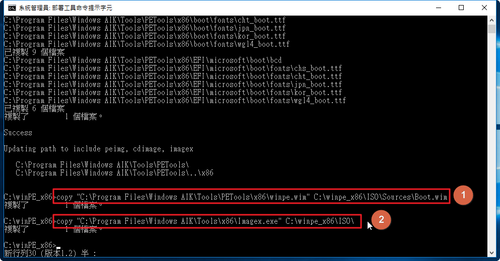
copy “C:Program FilesWindows AIKToolsPEToolsx86winpe.wim” C:winpe_x86ISOSourcesBoot.wim
copy “C:Program FilesWindows AIKToolsx86Imagex.exe” C:winpe_x86ISO

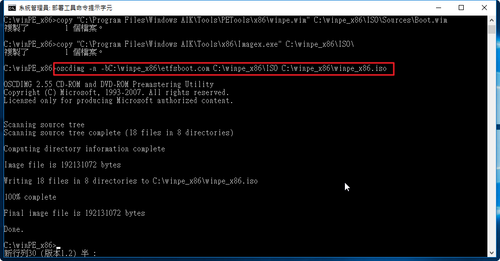
oscdimg -n -bC:winpe_x86etfsboot.com C:winpe_x86ISO C:winpe_x86WinPE_x86.iso

x86_64
copype amd64 C:winPE_amd64
copy “C:Program FilesWindows AIKToolsPEToolsamd64winpe.wim” C:winpe_amd64ISOSourcesBoot.wim
copy “C:Program FilesWindows AIKToolsamd64Imagex.exe” C:winpe_amd64ISO
oscdimg -n -bC:winpe_amd64etfsboot.com C:winpe_amd64ISO C:winpe_amd64WinPE_amd64.iso

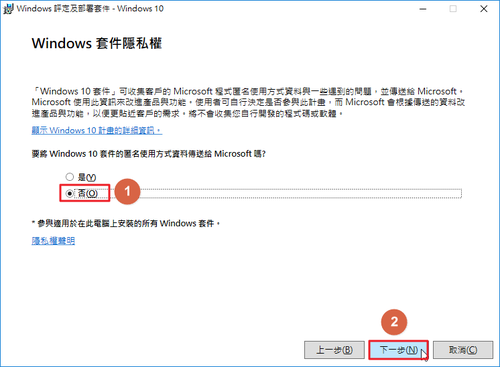
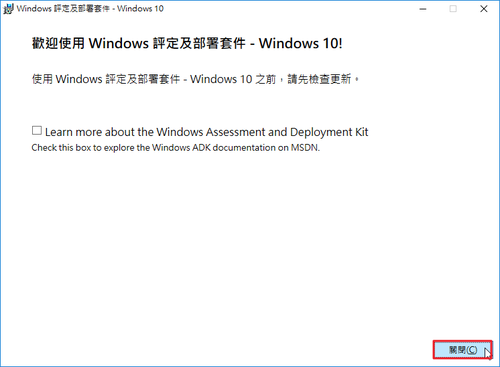
4. Windows 10 Automated Installation Kit 安裝

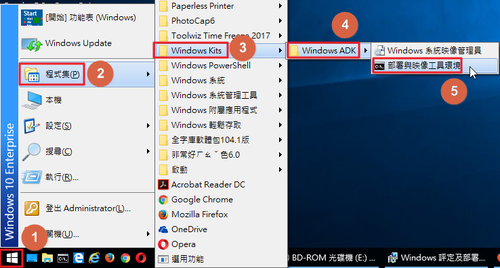
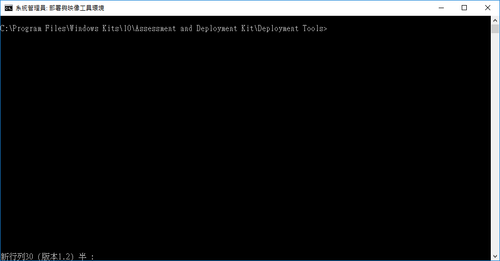
5. 製作 Windows 10 PE 光碟

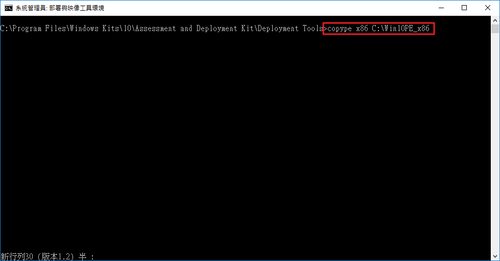
copype x86 C:Win10PE_x86

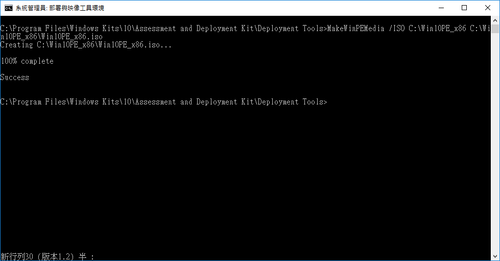
MakeWinPEMedia /ISO C:Win10PE_x86 C:Win10PE_x86Win10PE_x86.iso

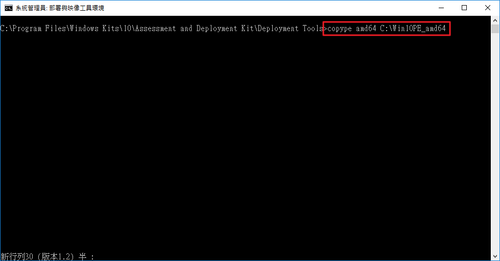
copype amd64 C:Win10PE_amd64
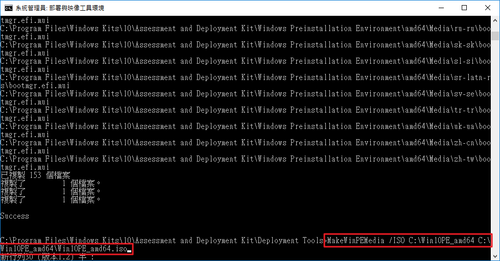
MakeWinPEMedia /ISO C:Win10PE_amd64 C:Win10PE_amd64Win10PE_amd64.iso

使用 PXE Server 自動安裝 Ubuntu Server 16.04.2

參考網頁:
Ubuntu 16.04 / Debian 8: Run PXE boot server for automated install – Narrow Escape
B.4. Contents of the preconfiguration file (for xenial)
https://help.ubuntu.com/16.04/installation-guide/example-preseed.txt
system installation – How do I create a completely unattended install of Ubuntu? – Ask Ubuntu

CentOS 7 PXE Server:192.168.131.241
與 頭城國小資訊組 | 使用 PXE Server 來安裝 Ubuntu Server 16.04.2 相同,底下僅列出不一樣的地方
1. 修改設定檔 /var/lib/tftpboot/pxelinux.cfg/default
# vim
/var/lib/tftpboot/pxelinux.cfg/default
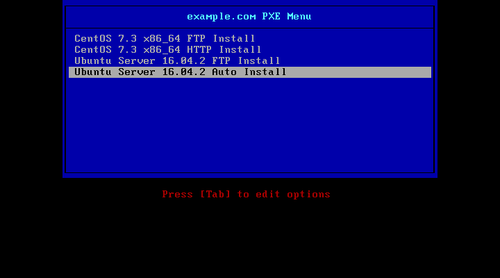
LABEL Ubuntu Server 16.04.2 x64 Auto Install
MENU LABEL Ubuntu Server 16.04.2 Auto Install
kERNEL /netboot/ubuntu_server/ubuntu-installer/amd64/linux
APPEND auto=true priority=critical vag=788 initrd=/netboot/ubuntu_server/ubuntu-installer/amd64/initrd.gz url=ftp://192.168.131.241/pub/Ubuntu16042/preseed/preseed.cfg preseed/interactive=false[@more@]2. 建立設定檔
/var/ftp/pub/Ubuntu16042/preseed/preseed.cfg
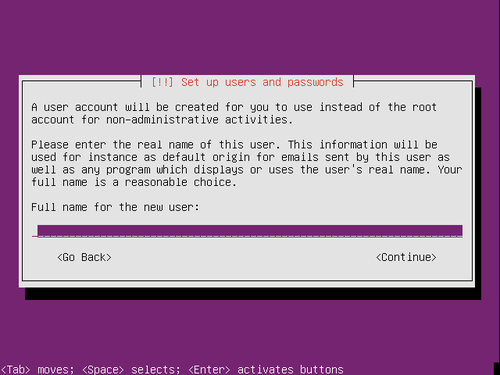
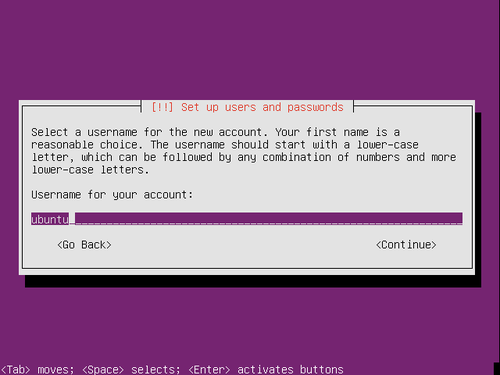
取消自動化的部份:
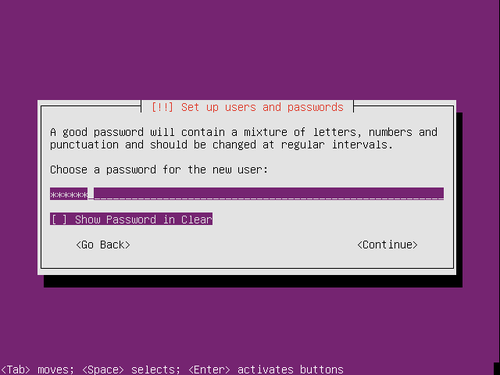
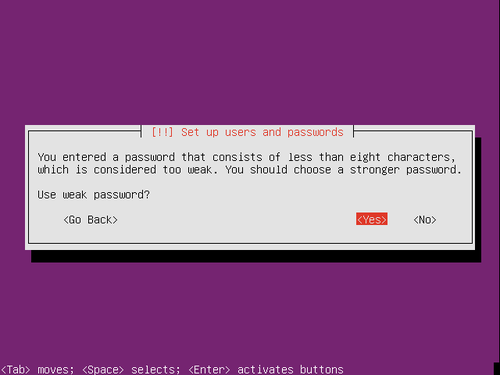
建立一個普通的使用者及設定密碼
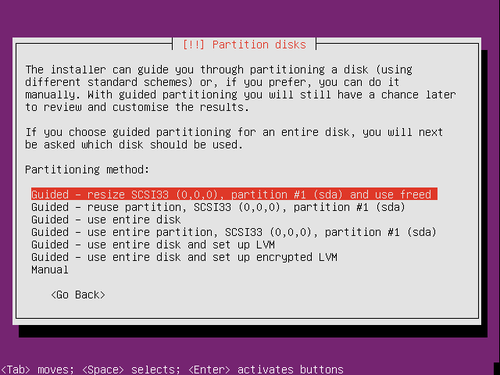
取消硬碟自動分割
# vim /var/ftp/pub/Ubuntu16042/preseed/preseed.cfg

d-i debian-installer/locale string en_US
d-i debian-installer/language string en
d-i debian-installer/country string TW
d-i console-setup/ask_detect boolean false
d-i keyboard-configuration/xkb-keymap select us
#d-i passwd/user-fullname string
#d-i passwd/username string ubuntu
#d-i passwd/root-password password ubuntu
#d-i passwd/root-password-again password ubuntu
#d-i passwd/user-password password ubuntu
#d-i passwd/user-password-again password ubuntu
#d-i user-setup/allow-password-weak boolean true
d-i netcfg/choose_interface select auto
d-i netcfg/get_hostname string unassigned-hostname
d-i netcfg/get_domain string unassigned-domain
d-i mirror/country string manual
#d-i mirror/http/hostname string http://tw.archive.ubuntu.com
d-i mirror/http/hostname string http://free.nchc.org.tw
d-i apt-setup/services-select multiselect security
d-i apt-setup/security_host string free.nchc.org.tw
d-i apt-setup/security_path string /ubuntu

d-i mirror/http/directory string /ubuntu
d-i mirror/http/proxy string
d-i clock-setup/utc boolean false
d-i clock-setup/ntp boolean true
d-i time/zone string Asia/Taipei
#d-i partman/confirm boolean true
#d-i partman/choose_partition select finish
#d-i partman/confirm_nooverwrite boolean true
#d-i partman-auto/disk string /dev/[sv]da
#d-i partman-auto/method string lvm
#d-i partman-auto/choose_recipe select atomic
#d-i partman-lvm/device_remove_lvm boolean true
#d-i partman-lvm/confirm boolean true
#d-i partman-lvm/confirm_nooverwrite boolean true
#d-i partman-auto-lvm/guided_size string max
#d-i partman-partitioning/confirm_write_new_label boolean true
#d-i grub-installer/grub2_instead_of_grub_legacy boolean true
#d-i grub-installer/only_debian boolean true
#d-i grub-installer/bootdev string /dev/[sv]da
d-i pkgsel/update-policy select none
#d-i pkgsel/include string unity ubuntu-desktop openssh-server
# 安裝 lamp 及 openssh Server
tasksel tasksel/first multiselect lamp-server, openssh-server
d-i finish-install/reboot_in_progress note

3.
處理 SELinux
# restorecon -R -F -v /var/ftp/pub/

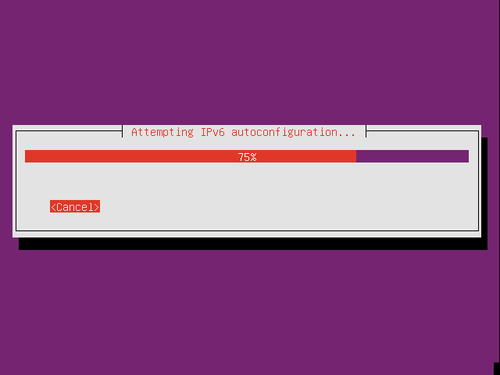
4. Client 端以 PXE 網路開機


使用 PXE Server 來安裝 Ubuntu Server 16.04.2

參考網頁:
Ubuntu 16.04 / Debian 8: Run PXE boot server for automated install – Narrow Escape

CentOS 7 PXE Server:192.168.131.241
1. 下載 Ubuntu Server netboot image 網路開機檔
# wget http://archive.ubuntu.com/ubuntu/ubuntu/dists/xenial/main/installer-amd64/current/images/netboot/netboot.tar.gz -O ubuntu-16.04-netboot.tar.gz

2. 建立目錄
# mkdir /var/lib/tftpboot/ubuntu_server
# mkdir ubuntu-16.04-netboot

3. 解壓縮,並移動到 /var/lib/tftpboot/ubuntu_server 目錄下
# tar zxf ubuntu-16.04-netboot.tar.gz -C ubuntu-16.04-netboot
# mv ubuntu-16.04-netboot/ubuntu-installer /var/lib/tftpboot/ubuntu_server[@more@]
4. 修改設定檔 /var/lib/tftpboot/pxelinux.cfg/default
#
vim
/var/lib/tftpboot/pxelinux.cfg/default
LABEL Ubuntu Server 16.04.2 x64 FTP Install
MENU LABEL Ubuntu Server 16.04.2 FTP Install
kERNEL /netboot/ubuntu_server/ubuntu-installer/amd64/linux
APPEND initrd=/netboot/ubuntu_server/ubuntu-installer/amd64/initrd.gz url=ftp://192.168.131.241/pub/Ubuntu16042/preseed/ubuntu-server.seed

5. 下載 Ubuntu Server 16.04.2 ISO
# wget http://debian.linux.org.tw/ubuntu-releases/16.04.2/ubuntu-16.04.2-server-amd64.iso

6. 掛載光碟
# mount -o loop ubuntu-16.04.2-server-amd64.iso /mnt

7. 複製檔案到 FTP Server
# mkdir /var/ftp/pub/Ubuntu16042
# cp -a /mnt/* /var/ftp/pub/Ubuntu16042

8. 處理 SELinux
# restorecon -R -F -v /var/lib/tftpboot/
# restorecon -R -F -v /var/ftp/pub/

9. Client 端以 PXE 網路開機

在 Debian / Kali Linux 上安裝 OpenVAS

參考網站:
OpenVAS 8.0 Vulnerability Scanning | Kali Linux

1. 更新套件庫及套件更新
# apt-get update;apt-get dist-upgrade

2. 安裝 OpenVAS
# apt-get install openvas

3. 設定
# /usr/bin/openvas-setup
sha1sums
          2,002 100%    2.61kB/s    0:00:00 (xfr#33, to-chk=2/36)
timestamp
             13 100%    0.02kB/s    0:00:00 (xfr#34, to-chk=1/36)
timestamp.asc
            181 100%    0.24kB/s    0:00:00 (xfr#35, to-chk=0/36)

sent 719 bytes  received 35,306,134 bytes  659,941.18 bytes/sec
total size is 35,295,201  speedup is 1.00
/usr/sbin/openvasmd

User created with password ‘bf177576-d9b8-44ae-8b6a-492ac0796acc’.

[@more@]4. 設定管理者帳號及密碼
# /usr/sbin/openvasmd –user=admin –new-password=<new-password>

5. 修改 /usr/bin/openvas-start
# vim /usr/bin/openvas-start

#!/bin/bash
echo “Starting OpenVas Services”
service greenbone-security-assistant start
service openvas-scanner start
service openvas-manager start
修改成
#!/bin/bash
echo “Starting OpenVas Services”
#service greenbone-security-assistant start
/usr/sbin/gsad –listen=0.0.0.0 –port=9392 –no-redirect
service openvas-scanner start
#service openvas-manager start
/usr/sbin/openvasmd –listen=0.0.0.0 –port=9390

Debian 8.x 上防火牆

1. 搜尋 iptables 相關套件
# apt-cache search iptables | grep ^iptables
iptables – administration tools for packet filtering and NAT
iptables-converter – convert iptables-commands from a file to iptables-save format
iptables-converter-doc – sphinx documentation for iptables-converter
iptables-dev – transitional dummy package
iptables-nftables-compat – iptables compat tools for nftables
iptables-optimizer – sort iptables rules by packet counters
iptables-optimizer-doc – sphinx html documentation for iptables-optimizer
iptables-persistent – boot-time loader for netfilter rules, iptables plugin

2. 安裝 iptables-persistent 套件
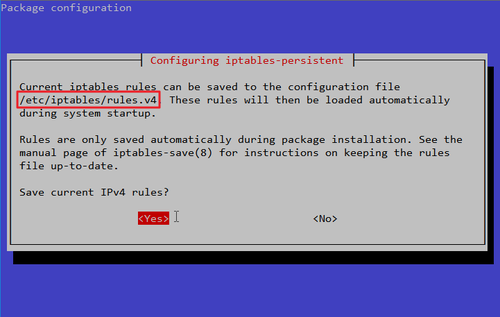
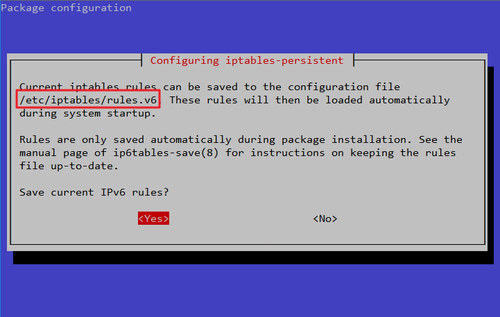
# apt-get install iptables-persistent
   ipv4 防火牆 /etc/iptables/rules.v4
   ipv6 防火牆 /etc/iptables/rules.v6


[@more@]3. 建立自行的防火牆規則
# iptables -L -n
Chain INPUT (policy DROP)
target     prot opt source               destination
f2b-sshd   tcp  —  0.0.0.0/0            0.0.0.0/0            multiport dports 22
ACCEPT     all  —  0.0.0.0/0            0.0.0.0/0
DROP       all  —  0.0.0.0/0            0.0.0.0/0            state INVALID
DROP       tcp  —  0.0.0.0/0            0.0.0.0/0            tcp flags:!0x17/0x02 state NEW
DROP       tcp  —  0.0.0.0/0            0.0.0.0/0            tcp flags:0x3F/0x00
DROP       tcp  —  0.0.0.0/0            0.0.0.0/0            tcp flags:0x03/0x03
DROP       tcp  —  0.0.0.0/0            0.0.0.0/0            tcp flags:0x06/0x06
DROP       tcp  —  0.0.0.0/0            0.0.0.0/0            tcp flags:0x05/0x05
DROP       tcp  —  0.0.0.0/0            0.0.0.0/0            tcp flags:0x11/0x01
DROP       tcp  —  0.0.0.0/0            0.0.0.0/0            tcp flags:0x30/0x20
DROP       tcp  —  0.0.0.0/0            0.0.0.0/0            tcp flags:0x18/0x08
DROP       tcp  —  0.0.0.0/0            0.0.0.0/0            tcp flags:0x3F/0x29
DROP       tcp  —  0.0.0.0/0            0.0.0.0/0            tcp flags:0x3F/0x37
DROP       tcp  —  0.0.0.0/0            0.0.0.0/0            tcp flags:0x3F/0x3F
DROP       tcp  —  0.0.0.0/0            0.0.0.0/0            tcp flags:0x3F/0x01
ACCEPT     all  —  0.0.0.0/0            0.0.0.0/0            state RELATED,ESTABLISHED
ACCEPT     tcp  —  192.168.1.0/24      0.0.0.0/0            tcp dpt:22 flags:0x17/0x02 state NEW

Chain FORWARD (policy DROP)
target     prot opt source               destination

Chain OUTPUT (policy ACCEPT)
target     prot opt source               destination
ACCEPT     all  —  0.0.0.0/0            0.0.0.0/0
ACCEPT     all  —  0.0.0.0/0            0.0.0.0/0            state RELATED,ESTABLISHED

Chain f2b-sshd (1 references)
target     prot opt source               destination
RETURN     all  —  0.0.0.0/0            0.0.0.0/0

4. 將 ipv4/6 規則寫入 /etc/iptables/rules.v4/6
# /sbin/iptables-save > /etc/iptables/rules.v4
# /sbin/ip6tables-save > /etc/iptables/rules.v6

5. 在 /etc/rc.local 中設定,開機時載入
# sed -i ‘/^exit 0/i/sbin/iptables-restore < /etc/iptables/rules.v4’ /etc/rc.local
# sed -i ‘/^exit 0/i/sbin/ip6tables-restore < /etc/iptables/rules.v6’ /etc/rc.local

客製化 Ubuntu Server 16.04.2 安裝光碟

本來一直以為 Debian/Ubuntu 只能透過 LiveCD 來進行客製化,偶然在以下的網站發現 Debian/Ubuntu 也能像 RedHat/CentOS 的 kickstart 一樣,透然編輯文字檔的方式來達成自動安裝的工作。
參考網站:
ubuntu-autoinstaller/txt.cfg at master · express42/ubuntu-autoinstaller · GitHub
InstallCDCustomization – Community Help Wiki
Ubuntu 16.04 / Debian 8: Run PXE boot server for automated install – Narrow Escape
B.4. Contents of the preconfiguration file (for xenial)
https://help.ubuntu.com/16.04/installation-guide/example-preseed.txt
system installation – How do I create a completely unattended install of Ubuntu? – Ask Ubuntu

1. 下載 Ubuntu Server 16.04.2 ISO
# wget http://debian.linux.org.tw/ubuntu-releases/16.04.2/ubuntu-16.04.2-server-amd64.iso

2. 掛載光碟
# mount -o loop ubuntu-16.04.2-server-amd64.iso /mnt

3. 複製檔案
# mkdir ~/Ubuntu16042
# cp -a /mnt/* ~/Ubuntu16042
# cp -r /mnt/.disk ~/Ubuntu16042[@more@]
4. 修改 ~/Ubuntu16042/isolinux/txt.cfg
# vim ~/Ubuntu16042/isolinux/txt.cfg
default ainstall
label ainstall
  menu label ^Auto Install Ubuntu Server
  kernel /install/vmlinuz
  append  file=/cdrom/preseed/aubuntu-server.seed vga=788 initrd=/install/initrd.gz quiet debian-installer/language=en debian-installer/country=TW console-setup/ask_detect=false keyboard-configuration/layoutcode=us debian-installer/locale=en_US —
label install
  menu label ^Install Ubuntu Server
  kernel /install/vmlinuz
  append  file=/cdrom/preseed/ubuntu-server.seed vga=788 initrd=/install/initrd.gz quiet —

5. 建立 ~/Ubuntu16042/preseed/aubuntu-server.seed
    預設安裝 LAMP / OpenSSH Server
# vim ~/Ubuntu16042/preseed/aubuntu-server.seed
d-i debian-installer/locale string en_US.UTF-8
#d-i debian-installer/locale string en_US
d-i console-setup/ask_detect boolean false
d-i console-setup/layout string USA
d-i debian-installer/language string en
d-i debian-installer/country string TW
d-i console-setup/ask_detect boolean false
d-i keyboard-configuration/xkb-keymap select us
# Default user, change
d-i passwd/root-login boolean true
d-i passwd/make-user boolean false
d-i user-setup/encrypt-home boolean false
d-i user-setup/allow-password-weak boolean true
d-i netcfg/choose_interface select auto
d-i netcfg/get_hostname string unassigned-hostname
d-i netcfg/get_domain string unassigned-domain
d-i mirror/country string manual
#d-i mirror/http/hostname string http://tw.archive.ubuntu.com
d-i mirror/http/hostname string http://free.nchc.org.tw
d-i mirror/http/directory string /ubuntu
d-i apt-setup/services-select multiselect security
d-i apt-setup/security_host string free.nchc.org.tw
d-i apt-setup/security_path string /ubuntu
d-i mirror/http/proxy string
d-i clock-setup/utc boolean false
d-i clock-setup/ntp boolean true
d-i time/zone string Asia/Taipei
#d-i partman/confirm boolean true
#d-i partman/choose_partition select finish
#d-i partman/confirm_nooverwrite boolean true
#d-i partman-auto/disk string /dev/[sv]da
#d-i partman-auto/method string lvm
#d-i partman-auto/choose_recipe select atomic
#d-i partman-lvm/device_remove_lvm boolean true
#d-i partman-lvm/confirm boolean true
#d-i partman-lvm/confirm_nooverwrite boolean true
#d-i partman-auto-lvm/guided_size string max
#d-i partman-partitioning/confirm_write_new_label boolean true
#d-i grub-installer/grub2_instead_of_grub_legacy boolean true
#d-i grub-installer/only_debian boolean true
#d-i grub-installer/bootdev string /dev/[sv]da
d-i pkgsel/update-policy select none
#d-i pkgsel/include string unity ubuntu-desktop openssh-server
tasksel tasksel/first multiselect lamp-server, openssh-server
#d-i pkgsel/include string openssh-server ntp build-essential rsync less vim ethtool curl lsscsi dstat htop strace
d-i finish-install/reboot_in_progress note

6. 製作成 ISO 光碟
# cd ~/Ubuntu16042
# mkisofs -r -V “Ubuntu-Server 16.04.2” -J -l -b isolinux/isolinux.bin -c isolinux/boot.cat -no-emul -boot-load-size 4 -boot-info-table -o ~/ubuntu-16.04.2-server-amd6_0501.iso .

7. 進行安裝測試
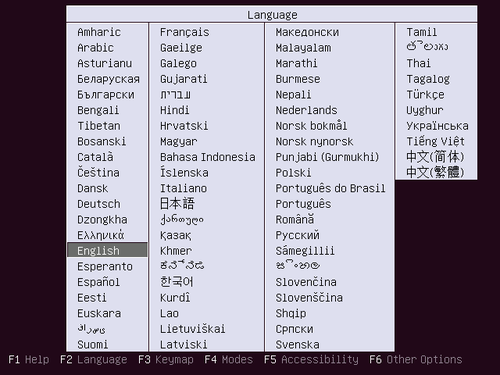
選擇安裝語言


選擇 Auto Install Ubuntu Server

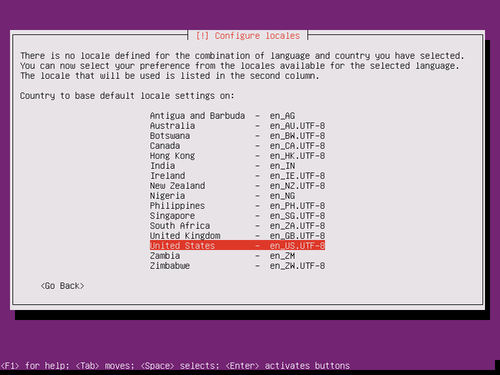
不知道為什麼,要重新再選擇一次 locales

設定 root 密碼

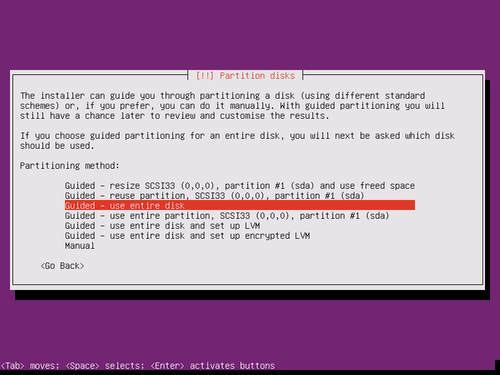
分割硬碟

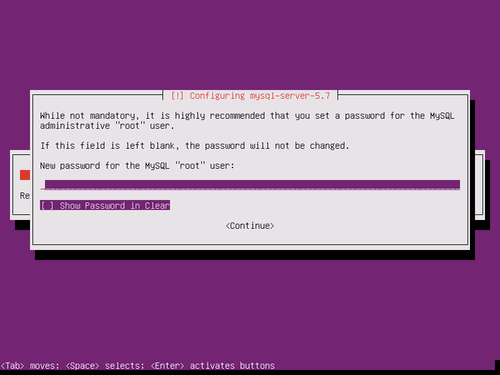
設定 MySQL Server 管理者密碼

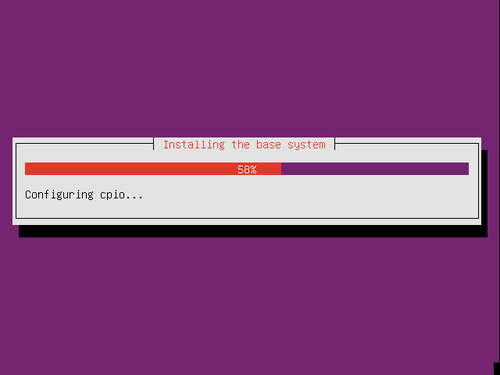
安裝完成,重新啟動