
更新後版本
主要是更新 KB3185614
[@more@]KB3185614 手動下載
x64
http://download.windowsupdate.com/d/msdownload/update/software/secu/2016/09/windows10.0-kb3185614-x64_25f5c8cf3246cb639a76b8c07e5f8cf2fe49e8e6.msu
Windows 10 更新至 1607 14393.187

[@more@]安裝更新 KB3176936 / KB3189866
更新後版本
KB3176936 下載
x64 下載
http://download.windowsupdate.com/c/msdownload/update/software/crup/2016/08/windows10.0-kb3176936-x64_795777f8a7f8cd1a4c96ee030848f9f888490555.msu
KB3189666 下載
x64 下載
http://download.windowsupdate.com/d/msdownload/update/software/secu/2016/09/windows10.0-kb3189866-x64_2c3e91a8162269579c8bf26a502c620d41efef0d.msu
x86 下載
http://download.windowsupdate.com/d/msdownload/update/software/secu/2016/09/windows10.0-kb3189866-x86_48cc54806747877357a732fee03118eb38e92947.msu
Adobe AIR 23.0.0.257

Adobe Flash Player 23.0.0.162
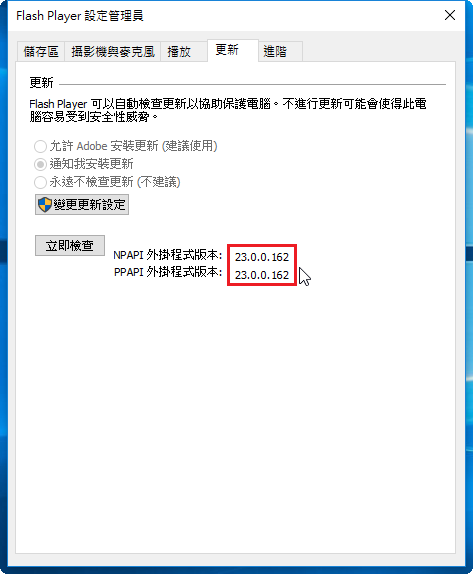
檢查安裝版本:https://www.adobe.com/tw/software/flash/about/
https://get.adobe.com/tw/flashplayer/[@more@]Windows 7 平台
Internet Explorer:
http://fpdownload.macromedia.com/get/flashplayer/current/licensing/win/install_flash_player_23_active_x.exe
Windows 8 / 8.1 / 10 / Server 2012 / Server 2012 R2 要從 Windows Update 更新
All Other Browsers(Firefox,Safari & Opera):
http://fpdownload.macromedia.com/get/flashplayer/current/licensing/win/install_flash_player_23_plugin.exe
Google Chrome
http://fpdownload.macromedia.com/pub/flashplayer/latest/help/install_flash_player_ppapi.exe
Mac 平台:
http://fpdownload.adobe.com/get/flashplayer/pdc/23.0.0.162/install_flash_player_osx.dmg
Office 2016 for Mac 15.25 更新檔

Windows 10 更新至 1607 14393.105


Windows 登錄檔操作
參考網頁:
新增、修改、刪除登錄值的批次語法 @ 更高境界.願景 :: 痞客邦 PIXNET ::
The Will Will Web | 如何使用登錄檔(.reg)進行新增、修改或刪除登錄機碼和值
在批次檔中新增 刪除 機碼 BAT與REG基本 @ Candy Paris 糖果巴黎 :: 痞客邦 PIXNET ::
使用命令列工具 REG 修改或刪除登錄檔 @ 呆丸北拜已搬家至 Blogger :: 痞客邦 PIXNET ::
新增/修改機碼的值
REG_SZ 語法
Windows Registry Editor Version 5.00
; 設定 IE 首頁為 Google
[HKEY_CURRENT_USERSoftwareMicrosoftInternet ExplorerMain]
“Start Page”=”http://www.google.com.tw/”
“Default_Page_URL”=”http://www.google.com.tw/”
REG_DWORD 語法
Windows Registry Editor Version 5.00
; 控制台檢視方式 – 大圖示
[HKEY_CURRENT_USERSoftwareMicrosoftWindowsCurrentVersionExplorerControlPanel]
“AllItemsIconView”=dword:00000000
“StartupPage”=dword:00000001
刪除機碼
Windows Registry Editor Version 5.00
[–HKEY_LOCAL_MACHINESoftwareClassesDictoryShellNewWindow]
刪除機碼的值
Windows Registry Editor Version 5.00
; OneDrive 開機時不啟動
[HKEY_CURRENT_USERSOFTWAREMicrosoftWindowsCurrentVersionRun]
“OneDrive”=–[@more@]指令方式:
; 檔案總管顯示副檔名
cmd /c reg add “HKCUSoftwareMicrosoftWindowsCurrentVersionExplorerAdvanced” /v HideFileExt /t REG_DWORD /d 0 /f
說明:
add 新增 / 修改
delete 刪除
/v 機碼名稱
/t 機碼類型:REG_SZ、REG_DWORD、REG_BINARY
/d 機碼的值
/f 不提示,直接修改
HKCU 是 HKEY_CURRENT_USER 的縮寫。
HKLM 是 HKEY_LOCAL_MACHINE 的縮寫。
IBM OS/2 4.0 WARP
偶然想起的一套作業系統,以前也曾為此消磨過一段時間。

[@more@]使用虛擬機器來安裝
底下是安裝過程


雖然可以 ping 的出去,DNS 也可以查詢
但不知道為什麼網路一直連不出去
花了一段時間才安裝起來,好像沒有什麼可以使用,當然不能與現在的作業系統相比。而且這一套 IBM OS/2 WARP 好像和我原來使用的不同,應該是 eComStation 才對,關於更多 IBM OS/2 WARP,可以查看 OS/2 – 維基百科,自由的百科全書。
Windows 10 更新至 1607 14393.82


OpenVPN 無法正常啟動
1. 安裝及修改完 OpenVPN,要啟動時,卻出現錯誤
# systemctl start openvpn@server.service
Job for openvpn@server.service failed because the control process exited with error code. See “systemctl status openvpn@server.service” and “journalctl -xe” for details.
2. 檢查 OpenVPN 服務狀態
# systemctl status openvpn@server.service
● openvpn@server.service – OpenVPN Robust And Highly Flexible Tunneling Application On server
Loaded: loaded (/usr/lib/systemd/system/openvpn@.service; enabled; vendor preset: disabled)
Active: failed (Result: exit-code) since 二 2016-08-16 11:31:37 CST; 5min ago
Process: 1883 ExecStart=/usr/sbin/openvpn –daemon –writepid /var/run/openvpn/%i.pid –cd /etc/openvpn/ –config %i.conf (code=exited, status=1/FAILURE)
Main PID: 1845 (code=exited, status=0/SUCCESS)
8月 16 11:31:37 xxxxx.sytes.net systemd[1]: Starting OpenVPN Robust And Highly Flexible Tunneling Application On server…
8月 16 11:31:37 xxxxx.sytes.net openvpn[1883]: Options error: In [CMD-LINE]:1: Error opening configuration file: server.conf
8月 16 11:31:37 xxxxx.sytes.net openvpn[1883]: Use –help for more information.
8月 16 11:31:37 xxxxx.sytes.net systemd[1]: openvpn@server.service: control process exited, code=exited status=1
8月 16 11:31:37 xxxxx.sytes.net systemd[1]: Failed to start OpenVPN Robust And Highly Flexible Tunneling Application On server.
8月 16 11:31:37 xxxxx.sytes.net systemd[1]: Unit openvpn@server.service entered failed state.
8月 16 11:31:37 xxxxx.sytes.net systemd[1]: openvpn@server.service failed.
[@more@]3. 另外一種檢查方式
# journalctl -xe
— Unit openvpn@server.service has begun starting up.
8月 16 11:31:37 xxxxx.sytes.net openvpn[1883]: Options error: In [CMD-LINE]:1: Error opening configuration file: server.conf
8月 16 11:31:37 xxxxx.sytes.net openvpn[1883]: Use –help for more information.
8月 16 11:31:37 xxxxx.sytes.net systemd[1]: openvpn@server.service: control process exited, code=exited status=1
8月 16 11:31:37 xxxxx.sytes.net systemd[1]: Failed to start OpenVPN Robust And Highly Flexible Tunneling Application On server.
— Subject: Unit openvpn@server.service has failed
— Defined-By: systemd
— Support: http://lists.freedesktop.org/mailman/listinfo/systemd-devel
—
— Unit openvpn@server.service has failed.
—
— The result is failed.
8月 16 11:31:37 xxxxx.sytes.net systemd[1]: Unit openvpn@server.service entered failed state.
8月 16 11:31:37 xxxxx.sytes.net systemd[1]: openvpn@server.service failed.
8月 16 11:31:37 xxxxx.sytes.net polkitd[1816]: Unregistered Authentication Agent for unix-process:1878:1286078 (system bus name :1.37, object path /
看訊息似乎是無法開啟 /etc/openvpn/server.conf 設定檔
4. 檢查 /etc/openvpn/server.conf 檔案是否存在
# ls -l /etc/openvpn/server.conf
-rw-r–r–. 1 root root 10441 8月 16 11:30 /etc/openvpn/server.conf
5. 檔案正常存在,因為這一台 Server 有開啟 SELinux,所以檢查檔案的屬性
# ls -lZ /etc/openvpn/server.conf*
-rw-r–r–. root root unconfined_u:object_r:admin_home_t:s0 /etc/openvpn/server.conf
-rw-r–r–. root root unconfined_u:object_r:openvpn_etc_t:s0 /etc/openvpn/server.conf.20160816
6. 修改屬性
# chcon -t openvpn_etc_t /etc/openvpn/server.conf
7. 再檢查一次
# ls -lZ /etc/openvpn/server.conf*
-rw-r–r–. root root unconfined_u:object_r:openvpn_etc_t:s0 /etc/openvpn/server.conf
-rw-r–r–. root root unconfined_u:object_r:openvpn_etc_t:s0 /etc/openvpn/server.conf.20160816
8. 啟動 OpenVPN 服務
# systemctl start openvpn@server.service
# systemctl status openvpn@server.service
● openvpn@server.service – OpenVPN Robust And Highly Flexible Tunneling Application On server
Loaded: loaded (/usr/lib/systemd/system/openvpn@.service; enabled; vendor preset: disabled)
Active: active (running) since 二 2016-08-16 11:49:11 CST; 10s ago
Process: 1934 ExecStart=/usr/sbin/openvpn –daemon –writepid /var/run/openvpn/%i.pid –cd /etc/openvpn/ –config %i.conf (code=exited, status=0/SUCCESS)
Main PID: 1935 (openvpn)
CGroup: /system.slice/system-openvpn.slice/openvpn@server.service
mq1935 /usr/sbin/openvpn –daemon –writepid /var/run/openvpn/server.pid –cd /etc/openvpn/ –config server.conf
8月 16 11:49:11 xxxxx.sytes.net openvpn[1935]: GID set to nobody
8月 16 11:49:11 xxxxx.sytes.net openvpn[1935]: UID set to nobody
8月 16 11:49:11 xxxxx.sytes.net openvpn[1935]: Listening for incoming TCP connection on [undef]
8月 16 11:49:11 xxxxx.sytes.net openvpn[1935]: TCPv4_SERVER link local (bound): [undef]
8月 16 11:49:11 xxxxx.sytes.net openvpn[1935]: TCPv4_SERVER link remote: [undef]
8月 16 11:49:11 xxxxx.sytes.net openvpn[1935]: MULTI: multi_init called, r=256 v=256
8月 16 11:49:11 xxxxx.sytes.net openvpn[1935]: IFCONFIG POOL: base=10.8.0.4 size=62, ipv6=0
8月 16 11:49:11 xxxxx.sytes.net openvpn[1935]: IFCONFIG POOL LIST
8月 16 11:49:11 xxxxx.sytes.net openvpn[1935]: MULTI: TCP INIT maxclients=10 maxevents=14
8月 16 11:49:11 xxxxx.sytes.net openvpn[1935]: Initialization Sequence Completed
因為 /etc/openvpn/server.conf 是我直接複製別台修改好的設定檔,所以才會出現這樣的問題,也提醒自己使用 SELinux 應該注意的事項。