OpenVPN Client 端設定

參考網頁:
CentOS 7 install OpenVPN @ 回憶……! :: 痞客邦 PIXNET ::
How To Set Up an OpenVPN Server on Ubuntu 16.04 | DigitalOcean 

複製 OpenVPN Server 以下的這四個檔案至 OpenVPN Client Devices 上。
/etc/openvpn/easy-rsa/keys/ca.crt
/etc/openvpn/easy-rsa/keys/client.crt
/etc/openvpn/easy-rsa/keys/client.key
/etc/openvpn/easy-rsa/keys/ta.key

因為檔案比較多,為了使用者設定的方便,所以整合成一個 .ovpn 檔[@more@]建立存放檔案的目錄
# mkdir ~/openvpn_client_files
切換目錄
# cd /etc/openvpn/easy-rsa/keys/
複製 Client 端所需檔案
# cp ca.crt client.crt client.key ta.key ~/openvpn_client_files

建立 Client 端基本設定檔
# vim ~/openvpn_client_files/base.conf
client
dev tun
proto tcp
remote server_IP_address 1194
user nobody
group nogroup
persist-key
persist-tun
remote-cert-tls server
comp-lzo
verb 3
cipher AES-128-CBC
auth SHA256
key-direction 1

參考 How To Set Up an OpenVPN Server on Ubuntu 16.04 | DigitalOcean 建立 .ovpn 的 Script 檔
# vim ~/openvpn_client_files/make_config.sh
#!/bin/bash

# First argument: Client identifier

KEY_DIR=~/openvpn_client_files
OUTPUT_DIR=~/openvpn_client_files
BASE_CONFIG=~/openvpn_client_files/base.conf

cat ${BASE_CONFIG}
    <(echo -e ‘<ca>’)
    ${KEY_DIR}/ca.crt
    <(echo -e ‘</ca>n<cert>’)
    ${KEY_DIR}/${1}.crt
    <(echo -e ‘</cert>n<key>’)
    ${KEY_DIR}/${1}.key
    <(echo -e ‘</key>n<tls-auth>’)
    ${KEY_DIR}/ta.key
    <(echo -e ‘</tls-auth>’)
    > ${OUTPUT_DIR}/${1}.ovpn

更改檔案權限
# chmod 700 ~/openvpn_client_files/make_config.sh

切換目錄
# cd ~/openvpn_client_files

進行製作
# ./make_config.sh client

檢查是否有產生整合的設定檔
# ls -l ~/openvpn_client_files/*.ovpn
-rw-r–r– 1 root root 9860 12月 23 22:15 client.ovpn

active (exited) 和 active (running)

啟動 OpenVPN Server 後,檢查是否有正常運作
# systemctl start openvpn
# systemctl status openvpn
● openvpn.service – OpenVPN service
Loaded: loaded (/lib/systemd/system/openvpn.service; enabled; vendor preset:
Active: active (exited) since 五 2016-12-23 21:35:43 CST; 28s ago

使用 netstat 來檢查
# netstat -antp | grep :1194
tcp 0 0 0.0.0.0:1194 0.0.0.0:* LISTEN 3146/openvpn

似乎有正常運作[@more@]解決方式:
# systemctl start openvpn@server.service
# systemctl status openvpn@server.service
● openvpn@server.service – OpenVPN connection to server
Loaded: loaded (/lib/systemd/system/openvpn@.service; disabled; vendor preset
Active: active (running) since 五 2016-12-23 21:33:19 CST; 5s ago

關於這二者的說明,可以參考:
[Linux] systemctl 列出來的 loaded active exited 是什麼意思? @ 亂打一通的心情日記 :: 痞客邦 PIXNET ::

只不過我以前都是習慣使用前一種方式來執行

客製化 ezgo 13 LXDE

稍微修改了一下,以符合自己的需要。
已先預載套件

[@more@]辦公文書功能表

美工設計功能表

影音媒體功能表

網際網路功能表

益智遊戲功能表

教育學習功能表

程式開發功能表

自由教材功能表

附屬應用程式功能表

ezgo 工具箱功能表

系統功能表

設定功能表

主要修改的地方:移除 LibreOffice,改安裝 OxOffice 6

Firefox 新增附加元件:Adblock Plus / AdBlocker for Youtube / ColorfulTabs

Google Chrome:預設首頁改成「如何開始體驗ezgo」,新增擴充功能:Adblock Plus / AdBlocker for Youtube

Chromium:預設首頁改成「如何開始體驗ezgo」,新增擴充功能:Adblock Plus / AdBlocker for Youtube

輸入法部分,移除 fcitx,改安裝 gcin,預設輸入法改成行列輸入法

Ubuntu Server ufw Firewall

安裝 ufw 套件
# apt-get install ufw
設定 ufw (0.35-0ubuntu2) …
Creating config file /etc/ufw/before.rules with new version
Creating config file /etc/ufw/before6.rules with new version
Creating config file /etc/ufw/after.rules with new version
Creating config file /etc/ufw/after6.rules with new version
Processing triggers for systemd (229-4ubuntu13) …
Processing triggers for ureadahead (0.100.0-19) …

1. 停用防火牆,取消開機時執行
# ufw disable
Firewall stopped and disabled on system startup

未啟用
# ufw status
Status: inactiv[@more@]2. 啟用防火牆
# ufw enable
Firewall is active and enabled on system startup

已啟用
# ufw status
Status: active

3. 預設規則
預設同意
# ufw default allow
拒絕外部連線
# ufw default deny incoming
Default incoming policy changed to ‘deny’
(be sure to update your rule accordingly)
預設拒絕
# ufw default deny
同意對外連線
# ufw default allow outgoing
Default outgoing policy changed to ‘allow’
(be sure to update your rule accordingly)

4. 防火牆規則
# ufw allow in 22/tcp
# ufw allow in ssh
# ufw allow in http
# ufw allow out http
# ufw allow from 192.168.1.0/24
# ufw allow from 192.168.1.0/24 port 22
# ufw allow proto tcp from 192.168.1.0/24 port 22
# ufw deny from 192.168.1.17 to 192.168.1.16 port 22
# ufw allow from 192.168.1.0/24 to 192.168.1.16 port 22

5. 列出防火牆規則
# ufw status
Status: active

To                         Action      From
—                         ——      —-
22                         ALLOW       Anywhere
443/tcp                    ALLOW       Anywhere
53                         ALLOW       Anywhere
22/tcp                     ALLOW       Anywhere
1194/tcp                   ALLOW       Anywhere
22                         ALLOW       192.168.1.0/24
22 (v6)                    ALLOW       Anywhere (v6)
443/tcp (v6)               ALLOW       Anywhere (v6)
53 (v6)                    ALLOW       Anywhere (v6)
22/tcp (v6)                ALLOW       Anywhere (v6)
1194/tcp (v6)              ALLOW       Anywhere (v6)

加上編號
# ufw status numbered
Status: active

     To                         Action      From
     —                         ——      —-
[ 1] 22                         ALLOW IN    Anywhere
[ 2] 443/tcp                    ALLOW IN    Anywhere
[ 3] 53                         ALLOW IN    Anywhere
[ 4] 22/tcp                     ALLOW IN    Anywhere
[ 5] 1194/tcp                   ALLOW IN    Anywhere
[ 6] 22                         ALLOW IN    192.168.1.0/24
[ 7] 22 (v6)                    ALLOW IN    Anywhere (v6)
[ 8] 443/tcp (v6)               ALLOW IN    Anywhere (v6)
[ 9] 53 (v6)                    ALLOW IN    Anywhere (v6)
[10] 22/tcp (v6)                ALLOW IN    Anywhere (v6)
[11] 1194/tcp (v6)              ALLOW IN    Anywhere (v6)

列出更詳細的資訊
# ufw status verbose
Status: active
Logging: on (low)
Default: deny (incoming), allow (outgoing), disabled (routed)
New profiles: skip

To                         Action      From
—                         ——      —-
192.168.1.16 22            ALLOW IN    192.168.1.0/24

6. 刪除防火牆則
# ufw delete allow 22/tcp
# ufw delete allow from 192.168.1.0/24 to 192.168.1.16 port 22
# ufw delete 6
Deleting:
 allow from 192.168.1.0/24 to any port 22
Proceed with operation (y|n)? y
Rule deleted

原本第六條規則已刪除
# ufw status numbered
Status: active

     To                         Action      From
     —                         ——      —-
[ 1] 22                         ALLOW IN    Anywhere
[ 2] 443/tcp                    ALLOW IN    Anywhere
[ 3] 53                         ALLOW IN    Anywhere
[ 4] 22/tcp                     ALLOW IN    Anywhere
[ 5] 1194/tcp                   ALLOW IN    Anywhere
[ 6] 22 (v6)                    ALLOW IN    Anywhere (v6)
[ 7] 443/tcp (v6)               ALLOW IN    Anywhere (v6)
[ 8] 53 (v6)                    ALLOW IN    Anywhere (v6)
[ 9] 22/tcp (v6)                ALLOW IN    Anywhere (v6)
[10] 1194/tcp (v6)              ALLOW IN    Anywhere (v6)

7. 清除所有的規則
# ufw reset
Resetting all rules to installed defaults. This may disrupt existing ssh
connections. Proceed with operation (y|n)? y
Backing up ‘after.rules’ to ‘/etc/ufw/after.rules.20161225_095230’
Backing up ‘after6.rules’ to ‘/etc/ufw/after6.rules.20161225_095230’
Backing up ‘user.rules’ to ‘/etc/ufw/user.rules.20161225_095230’
Backing up ‘before.rules’ to ‘/etc/ufw/before.rules.20161225_095230’
Backing up ‘user6.rules’ to ‘/etc/ufw/user6.rules.20161225_095230’
Backing up ‘before6.rules’ to ‘/etc/ufw/before6.rules.20161225_095230’

8. 啟用日誌功能:
# ufw logging on
Logging enabled

停用日誌功能:
# ufw logging off
Logging disabled

日誌預設會存在 /var/log/ufw.log

設定日誌的層級(預設是 low)
# ufw logging (low | medium | high | full)

10. 直接修改預設規則 /etc/ufw/before.rules
拒絕 Ping
# sed -i ‘34,38 s/ACCEPT/DROP/’ /etc/ufw/before.rules

重新載入
# ufw reload
Firewall reloaded

安裝 ezgo 13 工具箱中的推薦軟體及Scratch 2

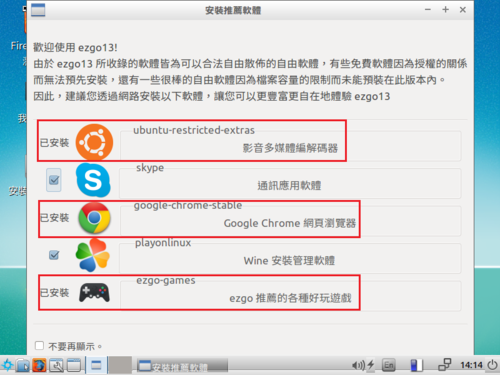
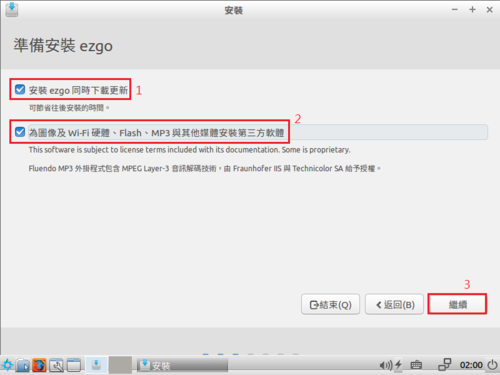
因為特殊的因素,所以有一些軟體不能直接預載在光碟之中,必需在安裝完成之後,再另行安裝!
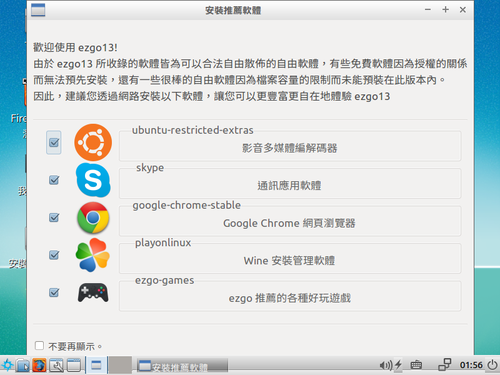
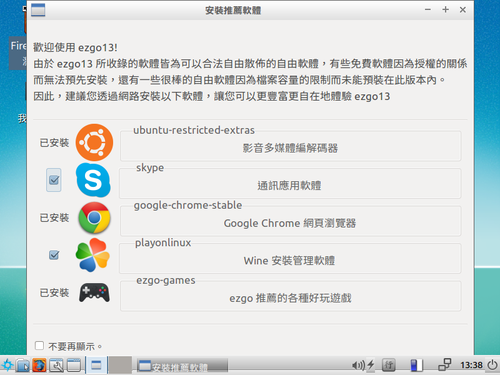
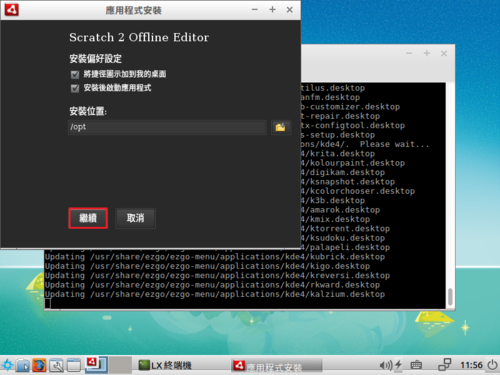
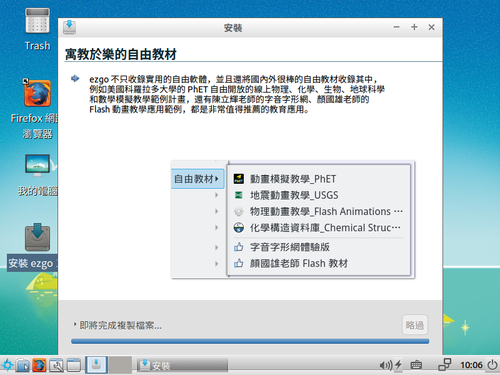
安裝推薦軟體畫面,可以勾選所需要的軟體,然後選擇右下角的安裝

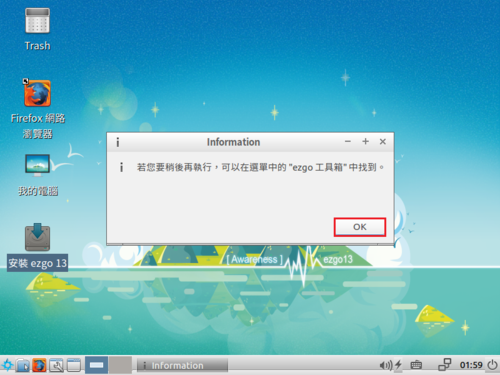
[@more@]如果不小心已經把這個畫面關閉,也可以在 ezgo 工具箱中找到

執行 安裝推薦軟體

勾選要安裝的軟體

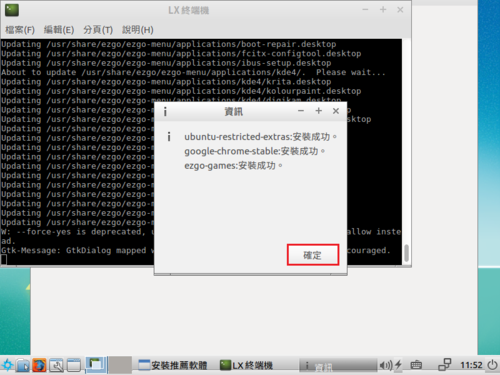
安裝完成

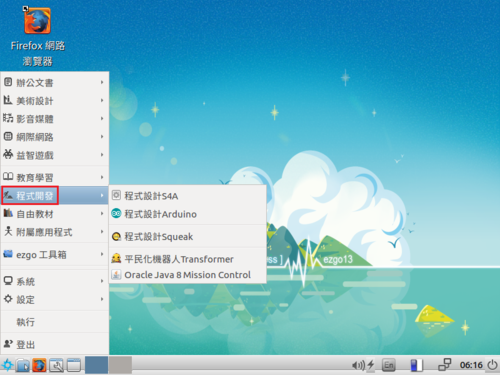
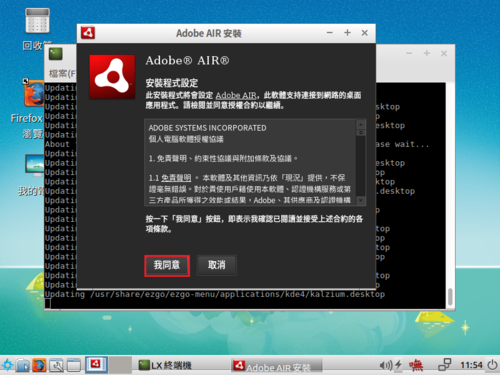
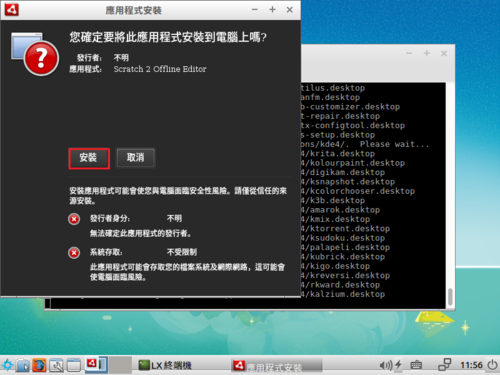
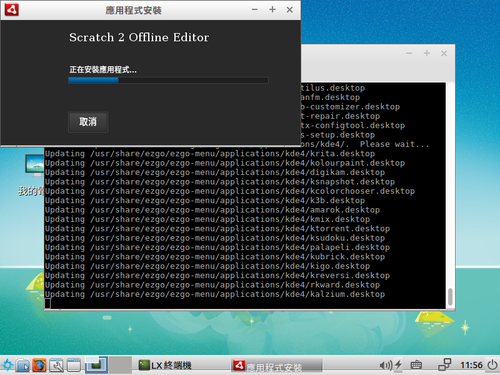
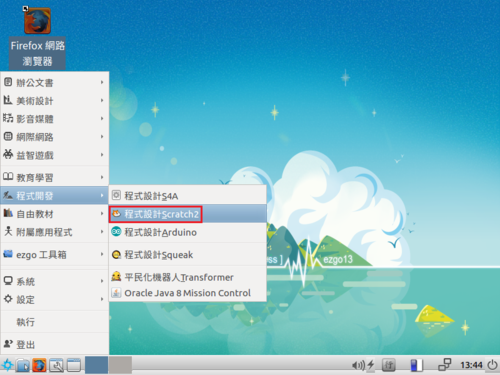
安裝 Scratch 2

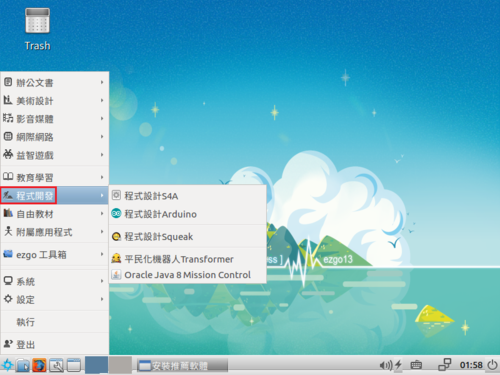
在程式開發功能表中可以找到

操作介面改成正體中文

試用 ezgo 13 LXDE

ezgo 13 於 2017/1/1 正式釋出,有興趣的人可以到 ezgo 官網下載。想要更加了解 ezgo 也同樣可以在官網上找到許多的說明。
ezgo 13 下載:http://ezgo.westart.tw/ezgo13/download.php
目前支援二個版本下載:LXDE / KDE
[@more@]底下做一個簡單的試用:
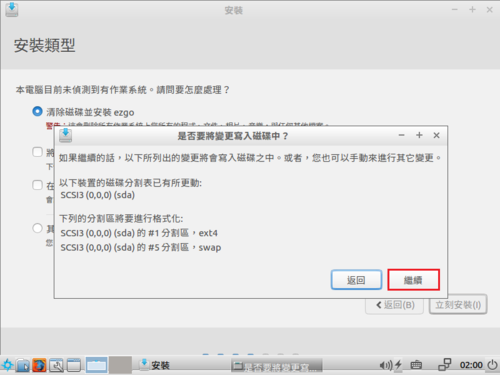
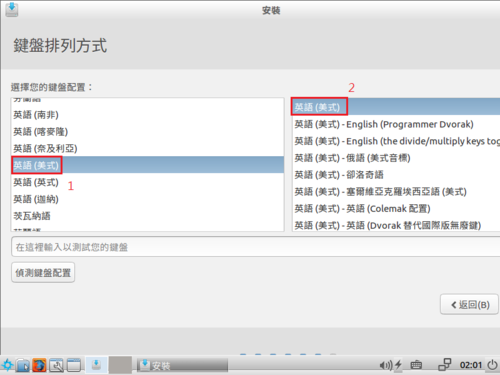
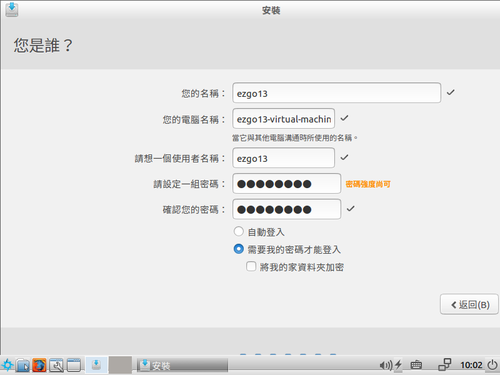
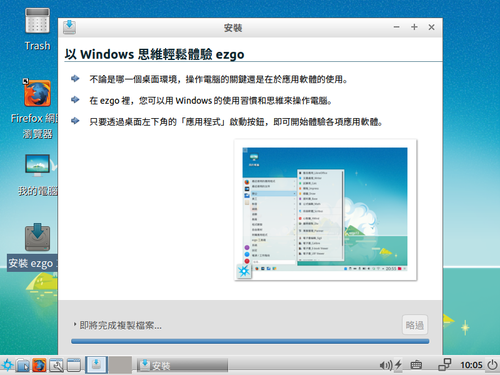
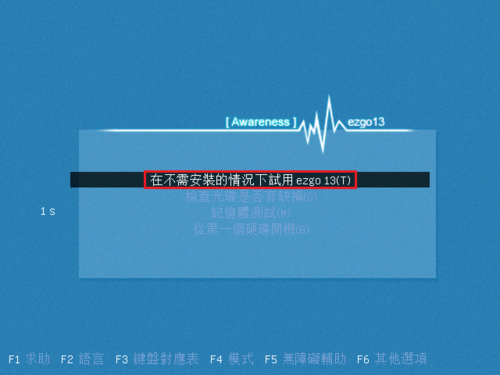
開機畫面

開機畫面

進入桌面環境

功能表

辦公文書功能表

美工設計功能表

影音媒體功能表

網際網路功能表

益智遊戲功能表

教育學習功能表

程式開發功能表

自由教材功能表

附屬應用程式功能表

ezgo 工具箱功能表

系統功能表

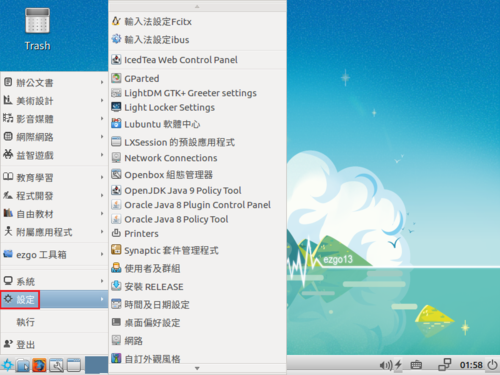
設定功能表

試用感覺:
1. 執行速度很快
2. 軟體收錄非常完整,幾乎全部都有了,有些限於版權的因素,而不能直接整合在光碟中的套件,也可以由 ezgo 工具箱中補安裝。
3. 功能表也做了中文化,方便對 Linux 不是很熟悉的使用者使用。
4. 不過也因為太齊全了,對於某部分使用者來說,可能過於雜亂。
5. 只有 LXDE / KDE 的版本有些可惜,因為個人習慣使用 GNOME 2 MATE 的桌面環境。

後記:
覺得版本太肥大的人,可以考慮下載另外二個沒有在官網上直接列出,但在 FTP Server 上有的 B 版本,套件安裝的比較少一些,但沒有 LXDE  版。
下載位置:
ftp://freenas.slat.org/ezgo/

試用 Banana Pi R1 – Ubuntu minimal 16.04 上安裝 OpenVPN

參考網站:
How To Set Up an OpenVPN Server on Ubuntu 16.04 | DigitalOcean

1. 安裝 OpenVPN
# apt-get install openvpn easy-rsa

2. 建立 Certificate Authority
# mkdir -p /etc/openvpn/easy-rsa/keys
# cp -r /usr/share/easy-rsa /etc/openvpn
# cd /etc/openvpn/easy-rsa
請情況修改 /etc/openvpn/easy-rsa/vars 中的變數
# vim /etc/openvpn/easy-rsa/vars
export KEY_COUNTRY=”TW

export KEY_PROVINCE=”Taiwan
export KEY_CITY=”Yilan
export KEY_ORG=”School
export KEY_EMAIL=”me@myhost.mydomain”
export KEY_OU=”MyOrganizationalUnit”

# X509 Subject Field
export KEY_NAME=”EasyRSA”[@more@]
# source ./vars
NOTE: If you run ./clean-all, I will be doing a rm -rf on /etc/openvpn/easy-rsa/keys
# ./clean-all
# ./build-ca

3. 產生 Server 憑證、金鑰及加密檔案
#  ./build-key-server server
Certificate is to be certified until Dec 21 10:24:53 2026 GMT (3650 days)
Sign the certificate? [y/n]:y

1 out of 1 certificate requests certified, commit? [y/n]y
Write out database with 1 new entries
Data Base Updated

時間會稍微比較久一些
# ./build-dh
# openvpn –genkey –secret keys/ta.key

4. 產生 Client Certificate 和 Key Pair
# source ./vars
NOTE: If you run ./clean-all, I will be doing a rm -rf on /etc/openvpn/easy-rsa/keys
# ./build-key client
Please enter the following ‘extra’ attributes
to be sent with your certificate request
A challenge password []:
An optional company name []:
Using configuration from /etc/openvpn/easy-rsa/openssl-1.0.0.cnf
Check that the request matches the signature
Signature ok

Certificate is to be certified until Dec 21 12:15:42 2026 GMT (3650 days)
Sign the certificate? [y/n]:y

1 out of 1 certificate requests certified, commit? [y/n]y
Write out database with 1 new entries
Data Base Updated

如果要建立需要密碼
# source ./vars
NOTE: If you run ./clean-all, I will be doing a rm -rf on /etc/openvpn/easy-rsa/keys
# ./build-pass client

5. 複製憑證金鑰到 /etc/openvpn/keys 目錄
# cd /etc/openvpn/easy-rsa/keys 
# mkdir /etc/openvpn/keys
# cp ca.crt ca.key server.crt server.key ta.key dh2048.pem /etc/openvpn/keys

6. 設定 OpenVPN
修改 /etc/openvpn/server.conf 設定檔
# gunzip -c /usr/share/doc/openvpn/examples/sample-config-files/server.conf.gz | tee /etc/openvpn/server.conf
# cp /etc/openvpn/server.conf /etc/openvpn/server.conf.$(date +%F)

修改設定
# sed -i ‘s/;tls-auth/tls-auth/’ /etc/openvpn/server.conf
# sed -i ‘/tls-auth/ akey-direction 0’ /etc/openvpn/server.conf
# sed -i ‘s/;cipher AES/cipher AES/’ /etc/openvpn/server.conf
# sed -i ‘/^cipher/ aauth SHA256’ /etc/openvpn/server.conf
OpenVPN 執行使用者及群組
# sed -i ‘s/^;user/user/’ /etc/openvpn/server.conf
# sed -i ‘s/^;group/group/’ /etc/openvpn/server.conf
VPN Client 的 Default Gatewa y以 VPN Gateway 為主
# sed -i ‘s/^;push “redirect/push “redirect/’ /etc/openvpn/server.conf
DNS  設定
# sed -i ‘s/^;push “dhcp-option DNS 208.67.222.222″/push “dhcp-option DNS 168.95.1.1″/’ /etc/openvpn/server.conf
# sed -i ‘s/^;push “dhcp-option DNS 208.67.220.220″/push “dhcp-option DNS 8.8.8.8″/’ /etc/openvpn/server.conf
將預設的 UDP 改為 TCP
# sed -i ‘s/^;proto tcp/proto tcp/’ /etc/openvpn/server.conf
# sed -i ‘s/^proto udp/;proto udp/’ /etc/openvpn/server.conf
更改 crt / key 的檔案位置
# sed -i ‘s|ca ca.crt|ca /etc/openvpn/keys/ca.crt|’ /etc/openvpn/server.conf
# sed -i ‘s|cert server.crt|cert /etc/openvpn/keys/server.crt|’ /etc/openvpn/server.conf
# sed -i ‘s|key server.key|key /etc/openvpn/keys/server.key|’ /etc/openvpn/server.conf
# sed -i ‘s|dh dh2048.pem|dh /etc/openvpn/keys/dh2048.pem|’ /etc/openvpn/server.conf
# sed -i ‘s|tls-auth ta.key 0|tls-auth /etc/openvpn/keys/ta.key 0|’ /etc/openvpn/server.conf
使用憑證認證時,允許所有的 Client 使用相同的 KEY 登入
# sed -i ‘s/^;duplicate-cn/duplicate-cn/’ /etc/openvpn/server.conf
允許 Client 間互接連接
# sed -i ‘s/^;client-to-client/client-to-client/’ /etc/openvpn/server.conf
更改 log 檔位置
# sed -i ‘s|status openvpn-status.log|status /var/log/openvpn/openvpn-status.log|’  /etc/openvpn/server.conf
# sed -i ‘s|;log         openvpn.log|log         /var/log/openvpn/openvpn.log|’ /etc/openvpn/server.conf
# sed -i ‘s|;log-append  openvpn.log|log-append  /var/log/openvpn/openvpn.log|’ /etc/openvpn/server.conf
此網段走 VPN Gateway
# sed -i ‘/^;push “route 192.168.10/ ipush “route 10.8.0.0 255.255.255.0″‘ /etc/openvpn/server.conf

For sed
# cat script-file
s/;tls-auth/tls-auth/
/tls-auth/ akey-direction 0
s/;cipher AES/cipher AES/
/^cipher/ aauth SHA256
s/^;user/user/
s/^;group/group/
s/^;push “redirect/push “redirect/
s/^;push “dhcp-option DNS 208.67.222.222″/push “dhcp-option DNS 168.95.1.1″/
s/^;push “dhcp-option DNS 208.67.220.220″/push “dhcp-option DNS 8.8.8.8″/
s/^;proto tcp/proto tcp/
s/^proto udp/;proto udp/
s|ca ca.crt|ca /etc/openvpn/keys/ca.crt|
s|cert server.crt|cert /etc/openvpn/keys/server.crt|
s|key server.key|key /etc/openvpn/keys/server.key|
s|dh dh2048.pem|dh /etc/openvpn/keys/dh2048.pem|
s|tls-auth ta.key 0|tls-auth /etc/openvpn/keys/ta.key 0|
s/^;duplicate-cn/duplicate-cn/
s/^;client-to-client/client-to-client/
s|status openvpn-status.log|status /var/log/openvpn/openvpn-status.log|
s|;log         openvpn.log|log         /var/log/openvpn/openvpn.log|
s|;log-append  openvpn.log|log-append  /var/log/openvpn/openvpn.log|
/^;push “route 192.168.10/ ipush “route 10.8.0.0 255.255.255.0”

# sed -i -f script-file /etc/openvpn/server.conf

建立存放 Log 的目錄
# mkdir /var/log/openvpn

7.設定網路 Forward
# sed -i ‘s/#net.ipv4.ip_forward=1/net.ipv4.ip_forward=1/’ /etc/sysctl.conf
# sysctl -p

8. 防火牆設定 iptables
# iptables -t nat -A POSTROUTING -s 10.8.0.0/24 -o eth0 -j MASQUERADE
# iptables -A FORWARD -i tun0 -j ACCEPT 
# iptables -A FORWARD -o tun0 -j ACCEPT

9. 設定開機時啟動 OpenVPN 服務
# systemctl enable openvpn@server.service
Created symlink from /etc/systemd/system/multi-user.target.wants/openvpn@server.service to /lib/systemd/system/openvpn@.service.

10. 啟動並檢查是否有正常啟動
# systemctl start openvpn@server.service
# systemctl status openvpn@server.service | head -3
● openvpn@server.service – OpenVPN connection to server
   Loaded: loaded (/lib/systemd/system/openvpn@.service; enabled; vendor preset: enabled)
   Active: active (running) since 五 2016-12-23 21:35:43 CST; 15h ago

# netstat -antpl | grep :1194
tcp        0      0 0.0.0.0:1194            0.0.0.0:*               LISTEN      3146/openvpn

試用 Banana Pi M3 – DietPi 取消每次登入時都會自動執行 dietpi-software

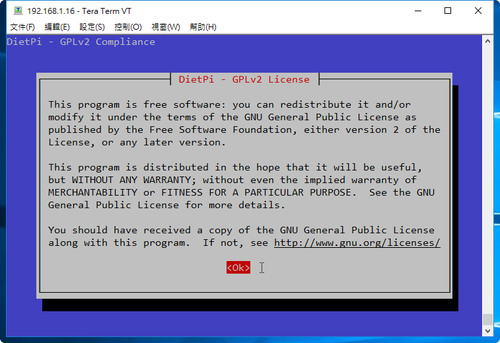
DietPi 在每次 root 登入時都會自動執行設定的畫面

實在有些煩人……[@more@]解決方式:
# sed -i ‘s|/DietPi|#/DietPi|’ /root/.bashrc

後來發現,只要有執行 dietpi-*,又會把下面這一行加回去 /root/.bashrc
/DietPi/dietpi/login

所以就乾脆在 /etc/rc.local 加入去除的這一行
# tail -2 /etc/rc.local
sed -i ‘s|^/DietPi|#/DietPi|’ /root/.bashrc
exit 0

試用 Banana Pi M3 – DietPi 簡單調整

1. 更改預設的 Locale 預設是 en_GB.UTF-8
# locale
LANG=en_GB.UTF-8
LANGUAGE=
LC_CTYPE=”en_GB.UTF-8″
LC_NUMERIC=”en_GB.UTF-8″
LC_TIME=”en_GB.UTF-8″
LC_COLLATE=”en_GB.UTF-8″
LC_MONETARY=”en_GB.UTF-8″
LC_MESSAGES=”en_GB.UTF-8″
LC_PAPER=”en_GB.UTF-8″
LC_NAME=”en_GB.UTF-8″
LC_ADDRESS=”en_GB.UTF-8″
LC_TELEPHONE=”en_GB.UTF-8″
LC_MEASUREMENT=”en_GB.UTF-8″
LC_IDENTIFICATION=”en_GB.UTF-8″
LC_ALL=

# cat /etc/default/locale
#  File generated by update-locale
LC_MESSAGES=POSIX
LANG=en_GB.UTF-8
LANGUAGE=en_GB.UTF-8[@more@]執行 dpkg-reconfigure locales 進行設定
# dpkg-reconfigure locales
Generating locales (this might take a while)…
  en_US.UTF-8… done
Generation complete.

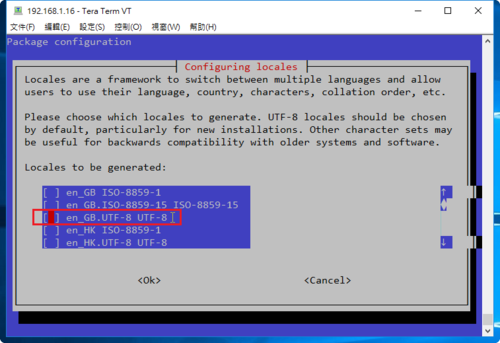
取消選擇 en_GB.UTF-8

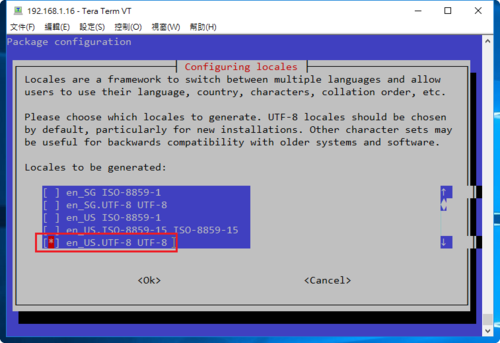
加選 en_US.UTF-8

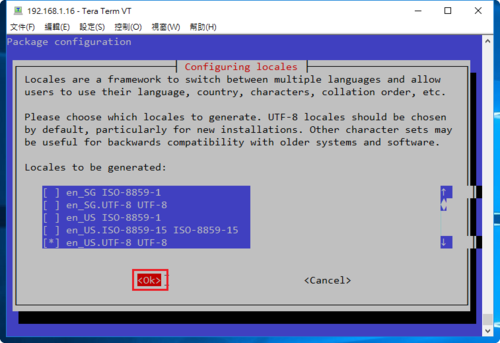
選擇 OK 繼續

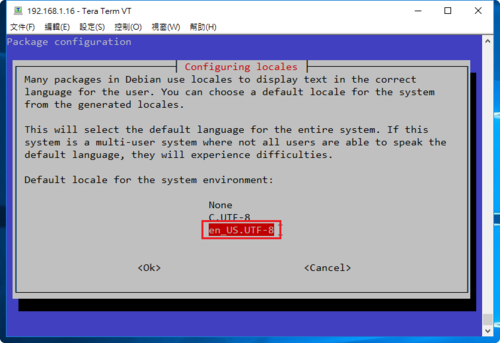
選擇 en_US.UTF-8 為預設的 Locales

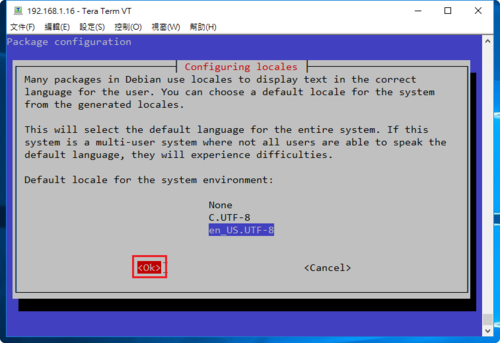
選擇 OK 完成設定

後記:
後來發現改用 en_US.UTF-8 後,有些設定畫面就會不太正常,所以後來又改回 en_GB.UTF-8

2. 補安裝一些個人覺得缺少的套件
# apt-get install openssh-client cifs-utils screen dnsutils mlocate