使用 migrationtools 工具來產生 LDIF 格式檔

因為 LDIF 格式有一定的格式,如果完全使用手動來建立,是一件很累的工作,尤其是要處理的帳號很多時,這時可以利用 migrationtools 工具來協助產生 LDIF 格式檔,再視情況做修改。
1. 安裝 migrationtools 工具
# yum install migrationtools
安裝完成之後,可以在 /usr/share/migrationtools 目錄下找到很多以 .sh .pl 的程序檔
[root@localhost:/usr/share/migrationtools]
# ls
migrate_aliases.pl* migrate_all_nis_online.sh* migrate_all_online.sh* migrate_fstab.pl* migrate_netgroup_byuser.pl* migrate_profile.pl* migrate_slapd_conf.pl*
migrate_all_netinfo_offline.sh* migrate_all_nisplus_offline.sh* migrate_automount.pl* migrate_group.pl* migrate_netgroup.pl* migrate_protocols.pl*
migrate_all_netinfo_online.sh* migrate_all_nisplus_online.sh* migrate_base.pl* migrate_hosts.pl* migrate_networks.pl* migrate_rpc.pl*
migrate_all_nis_offline.sh* migrate_all_offline.sh* migrate_common.ph migrate_netgroup_byhost.pl* migrate_passwd.pl* migrate_services.pl* [@more@]2. 修改 /usr/share/migrationtools/migrate_common.ph
# vim /usr/share/migrationtools/migrate_common.ph
修改下面的值
# Default DNS domain
$DEFAULT_MAIL_DOMAIN = ” ilc.edu.tw “;

# Default base
$DEFAULT_BASE = ” dc=ldap,dc=tces.ilc.edu.tw “;

$EXTENDED_SCHEMA = 1;

3. 建立存放 ldif 檔案的目錄
# mkdir /root/ldif

4. 從系統帳號中取出要的資料
# grep t850008 /etc/passwd > /root/ldif/t850008.passwd
# grep ^s0990 /etc/passwd | sort > /root/s0990.passwd
# cat /root/ldif/s0990.passwd | head -2
s0990001:x:1390:505:四愛12林○瑋:/home/s0990/s0990001:/sbin/nologin
s0990002:x:1391:505:四愛13林○豪:/home/s0990/s0990002:/sbin/nologin

5. 從系統群組中取出要的資料
# egrep ‘teacher|s0990’ /etc/group > /root/ldif/group
# cat /root/ldif/group
teacher:x:500:
s0990:x:505:

6. 使用 migrationtools 工具
# cd /usr/share/migrationtools
# ./migrate_base.pl > /root/ldif/base.ldif
# ./migrate_passwd.pl /root/ldif/t850008.passwd > /root/ldif/t850008.ldif
# ./migrate_passwd.pl /root/ldif/s0090.passwd > /root/ldif/s0990.ldif
# ./migrate_group.pl /root/ldif/group > /root/ldif/group.ldif

7. 開始匯入
# service slapd stop
# slapadd -l /root/ldif/base.ldif
The first database does not allow slapadd; using the first available one (2)
_#################### 100.00% eta   none elapsed            none fast!
Closing DB…
# slapadd -l /root/ldif/t850008.ldif
# slapadd -l /root/ldif/s0990.ldif
# slapadd -l /root/ldif/group.ldif

8. 啟動 LDAP Server
# chown -R ldap:ldap /var/lib/ldap
# service slapd start

LDIF – LDAP Server 格式檔

LDIF 是 LDAP Data Interchange Format 的縮寫,是 LDAP Server 明文的格式檔。
底下是一個例子
#存放帳號資料之 Teacher 物件的 DN
dn: ou=Teacher,dc=ldap,dc=tces.ilc.edu.tw
#物件類別為 organizationalUnit 及 top
objectClass: top
objectClass: organizationalUnit
#指定必要屬性 ou 為 Teacher
ou: Teacher

# 後面接的是註解
: 左邊為屬性,右邊為屬性值,: 的右邊要空一格
如果有跨列時,不使用一般使用的倒斜線  來接續上一行,只要在下一行開加一個空格即可!

也因為 LDIF 是採用明文的格式檔,所以可以直接使用 vim 等編輯器來處理,也可以使用 awk / grep / sed 來做大批匯入 /  匯出等處理。

Open LDAP Server 測試

距離上一次摸 LDAP Server 真是有些久了,該忘了也都忘光了,只能靠自己以前的筆記和舊的 LDAP Server 的設定檔,和 Google 搜尋網頁,所以要不斷測試設定檔和匯入 ldif 設定檔,但如果沒有先把舊的資料先清除,直接匯入新的資料,就會出現類似下面的畫面:
# slapadd -v -l /root/ldif/s0990.passwd.ldif_N
The first database does not allow slapadd; using the first available one (2)
=> bdb_tool_entry_put: id2entry_add failed: DB_KEYEXIST: Key/data pair already exists (-30995)
=> bdb_tool_entry_put: txn_aborted! DB_KEYEXIST: Key/data pair already exists (-30995)
slapadd: could not add entry dn=”uid=s0990001,ou=Student,dc=ldap,dc=tces.ilc.edu.tw” (line=1): txn_aborted! DB_KEYEXIST: Key/data pair already exists (-30995)
_                       0.77% eta   none elapsed            none spd 118.5 k/s
Closing DB…[@more@]如果是修改 /etc/openldap/slapd.conf 設定檔
要做下面的處理
# service slapd stop
# rm -rf /etc/openldap/slapd.d/*
# slaptest -f /etc/openldap/slapd.conf -F /etc/openldap/slapd.d
# chown -R ldap:ldap /etc/openldap/slapd.d
# service slapd start

如果要重新匯入全部的資料
# service slapd stop
# rm -rf /var/lib/ldap/*
# cp /usr/share/openldap-servers/DB_CONFIG.example /var/lib/ldap/DB_CONFIG
匯入 LDIF 格式檔後
# chown -R ldap:ldap /var/lib/ldap
# service slapd start
安裝 Open LDAP Server

LDAP(Lightweight Directory Access Protocol) 輕量級的目錄存取協定,運作在 TCP/IP 四曾架構上,跟運作於 OSI 七層的重量級協定 X.500 相比起來,才被稱為輕量級。

1. 安裝套件
# yum install openldap openldap-servers openldap-clients

2. 複製範例檔
# cp /usr/share/openldap-servers/slapd.conf.obsolete /etc/openldap/slapd.conf
# cp /usr/share/openldap-servers/DB_CONFIG.example /var/lib/ldap/DB_CONFIG

3. 設定管理密碼
# slappasswd
New password:
Re-enter new password:
{SSHA}IYAqaRIJsz+xxxx3wDZXe0ZYKyxxxEHzk[@more@]4. 修改設定檔
# vim /etc/openldap/slapd.conf
修改 dc Domain Componet
:%s/dc=my-domain,dc=com/dc=ldap,dc=tces.ilc.edu.tw/g
設定密碼
rootpw         {SSHA}IYAqaRIJsz+xxxx3wDZXe0ZYKyxxxEHzk

5.  安裝 migrationtools 工具
# yum install migrationtools

6. 修改設定檔 /usr/share/migrationtools/migrate_common.ph
# vim /usr/share/migrationtools/migrate_common.ph
# Default DNS domain
$DEFAULT_MAIL_DOMAIN = “ilc.edu.tw”;

# Default base
$DEFAULT_BASE = “dc=ldap,dc=tces.ilc.edu.tw”;

7. 產生新的設定,並修改權限
# mv /etc/openldap/slapd.d /etc/openldap/slapd.d.orig
# mkdir /etc/openldap/slapd.d
# chown -R ldap.ldap /etc/openldap/slapd.d
# chown -R ldap.ldap /var/lib/ldap

8. 測試設定檔
# slaptest -f /etc/openldap/slapd.conf -F /etc/openldap/slapd.d
config file testing succeeded

9. 如果出現下面的錯誤訊息,代表目錄的權限有問題
# service slapd start
/var/lib/ldap/__db.005 is not owned by “ldap”              [警告]
/var/lib/ldap/__db.006 is not owned by “ldap”              [警告]
/var/lib/ldap/__db.002 is not owned by “ldap”              [警告]
/var/lib/ldap/__db.001 is not owned by “ldap”              [警告]
/var/lib/ldap/__db.004 is not owned by “ldap”              [警告]
/var/lib/ldap/__db.003 is not owned by “ldap”              [警告]
/var/lib/ldap/alock is not owned by “ldap”                 [警告]
正在為 slapd 檢查設定檔案:                                [失敗]
ldif_read_file: Permission denied for “/etc/openldap/slapd.d/cn=config.ldif”
slaptest: bad configuration file!

要做下面的權限設定
# chown -R ldap.ldap /etc/openldap/slapd.d
# chown -R ldap.ldap /var/lib/ldap

10. 如果有使用 SELinux 的話,還要做下面的設定
# service slapd start
ls: cannot access /etc/openldap/slapd.d//cn=config/olcDatabase*.ldif: No such file or directory
Starting slapd:                                            [  OK  ]
# restorecon -R /etc/openldap/slapd.d

11. 設定開機時啟動
# chkconfig –level 3 slapd on

12. 設定防火牆
# iptables -A INPUT -p tcp -s 192.168.1.0/24 -m state –state NEW –dport 389 -j ACCEPT

規畫 Open LDAP Server

目前正在規畫將一部分的 Server 做虛擬化,或是重新以新版本的 CentOS 6.x 來重新架設,在 Open LDAP Server 之前的應用主要是和學校的 Moodle 帳號做整合,將學生的帳號做大批建立及匯入。
在新的規畫中,主要是以和 Moodle / Proxy Server / FTP Server / Samba Server 做整合
1. Moodle 部分主要是跟學生的帳號及密碼做整合,在新學期初建立學生帳號時,也一併建立完成,讓學生可以使用單一帳號,使用所有校內提供給學生的服務。
2. Proxy Server 主要是使用 Open LDAP Server 來做後端的使用者認證,通過認證的使用者才可以使用 Proxy Server 對外的服務。
3. FTP Server 主要是使用 ProFTPD / PureFTPD FTP Server 搭配 Open LDAP Server 做使用者的認證。
4. 最後才是 Samba Server 的部分,因為 Samba Server 和 Open LDAP Server 要整合似乎比較麻煩,之前有試過,不容易成功,也覺得很麻煩,所以放到最後面。

架設 NTP Time Server

時間對於 Server 來說是非常重要,舉凡排程、備份,如果時間不對,可能會造成一些問題,所以一般都會在 cron 中排程,自動對時。
底下是每天晚上 12:00 自動對時
# crontab -l
0 0 * * * /usr/sbin/ntpdate -s time.stdtime.gov.tw;/sbin/hwclock -w[@more@]但如果 Server 的數量非常的多,所有的 Server 都要對外對時,比較方便是在內部網路中自行架設 NTP Time Server。
底下是安裝步驟
1. 安裝 ntp 套件
# yum install ntp

2. 修改 /etc/ntp.conf 設定檔
# vim /etc/ntp.conf
加上可以使用這一台 NTP Time Server 的網段
nomodify 用戶端不能更改 NTP Time Server 的時間參數
notrap 不提供 trap 這個遠端事件登錄的功能
# Hosts on local network are less restricted.
restrict 192.168.1.0 mask 255.255.255.0 nomodify notrap

指定要和遠端 NTP Time Server 進行時間同步的 Server,prefer 表示優先使用的主機
server tock.stdtime.gov.tw perfer
server csie.cyut.edu.tw
server watch.stdtime.gov.tw
server time.stdtime.gov.tw
server clock.stdtime.gov.tw

3. 修改 /etc/sysconfig/ntpd,設定 BIOS 的時間也同步調整
# vim /etc/sysconfig/ntpd
# Drop root to id ‘ntp:ntp’ by default.
OPTIONS=”-u ntp:ntp -p /var/run/ntpd.pid -g”
SYNC_HWCLOCK=yes

4. 啟動 NTP Time Server
# service ntpd start
5. 設定開機時啟動
# chkconfig –level 3 ntpd on

6. 檢查是否有正常啟動
# netstat -tulnp | grep 123
udp        0      0 192.168.1.109:123          0.0.0.0:*                               8829/ntpd
udp        0      0 127.0.0.1:123               0.0.0.0:*                               8829/ntpd
udp        0      0 0.0.0.0:123                 0.0.0.0:*                               8829/ntpd
udp        0      0 ::1:123                     :::*                                    8829/ntpd
udp        0      0 :::123                      :::*                                    8829/ntpd

7. 在防火牆中設定
iptables -A INPUT -p UDP -s 192.168.1.0/24 –dport 123 -j ACCEPT

8. 在別台 Server 中做測試
目前時間
# date
一 12月 23 11:45:18 CST 2013

9. 隨便更改一個時間
# date 072816332011
四  7月 28 16:33:00 CST 2011

10. 進行對時
# /usr/sbin/ntpdate -s 192.168.1.109

11. 檢查時間是否正確
# date
一 12月 23 11:47:08 CST 2013

將 Android 手機或平板畫面顯示在 PC 上

有時候在做 Andorid 手機或平板教學時,要大家圍在一起看小小的螢幕,實在有些辛苦,如果能把 Andorid 手機或平板的螢幕,先顯示在 PC 螢幕上,再透過連接電腦的單槍投影機投影到布幕上,就會比較清楚一些,也可以使用螢幕錄影軟體,把操作的步驟或過程錄影下來,做為教學使用。
底下是要使用到的軟體
Java JDK 下載:http://www.oracle.com/technetwork/java/javase/downloads/jdk7-downloads-1880260.html
Android SDK 下載:https://developer.android.com/sdk/index.html
Android Screen Monitor:http://code.google.com/p/android-screen-monitor/
oCam:http://ohsoft.net/product_ocam.php
[@more@]1. 首先先確認作業系統是 32 位元,還是 64 位元的 Windows
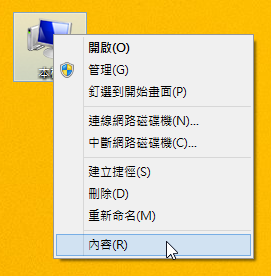
在電腦上按滑鼠右鍵,選擇 內容

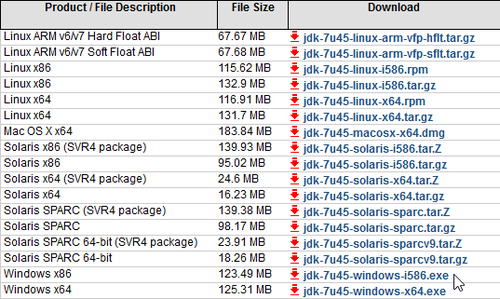
在這裡,使用的是 64 位元的 Windows,所以要下載 64 位元的 Java JDK

視作業系統下載相對應的版本

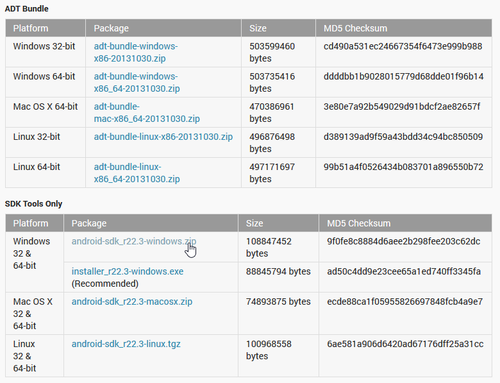
2. 下載 Android SDK,下載其它平台(Download For Other Platforms)

這裡 SDK Tools Only

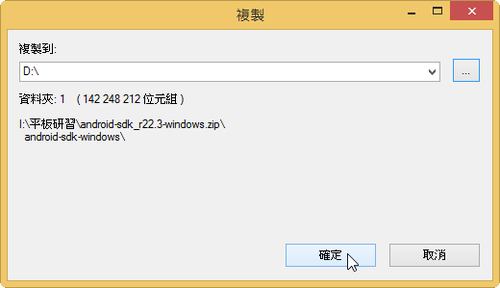
下載下來解壓縮

將 Andorid 設備使用連接線連接到電腦
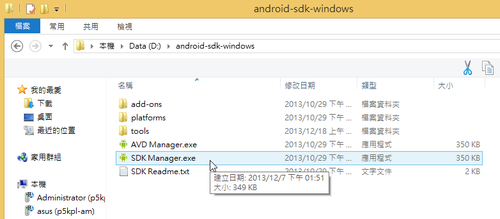
執行目錄中的 SDK Manager.exe

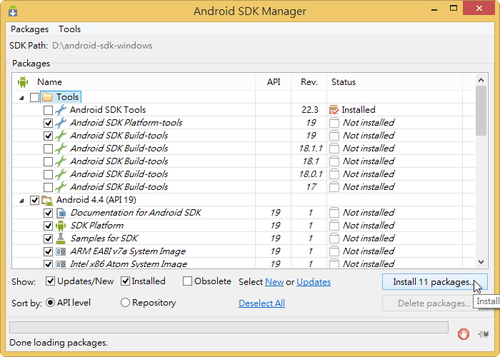
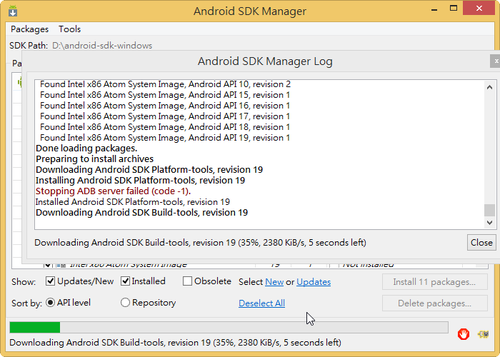
請安所需套件

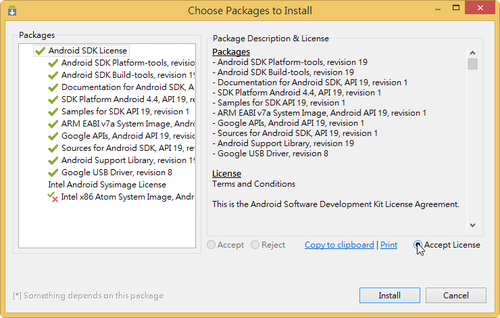
接受軟體授權

下載中

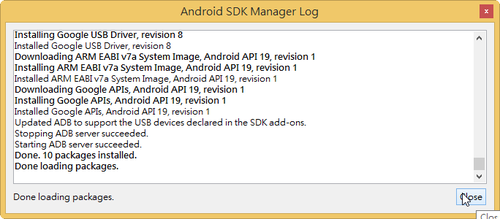
下載完畢

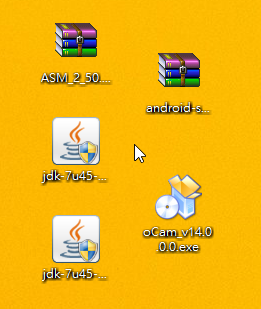
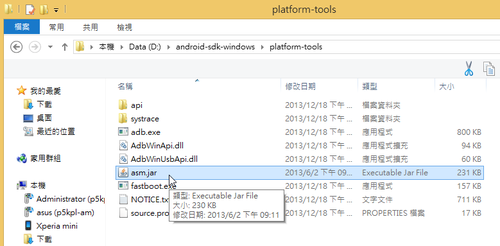
3. 下載 Android Screen Monitor,並且解壓縮到 android-sdk-windowsplatform-tools 目錄之下

將 Andorid 設備設定成 開發人員選項

執行 asm.jar,就會在畫面中看到一個編號,

選擇 OK

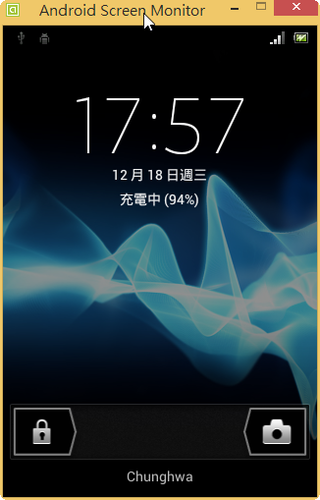
就可以在電腦螢幕上看到 Android 設備的畫面了!

4. 安裝 oCam 螢幕錄影軟體
把錄影的框拉成和畫面一樣大

錄制 即可開始錄影

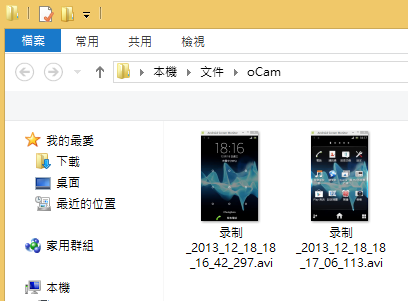
按 打開,即可打開存放錄影檔的資料夾

存放錄影檔的資料夾

這是另外一台 Nexus 7

按滑鼠右鍵,可以放大 / 縮小 / 旋轉 / 抓圖 等功能

在安裝 Windows 時,預設安裝特定輸入法

如果在安裝 Windows 時,可以自動預設安裝自己熟悉的輸入法,安裝完成可以立即使用,應該會方便許多。
底下以 Windows 8.1 64 位元,預設安裝行列輸入法為例

    <settings pass=”oobeSystem”>
        <component name=”Microsoft-Windows-International-Core” processorArchitecture=”amd64″ publicKeyToken=”31bf3856ad364e35″ language=”neutral” versionScope=”nonSxS” xmlns:wcm=”http://schemas.microsoft.com/WMIConfig/2002/State” xmlns:xsi=”http://www.w3.org/2001/XMLSchema-instance”>
            <InputLocale>0404:{E429B25A-E5D3-4D1F-9BE3-0C608477E3A1}{D38EFF65-AA46-4FD5-91A7-67845FB02F5B}</InputLocale>
        </component>
</settings>

[@more@]如果要同時安二種輸入法,就以 ; 做間(同時安裝行列和大易輸入法)

<settings pass=”oobeSystem”>
        <component name=”Microsoft-Windows-International-Core” processorArchitecture=”amd64″ publicKeyToken=”31bf3856ad364e35″ language=”neutral” versionScope=”nonSxS” xmlns:wcm=”http://schemas.microsoft.com/WMIConfig/2002/State” xmlns:xsi=”http://www.w3.org/2001/XMLSchema-instance”>
            <InputLocale>0404:{E429B25A-E5D3-4D1F-9BE3-0C608477E3A1}{D38EFF65-AA46-4FD5-91A7-67845FB02F5B};0404:{E429B25A-E5D3-4D1F-9BE3-0C608477E3A1}{037B2C25-480C-4D7F-B027-D6CA6B69788A}</InputLocale>
        </component>
</settings>

各個輸入法新增的方式:
行列輸入法 0404:{E429B25A-E5D3-4D1F-9BE3-0C608477E3A1}{D38EFF65-AA46-4FD5-91A7-67845FB02F5B}
大易輸入法 0404:{E429B25A-E5D3-4D1F-9BE3-0C608477E3A1}{037B2C25-480C-4D7F-B027-D6CA6B69788A}
倉頡輸入法: 0404:{531FDEBF-9B4C-4A43-A2AA-960E8FCDC732}{4BDF9F03-C7D3-11D4-B2AB-0080C882687E}
微軟新注音:0404:{531FDEBF-9B4C-4A43-A2AA-960E8FCDC732}{B2F9C502-1742-11D4-9790-0080C882687E}
微軟速成輸入法 :0404:{531FDEBF-9B4C-4A43-A2AA-960E8FCDC732}{6024B45F-5C54-11D4-B921-0080C882687E}

至於嘸蝦米輸入法,因為我沒有用,而且也不是系統內定就有的輸入法,所以暫時無法了解,詳細的代號可以使用登錄編輯程式來查
[HKEY_CURRENT_USERSoftwareMicrosoftCTF 下

最後把設定寫入到光碟目錄之下的 autounattend.xml 這一個設定檔,至於這一個檔案的設定方式,則是要利用 Windows ADK 來做設定。

Scientific Linux 6.5


另外一套和 CentOS Linux 一樣的 RedHat Enterprise Linux Clone,在 FTP 站台已經可以下載的到 6.5 版,但官方網站上面,還是沒有正式發布,有興趣的人可以先行下載下來使用。
台灣下載網站:國家高速網路中心 x86 版 / x86_64 版
                             頭城國小 x86 版 / x86_64 版

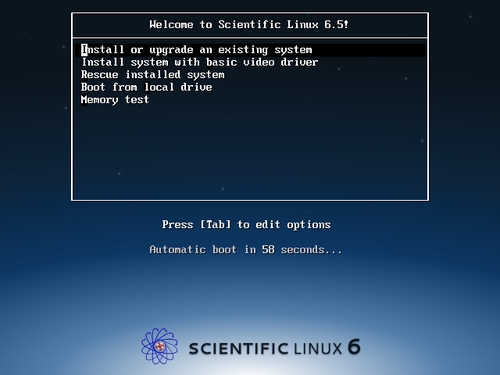
光碟開機畫面
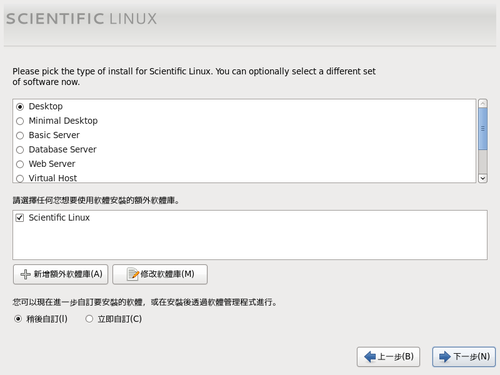
[@more@]套件選擇畫面

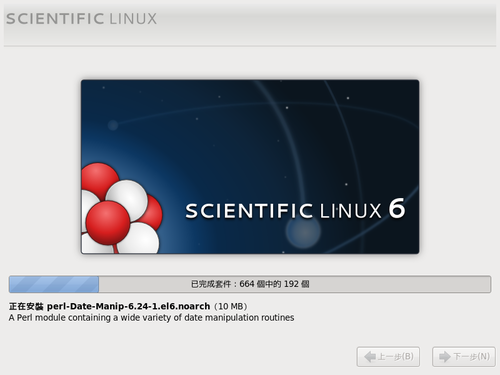
進行安裝

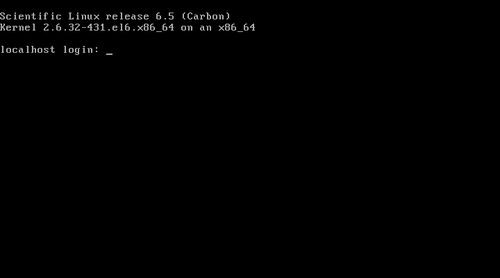
完成安裝,版本代號 Carbon

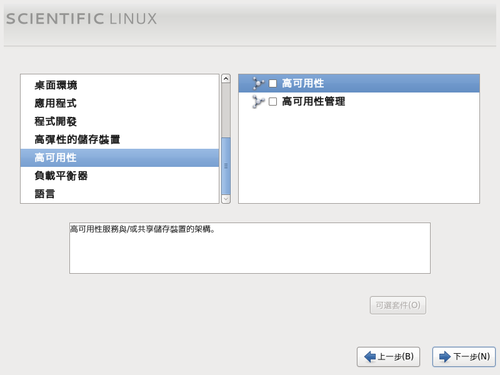
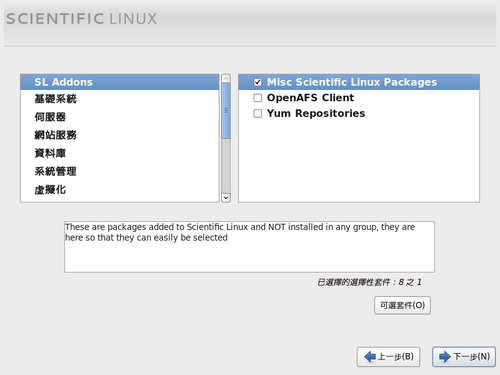
感覺 Scientific Linux 的套件選擇上是比較貼心的,已經在套件庫中包含第三方的套件庫,如果有需要的人,就可以直接安裝,不用安裝完之後,自己再逐一設定。
套件庫中已有一些,像是高可用性和負載平衡的套件可以選擇,如果是使用比較重要的系統,就可以加裝這些套件進行設定。