Proxmox – Clone 功能

1. 在要複製 Clone 的虛擬主機按滑鼠右鍵,選擇 Clone

[@more@]2. 修改設定
    Name: 識別名稱
    Target Storage: 儲存位置
    Format: 儲存格式

3. 產生複製完成的主機

4. 進行開機

5. 修改網路設定(改成不同的 IP)
# vim /etc/rc.conf
ifconfig_em0=”inet 192.168.1.15  netmask 255.255.255.0″
defaultrouter=”192.168.1.254″

FreeBSD 設定

1. 設定網路
# vi /etc/rc.conf
ifconfig_em0=”inet 192.168.1.14  netmask 255.255.255.0″
defaultrouter=”192.168.1.254″

# vi /etc/resolv.conf
nameserver 168.95.1.1
nameserver 140.111.66.1

重新啟動電腦
# shutdown -r now[@more@]2. 更新 pkg 資料庫
# pkg update

3. 安裝 OpenSSH Server
# pkg install openssh-portable
# vi /etc/rc.conf
加入下面一行
openssh_enable=”YES”

4. 安裝 bash
# pkg install bash bash-completion
# chsh
修改
Shell: /usr/local/bin/bash

5. 安裝其它套件
# pkg install nano vim-lite tree p7zip most unzip zip wget colordiff bind-tools screen

Proxmox – 建立 FreeBSD 虛擬主機

1. 先在 Proxmox Server 上建立 FreeBSD 虛擬主機
[@more@]2. 直接到 FreeBSD 官方網站下載虛擬映像檔
https://www.freebsd.org/where.html

# wget ftp://ftp.freebsd.org/pub/FreeBSD/releases/VM-IMAGES/11.0-RELEASE/amd64/Latest/FreeBSD-11.0-RELEASE-amd64.qcow2.xz

3. 解壓縮
# xz -d FreeBSD-11.0-RELEASE-amd64.qcow2.xz

4. 修改 FreeBSD kvm 設定檔 /etc/pve/qemu-server/100.conf
# cat /etc/pve/qemu-server/100.conf
bootdisk: virtio0
cores: 1
ide2: none,media=cdrom
memory: 1536
name: FreeBSD11
net0: e1000=D2:3E:16:76:5B:97,bridge=vmbr0
numa: 0
ostype: other
scsihw: virtio-scsi-pci
smbios1: uuid=2f1a665c-a317-4b16-9646-e674e901f628
sockets: 1
virtio0: Seagate320G:100/FreeBSD-11.0-RELEASE-amd64.qcow2,size=32G

5. 搬移映像檔到指定的位置
# rm -rf /var/lib/vz/images/100/vm-100-disk-1.qcow2
# mv FreeBSD-11.0-RELEASE-amd64.qcow2 /var/lib/vz/images/100

6. 進行開機

7. 預設登入的帳號是 root

8. 設定 root 密碼
# passwd root

讓 FreeBSD 的終端機也多彩多姿另一章

頭城國小資訊組 | 讓 FreeBSD 的終端機也多彩多姿 中雖然設定讓終端機有顏色,可是目錄顏色比較暗,甚至看不太清楚。

在網路上搜尋了一下,找到這些可以參考的文章:
FreeBSD: Enable Colorized ls Output
How To Enable ls Color?
color ls in FreeBSD (in the Bash shell) | Jared Evans Global Microbrand
ls 顏色設定(in Bash shell) – Tsung’s Blog[@more@]設定的方式:
以 bash shell 為例
/etc/profile 加入下面一行
# vim /etc/profile
export LSCOLORS=”gxfxcxdxcxegedabagacad”
alias ls=’ls -GF’

讓設定生效
# source /etc/profile
更改之後

其中 LSCOLORS 參數的設定一直都沒看懂,後來在 Mac 讓終端機 ls 有顏色 « Soda Hau’s Note 上才看懂了!

LSCOLORS 後面一串的意思是,照著順序設定顏色(共 11 項),順序是:
    directory
    symbolic link
    socket
    pipe
    executable
    block special
    character special
    executable with setuid bit set
    executable with setgid bit set
    directory writable to others, with sticky bit
    directory writable to others, without sticky bit

顏色的對應值則是:
    a -> black
    b -> red
    c -> green
    d -> brown
    e -> blue
    f -> magenta
    g -> cyan
    h -> light grey

    A -> bold black, usually shows up as dark grey
    B -> bold red
    C -> bold green
    D -> bold brown, usually shows up as yellow
    E -> bold blue
    F -> bold magenta
    G -> bold cyan
    H -> bold light grey; looks like bright white
    x -> default foreground or background

每個種類的檔案有兩個值,字的顏色和底色。以 LSCOLORS=”gxfxcxdxcxegedabagacad” 來說,
前面的 gx 是設定資料夾顯示的顏色為青色,底色是預設的前景和背景色;
            fx 是 symbolic link 的設定,字是洋紅色,底色是預設的前景和背景色
            cx 是 socket 的設定,字是 green 色,底色是預設的前景和背景色
            dx 是 pipe 的設定,字是 brown 色,底色是預設的前景和背景色
            cx 是 executable 的設定,字是 green 色,底色是預設的前景和背景色
            eg 是 block special 的設定,字是 blue 色,底色是 cyan 色
            ed 是 character special  的設定,字是 blue 色,底色是 brown 色
            ab 是 executable with setuid bit set 的設定,字是 black 色,底色是 red 色
            ag 是 executable with setgid bit set 的設定,字是 black 色,底色是 cyan 色
            ac 是 directory writable to others, with sticky bit 的設定,字是 black 色,底色是 green 色
            ad 是 directory writable to others, without sticky bit 的設定,字是 black色,底色是 brown 色

另外也可以直接由 LSCOLORS Generator 網站上設定,會比較簡單方便!

在 FreeBSD 建立 RAID 5

參考文章:
FreeBSD 9.1 Программный RAID5 | Seclab
OS:FreeBSD 10.3
HDD:
20G*1:FreeBSDSystem(/dev/da0)
20G *3 :RAID (/dev/da1,da2,da3)

1. 磁碟機代號
# sysctl kern.disks
kern.disks: da3 da2 da1 da0 cd0

2. 取得磁碟機相關資訊
# fdisk da1
******* Working on device /dev/da1 *******
parameters extracted from in-core disklabel are:
cylinders=2610 heads=255 sectors/track=63 (16065 blks/cyl)

Figures below won’t work with BIOS for partitions not in cyl 1
parameters to be used for BIOS calculations are:
cylinders=2610 heads=255 sectors/track=63 (16065 blks/cyl)

fdisk: invalid fdisk partition table found
Media sector size is 512
Warning: BIOS sector numbering starts with sector 1
Information from DOS bootblock is:
The data for partition 1 is:
sysid 165 (0xa5),(FreeBSD/NetBSD/386BSD)
start 63, size 41929587 (20473 Meg), flag 80 (active)
beg: cyl 0/ head 1/ sector 1;
end: cyl 561/ head 254/ sector 63
The data for partition 2 is:
<UNUSED>
The data for partition 3 is:
<UNUSED>
The data for partition 4 is:
<UNUSED>[@more@]3. 建立掛載目錄
# mkdir /storage

4. 建立 /etc/gvinum.conf 設定檔
# vim /etc/gvinum.conf
drive raid51 device /dev/da1
drive raid52 device /dev/da2
drive raid53 device /dev/da3
volume raid5
plex org raid5 256k
sd len 20473m drive raid51
sd len 20473m drive raid52
sd len 20473m drive raid53

5. 建立 RAID5
# gvinum create /etc/gvinum.conf

6. 格式化
# newfs -U /dev/gvinum/raid5
/dev/gvinum/raid5: 40946.0MB (83857408 sectors) block size 32768, fragment size 4096
using 66 cylinder groups of 626.09MB, 20035 blks, 80256 inodes.
super-block backups (for fsck_ffs -b #) at:
192, 1282432, 2564672, 3846912, 5129152, 6411392, 7693632, 8975872, 10258112, 11540352,
12822592, 14104832, 15387072, 16669312, 17951552, 19233792, 20516032, 21798272, 23080512,
24362752, 25644992, 26927232, 28209472, 29491712, 30773952, 32056192, 33338432, 34620672,
35902912, 37185152, 38467392, 39749632, 41031872, 42314112, 43596352, 44878592, 46160832,
47443072, 48725312, 50007552, 51289792, 52572032, 53854272, 55136512, 56418752, 57700992,
58983232, 60265472, 61547712, 62829952, 64112192, 65394432, 66676672, 67958912, 69241152,
70523392, 71805632, 73087872, 74370112, 75652352, 76934592, 78216832, 79499072, 80781312,
82063552, 83345792

7. 掛載
# mount /dev/gvinum/raid5 /storage
# df -h
Filesystem Size Used Avail Capacity Mounted on
/dev/da0p2 18G 2.8G 14G 17% /
devfs 1.0K 1.0K 0B 100% /dev
/dev/gvinum/raid5 39G 8.0K 36G 0% /storage

8. 修改 /etc/fstab
# echo /dev/gvinum/raid5 /storage ufs rw 2 2 >> /etc/fstab

9. 開機便啟動 GVinum 服務
修改 /boot/loader.conf 設定檔
# vim /boot/loader.conf
加入下面一行
geom_vinum_load=”YES”

# echo geom_vinum_load=”YES” >> /boot/loader.conf

10. 重新啟動電腦
# reboot

11. RAID5 系統狀態
# gvinum l
3 drives:
D raid51 State: up /dev/da1 A: 6/20479 MB (0%)
D raid52 State: up /dev/da2 A: 6/20479 MB (0%)
D raid53 State: up /dev/da3 A: 6/20479 MB (0%)

1 volume:
V raid5 State: up Plexes: 1 Size: 39 GB

1 plex:
P raid5.p0 R5 State: up Subdisks: 3 Size: 39 GB

3 subdisks:
S raid5.p0.s0 State: up D: raid51 Size: 19 GB
S raid5.p0.s1 State: up D: raid52 Size: 19 GB
S raid5.p0.s2 State: up D: raid53 Size: 19 GB

在 FreeBSD 建立 RAID 0

參考文件:
不自量力 の Weithenn: Geom Vinum-軟體 RAID
18.2. RAID0 – 分散連結(striping)
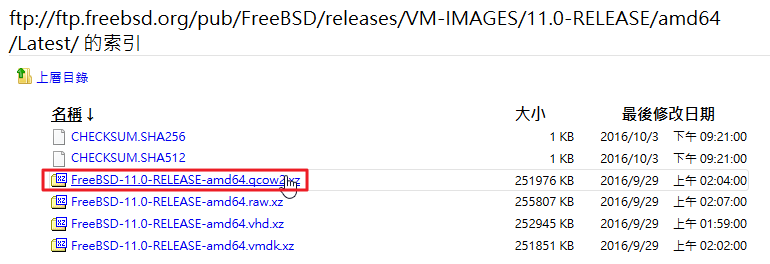
OS:FreeBSD 10.3
HDD:
20G*1:FreeBSDSystem(/dev/da0)
20G *3 :RAID (/dev/da1,da2,da3)

1. 載入 geom_stripe.ko Kernel Module
# kldload geom_stripe.ko

# gstripe load

2. 查看系統目前載入之核心模組
# kldstat
Id Refs Address            Size     Name
 1    6 0xffffffff80200000 17bc680  kernel
 2    1 0xffffffff81a11000 2ba8     uhid.ko
 3    1 0xffffffff81a14000 46d7     geom_stripe.ko[@more@]3. 產生 RAID0 Gvinum Plex
# gstripe label -v myraid0 /dev/da1 /dev/da2 /dev/da3
Metadata value stored on /dev/da1.
Metadata value stored on /dev/da2.
Metadata value stored on /dev/da3.
Done.

4. 修改串連後的 HDD 為 GVinum volume
# bsdlabel -wB /dev/stripe/myraid0

5. 初始化 Gvinum 分割區
# newfs -U /dev/stripe/myraid0a
/dev/stripe/myraid0a: 61439.8MB (125828720 sectors) block size 32768, fragment size 4096
        using 99 cylinder groups of 626.09MB, 20035 blks, 80256 inodes.
        with soft updates
super-block backups (for fsck_ffs -b #) at:
 192, 1282432, 2564672, 3846912, 5129152, 6411392, 7693632, 8975872, 10258112, 11540352, 12822592,
 14104832, 15387072, 16669312, 17951552, 19233792, 20516032, 21798272, 23080512, 24362752, 25644992,
 26927232, 28209472, 29491712, 30773952, 32056192, 33338432, 34620672, 35902912, 37185152, 38467392,
 39749632, 41031872, 42314112, 43596352, 44878592, 46160832, 47443072, 48725312, 50007552, 51289792,
 52572032, 53854272, 55136512, 56418752, 57700992, 58983232, 60265472, 61547712, 62829952, 64112192,
 65394432, 66676672, 67958912, 69241152, 70523392, 71805632, 73087872, 74370112, 75652352, 76934592,
 78216832, 79499072, 80781312, 82063552, 83345792, 84628032, 85910272, 87192512, 88474752, 89756992,
 91039232, 92321472, 93603712, 94885952, 96168192, 97450432, 98732672, 100014912, 101297152, 102579392,
 103861632, 105143872, 106426112, 107708352, 108990592, 110272832, 111555072, 112837312, 114119552,
 115401792, 116684032, 117966272, 119248512, 120530752, 121812992, 123095232, 124377472, 125659712

6. 掛載 Gvinum 分割區
# mount /dev/stripe/myraid0a /mnt

7. 查看磁碟機狀況
# df -h
Filesystem              Size    Used   Avail Capacity  Mounted on
/dev/da0p2               18G    2.8G     14G    17%    /
devfs                   1.0K    1.0K      0B   100%    /dev
/dev/stripe/myraid0a     58G    8.0K     53G     0%    /mnt

8. 修改 /etc/fstab
# vim /etc/fstab
加入下面一行
/dev/stripe/myraid0a     /mnt            ufs     rw      2       2

9. 開機便啟動 GVinum 服務
修改 /boot/loader.conf 設定檔
# vim /boot/loader.conf
加入下面一行
geom_stripe_load=”YES”

10. 查看所建立 Software RAID 狀態
# gstripe status
          Name  Status  Components
stripe/myraid0      UP  da1
                        da2
                        da3

11. 查看 RAID HDD 資訊
# gstripe list
Geom name: myraid0
State: UP
Status: Total=3, Online=3
Type: AUTOMATIC
Stripesize: 65536
ID: 1132737782
Providers:
1. Name: stripe/myraid0
   Mediasize: 64424312832 (60G)
   Sectorsize: 512
   Stripesize: 65536
   Stripeoffset: 0
   Mode: r1w1e2
Consumers:
1. Name: da1
   Mediasize: 21474836480 (20G)
   Sectorsize: 512
   Mode: r1w1e3
   Number: 0
2. Name: da2
   Mediasize: 21474836480 (20G)
   Sectorsize: 512
   Mode: r1w1e3
   Number: 1
3. Name: da3
   Mediasize: 21474836480 (20G)
   Sectorsize: 512
   Mode: r1w1e3
   Number: 2

讓 ProFTPD Server root 可以登入

雖然是不太好的習慣,不過可以用 root 身份登入方便許多。
1. 修改 /usr/local/etc/proftpd.conf 設定檔
# vim /usr/local/etc/proftpd.conf
加入
# 讓 root 身份可以登入
RootLogin on
# 讓 root 可以自由切換到其它目錄
DefaultRoot ~ !wheel

2. 重新啟動 ProFTPD Server
# kill -HUP `ps aux | grep proftpd | grep -v grep | awk ‘{print $2}’`[@more@]3. 測試看看
# lftp -u root 127.0.0.1
密碼:
lftp root@127.0.0.1:~> ls
ls: 登入錯誤: 530 登入不正確
lftp root@127.0.0.1:~>

出現 530 登入不正確

4. 解決方式:
修改 /usr/local/etc/proftpd.conf 設定檔
# vim /usr/local/etc/proftpd.conf
加入
UseFtpUsers off

5. 再次重新啟動 ProFTPD Server
# kill -HUP `ps aux | grep proftpd | grep -v grep | awk ‘{print $2}’`

解決 ProFTPD Server 執行時出錯誤的訊息

在 FreeBSD 上執行時偶爾出現如下的錯誤訊息
# /usr/local/sbin/proftpd
2016-06-26 10:56:58,850 freebsd proftpd[730]: warning: unable to determine IP address of ‘freebsd’
2016-06-26 10:56:58,850 freebsd proftpd[730]: error: no valid servers configured
2016-06-26 10:56:58,850 freebsd proftpd[730]: fatal: error processing configuration file ‘/usr/local/etc/proftpd.conf’

看錯誤訊息似乎和 IP 有關,因為目前是使用 DHCP Server 自動取得 IP[@more@]修改 /usr/local/etc/proftpd.conf 設定檔,加入下面一行
IP 請設定成 Server 目前使用的 IP
# vim /usr/local/etc/proftpd.conf
DefaultAddress                  192.168.1.13

重新啟動後就正常了!
# /usr/local/sbin/proftpd &

在 FreeBSD 上安裝 ProFTPD Server

在 FreeBSD 上安裝和 FreeNAS 及 NAS4Free 相同的 FTP Server。
1. 安裝 ProFTPD Server
# pkg install proftpd

2. 設定檔位置 /usr/local/etc/proftpd.conf
# grep -v -E ‘^#|^$’ /usr/local/etc/proftpd.conf
ServerName                      “ProFTPD Default Installation”
ServerType                      standalone
DefaultServer                   on
ScoreboardFile          /var/run/proftpd/proftpd.scoreboard
Port                            21
UseIPv6                         on
Umask                           022
MaxInstances                    30
CommandBufferSize       512
User                            nobody
Group                           nogroup
DefaultRoot ~ !
AllowOverwrite          on
<Limit SITE_CHMOD>
  DenyAll
</Limit>
  ### We want clients to be able to login with “anonymous” as well as “ftp”
  # UserAlias                   anonymous ftp
  ### Limit the maximum number of anonymous logins
  # MaxClients                  10
  ### We want ‘welcome.msg’ displayed at login, and ‘.message’ displayed
  ### in each newly chdired directory.
  # DisplayLogin                        welcome.msg
  # DisplayFirstChdir           .message
  ### Limit WRITE everywhere in the anonymous chroot
  # <Limit WRITE>
  #   DenyAll
  # </Limit>[@more@]3. 修改 /etc/rc.conf,設定開機時啟動
# vim /etc/rc.conf
加入下面一行
proftpd_enable=”YES”

# echo ‘proftpd_enable=”YES”‘ >> /etc/rc.conf

4. 啟動 ProFTPD Server
# /usr/local/sbin/proftpd &

5. 檢查 FTP Server 是否有正常啟動
# netstat -an | grep *.21
tcp46      0      0 *.21                   *.*                    LISTEN

在 FreeBSD 搜尋檔案

在 Unix-Like 系統搜尋檔案,可以用 find 指令,不過一般人可能會更習慣使用 locate 指令。
# find / -name proftpd.conf
/var/etc/proftpd.conf

但使用 locate 指令時卻出現下面的訊息
# locate proftpd.conf
locate: Command not found.

# locate proftpd.conf
locate: database too small: /var/db/locate.database
Run /usr/libexec/locate.updatedb[@more@]解決方式:
1. 安裝 findutils 套件
# pkg install findutils

更新檔案資訊
# /usr/local/bin/gupdatedb

搜尋檔案
# /usr/local/bin/glocate proftpd.conf
/var/etc/proftpd.conf

2. 改使用 locate.updatedb 指令(使用 root 身份來執行會有 Security Risk)
# /usr/libexec/locate.updatedb
>>> WARNING
>>> Executing updatedb as root.  This WILL reveal all filenames
>>> on your machine to all login users, which is a security risk.
# locate proftpd.conf
/var/etc/proftpd.conf

檔案資料庫
# ls -l /var/db/locate.database
-rw-r–r– 1 nobody wheel 1475158 6月 26 10:31 /var/db/locate.database