參考網站:
Setting Up RAID 10 or 1+0 (Nested) in Linux – Part 6
OS:Debian Linux 5.8.0
HDD:
10G*1 Debian Linux System
20G *4 (/dev/sdb,sdc,sdd,sde)
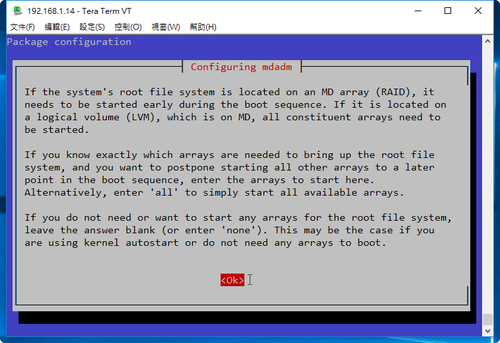
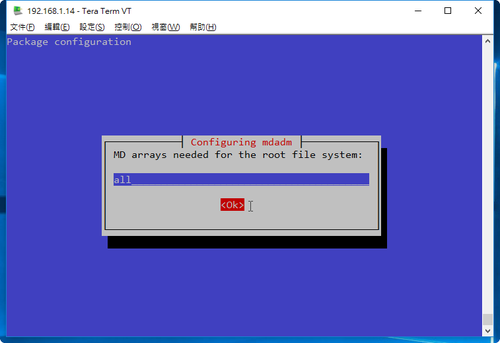
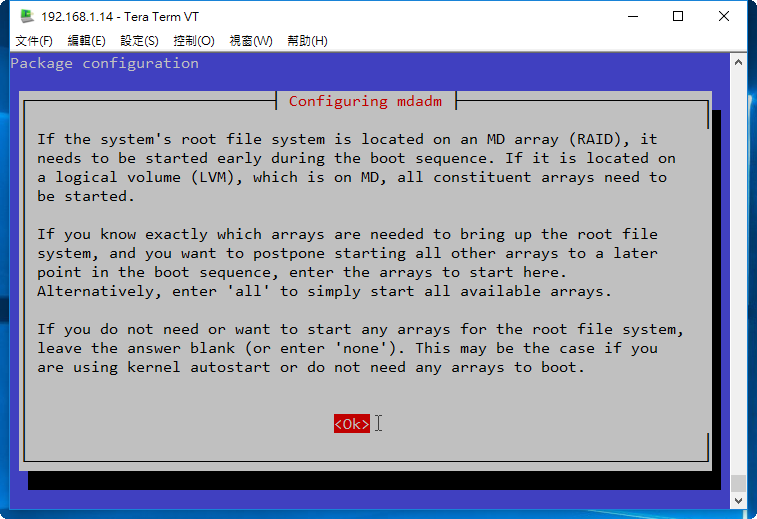
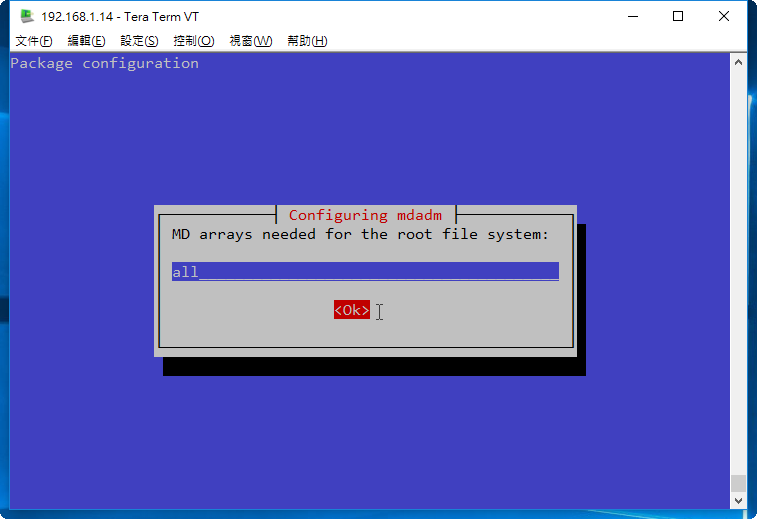
1. 安裝 mdadm 套件
# apt-get install mdadm
 [@more@]2. 查看目前磁碟狀態
# fdisk -l | grep ‘^Disk /dev’
Disk /dev/sdb: 20 GiB, 21474836480 bytes, 41943040 sectors
Disk /dev/sdc: 20 GiB, 21474836480 bytes, 41943040 sectors
Disk /dev/sdd: 20 GiB, 21474836480 bytes, 41943040 sectors
Disk /dev/sda: 10 GiB, 10737418240 bytes, 20971520 sectors
Disk /dev/sde: 20 GiB, 21474836480 bytes, 41943040 sectors
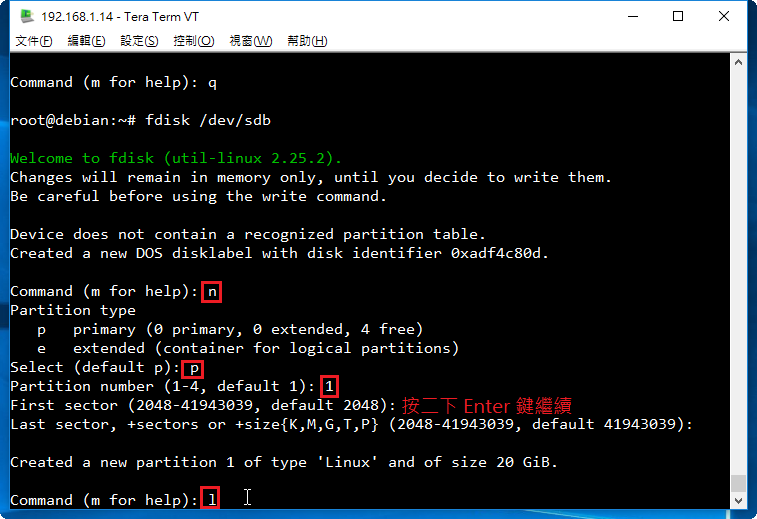
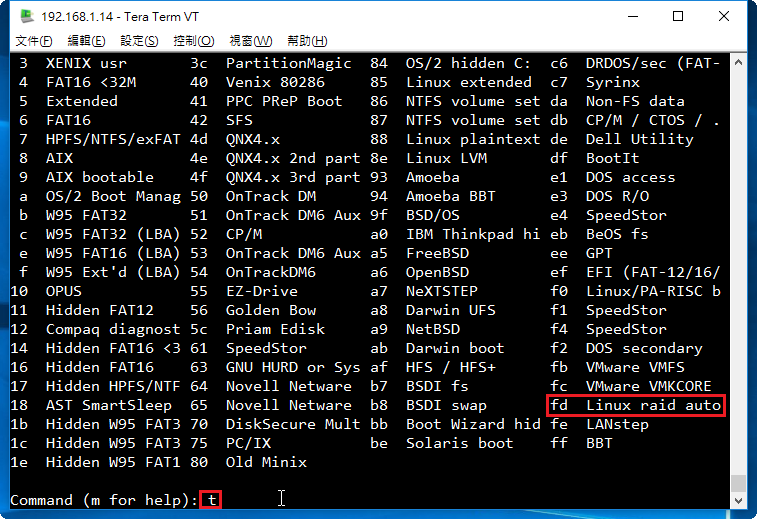
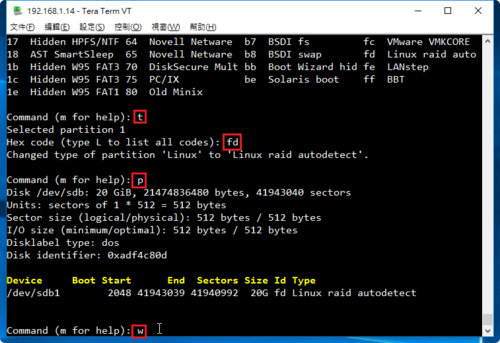
3. 建立磁碟分割區
# fdisk /dev/sdb
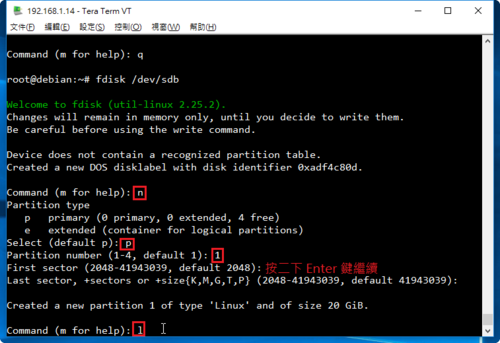
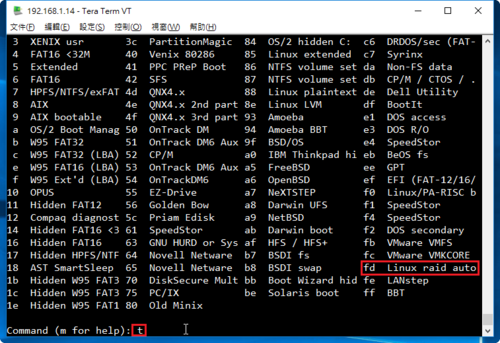
不一定要更改成 fd
重複上面的動作,完成所有的磁碟
# fdisk /dev/sdc
# fdisk /dev/sdd
# fdisk /dev/sde
4. 建立 /dev/md0 磁碟陣列分割區
# mdadm –create –verbose /dev/md0 –level=10 –raid-devices=4 /dev/sd[b-e]1
mdadm: layout defaults to n2
mdadm: layout defaults to n2
mdadm: chunk size defaults to 512K
mdadm: size set to 20954112K
mdadm: Defaulting to version 1.2 metadata
mdadm: array /dev/md0 started.
5. 檢視 RAID 10 狀態
# mdadm -D /dev/md0
/dev/md0:
Version : 1.2
Creation Time : Tue Jun 28 10:26:44 2016
Raid Level : raid10
Array Size : 41908224 (39.97 GiB 42.91 GB)
Used Dev Size : 20954112 (19.98 GiB 21.46 GB)
Raid Devices : 4
Total Devices : 4
Persistence : Superblock is persistent
Update Time : Tue Jun 28 10:27:37 2016
State : clean, resyncing
Active Devices : 4
Working Devices : 4
Failed Devices : 0
Spare Devices : 0
Layout : near=2
Chunk Size : 512K
Resync Status : 27% complete
Name : debian:0 (local to host debian)
UUID : b0c27dbd:1ddbb962:4bc7fbd4:e072ba41
Events : 4
Number Major Minor RaidDevice State
0 8 17 0 active sync set-A /dev/sdb1
1 8 33 1 active sync set-B /dev/sdc1
2 8 49 2 active sync set-A /dev/sdd1
3 8 65 3 active sync set-B /dev/sde1
# cat /proc/mdstat
Personalities : [raid10]
md0 : active raid10 sde1[3] sdd1[2] sdc1[1] sdb1[0]
41908224 blocks super 1.2 512K chunks 2 near-copies [4/4] [UUUU]
[=>……………….] resync = 5.7% (2400000/41908224) finish=3.2min speed=200000K/sec
unused devices: <none>
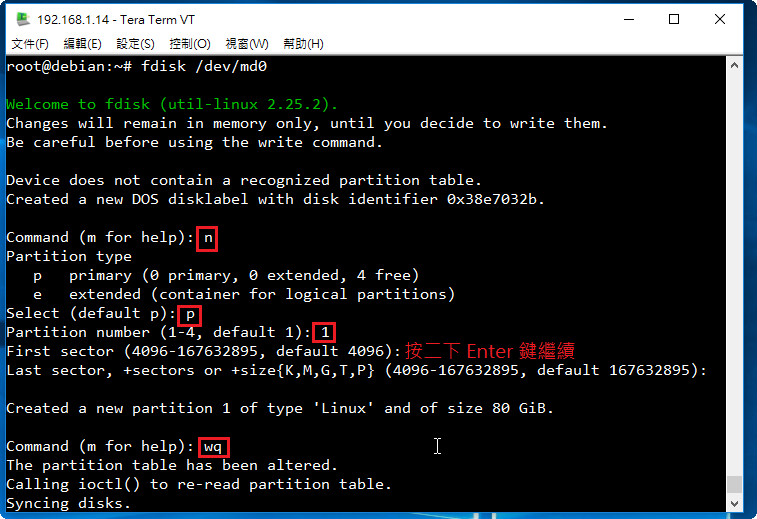
# fdisk -l | grep /dev/md0
Disk /dev/md0: 40 GiB, 42914021376 bytes, 83816448 sectors
6. 格式化分割區
# mkfs -t ext4 /dev/md0
mke2fs 1.42.12 (29-Aug-2014)
Creating filesystem with 10477056 4k blocks and 2621440 inodes
Filesystem UUID: 66244a88-5af2-4ab8-a274-2256649d0413
Superblock backups stored on blocks:
32768, 98304, 163840, 229376, 294912, 819200, 884736, 1605632, 2654208,
4096000, 7962624
Allocating group tables: done
Writing inode tables: done
Creating journal (32768 blocks): done
Writing superblocks and filesystem accounting information: done
7. 建立掛載目錄並掛載
# mkdir /mnt/raid10
# mount /dev/md0 /mnt/raid10
# df -h
Filesystem Size Used Avail Use% Mounted on
/dev/sda1 9.3G 968M 7.9G 11% /
udev 10M 0 10M 0% /dev
tmpfs 400M 5.7M 394M 2% /run
tmpfs 999M 0 999M 0% /dev/shm
tmpfs 5.0M 0 5.0M 0% /run/lock
tmpfs 999M 0 999M 0% /sys/fs/cgroup
/dev/md0 40G 48M 38G 1% /mnt/raid10
8. 查看硬碟的 UUID
# blkid | grep /dev/md0
/dev/md0: UUID=”66244a88-5af2-4ab8-a274-2256649d0413″ TYPE=”ext4″
9. 修改 /etc/fstab
# vim /etc/fstab
加入下面一行
UUID=66244a88-5af2-4ab8-a274-2256649d0413 /mnt/raid10 ext4 errors=remount-ro 0 0
10. 編輯 /etc/mdadm/mdadm.conf 設定檔
# mdadm –detail –scan –verbose >> /etc/mdadm/mdadm.conf
ARRAY /dev/md0 level=raid10 num-devices=4 metadata=1.2 name=debian:0 UUID=b0c27dbd:1ddbb962:4bc7fbd4:e072ba41
devices=/dev/sdb1,/dev/sdc1,/dev/sdd1,/dev/sde1
11. 磁碟分割資訊
# fdisk -l | grep /dev/sd
Disk /dev/sdb: 20 GiB, 21474836480 bytes, 41943040 sectors
/dev/sdb1 2048 41943039 41940992 20G fd Linux raid autodetect
Disk /dev/sda: 10 GiB, 10737418240 bytes, 20971520 sectors
/dev/sda1 * 2048 20013055 20011008 9.6G 83 Linux
/dev/sda2 20015102 20969471 954370 466M 5 Extended
/dev/sda5 20015104 20969471 954368 466M 82 Linux swap / Solaris
Disk /dev/sdc: 20 GiB, 21474836480 bytes, 41943040 sectors
/dev/sdc1 2048 41943039 41940992 20G fd Linux raid autodetect
Disk /dev/sdd: 20 GiB, 21474836480 bytes, 41943040 sectors
/dev/sdd1 2048 41943039 41940992 20G fd Linux raid autodetect
Disk /dev/sde: 20 GiB, 21474836480 bytes, 41943040 sectors
/dev/sde1 2048 41943039 41940992 20G fd Linux raid autodetect
12. 檢查是否有正確掛載
# df -h
Filesystem Size Used Avail Use% Mounted on
/dev/sda1 9.3G 968M 7.9G 11% /
udev 10M 0 10M 0% /dev
tmpfs 400M 5.7M 394M 2% /run
tmpfs 999M 0 999M 0% /dev/shm
tmpfs 5.0M 0 5.0M 0% /run/lock
tmpfs 999M 0 999M 0% /sys/fs/cgroup
/dev/md0 40G 48M 38G 1% /mnt/raid10
另外一種方式:先建立二個 RAID1,再把這二個 RAID1 合併成 RAID 0
1. 建立 RAID 1
# mdadm –create –verbose /dev/md1 –metadata=1.2 –level=1 –raid-devices=2 /dev/sd[b-c]1
mdadm: size set to 20954112K
mdadm: array /dev/md1 started.
# mdadm –create –verbose /dev/md2 –metadata=1.2 –level=1 –raid-devices=2 /dev/sd[d-e]1
mdadm: size set to 20954112K
mdadm: array /dev/md2 started.
# cat /proc/mdstat
Personalities : [raid1]
md2 : active raid1 sde1[1] sdd1[0]
20954112 blocks super 1.2 [2/2] [UU]
md1 : active raid1 sdc1[1] sdb1[0]
20954112 blocks super 1.2 [2/2] [UU]
unused devices: <none>
2. 建立 RAID 0
# mdadm –create –verbose /dev/md0 –level=0 –raid-devices=2 /dev/md1 /dev/md2
mdadm: chunk size defaults to 512K
mdadm: Defaulting to version 1.2 metadata
mdadm: array /dev/md0 started.
# cat /proc/mdstat
Personalities : [raid1] [raid0]
md0 : active raid0 md2[1] md1[0]
41875456 blocks super 1.2 512k chunks
md2 : active raid1 sde1[1] sdd1[0]
20954112 blocks super 1.2 [2/2] [UU]
md1 : active raid1 sdc1[1] sdb1[0]
20954112 blocks super 1.2 [2/2] [UU]
unused devices: <none>
# mdadm -D /dev/md0
/dev/md0:
Version : 1.2
Creation Time : Tue Jun 28 11:15:34 2016
Raid Level : raid0
Array Size : 41875456 (39.94 GiB 42.88 GB)
Raid Devices : 2
Total Devices : 2
Persistence : Superblock is persistent
Update Time : Tue Jun 28 11:15:34 2016
State : clean
Active Devices : 2
Working Devices : 2
Failed Devices : 0
Spare Devices : 0
Chunk Size : 512K
Name : debian:0 (local to host debian)
UUID : a55dec26:5dcd723f:4c8d15d4:2de2d739
Events : 0
Number Major Minor RaidDevice State
0 9 1 0 active sync /dev/md1
1 9 2 1 active sync /dev/md2
3. 編輯 /etc/mdadm/mdadm.conf 設定檔
# mdadm –detail –scan –verbose >> /etc/mdadm/mdadm.conf
ARRAY /dev/md1 level=raid1 num-devices=2 metadata=1.2 name=debian:1 UUID=ceac80b2:8ed44990:9927f0ab:03db076a
devices=/dev/sdb1,/dev/sdc1
ARRAY /dev/md2 level=raid1 num-devices=2 metadata=1.2 name=debian:2 UUID=2bca9bb2:b520fedb:d23a38da:7572c357
devices=/dev/sdd1,/dev/sde1
ARRAY /dev/md0 level=raid0 num-devices=2 metadata=1.2 name=debian:0 UUID=a55dec26:5dcd723f:4c8d15d4:2de2d739
devices=/dev/md1,/dev/md2
4. 格式化分割區
# mkfs -t ext4 /dev/md0
mke2fs 1.42.12 (29-Aug-2014)
Creating filesystem with 10468864 4k blocks and 2621440 inodes
Filesystem UUID: be4f4dc6-3729-4bb0-ab86-9fbd654eb882
Superblock backups stored on blocks:
32768, 98304, 163840, 229376, 294912, 819200, 884736, 1605632, 2654208,
4096000, 7962624
Allocating group tables: done
Writing inode tables: done
Creating journal (32768 blocks): done
Writing superblocks and filesystem accounting information: done
5. 建立掛載目錄並掛載
# mkdir /mnt/raid10
# mount /dev/md0 /mnt/raid10
# df -h
Filesystem Size Used Avail Use% Mounted on
/dev/sda1 9.3G 968M 7.9G 11% /
udev 10M 0 10M 0% /dev
tmpfs 400M 5.7M 394M 2% /run
tmpfs 999M 0 999M 0% /dev/shm
tmpfs 5.0M 0 5.0M 0% /run/lock
tmpfs 999M 0 999M 0% /sys/fs/cgroup
/dev/md0 40G 48M 38G 1% /mnt/raid10
6. 查看硬碟的 UUID
# blkid | grep /dev/md0
/dev/md0: UUID=”be4f4dc6-3729-4bb0-ab86-9fbd654eb882″ TYPE=”ext4″
7. 修改 /etc/fstab
# vim /etc/fstab
加入下面一行
UUID=66244a88-5af2-4ab8-a274-2256649d0413 /mnt/raid10 ext4 errors=remount-ro 0 0

 [@more@]