Cubie Truck 測試 – ArchLinux 使用無線網路

檢查是否有載入無線網路模組
# lsmod | grep bcmdhd
bcmdhd                497637  0

如果沒有的話
# echo bcmdhd >> /etc/modules-load.d/cubie.conf

建立無線網路設定檔
# cp /etc/netctl/examples/wireless-wpa /etc/netctl/wlan0[@more@]

修改設定檔
# egrep -v ‘^#|^$’ /etc/netctl/wlan0
Description=’A simple WPA encrypted wireless connection’
Interface=wlan0
Connection=wireless
Security=wpa
IP=dhcp
ESSID=’CHTN_T07AW’
Key=’123456789′

連上無線網路
# cd /etc/netctl
# netctl start wlan0

查看無線網路
# ifconfig wlan0
wlan0: flags=4163<UP,BROADCAST,RUNNING,MULTICAST>  mtu 1500
        inet 10.0.1.3  netmask 255.255.255.0  broadcast 10.0.1.255
        inet6 fe80::9a3b:16ff:fe1e:67d8  prefixlen 64  scopeid 0x20<link>
        ether 98:3b:11:1e:67:d8  txqueuelen 1000  (Ethernet)
        RX packets 10  bytes 1276 (1.2 KiB)
        RX errors 0  dropped 0  overruns 0  frame 0
        TX packets 30  bytes 3512 (3.4 KiB)
        TX errors 0  dropped 0 overruns 0  carrier 0  collisions 0

先切換有線網路 eth0
# ifconfig eth0 down

測試是否能連上網路
# ping -c 4 140.111.66.1
PING 140.111.66.1 (140.111.66.1) 56(84) bytes of data.
64 bytes from 140.111.66.1: icmp_seq=1 ttl=54 time=37.3 ms
64 bytes from 140.111.66.1: icmp_seq=2 ttl=54 time=349 ms
64 bytes from 140.111.66.1: icmp_seq=3 ttl=54 time=11.5 ms
64 bytes from 140.111.66.1: icmp_seq=4 ttl=54 time=11.9 ms

— 140.111.66.1 ping statistics —
4 packets transmitted, 4 received, 0% packet loss, time 3004ms
rtt min/avg/max/mdev = 11.581/102.619/349.571/142.959 ms

中斷無線網路
# netctl stop waln0

Cubie Truck 測試 – Arch Linux 開機執行的檔案

在 Fedora / CentOS Linux 可以在 /etc/rc.d/rc.local,在 Debian / Ubuntu Linux 可以在 /etc/rc.local 中設定開機要執行的一些功能,如:防火牆的設定之類的功能,不過在 Arch Linux 中似乎沒有這一個檔案的存在,但可以用替代的方式,達到這種功能。
參考網頁:
ArchLinux Systemd 增加rc-local自运行 – 羽毛の家
arch linux – systemd does not run /etc/rc.local? – Super User
Install Arch Linux on Cubietruck (Cubieboard 3) | Tom’s blog

方法一:
# vim /usr/lib/systemd/system/rc-local.service
[Unit]
Description=/etc/rc.local Compatibility
ConditionPathExists=/etc/rc.local
[Service]
Type=forking
ExecStart=/etc/rc.local
TimeoutSec=0
StandardOutput=tty
RemainAfterExit=yes
SysVStartPriority=99
[Install]
WantedBy=multi-user.target[@more@]開機時啟動 rc.local 此項功能
# systemctl enable rc-local.service
ln -s ‘/usr/lib/systemd/system/rc-local.service’ ‘/etc/systemd/system/multi-user.target.wants/rc-local.service’

建立 /etc/rc.local
關閉 Cubie Truck 上的 LED 燈號
# vim /etc/rc.local
#!/bin/sh
echo 0 > /sys/class/leds/blue:ph21:led1/brightness
echo 0 > /sys/class/leds/orange:ph20:led2/brightness
echo 0 > /sys/class/leds/white:ph11:led3/brightness
echo 0 > /sys/class/leds/green:ph07:led4/brightness

更改檔案執行權限
# chmod +x /etc/rc.local

方法二:
# vim /usr/bin/cubietruck_leds_off.sh
#!/bin/sh
echo 0 > /sys/class/leds/blue:ph21:led1/brightness
echo 0 > /sys/class/leds/orange:ph20:led2/brightness
echo 0 > /sys/class/leds/white:ph11:led3/brightness
echo 0 > /sys/class/leds/green:ph07:led4/brightness

更改檔案執行權限
# chmod +x /usr/bin/cubietruck_leds_off.sh

# vim /etc/systemd/system/cubietruck_leds_off.service
[Unit]
Description=Disable the LEDs of Cubietruck
[Service]
ExecStart=/usr/bin/cubietruck_leds_off.sh
[Install]
WantedBy=multi-user.target

啟動 cubietruck_leds_off 功能
# systemctl start cubietruck_leds_off

設定開機時啟動
# systemctl enable cubietruck_leds_off
ln -s ‘/etc/systemd/system/cubietruck_leds_off.service’ ‘/etc/systemd/system/multi-user.target.wants/cubietruck_leds_off.service’

Cubie Truck 測試 – 安裝 Arch Linux

下載網址
http://dl.cubieboard.org/software/a20-cubietruck/archlinux/ct-arch-v2/

參考網站:
Install Arch Linux on Cubietruck (Cubieboard 3) | Tom’s blog
http://www.fanninger.at/thomas/blog/2014/05/install-arch-linux-on-cubietruck-cubieboard-3/

預設登入的帳號及密碼:root / root[@more@]更改 root 密碼
# passwd
Enter new UNIX password:
Retype new UNIX password:
passwd: password updated successfully

Nand Flash 分割狀態
# nand-part
check partition table copy 0: mbr: version 0x00000200, magic softw411
magic softw411 is not softw311
check partition table copy 1: mbr: version 0x00000000, magic
magic          is not softw311
check partition table copy 2: mbr: version 0x00000000, magic
magic          is not softw311
check partition table copy 3: mbr: version 0x00000000, magic
magic          is not softw311
all partition tables are bad!
check partition table copy 0: mbr: version 0x00000200, magic softw411
OK
check partition table copy 1: mbr: version 0x00000200, magic softw411
OK
check partition table copy 2: mbr: version 0x00000200, magic softw411
OK
check partition table copy 3: mbr: version 0x00000200, magic softw411
OK
mbr: version 0x00000200, magic softw411
3 partitions
partition  1: class =         DISK, name =   bootloader, partition start =    32768, partition size =   131072 user_type=0
partition  2: class =         DISK, name =       rootfs, partition start =   163840, partition size =  8388608 user_type=0
partition  3: class =         DISK, name =        UDISK, partition start =  8552448, partition size = 22380544 user_type=0

擴展 root 分割區
# nand-part -f a20 /dev/nand 32768 ‘boot 131072’ ‘rootfs 30769152’

完成之後,重新啟動電腦
# reboot

原本分割區
# df -h
Filesystem      Size  Used Avail Use% Mounted on
/dev/root       4.0G  1.1G  2.8G  28% /
devtmpfs        888M     0  888M   0% /dev
tmpfs           985M     0  985M   0% /dev/shm
tmpfs           985M  368K  984M   1% /run
tmpfs           985M     0  985M   0% /sys/fs/cgroup
tmpfs           985M     0  985M   0% /tmp

重新設定 /dev/nandb 分割區大小
# resize2fs /dev/nandb
resize2fs 1.42.8 (20-Jun-2013)
Filesystem at /dev/nandb is mounted on /; on-line resizing required
old_desc_blocks = 1, new_desc_blocks = 1
The filesystem on /dev/nandb is now 3870720 blocks long.

擴展之後的分割區
# df -h
Filesystem      Size  Used Avail Use% Mounted on
/dev/root        15G  1.1G   13G   8% /
devtmpfs        888M     0  888M   0% /dev
tmpfs           985M     0  985M   0% /dev/shm
tmpfs           985M  368K  984M   1% /run
tmpfs           985M     0  985M   0% /sys/fs/cgroup
tmpfs           985M     0  985M   0% /tmp

更改時區設定
# date
Sun Oct 12 08:52:43 MDT 2014

刪除舊有設定
# rm -rf /etc/localtime

設定成 Asis/Taipei
# timedatectl set-timezone Asia/Taipei

# date
Sun Oct 12 22:53:21 CST 2014

更換成台灣的 Server
# sed -i ‘s/^Server/#Server/’ /etc/pacman.d/mirrorlist
# sed -i ’54s/# Server/Server/g’ /etc/pacman.d/mirrorlist

進行套件庫更新
# pacman -Syy
:: Synchronizing package databases…
 core                     205.1 KiB  2.95M/s 00:00 [#####################] 100%
 extra                      2.2 MiB  5.12M/s 00:00 [#####################] 100%
 community                  2.4 MiB  4.51M/s 00:01 [#####################] 100%
 alarm                     66.6 KiB  2.50M/s 00:00 [#####################] 100%
 aur                       60.5 KiB  4.22M/s 00:00 [#####################] 100%
 
 設定中文化環境,加入 en_US.UTF-8 和 zh-TW.UTF-8
# sed -i ‘s/#en_US.UTF-8/en_US.UTF-8/’ /etc/locale.gen
# sed -i ‘s/#zh_TW.UTF-8/zh_TW.UTF-8/’ /etc/locale.gen

產生 locale.gen 內指定的語系
locale-gen
Generating locales…
  en_US.UTF-8… done
  zh_TW.UTF-8… done
Generation complete.

設定預設語系
# echo ‘LANG=”en_US.UTF-8″‘ > /etc/locale.conf

檢視設定
# grep -v ^# /etc/locale.gen
en_US.UTF-8 UTF-8
zh_TW.UTF-8 UTF-8

更新已安裝的套件
# pacman -Syu

安裝所須套件(視須求)
# pacman -S vim mlocate dnsutils

(2/2) installing wget                                                                                                                          [#######################################################################################] 100%
warning: directory permissions differ on /usr/
filesystem: 775  package: 755

Cubie Truck 測試 – 放棄使用 Ubuntu 14.04

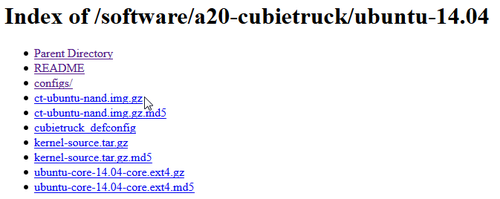
原本看到在 Cubie Truck 下載區有 Ubuntu 14.04 非常高興,馬上下載下來使用!
下載網址:http://dl.cubieboard.org/software/a20-cubietruck/ubuntu-14.04/

預設登入的帳號及密碼:root / cubie
不過開機完成後,發現進入的是文字介面,這也還好,反正可以透過網路加裝其它套件,然後發現竟然連 eth0 也沒抓到,這真的是給 Cubie Truck 用的版本嗎?

Cubie Truck 測試 – Ubuntu Desktop 中文化

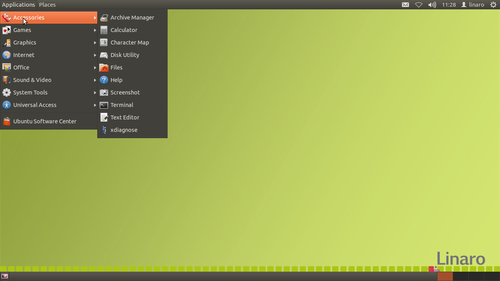
預設的 Ubuntu Desktop 是英文版的介面

底下是中文化的過程
[@more@]$ sudo locale-gen zh_TW.UTF-8
Generating locales…
  zh_TW.UTF-8… done
Generation complete.
$ sudo update-locale LANG=zh_TW.UTF-8
$ sudo update-locale LANGUAGE=zh_TW.UTF-8

安裝中文語系及中文字形
$ sudo apt-get install fonts-arphic-uming ttf-arphic-ukai language-pack-zh-hant firefox-locale-zh-hant poppler-data language-pack-gnome-zh-hant cmap-adobe-cns1

安裝中文輸入法 gcin
$ sudo apt-get install gcin

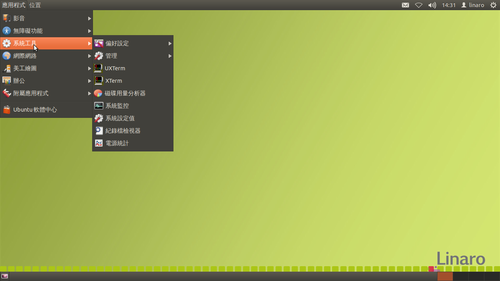
重新登出登入後,介面就中文的了!

但 gcin 的圖示無法出現在工作列上,參考下面的連結
http://www.ubuntu-tw.org/modules/newbb/viewtopic.php?post_id=217464#forumpost217464

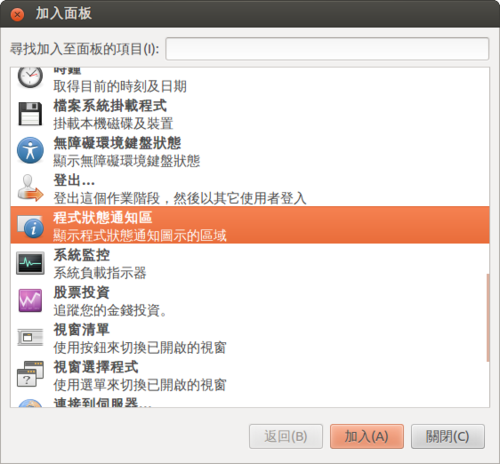
在上面的狀態列上按著「Win」+「Alt」再加上「滑鼠右鍵」,
接著按下「加入面板」就會跳出加入面板的視窗,
這時向下找到「程式狀態通知區」後選擇它並加入,
這樣就會看到 gcin 狀態列了!

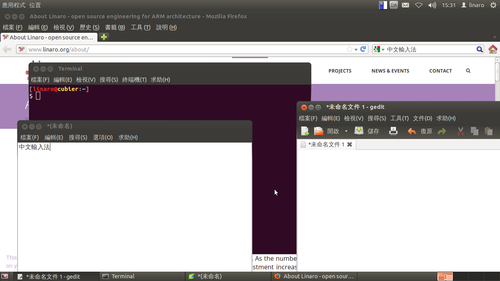
但出現圖示之後,發現並不是所有的程式都能使用,試了幾個程式,發現 firefox / leafpad 可以,但 terminal / gedit 則不行,這是…..

所以決定先放棄這一個版本。

Cubie Truck 測試 – 擴展 Ubuntu root 分割區

因為 Ubuntu root 分割區的大小實在有些小,稍微安裝一下套件就快滿了!
$ df -h
Filesystem      Size  Used Avail Use% Mounted on
/dev/root       1.8G  1.5G  199M  89% /
devtmpfs        889M  4.0K  889M   1% /dev
none            197M  552K  197M   1% /run
none            5.0M     0  5.0M   0% /run/lock
none            985M  172K  985M   1% /run/shm

但在 Ubuntu Desktop 似乎沒有提供 nand-part 這一個指令
$ sudo nand-part
sudo: nand-part: command not found
[@more@]安裝編譯 nand-part 所需的套件
$ sudo apt-get install libusb-1.0-0-dev

下載 sunxi-tools
$ git clone https://github.com/linux-sunxi/sunxi-tools
Cloning into ‘sunxi-tools’…
remote: Counting objects: 1075, done.
remote: Total 1075 (delta 0), reused 0 (delta 0)
Receiving objects: 100% (1075/1075), 368.20 KiB | 156 KiB/s, done.
Resolving deltas: 100% (577/577), done.

切換目錄
$ cd sunxi-tools

進行編譯
$ make

將 nand-part 複製到 /sbin 目錄
$ sudo cp nand-part /sbin

列出 Nand Flash 的分割區狀態
$ sudo nand-part -f a20 /dev/nand
check partition table copy 0: mbr: version 0x00000200, magic softw411
OK
check partition table copy 1: mbr: version 0x00000200, magic softw411
OK
check partition table copy 2: mbr: version 0x00000200, magic softw411
OK
check partition table copy 3: mbr: version 0x00000200, magic softw411
OK
mbr: version 0x00000200, magic softw411
3 partitions
partition  1: class =         DISK, name =   bootloader, partition start =    32768, partition size =   131072 user_type=0
partition  2: class =         DISK, name =       rootfs, partition start =   163840, partition size =  6291456 user_type=0
partition  3: class =         DISK, name =        UDISK, partition start =  6455296, partition size = 24477696 user_type=0

綠色是分割區的名字,粉紅色是分割區的起始位置,橘色是分割區的大小

UDISK 是還未用到的區域,也就是 root 分割區要擴展的區域
擴展之後 /dev/nandb 的大小 6291456+24477696 = 30769152

進行重新分割
$ sudo nand-part -f a20 /dev/nand 32768 ‘boot 131072’ ‘rootfs 30769152’
check partition table copy 0: mbr: version 0x00000200, magic softw411
OK
check partition table copy 1: mbr: version 0x00000200, magic softw411
OK
check partition table copy 2: mbr: version 0x00000200, magic softw411
OK
check partition table copy 3: mbr: version 0x00000200, magic softw411
OK
mbr: version 0x00000200, magic softw411
3 partitions
partition  1: class =         DISK, name =   bootloader, partition start =    32768, partition size =   131072 user_type=0
partition  2: class =         DISK, name =       rootfs, partition start =   163840, partition size =  6291456 user_type=0
partition  3: class =         DISK, name =        UDISK, partition start =  6455296, partition size = 24477696 user_type=0
check partition table copy 0: mbr: version 0x00000200, magic softw411
check partition table copy 1: mbr: version 0x00000200, magic softw411
check partition table copy 2: mbr: version 0x00000200, magic softw411
check partition table copy 3: mbr: version 0x00000200, magic softw411

ready to write new partition tables:
mbr: version 0x00000200, magic softw411
2 partitions
partition  1: class =         DISK, name =         boot, partition start =    32768, partition size =   131072 user_type=0
partition  2: class =         DISK, name =       rootfs, partition start =   163840, partition size = 30769152 user_type=0

write new partition tables? (Y/N)
y
Failed rereading partition table: Device or resource busy

verifying new partition tables:
check partition table copy 0: mbr: version 0x00000200, magic softw411
OK
check partition table copy 1: mbr: version 0x00000200, magic softw411
OK
check partition table copy 2: mbr: version 0x00000200, magic softw411
OK
check partition table copy 3: mbr: version 0x00000200, magic softw411
OK
mbr: version 0x00000200, magic softw411
2 partitions
partition  1: class =         DISK, name =         boot, partition start =    32768, partition size =   131072 user_type=0
partition  2: class =         DISK, name =       rootfs, partition start =   163840, partition size = 30769152 user_type=0
rereading partition table… returned -1

完成之後,重新啟動電腦
$ sudo reboot

原本的分割區大小
$ df -h
Filesystem      Size  Used Avail Use% Mounted on
/dev/root       1.8G  1.5G  199M  89% /
devtmpfs        889M  4.0K  889M   1% /dev
none            197M  552K  197M   1% /run
none            5.0M     0  5.0M   0% /run/lock
none            985M  172K  985M   1% /run/shm

重新設定 /dev/nandb 分割區大小
$ sudo resize2fs /dev/nandb
resize2fs 1.42 (29-Nov-2011)
Filesystem at /dev/nandb is mounted on /; on-line resizing required
old_desc_blocks = 1, new_desc_blocks = 1
The filesystem on /dev/nandb is now 3870720 blocks long.

之後的大小
$ df -h
Filesystem      Size  Used Avail Use% Mounted on
/dev/root        15G  1.6G   13G  12% /
devtmpfs        889M  4.0K  889M   1% /dev
none            197M  536K  197M   1% /run
none            5.0M     0  5.0M   0% /run/lock
none            985M   76K  985M   1% /run/shm

列出 Nand Flash 目前的分割區狀態
$ sudo nand-part -f a20 /dev/nand
check partition table copy 0: mbr: version 0x00000200, magic softw411
OK
check partition table copy 1: mbr: version 0x00000200, magic softw411
OK
check partition table copy 2: mbr: version 0x00000200, magic softw411
OK
check partition table copy 3: mbr: version 0x00000200, magic softw411
OK
mbr: version 0x00000200, magic softw411
2 partitions
partition  1: class =         DISK, name =         boot, partition start =    32768, partition size =   131072 user_type=0
partition  2: class =         DISK, name =       rootfs, partition start =   163840, partition size = 30769152 user_type=0

不過重新分割的過程中,出現 resize2fs: Permission denied to resize filesystem 的錯誤訊息,重試了很多次還是無法解決,後來重新燒錄 Nash Flash Image,再做一次就正常了!
$ sudo resize2fs /dev/nandb
resize2fs 1.42 (29-Nov-2011)
Filesystem at /dev/nandb is mounted on /; on-line resizing required
old_desc_blocks = 1, new_desc_blocks = 1
resize2fs: Permission denied to resize filesystem

Cubie Truck 測試 – 改用 Ubuntu Desktop

因為 Lubuntu 的版本比較舊所以改用比較新的版本 Ubuntu Desktop
下載位置:
http://dl.cubieboard.org/software/a20-cubietruck/ubuntu-desktop/

預設登入的帳號及密碼:linaro / linaro
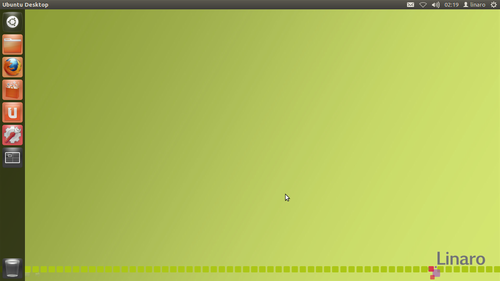
登入預設採用的是 Unity 介面
[@more@]Ubuntu Desktop 所採用的是 12.04 的版本,因為 Precise 屬於 LTS 的版本,所以還可以接受
CubieTruck 版本是 12.11 版本

$ sudo lsb_release -a
No LSB modules are available.
Distributor ID:    Linaro
Description:    Linaro 12.11
Release:    12.11
Codename:    precise

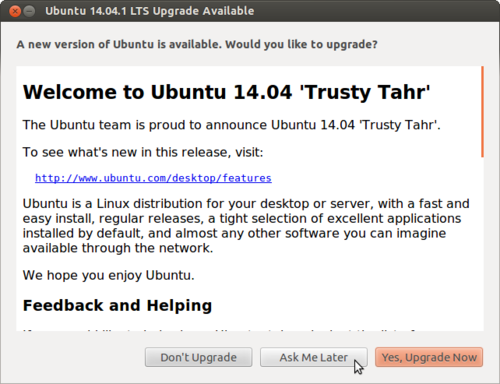
出現可以升級的訊息,但這裡先不升級,因為升級可能會面臨空間不足,或是其它的問題

先刪除一些個人比較不常用的套件,移除的套件純屬個人習慣
移除 ibus 輸入法架構
$ sudo apt-get remove –purge ibus ibus-gtk ibus-gtk3 ibus-pinyin ibus-pinyin-db-android ibus-pinyin-db-open-phrase libibus-1.0-0 python-ibus pinyin-database ibus-table libibus-1.0-0

移除 brasero 燒錄軟體
$ sudo apt-get remove –purge brasero brasero-cdrkit brasero-common libbrasero-media3-1

移除 empathy
$ sudo apt-get remove –purge empathy empathy-common nautilus-sendto-empathy

移除 gwibber
$ sudo apt-get remove –purge gwibber gwibber-service gwibber-service-facebook gwibber-service-identica gwibber-service-twitter libgwibber-gtk2 libgwibber2

移除 thunderbird
$ sudo apt-get remove –purge thunderbird thunderbird-globalmenu thunderbird-gnome-support

移除 transmission
$ sudo apt-get remove –purge transmission-gtk transmission-common

移除 simple-scan
$ sudo apt-get remove –purge simple-scan

移除遊戲
$ sudo apt-get remove –purge aisleriot gnome-games-data gnome-sudoku gnomine mahjongg

把用不到的套件一併清除
$ sudo apt-get autoremove

安裝 Ubuntu Desktop 傳統介面,因為不習慣使用新的介面,並不是 Unity 新的介面有什麼不好,就像 Windows 8 / 8.1 把開始功能表移除一樣
$ sudo apt-get install gnome-session-fallback

改成傳統介面

Cubie Truck 測試 – 安裝 Samba Server

安裝方式:
$ sudo apt-get install samba tdb-tools

修改設定檔 /etc/samba/smb.conf
$ grep -E -v ‘^$|^#|^;’ /etc/samba/smb.conf
[@more@]
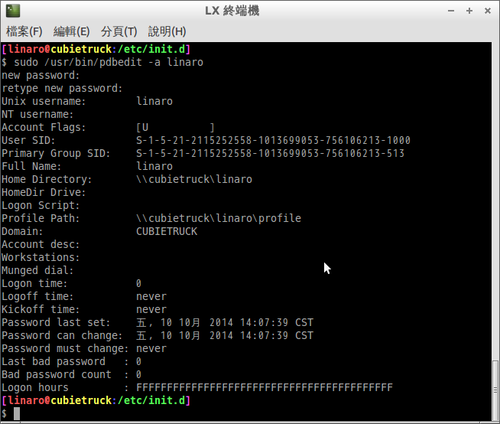
建立使用者的 Samba 帳號及密碼
$ sudo /usr/bin/pdbedit -a linaro

啟動 Samba Server
$ sudo /etc/init.d/nmbd start
$ sudo /etc/init.d/smbd start

在 Windows 7 上測試
在檔案總管上方列輸入 IPUsername

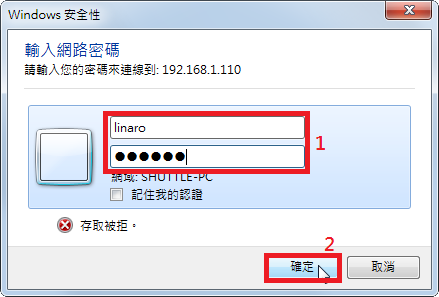
輸入帳號及密碼

應該可以瀏覽使用者的家目錄

Cubie Truck – 成為無線 AP 之二

因為之前的做法是無線網路連線時,不用輸入金鑰,任何人都可以連線,存在安全性上的問題,所以在這一篇做修正。
參考網站: 
Cubieboard 开箱和入门 | Name5566 
如何使用樹莓派變成無線熱點 [Raspberry Pi become a WIFI(wireless) AP] 
吉瓦小棧: 三月 2013 

編碼後的密碼
# wpa_passphrase “CubieTruck” 123456789 | grep -v ‘#psk’ | grep psk | awk -F’=’ ‘{print $2}’
ee07bee15c9c33bf7bcc53d84aac17e2b83f82476f96e32efcd03d716d99a4d2

修改 /etc/hostapd/hostapd.conf 設定檔
可以使用 
wpa_psk=ee07bee15c9c33bf7bcc53d84aac17e2b83f82476f96e32efcd03d716d99a4d2

wpa_passphrase=123456789
# cat /etc/hostapd/hostapd.conf
interface=wlan0
driver=nl80211
ssid=CubieTruck
channel=11
hw_mode=g
macaddr_acl=0
auth_algs=1
ignore_broadcast_ssid=0
wpa=2
wpa_psk=ee07bee15c9c33bf7bcc53d84aac17e2b83f82476f96e32efcd03d716d99a4d2
wpa_key_mgmt=WPA-PSK
rsn_pairwise=CCMP[@more@]但在使用 Lubuntu 內建的 hostapd 套件時
執行之後,使用者連線之後會出現許多錯誤訊息

# hostapd /etc/hostapd/hostapd.conf
Configuration file: /etc/hostapd/hostapd.conf
Failed to create interface mon.wlan0: -95 (Operation not supported)
Using interface wlan0 with hwaddr 02:1a:11:f5:42:57 and ssid ‘CubieTruck’
wlan0: STA 74:e5:43:d6:9d:91 IEEE 802.11: associated
Could not set station 74:e5:43:d6:9d:91 flags for kernel driver (errno=11).
i802_send_eapol – packet len: 131 – failed: 11 (Resource temporarily unavailable)
WPA: wpa_sm_step() called recursively
Could not set station 74:e5:43:d6:9d:91 flags for kernel driver (errno=11).
wlan0: STA 74:e5:43:d6:9d:91 IEEE 802.11: disassociated
Could not set station 74:e5:43:d6:9d:91 flags for kernel driver (errno=11).

在網路上搜尋的結論是,Cubie Truck Lubuntu 內建的 hostapd 版本過舊,不支援 wpa 的方式連線

解決方式:
移除原先安裝的 hostapd
# apt-get remove hostapd

下載已經編譯好的版本
# wget https://github.com/igorpecovnik/Cubietruck-Debian/raw/master/bin/hostapd21.tgz

解壓縮
# tar xvzf hostapd21.tgz

複製解壓縮完成的檔案到 /usr/sbin
# cp hostapd hostapd_cli /usr/sbin

檢查版本
# hostapd -v
hostapd v2.1
User space daemon for IEEE 802.11 AP management,
IEEE 802.1X/WPA/WPA2/EAP/RADIUS Authenticator
Copyright (c) 2002-2014, Jouni Malinen <j@w1.fi> and contributors

再執行一次,使用者連線時便不會出現錯誤訊息
# hostapd /etc/hostapd/hostapd.conf
Configuration file: /etc/hostapd/hostapd.conf
Using interface wlan0 with hwaddr 02:1a:11:f7:2e:23 and ssid “CubieTruck”
wlan0: interface state UNINITIALIZED->ENABLED
wlan0: AP-ENABLED 
wlan0: STA 74:e5:43:d6:9d:91 IEEE 802.11: associated
wlan0: AP-STA-CONNECTED 74:e5:43:d6:9d:91
wlan0: STA 74:e5:43:d6:9d:91 RADIUS: starting accounting session 54369C0D-00000000
wlan0: STA 74:e5:43:d6:9d:91 WPA: pairwise key handshake completed (RSN)
wlan0: STA 74:e5:43:d6:9d:91 IEEE 802.11: disassociated
wlan0: AP-STA-DISCONNECTED 74:e5:43:d6:9d:91
wlan0: STA 74:e5:43:d6:9d:91 IEEE 802.11: associated
wlan0: AP-STA-CONNECTED 74:e5:43:d6:9d:91
wlan0: STA 74:e5:43:d6:9d:91 RADIUS: starting accounting session 54369C0D-00000001

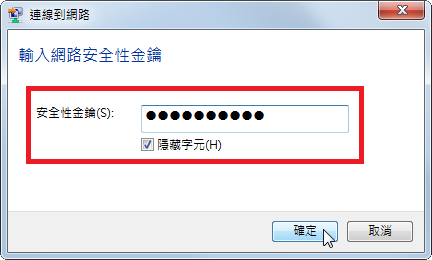
以 Windows 7 測試連線時,也會出現要輸入 網路安全性金鑰 的畫面

Cubie Truck – 成為無線 AP 之一

因為 Cubie Truck 內建有無線網路卡,之前有試著把 Raspberry Pi 做成無線 AP,也在網路上找了一下相關的資料。
參考網站:
Cubieboard 开箱和入门 | Name5566
如何使用樹莓派變成無線熱點 [Raspberry Pi become a WIFI(wireless) AP]
吉瓦小棧: 三月 2013
Cubieboard3做AP热点
【原创】让CubieBoard具备WIFI AP热点功能 – 其他Linux cubie.cc

底下的做法是不用做認證即可上網,比較不安全
安裝 hostapd 
$ su –
# apt-get install hostapd [@more@]
建立設定檔
# vim /etc/hostapd/hostapd.conf
interface=wlan0
driver=nl80211
ssid=CubieTruck
channel=11
hw_mode=g
macaddr_acl=0
auth_algs=1
ignore_broadcast_ssid=0

安裝 DHCP Server
# apt-get install isc-dhcp-server

設定由 wlan0 介面來發送 IP
# sed -i ‘s/INTERFACES=””/INTERFACES=”wlan0″/’ /etc/default/isc-dhcp-server

設定 DHCP Server
# grep -v ^# /etc/dhcp/dhcpd.conf | grep -v ^$
ddns-update-style none;
option domain-name “example.org”;
option domain-name-servers ns1.example.org, ns2.example.org;
default-lease-time 600;
max-lease-time 7200;
log-facility local7;
subnet 172.16.0.0 netmask 255.255.255.0 {
    range 172.16.0.1 172.16.0.10;
    option domain-name-servers 168.95.1.1;
    option domain-name-servers 8.8.8.8;
    option routers 172.16.0.254;
}

設定無線網路卡網路組態
# vim /etc/network/interfaces
auto wlan0
iface wlan0 inet static
        address 172.16.0.254
        netmask 255.255.255.0
        network 172.16.0.0
        broadcast 172.16.0.255

重新啟動網路
# /etc/init.d/networking restart

重新啟動 DHCP Server
/etc/init.d/isc-dhcp-server restart

設定防火牆
# vim /etc/firewall.wifiap
#!/bin/bash
IPTABLES=/sbin/iptables
$IPTABLES -F
$IPTABLES -F -t nat
$IPTABLES -X

$IPTABLES -P INPUT ACCEPT
$IPTABLES -P OUTPUT ACCEPT
$IPTABLES -P FORWARD ACCEPT

modprobe ip_conntrack
modprobe iptable_nat
modprobe ip_conntrack_ftp
modprobe ip_nat_ftp

echo 1 > /proc/sys/net/ipv4/ip_forward
$IPTABLES -t nat -A POSTROUTING -j MASQUERADE

執行防火牆規則
# sh /etc/firewall.wifiap

執行 hostapd 開啟熱點功能
# hostapd -B /etc/hostapd/hostapd.conf
Configuration file: /etc/hostapd/hostapd.conf
Failed to create interface mon.wlan0: -95 (Operation not supported)
Using interface wlan0 with hwaddr 02:1a:11:fe:c0:3d and ssid ‘CubieTruck’

設定開機時立即執行 
# sed -i ‘/^exit 0/ish /etc/firewall.wifiap’ /etc/rc.local
# sed -i ‘/^exit 0/i/usr/sbin/hostapd -B /etc/hostapd/hostapd.conf’ /etc/rc.local

使用 Windows 7 來做測試
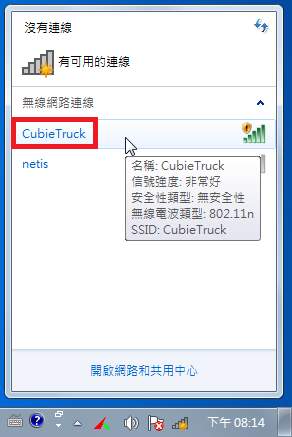
選擇 CubieTruck 無線網路

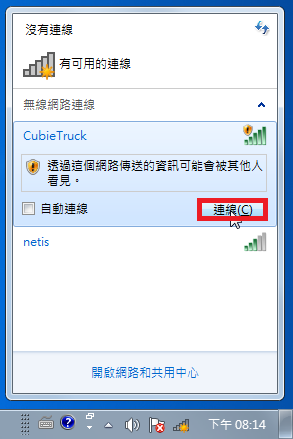
選擇  連線

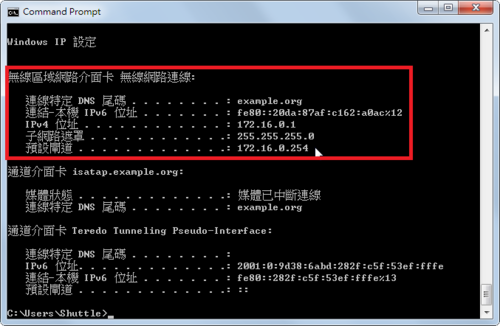
在  命令提示字元輸入 ipconfig 查看取得的 IP
C:> ipconfig

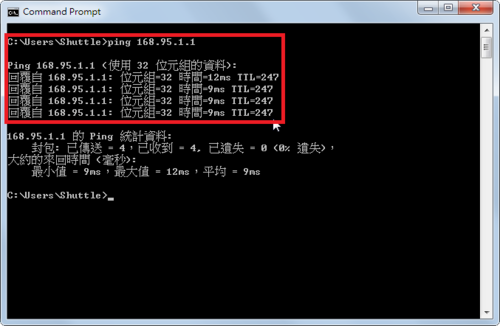
測試是否可以正常 Ping 到外部網路

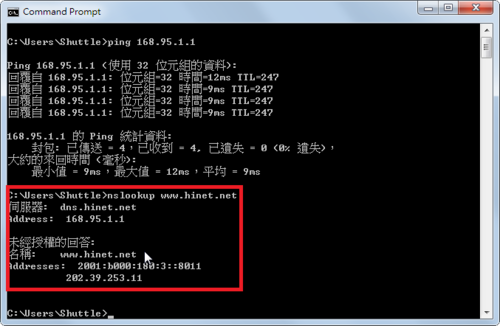
DNS 查詢也沒有問題