Banana Pi 釋出新版本的 OS Image

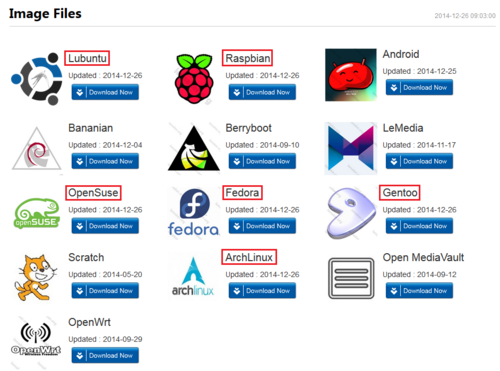
有 Lubuntu / Raspibian / OpenSuse / Fedora / Gentoo / ArchLinux 等都釋出新版本的 OS Image,Android 的部分則是針對 Banana Pro
至於每一個版本更新項目請參照下載頁中的 Release notes
OS Image 下載網址:http://www.lemaker.org/resources/9-38/image_files.html

由這一次的 Image 更新,可以發現有很多都有 for Banana Pro,看來也許 Banana Pro 會比較容易看得到它的身影了!

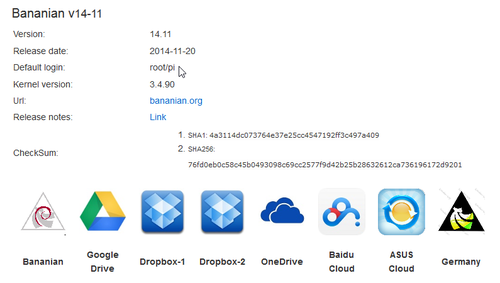
Bananian Linux 更新到 14.11

除了可以下載新的 Image 來安裝 Bananian Linux  14.11 外,也可以從已安裝的系統來做升級
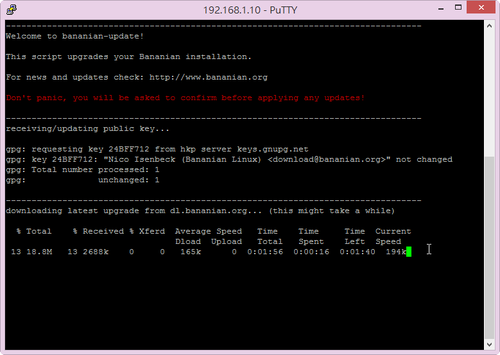
1. 登入系統,執行 bananian-update
# bananian-update
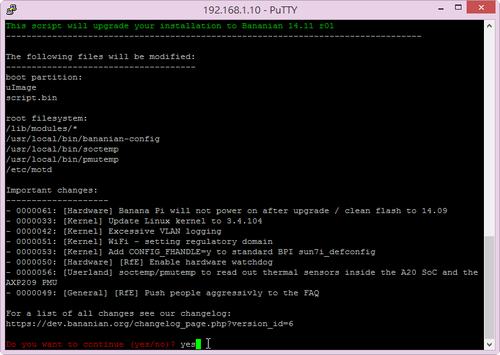
[@more@]2. 輸入 yes 進行更新

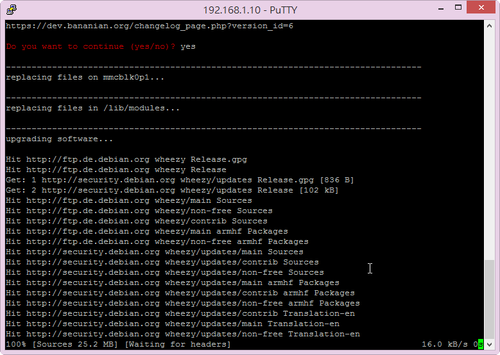
3. 更新中

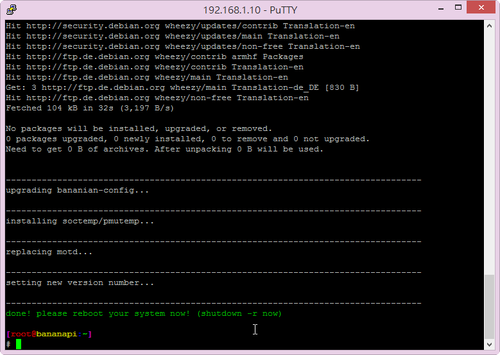
4. 更新完成,執行 shutdown -r now 重新啟動
# shutdown -r now

Banana Pi 測試 – LeMedia 1.1

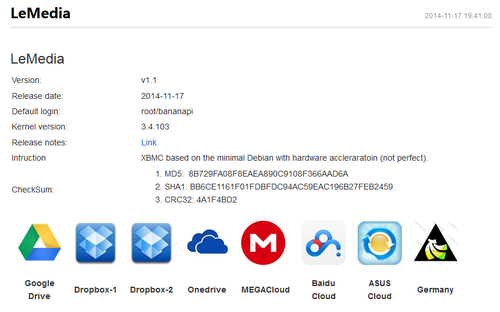
LeMedia 1.1 已於 11/17 Release
下載網頁:http://www.lemaker.org/resources/9-191/lemedia.html

[@more@]
更新事項:
LeMedia (XBMC) v1.1 Realeased – News – Banana Pro | Banana Pi Forum

Features:
1. Based on minimal Debian wheezy.
2. XBMC build from xbmc_Gotham_A10: https://github.com/warped-rudi/xbmc.git .
3. Enable sunxi_cedar_mod, mali_drm, drm, mali, ump driver module;
4. Pre-install UMP library;
5. Pre-install xorg and fbturbo_driver driver;
6. Pre-install libvdpau;
7. Pre-install libhybris wrapped Android libraries;
8. Pre-install LIRC, you can configure your own IR sender;
9. Auto mount usb storage;
10. Auto start XBMC when system boot;
11. Auto log in using root user;
12. Password is root/bananapi ;
13. Kernel version is 3.4.103;
14. Default display  resolution is 1080p ;
15. Audio ouput from audio HDMI by default.
16. Solved other bugs.

關閉 Banana Pi 上面的 Led 燈

Banana Pi 上的 Led 的作用主要是讓使用者能透過 Led 燈號來了解系統目前的狀態,不過因為我的 Banana Pi  是拿來當做 Server,一天 24h 開機,晚上經過放電腦的房間會發現 Led 燈號一閃一閃的,有些刺眼,所以決定把它關閉。
參考網頁:
Switch off the leds ? – Advanced users – Banana Pi Forum
Banana Pi User Defined LED | Banana Pi Blog
【转】关闭那个烦人的绿灯 – Banana PI – 树莓派创客社区 – Powered by Discuz!
Banana Pi Forums :: Topic: How to Modify The script.bin File (1/1)
Banana Pi: Onboard, User-Definable Green Led – Debian, <br> Ubuntu et al.

關閉 綠色 Led 燈
# echo none > /sys/class/leds/green:ph24:led1/trigger
開啟 綠色 Led 燈
# echo 1 >  /sys/class/leds/green:ph24:led1/brightness

讓開機時立即生效
# sed -i ‘/^exit 0/iecho none > /sys/class/leds/green:ph24:led1/trigger’ /etc/rc.local
開機時還原
# sed -i ‘/green/s/^/#/’ /etc/rc.local[@more@]另外一種方式:
安裝所須套件 git / pkg-config / libusb
# apt-get install git pkg-config libusb-1.0-0 libusb-1.0-0-dev -y

建立掛載目錄
# mkdir /mnt/mmcblk0p1

掛載第一個分割區
# mount /dev/mmcblk0p1 /mnt/mmcblk0p1

下載 sunxi-tools tool
# git clone git://github.com/linux-sunxi/sunxi-tools.git
Cloning into ‘sunxi-tools’…
remote: Counting objects: 1075, done.
remote: Total 1075 (delta 0), reused 0 (delta 0)
Receiving objects: 100% (1075/1075), 368.20 KiB | 36 KiB/s, done.
Resolving deltas: 100% (577/577), done.

切換目錄
# cd sunxi-tools

進行編譯
# make

備份原檔
# cp /mnt/mmcblk0p1/script.bin /root/script.bin.source

修改 /mnt/mmcblk0p1/script.bin 檔案
要先利用 bin2fex 工具將 script.bin 檔案轉換成 fex 檔案
# /root/sunxi-tools/bin2fex /mnt/mmcblk0p1/script.bin > /root/script.fex
fexc-bin: script.bin: version: 0.1.2
fexc-bin: script.bin: size: 50908 (86 sections)

開始修改 /mnt/mmcblk0p1/script.fex 檔案
# sed -i ‘s/leds_used = 1/leds_used = 0/’ /root/script.fex
# sed -i ‘s/leds_trigger_1 = “heartbeat”/leds_trigger_1 = “”/’ /root/script.fex

將 script.fex 轉換回 script.bin
# /root/sunxi-tools/fex2bin /root/script.fex > /root/script.bin

複製修改完的檔案回 /mnt/mmcblk0p1 目錄
# cp /root/script.bin /mnt/mmcblk0p1

取消掛載目錄
# umount /mnt/mmcblk0p1

刪除用來臨時掛載的目錄
# rm -rf /mnt/mmcblk0p1

大功告成!不過我比較喜歡用第一種方式,不用去更動系統的內部設定
至於 紅色和藍色的 Led 似乎不是使用 led_para 來做控制,所以並沒有找到相關的資料可以把它們關閉。

讓綠色的 Led 燈一閃一閃
# vim leds.sh
#!/bin/bash

echo none >  /sys/class/leds/green:ph24:led1/trigger
while true; do
   echo 1 >  /sys/class/leds/green:ph24:led1/brightness
   sleep 1
   echo 0 >  /sys/class/leds/green:ph24:led1/brightness
   sleep 1
done

執行
# sh leds.sh
Banana Pi 測試 – OpenMediaVault 篇

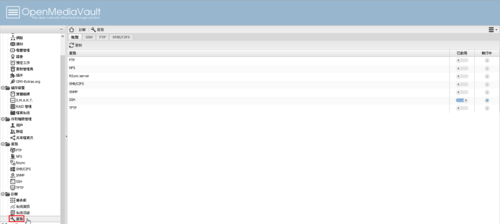
OpenMediaVault 是一套可以用來建置 NAS(Network Attached Storage) 網路儲存設備的系統,它的前身 FreeNAS 可能比較多的人對它會有印象。

關於 OpenMediaVault 開發由來和歷程,可以參考 利用下面這一系列的文章:
FreeNAS 打造儲存設備(1)-歷史篇 – OpenFoundry

Banana Pi OpenMediaVault 下載網頁:
http://www.lemaker.org/resources/9-137/bananas.html
[@more@]
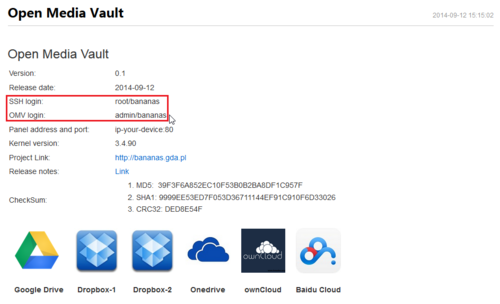
SSH 預設登入的帳號及密碼:root / bananas
Web 管理介面預設登入的帳號及密碼:admin / bananas

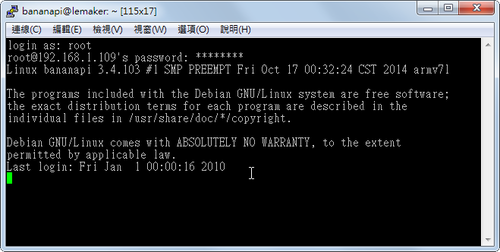
SSH 登入
請先更改預設的密碼:
# passwd
Enter new UNIX password:
Retype new UNIX password:
passwd: password updated successfully

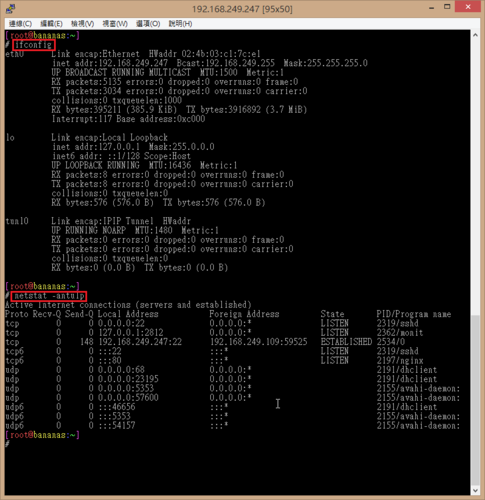
請先查看網路 IP 位址及連線開啟的 Port 和程式
# ifconfig eth0 | grep “inet addr:” | awk -F’:’ ‘{print $2}’ | awk ‘{print $1}’
# netstat -antulp

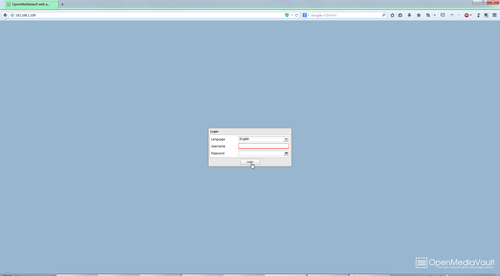
Web 登入畫面

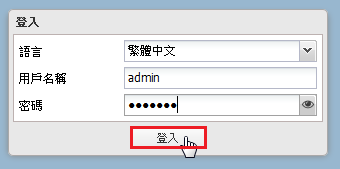
語言可以改成 繁體中文
預設登入的帳號及密碼:admin / bananas

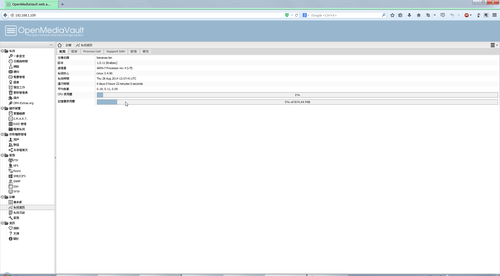
登入後畫面

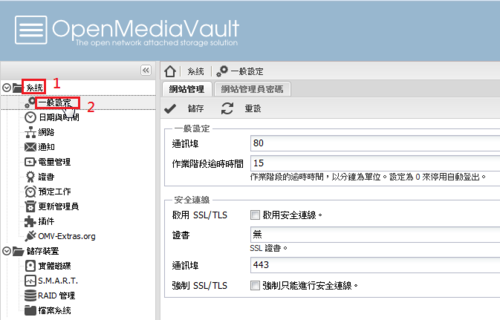
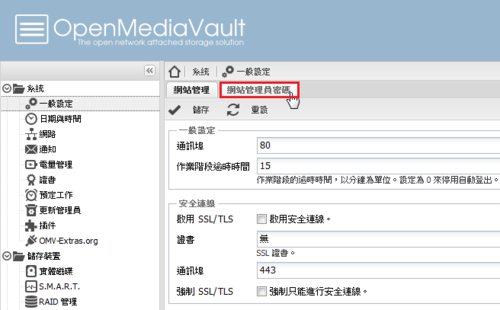
選擇 系統 / 一般設定

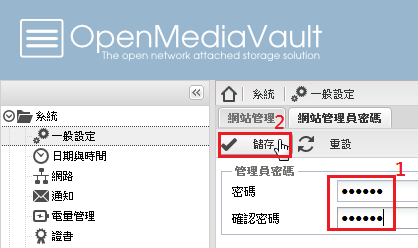
修改 網站管理者密碼

修改密碼,然後按 儲存

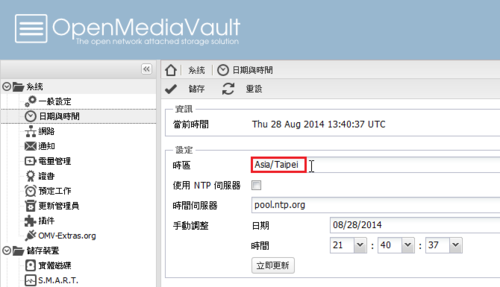
選擇 系統 / 日期與時間

時區改成 Asis/Taipei

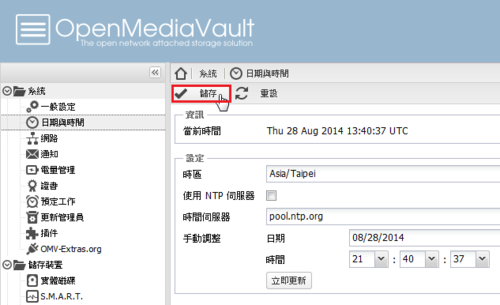
然後按 儲存

然後按 套用

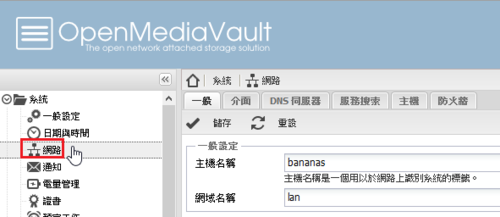
系統 / 網路 設定網路組態

系統 / 預定工作 工作排程

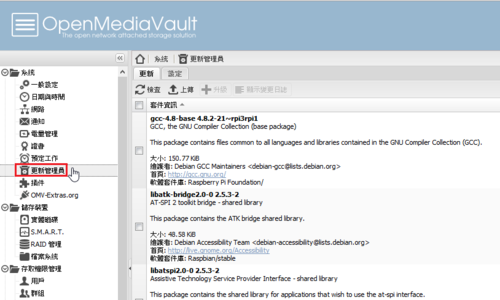
系統 / 更新管理員 套件管理

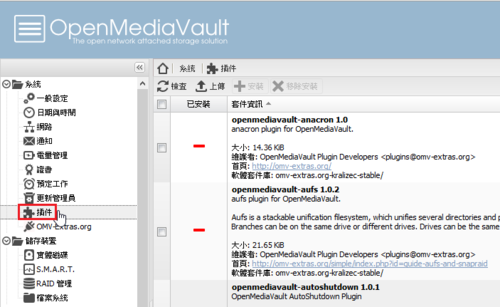
系統 / 插件 可以使用的外掛程式

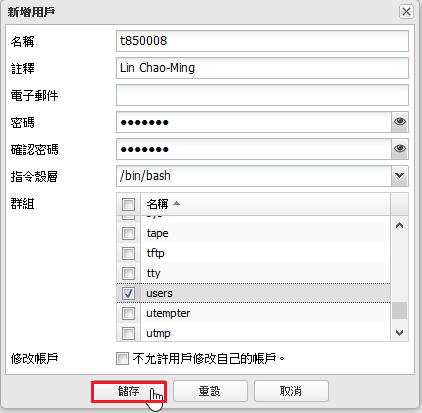
存取權限管理 / 用戶

新增用戶

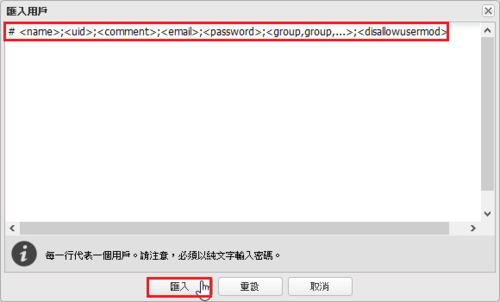
也可以大批匯入,但可惜不支援 LDAP

存取權限管理 / 群組

存取權限管理 / 共享檔案夾,可以分享資料夾

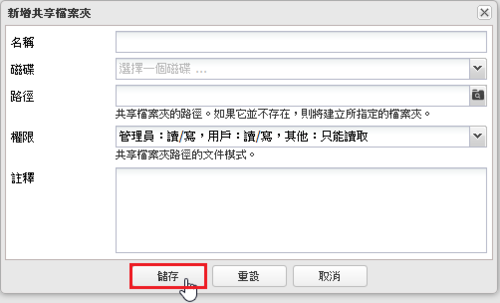
新增共享檔案夾

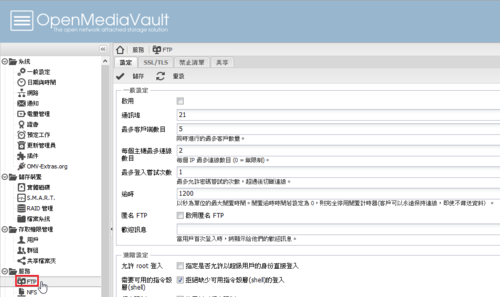
服務 / FTP 檔案伺服器設定

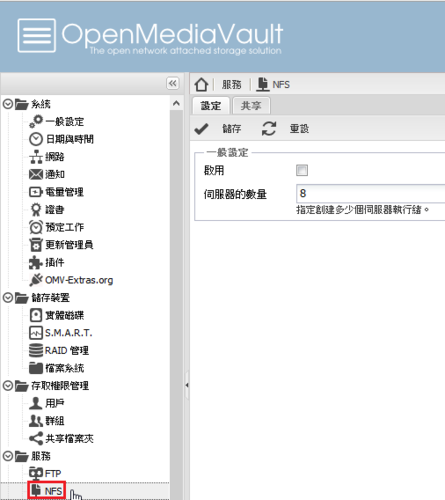
服務 / NFS 網路檔案分享設定

服務 / Rsync 檔案同步設定

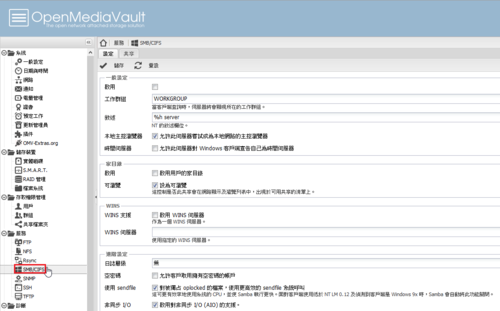
服務 / SMB/CIFS 網路上的芳鄰設定

服務 / SNMP 簡單網路管理協定設定

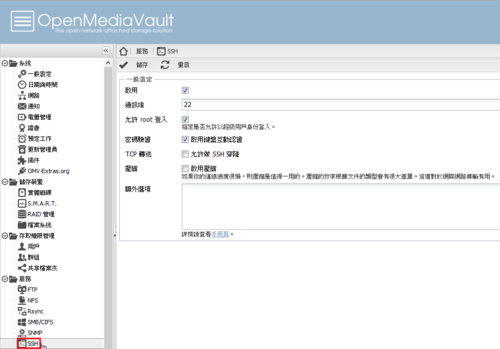
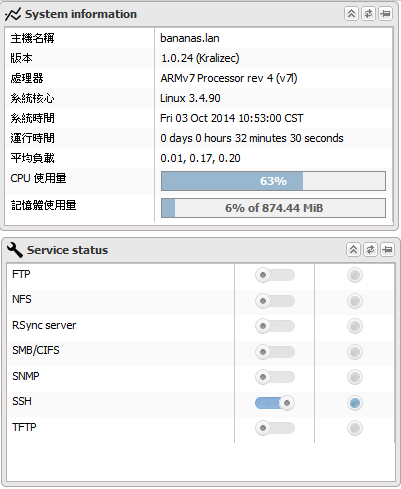
服務 / SSH SSH 連線設定

服務 / TFTP 簡單式檔案傳輸通訊協定

診斷 / 儀表板

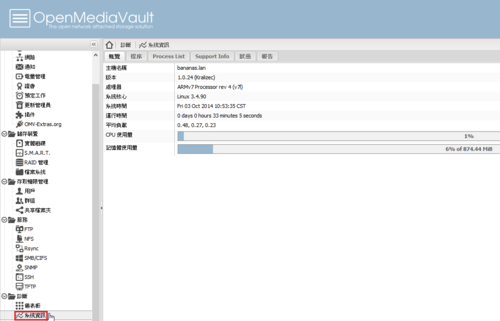
診斷 / 系統資訊

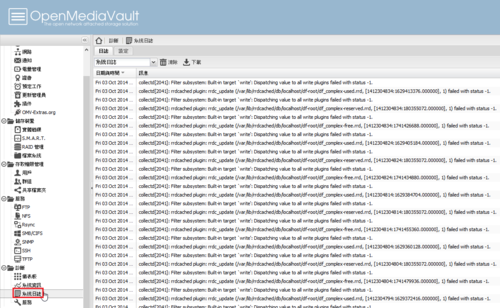
診斷 / 系統日誌 系統出現問題時,可以檢視日誌檔來查看問題

診斷 / 服務 檢查有哪些是開啟的服務

Raspberry Pi 測試 – ArchLinux 篇 IPv6

雖然 IPv6 目前在家裡使用的機率不是很高,但在學校裡使用是必要的。
預設使用的 Raspberry Pi  ArchLinux 預設把 IPv6 的設定關掉。
# cat /boot/cmdline.txt
ipv6.disable=1 avoid_safe_mode=1 selinux=0 plymouth.enable=0 smsc95xx.turbo_mode=N dwc_otg.lpm_enable=0 console=ttyAMA0,115200 kgdboc=ttyAMA0,115200 console=tty1 root=/dev/mmcblk0p5 rootfstype=ext4 elevator=noop rootwait libahci.ignore_sss=1

開啟 IPv6 功能
修改前先備份原檔
# cp /boot/cmdline.txt /boot/cmdline.txt.$(date +%F)[@more@]
修改設定檔
# vim /boot/cmdline.txt
avoid_safe_mode=1 selinux=0 plymouth.enable=0 smsc95xx.turbo_mode=N dwc_otg.lpm_enable=0 console=ttyAMA0,115200 kgdboc=ttyAMA0,115200 console=tty1 root=/dev/mmcblk0p5 rootfstype=ext4 elevator=noop rootwait libahci.ignore_sss=1

重新啟動電腦
# systemctl reboot

檢查是否有取得 IPv6
# ifconfig eth0 | grep -m 1 inet6
        inet6 2001:288:a229:2:ba27:ebff:fe31:70a5  prefixlen 64  scopeid 0x0<global>

檢查是否能以 IPv6 ping 到外部
# ping6 -c 4 2001:288:a229:1::250
PING 2001:288:a229:1::250(2001:288:a229:1::250) 56 data bytes
64 bytes from 2001:288:a229:1::250: icmp_seq=1 ttl=64 time=1.80 ms
64 bytes from 2001:288:a229:1::250: icmp_seq=2 ttl=64 time=0.502 ms
64 bytes from 2001:288:a229:1::250: icmp_seq=3 ttl=64 time=0.470 ms
64 bytes from 2001:288:a229:1::250: icmp_seq=4 ttl=64 time=0.502 ms

— 2001:288:a229:1::250 ping statistics —
4 packets transmitted, 4 received, 0% packet loss, time 3004ms
rtt min/avg/max/mdev = 0.470/0.818/1.800/0.567 ms

ArchLinux 更新時出現 ignoring package upgrade 訊息

使用 pacman -Syu 更新時,出現下面的警告訊息
# pacman -Syu
:: Synchronizing package databases…
 core is up to date
 extra is up to date
 community is up to date
 alarm is up to date
 aur is up to date
:: Starting full system upgrade…
warning: linux-firmware: ignoring package upgrade (20140603.a4f3bc0-1 => 20141009.0e5f637-1)
warning: linux-sun7i: ignoring package upgrade (3.4.90-4 => 3.4.90-5)
warning: uboot-cubieboard2: ignoring package upgrade (2014.04-8 => 2014.04-10)
 there is nothing to do[@more@]看起來似乎是 linux-firmware / linux-sun7i / uboot-cubieboard2 這三個套件被設定成不能夠更新

# grep IgnorePkg /etc/pacman.conf
# Pacman won’t upgrade packages listed in IgnorePkg and members of IgnoreGroup
IgnorePkg   = linux-sun7i linux-firmware uboot-cubieboard2

原來是這一個 ArchLinux 的版本有設定這三個套件不做更新。

因為我目前用的這一個版本是特別製作給 BerryBoot 使用的版本,所以不是很了解,為什麼要特別限定這三個套件不做更新!

解決 ArchLinux 套件更新時出現的錯誤

做套件更新時出現錯誤
# pacman -Syu
(28/28) checking for file conflicts                       [##############################] 100%
error: failed to commit transaction (conflicting files)
/sbin/ exists in both ‘bash’ and ‘filesystem’
/lib/ exists in both ‘libldap’ and ‘filesystem’
/lib/ exists in both ‘krb5’ and ‘filesystem’[@more@]

在網路上搜尋了一下,找到了下面這一篇:
arch linux – Pacman -Syu fails `/bin exists in filesystem` – Unix & Linux Stack Exchange

先不更新 filesystem 及 bash 套件

# pacman -Syu –ignore filesystem,bash
更新 bash 套件
# pacman -S bash
resolving dependencies…
looking for inter-conflicts…

Packages (1): bash-4.3.030-1

Total Installed Size:   6.38 MiB
Net Upgrade Size:       0.00 MiB

:: Proceed with installation? [Y/n] y
(1/1) checking keys in keyring                            [##############################] 100%
(1/1) checking package integrity                          [##############################] 100%
(1/1) loading package files                               [##############################] 100%
(1/1) checking for file conflicts                         [##############################] 100%
(1/1) checking available disk space                       [##############################] 100%
(1/1) upgrading bash                                      [##############################] 100%
warning: directory permissions differ on /etc/
filesystem: 775  package: 755

似乎是 /etc 目錄權限有問題,不能更新

檢查 /etc 目錄權限,目錄權限為 775
# ls -ld /etc
drwxrwxr-x 61 1001 1001 4096 Oct 31 11:04 /etc

更改 /etc 目錄權限為 755
# chmod 755 /etc

/etc 目錄權限已更改為 755
# ls -ld /etc
drwxr-xr-x 61 1001 1001 4096 Oct 31 11:04 /etc

再更新一次 bash,就能正常更新了
# pacman -S bash
warning: bash-4.3.030-1 is up to date — reinstalling
resolving dependencies…
looking for inter-conflicts…

Packages (1): bash-4.3.030-1

Total Installed Size:   6.38 MiB
Net Upgrade Size:       0.00 MiB

:: Proceed with installation? [Y/n] y
(1/1) checking keys in keyring                            [##############################] 100%
(1/1) checking package integrity                          [##############################] 100%
(1/1) loading package files                               [##############################] 100%
(1/1) checking for file conflicts                         [##############################] 100%
(1/1) checking available disk space                       [##############################] 100%
(1/1) reinstalling bash                                   [##############################] 100%

更新剩下的 filesystem
# pacman -Su

Banana Pi 測試 – 解決 LeMedia ssh 連線會停很久的問題

使用 ssh 連線時,會停很久,一直無法登入
[@more@]本來以為是時間不對所造成的,後來發現時間修正了依然是如此
解決方式:
1. 先使用 Ctrl+C 中斷連線
2. 將 /root 目錄下的 .profile 中的 xbmc 移除或加上 #
# cat /root/.profile
# ~/.profile: executed by Bourne-compatible login shells.

if [ “$BASH” ]; then
  if [ -f ~/.bashrc ]; then
    . ~/.bashrc
  fi
fi

#xbmc

mesg n

3. 將 xbmc 加入到 /etc/rc.local 之中
# cat /etc/rc.local
#!/bin/sh -e
#
# rc.local
#
# This script is executed at the end of each multiuser runlevel.
# Make sure that the script will “exit 0” on success or any other
# value on error.
#
# In order to enable or disable this script just change the execution
# bits.
#
# By default this script does nothing.

xbmc
exit 0