建立 Cache-only DNS

安裝在 Proxy Server 上,給 Proxy Server 使用,為了加快 DNS 查詢的速度,把查詢過的 DNS 記錄快取起來。
參考網站:
CentOS Cache-only DNS伺服器安裝設定[1]:::iThome Download-你要的軟體在這裡:::

1. 安裝套件
# yum install bind bind-chroot bind-utils

2. 修改設定檔  /etc/named.conf
# cp /etc/named.conf /etc/named.conf.$(date +%F)
# egrep -v ‘^$|//’ /etc/named.conf
options {
#       listen-on port 53 { 127.0.0.1; };
#       listen-on-v6 port 53 { ::1; };
        directory       “/var/named”;
        dump-file       “/var/named/data/cache_dump.db”;
        statistics-file “/var/named/data/named_stats.txt”;
        memstatistics-file “/var/named/data/named_mem_stats.txt”;
        allow-query     { localhost; };
        /*
         – If you are building an AUTHORITATIVE DNS server, do NOT enable recursion.
         – If you are building a RECURSIVE (caching) DNS server, you need to enable
           recursion.
         – If your recursive DNS server has a public IP address, you MUST enable access
           control to limit queries to your legitimate users. Failing to do so will
           cause your server to become part of large scale DNS amplification
           attacks. Implementing BCP38 within your network would greatly
           reduce such attack surface
        */
        recursion yes;
        dnssec-enable yes;
        dnssec-validation yes;
        /* Path to ISC DLV key */
        bindkeys-file “/etc/named.iscdlv.key”;
        forward only;
        forwarders {
                168.95.1.1;

                8.8.8.8;
                };
        managed-keys-directory “/var/named/dynamic”;
        pid-file “/run/named/named.pid”;
        session-keyfile “/run/named/session.key”;
};
logging {
        channel default_debug {
                file “data/named.run”;
                severity dynamic;
        };
};
zone “.” IN {
        type hint;
        file “named.ca”;
};
include “/etc/named.rfc1912.zones”;
include “/etc/named.root.key”;[@more@]3. 設定開機時啟動
# systemctl enable named.service
Created symlink from /etc/systemd/system/multi-user.target.wants/named.service to /usr/lib/systemd/system/named.service.
# systemctl start named.service

4. 修改 /etc/resolv.conf
# echo “nameserver 127.0.0.1” > /etc/resolv.conf

5. 進行 DNS 查詢
# host www.ilc.edu.tw 127.0.0.1
Using domain server:
Name: 127.0.0.1
Address: 127.0.0.1#53
Aliases:

www.ilc.edu.tw has address 140.111.66.96
www.ilc.edu.tw has IPv6 address 2001:288:a201::66:96

再一次查詢的速度會比前一次本查詢過的,快一些!

DNS 查詢指令 – dig 指令用法

一些常用的用法
正解
# dig abcd.tces.ilc.edu.tw @140.111.74.xxx
追踪
# dig +trace abcd.tces.ilc.edu.tw
反解
# dig -x 140.111.74.xxx @140.111.74.xxx
IPv6
# dig aaaa abcd.tces.ilc.edu.tw @140.111.74.xxx
DNS Server
# dig -t ns tces.ilc.edu.tw @140.111.74.xxx[@more@]# dig ilc.edu.tw NS

# dig ilc.edu.tw A

更多用法:
# dig -h
Usage:  dig [@global-server] [domain] [q-type] [q-class] {q-opt}
            {global-d-opt} host [@local-server] {local-d-opt}
            [ host [@local-server] {local-d-opt} […]]
Where:  domain    is in the Domain Name System
        q-class  is one of (in,hs,ch,…) [default: in]
        q-type   is one of (a,any,mx,ns,soa,hinfo,axfr,txt,…) [default:a]
                 (Use ixfr=version for type ixfr)
        q-opt    is one of:
                 -x dot-notation     (shortcut for reverse lookups)
                 -i                  (use IP6.INT for IPv6 reverse lookups)
                 -f filename         (batch mode)
                 -b address[#port]   (bind to source address/port)
                 -p port             (specify port number)
                 -q name             (specify query name)
                 -t type             (specify query type)
                 -c class            (specify query class)
                 -k keyfile          (specify tsig key file)
                 -y [hmac:]name:key  (specify named base64 tsig key)
                 -4                  (use IPv4 query transport only)
                 -6                  (use IPv6 query transport only)
                 -m                  (enable memory usage debugging)
        d-opt    is of the form +keyword[=value], where keyword is:
                 +[no]vc             (TCP mode)
                 +[no]tcp            (TCP mode, alternate syntax)
                 +time=###           (Set query timeout) [5]
                 +tries=###          (Set number of UDP attempts) [3]
                 +retry=###          (Set number of UDP retries) [2]
                 +domain=###         (Set default domainname)
                 +bufsize=###        (Set EDNS0 Max UDP packet size)
                 +ndots=###          (Set NDOTS value)
                 +[no]edns[=###]     (Set EDNS version) [0]
                 +[no]search         (Set whether to use searchlist)
                 +[no]showsearch     (Search with intermediate results)
                 +[no]defname        (Ditto)
                 +[no]recurse        (Recursive mode)
                 +[no]ignore         (Don’t revert to TCP for TC responses.)
                 +[no]fail           (Don’t try next server on SERVFAIL)
                 +[no]besteffort     (Try to parse even illegal messages)
                 +[no]aaonly         (Set AA flag in query (+[no]aaflag))
                 +[no]adflag         (Set AD flag in query)
                 +[no]cdflag         (Set CD flag in query)
                 +[no]cl             (Control display of class in records)
                 +[no]cmd            (Control display of command line)
                 +[no]comments       (Control display of comment lines)
                 +[no]rrcomments     (Control display of per-record comments)
                 +[no]question       (Control display of question)
                 +[no]answer         (Control display of answer)
                 +[no]authority      (Control display of authority)
                 +[no]additional     (Control display of additional)
                 +[no]stats          (Control display of statistics)
                 +[no]short          (Disable everything except short
                                      form of answer)
                 +[no]ttlid          (Control display of ttls in records)
                 +[no]all            (Set or clear all display flags)
                 +[no]qr             (Print question before sending)
                 +[no]nssearch       (Search all authoritative nameservers)
                 +[no]identify       (ID responders in short answers)
                 +[no]trace          (Trace delegation down from root [+dnssec])
                 +[no]dnssec         (Request DNSSEC records)
                 +[no]nsid           (Request Name Server ID)
                 +[no]sigchase       (Chase DNSSEC signatures)
                 +trusted-key=####   (Trusted Key when chasing DNSSEC sigs)
                 +[no]topdown        (Do DNSSEC validation top down mode)
                 +[no]split=##       (Split hex/base64 fields into chunks)
                 +[no]multiline      (Print records in an expanded format)
                 +[no]onesoa         (AXFR prints only one soa record)
                 +[no]keepopen       (Keep the TCP socket open between queries)
        global d-opts and servers (before host name) affect all queries.
        local d-opts and servers (after host name) affect only that lookup.
        -h                           (print help and exit)
        -v                           (print version and exit)

MaraDNS 輕量級 DNS Server 設定 – authoritative DNS server

參考網頁:How to install the fast and lightweight DNS Server MaraDNS on CentOS 7
                  MaraDNS tutorial
                  http://maradns.samiam.org/tutorial/man.csv2.html
建置 authoritative DNS server
1. 修改 /etc/mararc 設定檔
# egrep -v ‘^#|^$’ /etc/mararc
# 設定 MaraDNS 為 authoritative DNS server
csv2 = {}
# 管理的網域
csv2[“example.net.”] = “db.example.net”
# MaraDNS Server IP
ipv4_bind_addresses = “127.0.0.1”
# 設定檔的位置
chroot_dir = “/etc/maradns”[@more@]2. 建立網域設定檔 /etc/maradns/db.example.net
# cat /etc/maradns/db.example.net
example.net.      +14400    soa    ns1.example.net. dns@example.net. 2012010117 14400 3600 604800 14400 ~
example.net.      +14400    ns     ns1.example.net. ~
example.net.      +14400    ns     ns2.example.net. ~
ns1.example.net.  +14400    a      127.0.0.1 ~
ns2.example.net.  +14400    a      127.0.0.1 ~
example.net.      +14400    a      127.0.0.1 ~
www.example.net.  +14400    a      127.0.0.1 ~
example.net.      +14400    mx     10 mail.example.net. ~
mail.example.net. +14400    a      127.0.0.1 ~
ftp.% +14400    a      192.168.1.2 ~
2.1.168.192.in-addr.arpa. ptr ftp.% ~
ftp.%   AAAA    fd4d:6172:6144:4e53:ffe::f ~
disk.% +14400    a      192.168.1.3 ~
nas.% +14400    cname      disk.% ~
3.1.168.192.in-addr.arpa. ptr disk.example.net. ~

3. 重新啟動 MaraDNS Server
# systemctl restart maradns

4. 進行測試
# host ftp.example.net 127.0.0.1
Using domain server:
Name: 127.0.0.1
Address: 127.0.0.1#53
Aliases:

ftp.example.net has address 192.168.1.2
ftp.example.net has IPv6 address fd4d:6172:6144:4e53:ffe::f

# host nas.example.net 127.0.0.1
Using domain server:
Name: 127.0.0.1
Address: 127.0.0.1#53
Aliases:

nas.example.net is an alias for disk.example.net.
disk.example.net has address 192.168.1.3

# host 192.168.1.3 127.0.0.1
Using domain server:
Name: 127.0.0.1
Address: 127.0.0.1#53
Aliases:

3.1.168.192.in-addr.arpa domain name pointer disk.example.net.

# host 192.168.1.2 127.0.0.1
Using domain server:
Name: 127.0.0.1
Address: 127.0.0.1#53
Aliases:

2.1.168.192.in-addr.arpa domain name pointer ftp.example.net.

MaraDNS 輕量級 DNS Server 安裝

MaraDNS 是一套 OpenSource 開放源碼、輕量級、容易設定且跨平台的 DNS Server,由 Sam Trenholme 所開發。
MaraDNS 官方網站:http://maradns.samiam.org/index.html
目前最新的版本是 2.0.11 版,2015.1.19 釋出。

底下是安裝的方式:
1. 使用 rpm 安裝
官方網站上有提供 for CentOS 6.x 版的 rpm 可以下載
CentOS 6.x 下載:http://maradns.samiam.org/download/2.0/2.0.11/rpmlist.html
下載:
# wget http://maradns.samiam.org/download/2.0/2.0.11/maradns-2.0.11-1.i686.rpm
進行安裝
# rpm -ivh maradns-2.0.11-1.i686.rpm[@more@]CentOS 7.x 的部份,因為官方網站上的 rpm 是 for CentOS 6.x,所以要重新編譯後才能使用
這裡是我重新編譯過的程式:從 此處 下載
# wget https://2blog.ilc.edu.tw/wp-content/uploads/sites/985/25793/25793-3010188.rpm -O /root/maradns-2.0.11-1.x86_64.rpm
安裝:
# rpm -ivh /root/maradns-2.0.11-1.x86_64.rpm

2. 使用 tar.gz 原始碼安裝
安裝 gcc 編譯程式
# yum install gcc
下載 MaraDNS 原始碼
# wget http://maradns.samiam.org/download/2.0/2.0.11/maradns-2.0.11.tar.bz2
解壓縮
# tar xvjf maradns-2.0.11.tar.bz2
進行編譯及安裝
# cd maradns-2.0.1
# make;make install

3. 啟動 maradns
CentOS 6.x
# chkconfig –level 35 maradns on
# service maradns start
CentOS 7.x
# chkconfig –level 35 maradns on
# systemctl start maradns

在 Debian 7 上建置 Slave DNS Server

Master DNS Server – 192.168.1.3
Slave DNS Server – 192.168.1.12

Master DNS Server 的部分已設定完成,這篇文章主要針對 Slave DNS Server 來做設定
參考網頁:
Setup DNS Server On Debian 7 Wheezy | Unixmen
Mind Reference: Debian Slave DNS Server Setup
[@more@]1. 安裝 DNS Server 所須套件
# apt-get install bind9 bind9utils bind9-doc dnsutils

2.修改 Master DNS Server 上的 /etc/bind/named.conf.local 設定檔,加入紅字的部分
# vim /etc/bind/named.conf.local
zone “test.ilc.edu.tw” IN {
        type master;
        file “/etc/bind/db.test.ilc.edu.tw”;
        allow-transfer  { 192.168.1.12; };
        also-notify { 192.168.1.12; };
};

zone “1.168.192.in-addr.arpa” IN {
        type master;
        file “/etc/bind/db.1.168.192”;
        allow-transfer  { 192.168.1.12; };
        also-notify { 192.168.1.12; };
};

3. 修改 Slave DNS Server 的 /etc/bind/named.conf.local
# vim /etc/bind/named.conf.local
zone “test.ilc.edu.tw” IN {
        type slave;
        file “/etc/bind/db.test.ilc.edu.tw”;
       
masters  { 192.168.1.3; };
};

zone “1.168.192.in-addr.arpa” IN {
        type slave;
        file “/etc/bind/db.1.168.192”;
        masters  { 192.168.1.3; };
};

4. 重新啟動 Slave DNS Server
# /etc/init.d/bind9 restart

5. 會自動從 Master DNS Server 抓取設定檔
# ls -l /etc/bind/db.*
-rw-rw-r– 1 bind bind   237 Dec  9 04:21 /etc/bind/db.0
-rw-rw-r– 1 bind bind   271 Dec  9 04:21 /etc/bind/db.127
-rw-rw-r– 1 bind bind   237 Dec  9 04:21 /etc/bind/db.255
-rw-r–r– 1 bind bind 17797 Dec 25 14:16 /etc/bind/db.1.168.192
-rw-rw-r– 1 bind bind   353 Dec  9 04:21 /etc/bind/db.empty
-rw-rw-r– 1 bind bind   270 Dec  9 04:21 /etc/bind/db.local
-rw-rw-r– 1 bind bind  3048 Dec  9 04:21 /etc/bind/db.root
-rw-r–r– 1 bind bind 20142 Dec 25 14:17 /etc/bind/db.test.ilc.edu.tw

6. 進行測試
# host 192.168.1.3 192.168.1.12
Using domain server:
Name: 192.168.1.12
Address: 192.168.1.12#53
Aliases:

3.1.168.192.in-addr.arpa domain name pointer ftp.test.ilc.edu.tw.

# host ftp.test.ilc.edu.tw 192.168.1.12
Using domain server:
Name: 192.168.1.12
Address: 192.168.1.12#53
Aliases:

ftp.test.ilc.edu.tw has address 192.168.1.3


在 Debian 建置有 logging 功能的 DNS Server

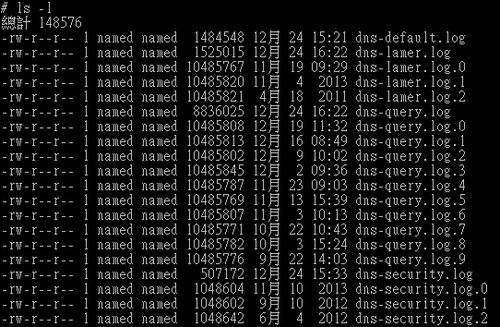
在網路中,DNS Server 服務是非常重要的,由 DNS Server 的 log 中,可以查詢到一些非常重要的資料。

# tail dns-security.log
24-Dec-2014 00:49:26.723 security: info: client 192.3.96.146#48302: query (cache) ‘openresolver.com/A/IN’ denied
24-Dec-2014 02:11:25.169 security: info: client 89.248.172.169#46003: query (cache) ‘globe.gov/ANY/IN’ denied
24-Dec-2014 05:09:04.502 security: info: client 202.153.191.99#60017: query (cache) ‘./NS/IN’ denied
24-Dec-2014 08:31:24.675 security: info: client 204.42.253.2#58601: query (cache) ‘c526034a.openresolvertest.net/A/IN’ denied
24-Dec-2014 08:59:36.327 security: info: client 124.232.142.220#54455: query (cache) ‘www.google.com/A/IN’ denied
24-Dec-2014 12:44:44.954 security: info: client 74.82.47.8#54631: query (cache) ‘dnsscan.shadowserver.org/A/IN’ denied
24-Dec-2014 15:33:08.420 security: info: client 207.244.82.115#48706: query (cache) ‘./ANY/IN’ denied[@more@]設定方式:DNS Server 已經設定 chroot
參考網頁:Bind9 – Debian Wiki
1. 建立 /var/chroot/bind9/var/log 目錄
# mkdir /var/chroot/bind9/var/log

2. 更改目錄權限
# chown bind:bind /var/chroot/bind9/var/log

3. 修改 /etc/bind/named.conf
# vim /etc/bind/named.conf
加入下面一行
include “/etc/bind/named.conf.log”;

4. 建立 /etc/bind/named.conf.log
# vim /etc/bind/named.conf.log
logging {
        channel update_debug {
                file “/var/log/update_debug.log” versions 3 size 100k;
                severity debug;
                print-severity  yes;
                print-time      yes;
        };
        channel security_info {
                file “/var/log/security_info.log” versions 1 size 100k;
                severity info;
                print-severity  yes;
                print-time      yes;
        };
        channel bind_log {
                file “/var/log/bind.log” versions 3 size 1m;
                severity info;
                print-category  yes;
                print-severity  yes;
                print-time      yes;
        };

        category default { bind_log; };
        category lame-servers { null; };
        category update { update_debug; };
        category update-security { update_debug; };
        category security { security_info; };
};

5. 重新啟動 DNS Server 及 Log Server
# /etc/init.d/rsyslog restart; /etc/init.d/bind9 start

6. 驗收成果及收工
# ls -l /var/chroot/bind9/var/log/
total 4
-rw-r–r– 1 bind bind 1417 Dec 24 15:45 bind.log
-rw-r–r– 1 bind bind    0 Dec 24 15:45 security_info.log
-rw-r–r– 1 bind bind    0 Dec 24 15:45 update_debug.log

在 Debian 建置 chroot 的 DNS Server

在 Debian 上安裝的 DNS Server 預設和 ArchLinux 一樣是沒有 chroot 的,為了 DNS Server 的安全,通常都會建議要以 chroot 的方式來執行。
參考網頁:Mind Reference: How to chroot bind9 in Debian
                     Bind9 – Debian Wiki
底下以 Script 檔來自動處理這項工作
[@more@]Script 檔案來源,稍做修改
1. 建立 chroot-bind9
# vim /usr/local/bin/chroot-bind9
#!/bin/bash

/etc/init.d/bind9 stop

mkdir -p /var/chroot/bind9/{etc,dev,var/cache/bind,var/run/bind/run}
chown -R bind:bind /var/chroot/bind9/var/*

mknod /var/chroot/bind9/dev/null c 1 3
mknod /var/chroot/bind9/dev/random c 1 8
chmod 666 /var/chroot/bind9/dev/{null,random}

mv /etc/bind /var/chroot/bind9/etc
ln -s /var/chroot/bind9/etc/bind /etc/bind

chown -R bind:bind /etc/bind/*
chmod -R g+w /etc/bind/

echo “$AddUnixListenSocket /var/chroot/bind9/dev/log” > /etc/rsyslog.d/bind-chroot.conf

sed -e ‘s,”-u bind”,”-u bind -t /var/chroot/bind9″,’ /etc/default/bind9 > /tmp/x && mv /tmp/x /etc/default/bind9

/etc/init.d/bind9 start

2. 給予 root 執行權限
# chmod 700 /usr/local/bin/chroot-bind9

3. 執行
# /usr/local/bin/chroot-bind9

4. 驗收成果
# host 192.168.1.3 192.168.1.2
Using domain server:
Name: 192.168.1.2
Address: 192.168.1.2#53
Aliases:

3.1.168.192.in-addr.arpa domain name pointer ftp.test.ilc.edu.tw.

# host ftp.test.ilc.edu.tw 192.168.1.2
Using domain server:
Name: 192.168.1.2
Address: 192.168.1.2#53
Aliases:

ftp.test.ilc.edu.tw has address 192.168.1.3

解決執行 /etc/init.d/bind9 status 會出現的錯誤訊息
# /etc/init.d/bind9 status
 * bind9 is not running

先將 PIDFILE=/var/run/named/named.pid 前面加上 # 註解
# sed -i ‘s/^PIDFILE/#PIDFILE/’ /etc/init.d/bind9
#PIDFILE 後面插入一行
# sed -i ‘/#PIDFILE/ a PIDFILE=/var/chroot/bind9/var/run/named/named.pid’ /etc/init.d/bind9

/etc/init.d/bind9 status
 * bind9 is running

在 Debian 7 上建置 DNS Server

因為目前學校用來建置 DNS Server 的系統為 CentOS 5.x,系統比較老舊一些,雖然它的支援期到 2017-03-31,但考量到 DNS Server 的負載沒那麼重,所以找了一台比較輕量級的電腦來擔任 DNS Server 的工作,替換下來的主機則可以做其它的用途。
參考網頁:Setup DNS Server On Debian 7 Wheezy | Unixmen
1. 安裝 DNS Server
# apt-get install bind9 bind9utils bind9-doc dnsutils
[@more@]2.  備份原設定檔
# cp /etc/bind/named.conf.local /etc/bind/named.conf.local.$(date +%F)

3. 修改 /etc/bind/named.conf.local 設定檔
zone “test.ilc.edu.tw” IN {
        type master;
        file “/etc/bind/db.test.ilc.edu.tw”;
};

zone “1.168.192.in-addr.arpa” IN {
        type master;
        file “/etc/bind/db.1.168.192”;
};

4. 修改 /etc/bind/db.test.ilc.edu.tw 設定檔
# cp /etc/bind/db.local /etc/bind/db.test.ilc.edu.tw
# vim /etc/bind/db.test.ilc.edu.tw
;
; BIND data file for local loopback interface
;
$TTL    604800
@       IN      SOA     dns.test.ilc.edu.tw. root.dns.test.ilc.edu.tw. (
                              2         ; Serial
                         604800         ; Refresh
                          86400         ; Retry
                        2419200         ; Expire
                         604800 )       ; Negative Cache TTL
;
@       IN      NS      dns.test.ilc.edu.tw.
@       IN      A       192.168.1.2
@       IN      AAAA    ::1
test.ilc.edu.tw.        IN      A       192.168.1.2
www            IN      A       192.168.1.1
dns            IN      A       192.168.1.2
ftp            IN      A       192.168.1.3

5. 修改 /etc/bind/db.1.168.192 設定檔
# cp /etc/bind/db.127 /etc/bind/db.1.168.192
# vim /etc/bind/db.1.168.192

;
; BIND reverse data file for local loopback interface
;
$TTL    604800
@       IN      SOA     dns.test.ilc.edu.tw. root.dns.test.ilc.edu.tw. (
                              1         ; Serial
                         604800         ; Refresh
                          86400         ; Retry
                        2419200         ; Expire
                         604800 )       ; Negative Cache TTL
;
@     IN        NS      dns.test.ilc.edu.tw.
;
1     IN        PTR     www.test.ilc.edu.tw.
2     IN        PTR     dns.test.ilc.edu.tw.
3     IN        PTR     ftp.test.ilc.edu.tw.

6. 重新啟動 DNS Server
# service bind9 restart

7. 進行測試
# host 192.168.1.3 192.168.1.2
Using domain server:
Name: 192.168.1.2
Address: 192.168.1.2#53
Aliases:

3.1.168.192.in-addr.arpa domain name pointer ftp.test.ilc.edu.tw.

# host ftp.test.ilc.edu.tw 192.168.1.2
Using domain server:
Name: 192.168.1.2
Address: 192.168.1.2#53
Aliases:

ftp.test.ilc.edu.tw has address 192.168.1.3

8. 在防火牆中設定
防火牆上的設定
# iptables -A INPUT -p udp -m state –state NEW -m udp –dport 53 -j ACCEPT

DNSSEC (DNS Security Extensions)

DNS 是網路設定的基礎,幾乎每天都要使用,設定錯誤可能就會無法正常連線,但它的安全性也一直受到關切,除了一般做限制遞迴查詢(recursion),限制 zone transfer,也可以考慮使用 DNSSEC。
以下資料引自:首頁 – DNSSEC技術中心
DNSSEC 是一個 DNS 的安全強化技術,它在原本的 DNS 標準上做了許多安全上的延伸,它以電子簽章技術為基礎,能有效避免 DNS 資料竄改等問題,同時仍相容於 DNS。

DNSSEC 相關安全技術,請參閱底下網站
DNSSEC安全技術簡介

這個部份會納入未來研究的課題。

DNS 的安全性設定

參考網站:
bind – DNS 設定
中小企業 DNS Server 實戰應用(上)
中小企業 DNS Server 實戰應用(中)
中小企業 DNS Server 實戰應用(下)
中小企業 DNS Server 實戰應用(特集)

1. 避免成為 Open DNS servers
Open DNS servers 簡單來說,就是只要大家指向你為查詢伺服器,那麼你就會為大家努力的查詢,而且來者不拒。
# vim /etc/named.conf
#在檔案最上面加入 trusted 的 acl。
acl “trusted” {127.0.0.1; 192.168.1.0/24;};

options {
~其它 option 設定~
allow-recursion { trusted; };
};
[@more@]
2.限制 zone transfer 來源主機,就是不能隨便一台主機都可以將所有紀錄探查出來。
在 master 主機限制 zone transfer 來源只能是 slave,或是上一層的 DNS Server
master DNS – 192.168.1.3
options {
~其它 option 設定~
allow-transfer { 140.111.66.1; 140.111.66.10; 192.168.1.12; };
};

3.在 slave 主機限制不開放 zone transfer
slave DNS – 192.168.1.12
options {
~其它 option 設定~
allow-transfer { none; };
};