CentOS 5.x / 6.x / 7 bash 漏洞檢測及修正

參考網站:bash 漏洞檢測與修補 « Jamyy’s Weblog

bash 的漏洞造成的危害,請參考:
MyFirefox | Unix亮紅燈!大漏洞「Shellshock」可惡意挾持電腦系統

CentOS 5.x
# cat /etc/redhat-release
CentOS release 5.10 (Final)

目前安裝 bash 套件
# rpm -qa | grep bash
bash-3.2-32.el5_9.1

bash 版本
# bash –version
GNU bash, version 3.2.25(1)-release (i386-redhat-linux-gnu)
Copyright (C) 2005 Free Software Foundation, Inc.

檢查是否有漏洞()
# env x='() { :;}; echo vulnerable’ bash -c “echo this is a test”
vulnerable
this is a test

更新之後的 bash 套件
# rpm -qa | grep bash
bash-3.2-33.el5.1

bash-3.2-33.el5_10.4

bash 版本
# bash –version
GNU bash, version 3.2.25(1)-release (x86_64-redhat-linux-gnu)
Copyright (C) 2005 Free Software Foundation, Inc.

檢查是否有漏洞()
# env x='() { :;}; echo vulnerable’ bash -c “echo this is a test”
bash: warning: x: ignoring function definition attempt
bash: error importing function definition for `x’
this is a test[@more@]CentOS 6.x
# cat /etc/redhat-release
CentOS release 6.5 (Final)

bash 版本
# bash –version
GNU bash, version 4.1.2(1)-release (x86_64-redhat-linux-gnu)

檢查是否有漏洞()
# env x='() { :;}; echo vulnerable’ bash -c “echo this is a test”
bash: warning: x: ignoring function definition attempt
bash: 錯誤,輸入的函數定義為 `x’
this is a test

更新之後的 bash 套件
# rpm -qa | grep bash
bash-4.1.2-15.el6_5.2.i686
bash-4.1.2-15.el6_5.2.x86_64

CentOS 7.x
# cat /etc/redhat-release
CentOS Linux release 7.0.1406 (Core)

目前安裝 bash 套件
# rpm -qa | grep bash
bash-4.2.45-5.el7.x86_64
bash-completion-2.1-6.el7.noarch

目前 bash 的版本
# bash –version
GNU bash, version 4.2.45(1)-release (x86_64-redhat-linux-gnu)
Copyright (C) 2011 Free Software Foundation, Inc.

檢查是否有漏洞()
# env x='() { :;}; echo vulnerable’ bash -c “echo this is a test”
vulnerable
this is a test

更新之後的 bash 套件
# rpm -qa | grep bash
bash-4.2.45-5.el7_0.4.x86_64
bash-completion-2.1-6.el7.noarch

更新之後的 bash 版本
# bash –version
GNU bash, version 4.2.45(1)-release (x86_64-redhat-linux-gnu)

出現這樣,不知道有沒有修補完成(?),但應該是有修正完成
# env x='() { :;}; echo vulnerable’ bash -c “echo this is a test”
this is a test

OpenSSL 的 Heartbleed 漏洞

OpenSSL 的 Heartbleed 漏洞被稱為是有史以來最危險的程式臭蟲,所以有使用 Linux/BSD Server 的系統管理者,都務必要檢測一下自己管理的伺服器是否安全。
底下列幾個網路上搜尋到的相關網站:
OpenSSL Heartbleed 漏洞檢測 @ CentOS 6 « Jamyy’s Weblog
修復CentOS 6.5 OpenSSL CVE-2014-0160資安漏洞的方法 | 阿維雜記本 (Wei’s Blog)
OpenSSL Heartbleed漏洞危機特別報導 | iThome
Test your server for Heartbleed

在 CentOS 6.x 上安裝 Rootkit Hunter

Rootkit Hunter 是一套能偵測 Linux /BSD 作業系統是不是有中木馬、惡意程式、或是病毒的程式,也可以偵測系統是不是有一些不安全的設定,系統管理者可以安裝,用來檢測系統是否有問題,做為防護上的參考。
由於 Rootkit Hunter 不是官方套件庫中的套件,所以要利用 epel 套件庫來安裝
1. 安裝 Rootkit Hunter
# yum install rkhunter –enablerepo=epel

2. 更新 Rootkit Hunter
# rkhunter –update
[ Rootkit Hunter version 1.4.0 ]

Checking rkhunter data files…
  Checking file mirrors.dat                                  [ No update ]
  Checking file programs_bad.dat                             [ No update ]
  Checking file backdoorports.dat                            [ No update ]
  Checking file suspscan.dat                                 [ No update ]
  Checking file i18n/cn                                      [ No update ]
  Checking file i18n/de                                      [ No update ]
  Checking file i18n/en                                      [ No update ]
  Checking file i18n/zh                                      [ No update ]
  Checking file i18n/zh.utf8                                 [ No update ]

3. 使用方式 -c 代表 –check –lang 後面是顯示的語系,預設是英文
# rkhunter -c –lang zh.utf8
[ Rootkit Hunter 版本 1.4.0 ]

檢查系統命令…

  執行 ‘字串’ 命令檢查
    檢查 ‘字串’ 命令                                   [ 正常 ]

  執行 ‘函式庫’ 的檢查
    檢查預先載入的變數                              [ 沒發現 ]
    檢查預先載入的檔案                              [ 沒發現 ]
    檢查 LD_LIBRARY_PATH 變數                            [ 沒發現 ]

  執行檔案屬性檢查
    檢查重要的基本程式                              [ !注意! ]
    /sbin/chkconfig                                          [ 正常 ]
    /sbin/depmod                                             [ 正常 ]
    /sbin/fsck                                               [ 正常 ]
    /sbin/fuser                                              [ 正常 ]
    /sbin/ifconfig                                           [ 正常 ]
    /sbin/ifdown                                             [ 正常 ]
    /sbin/ifup                                               [ 正常 ]
    /sbin/init                                               [ 正常 ]
    /sbin/insmod                                             [ 正常 ]
[@more@]4. 加入到工作排程 cron
# vim /usr/local/bin/rkhunter_check.sh
#!/bin/bash
(
/usr/bin/rkhunter –update
/usr/bin/rkhunter –cronjob –report-warnings-only
) | /bin/mail -s ‘Rootkit Hunter Daily Run (PutYourServerNameHere)’ your@email.com

給檔案執行權限
# chmod 700 /usr/local/bin/rkhunter_check.sh

加入工作排,每天早上 3 點執行
# crontab -e
加入下面一行
0 3 * * * /usr/local/bin/rkhunter_check.sh

5. 更多的執行參數
# /usr/bin/rkhunter -h

以 fail2ban 偵測網頁連線攻擊

使用 Apache / MySQL / PHP 來架設網站的人,可能都會有安裝 phpMyAdmin 來管理網頁資料庫,但因為 phpMyAdmin 這一個套件可能存在一些安全性上的漏洞,所以有些攻擊方式,就會搜尋網頁上是否有安裝 phpMyAdmin,並嘗試進行攻擊。
來自網頁上的攻擊
# grep admin /var/log/httpd/error_log
[error] [client 70.87.15.74] File does not exist: /var/www/html/admin
[error] [client 70.87.15.74] File does not exist: /var/www/html/dbadmin
[error] [client 70.87.15.74] File does not exist: /var/www/html/myadmin
[error] [client 70.87.15.74] File does not exist: /var/www/html/mysqladmin
[error] [client 70.87.15.74] File does not exist: /var/www/html/phpadmin
[error] [client 70.87.15.74] File does not exist: /var/www/html/phpmyadmin
[error] [client 70.87.15.74] File does not exist: /var/www/html/php-my-admin
[error] [client 70.87.15.74] File does not exist: /var/www/html/phpmyadmin1
[error] [client 70.87.15.74] File does not exist: /var/www/html/phpmyadmin2[@more@]阻擋的方式
底下文章內容參考 網路系統組 / Network Systems [security:fail2ban]
修改 fail2ban 設定檔,加入下面的設定檔
# vim /etc/fail2ban/jail.conf
[apache-notexist]

enabled  = true
filter   = apache-notexist
action   = iptables[name=HTTP, port=http, protocol=tcp]
logpath  = /var/log/httpd/*error_log
maxretry = 3
bantime  = 600

新增 fail2ban 的 apache-noexist filter 設定檔
# vim /etc/fail2ban/filter.d/apache-notexist.conf
[Definition]

# Option:  failregex
# Notes.:  regex to match the password failure messages in the logfile. The
#          host must be matched by a group named “host”. The tag “<HOST>” can
#          be used for standard IP/hostname matching and is only an alias for
#          (?:::f{4,6}:)?(?P<host>S+)
# Values:  TEXT
#
failregex = [[]client <HOST>[]] (File does not exist): .*

# Option:  ignoreregex
# Notes.:  regex to ignore. If this regex matches, the line is ignored.
# Values:  TEXT
#
ignoreregex =

# service fail2ban restart
Stopping fail2ban:                                         [  OK  ]
Starting fail2ban:                                         [  OK  ]

# fail2ban-client status
Status
|- Number of jail:      3
`- Jail list:           apache-notexist, pure-ftpd, ssh-iptables

嘗試幾次錯誤連線

# fail2ban-client status apache-notexist
Status for the jail: apache-notexist
|- filter
|  |- File list:        /var/log/httpd/ssl_error_log /var/log/httpd/error_log
|  |- Currently failed: 0
|  `- Total failed:     3
`- action
   |- Currently banned: 1
   |  `- IP list:       192.168.1.1
   `- Total banned:     1

# iptables -t filter -L fail2ban-HTTP -n
Chain fail2ban-HTTP (1 references)
target     prot opt source               destination
DROP       all  —  192.168.1.1          0.0.0.0/0
RETURN     all  —  0.0.0.0/0            0.0.0.0/0

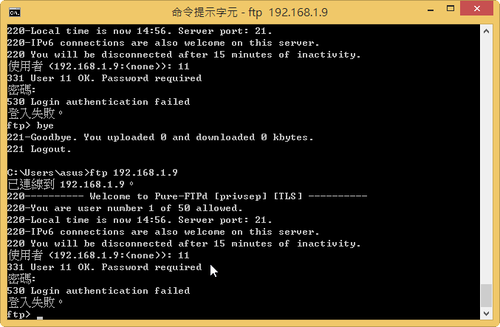
以 fail2ban 偵測 ftp 連線攻擊 – Pure-FTPd 篇

在 CentOS 6.x 下安裝
# yum install pure-ftpd –enablerepo=rpmforge

啟動 Pure-FTPd FTP Server
# /etc/init.d/pure-ftpd start
Starting pure-ftpd:                                        [  OK  ]

修改 /etc/rsyslog.conf 設定檔,讓 Pure-FTPd FTP Server 設定檔能獨立成一個檔案
# vim /etc/rsyslog.conf
ftp.*                                                /var/log/pureftpd.log

重新啟動 Syslog Server
# /etc/init.d/rsyslog restart

檢查 log 檔是否有產生
# ls -l /var/log/pureftpd.log
-rw——-. 1 root root 0 Jan  1 14:54 /var/log/pureftpd.log
[@more@]修改 fail2ban 設定檔
# vim /etc/fail2ban/jail.conf
加入下面的設定
[pure-ftpd]
enabled  = true
filter   = pure-ftpd
action   = iptables[name=pure-ftpd, port=ftp, protocol=tcp]
logpath  = /var/log/pureftpd.log
maxretry = 3
bantime  = 86400

重新啟動 fail2ban
# service fail2ban restart

# fail2ban-client status
Status
|- Number of jail:      2
`- Jail list:           pure-ftpd, ssh-iptables

嘗試錯誤連線幾次

# fail2ban-client status pure-ftpd
Status for the jail: pure-ftpd
|- filter
|  |- File list:        /var/log/pureftpd.log
|  |- Currently failed: 0
|  `- Total failed:     3
`- action
   |- Currently banned: 1
   |  `- IP list:       192.168.1.1
   `- Total banned:     1

# iptables -t filter -L fail2ban-pure-ftpd -n
Chain fail2ban-pure-ftpd (1 references)
target     prot opt source               destination
DROP       all  —  192.168.1.1          0.0.0.0/0
RETURN     all  —  0.0.0.0/0            0.0.0.0/0

以 fail2ban 偵測 ftp 連線攻擊 – ProFTPD 篇

修改 /etc/proftpd.conf 讓 ProFTPD FTP Server 產生單獨的 log 檔
# vim /etc/proftpd.conf
# 產生 log 檔
SystemLog                       /var/log/proftpd/proftpd.log
TransferLog                     /var/log/proftpd/xferlog

重新啟動 ProFTPD Server
# service proftpd restart
Shutting down proftpd:                                     [  OK  ]
Starting proftpd:                                          [  OK  ]

在 /var/log/proftpd 目錄之下可以看到 Log 檔
# ls -l /var/log/proftpd/proftpd.log
-rw-r—–. 1 root root 129 Jan  1 14:24 /var/log/proftpd/proftpd.log[@more@]
修改 /etc/fail2ban/jail.conf 設定檔
# vim /etc/fail2ban/jail.conf
[proftpd-iptables]

enabled  = true
filter   = proftpd
action   = iptables[name=ProFTPD, port=ftp, protocol=tcp]
#           sendmail-whois[name=ProFTPD, dest=you@example.com]
logpath  = /var/log/proftpd/proftpd.log
maxretry = 3
bantime  = 86400

重新啟動 fail2ban
# service fail2ban restart
Stopping fail2ban:                                         [  OK  ]
Starting fail2ban:                                         [  OK  ]

# fail2ban-client status
Status
|- Number of jail:      2
`- Jail list:           proftpd-iptables, ssh-iptables

嘗試連線錯誤幾次之後
# fail2ban-client status proftpd-iptables
Status for the jail: proftpd-iptables
|- filter
|  |- File list:        /var/log/proftpd/proftpd.log
|  |- Currently failed: 0
|  `- Total failed:     3
`- action
   |- Currently banned: 1
   |  `- IP list:       192.168.1.1
   `- Total banned:     1

在防火牆中的規則
# iptables -t filter -L fail2ban-ProFTPD -n
Chain fail2ban-ProFTPD (1 references)
target     prot opt source               destination
DROP       all  —  192.168.1.1          0.0.0.0/0
RETURN     all  —  0.0.0.0/0            0.0.0.0/0

以 fail2ban 偵測 ftp 連線攻擊 – vsFTPd 篇

修改 vsFTPd FTP Server 設定
# vim /etc/vsftpd/vsftpd.conf
# The target log file can be vsftpd_log_file or xferlog_file.
# This depends on setting xferlog_std_format parameter
xferlog_enable=YES
#
# The name of log file when xferlog_enable=YES and xferlog_std_format=YES
# WARNING – changing this filename affects /etc/logrotate.d/vsftpd.log
xferlog_file=/var/log/xferlog
#
# Switches between logging into vsftpd_log_file and xferlog_file files.
# NO writes to vsftpd_log_file, YES to xferlog_file
#xferlog_std_format=YES

重新啟動 vsFTPd FTP Server
# service vsftpd restart
[@more@]修改 fail2ban 設定
# vim /etc/fail2ban/jail.conf
[vsftpd-iptables]

enabled  = true
filter   = vsftpd
action   = iptables[name=VSFTPD, port=ftp, protocol=tcp]
#           sendmail-whois[name=VSFTPD, dest=you@example.com]
logpath  = /var/log/vsftpd.log
maxretry = 3
bantime  = 86400

重新啟動 fail2ban
# service fail2ban restart

目前已經有二個阻擋的規則 ssh-iptables, vsftpd-iptables
# fail2ban-client status
Status
|- Number of jail:      2
`- Jail list:           ssh-iptables, vsftpd-iptables

以 Client IP 192.168.1.1 連線 Server IP 192.168.1.9 做錯誤連線

可以在 vsftpd-iptables 列出有偵測到的連線攻擊
# fail2ban-client status vsftpd-iptables
Status for the jail: vsftpd-iptables
|- filter
|  |- File list:        /var/log/vsftpd.log
|  |- Currently failed: 0
|  `- Total failed:     5
`- action
   |- Currently banned: 1
   |  `- IP list:       192.168.1.1
   `- Total banned:     1

在防火牆規則上的規則
# iptables -t filter -L fail2ban-VSFTPD -n
Chain fail2ban-VSFTPD (1 references)
target     prot opt source               destination
DROP       all  —  192.168.1.1          0.0.0.0/0
RETURN     all  —  0.0.0.0/0            0.0.0.0/0

利用 fail2ban 阻擋來自網路的 SSH 連線攻擊

在 /var/log/secure 中嘗試以 root 帳號登入的錯誤記錄
# grep Failed /var/log/secure | grep -v invalid | tail -5
Jan  1 01:39:54  sshd[6417]: Failed password for root from 192.168.1.1 port 53355 ssh2
Jan  1 01:39:57  sshd[6417]: Failed password for root from 192.168.1.1 port 53355 ssh2
Jan  1 12:18:38  sshd[1556]: Failed password for root from 192.168.1.1 port 54849 ssh2
Jan  1 12:18:41  sshd[1556]: Failed password for root from 192.168.1.1 port 54849 ssh2
Jan  1 12:18:44  sshd[1556]: Failed password for root from 192.168.1.1 port 54849 ssh2

設定方式:
# vim /etc/fail2ban/jail.conf
[ssh-iptables]

enabled  = true
filter   = sshd
action   = iptables[name=SSH, port=ssh, protocol=tcp]
#           sendmail-whois[name=SSH, dest=you@example.com, sender=fail2ban@example.com]
logpath  = /var/log/secure
maxretry = 3
bantime  = 86400[@more@]啟用 ssh-iptables
enabled = true

filter 是指使用 sshd 的 filter 來檢查 log 檔中是否有符合判斷規則的樣式(在 /etc/fail2ban/filter.d 目錄之下)
filter   = sshd

action 是指偵測到之後要採取的行動,這裡有二種方式,iptables 是使用 iptables 來阻擋,sendmail-whois 是寄信給管理者,這二種行動的設定,可以在 /etc/fail2ban/action.d 目錄下找到相關的設定
action   = iptables[name=SSH, port=ssh, protocol=tcp]
這裡只使用 iptables 來阻擋,不寄信給管理者

SSH Server 登錄錯誤的 Log 檔
logpath  = /var/log/secure

maxretry 是指嘗試錯誤 3 次,就阻擋,bantime = 86400 是指阻擋的時間,86400 是指秒,所以是阻擋 1 天
maxretry = 3
bantime  = 86400

重新啟動 fail2ban 服務
# server fail2ban restart

檢查 fail2ban 的狀態
# fail2ban-client status
Status
|- Number of jail:      1
`- Jail list:           ssh-iptables

列出目前的防火牆規則
# iptables -L -n
Chain INPUT (policy ACCEPT)
target     prot opt source               destination
fail2ban-VSFTPD  tcp  —  0.0.0.0/0            0.0.0.0/0           tcp dpt:21
fail2ban-SSH  tcp  —  0.0.0.0/0            0.0.0.0/0           tcp dpt:22
ACCEPT     all  —  0.0.0.0/0            0.0.0.0/0           state RELATED,ESTABLISHED
ACCEPT     icmp —  0.0.0.0/0            0.0.0.0/0
ACCEPT     all  —  0.0.0.0/0            0.0.0.0/0
ACCEPT     tcp  —  0.0.0.0/0            0.0.0.0/0           state NEW tcp dpt:22
ACCEPT     tcp  —  0.0.0.0/0            0.0.0.0/0           state NEW tcp dpt:21
REJECT     all  —  0.0.0.0/0            0.0.0.0/0           reject-with icmp-host-prohibited

Chain FORWARD (policy ACCEPT)
target     prot opt source               destination
REJECT     all  —  0.0.0.0/0            0.0.0.0/0           reject-with icmp-host-prohibited

Chain OUTPUT (policy ACCEPT)
target     prot opt source               destination

Chain fail2ban-SSH (1 references)
target     prot opt source               destination
RETURN     all  —  0.0.0.0/0            0.0.0.0/0

以 Client  IP 192.168.1.1 嘗試對 Server IP 192.168.1.9 嘗試連線錯誤幾次之後
列出 fail2ban 偵測到的 SSH 攻擊
# fail2ban-client status ssh-iptables
Status for the jail: ssh-iptables
|- filter
|  |- File list:        /var/log/secure
|  |- Currently failed: 0
|  `- Total failed:     4
`- action
   |- Currently banned: 1
   |  `- IP list:       192.168.1.1
   `- Total banned:     1

列出 fail2ban-SSH 的規則
# iptables -t filter -L fail2ban-SSH -n
Chain fail2ban-SSH (1 references)
target     prot opt source               destination
DROP       all  —  192.168.1.1          0.0.0.0/0
RETURN     all  —  0.0.0.0/0            0.0.0.0/0

解除方式:
# iptables -D fail2ban-SSH  -s 192.168.1.1 -j DROP

安裝 fail2ban 阻擋來自網路上的嘗試攻擊

Server 安裝完成提供對外的服務,如果沒有設定防火牆,或是限定連線來源,隨時隨地都會受到來自網路上的各種嘗試攻擊,所以必須耤助相關的工具,來協助解決這樣的問題。
底下是來自 SSH 的嘗試攻擊
# grep Failed /var/log/secure
sshd[7935]: Failed password for invalid user cacti from 66.197.211.18 port 39463 ssh2
sshd[7937]: Failed password for invalid user test1 from 66.197.211.18 port 40185 ssh2
sshd[7939]: Failed password for root from 66.197.211.18 port 40773 ssh2
sshd[7966]: Failed password for invalid user git from 66.197.211.18 port 41463 ssh2
sshd[7968]: Failed password for invalid user git from 66.197.211.18 port 42190 ssh2
sshd[7970]: Failed password for mysql from 66.197.211.18 port 42754 ssh2
sshd[7972]: Failed password for mysql from 66.197.211.18 port 43388 ssh2[@more@]來自網頁上的攻擊
# grep admin /var/log/httpd/error_log
[error] [client 70.87.15.74] File does not exist: /var/www/html/admin
[error] [client 70.87.15.74] File does not exist: /var/www/html/dbadmin
[error] [client 70.87.15.74] File does not exist: /var/www/html/myadmin
[error] [client 70.87.15.74] File does not exist: /var/www/html/mysqladmin
[error] [client 70.87.15.74] File does not exist: /var/www/html/phpadmin
[error] [client 70.87.15.74] File does not exist: /var/www/html/phpmyadmin
[error] [client 70.87.15.74] File does not exist: /var/www/html/php-my-admin
[error] [client 70.87.15.74] File does not exist: /var/www/html/phpmyadmin1
[error] [client 70.87.15.74] File does not exist: /var/www/html/phpmyadmin2

這一類的工具非常的多,如:SSHBlock / DenyHosts / Fail2ban 等等,這些工具都很不錯,但這裡我選用的是 fail2ban,因為它支援多種常見的服務,如:SSH / FTP / Apache 等等。


Fail2ban 官方網站:http://www.fail2ban.org/wiki/index.php/Main_Page
底下是它的安裝方式:
以 CentOS 6.x 為例,因為 fail2ban 不是官方套件庫中的套件,所以必須先安裝第三方套件庫 epel 或 rpmforge
安裝 epel 第三方套件庫
# wget http://dl.fedoraproject.org/pub/epel/6/x86_64/epel-release-6-8.noarch.rpm
# rpm -ivh epel-release-6-8.noarch.rpm

更新套件庫來源
# yum update

安裝 fail2ban
# yum install fail2ban

fail2ban 預設開機就會啟動
# chkconfig –list fail2ban
fail2ban        0:off   1:off   2:off   3:on    4:on    5:on    6:off

使用 TLS/SSL 的方式查詢做 LDAP 資料的查詢

在本機上查詢
-ZZ TLS 方式查詢
-x 使用 SASL 認證
ldapsearch -x -ZZ -h localhost -b “ou=Teacher,dc=ldap,dc=tces.ilc.edu.tw” uid=t850008
# extended LDIF
#
# LDAPv3
# base <ou=Teacher,dc=ldap,dc=tces.ilc.edu.tw> with scope subtree
# filter: uid=t850008
# requesting: ALL
#

# t850008, Teacher, ldap.tces.ilc.edu.tw
dn: uid=t850008,ou=Teacher,dc=ldap,dc=tces.ilc.edu.tw
uid: t850008
cn:: 5p6X5pit5ZCN
objectClass: account
objectClass: posixAccount
objectClass: top
userPassword:: e2Nye
loginShell: /bin/bash
uidNumber: 953
gidNumber: 500
homeDirectory: /home/t850008

# search result
search: 3
result: 0 Success

# numResponses: 2
# numEntries: 1
[@more@]以 SSL 方式查詢
# ldapsearch -x -H ldaps://localhost -b “ou=Teacher,dc=ldap,dc=tces.ilc.edu.tw” uid=t850008
# extended LDIF
#
# LDAPv3
# base <ou=Teacher,dc=ldap,dc=tces.ilc.edu.tw> with scope subtree
# filter: uid=t850008
# requesting: ALL
#

# t850008, Teacher, ldap.tces.ilc.edu.tw
dn: uid=t850008,ou=Teacher,dc=ldap,dc=tces.ilc.edu.tw
uid: t850008
cn:: 5p6X5pit5ZCN
objectClass: account
objectClass: posixAccount
objectClass: top
userPassword:: e2Nye
loginShell: /bin/bash
uidNumber: 953
gidNumber: 500
homeDirectory: /home/t850008

# search result
search: 2
result: 0 Success

# numResponses: 2
# numEntries: 1