在 Windows 7/10 下掛載 CentOS 7.x NFS Server 分享的目錄

1. 安裝 Services for NFS

[@more@]
安裝過程
Windows 10

Windows 7 SP1 安裝完成要重新啟動電腦才能生效!

Windows 10 1607

執行 showmount -e 指令會顯示「不支援的 Windows 版本

Windows 7 SP1 / Windows 10 1511 / Windows 10 1607 可以掛載,但無法存取,顯示「找不到檔案」

似乎是 Windows 7/10 的 Services for NFS 與 CentOS 7.x 的 NFS Server 無法配合,因為後來改用 Synology NAS Server 的 NFS Server 則一切正常!

CentOS 7.x NFS Server 的防火牆設定

參考網站:
鳥哥的 Linux 私房菜 — NFS 伺服器
CentOS 7 NFS服务器和客户端设置 – 阿泰的菜园
How to setup NFS Server on CentOS 7 / RHEL 7 / Fedora 22
NFS issue Behind iptables in Centos 7 – Server Fault

# /usr/sbin/rpcinfo -p
   program vers proto   port  service
    100000    4   tcp    111  portmapper
    100000    3   tcp    111  portmapper
    100000    2   tcp    111  portmapper
    100000    4   udp    111  portmapper
    100000    3   udp    111  portmapper
    100000    2   udp    111  portmapper
    100024    1   udp  33438  status
    100024    1   tcp  45447  status
    100005    1   udp   1002  mountd
    100005    1   tcp   1002  mountd
    100005    2   udp   1002  mountd
    100005    2   tcp   1002  mountd
    100005    3   udp   1002  mountd
    100005    3   tcp   1002  mountd
    100003    3   tcp   2049  nfs
    100003    4   tcp   2049  nfs
    100227    3   tcp   2049  nfs_acl
    100003    3   udp   2049  nfs
    100003    4   udp   2049  nfs
    100227    3   udp   2049  nfs_acl
    100021    1   udp  58234  nlockmgr
    100021    3   udp  58234  nlockmgr
    100021    4   udp  58234  nlockmgr
    100021    1   tcp  33450  nlockmgr
    100021    3   tcp  33450  nlockmgr
    100021    4   tcp  33450  nlockmgr

稍微整理一下,其中 tcp/udp 111tcp/udp 2049 是固定的,其它則會變動
# /usr/sbin/rpcinfo -p | awk ‘{print $3,$4,$5}’ | sort | uniq
proto port service
tcp 111 portmapper
tcp 2049 nfs
tcp 2049 nfs_acl
tcp 33450 nlockmgr
tcp 45447 status
tcp 1002 mountd
udp 111 portmapper
udp 2049 nfs
udp 2049 nfs_acl
udp 58234 nlockmgr
udp 33438 status
udp 1002 mountd

[@more@]使用 firewalld 防火牆
# /usr/bin/firewall-cmd –permanent –zone public –add-service mountd
# /usr/bin/firewall-cmd –permanent –zone public –add-service rpc-bind
# /usr/bin/firewall-cmd –permanent –zone public –add-service nfs
# /usr/bin/firewall-cmd –reload

不過個人比較習慣使用原有的 iptables 防火牆,所以底下改用固定 NFS Server Port  的方式處理

備份原檔 /etc/sysconfig/nfs
# cp /etc/sysconfig/nfs /etc/sysconfig/nfs.$(date +%F)

修改設定檔 /etc/sysconfig/nfs
# grep PORT /etc/sysconfig/nfs
LOCKD_TCPPORT=32803
LOCKD_UDPPORT=32769
MOUNTD_PORT=892
STATD_PORT=662
STATD_OUTGOING_PORT=2020

重新啟動 NFS Server
# systemctl restart nfs-server

如果 nlockmgr Port 還是無法固定,則要修改 /etc/sysctl.conf
# cp /etc/sysctl.conf /etc/sysctl.conf.$(date +%F)
加入下面二行
fs.nfs.nlm_tcpport=32803
fs.nfs.nlm_udpport=32769
# sed -i ‘$a fs.nfs.nlm_tcpport=32803nfs.nfs.nlm_udpport=32769’ /etc/sysctl.conf

讓設定生效
# sysctl -p

再次檢查所使用的 Port 是否有固定
# /usr/sbin/rpcinfo -p
   program vers proto   port  service
    100000    4   tcp    111  portmapper
    100000    3   tcp    111  portmapper
    100000    2   tcp    111  portmapper
    100000    4   udp    111  portmapper
    100000    3   udp    111  portmapper
    100000    2   udp    111  portmapper
    100024    1   udp    662  status
    100024    1   tcp    662  status
    100005    1   udp    892  mountd
    100005    1   tcp    892  mountd
    100005    2   udp    892  mountd
    100005    2   tcp    892  mountd
    100005    3   udp    892  mountd
    100005    3   tcp    892  mountd
    100003    3   tcp   2049  nfs
    100003    4   tcp   2049  nfs
    100227    3   tcp   2049  nfs_acl
    100003    3   udp   2049  nfs
    100003    4   udp   2049  nfs
    100227    3   udp   2049  nfs_acl
    100021    1   udp  32769  nlockmgr
    100021    3   udp  32769  nlockmgr
    100021    4   udp  32769  nlockmgr
    100021    1   tcp  32803  nlockmgr
    100021    3   tcp  32803  nlockmgr
    100021    4   tcp  32803  nlockmgr

# /usr/sbin/rpcinfo -p | awk ‘{print $3,$4,$5}’ | sort | uniq
proto port service
tcp 111 portmapper
tcp 2049 nfs
tcp 2049 nfs_acl
tcp 32803 nlockmgr
tcp 662 status
tcp 892 mountd
udp 111 portmapper
udp 2049 nfs
udp 2049 nfs_acl
udp 32769 nlockmgr
udp 662 status
udp 892 mountd

使用 firewalld 防火牆
# /usr/bin/firewall-cmd –permanent –add-port=111/tcp
# /usr/bin/firewall-cmd –permanent –add-port=111/udp
# /usr/bin/firewall-cmd –permanent –add-port=662/tcp
# /usr/bin/firewall-cmd –permanent –add-port=662/udp
# /usr/bin/firewall-cmd –permanent –add-port=892/tcp
# /usr/bin/firewall-cmd –permanent –add-port=892/udp
# /usr/bin/firewall-cmd –permanent –add-port=2049/tcp
# /usr/bin/firewall-cmd –permanent –add-port=2049/udp
# /usr/bin/firewall-cmd –permanent –add-port=32803/tcp
# /usr/bin/firewall-cmd –permanent –add-port=32769/udp

# /usr/bin/firewall-cmd –reload

使用 iptables 防火牆
# /usr/sbin/iptables -A INPUT -i eth0 -p tcp -s 192.168.1.0/24 -m multiport –dport 111,2049,662,892,32803 -j ACCEPT
# /usr/sbin/iptables -A INPUT -i eth0 -p udp -s 192.168.1.0/24 -m multiport –dport 111,2049,662,892,32769 -j ACCEPT

在 CentOS 7.x 架設 NFS Server

因為要分享檔案給內部區域網路使用,所以架設了 NFS Server。
參考網站:
鳥哥的 Linux 私房菜 — NFS 伺服器
CentOS 7 NFS服务器和客户端设置 – 阿泰的菜园
How to setup NFS Server on CentOS 7 / RHEL 7 / Fedora 22

NFS Server IP: 192.168.1.13
1. 在 CentOS 7.x 下安裝
# yum install nfs-utils

2. 建立要分享的目錄設定檔 /etc/exports
# cat /etc/exports
# 分享目錄 允許連線來源(權限)
# ro 唯讀
# async 非同步寫入到硬碟
# no_root_squash 使用 root 身份連線
/home/test 192.168.1.0/24(ro,async,no_root_squash)[@more@]3. 之後如果有重新修改 /etc/exports 檔案時,不用重新啟動 NFS Server,只要執行下面指令即可!
# /usr/sbin/exportfs -arv
選項與參數:
-a :全部掛載(或卸載) /etc/exports 檔案內的設定
-r :重新掛載 /etc/exports 裡面的設定,此外,亦同步更新 /etc/exports
        及 /var/lib/nfs/xtab 的內容!
-u :卸載某一目錄
-v :在 export 的時候,將分享的目錄顯示到螢幕上!

4. 在 NFS Server 上,啟動 SELiux 放行規定
# setsebool -P nfs_export_all_rw on
# setsebool -P nfs_export_all_ro on

5. 執行 NFS Server
# systemctl restart nfs-server
# systemctl enable nfs-server

6. 檢查 NFS Server 的 Port 使用狀態
# netstat -tulnp| grep -E ‘(rpc|nfs)’
tcp        0      0 0.0.0.0:662             0.0.0.0:*               LISTEN      4612/rpc.statd
tcp        0      0 0.0.0.0:1002             0.0.0.0:*               LISTEN      6033/rpc.mountd
udp        0      0 0.0.0.0:111             0.0.0.0:*                           4558/rpcbind
udp        0      0 0.0.0.0:662             0.0.0.0:*                           4612/rpc.statd
udp        0      0 0.0.0.0:1002             0.0.0.0:*                           6033/rpc.mountd
udp     6144      0 0.0.0.0:913             0.0.0.0:*                           4558/rpcbind
udp        0      0 127.0.0.1:972           0.0.0.0:*                           4612/rpc.statd

7. 顯示出目前這部主機的 RPC 狀態
# /usr/sbin/rpcinfo -p
   program vers proto   port  service
    100000    4   tcp    111  portmapper
    100000    3   tcp    111  portmapper
    100000    2   tcp    111  portmapper
    100000    4   udp    111  portmapper
    100000    3   udp    111  portmapper
    100000    2   udp    111  portmapper
    100024    1   udp  33438  status
    100024    1   tcp  45447  status
    100005    1   udp   1002  mountd
    100005    1   tcp   1002  mountd
    100005    2   udp   1002  mountd
    100005    2   tcp   1002  mountd
    100005    3   udp   1002  mountd
    100005    3   tcp   1002  mountd
    100003    3   tcp   2049  nfs
    100003    4   tcp   2049  nfs
    100227    3   tcp   2049  nfs_acl
    100003    3   udp   2049  nfs
    100003    4   udp   2049  nfs
    100227    3   udp   2049  nfs_acl
    100021    1   udp  58234  nlockmgr
    100021    3   udp  58234  nlockmgr
    100021    4   udp  58234  nlockmgr
    100021    1   tcp  33450  nlockmgr
    100021    3   tcp  33450  nlockmgr
    100021    4   tcp  33450  nlockmgr

8. 顯示 NFS Server 分享的資源
# /usr/sbin/showmount -e 127.0.0.1
Export list for 127.0.0.1:
/home/test 192.168.1.0/24
# /usr/sbin/showmount -e 192.168.1.13
Export list for 192.168.1.13:
/home/t850008 192.168.1.0/24

9. 在 Linux 下進行連線
建立目錄
# mkdir /mnt/nfs_test

進行掛載
# mount -t nfs 192.168.1.13:/home/test /mnt/nfs_test

取消掛載
# umount  /mnt/nfs_test

Ubuntu 14.04 Server 上的 NFS Server 設定

使用 NFS Server 感覺比較麻煩的是,NFS Server 除了固定的 tcp/udp 111 和 tcp/udp 2049 外,其它的 Port 都是動態產生,如果要在防火牆上做設定,不太容易,最好能固定使用某些 Port,方便處理。
# rpcinfo -p
   program vers proto   port  service
    100000    4   tcp    111  portmapper
    100000    3   tcp    111  portmapper
    100000    2   tcp    111  portmapper
    100000    4   udp    111  portmapper
    100000    3   udp    111  portmapper
    100000    2   udp    111  portmapper
    100024    1   udp  56027  status
    100024    1   tcp  32961  status
    100003    2   tcp   2049  nfs
    100003    3   tcp   2049  nfs
    100003    4   tcp   2049  nfs
    100227    2   tcp   2049
    100227    3   tcp   2049
    100003    2   udp   2049  nfs
    100003    3   udp   2049  nfs
    100003    4   udp   2049  nfs
    100227    2   udp   2049
    100227    3   udp   2049
    100021    1   udp  44022  nlockmgr
    100021    3   udp  44022  nlockmgr
    100021    4   udp  44022  nlockmgr
    100021    1   tcp  48020  nlockmgr
    100021    3   tcp  48020  nlockmgr
    100021    4   tcp  48020  nlockmgr
    100005    1   udp  33475  mountd
    100005    1   tcp  45010  mountd
    100005    2   udp  60988  mountd
    100005    2   tcp  44341  mountd
    100005    3   udp  51772  mountd
    100005    3   tcp  40966  mountd
[@more@]這方面的資料在 CentOS Linux 有很多的參考資料,如:鳥哥的 Linux 私房菜 — NFS 伺服器,但在 Ubuntu Server 上似乎不多,尤其是中文的部份,後來在英文的網站中,找到了 SecuringNFS – Debian Wiki 這一篇,根據網站上的說明,實際設定一下,可以正常成功。
1. 修改設定檔 /etc/default/nfs-common
# vim /etc/default/nfs-common
STATDOPTS=”–port 32765 –outgoing-port 32766″

2. 修改設定檔 /etc/default/nfs-kernel-server
# vim /etc/default/nfs-kernel-server
RPCMOUNTDOPTS=”-p 32767″

3. 修改設定檔 /etc/default/quota
# vim /etc/default/quota
RPCRQUOTADOPTS=”-p 32769″

4. 修改 /etc/services 加入下面的設定
# vim /etc/services
rpc.nfsd        2049/tcp                        # RPC nfsd
rpc.nfsd        2049/udp                        # RPC nfsd
rpc.nfs-cb      32764/tcp                       # RPC nfs callback
rpc.nfs-cb      32764/udp                       # RPC nfs callback
rpc.statd-bc    32765/tcp                       # RPC statd broadcast
rpc.statd-bc    32765/udp                       # RPC statd broadcast
rpc.statd       32766/tcp                       # RPC statd listen
rpc.statd       32766/udp                       # RPC statd listen
rpc.mountd      32767/tcp                       # RPC mountd
rpc.mountd      32767/udp                       # RPC mountd
rpc.lockd       32768/tcp                       # RPC lockd/nlockmgr
rpc.lockd       32768/udp                       # RPC lockd/nlockmgr
rpc.quotad      32769/tcp                       # RPC quotad
rpc.quotad      32769/udp                       # RPC quotad

5. 修改設定檔 /etc/modprobe.d/local.conf
# vim /etc/modprobe.d/local.conf
options lockd nlm_udpport=32768 nlm_tcpport=32768
options nfs callback_tcpport=32764

6. 重新啟動 Ubuntu Server

7. 檢查成果
# rpcinfo -p
   program vers proto   port  service
    100000    4   tcp    111  portmapper
    100000    3   tcp    111  portmapper
    100000    2   tcp    111  portmapper
    100000    4   udp    111  portmapper
    100000    3   udp    111  portmapper
    100000    2   udp    111  portmapper
    100024    1   udp  32765  status
    100024    1   tcp  32765  status
    100003    2   tcp   2049  nfs
    100003    3   tcp   2049  nfs
    100003    4   tcp   2049  nfs
    100227    2   tcp   2049
    100227    3   tcp   2049
    100003    2   udp   2049  nfs
    100003    3   udp   2049  nfs
    100003    4   udp   2049  nfs
    100227    2   udp   2049
    100227    3   udp   2049
    100021    1   udp  32768  nlockmgr
    100021    3   udp  32768  nlockmgr
    100021    4   udp  32768  nlockmgr
    100021    1   tcp  32768  nlockmgr
    100021    3   tcp  32768  nlockmgr
    100021    4   tcp  32768  nlockmgr
    100005    1   udp  32767  mountd
    100005    1   tcp  32767  mountd
    100005    2   udp  32767  mountd
    100005    2   tcp  32767  mountd
    100005    3   udp  32767  mountd
    100005    3   tcp  32767  mountd

8. 加入防火牆的設定
# NFS Port 111,2049,32764:32769
# eth1 對內網路卡 192.168.66.0/24 內部網路網段
# vim /etc/rc.local
iptables -A INPUT -i eth1 -p tcp -s 192.168.66.0/24 -m state –state NEW -m multiport –dport 111,2049,32764:32769 -j ACCEPT
iptables -A INPUT -i eth1 -p udp -s 192.168.66.0/24 -m state –state NEW -m multiport –dport 111,2049,32764:32769 -j ACCEPT

9. 重新啟動防火牆
# service rc.local start

在 Ubuntu 14.04 上安裝 NFS Server

因為搭配 DRBL Live,所以特別在 Ubuntu Server 上安裝 NFS Server。
安裝所須套件
# apt-get install nfs-common nfs-kernel-server

建立要分享及掛載的目錄
# mkdir /home/partimag

[@more@]修改設定檔 /etc/exports
加入下面一列
# vim /etc/exports
/home/partimag 192.168.66.0/24(rw,sync,no_subtree_check)

啟動 NFS Server
# /etc/init.d/nfs-kernel-server start
 * Exporting directories for NFS kernel daemon…                                                                                                                                             [ OK ]
 * Starting NFS kernel daemon                                                                                                                                                                 [ OK ]
檢查是是有啟動成功
# showmount -e localhost
Export list for localhost:
/home/partimag 192.168.66.0/24

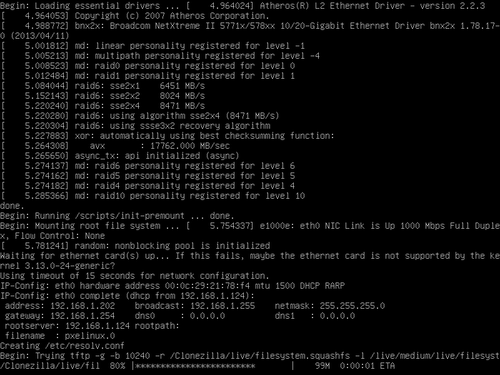
透過 PXE Server 使用 NFS 和 Clonezilla 自動備份及還原

主要是在 PXE Server 的功能表,使用 NFS 和 Clonezilla 做自動的備份及還原

修改 PXE Server 功能表,因為執行的時候會覆蓋原有的備份檔和把 Windows 系統磁碟還原,所以在選項上加上了密碼,避免誤觸
要注意的是 append initrd 到後面算是一行
# vim /var/lib/tftpboot/pxelinux.cfg/Backup_Restore
LABEL Clonezilla Livei nfs AutoBackup
        MENU LABEL Clonezilla Live nfs ^AutoBackup
        MENU PASSWD CloneZilla
        kernel images/Clonezilla/live/vmlinuz
        append initrd=images/Clonezilla/live/initrd.img boot=live config username=user quiet noswap edd=on nomodeset noeject locales=”zh_TW.UTF-8″ keyboard-layouts=”NONE” ocs_live_run=”/usr/sbin/ocs-sr -q2 -j2 -z1p -p true saveparts Win7Backup sda1″ ocs_live_extra_param=”” ocs_live_batch=”yes” ocs_prerun=”mount -t nfs4 192.168.1.6:/var/lib/tftpboot/Backup /home/partimag” vga=788 ip=frommedia nosplash netboot=nfs nfsroot=192.168.1.6:/var/lib/tftpboot/images/Clonezilla

LABEL Clonezilla Livei nfs AutoRestore
        MENU LABEL Clonezilla Live nfs ^AutoRestore
        MENU PASSWD CloneZilla
        kernel images/Clonezilla/live/vmlinuz
        append initrd=images/Clonezilla/live/initrd.img boot=live config username=user quiet noswap edd=on nomodeset noeject locales=”zh_TW.UTF-8″ keyboard-layouts=”NONE” ocs_live_run=”/usr/sbin/ocs-sr –batch -g auto -e1 auto -e2 -r -j2 -p reboot restoreparts Win7Backup sda1″ ocs_live_extra_param=”” ocs_live_batch=”yes” ocs_prerun=”mount -t nfs4 192.168.1.6:/var/lib/tftpboot/Backup /home/partimag” vga=788 ip=frommedia nosplash netboot=nfs nfsroot=192.168.1.6:/var/lib/tftpboot/images/Clonezilla

在 PXE 開機選單中加入 Clonezilla 功能

Clonezilla 是一套類似 Ghost 的備份和還原程式,是由國家高速網路中心所開發,完全免費,支援多種平台的備份及還原,如:Windows / Linux / Mac…等等,一般使用時都是放在 USB 隨身碟(硬碟) 或燒錄成光碟來使用,不過既然有 PXE,就放在 PXE Server 上,更加的方便,完全不用光碟或隨身碟,既方便又環保。
Clonezilla 官方網站: http://clonezilla.nchc.org.tw/clonezilla-live/

參考網站:
【FreeBSD】架設電腦教室大量佈署環境 – PXE + Clonezilla Live + NFS 備份/還原 @ 有為青年生活札記 :: 痞客邦 PIXNET ::
Clonezilla live

下載 Clonezilla: 版本會一直更新,視所需平台而定
# wget http://downloads.sourceforge.net/project/clonezilla/clonezilla_live_alternative_testing/20140107-trusty/clonezilla-live-20140107-trusty-amd64.zip
# wget http://downloads.sourceforge.net/project/clonezilla/clonezilla_live_alternative_testing/20140107-trusty/clonezilla-live-20140107-trusty-i386.zip
# mkdir /var/lib/tftpboot/images/Clonezilla
# unzip clonezilla-live-20140107-trusty-amd64.zip -d /var/lib/tftpboot/images/Clonezilla

[@more@]
修改 PXE 選單
# vim /var/lib/tftpboot/pxelinux.cfg/default
加入下面幾行
使用 tftp
LABEL Clonezilla Live
   MENU LABEL Clonezilla Live
   MENU PASSWD Clonezilla
   kernel images/Clonezilla/live/vmlinuz
   append initrd=images/Clonezilla/live/initrd.img boot=live config noswap nolocales edd=on nomodeset ocs_live_run=”ocs-live-general” ocs_live_extra_param=”” ocs_live_keymap=”NONE” ocs_live_batch=”no” ocs_lang=”zh_TW.UTF-8″ vga=788 nosplash fetch=tftp://192.168.1.6/images/Clonezilla/live/filesystem.squashfs

使用 nfs
LABEL Clonezilla Live
   MENU LABEL Clonezilla Live
   MENU PASSWD Clonezilla
   kernel images/Clonezilla/live/vmlinuz
   append initrd=images/Clonezilla/live/initrd.img boot=live config noswap nolocales edd=on nomodeset ocs_live_run=”ocs-live-general” ocs_live_extra_param=”” ocs_live_keymap=”NONE” ocs_live_batch=”no” ocs_lang=”zh_TW.UTF-8″ vga=788 nosplash  netboot=nfs nfsroot=192.168.1.6:/Clonezilla

PXE 功能表


開機畫面


開機完成