因為 PXE 功能表的選項愈來愈多,一個頁面放不下,所以修改 PXE 功能表,讓 PXE 功能表可以有很多層。
底下文章參考: http://wiki.centos.org/HowTos/PXE/PXE_Setup/Menus
# vim /var/lib/tftpboot/pxelinux.cfg/default
default menu.c32
prompt 0
timeout 300
ONTIMEOUT local
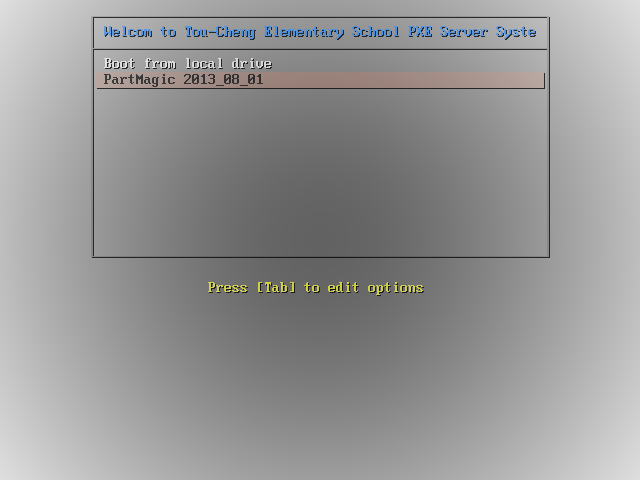
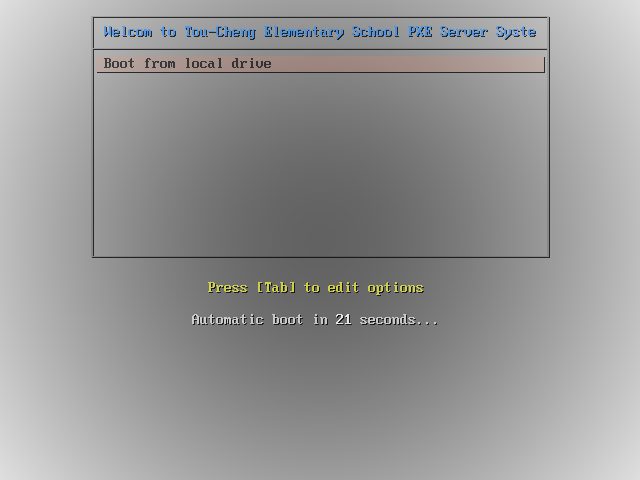
MENU TITLE Welcom to Tou-Cheng Elementary School PXE Server System
LABEL local
MENU LABEL Boot from local hard drive
LOCALBOOT 0
LABEL Install CentOS 6.5 x86_64 Servers
MENU LABEL Install CentOS 6.5 x86_64 Servers
MENU PASSWD CentOS
KERNEL menu.c32
APPEND pxelinux.cfg/x86_64_Servers
LABEL Install CentOS 6.5 x86 Servers
MENU LABEL Install CentOS 6.5 x86 Servers
MENU PASSWD CentOS
KERNEL menu.c32
APPEND pxelinux.cfg/x86_Servers
LABEL Backup / Restore
MENU LABEL Backup / Restore
MENU PASSWD BR
KERNEL menu.c32
APPEND pxelinux.cfg/Backup_Restore
LABEL Tools
MENU LABEL Tools
KERNEL menu.c32
APPEND pxelinux.cfg/tools[@more@]# cat /var/lib/tftpboot/pxelinux.cfg/x86_64_Servers
MENU TITLE Install CentOS 6.5 x86_64 Server Menu
LABEL Main Menu
MENU LABEL ^Return Main Menu
KERNEL menu.c32
APPEND pxelinux.cfg/default
LABEL Install CentOS 6.5 x86_64 from FTP
MENU LABEL Install CentOS 6.5 x86_64 from FTP
kernel images/CentOS/6.5/x86_64/vmlinuz
append initrd=images/CentOS/6.5/x86_64/initrd.img method=ftp://192.168.1.6/CentOS/6.5/os/x86_64/
LABEL Install CentOS 6.5 x86_64 from HTTP
MENU LABEL Install CentOS 6.5 x86_64 from HTTP
kernel images/CentOS/6.5/x86_64/vmlinuz
append initrd=images/CentOS/6.5/x86_64/initrd.img method=http://192.168.1.6/CentOS/6.5/os/x86_64/
LABEL Install CentOS 6.5 x86_64 from NFS
MENU LABEL Install CentOS 6.5 x86_64 from NFS
kernel images/CentOS/6.5/x86_64/vmlinuz
append initrd=images/CentOS/6.5/x86_64/initrd.img method=http://192.168.1.6/CentOS/6.5/os/x86_64/
LABEL AutoInstall CentOS 6.5 x86_64 from FTP
MENU LABEL AutoInstall CentOS 6.5 x86_64 from FTP
kernel images/CentOS/6.5/x86_64/vmlinuz
append initrd=images/CentOS/6.5/x86_64/initrd.img ks=ftp://192.168.1.6/ks/ks.cfg method=ftp://192.168.1.6/CentOS/6.5/os/x86_64/
LABEL AutoInstall CentOS 6.5 x86_64 from HTTP
MENU LABEL AutoInstall CentOS 6.5 x86_64 from HTTP
kernel images/CentOS/6.5/x86_64/vmlinuz
append initrd=images/CentOS/6.5/x86_64/initrd.img ks=http://192.168.1.6/ks/ks.cfg method=http://192.168.1.6/CentOS/6.5/os/x86_64/
LABEL AutoInstall CentOS 6.5 x86_64 from NFS
MENU LABEL AutoInstall CentOS 6.5 x86_64 from NFS
kernel images/CentOS/6.5/x86_64/vmlinuz
append initrd=images/CentOS/6.5/x86_64/initrd.img ks=http://192.168.1.6/ks/ks.cfg method=http://192.168.1.6/CentOS/6.5/os/x86_64/
# cat /var/lib/tftpboot/pxelinux.cfg/x86_Servers
MENU TITLE Install CentOS 6.5 x86 Server Menu
LABEL Main Menu
MENU LABEL ^Return Main Menu
KERNEL menu.c32
APPEND pxelinux.cfg/default
LABEL Install CentOS 6.5 i386 from FTP
MENU LABEL Install CentOS 6.5 i386 from FTP
kernel images/CentOS/6.5/i386/vmlinuz
append initrd=images/CentOS/6.5/i386/initrd.img method=ftp://192.168.1.6/CentOS/6.5/os/i386/
LABEL Install CentOS 6.5 i386 from HTTP
MENU LABEL Install CentOS 6.5 i386 from HTTP
kernel images/CentOS/6.5/i386/vmlinuz
append initrd=images/CentOS/6.5/i386/initrd.img method=http://192.168.1.6/CentOS/6.5/os/i386/
LABEL Install CentOS 6.5 i386 from NFS
MENU LABEL Install CentOS 6.5 i386 from NFS
kernel images/CentOS/6.5/i386/vmlinuz
append initrd=images/CentOS/6.5/i386/initrd.img method=http://192.168.1.6/CentOS/6.5/os/i386/
LABEL AutoInstall CentOS 6.5 i386 from FTP
MENU LABEL AutoInstall CentOS 6.5 i386 from FTP
kernel images/CentOS/6.5/i386/vmlinuz
append initrd=images/CentOS/6.5/i386/initrd.img ks=ftp://192.168.1.6/ks/ks.cfg method=ftp://192.168.1.6/CentOS/6.5/os/i386/
LABEL AutoInstall CentOS 6.5 i386 from HTTP
MENU LABEL AutoInstall CentOS 6.5 i386 from HTTP
kernel images/CentOS/6.5/i386/vmlinuz
append initrd=images/CentOS/6.5/i386/initrd.img ks=http://192.168.1.6/ks/ks.cfg method=http://192.168.1.6/CentOS/6.5/os/i386/
LABEL AutoInstall CentOS 6.5 i386 from NFS
MENU LABEL AutoInstall CentOS 6.5 i386 from NFS
kernel images/CentOS/6.5/i386/vmlinuz
append initrd=images/CentOS/6.5/i386/initrd.img ks=http://192.168.1.6/ks/ks.cfg method=http://192.168.1.6/CentOS/6.5/os/i386/
# cat /var/lib/tftpboot/pxelinux.cfg/Backup_Restore
MENU TITLE Backup / Restore Menu
LABEL Main Menu
MENU LABEL ^Return Main Menu
KERNEL menu.c32
APPEND pxelinux.cfg/default
LABEL Symantec Ghost
MENU LABEL ^Symantec Ghost
MENU PASSWD Ghost
kernel memdisk
append initrd=images/dos/GHO1151.IMG
LABEL Clonezilla Live tftp
MENU LABEL Clonezilla Live ^tftp
MENU PASSWD CloneZilla
kernel images/Clonezilla/live/vmlinuz
append initrd=images/Clonezilla/live/initrd.img boot=live config username=user quiet noswap edd=on nomodeset noeject locales=”zh_TW.UTF-8″ keyboard-layouts=”NONE” ocs_live_run=”ocs-live-general” ocs_live_extra_param=”” ocs_live_batch=no vga=788 ip=frommedia nosplash fetch=tftp://192.168.1.6/images/Clonezilla/live/filesystem.squashfs
LABEL Clonezilla Livei nfs
MENU LABEL Clonezilla Live ^nfs
MENU PASSWD CloneZilla
kernel images/Clonezilla/live/vmlinuz
append initrd=images/Clonezilla/live/initrd.img boot=live config username=user quiet noswap edd=on nomodeset noeject locales=”zh_TW.UTF-8″ keyboard-layouts=”NONE” ocs_live_run=”ocs-live-general” ocs_live_extra_param=”” ocs_live_batch=no vga=788 ip=frommedia nosplash netboot=nfs nfsroot=192.168.1.6:/var/lib/tftpboot/images/Clonezilla
# cat /var/lib/tftpboot/pxelinux.cfg/tools
MENU TITLE Tools Menu
LABEL Main Menu
MENU LABEL ^Return Main Menu
KERNEL menu.c32
APPEND pxelinux.cfg/default
LABEL Memory Test
MENU LABEL ^Memory Test – memtest86+
kernel images/memtest/memtest86+-5.01
LABEL SPFDisk
MENU LABEL ^SPFDisk
MENU PASSWD SPFDisk
kernel memdisk
append initrd=images/dos/spfdisk.img
label FreeDOS 1.0 Bootdisk
MENU LABEL ^FreeDOS 1.0 bootdisk
MENU PASSWD FreeDOS
kernel memdisk
append initrd=images/dos/balder10.img