學校行政人員在使用 Windows 7 時,常常會因為 Internet Explorer 的版本升級之後,造成一些無法使用的困擾,雖然常用的公文系統在 IE 10/11 上都可以解決,但仍有些系統(文書/人事/主計…)等的系統,可能還是無法使用新版本的 IE。
因為一些資安的問題,所以都會請使用者要常常做 Windows Update,甚至開啟自動更新,但這會造成 Internet Explorer 自動升級到最新版本,如果要使用者在安裝更新時,略過新版本的 IE,對使用者來說,要有些困擾,就時候就可以使用 Internet Explorer BlockerToolkit 來阻擋 Internet Explorer 自動升級到最新版本。
Internet Explorer 9 BlockerToolkit:下載網址
Internet Explorer 10 BlockerToolkit: 下載網址
Internet Explorer 11 BlockerToolkit: 下載網址
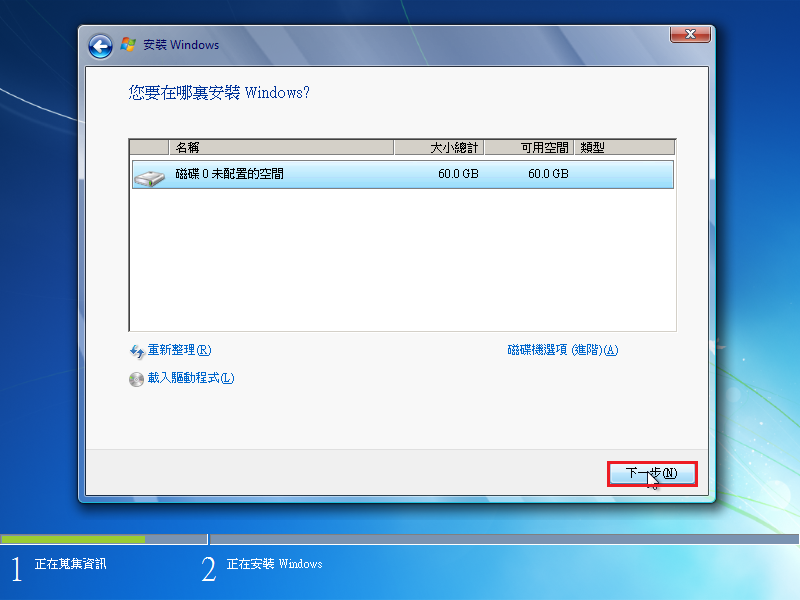
[@more@]這裡以 Windows 7 x64 SP1 為例,將下載下來的 Internet Explorer 9/10/11 BlockerToolkit 先行解壓縮
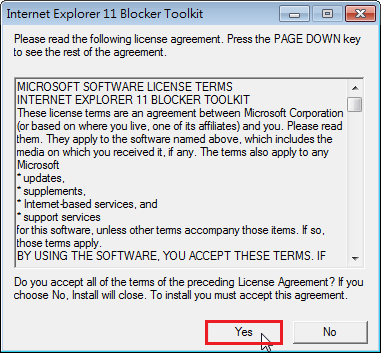
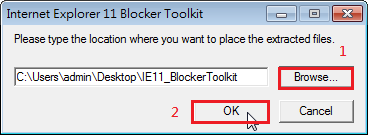
1. 這裡以 Internet Explorer 11 BlockerToolkit 為例,按二下程式,出現授權協定,請按下方的 Yes

2. 選擇要解壓縮的路徑,然後按 OK
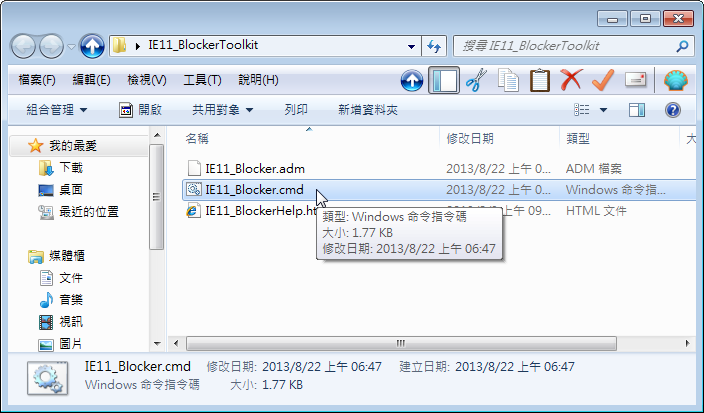
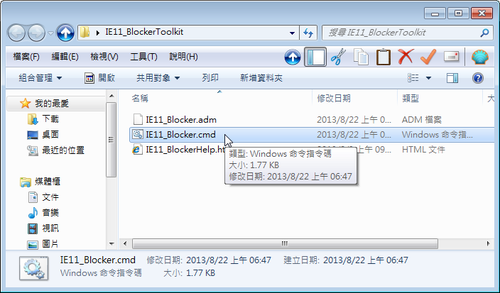
3. 解壓縮完成的目錄
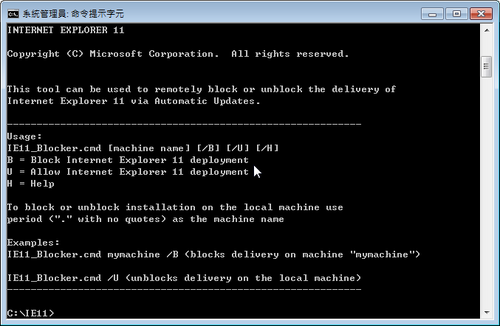
4. 程式執行的參數
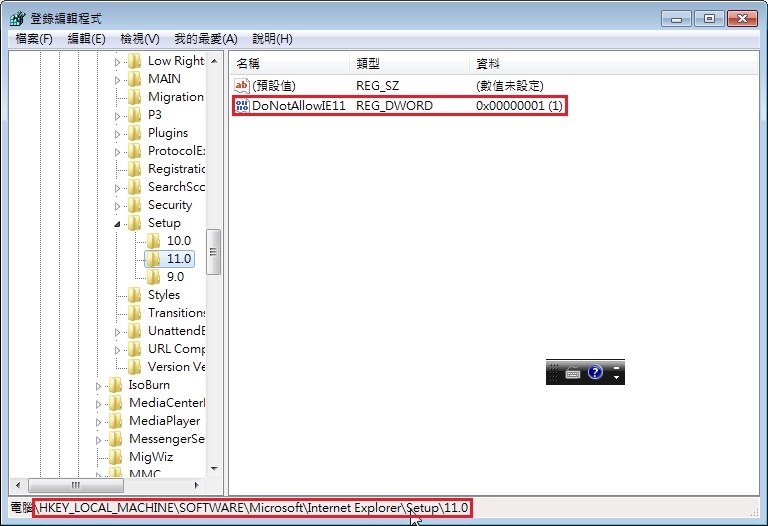
/B 是阻擋系統升級到 Internet Explorer 11
/U 是同意系統可以升級到 Internet Explorer 11
/H 顯示 Help 使用參數
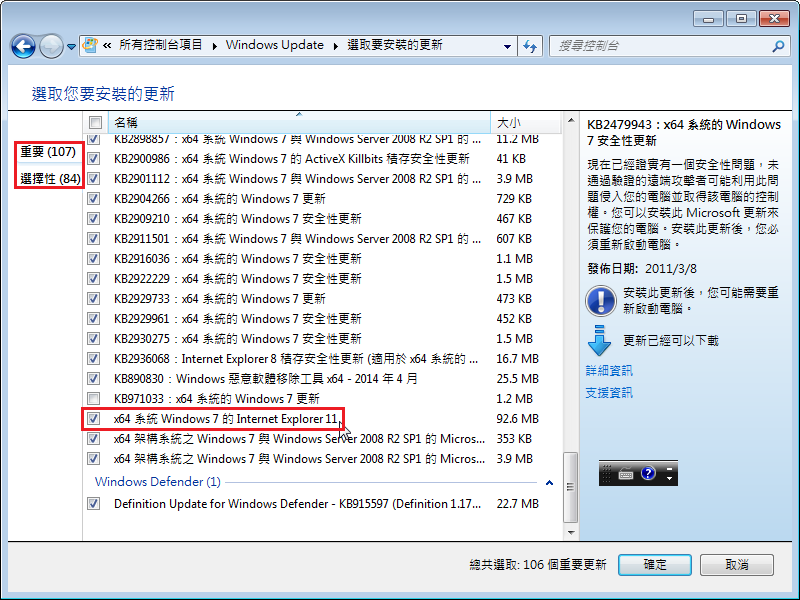
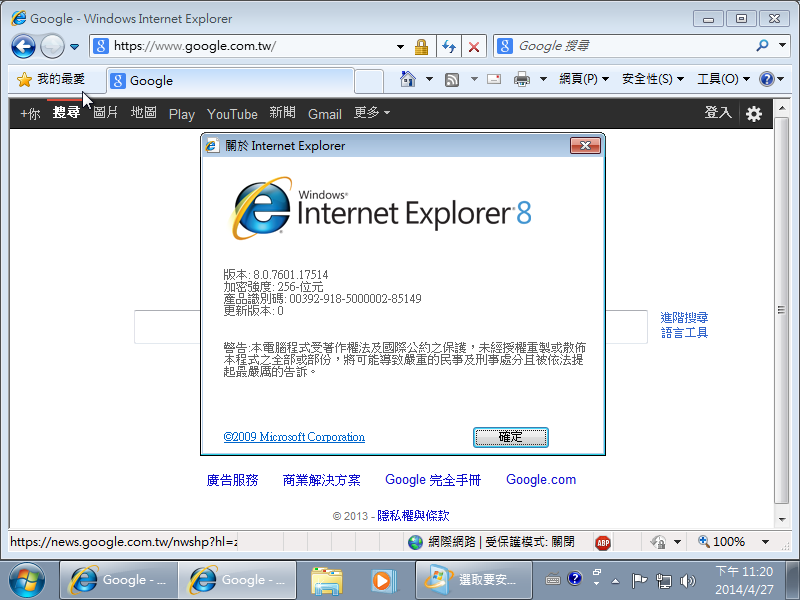
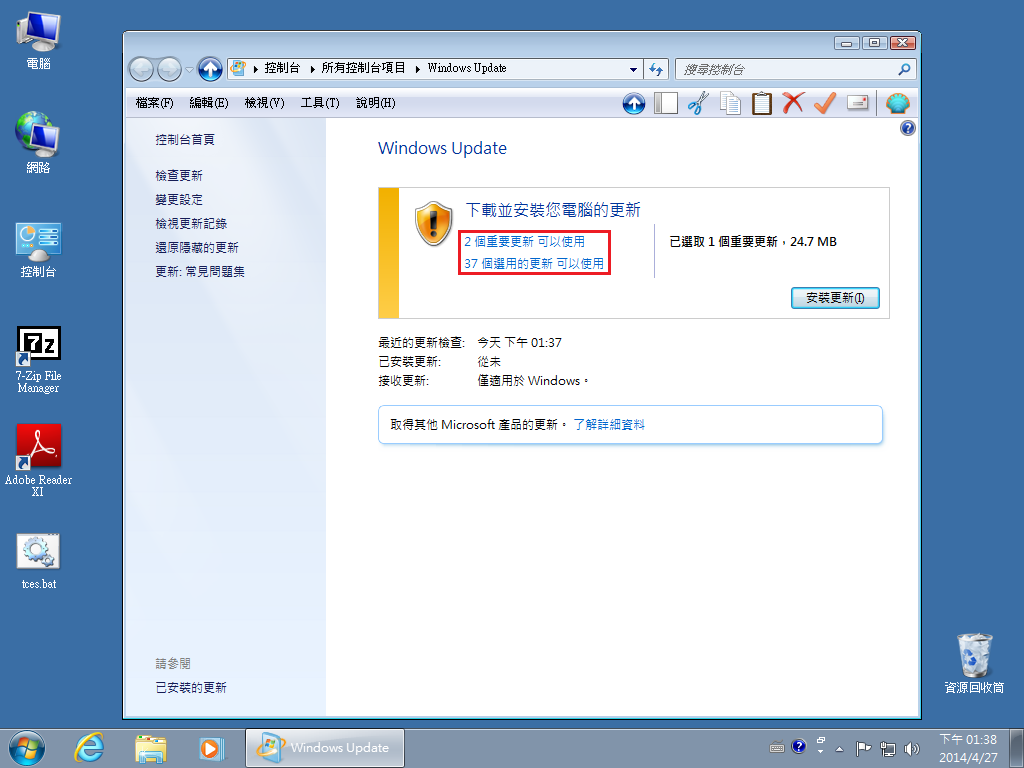
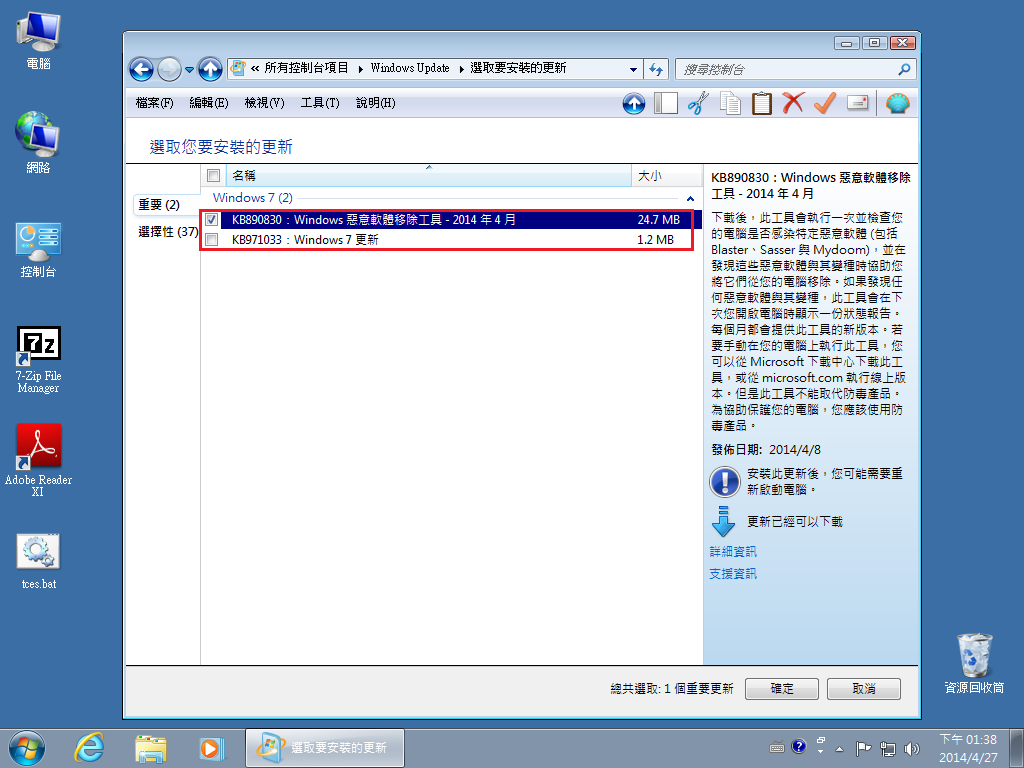
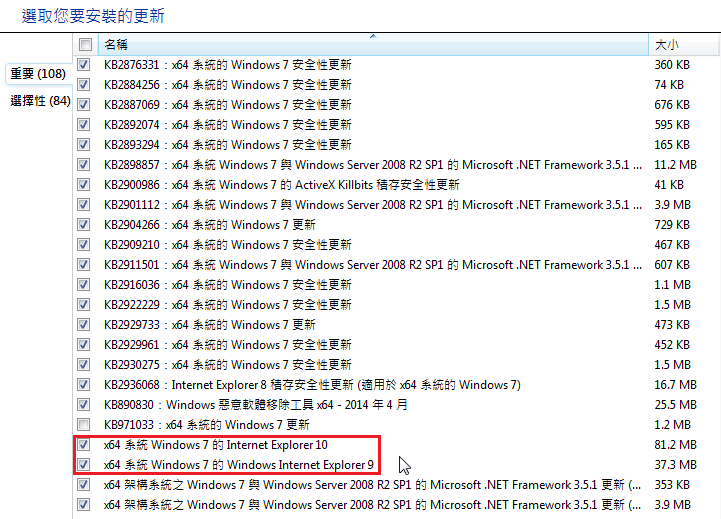
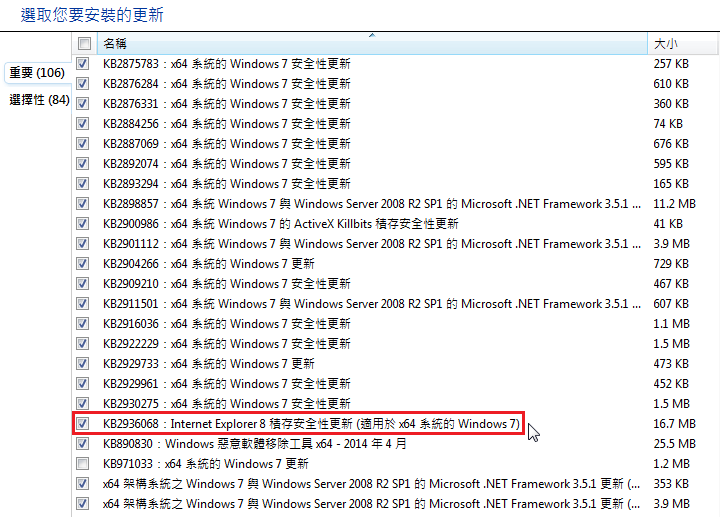
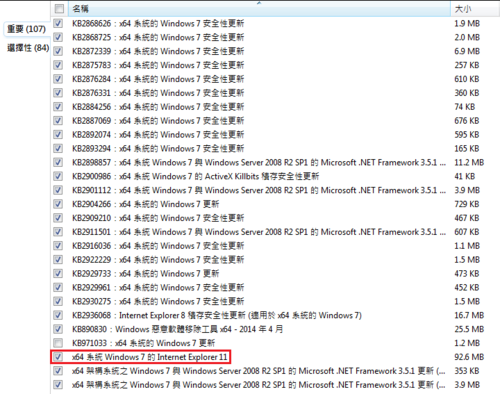
5. 原本的 Windows 7 x64 SP1 安裝完成是 Internet Explorer 8,所以有 Internet Explorer 11 可以升級
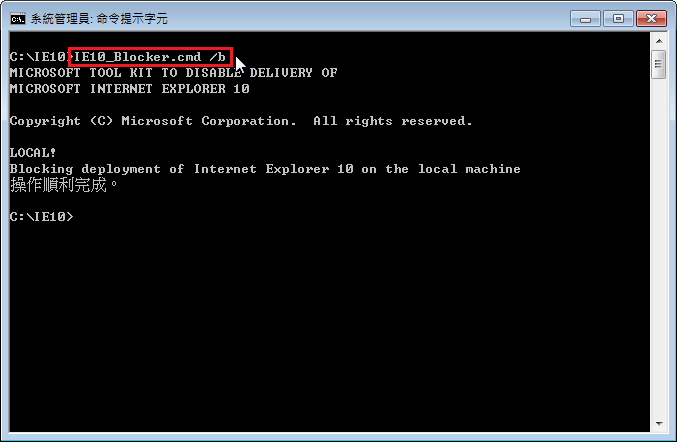
6. 以系統管理者身份執行命令提示字元,切換到 Internet Explorer BlockerToolkit 目錄,執行
c:IE11>IE11_Blocker.cmd /b
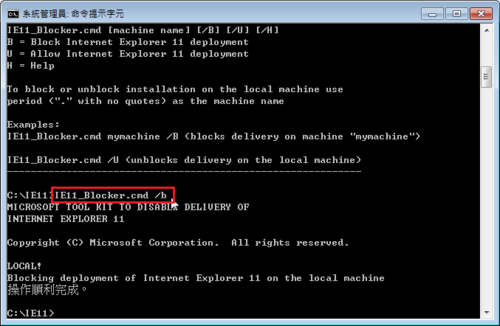
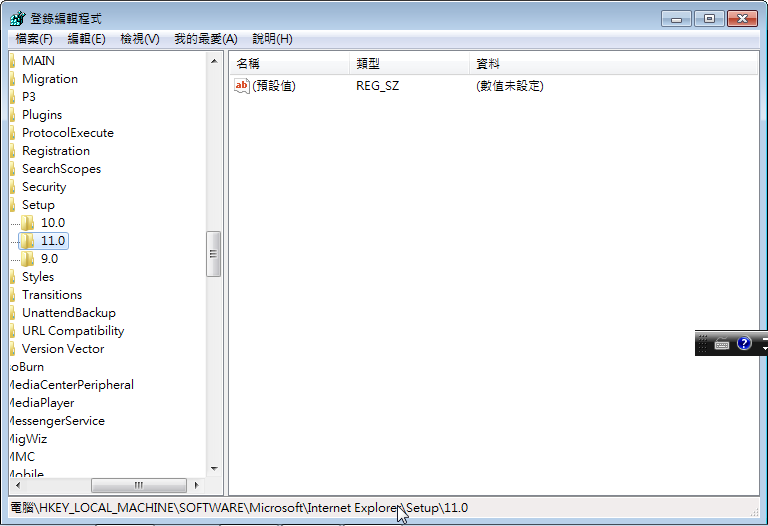
這時候,Internet Explorer 11 就會不在更新清單之中,取而代之的是 Internet Explorer 9/10

執行 Internet Explorer10 BlockerToolkit
c:IE10>IE10_Blocker.cmd /b

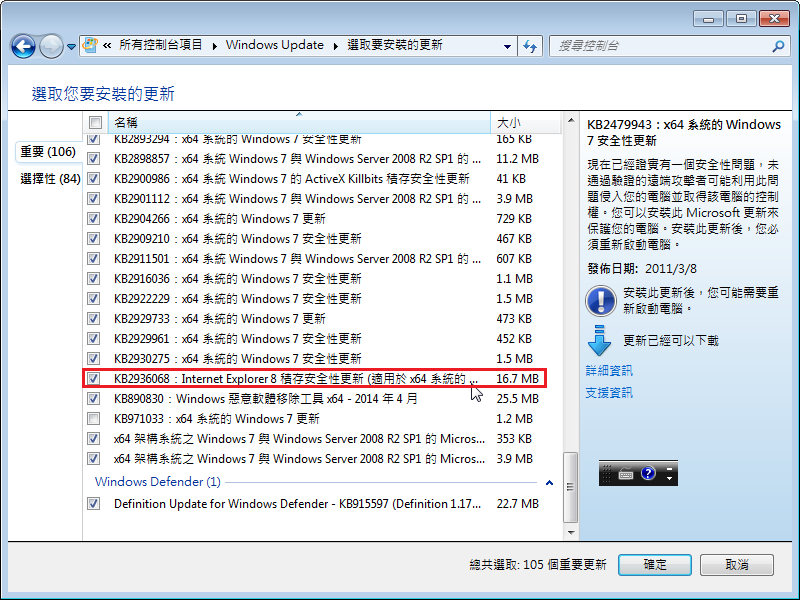
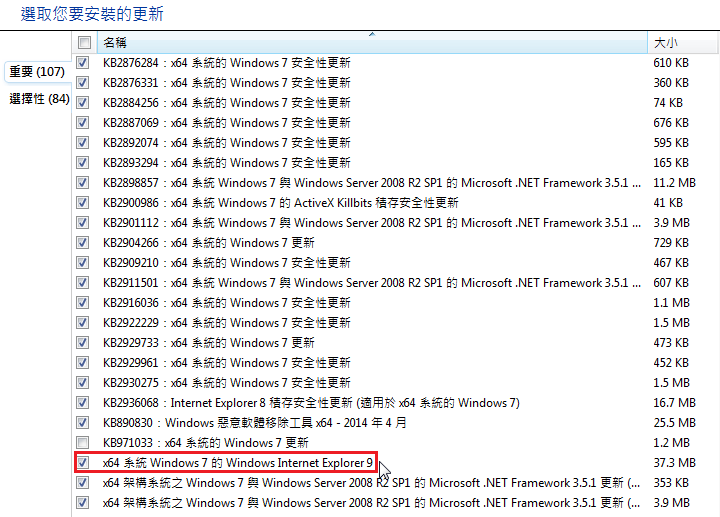
這時候,Internet Explorer 11/10 就會不在更新清單之中,剩下的是 Internet Explorer 9

執行 Internet Explorer 9 BlockerToolkit
c:IE9>IE9_Blocker.cmd /b

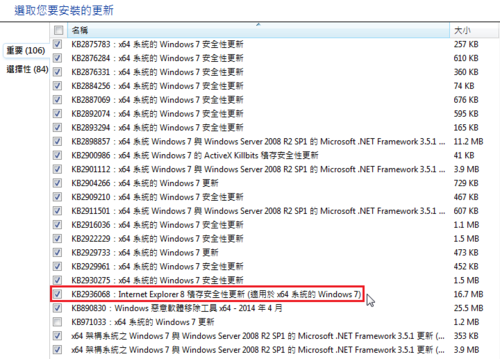
更新清單中就只剩下 Internet Explorer 8 的更新了!
下一步就可以考慮把 Internet Explorer BlockerToolkit 加入到安裝光碟,讓 Windows 7 SP1 安裝完成時即完成設定。