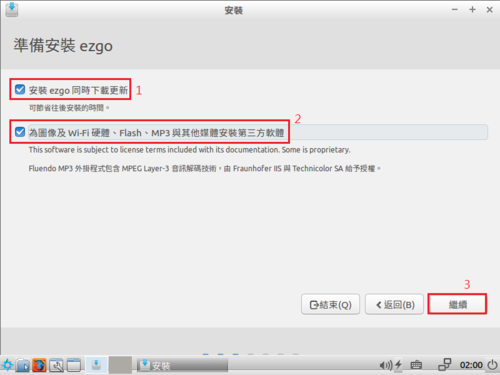
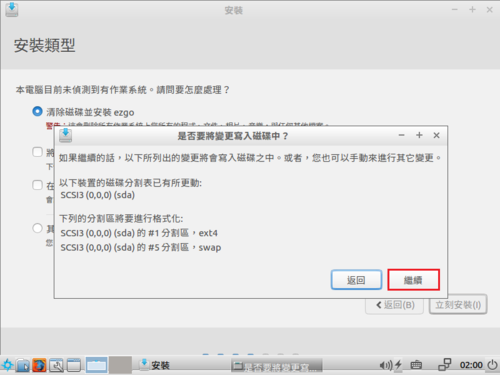
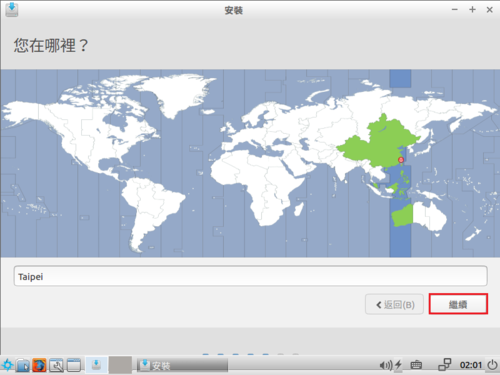
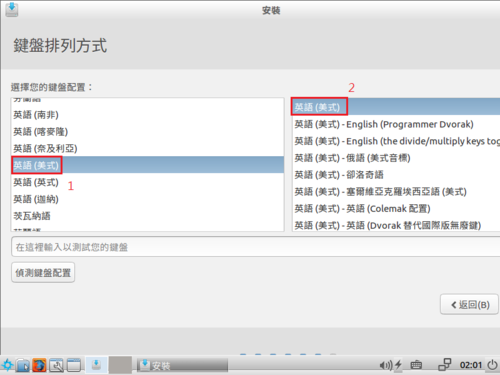
試用 Banana Pi M3 – Ubuntu minimal 16.04 上安裝 no-ip2

為了管理方便,所以在家裡的 Banana Pi M3 上加裝 no-ip2
因為套件庫中沒有 noip 套件,所以要自行編譯安裝
參考網站:
How To Install No-ip2 On Ubuntu 12.04 LTS In Order To Host Servers On A Dynamic IP Address
How to Install the Linux Dynamic Update Client on Ubuntu

1. 安裝編譯相關套件
# apt-get install build-essential checkinstall[@more@]2. 下載 no-ip2 官網程式
# cd /usr/local/src/
# wget http://www.no-ip.com/client/linux/noip-duc-linux.tar.gz

3. 解壓縮
# tar xf noip-duc-linux.tar.gz

4. 切換目錄
# cd noip-2.1.9-1

5. 進行安裝
# make install
Please enter the login/email string for no-ip.com  abc@ilc.edu.tw
Please enter the password for user ‘abc@ilc.edu.tw’  ***********

Only one host [bplinux.sytes.net] is registered to this account.
It will be used.
Please enter an update interval:[30]
Do you wish to run something at successful update?[N] (y/N)  N

New configuration file ‘/tmp/no-ip2.conf’ created.

mv /tmp/no-ip2.conf /usr/local/etc/no-ip2.conf

設定檔位置:/usr/local/etc/no-ip2.conf

6. 建立開機啟動檔
# vim /etc/init.d/noip2
#! /bin/sh
### BEGIN INIT INFO
# Provides:          no-ip2
# Required-Start:    $local_fs $remote_fs $network $syslog $named
# Required-Stop:     $local_fs $remote_fs $network $syslog $named
# Default-Start:     2 3 4 5
# Default-Stop:      0 1 6
# Short-Description: Start/stop no-ip2
### END INIT INFO
case “$1” in
    start)
        echo “Starting no-ip2”
        /usr/local/bin/noip2
    ;;
    stop)
        echo -n “Shutting down no-ip2”
        for i in `noip2 -S 2>&1 | grep Process | awk ‘{print $2}’ | tr -d ‘,’`
        do
          noip2 -K $i
        done
    ;;
    *)
        echo “Usage: $0 {start|stop}”
        exit 1
esac
exit 0

7. 更改檔案執行權限
# chmod 755 /etc/init.d/noip2

8. 執行 no-ip2
# /etc/init.d/noip2 start
Starting no-ip2
# ps aux | grep noip2 | grep -v grep
nobody    1605  0.0  0.0   2036   628 ?        Ss   05:12   0:00 /usr/local/bin/noip2

9. 設定開機時執行
# sed -i ‘/export/ an#Starting no-ip2…n/etc/init.d/noip2 start’ /etc/rc.local

# update-rc.d noip2 defaults

10. 如果不需要編譯套件也可以移除
# apt-get remove –purge binutils build-essential checkinstall cpp cpp-5 dpkg-dev fakeroot file g++ g++-5 gcc gcc-5 libalgorithm-diff-perl libalgorithm-diff-xs-perl libalgorithm-merge-perl libasan2 libatomic1 libc-dev-bin libc6-dev libcc1-0 libdpkg-perl libfakeroot libfile-fcntllock-perl libgcc-5-dev libgomp1 libisl15 libmagic1 libmpc3 libstdc++-5-dev libubsan0 linux-libc-dev make manpages manpages-dev patch


Linux 下壓縮程式比較

原檔
$ ls -l UNUBeaconLogo128.png
-rw-r–r– 1 bananapi bananapi 25102 10月 12 17:16 UNUBeaconLogo128.png

使用 zip 格式
壓縮
# zip UNUBeaconLogo128.png.zip UNUBeaconLogo128.png
解壓縮
# unzip UNUBeaconLogo128.png.zip[@more@]

使用 7z 格式
壓縮
# 7z a
UNUBeaconLogo128.png.7z UNUBeaconLogo128.png
解壓縮
# 7z x UNUBeaconLogo128.png.7z

使用 gz 格式
壓縮(壓縮後原檔會不見)
# gzip
UNUBeaconLogo128.png
解壓縮(解壓縮後壓縮檔會不見)
# gzip -d UNUBeaconLogo128.png.gz
# gunzip UNUBeaconLogo128.png.gz

使用 xz 格式
壓縮(壓縮後原檔會不見)
# xz -z
UNUBeaconLogo128.png
解壓縮(解壓縮後壓縮檔會不見)
# xz -d UNUBeaconLogo128.png.xz
# unxz UNUBeaconLogo128.png.xz

綜合比較:在預設的情況下,不特別加上壓縮參數
$ ls -l UNUBeaconLogo128.png*
-rw-r–r– 1 bananapi bananapi 25102 10月 12 17:16 UNUBeaconLogo128.png
-rw-rw-r– 1 bananapi bananapi 11322 12月 24 13:54 UNUBeaconLogo128.png.7z
-rw-r–r– 1 bananapi bananapi 11378 10月 12 17:16 UNUBeaconLogo128.png.gz
-rw-r–r– 1 bananapi bananapi 11244 10月 12 17:16 UNUBeaconLogo128.png.xz
-rw-rw-r– 1 bananapi bananapi 11529 12月 24 13:54 UNUBeaconLogo128.png.zip

xz > 7z > gz > zip

gz / bz2 / xz 搭配 tar 使用
壓縮
# tar cjzf filename.tar.gz dirname
# tar cvjf filename.tar.bz2 dirname
# tar cvJf filename.tar.xz dirname

解壓縮
# tar xjzf filename.tar.gz
# tar xvjf filename.tar.bz2
# tar xvJf filename.tar.xz

Linux 下 7z 的使用方式

CentOS 7.x 安裝
# yum install epel-release
# yum update
# yum install p7zip

Arch Linux 安裝
# pacman -S p7zip

Ubuntu / Debian
# apt-get install p7zip-full 

# apt-get install p7zip[@more@]CentOS 可用指令 7za
Arch Linux / Debian / Ubuntu 可用指令 7z / 7za

常用參數
壓縮
# 7z a 壓縮檔名.7z 要壓縮的檔案或目錄1 要壓縮的檔案或目錄2

解壓縮
# 7z x 壓縮檔名.7z

# 7z e 壓縮檔名.7z

xe 差別,如果建立壓縮檔時有包含目錄,則 x 會依照原本壓縮時的樣子來還原,e 會建立原來的空目錄名稱,並把檔案解開在目錄名稱的外面
原則上會建議使用 x

列出壓縮檔的內容
# 7z l 壓縮檔名.7z

解壓縮時指定目錄
# 7z x 壓縮檔名.7z -o目錄位置
# 7z x 123.7z -o/tmp

更多的參數
# 7z –help

<Commands>
  a : Add files to archive
  b : Benchmark
  d : Delete files from archive
  e : Extract files from archive (without using directory names)
  h : Calculate hash values for files
  i : Show information about supported formats
  l : List contents of archive
  rn : Rename files in archive
  t : Test integrity of archive
  u : Update files to archive
  x : eXtract files with full paths

試用 Banana Pi M3 – 試用新北市 bpi-m3-mate1604-0709

下載網站:ftp://163.20.108.15/ftp/bpim3/bpi-m3-mate1604-0709.zip


感謝新北團隊的製作,這一個版本是我使用過 Ubuntu Mate 最沒有問題的版本,官網上下載下來的版本,最後在做 apt-get upgrade 通通都陣亡了![@more@]

順手修改了一下,移除一些自己不用的軟體
# apt-get update

移除 fcitx
# apt-get remove –purge fcitx

移除 cheese 攝影機及 brasero 燒錄程式
# apt-get remove –purge cheese brasero

移除 hexchat 網路清談、pidgin 聊天、thunderbird 信件軟體
# apt-get remove –purge hexchat pidgin thunderbird

移除 Apache、PHP、MySQL
# apt-get remove –purge apache2 php mysql

移除多餘語言套件
apt-get remove –purge $(dpkg -l | grep language | awk ‘{print $2}’ | grep ^language | egrep -v ‘zh-hant|en|selector’)

改用 gcin
# apt-get install gcin

更新到最新版本
# apt-get upgrade

不過不知道為什麼,這一個版本好像有點大,我試過用三片的 16G  MicroSD(ADATA/TOSHIBA/Transcend),都一直無法燒錄 Image 成功,後來直接改用 32G 的才沒有問題。

active (exited) 和 active (running)

啟動 OpenVPN Server 後,檢查是否有正常運作
# systemctl start openvpn
# systemctl status openvpn
● openvpn.service – OpenVPN service
Loaded: loaded (/lib/systemd/system/openvpn.service; enabled; vendor preset:
Active: active (exited) since 五 2016-12-23 21:35:43 CST; 28s ago

使用 netstat 來檢查
# netstat -antp | grep :1194
tcp 0 0 0.0.0.0:1194 0.0.0.0:* LISTEN 3146/openvpn

似乎有正常運作[@more@]解決方式:
# systemctl start openvpn@server.service
# systemctl status openvpn@server.service
● openvpn@server.service – OpenVPN connection to server
Loaded: loaded (/lib/systemd/system/openvpn@.service; disabled; vendor preset
Active: active (running) since 五 2016-12-23 21:33:19 CST; 5s ago

關於這二者的說明,可以參考:
[Linux] systemctl 列出來的 loaded active exited 是什麼意思? @ 亂打一通的心情日記 :: 痞客邦 PIXNET ::

只不過我以前都是習慣使用前一種方式來執行

客製化 ezgo 13 LXDE

稍微修改了一下,以符合自己的需要。
已先預載套件

[@more@]辦公文書功能表

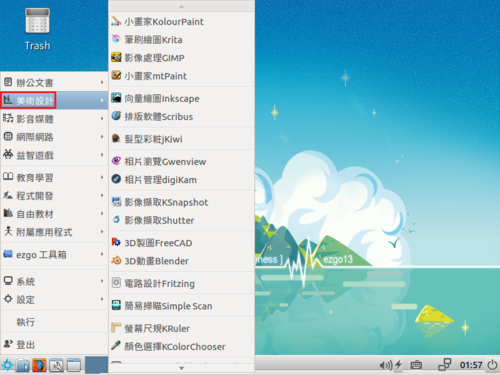
美工設計功能表

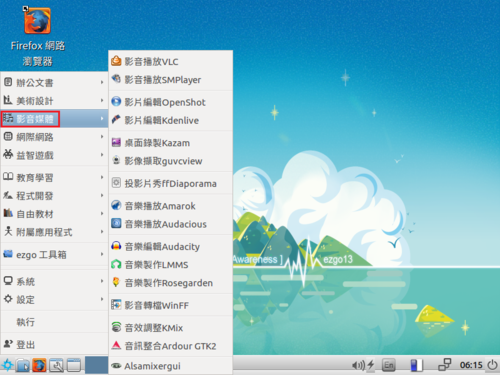
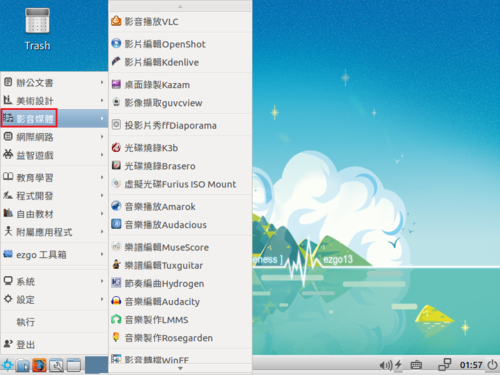
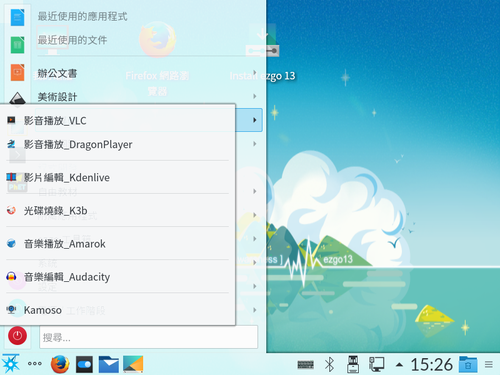
影音媒體功能表

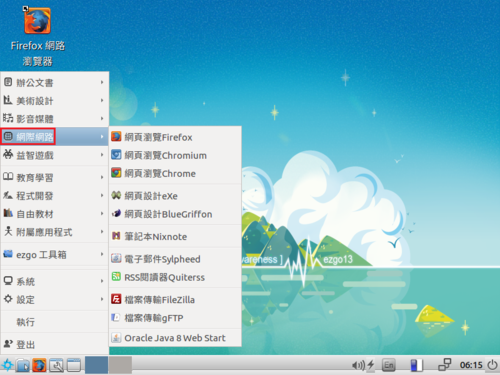
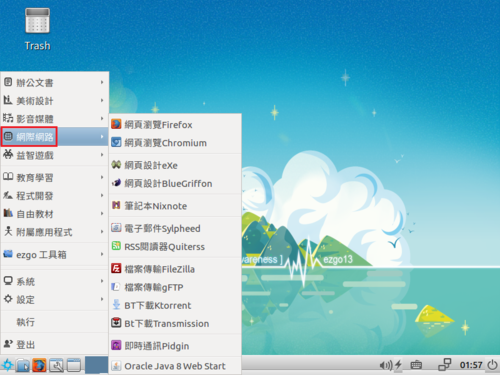
網際網路功能表

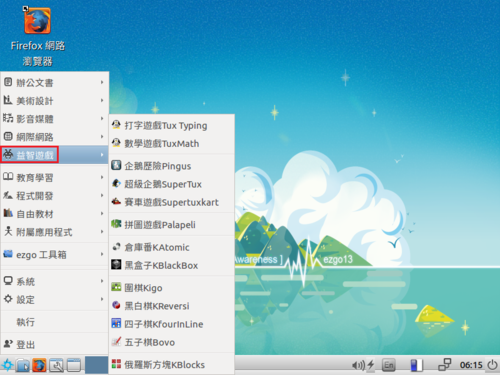
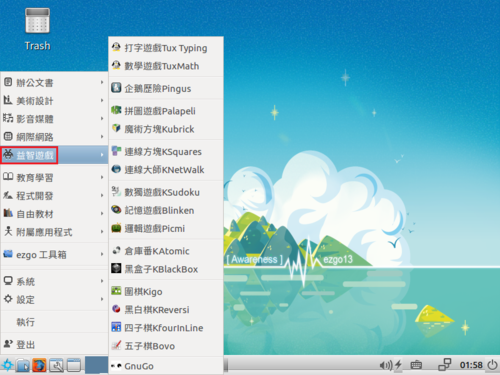
益智遊戲功能表

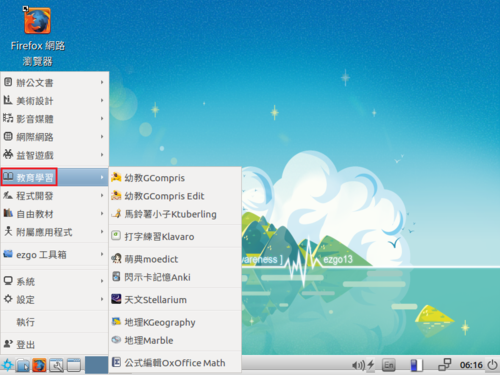
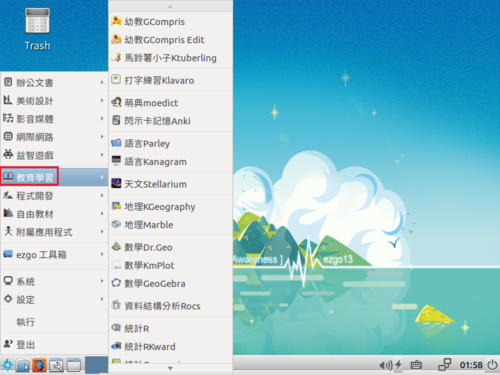
教育學習功能表

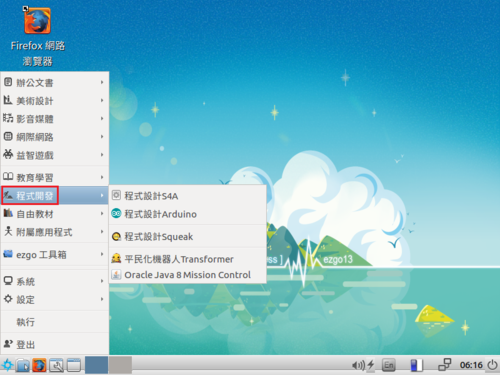
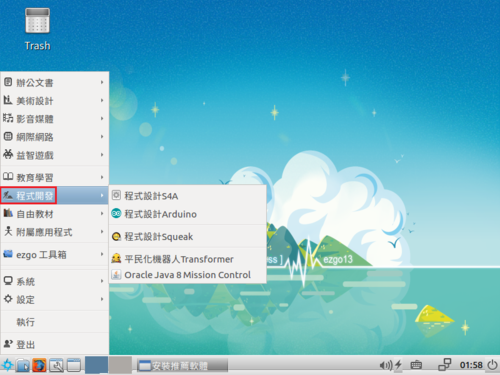
程式開發功能表

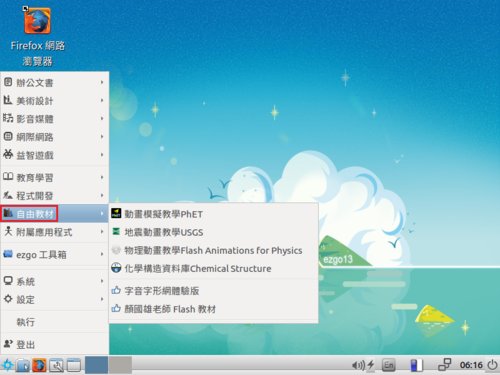
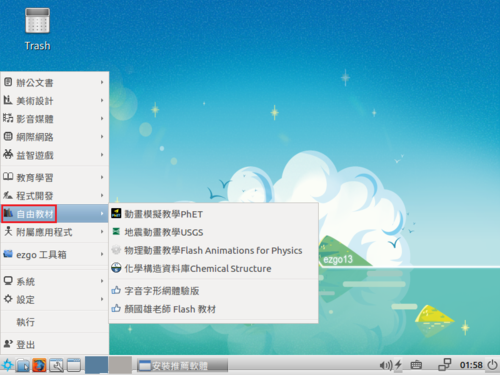
自由教材功能表

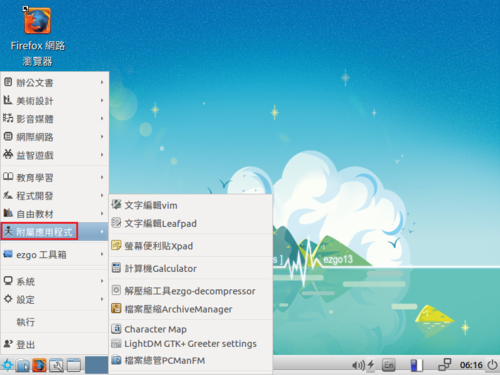
附屬應用程式功能表

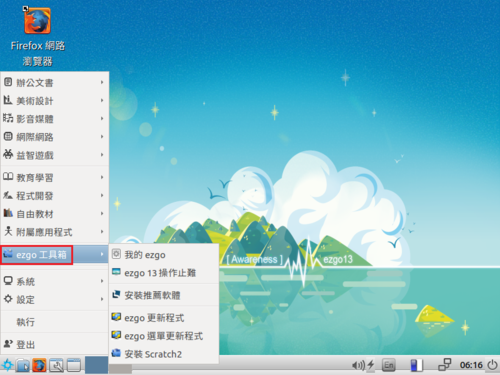
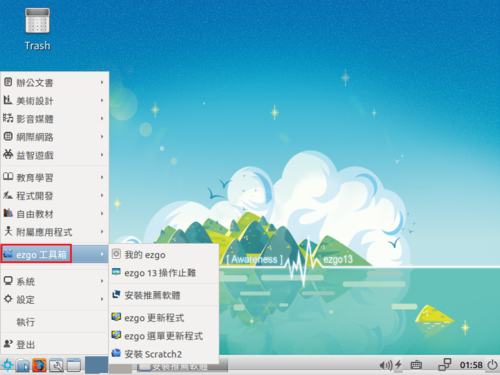
ezgo 工具箱功能表

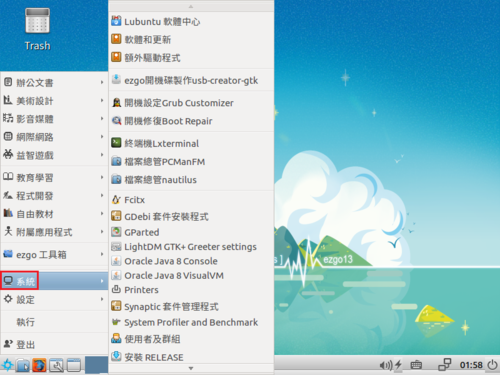
系統功能表

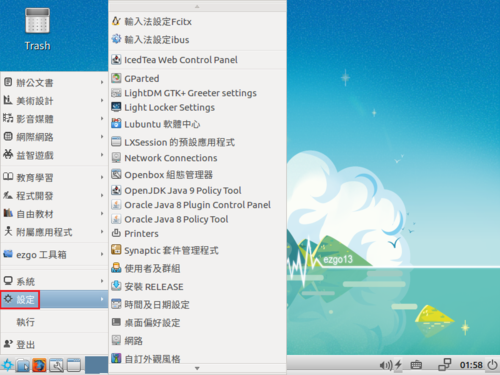
設定功能表

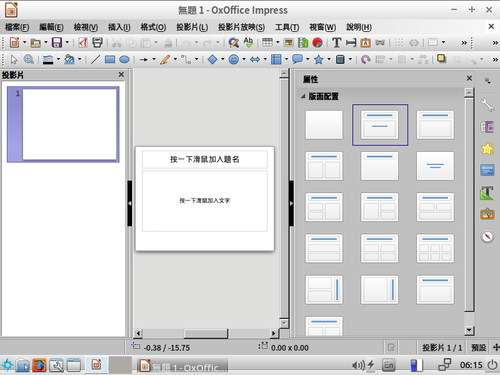
主要修改的地方:移除 LibreOffice,改安裝 OxOffice 6

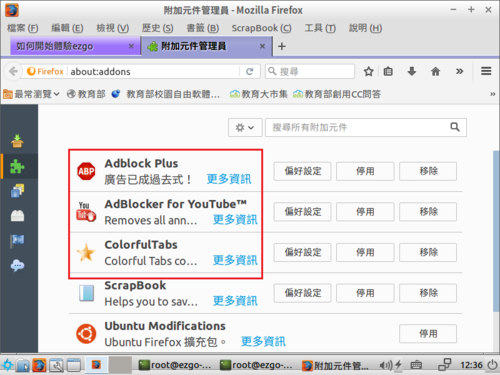
Firefox 新增附加元件:Adblock Plus / AdBlocker for Youtube / ColorfulTabs

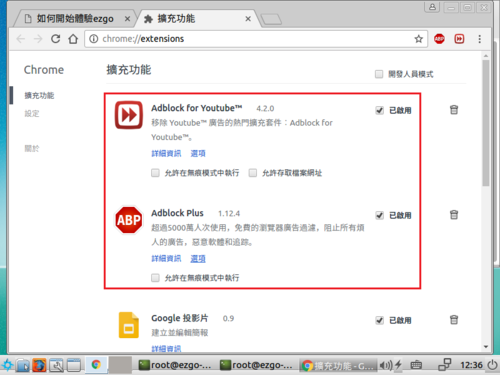
Google Chrome:預設首頁改成「如何開始體驗ezgo」,新增擴充功能:Adblock Plus / AdBlocker for Youtube

Chromium:預設首頁改成「如何開始體驗ezgo」,新增擴充功能:Adblock Plus / AdBlocker for Youtube

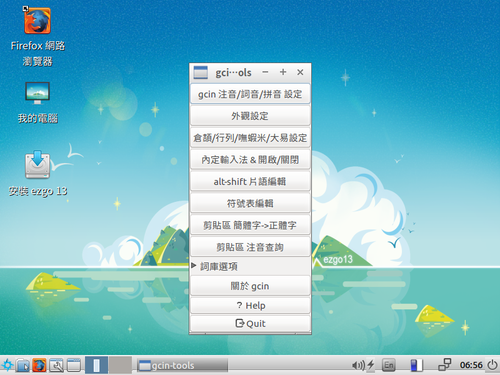
輸入法部分,移除 fcitx,改安裝 gcin,預設輸入法改成行列輸入法

Ubuntu Server ufw Firewall

安裝 ufw 套件
# apt-get install ufw
設定 ufw (0.35-0ubuntu2) …
Creating config file /etc/ufw/before.rules with new version
Creating config file /etc/ufw/before6.rules with new version
Creating config file /etc/ufw/after.rules with new version
Creating config file /etc/ufw/after6.rules with new version
Processing triggers for systemd (229-4ubuntu13) …
Processing triggers for ureadahead (0.100.0-19) …

1. 停用防火牆,取消開機時執行
# ufw disable
Firewall stopped and disabled on system startup

未啟用
# ufw status
Status: inactiv[@more@]2. 啟用防火牆
# ufw enable
Firewall is active and enabled on system startup

已啟用
# ufw status
Status: active

3. 預設規則
預設同意
# ufw default allow
拒絕外部連線
# ufw default deny incoming
Default incoming policy changed to ‘deny’
(be sure to update your rule accordingly)
預設拒絕
# ufw default deny
同意對外連線
# ufw default allow outgoing
Default outgoing policy changed to ‘allow’
(be sure to update your rule accordingly)

4. 防火牆規則
# ufw allow in 22/tcp
# ufw allow in ssh
# ufw allow in http
# ufw allow out http
# ufw allow from 192.168.1.0/24
# ufw allow from 192.168.1.0/24 port 22
# ufw allow proto tcp from 192.168.1.0/24 port 22
# ufw deny from 192.168.1.17 to 192.168.1.16 port 22
# ufw allow from 192.168.1.0/24 to 192.168.1.16 port 22

5. 列出防火牆規則
# ufw status
Status: active

To                         Action      From
—                         ——      —-
22                         ALLOW       Anywhere
443/tcp                    ALLOW       Anywhere
53                         ALLOW       Anywhere
22/tcp                     ALLOW       Anywhere
1194/tcp                   ALLOW       Anywhere
22                         ALLOW       192.168.1.0/24
22 (v6)                    ALLOW       Anywhere (v6)
443/tcp (v6)               ALLOW       Anywhere (v6)
53 (v6)                    ALLOW       Anywhere (v6)
22/tcp (v6)                ALLOW       Anywhere (v6)
1194/tcp (v6)              ALLOW       Anywhere (v6)

加上編號
# ufw status numbered
Status: active

     To                         Action      From
     —                         ——      —-
[ 1] 22                         ALLOW IN    Anywhere
[ 2] 443/tcp                    ALLOW IN    Anywhere
[ 3] 53                         ALLOW IN    Anywhere
[ 4] 22/tcp                     ALLOW IN    Anywhere
[ 5] 1194/tcp                   ALLOW IN    Anywhere
[ 6] 22                         ALLOW IN    192.168.1.0/24
[ 7] 22 (v6)                    ALLOW IN    Anywhere (v6)
[ 8] 443/tcp (v6)               ALLOW IN    Anywhere (v6)
[ 9] 53 (v6)                    ALLOW IN    Anywhere (v6)
[10] 22/tcp (v6)                ALLOW IN    Anywhere (v6)
[11] 1194/tcp (v6)              ALLOW IN    Anywhere (v6)

列出更詳細的資訊
# ufw status verbose
Status: active
Logging: on (low)
Default: deny (incoming), allow (outgoing), disabled (routed)
New profiles: skip

To                         Action      From
—                         ——      —-
192.168.1.16 22            ALLOW IN    192.168.1.0/24

6. 刪除防火牆則
# ufw delete allow 22/tcp
# ufw delete allow from 192.168.1.0/24 to 192.168.1.16 port 22
# ufw delete 6
Deleting:
 allow from 192.168.1.0/24 to any port 22
Proceed with operation (y|n)? y
Rule deleted

原本第六條規則已刪除
# ufw status numbered
Status: active

     To                         Action      From
     —                         ——      —-
[ 1] 22                         ALLOW IN    Anywhere
[ 2] 443/tcp                    ALLOW IN    Anywhere
[ 3] 53                         ALLOW IN    Anywhere
[ 4] 22/tcp                     ALLOW IN    Anywhere
[ 5] 1194/tcp                   ALLOW IN    Anywhere
[ 6] 22 (v6)                    ALLOW IN    Anywhere (v6)
[ 7] 443/tcp (v6)               ALLOW IN    Anywhere (v6)
[ 8] 53 (v6)                    ALLOW IN    Anywhere (v6)
[ 9] 22/tcp (v6)                ALLOW IN    Anywhere (v6)
[10] 1194/tcp (v6)              ALLOW IN    Anywhere (v6)

7. 清除所有的規則
# ufw reset
Resetting all rules to installed defaults. This may disrupt existing ssh
connections. Proceed with operation (y|n)? y
Backing up ‘after.rules’ to ‘/etc/ufw/after.rules.20161225_095230’
Backing up ‘after6.rules’ to ‘/etc/ufw/after6.rules.20161225_095230’
Backing up ‘user.rules’ to ‘/etc/ufw/user.rules.20161225_095230’
Backing up ‘before.rules’ to ‘/etc/ufw/before.rules.20161225_095230’
Backing up ‘user6.rules’ to ‘/etc/ufw/user6.rules.20161225_095230’
Backing up ‘before6.rules’ to ‘/etc/ufw/before6.rules.20161225_095230’

8. 啟用日誌功能:
# ufw logging on
Logging enabled

停用日誌功能:
# ufw logging off
Logging disabled

日誌預設會存在 /var/log/ufw.log

設定日誌的層級(預設是 low)
# ufw logging (low | medium | high | full)

10. 直接修改預設規則 /etc/ufw/before.rules
拒絕 Ping
# sed -i ‘34,38 s/ACCEPT/DROP/’ /etc/ufw/before.rules

重新載入
# ufw reload
Firewall reloaded

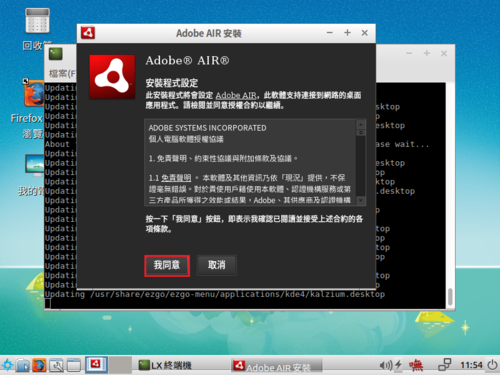
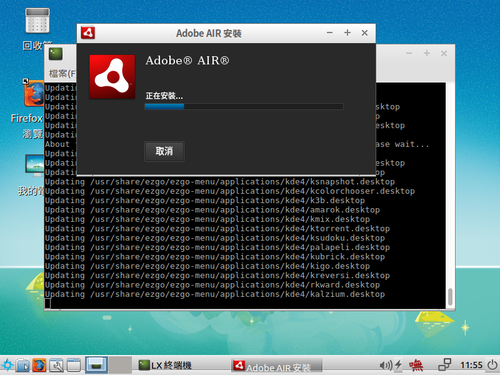
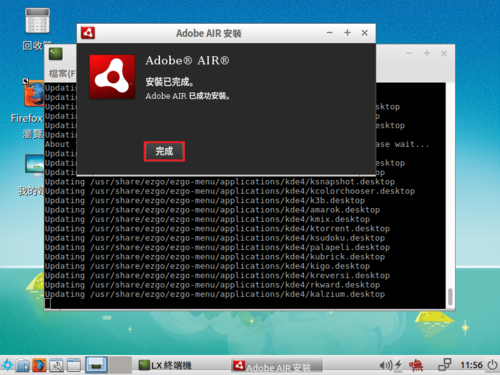
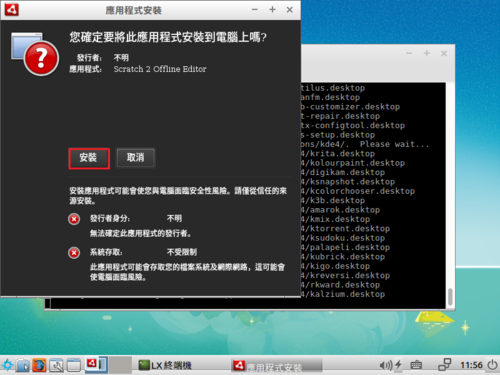
安裝 ezgo 13 工具箱中的推薦軟體及Scratch 2

因為特殊的因素,所以有一些軟體不能直接預載在光碟之中,必需在安裝完成之後,再另行安裝!
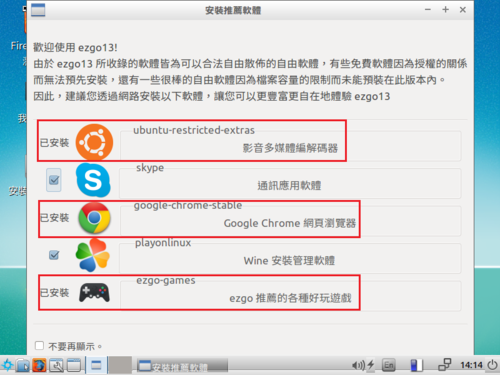
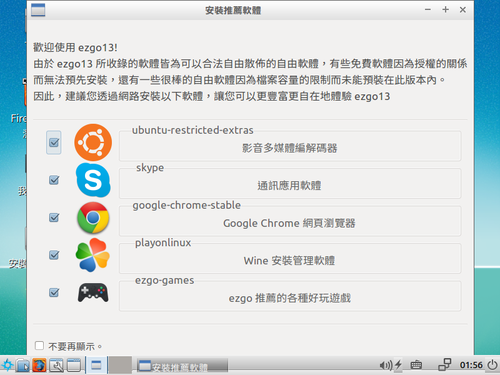
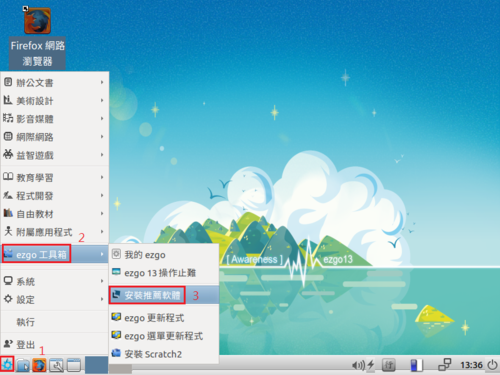
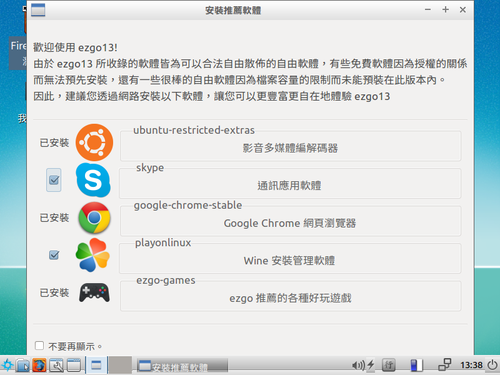
安裝推薦軟體畫面,可以勾選所需要的軟體,然後選擇右下角的安裝

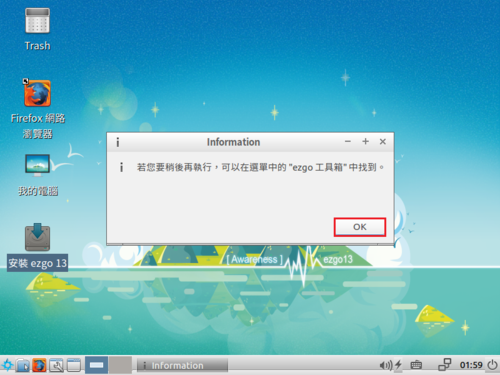
[@more@]如果不小心已經把這個畫面關閉,也可以在 ezgo 工具箱中找到

執行 安裝推薦軟體

勾選要安裝的軟體

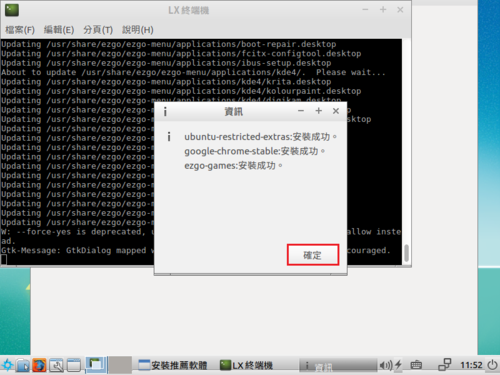
安裝完成

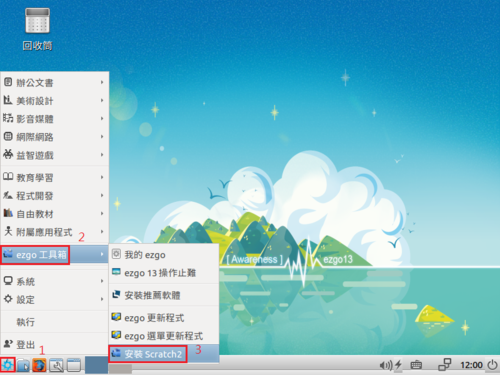
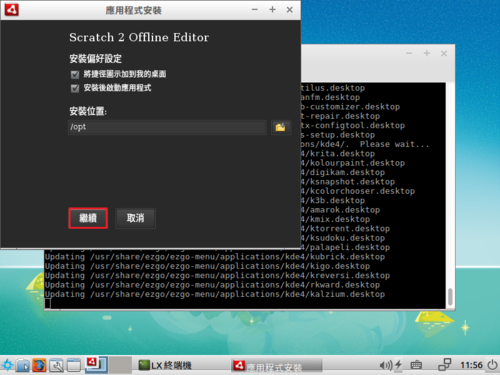
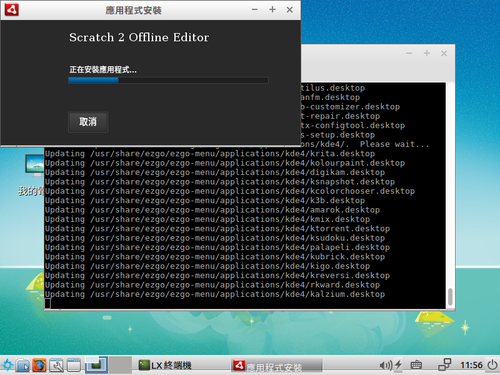
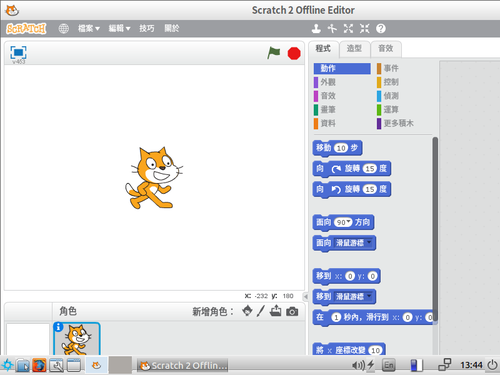
安裝 Scratch 2
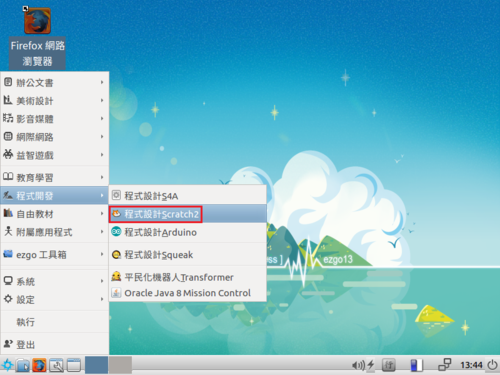
在程式開發功能表中可以找到

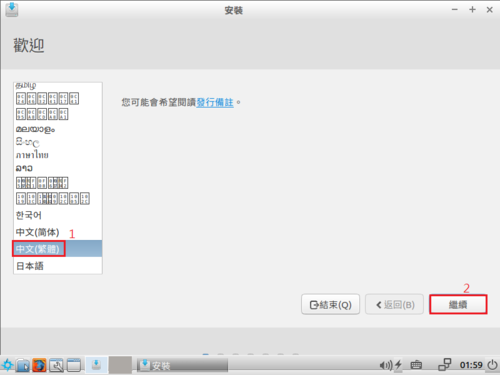
操作介面改成正體中文

試用 ezgo 13 LXDE

ezgo 13 於 2017/1/1 正式釋出,有興趣的人可以到 ezgo 官網下載。想要更加了解 ezgo 也同樣可以在官網上找到許多的說明。
ezgo 13 下載:http://ezgo.westart.tw/ezgo13/download.php
目前支援二個版本下載:LXDE / KDE
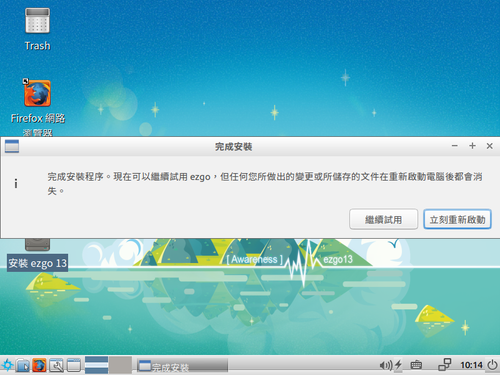
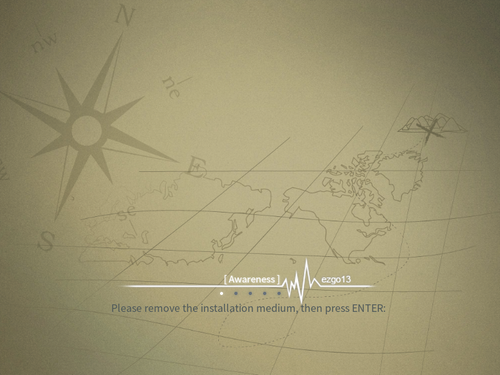
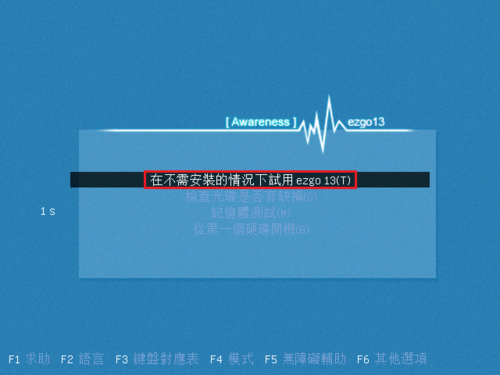
[@more@]底下做一個簡單的試用:
開機畫面

開機畫面

進入桌面環境

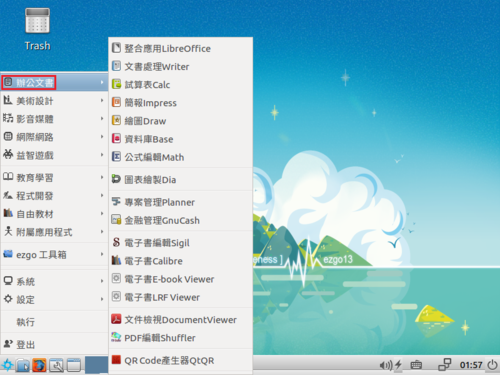
功能表

辦公文書功能表

美工設計功能表

影音媒體功能表

網際網路功能表

益智遊戲功能表

教育學習功能表

程式開發功能表

自由教材功能表

附屬應用程式功能表

ezgo 工具箱功能表

系統功能表

設定功能表

試用感覺:
1. 執行速度很快
2. 軟體收錄非常完整,幾乎全部都有了,有些限於版權的因素,而不能直接整合在光碟中的套件,也可以由 ezgo 工具箱中補安裝。
3. 功能表也做了中文化,方便對 Linux 不是很熟悉的使用者使用。
4. 不過也因為太齊全了,對於某部分使用者來說,可能過於雜亂。
5. 只有 LXDE / KDE 的版本有些可惜,因為個人習慣使用 GNOME 2 MATE 的桌面環境。

後記:
覺得版本太肥大的人,可以考慮下載另外二個沒有在官網上直接列出,但在 FTP Server 上有的 B 版本,套件安裝的比較少一些,但沒有 LXDE  版。
下載位置:
ftp://freenas.slat.org/ezgo/