在 Ubuntu Server 14.04 安裝 PXE Server

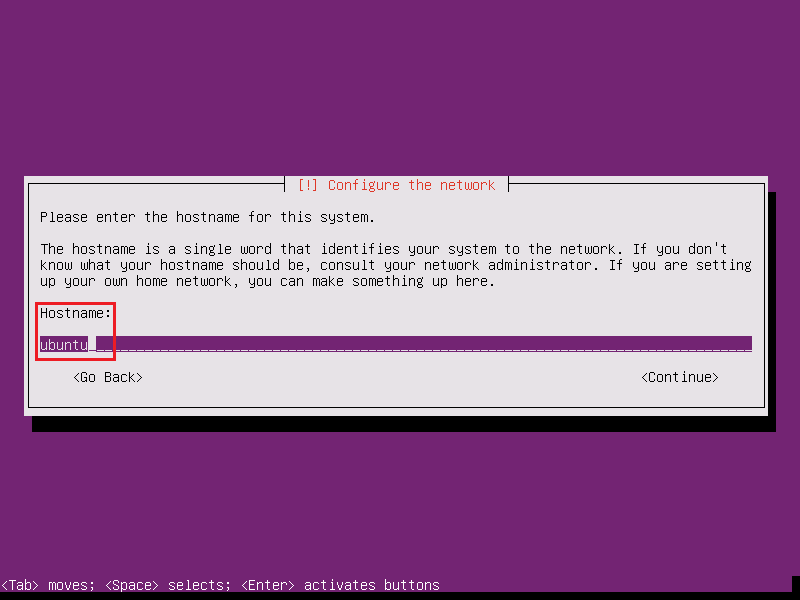
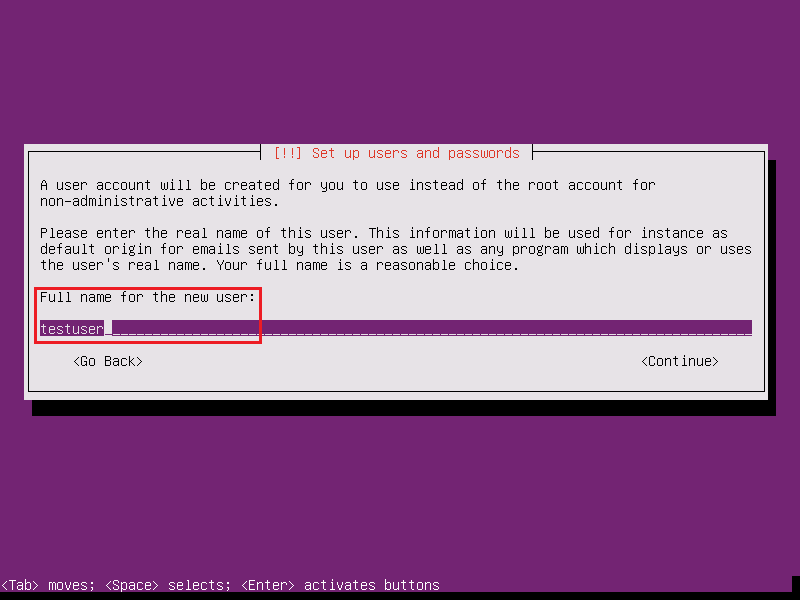
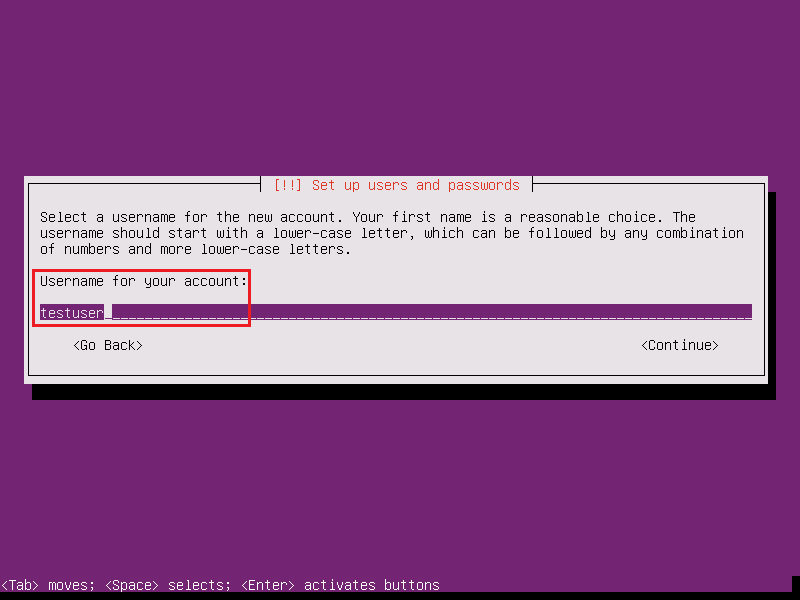
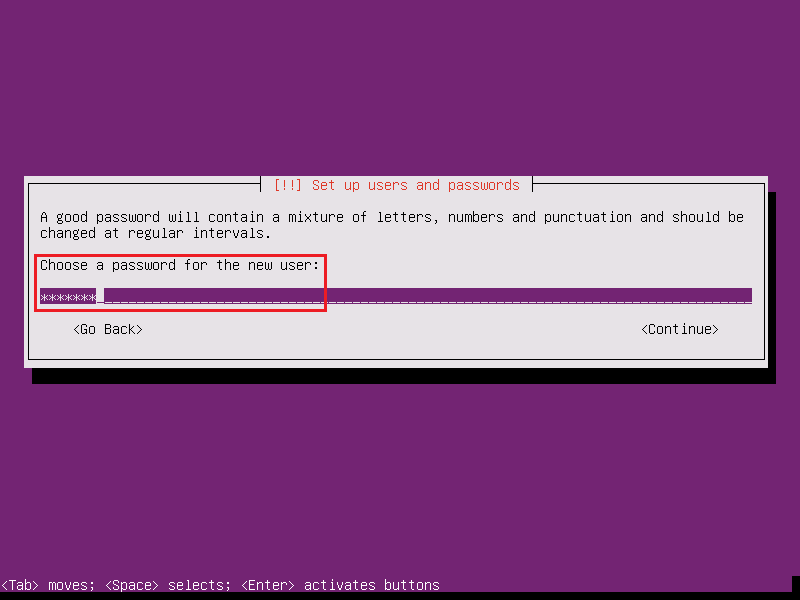
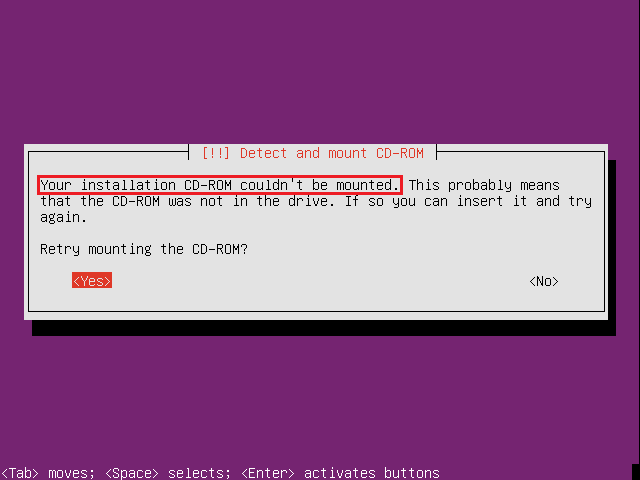
在 Ubuntu Server 14.04 安裝 PXE Server 主要是想利用 PXE Server 搭配 Clonezilla 來備份及還原 Client 端作業系統。
參考網站:
How to Setup a PXE Server on Ubuntu
PXE Boot Server Installation Steps in Ubuntu Server VM – Ask Ubuntu

安裝 tftp 和 dhcp server 及一些所須的套件
# apt-get -y install tftpd-hpa isc-dhcp-server lftp openbsd-inetd inetutils-inetd
建立 dhcp server 設定檔
# vim /etc/dhcp/dhcpd.conf
default-lease-time 600;
max-lease-time 7200;
subnet 192.168.1.0 netmask 255.255.255.0 {
    range 192.168.1.201 192.168.1.210;
    option subnet-mask 255.255.255.0;
    option routers 192.168.1.254;
    option broadcast-address 192.168.1.255;
    filename “pxelinux.0”;
    next-server 192.168.1.124;
}
[@more@]啟動 dhcpd server
# /etc/init.d/isc-dhcp-server restart
 * Stopping ISC DHCP server dhcpd                                        [fail]
 * Starting ISC DHCP server dhcpd                                        [ OK ]

檢查 dhcpd server 是否有正常啟動
# netstat -lu | grep boot
udp        0      0 *:bootps                *:*
udp        0      0 *:bootpc                *:*

修改 tftpd server 設定
# vim /etc/inetd.conf
加入下面一行
tftp    dgram   udp wait    root    /usr/sbin/in.tftpd  /usr/sbin/in.tftpd -s /var/lib/tftpboot

# update-inetd –enable BOOT
# /etc/init.d/openbsd-inetd restart
 * Restarting internet superserver inetd                                 [ OK ]
# /etc/init.d/tftpd-hpa restart

檢查 tftpd server 是否有正常啟動
# netstat -lu | grep tftp
udp        0      0 *:tftp                  *:*

安裝 syslinux
# apt-get install syslinux

複製設定檔到 /var/lib/tftpboot 目錄
# cp /usr/lib/syslinux/menu.c32  /var/lib/tftpboot
# cp /usr/lib/syslinux/vesamenu.c32 /var/lib/tftpboot
# cp /usr/lib/syslinux/pxelinux.0 /var/lib/tftpboot
# cp /usr/lib/syslinux/memdisk /var/lib/tftpboot
# cp /usr/lib/syslinux/mboot.c32 /var/lib/tftpboot
# cp /usr/lib/syslinux/chain.c32 /var/lib/tftpboot

建立 /var/lib/tftpboot/pxelinux.cfg 目錄,用來存放 PXE 開機時 Client 端的一些設定
# mkdir /var/lib/tftpboot/pxelinux.cfg
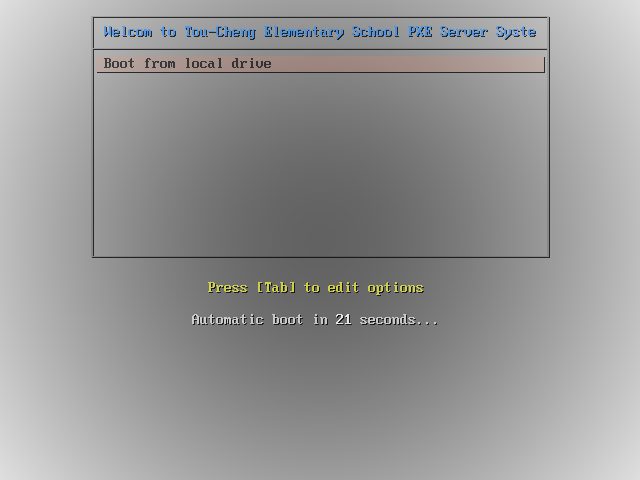
建立 PXE 開機的開機選單
# vim /var/lib/tftpboot/pxelinux.cfg/default
UI vesamenu.c32
TIMEOUT 300
MENU TITLE Welcom to Tou-Cheng Elementary School PXE Server System

LABEL local
  MENU LABEL Boot from local drive
  MENU DEFAULT
  localboot 0

開機畫面

解決 Ubuntu Server /etc/resolv.conf 自動還原的問題

/etc/resolv.conf 是 Linux 設定 DNS Server 的設定檔,不知道為什麼,每次 Ubuntu Server 重新啟動後,都會把裡面的內容清空,造成一些須要有 DNS 設定的服務,如:套件更新等服務都無法正常執行。
解決方式:[@more@]
1. 使用 rcconf 或 sysv-rc-conf 關閉
# apt-get -y install rcconf sysv-rc-conf
rcconf 設定畫面

sysv-rc-conf 設定畫面

2. 修改 /etc/resolvconf/resolv.conf.d/base
# vim /etc/resolvconf/resolv.conf.d/base
加入
nameserver 168.95.1.1
nameserver 140.111.66.1

下次重新開機後,/etc/resolv.conf 就不會自動還原了!

或直接修改 /etc/network/interfaces
# vim /etc/network/interfaces
在 eth0 區段中加入
iface eth0 inet static

        dns-nameservers 140.111.66.1 168.95.1.1

重新啟動網路
# /etc/init.d/networking restart

安裝 Ubuntu 14.04 Server amd64

光碟開機畫面
選擇安裝語系

[@more@]選擇 Install Ubuntu Server

選擇 English

選擇 Other

選擇 Asia

選擇 Taiwan

選擇 United States – en_US.UTF-8

不偵測鍵盤

選擇 English (US)

選擇 English (US)

載入附加元件

設定網路

設定主機名稱

建立使用者和密碼

因為設定的密碼過於簡單,所以出現警告訊息

設定時區

時區 Asia/Taipei

硬碟分割

安裝基本系統

設定 HTTP Proxy

如果可以連上網路,會連線到網路下載

設定 MySQL 密碼

再次輸入 MySQL Server 密碼

安裝 GRUB

安裝完畢

安裝完成的開機畫面

登入後畫面

使用 grub4dos 來安裝 Ubuntu 14.04 Server amd64 版本

對於 Linux Server 自己比較習慣使用的是 CentOS,因為它的支援期長,小版本之間的升級使用 yum update 就可以無痛升級,但 Ubuntu 14.04 Server 是所謂的 LTS 版本,支援期有到 5 年,再加上有時會遇到一些要用的套件,在 CentOS 上要自己重新編譯來安裝,但在 Ubuntu 上則是有已經打包好的套件,可以使用 apt-get  指令來安裝,所以有的 Server 就改裝了 Ubuntu Server。

[@more@]在 grub4dos 中的設定

title   – 安裝 Ubuntu 14.04 Server-amd64n 安裝 Ubuntu 14.04 Server-amd64
find –set-root /GRUB/ISO/Linux/ubuntu-14.04-server-amd64.iso
map /GRUB/ISO/Linux/ubuntu-14.04-server-amd64.iso (0xff) || map –mem /GRUB/ISO/Linux/ubuntu-14.04-server-amd64.iso (0xff)
map –hook
root (0xff)
kernel /install/vmlinuz  file=/cdrom/preseed/ubuntu-server.seed boot=install noprompt only-ubiquity iso-scan/filename=/GRUB/ISO/Linux/ubuntu-14.04-server-amd64.iso quiet splash —
initrd /install/initrd.gz

不知道為什麼一直出現找不到光碟的訊息,在網路上找了很久,好像沒有找到可以解決的方法,所以目前就改用卡碟機來安裝 Ubuntu Server 了!
在這個有找到一個網頁,有說到可以按 Alt+F2,但我測試了一下子,還是沒有成功,也不想把整個光碟檔案複製出來,只想用 ISO 碟來安裝。

選擇 English

選擇 Other

選擇 Asia

選擇 Taiwan

選擇 United States – en_US.UTF-8

不偵測鍵盤

選擇 English (US)

選擇 English (US)

出現光碟機無法掛載的錯誤

使用 grub4dos 來安裝 Ubuntu 14.04 Desktop amd64 版本

因為工作的關係,常常會測試不同的作業系統,以前是燒成光碟直接安裝,後來改用虛擬機器並使用 ISO 檔安裝測試,再來是使用 USB 隨身碟,將 ISO 檔植入隨身碟安裝,目前自己常會用的方式就是使用隨身硬碟並搭配 grub4dos 來安裝不同的作業系統,包括:Windows 7 / 8.1 / Ubuntu….,如果無法用隨身硬碟加 grub4dos 的,則改用卡碟機來處理。

選擇要安裝 Linux 作業系統

[@more@]grub4dos 設定

title   – 安裝 Ubuntu 14.04 Desktop-amd64n 安裝 Ubuntu 14.04 Desktop-amd64
find –set-root /GRUB/ISO/Linux/ubuntu-13.04-desktop-amd64.iso
map /GRUB/ISO/Linux/ubuntu-14.04-desktop-amd64.iso (0xff) || map –mem /GRUB/ISO/Linux/ubuntu-14.04-desktop-amd64.iso (0xff)
map –hook
root (0xff)
kernel /casper/vmlinuz.efi file=/cdrom/preseed/ubuntu.seed boot=casper locale=zh_TW noprompt only-ubiquity iso-scan/filename=/GRUB/ISO/Linux/ubuntu-14.04-desktop-amd64.iso quiet splash —
initrd=/casper/initrd.lz

ISO 檔是放在 GRUB/ISO/Linux 的目錄下

選擇要安裝的 Linux 版本

光碟開機畫面

安裝畫面

Ubuntu 14.04 版釋出

Ubuntu 14.04 版已經釋出,版本代號為 Trusty Tahr,是 Ubuntu 家族第三個長期支援版(Long Term Support,LTS)。
一般的 Ubuntu 版本平均每半年就會釋出新版,在每年的 4/10 月,但 LTS 平均兩年才有新版,技術支援則長達 5 年。
所以有興趣的人,可以下載下來試用看看,舊系統的部分也可以以升級的方式來做更新。

[@more@]
伺服器版本下載:
x86 版本:

x64 版本:

桌面版本下載:
x86 版本:

x64 版本:

ownClient Linux Client 端使用

這裡以 Ubuntu 13.10 x64 版本為例
首先先連線到 ownCloud Client 端網頁:http://owncloud.org/sync-clients/

選擇 Ubuntu
[@more@]底下是安裝步驟
1. 下載 gpg key
# wget http://download.opensuse.org/repositories/isv:ownCloud:desktop/xUbuntu_13.10/Release.key
2. 匯入 gpg key
# sudo apt-key add – < Release.key
3. 加入安裝來源
# sudo sh -c “echo ‘deb http://download.opensuse.org/repositories/isv:/ownCloud:/desktop/xUbuntu_13.10/ /’ >> /etc/apt/sources.list.d/owncloud-client.list”
4. 更新套件庫來源
# sudo apt-get update
安裝 owncloud-client
# sudo apt-get install owncloud-client

安裝完成的 ownCloud Client

設定 伺服器位址

輸入 使用者帳號及密碼

本地端同步的目錄

設定完成

同步的目錄,在家目錄下的 ownCloud

同步的檔案及目錄

透過 PXE Server 安裝 Ubuntu 13.10 Server

# mkdir /mnt/{Ubuntu-12.04.3-amd64,Ubuntu-12.04.3-i386,Ubuntu-13.10-amd64,Ubuntu-13.10-i386}
# mount -o loop /var/ftp/pub/ubuntu-13.10-server-amd64.iso /mnt/Ubuntu-13.10-amd64
# mount -o loop /var/ftp/pub/ubuntu-13.10-server-i386.iso /mnt/Ubuntu-13.10-i386

# mkdir -p /var/lib/tftpboot/Ubuntu/{1310,1204}/{amd64,i386}

# cp /mnt/Ubuntu-13.10-amd64/install/netboot/ubuntu-installer/amd64/linux /var/lib/tftpboot/images/Ubuntu/1310/amd64
# cp /mnt/Ubuntu-13.10-amd64/install/netboot/ubuntu-installer/amd64/initrd.gz /var/lib/tftpboot/images/Ubuntu/1310/amd64

# vim /var/lib/tftpboot/pxelinux.cfg/Ubuntu_Server
LABEL Install Ubuntu 13.10 Server amd64
        MENU LABEL Install Ubuntu 13.10 Server amd64
        kernel images/Ubuntu/1310/amd64/linux
        append initrd=images/Ubuntu/13.10/amd64/initrd.gz ramdisk_size=65535 vga=normal url=http://192.168.1.6/us1310-amd64/preseed.cfg

# mkdir /var/www/html/us1310-amd64
# vim /var/www/html/us1310-amd64/preseed.cfg
# Components to use for loading installer components (options).
d-i mirror/udeb/components multiselect main
# Apt Setup
d-i apt-setup/restricted boolean false
d-i apt-setup/universe boolean false
d-i apt-setup/backports boolean false
d-i apt-setup/non-free boolean false
d-i apt-setup/contrib boolean false
# Don’t want to use a network mirror
d-i apt-setup/use_mirror boolean false
d-i apt-setup/services-select multiselect none
d-i apt-setup/security-updates boolean false
d-i apt-setup/another boolean false
# Soultion for could not find any live images
d-i live-installer/net-image string

http://192.168.1.6/Ubuntu-13.10-amd64/install/filesystem.squashfs

# mount –bind /mnt/Ubuntu-13.10-amd64 /var/www/html/Ubuntu-13.10-amd64