在終端機下執行
$ sudo do-release-upgrade
已升級到 14.04 LTS
$ sudo lsb_release -a
No LSB modules are available.
Distributor ID: Ubuntu
Description: Ubuntu 14.04 LTS
Release: 14.04
Codename: trusty

全新的繁體中文 WordPress 網站《宜蘭部落格教育平台 網站》
Cubie Truck Ubuntu Server 這一個版本讓我感覺最特別的地方,就是系統開完機之後,會自動以 root 登入,雖然在測試時很方便,但如果要實際上線使用時,這是一個很大的安全問題。
前思後想了很久,都想不出這是怎麼做到的,使用 Google 在網路上搜尋了很久,找到的大部分都是在 XWindow 下的自動登入,只有找到下面這幾篇文章,是比較有可能的做法:
linux(centos/ubuntu)下实现root用户无密码自动登录- 92wiki linux php hdwiki 编程 技巧 方法
How to enable root autologin without password in linux(centos 6.2) – Blog – 92wiki.com
How do I auto-login as root into the TTY upon boot? – Ask Ubuntu
但詳細比對起來,全都不是,後來改搜尋 cubie truck root auto login, 終於在這一篇文章中,找到了解答:
散人日誌: Cubietruck lubuntu server版 自動登入root
處理方式:
# sed -i ‘s/exec/#exec/’ /bin/auto-root-login
重新啟動電腦即可生效
# reboot[@more@]相關設定檔
# cat /etc/init/openvt.conf
#
# Author: Steve Langasek <steve.langasek@linaro.org>
# License: see debian/copyright
#
start on started tty1
stop on runlevel [!2345]
respawn
pre-start script
if status tty1 | grep -q start/; then
stop tty1
fi
end script
exec /bin/openvt -e -c 1 -f — /bin/auto-root-login
# cat /etc/default/autogetty
# here you can provide what to run instead of /bin/login
AUTOGETTY_ARGS=”-n -l /bin/auto-root-login”
# Should autogetty be enabled?
ENABLED=1
下載網址:
http://dl.cubieboard.org/software/a20-cubietruck/lubuntu/ct-lubuntu-nand-v2.0/server/
比較特別的是:
1. 這一個版本開機後在 Console 端,自動會以 root 登入[@more@]
2. 這一個版本已經預先安裝並啟動 Apache + MySQL + PHP
# netstat -antulp
Active Internet connections (servers and established)
Proto Recv-Q Send-Q Local Address Foreign Address State PID/Program name
tcp 0 0 127.0.0.1:3306 0.0.0.0:* LISTEN 745/mysqld
tcp 0 0 0.0.0.0:22 0.0.0.0:* LISTEN 656/sshd
tcp 0 52 192.168.1.105:22 192.168.1.6:3349 ESTABLISHED 1035/0
tcp6 0 0 :::80 :::* LISTEN 784/apache2
tcp6 0 0 :::22 :::* LISTEN 656/sshd
3. Ubuntu Server 版本是 14.04
Welcome to Linaro 14.04 (GNU/Linux 3.4.79 armv7l)
* Documentation: https://wiki.linaro.org/
# lsb_release -a
No LSB modules are available.
Distributor ID: Linaro
Description: Linaro 14.04
Release: 14.04
Codename: trusty
4. 系統已經預先擴展 root 分割區到 8G,但因為這一片 Cubie Truck 是 16G
所以擴展 root 分割區到 16G
# nand-part -f a20 /dev/nand 32768 ‘boot 131072’ ‘rootfs 30769152’
# df -h
Filesystem Size Used Avail Use% Mounted on
/dev/root 15G 769M 14G 6% /
devtmpfs 889M 4.0K 889M 1% /dev
none 4.0K 0 4.0K 0% /sys/fs/cgroup
tmpfs 20M 0 20M 0% /tmp
none 197M 288K 197M 1% /run
none 5.0M 0 5.0M 0% /run/lock
none 985M 0 985M 0% /run/shm
none 100M 0 100M 0% /run/user
設定 MySQL Server
# /usr/bin/mysql_secure_installation
原本看到在 Cubie Truck 下載區有 Ubuntu 14.04 非常高興,馬上下載下來使用!
下載網址:http://dl.cubieboard.org/software/a20-cubietruck/ubuntu-14.04/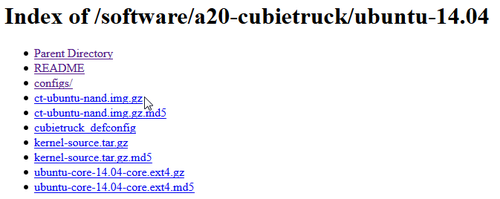
預設登入的帳號及密碼:root / cubie
不過開機完成後,發現進入的是文字介面,這也還好,反正可以透過網路加裝其它套件,然後發現竟然連 eth0 也沒抓到,這真的是給 Cubie Truck 用的版本嗎?
預設的 Ubuntu Desktop 是英文版的介面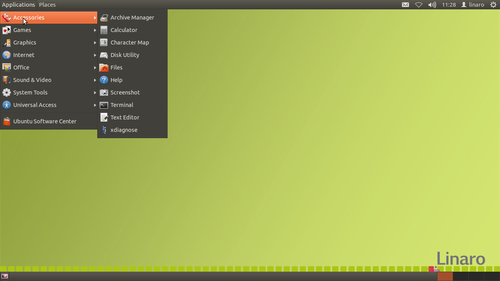
底下是中文化的過程
[@more@]$ sudo locale-gen zh_TW.UTF-8
Generating locales…
zh_TW.UTF-8… done
Generation complete.
$ sudo update-locale LANG=zh_TW.UTF-8
$ sudo update-locale LANGUAGE=zh_TW.UTF-8
安裝中文語系及中文字形
$ sudo apt-get install fonts-arphic-uming ttf-arphic-ukai language-pack-zh-hant firefox-locale-zh-hant poppler-data language-pack-gnome-zh-hant cmap-adobe-cns1
安裝中文輸入法 gcin
$ sudo apt-get install gcin
但 gcin 的圖示無法出現在工作列上,參考下面的連結
http://www.ubuntu-tw.org/modules/newbb/viewtopic.php?post_id=217464#forumpost217464
在上面的狀態列上按著「Win」+「Alt」再加上「滑鼠右鍵」,
接著按下「加入面板」就會跳出加入面板的視窗,
這時向下找到「程式狀態通知區」後選擇它並加入,
這樣就會看到 gcin 狀態列了!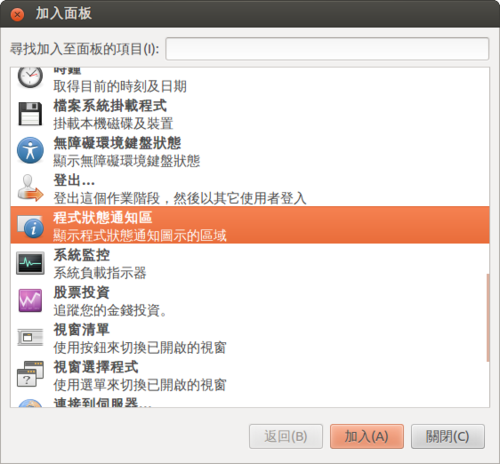
但出現圖示之後,發現並不是所有的程式都能使用,試了幾個程式,發現 firefox / leafpad 可以,但 terminal / gedit 則不行,這是…..
所以決定先放棄這一個版本。
因為 Ubuntu root 分割區的大小實在有些小,稍微安裝一下套件就快滿了!
$ df -h
Filesystem Size Used Avail Use% Mounted on
/dev/root 1.8G 1.5G 199M 89% /
devtmpfs 889M 4.0K 889M 1% /dev
none 197M 552K 197M 1% /run
none 5.0M 0 5.0M 0% /run/lock
none 985M 172K 985M 1% /run/shm
但在 Ubuntu Desktop 似乎沒有提供 nand-part 這一個指令
$ sudo nand-part
sudo: nand-part: command not found
[@more@]安裝編譯 nand-part 所需的套件
$ sudo apt-get install libusb-1.0-0-dev
下載 sunxi-tools
$ git clone https://github.com/linux-sunxi/sunxi-tools
Cloning into ‘sunxi-tools’…
remote: Counting objects: 1075, done.
remote: Total 1075 (delta 0), reused 0 (delta 0)
Receiving objects: 100% (1075/1075), 368.20 KiB | 156 KiB/s, done.
Resolving deltas: 100% (577/577), done.
切換目錄
$ cd sunxi-tools
進行編譯
$ make
將 nand-part 複製到 /sbin 目錄
$ sudo cp nand-part /sbin
列出 Nand Flash 的分割區狀態
$ sudo nand-part -f a20 /dev/nand
check partition table copy 0: mbr: version 0x00000200, magic softw411
OK
check partition table copy 1: mbr: version 0x00000200, magic softw411
OK
check partition table copy 2: mbr: version 0x00000200, magic softw411
OK
check partition table copy 3: mbr: version 0x00000200, magic softw411
OK
mbr: version 0x00000200, magic softw411
3 partitions
partition 1: class = DISK, name = bootloader, partition start = 32768, partition size = 131072 user_type=0
partition 2: class = DISK, name = rootfs, partition start = 163840, partition size = 6291456 user_type=0
partition 3: class = DISK, name = UDISK, partition start = 6455296, partition size = 24477696 user_type=0
綠色是分割區的名字,粉紅色是分割區的起始位置,橘色是分割區的大小
UDISK 是還未用到的區域,也就是 root 分割區要擴展的區域
擴展之後 /dev/nandb 的大小 6291456+24477696 = 30769152
進行重新分割
$ sudo nand-part -f a20 /dev/nand 32768 ‘boot 131072’ ‘rootfs 30769152’
check partition table copy 0: mbr: version 0x00000200, magic softw411
OK
check partition table copy 1: mbr: version 0x00000200, magic softw411
OK
check partition table copy 2: mbr: version 0x00000200, magic softw411
OK
check partition table copy 3: mbr: version 0x00000200, magic softw411
OK
mbr: version 0x00000200, magic softw411
3 partitions
partition 1: class = DISK, name = bootloader, partition start = 32768, partition size = 131072 user_type=0
partition 2: class = DISK, name = rootfs, partition start = 163840, partition size = 6291456 user_type=0
partition 3: class = DISK, name = UDISK, partition start = 6455296, partition size = 24477696 user_type=0
check partition table copy 0: mbr: version 0x00000200, magic softw411
check partition table copy 1: mbr: version 0x00000200, magic softw411
check partition table copy 2: mbr: version 0x00000200, magic softw411
check partition table copy 3: mbr: version 0x00000200, magic softw411
ready to write new partition tables:
mbr: version 0x00000200, magic softw411
2 partitions
partition 1: class = DISK, name = boot, partition start = 32768, partition size = 131072 user_type=0
partition 2: class = DISK, name = rootfs, partition start = 163840, partition size = 30769152 user_type=0
write new partition tables? (Y/N)
y
Failed rereading partition table: Device or resource busy
verifying new partition tables:
check partition table copy 0: mbr: version 0x00000200, magic softw411
OK
check partition table copy 1: mbr: version 0x00000200, magic softw411
OK
check partition table copy 2: mbr: version 0x00000200, magic softw411
OK
check partition table copy 3: mbr: version 0x00000200, magic softw411
OK
mbr: version 0x00000200, magic softw411
2 partitions
partition 1: class = DISK, name = boot, partition start = 32768, partition size = 131072 user_type=0
partition 2: class = DISK, name = rootfs, partition start = 163840, partition size = 30769152 user_type=0
rereading partition table… returned -1
完成之後,重新啟動電腦
$ sudo reboot
原本的分割區大小
$ df -h
Filesystem Size Used Avail Use% Mounted on
/dev/root 1.8G 1.5G 199M 89% /
devtmpfs 889M 4.0K 889M 1% /dev
none 197M 552K 197M 1% /run
none 5.0M 0 5.0M 0% /run/lock
none 985M 172K 985M 1% /run/shm
重新設定 /dev/nandb 分割區大小
$ sudo resize2fs /dev/nandb
resize2fs 1.42 (29-Nov-2011)
Filesystem at /dev/nandb is mounted on /; on-line resizing required
old_desc_blocks = 1, new_desc_blocks = 1
The filesystem on /dev/nandb is now 3870720 blocks long.
之後的大小
$ df -h
Filesystem Size Used Avail Use% Mounted on
/dev/root 15G 1.6G 13G 12% /
devtmpfs 889M 4.0K 889M 1% /dev
none 197M 536K 197M 1% /run
none 5.0M 0 5.0M 0% /run/lock
none 985M 76K 985M 1% /run/shm
列出 Nand Flash 目前的分割區狀態
$ sudo nand-part -f a20 /dev/nand
check partition table copy 0: mbr: version 0x00000200, magic softw411
OK
check partition table copy 1: mbr: version 0x00000200, magic softw411
OK
check partition table copy 2: mbr: version 0x00000200, magic softw411
OK
check partition table copy 3: mbr: version 0x00000200, magic softw411
OK
mbr: version 0x00000200, magic softw411
2 partitions
partition 1: class = DISK, name = boot, partition start = 32768, partition size = 131072 user_type=0
partition 2: class = DISK, name = rootfs, partition start = 163840, partition size = 30769152 user_type=0
不過重新分割的過程中,出現 resize2fs: Permission denied to resize filesystem 的錯誤訊息,重試了很多次還是無法解決,後來重新燒錄 Nash Flash Image,再做一次就正常了!
$ sudo resize2fs /dev/nandb
resize2fs 1.42 (29-Nov-2011)
Filesystem at /dev/nandb is mounted on /; on-line resizing required
old_desc_blocks = 1, new_desc_blocks = 1
resize2fs: Permission denied to resize filesystem
因為 Lubuntu 的版本比較舊所以改用比較新的版本 Ubuntu Desktop
下載位置:
http://dl.cubieboard.org/software/a20-cubietruck/ubuntu-desktop/
預設登入的帳號及密碼:linaro / linaro
登入預設採用的是 Unity 介面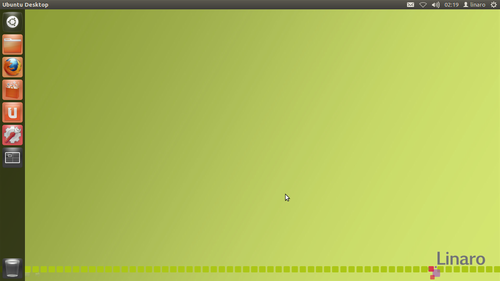 [@more@]Ubuntu Desktop 所採用的是 12.04 的版本,因為 Precise 屬於 LTS 的版本,所以還可以接受
CubieTruck 版本是 12.11 版本
$ sudo lsb_release -a
No LSB modules are available.
Distributor ID: Linaro
Description: Linaro 12.11
Release: 12.11
Codename: precise
出現可以升級的訊息,但這裡先不升級,因為升級可能會面臨空間不足,或是其它的問題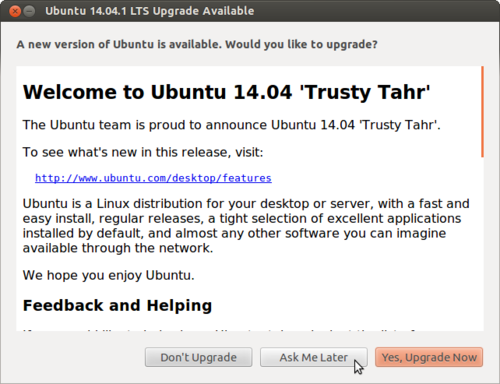
先刪除一些個人比較不常用的套件,移除的套件純屬個人習慣
移除 ibus 輸入法架構
$ sudo apt-get remove –purge ibus ibus-gtk ibus-gtk3 ibus-pinyin ibus-pinyin-db-android ibus-pinyin-db-open-phrase libibus-1.0-0 python-ibus pinyin-database ibus-table libibus-1.0-0
移除 brasero 燒錄軟體
$ sudo apt-get remove –purge brasero brasero-cdrkit brasero-common libbrasero-media3-1
移除 empathy
$ sudo apt-get remove –purge empathy empathy-common nautilus-sendto-empathy
移除 gwibber
$ sudo apt-get remove –purge gwibber gwibber-service gwibber-service-facebook gwibber-service-identica gwibber-service-twitter libgwibber-gtk2 libgwibber2
移除 thunderbird
$ sudo apt-get remove –purge thunderbird thunderbird-globalmenu thunderbird-gnome-support
移除 transmission
$ sudo apt-get remove –purge transmission-gtk transmission-common
移除 simple-scan
$ sudo apt-get remove –purge simple-scan
移除遊戲
$ sudo apt-get remove –purge aisleriot gnome-games-data gnome-sudoku gnomine mahjongg
把用不到的套件一併清除
$ sudo apt-get autoremove
安裝 Ubuntu Desktop 傳統介面,因為不習慣使用新的介面,並不是 Unity 新的介面有什麼不好,就像 Windows 8 / 8.1 把開始功能表移除一樣
$ sudo apt-get install gnome-session-fallback
Ubuntu Linux 預設開機後 NumLock 的燈是不亮的,造成有時候輸入數字時的不方便。
解決之道:
參考網頁:
NumLock – Community Help Wiki
1. 安裝 numlockx 套件
$ sudo apt-get install -y numlockx
2. 執行測試看看 NumLock 燈會不會亮
$ /usr/bin/numlockx on
3. 如果沒有問題的話,設定開機時執行
$ sudo sed -i ‘s|^exit 0.*$|# Numlock enablen[ -x /usr/bin/numlockx ] && numlockx onnnexit 0|’ /etc/rc.local
$ sudo tail -4 /etc/rc.local
# Numlock enable
[ -x /usr/bin/numlockx ] && numlockx on
exit 0
Netrunner OS 官方網站:http://www.netrunner-os.com
Netrunner 14 Frontier base on kubuntu
Netrunner Rolling based on Manjaro 0.8.10 “Ascella”, Arch/AUR-compatible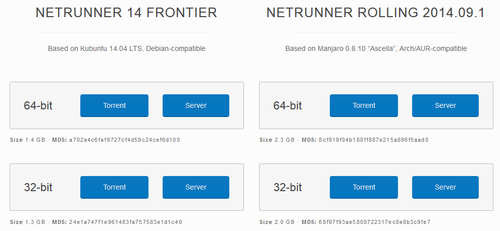 [@more@]Netrunner 14 Frontier 開機畫面
Netrunner Rolling 2014.09.1 開機畫面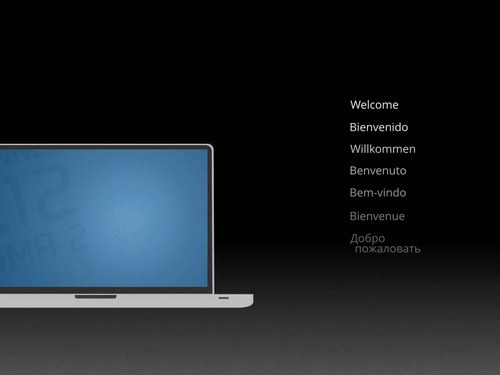
更多 Netrunne 的介紹可以參考:上鎖者: NetRunner OS : 一套特別與Gnome做整合設計的Kubuntu
Ubuntu 版本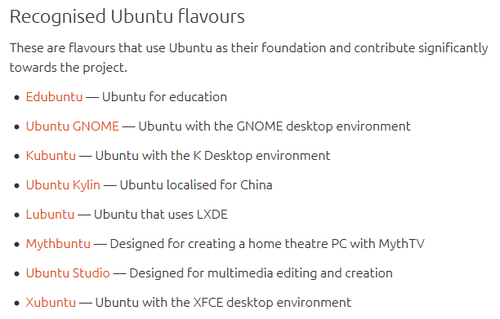
Ubuntu 14.10
下載位址:http://releases.ubuntu.com/14.10/
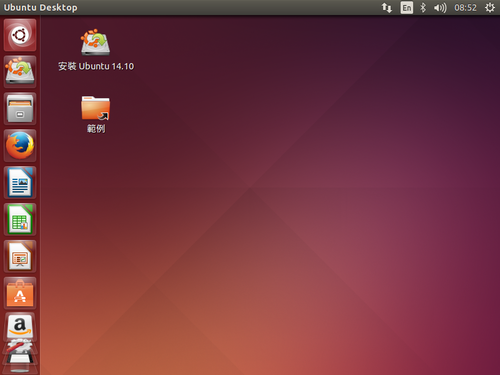
[@more@]
Ubuntu GNOME 14.10
下載位址:http://cdimage.ubuntu.com/ubuntu-gnome/releases/14.10/release/
Kubuntu 14.10
下載位址:http://cdimage.ubuntu.com/kubuntu/releases/14.10/release/
Lubuntu 14.10 LXDE
下載位址:http://cdimage.ubuntu.com/lubuntu/releases/14.10/release/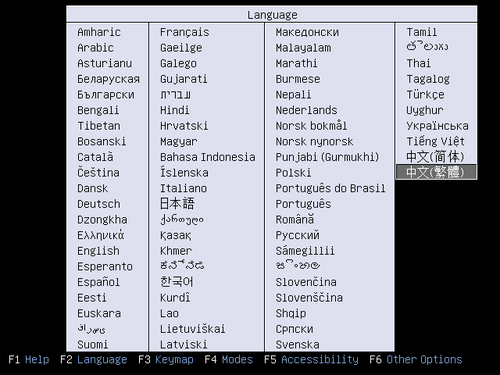
Xubuntu 14.10 XFCE
下載位址:http://cdimage.ubuntu.com/xubuntu/releases/14.10/release/
Ubuntu MATE 14.10
下載網址:https://ubuntu-mate.org/download/
http://pub.mate-desktop.org/iso/ubuntu-mate/release
Ubuntu Studio 14.10
下載位址:https://ubuntustudio.org/download/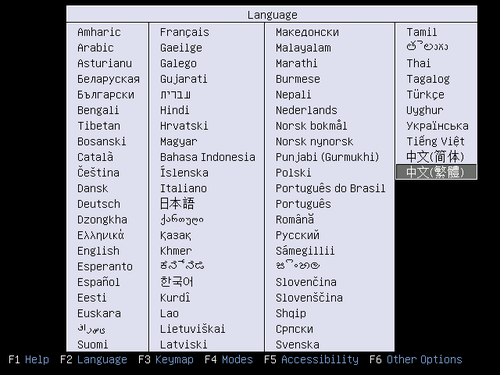
Ubuntu Kylin 14.10 for China
下載位址:http://www.ubuntukylin.com/downloads/
Mythbuntu 14.10 目前還沒有14.10 Rlease 的版本
下載位址:http://cdimage.ubuntu.com/mythbuntu/releases/
底下是 Daily Build 版本
Edubuntu 14.10 目前還沒有14.10 Rlease 的版本
下載位址:http://cdimage.ubuntu.com/edubuntu/releases/
底下是 Daily Build 版本
心得:
1. 會想真正安裝到硬碟使用的版本:Ubuntu MATE / Ubuntu Studio
2. Ubuntu Kylin 的開機動畫很炫
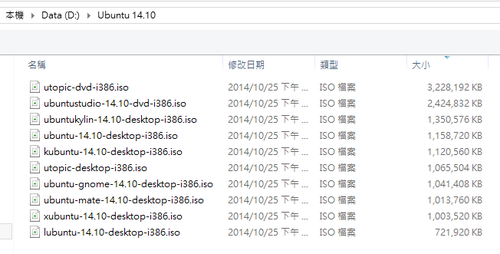
3. ISO 檔大小,以 x86 平台
Edubuntu > Ubuntu Studio > Ubuntu Kylin > Ubuntu > Kubuntu > Mythbuntu > Ubuntu GNOME > Ubuntu MATE > Xubuntu > Lubuntu