Acer Chromebox – 安裝 Ubuntu 14.04 多媒體相關套件

1. 安裝 ubuntu-restricted-extras 套件
$ sudo apt-get install ubuntu-restricted-extras

2. 安裝 totem
$ sudo apt-get install totem
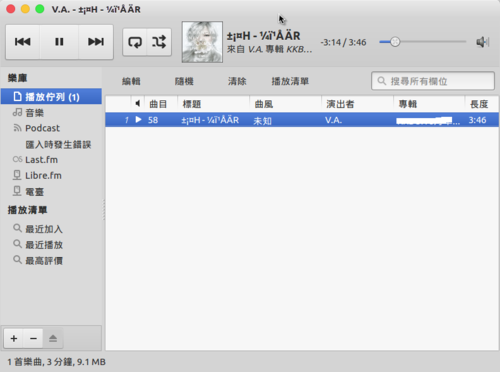
[@more@]3. 安裝  rhythmbox
$ sudo apt-get install rhythmbox

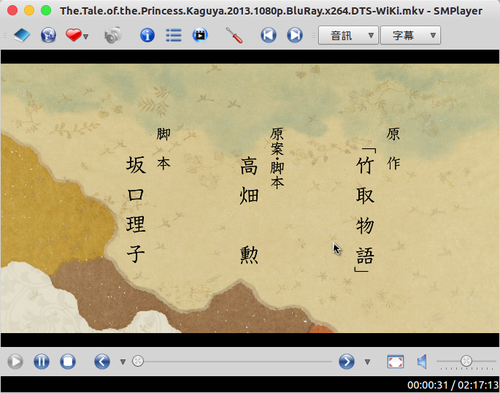
4. 安裝 smplayer
$ sudo apt-get install mplayer mplayer-fonts smplayer mplayer-skins mplayer-skin-blue

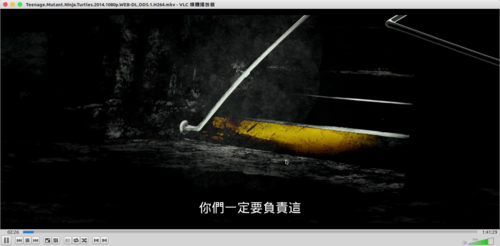
5. 安裝 vlc
$ sudo apt-get install vlc

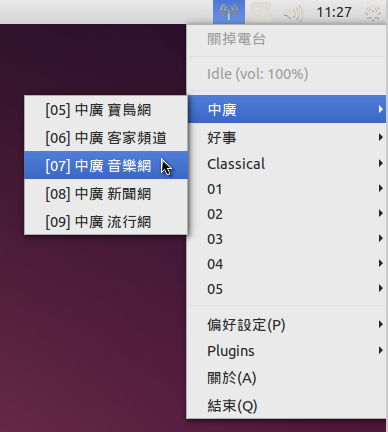
6. 安裝 radiotray
$ sudo apt-get install radiotray
添加中文頻道
$ wget https://2blog.ilc.edu.tw/wp-content/uploads/sites/985/25793/25793-2932173.zip -P ~/Downloads
備份原檔
$ mv ~/.local/share/radiotray/bookmarks.xml ~/.local/share/radiotray/bookmarks.xml.$(date +%F)
解壓縮
$ unzip ~/Downloads/25793-2932173.zip -d  ~/.local/share/radiotray

後來發現,因為中華電信常常網頁改版,所以好像只好中廣新聞網還可以收聽,其它大概都不行!

Acer Chromebox – 安裝 Ubuntu 14.04 所須套件

參考網頁:
[教學] Ubuntu 14.04的調校 [論壇 – Ubuntu基本設定] | Ubuntu 正體中文站
Ubuntu 14.04 LTS 中文修正 | ScarShow | 刀疤說
Ubuntu 14.04 LTS 中文字體 « Brian’s home
Ubuntu 使用軟體記錄 – 新營國小文件庫
清水國中資訊組 | Kubuntu與Linux自由軟體

主要是安裝一些常用到的套件及安裝資訊課程會教的一些套件。

1. 安裝 gnome-termainal 終端機程式
$ sudo apt-get install gnome-terminal

2. 安裝 gnome-screenshot 擷圖程式
$ sudo apt-get install gnome-screenshot

3. 安裝 eog 看圖程式
$ sudo apt-get install eog

4. 安裝文字編輯器 vim/nano/leafpad
$ sudo apt-get install vim nano leafpad

5. 移除 xterm
$ sudo apt-get remove –purge xterm

6. 移除 netsurf
$ sudo apt-get remove –purge netsurf-gtk netsurf-common[@more@]7. 安裝所須的套件
$ sudo apt-get install mlocate dnsutils zip unzip rar unrar p7zip p7zip-full p7zip-rar xarchiver

8. 安裝 gnome-tweak-tool
$ sudo apt-get install gnome-tweak-tool

9. 安裝 kolourpaint
$ sudo apt-get install kolourpaint4 kde-l10n-zhtw

10. 安裝 Firefox
$ sudo apt-get install firefox firefox-locale-zh-hant

11. 安裝 Firefox Flash Player Plugin
$ sudo apt-get install flashplugin-installer

12. 安裝 unity-tweak-tool
$ sudo apt-get install notify-osd overlay-scrollbar unity-webapps-service
$ sudo apt-get install unity-tweak-tool

13. 加入 add-apt-repository 指令
$ sudo apt-get install software-properties-common python-software-properties

14. 安裝 Adobe PDF Reader
新增套件庫來源
$ sudo add-apt-repository “deb http://archive.canonical.com/ precise partner”
更新套件庫
$ sudo apt-get update
安裝 acroread
$ sudo apt-get install -y acroread

15. 安裝 scratch
$ sudo apt-get install -y scratch

16. 安裝 Scratch 2
$ sudo apt-get install gnome-session-canberra libcanberra-gtk-module libcanberra-gtk0
下載檔案
$ wget http://airdownload.adobe.com/air/lin/download/2.6/AdobeAIRInstaller.bin -P ~/Downloads
$ wget http://cdn.scratch.mit.edu/scratchr2/static/sa/Scratch-431.air -P ~/Downloads
建立連結
$ sudo ln -s /usr/lib/i386-linux-gnu/libgnome-keyring.so.0 /usr/lib/libgnome-keyring.so.0
$ sudo ln -s /usr/lib/i386-linux-gnu/libgnome-keyring.so.0.2.0 /usr/lib/libgnome-keyring.so.0.2.0
更改檔案權限
$ sudo chmod +x ~/Downloads/adobeAIRInstaller.bin
開始進行安裝
$ sudo ~/Downloads/AdobeAIRInstaller.bin
$ sudo /etc/alternatives/Adobe_AIR_Application_Installer ~/Downloads/Scratch-431.air
Scratch 2.0 中文化設定
備份原設定檔
$ sudo mv /opt/Scratch 2/share/locale/lang_list.txt /opt/Scratch 2/share/locale/lang_list.txt.orig
切換成 root 身份
$ su –
建立 lang_list.txt
# echo “zh-tw,正體中文” > /opt/Scratch 2/share/locale/lang_list.txt
退出 root
# exit
下載正體中文語系檔
$ wget https://2blog.ilc.edu.tw/wp-content/uploads/sites/985/25793/25793-2647185.zip -P ~/Downloads
解壓縮
$ unzip ~/Downloads/25793-2647185.zip -d ~/Downloads
搬移正體中文語系檔到 /opt/Scratch 2/share/locale 目錄
$ sudo mv ~/Downloads/locale/zh_TW.po /opt/Scratch 2/share/locale/zh-tw.po
下載修正過的 Scratch.swf
$ wget https://2blog.ilc.edu.tw/wp-content/uploads/sites/985/25793/25793-2889399.zip -P ~/Downloads
解壓縮
$ unzip ~/Downloads/25793-2889399.zip -d ~/Downloads
備份原檔
$ sudo mv  /opt/Scratch 2/share/Scratch.swf /opt/Scratch 2/share/Scratch.swf-bak
複製檔案到 /opt/Scratch 2/share 目錄
$ sudo cp ~/Downloads/Scratch.swf /opt/Scratch 2/share/
更改檔案權限
$ sudo chown root.root  /opt/Scratch 2/share/Scratch.swf
執行 Scratch 2,並將語系切換成正體中文
修改檔案權限
$ sudo chown root:root ~/.appdata/edu.media.mit.Scratch2Editor/Local Store/#SharedObjects/Scratch.swf/Scratch.sol

17. 安裝 arduino 1.0.x
Arduino 官方網站:http://www.arduino.cc/
$ sudo apt-get install -y arduino arduino-core

18. 安裝 arduino 1.5.x
建立目錄
$ sudo mkdir /opt/arduino
解壓縮
$ sudo tar xvzf ~/Downloads/arduino-1.5.8-linux32.tgz -C /opt/arduino
讓所有人都可以執行
$ sudo chmod a+rX /opt/arduino
建立在功能表上執行的圖示
$ sudo vim /usr/share/applications/arduino158.desktop
[Desktop Entry]
Type=Application
Name=Arduino IDE 1.5.8
GenericName=Create physical computing projects
Exec=/opt/arduino/arduino-1.5.8/arduino
Icon=arduino
Terminal=false
Categories=Development;Engineering;Electronics;
MimeType=text/x-arduino

19. 安裝 s4a
sa4 官方網站:http://s4a.cat/
下載 s4a
$ wget http://vps34736.ovh.net/S4A/S4A15.deb -P ~/Downloads
進行安裝
$ sudo dpkg -i ~/Downloads/S4A15.deb

20. 安裝 ardublock arduino 圖形化工具
下載 ardublock
$ wget http://sourceforge.net/projects/ardublock/files/ardublock-beta-20140828.jar -P ~/Downloads
建立目錄
$ sudo mkdir -p /usr/share/arduino/tools/ArduBlockTool/tool
複製檔案
$ sudo cp ~/Downloads/ardublock-beta-20140828.jar /usr/share/arduino/tools/ArduBlockTool/tool/
建立目錄
$ sudo mkdir -p /opt/arduino/arduino-1.5.8/tools/ArduBlockTool/tool
複製檔案
$ sudo cp ~/Downloads/ardublock-beta-20140828.jar /opt/arduino/arduino-1.5.8/tools/ArduBlockTool/tool/

21. 安裝 LibreOffice
$ sudo apt-get install libreoffice libreoffice-help-zh-tw libreoffice-l10n-zh-tw openclipart-libreoffice openclipart-png

Acer Chromebox – 安裝 Ubuntu 14.04 後中文化設定

參考網頁:
Ubuntu 14.04 主機的終端機中文顯示 – Linux – 彰化縣自由軟體工作日誌
頭城國小資訊組 | Cubie Truck 測試 – Ubuntu Desktop 中文化

利用 crouton 建立的 Ubuntu,因為是最小化安裝,所以語系是英文的,而且也缺少非常多的套件,須要再處理過。
建立中文化環境的設定
1.  備份原檔
$ sudo cp /var/lib/locales/supported.d/local /var/lib/locales/supported.d/local.$(date +%F)
2. 加入 zh_TW.UTF-8
$ sudo sed -i ‘$azh_TW.UTF-8 UTF-8’ /var/lib/locales/supported.d/local
3. 產生中文化環境設定
$ sudo locale-gen zh_TW.UTF-8
Generating locales…
  zh_TW.UTF-8… done
  Generation complete.
$ sudo update-locale LANG=zh_TW.UTF-8
$ sudo update-locale LANGUAGE=zh_TW.UTF-8
[@more@]4. 安裝中文化所須套件
$ sudo apt-get install fonts-arphic-bkai00mp fonts-arphic-bsmi00lp fonts-arphic-ukai fonts-arphic-uming fonts-wqy-microhei fonts-wqy-zenhei ttf-wqy-microhei ttf-wqy-zenhei xfonts-wqy fonts-droid
$ sudo apt-get install language-pack-zh-hant language-pack-gnome-zh-hant language-pack-zh-hant-base language-pack-gnome-zh-hant-base language-selector-common language-selector-gnome

5. 移除不須要的輸入法模組
$ sudo apt-get remove –purge ibus-table-cangjie3 ibus-table-cangjie5 ibus-table-quick-classic ibus-table
6. 安裝行列輸入法模組
$ sudo apt-get install ibus-array ibus-table-array30

7. 輸入法設定
$ /usr/bin/im-config


8. 重新登出再登入

9. ibus 設定,移除不要的輸入法
$ /usr/bin/ibus-setup

Chromebox 安裝 Ubuntu(crouton)

參考網頁:在 ASUS Chromebook C300 使用 Ubuntu Unity 桌面 « Jamyy’s Weblog

1. 進入開發人員模式
注意:進入開發人員模式,會把 ChromeOS 上的所有設定清除,就像是重新使用新機一樣,所以請先備份好自己的檔案
先將 Chromebox 關機
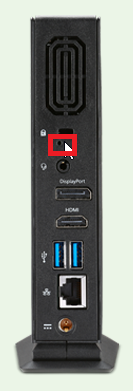
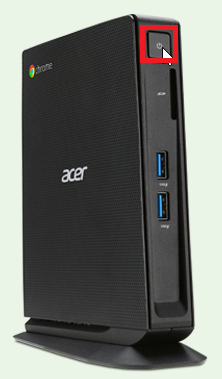
同時按 修復按鈕電源鍵

[@more@]出現 Chrome 作業系統已毀損或遺失,請按 Ctlr+D
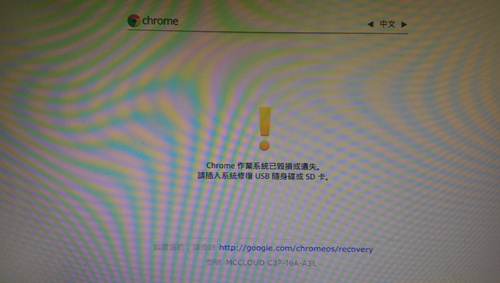
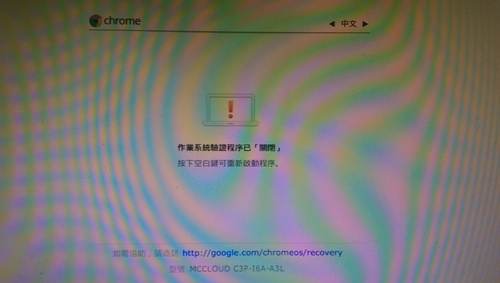
按一下 修復按鈕,關閉 Chrome 作業系統驗證程序
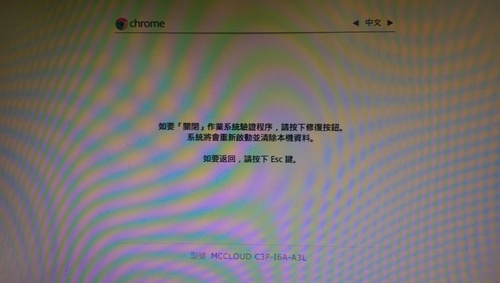
Chrome 作業系統驗證程序已關閉,按 Ctrl+D 繼續
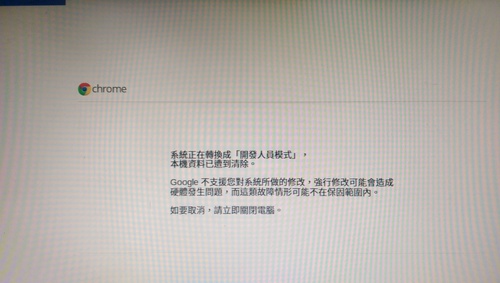
系統正在進入 開發人員模式,本機的資料已遭到清除
轉換完成之後,系統會重新開機
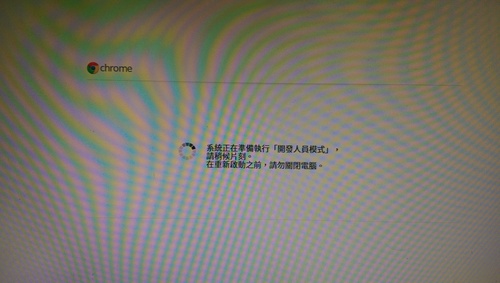
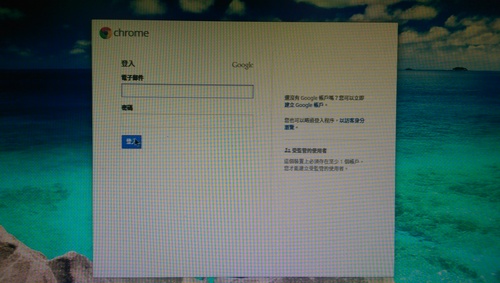
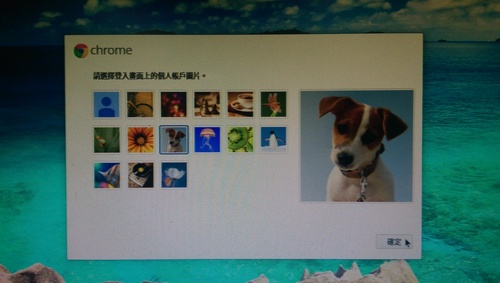
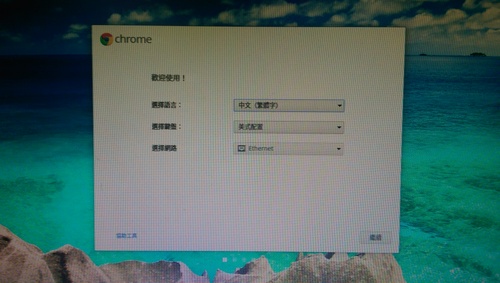
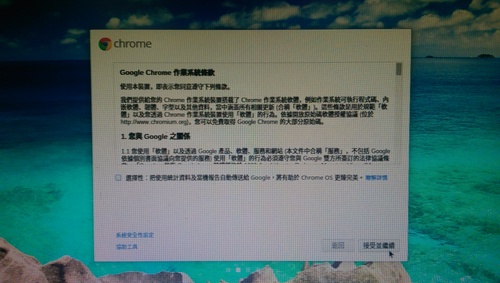
重新初始化設定
2. 下載 crouton,將檔案存放在 Downloads 目錄

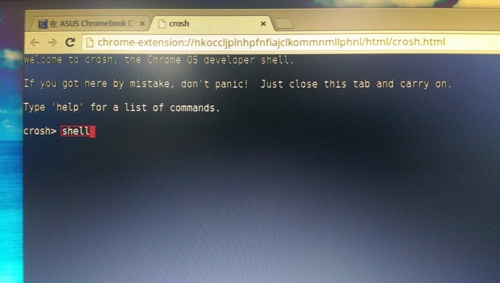
3. 按 Ctrl+Alt+T 開啟 Shell 終端機
輸入 shell 並按 Enter 鍵,進入完整的 Shell 模式
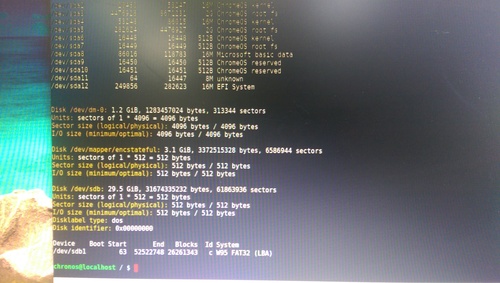
4. 查看分割區的資訊
$ sudo fdisk -l
5. 取消掛載記憶卡,這裡要視掛載的目錄而定 
$ sudo umount /media/removable/SD Card

6. 分割記憶卡
$ sudo fdisk /dev/sdb

Welcome to fdisk (util-linux 2.24).
Changes will remain in memory only, until you decide to write them.

Be careful before using the write command.


Command (m for help): d
Selected partition 1
Partition 1 has been deleted.

Command (m for help): n

Partition type:
   p   primary (0 primary, 0 extended, 4 free)
   e   extended
Select (default p): p
Partition number (1-4, default 1): 
First sector (2048-61863935, default 2048): 
Last sector, +sectors or +size{K,M,G,T,P} (2048-61863935, default 61863935): 

Created a new partition 1 of type ‘Linux’ and of size 29.5 GiB.

Command (m for help): wq
The partition table has been altered.
Calling ioctl() to re-read partition table.
Syncing disks.

7. 格式化記憶卡
$ sudo mkfs.ext4 -m 1 /dev/sdb1

mke2fs 1.42 (29-Nov-2011)
Filesystem label=
OS type: Linux
Block size=4096 (log=2)
Fragment size=4096 (log=2)
Stride=0 blocks, Stripe width=0 blocks
1933312 inodes, 7732736 blocks
77327 blocks (1.00%) reserved for the super user
First data block=0
Maximum filesystem blocks=4294967296
236 block groups
32768 blocks per group, 32768 fragments per group
8192 inodes per group
Superblock backups stored on blocks: 
        32768, 98304, 163840, 229376, 294912, 819200, 884736, 1605632, 2654208, 
        4096000

Allocating group tables: done                            
Writing inode tables: done                            
Creating journal (32768 blocks): done
Writing superblocks and filesystem accounting information: done

8. 建立掛載目錄
$ sudo mkdir /media/removable/sdcard

9. 進行掛載
$ sudo mount -o rw,noatime /dev/sdb1 /media/removable/sdcard

10. 建立 Chroot 環境(Ubuntu 14.04 Unity 桌面)
這一個部分須要很久的時間,因為要到網路上下載套件
-a 採用架構  i386/amd64/armhf
-r  安裝 Ubuntu 版本 trusty-14.04  precise-12.04 saucy-13.10
-t 採用 XWindow gnome/lxde/xfce/kde/cinnamon/unity 
$ sudo sh ~/Downloads/crouton -r trusty -t unity -p /media/removable/sdcard
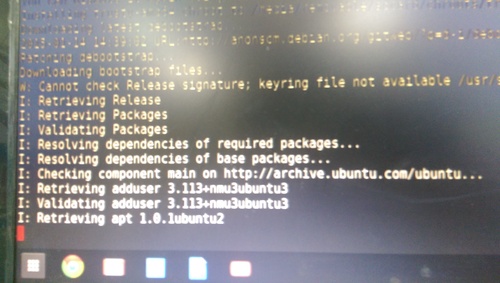
11. 設定帳號及密碼
Please specify a username for the primary user: 
Enter new UNIX password: 

Retype new UNIX password: 

看到下面這一段時,代表終於完成了
Here’s some tips:

Audio from the chroot will now be forwarded to CRAS (Chromium OS audio server),
through an ALSA plugin.

Future Chromium OS upgrades may break compatibility with the installed version
of CRAS. Should this happen, simply update your chroot.

You can flip through your running chroot desktops and Chromium OS by hitting
Ctrl+Alt+Shift+Back and Ctrl+Alt+Shift+Forward.

You can start Unity via the startunity host command: sudo startunity

Unmounting /media/removable/sdcard/chroots/trusty…
Done! You can enter the chroot using enter-chroot.

12. 讓 Ubuntu 桌面按揵配置與 Chrome OS 相同
$ sudo sh ~/Downloads/crouton -u -r trusty -t keyboard -p /media/removable/sdcard

或將 10 和 12 合而為一
sudo sh -e ~/Downloads/crouton -a i386 -r trusty -t audio,core,gtk-extra,keyboard,x11,chrome,cli-extra,extension,unity -p /media/removable/sdcard

13. 建立啟動 Ubuntu 的 Script 檔
$ vim ~/startunity

#!/bin/bash
if [ -z “$(mount | grep sdb1 | grep sdcard)” ]; then
    umount /dev/sdb1
    if [ ! -d /media/removable/sdcard ]; then
        mkdir /media/removable/sdcard
    fi 

    mount -o rw,noatime /dev/sdb1 /media/removable/sdcard
fi
/media/removable/sdcard/bin/startunity

14. 進入 Ubuntu Unity 桌面
Chrome 作業系統驗證程序已關閉,按 Ctrl+D 繼續

進入 Chrome OS
按 Ctrl+Alt+T,輸入 shell 進入完整 shell 模式
執行
$ sudo sh ~/startunity

進入 Ubuntu
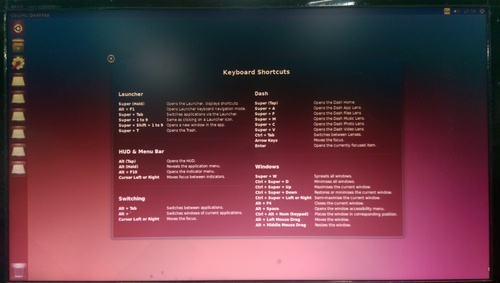
使用 crouton 的方式來安裝 Ubuntu 的好處是可以保留原有的 ChromeOS,在進入 ChromeOS 系統後,再以 Chroot 的方式來執行 Ubuntu。
Ubuntu Chromium 瀏覽器 Cache 目錄設定

參考網頁:
將 Linux 的 Firefox、Chrome 暫存區設定到 RAM 裡面 – Tsung’s Blog

因為在 Ubuntu Chromium 瀏覽器中,沒有辦法像 Firefox 一樣,可以設定 Cache 暫存區的目錄,所以要改用直接修改 .desktop 的方式。
1. 備份原檔
$ cp /usr/share/applications/chromium-browser.desktop ~/chromium-browser.desktop.$(date +%F)
[@more@]2. 進行修改
$ sudo sed -i ‘s/Exec=chromium-browser/Exec=chromium-browser –disk-cache-dir=”/tmp”/’ /usr/share/applications/chromium-browser.desktop

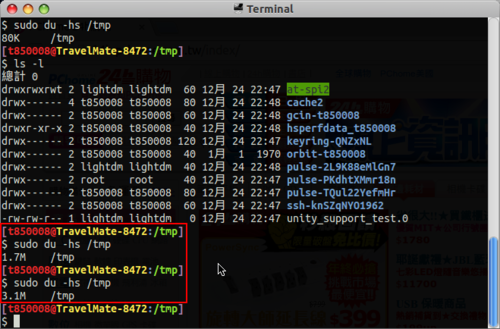
3. 檢查設定是否有生效,前後做比較

在 Ubuntu Mac Style 12.04 中使用 SSD

參考網頁:
Solid State Drive (SSD): optimize it for Ubuntu 14.04, Linux Mint 17.1 and Debian – Easy Linux tips project
永遠的真田幸村: Linux平台使用SSD必讀 (範例為Ubuntu) – yblog.org

修改方式:
1. 備份原 /etc/fstab
$ sudo cp /etc/fstab /etc/fstab.$(date +%F)
[@more@]2. 修改 /etc/fstab
這裡 120G  SSD 的分割是
92G / 根目錄
2G swap
25G /windows 備份區
# vim /etc/fstab
加入紅字的部份
# <file system> <mount point>   <type>  <options>       <dump>  <pass>
proc            /proc           proc    nodev,noexec,nosuid 0       0
# / was on /dev/sda1 during installation
UUID=1bfa9571-c711-4d02-8a65-a61e6c2f790f /               ext4    noatime,nodiratime,discard,errors=remount-ro 0       1
# /windows was on /dev/sda2 during installation
UUID=85E0-42F0  /windows        vfat    utf8,umask=007,gid=46 0       1
# swap was on /dev/sda3 during installation
UUID=324d38ce-b71d-4872-82a3-bb262397c221 none            swap    sw              0       0
# 將 /tmp 以 tmpfs 形式掛上
tmpfs /tmp tmpfs nodev,nosuid,noexec,mode=1777 0 0
tmpfs   /var/spool tmpfs   defaults,noatime,mode=1777   0  0
tmpfs   /var/tmp   tmpfs   defaults,noatime,mode=1777   0  0
tmpfs   /var/log   tmpfs   defaults,noatime,mode=0755   0  0

3. 將 Firefox 瀏覽器的暫存檔指到 /tmp
開啟 Firefox 於瀏覽網址輸入
about:config

按我發誓,我一定會小心的!

於偏好設定名稱按 右鍵->新增->字
新增 browser.cache.disk.parent_directory
數值設定 /tmp

4. 改用 I/O Scheduler 提供系統效率
$ sudo cat /sys/block/sda/queue/scheduler
在 Ubuntu 12.04 顯示的可能是:
noop deadline [cfq]
修改 /etc/default/grub 設定檔
$ sudo vim /etc/default/grub

#GRUB_CMDLINE_LINUX_DEFAULT=”quiet splash”
改成
GRUB_CMDLINE_LINUX_DEFAULT=”elevator=deadline quiet splash”

5. 讓設定生效
$ sudo update-grub
Generating grub.cfg …
Found linux image: /boot/vmlinuz-3.2.0-74-generic-pae
Found initrd image: /boot/initrd.img-3.2.0-74-generic-pae
Found linux image: /boot/vmlinuz-3.2.0-67-generic-pae
Found initrd image: /boot/initrd.img-3.2.0-67-generic-pae
Found memtest86+ image: /boot/memtest86+.bin
done

6. 重新啟動電腦
$ sudo reboot

在 Ubuntu Mac Style 上安裝 Variety 自動切換桌布

改安裝另外一套 Variety 來自動切換桌布,Variety 除了可以利用系統中的圖片來切換外,也可以下載網站上的圖片來當做桌布。
安裝 Variety
$ sudo apt-get install variety
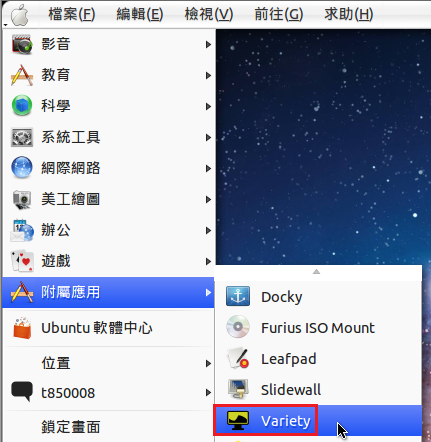
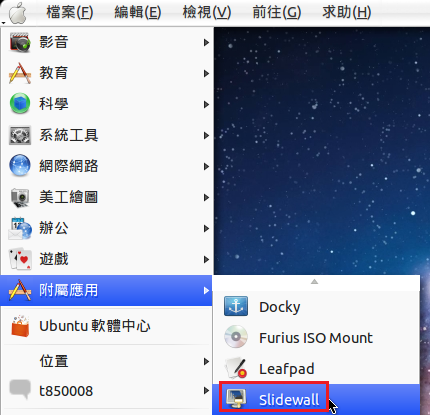
安裝完成後在功能表上的位置
[@more@]
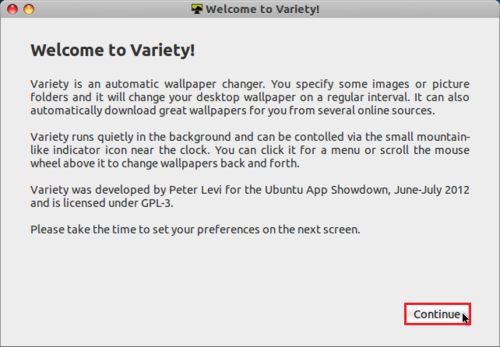
執行 Variety,選擇 Continue 繼續

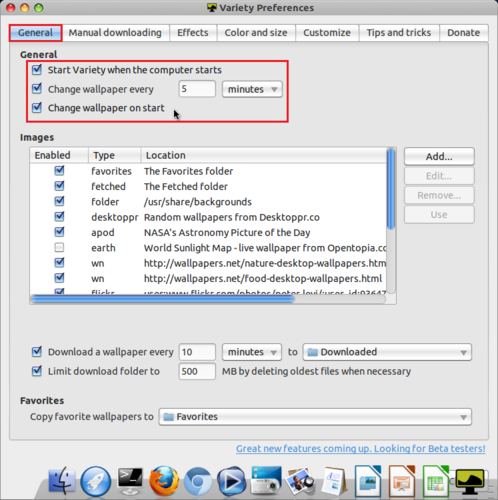
General  頁面設定,我只在在這裡做設定,其它的頁面沒有更動

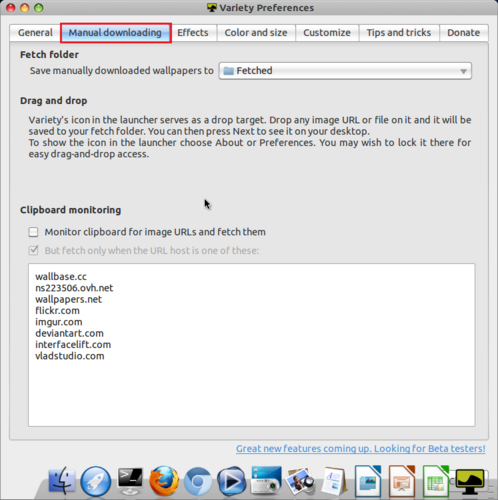
Manual downloading 頁面

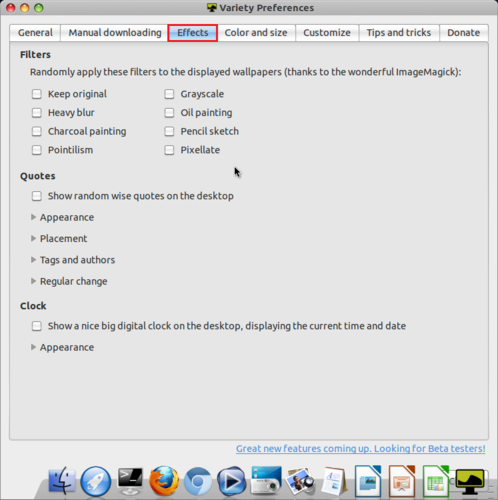
Effects 頁面

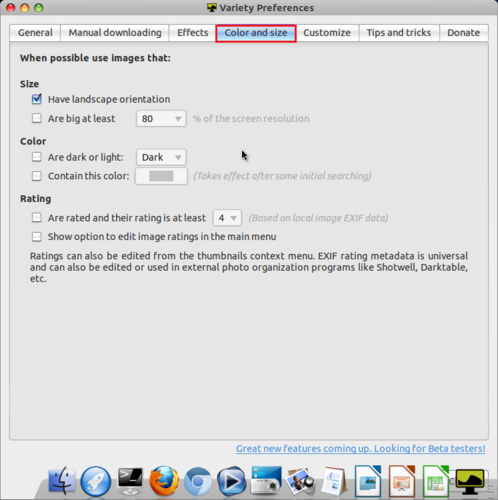
Color and size 頁面

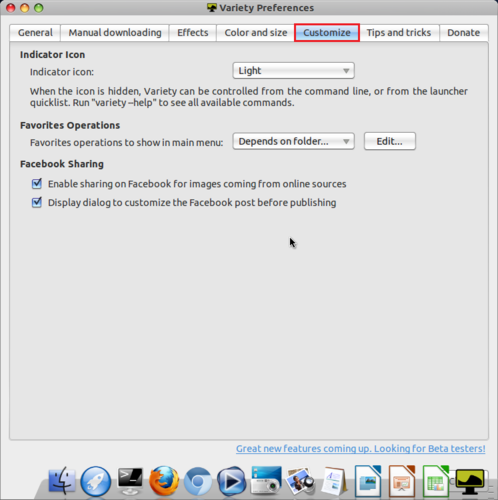
Customize 頁面

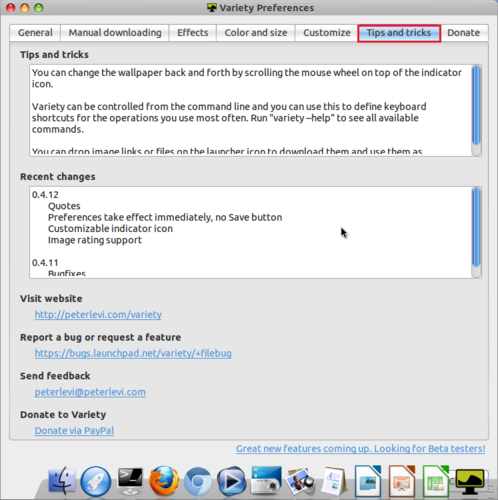
Trips and tricks 頁面

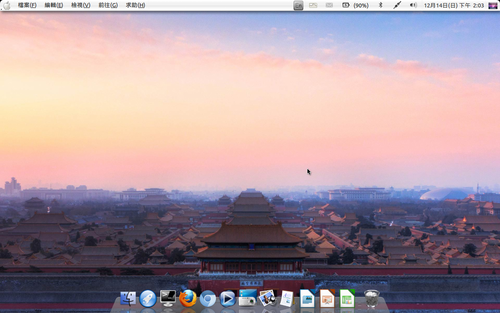
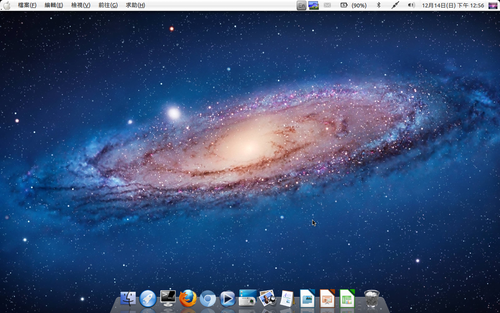
切換的桌布

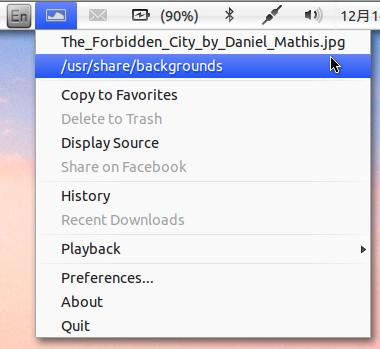
手動切換

移除 Variety 方式
$ sudo apt-get remove –purge libboost-python1.46.1 python-bs4 python-configobj python-pyexiv2 python-pyexiv2-doc variety

在 Ubuntu Mac Style 上安裝 DesktopNova 自動切換桌布

在 Windows 及 Mac OSX 的作業系統中,都可以設定定時自動切換桌布,偶爾換一下桌布,感覺可以換一下心情。
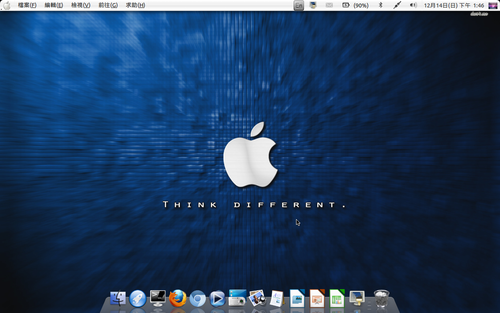
Ubuntu Mac Style 預設的桌布
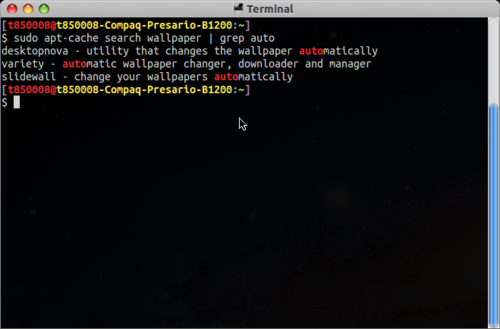
[@more@]在套件搜尋了一下,尋找可以自動切換桌布的套件
$ sudo apt-cache search wallpaper | grep auto

先試第一套 desktopnova
安裝 DesktopNova
$ sudo apt-get install desktopnova

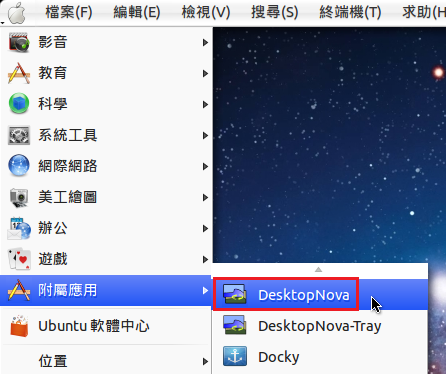
安裝完成後在功能表的位置

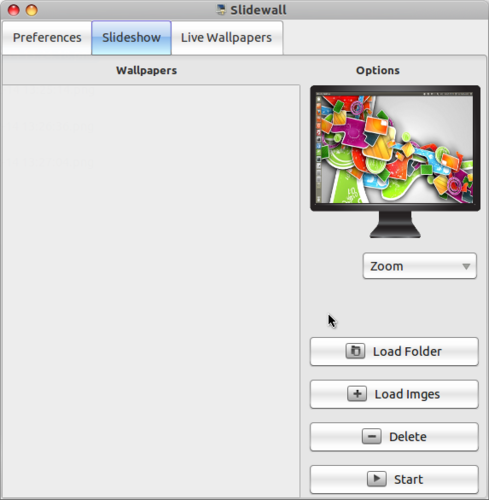
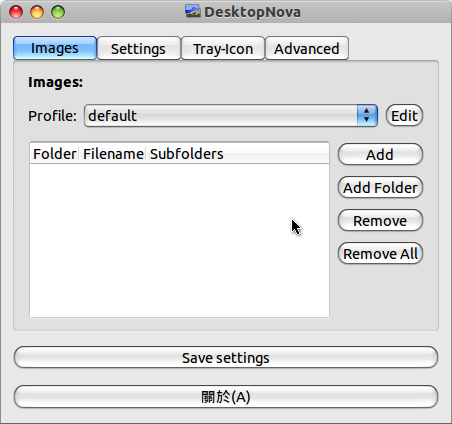
執行畫面

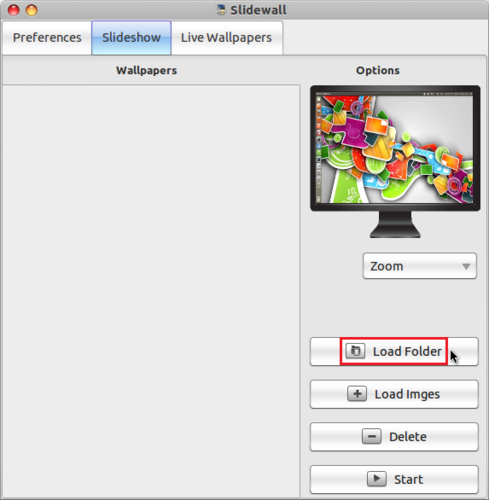
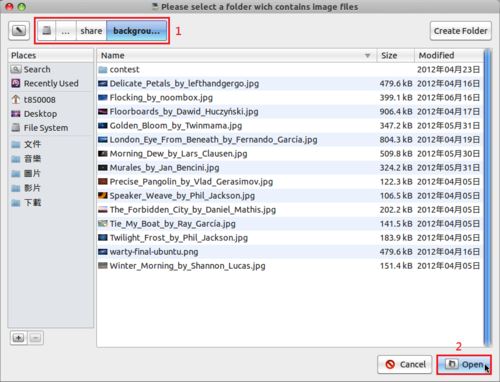
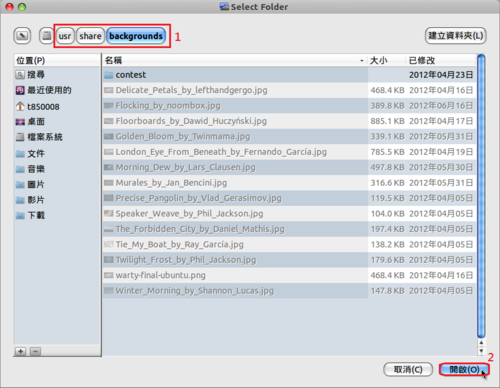
選擇 Add Folder 新增桌布放置的目錄
系統預設的目錄是 /usr/share/backgrounds

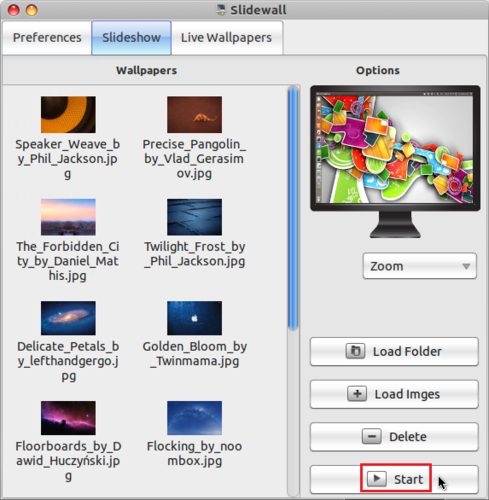
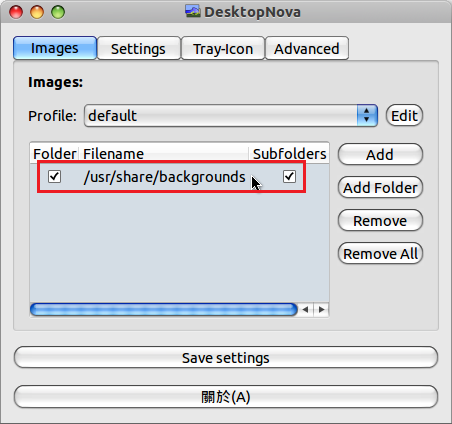
新增完成的目錄

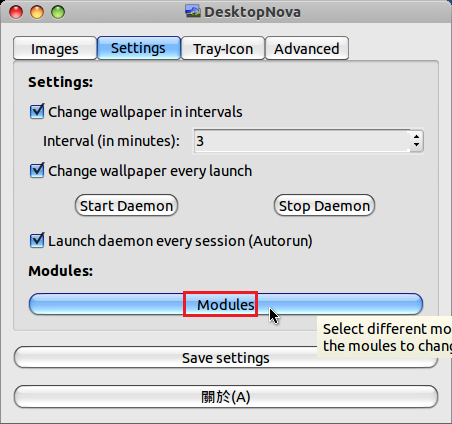
選擇 Settings,選擇 Modules

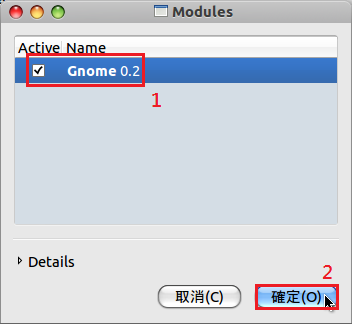
Modules 設定

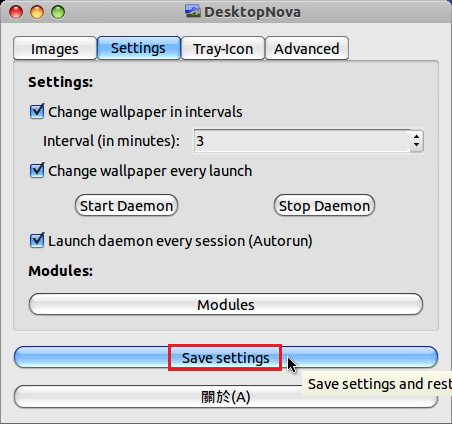
選擇 Save settings

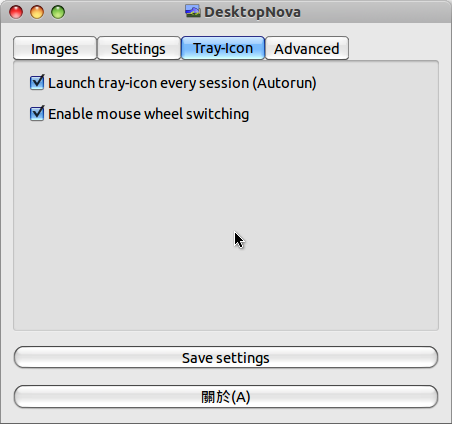
選擇 Tray-Icon 做設定,選擇 Save settings

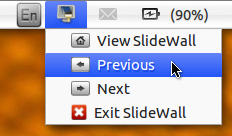
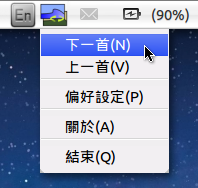
登出或重新啟動電腦後,可以在上方功能表找到 DesktopNova 的圖示

可是等了很久,桌布依然沒有更換,採用手動方式來切換,依然是不行,所以就把它給移除了!

移除 DesktopNova
$ sudo apt-get remove –purge desktopnova desktopnova-module-gnome desktopnova-tray

在 Ubuntu Mac Style 中改使用 LibreOffice

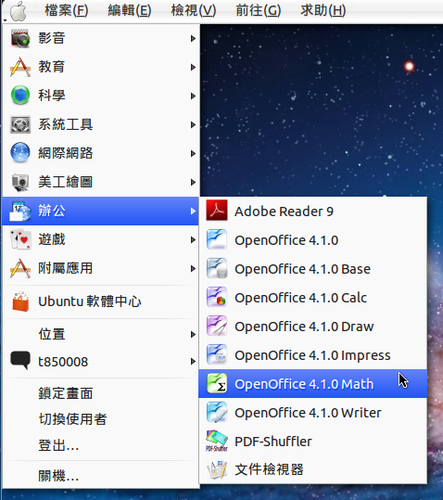
在 Ubuntu Mac Style 中預設是安裝 Apache OpenOffice,不過用起來有些不太習慣,所以改安裝 LibreOffice。
[@more@]首先先移除 Apache OpenOffice
$ sudo apt-get remove –purge openoffice-calc openoffice-core01 openoffice-debian-menus openoffice-ure openoffice.org-hyphenation

 安裝 LibreOffice
$ sudo apt-get install libreoffice libreoffice-l10n-zh-tw

移除 Apache OpenOffice 功能表
$ rm -rf ~/.local/share/applications/openoffice4-*

如果功能表上找不到 LibreOffice
$ rm -rf ~/.local/share/applications/libreoffice*
$ cd /usr/share/applications
$ cp libreoffice-base.desktop libreoffice-calc.desktop libreoffice-draw.desktop libreoffice-impress.desktop libreoffice-math.desktop libreoffice-writer.desktop ~/.local/share/applications/

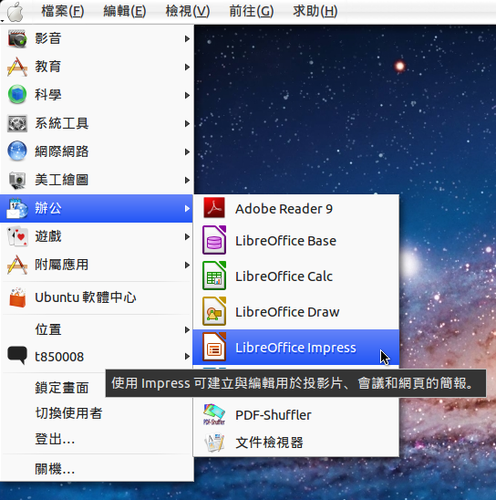
在功能表上的 LibreOffice