Ubuntu 14.04 上安裝 fcitx 小企鵝輸入法

一直以來都是使用 gcin 為主要的中文輸入法,但 gcin 在 Ubuntu 14.04 上右上角的圖示一直無法正常顯示,加上不太習慣使用 ibus,所以就改用了 fcitx。

1. 安裝 fcitx
$ sudo apt-get install fcitx fcitx-table-array30

2. 使用 im-config 來設定預設的中文輸入法
$ /usr/bin/im-config

3. 登出後重新登入

4. 在右上角的圖示,按滑鼠右鍵選擇 設定
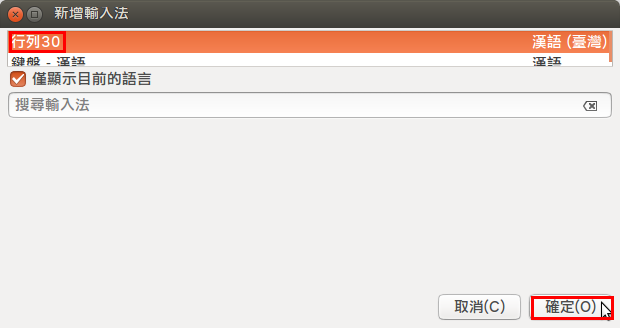
[@more@]5. 選擇要安裝的輸入法,然後按 確定(O)

6. 按 Ctrl+Space 鍵可以切換到行列輸入法,右上角也會出現行列輸入法圖示

7. 但 fcitx 裡面的行列輸入法是有一點怪怪的,其中最大的問題就是,原本使用w+(1~0)可以輸入標點符號的功能,竟然不見了!

8. 參考 夢幻天地blog: fcitx行列輸入法問題 網站上的設定也是不行,所以只好把 fcitx 給移除了!

9. 移除 fcitx
$ sudo apt-get remove –purge fcitx fcitx-bin fcitx-config-common fcitx-config-gtk fcitx-data fcitx-frontend-all fcitx-frontend-gtk2 fcitx-frontend-gtk3 fcitx-frontend-qt4 fcitx-libs fcitx-libs-gclient fcitx-libs-qt fcitx-module-dbus fcitx-module-kimpanel fcitx-module-lua fcitx-module-x11 fcitx-modules fcitx-pinyin fcitx-table fcitx-table-array30 fcitx-ui-classic liblua5.2-0

增加 LibreOffice 圖示與樣式

在 Ubuntu 安裝的 LibreOffice 預設安裝二組的圖示與樣式,分別是 銀河和 Human。
銀河

Human

[@more@]另外增加幾組
$ sudo apt-get install libreoffice-style-tango libreoffice-style-crystal libreoffice-style-hicontrast libreoffice-style-oxygen libreoffice-style-sifr

使用方式:
在 LibreOffice 選擇 工具 / 選項

選擇 檢視 / 圖示大小與樣式

高對比

Crystal

Tango

Oxygen

Sifr

使用 add-apt-repository 來增加/移除 Ubuntu 套件庫來源

加入 add-apt-repository 指令
$ sudo apt-get install software-properties-common python-software-properties
加入套件庫來源
$ sudo add-apt-repository  ppa:noobslab/apps
更新套件庫
$ sudo apt-get update
搜尋套件
$ sudo apt-cache search slidewall
slidewall – Let Slidewall to change your wallpapers.[@more@]移除套件庫來源
$ sudo add-apt-repository -r ppa:noobslab/apps
更新套件庫
$ sudo apt-get update
已經找不到套件
$ sudo apt-cache search slidewall

RedHat/CentOS、Debian/Ubuntu、Arch Linux、Gentoo 套件管理比較

1. 更新套件庫
ReHat/CentOS
# yum update
Debian/Ubuntu
# apt-get update
Arch Linux
# pacman -Sy
Gentoo Linux
# emerge –sync[@more@]2. 更新整個系統
ReHat/CentOS
# yum -y update
Debian/Ubuntu
# apt-get upgrade
# apt-get dist-upgrade
Arch Linux
# pacman -Syu
Gentoo Linux
# emerge -u world

3. 搜尋套件
ReHat/CentOS
# yum search pkg_filename
Debian/Ubuntu
# apt-cache search pkg_filename
Arch Linux
# pacman -Ss pkg_filename
Gentoo Linux
# emerge -s pkg_filename

4. 安裝套件
ReHat/CentOS
# yum install pkg_filename
# rpm -ivh pkg_filename.rpm
Debian/Ubuntu
# apt-get install pkg_filename
# dpkg -i pkg_filename.deb
Arch Linux
# pacman -S pkg_filename
Gentoo Linux
# emerge pkg_filename
# emerge -k pkg_filename

5. 移除套件
ReHat/CentOS
# yum remove pkg_filename
# rpm -e pkg_filename
Debian/Ubuntu
# apt-get remove –purge pkg_filename
# dpkg -P pkg_filename.deb
Arch Linux
# pacman -Rn pkg_filename
Gentoo Linux
# emerge -C pkg_filename

Ubuntu 10.04 Server LTS 升級

有一台舊的 Ubuntu 10.04 Server LTS,因為支援期只到 2015-04,所以趁有時間來升級一下!
# do-release-upgrade
Checking for a new ubuntu release
Done Upgrade tool signature
Done Upgrade tool
Done downloading
authenticate ‘precise.tar.gz’ against ‘precise.tar.gz.gpg’
extracting ‘precise.tar.gz’
[@more@]正在讀取快取

正在檢查套件管理員

繼續執行於 SSH 中?

此連線階段似乎是在 ssh 下執行。目前不建議在 ssh
連線下進行升級,因為若發生失敗將會較難以修復。

若您繼續,一個額外的 ssh 背景程序將會啟動在 ‘1022’
連接埠。
您想要繼續嗎?

繼續 [yN] y

啟動後備 sshd 中

為在失敗時更易進行修復,一個後備 sshd
將在‘1022’埠被啟動。如果使用中的 ssh
有任何問題,您仍可以連接後備的 sshd 。

若您有執行防火牆,您可能需要暫時開啟此連接埠。由於此動作存在潛在危險,系統不會自動執行。您可以這樣開啟連接埠:
iptables -I INPUT -p tcp –dport 1022 -j ACCEPT

若要繼續請按 [ENTER]
Reading package lists… Done
Building dependency tree
Reading state information… Done
Building data structures… Done
WARNING: Failed to read mirror file
Hit http://tw.archive.ubuntu.com lucid Release.gpg
Hit http://tw.archive.ubuntu.com lucid-updates Release.gpg
Hit http://tw.archive.ubuntu.com lucid Release
Hit http://tw.archive.ubuntu.com lucid-updates Release
Hit http://tw.archive.ubuntu.com lucid/main Packages
Hit http://tw.archive.ubuntu.com lucid/restricted Packages

正在計算所有的更動

正在計算所有的更動

要開始升級嗎?

2 個已安裝套件不再受 Canonical
支援。您仍可以取得來自社群的支援。

即將移除 11 個套件。 即將安裝 176 個新套件。
即將升級 423 個套件。

要下載共309 M。 依照您的連線速率,此下載將要約 1
分鐘 的時間。

安裝升級可能會花上幾個鐘頭。一旦下載完成,程序便無法取消。

 繼續 [yN]  詳情 [d]y

中間一大段過程………

系統升級完成。

需要重新開機

需要重新開機才能完成升級。
如果您選擇「y」系統將會重新開機。

繼續 [yN]y

重新開機後,已經升級到 12.04.

Welcome to Ubuntu 12.04.5 LTS (GNU/Linux 3.2.0-74-generic-pae i686)

 * Documentation:  https://help.ubuntu.com/

  System information as of Fri Jan  9 14:54:20 CST 2015

  System load:  0.41              Processes:           77
  Usage of /:   8.0% of 72.05GB   Users logged in:     0
  Memory usage: 17%               IP address for eth0: 192.168.1.22
  Swap usage:   0%

  Graph this data and manage this system at:
    https://landscape.canonical.com/

New release ‘trusty‘ available.
Run ‘do-release-upgrade‘ to upgrade to it.

還可以繼續升級到 14.04,不過暫且就先到這裡!

解決 Ubuntu 12.04 重新啟動網路出現的錯誤訊息

因為想要直接從文字介面來修改網路設定,所以移除 network-manager 相關套件
$ sudo apt-get remove –purge network-manager network-manager-gnome network-manager-pptp network-manager-pptp-gnome

重新啟動網路時出現
$ sudo /etc/init.d/networking restart
 * Reconfiguring network interfaces…                                          RTNETLINK answers: No such process
resolvconf: Error: /etc/resolv.conf isn’t a symlink, not doing anything.
                                                                         [ OK ][@more@]根據下面網頁解決問題:
誤刪/etc/resolv.conf [論壇 – 新手村] | Ubuntu 正體中文站

搬移檔案
$ sudo mv /etc/resolv.conf /run/resolvconf

建立連結
$ sudo ln -s /run/resolvconf/resolv.conf /etc/resolv.conf

重新啟動網路就不會出現錯誤的訊息了!

也可以用底下網頁介紹的方式
【浪費人生】resolvconf: Error: /etc/resolv.conf isn’t a symlink, not doing anything. | [leave] for me

$ sudo dpkgreconfigure resolvconf

Debian/Ubuntu – localepurge 移除不須要的語系

因為 Linux 都是支援多國語言,所以可以同時支援多國語言的輸入及顯示,但有時使用者並不須要支援這多種語言時,就可以把用不到的語系給清除掉。
$ head /usr/share/applications/chromium-browser.desktop 
[Desktop Entry]
Version=1.0
Name=Chromium Web Browser
Name[ast]=Restolador web Chromium
Name[bg]=Уеб четец Chromium
Name[bn]=ক্রোমিয়াম ওয়েব ব্রাউজার
Name[bs]=Chromium web preglednik
Name[ca]=Navegador web Chromium
Name[ca@valencia]=Navegador web Chromium
Name[da]=Chromium netbrowser

[@more@]

安裝 localepurge 工具
sudo apt-get install localepurge

第一次安裝 localepurge 時,系統會問你要保留哪些語系,回答過一次後,未來每次透過 apt/aptitude 安裝套件時,它都會自動清理一次。

設定檔 /etc/locale.nopurge
$ sudo tail -5 /etc/locale.nopurge 
en_US
en_US.UTF-8
zh_TW
zh_TW.EUC-TW
zh_TW.UTF-8

之後在進行套件安裝時,就會進行這項動作
正在進行 menu 的觸發程式 …
localepurge: Disk space freed in /usr/share/locale: 58596 KiB
localepurge: Disk space freed in /usr/share/man: 4920 KiB
localepurge: Disk space freed in /usr/share/gnome/help: 16152 KiB
localepurge: Disk space freed in /usr/share/omf: 1276 KiB

Total disk space freed by localepurge: 80944 KiB


取消 Ubuntu 登入時的訪客作業階段

因為不須要使用到這一項功能,所以把它取消
修改方式:
1. 備份原檔
$ sudo cp /etc/lightdm/lightdm.conf /etc/lightdm/lightdm.conf.$(date +%F)
2. 修改設定檔 /etc/lightdm/lightdm.conf
$ sudo sed -i ‘$aallow-guest=false’ /etc/lightdm/lightdm.conf
3. 重新啟動 lightdm
$ sudo restart lightdm

Acer Chromebox – Ubuntu 14.04 桌面打扮成 Mac OS X

參考網頁:
MBuntu (MacBuntu) 14.10/14.04 Transformation Pack Is Ready For Ubuntu 14.10/14.04 – NoobsLab
將 Ubuntu 14.10 Unity 桌面打扮成 Mac OS X Yosemite « Jamyy’s Weblog

[@more@]
下載桌布
$ wget http://drive.noobslab.com/data/Mac-14.10/MBuntu-Wallpapers.zip -P ~/Download
解壓縮
$ sudo unzip ~/Download/MBuntu-Wallpapers.zip /usr/share/backgrounds

安裝佈景主題、圖示、游標
新增套件庫
$ sudo add-apt-repository ppa:noobslab/themes
更新套件庫
$ sudo apt-get update
安裝佈景主題、圖示、游標
$ sudo apt-get install mbuntu-y-ithemes-v4
$ sudo apt-get install mbuntu-y-icons-v4

若要移除佈景主題、圖示、游標
$ cd /usr/share/icons/mac-cursors && sudo ./uninstall-mac-cursors.sh
$ sudo apt-get remove –purge mbuntu-y-icons-v4 mbuntu-y-ithemes-v4

安裝 Slingscold Launcher
新增套件庫
$ sudo add-apt-repository ppa:noobslab/apps
更新套件
$ sudo apt-get update
安裝 Slingscold 套件
$ sudo apt-get install slingscold

安裝 Indicator-Synapse
新增套件庫
$ sudo add-apt-repository ppa:noobslab/apps
更新套件庫
$ sudo apt-get update
安裝 Indicator-Synapse 套件
$ sudo apt-get install indicator-synapse

安裝 Docky
新增套件庫
$ sudo add-apt-repository ppa:docky-core/ppa
更新套件庫
$ sudo apt-get update
安裝 Docky
$ sudo apt-get install docky

安裝 Docky Themes
新增套件庫
$ sudo add-apt-repository ppa:noobslab/themes
更新套件庫
$ sudo apt-get update
安裝 Docky Themes
$ sudo apt-get install mbuntu-y-docky-skins-v4

若要移除 Docky 和 Docky Themes
$ sudo apt-get autoremove docky mbuntu-y-docky-skins-v4

設定佈景主題和圖示
$ cd ~/Downloads && wget -O config.sh http://drive.noobslab.com/data/Mac-14.10/config.sh
$ chmod +x config.sh;./config.sh
回復原設定值
$ cd ~/Downloads && wget -O unconfig.sh http://drive.noobslab.com/data/Mac-14.10/unconfig.sh
$ chmod +x unconfig.sh;./unconfig.sh

在 Launcher 加入 Apple Logo
$ sudo mv /usr/share/unity/icons/launcher_bfb.png /usr/share/unity/icons/launcher_bfb.png.backup
$ cd ~/Downloads;wget -O apple_launcher_bfb.png http://drive.noobslab.com/data/Mac-14.10/launcher-logo/apple/launcher_bfb.png;cd
$ sudo cp ~/Downloads/apple_launcher_bfb.png /usr/share/unity/icons/launcher_bfb.png
回復原先的設定值
$ sudo mv /usr/share/unity/icons/launcher_bfb.png.backup /usr/share/unity/icons/launcher_bfb.png

安裝 Unity Tweak Tool 來設定佈景主題和圖示
$ sudo apt-get install unity-tweak-tool