使用 OpenVPN Acess Server Client 端

輸入 https://IP:943/ 連線畫面
Connect 透過 Web Browser 連上 VPN Server
Login 下載使用者可以使用的 Client 程式,或直接下載 設定檔 client.ovpn

[@more@]可以下載 整合好的 *.msi 檔下載下來安裝

下載下來的檔案

安裝完成可以在桌面上看到 OpenVPN Connect 圖示

程式會自動帶出 Server IP 資訊,輸入帳號及密碼,按 Connect 即可!

選擇 Yes

已正常連線,下方也可以看到一個 OpenVPN 的圖示,亮綠色的燈

如果要斷線,選擇 OpenVPN 圖示,並按滑鼠右鍵

選擇 Exit 即可

透過網頁來連線

也可以下載各個平台的 Client 端程式自行安裝

如果系統已有安裝 OpenVPN 程式,可以直接下載設定檔 client.ovpn

將 client.ovpn 複製到 C:Program FilesOpenVPNconfig 即可以使用原來的 OpenVPN 程式進行連線

連線時會要求輸入帳號及密碼

試用 OpenVPN Acess Server

OpenVPN Acess Server 除了可以使用 Web 介面來進行管理及設定外,也可以使用命令式的指令來進行管理。
# /usr/local/openvpn_as/bin/ovpn-init
Detected an existing OpenVPN-AS configuration.
Continuing will delete this configuration and restart from scratch.
Please enter ‘DELETE’ to delete existing configuration:

輸入 DELETE 可以刪除目前的設定檔,重新設定

以下改用 Web 介面來進行管理及設定
以 Firefox 連線為例
選擇 進階 / 新增例外網站 / 取得憑證 / 確認安全例外


[@more@]帳號 openvpn 密碼是之前所設定的密碼

軟體授權

登入畫面

功能說明
Status / Status Overview(系統狀態概述)

Status / Current Users(目前線上使用者)

Status / Log Reports(Log 報表)

Configuration / License(授權管理)

Configuration / SSL Settings(SSL 設定)

Configuration /  Server Netwok Settings(伺服器網路設定)

Configuration / VPN Mode(VPN 的模式 Bridge or Route)

Configuration / VPN Settings(VPN 設定)

Configuration / Advanced VPN(VPN 進階設定)

Configuration / Web Server(網路伺服器)

Configuration / Client Settings(使用者端設定)

Configuration / Failover(故障轉移)

User Management / User Permissions(使用者權限)

User Management / Group Permissions(群組權限)

User Management / Revoke Certificates(撤銷憑證)

Authentication / General(設定認證的方式)

Authentication / PAM(使用 PAM 系統帳號做認證)

Authentication / RADIUS(使用 RADIUS 做認證)

Authentication / LDAP(使用 LDAP 做認證)

Tools / Profiles 設定

Tools / Connectivity Test(測試網路連線狀態)

安裝 OpenVPN Acess Server

如果 VPN 的使用者不多,又不想花太多的時間安裝及設定 OpenVPN 或是 OpenConnect,則可以考慮改用 OpenVPN Access Server,底下簡稱 OpenVPN AS。
OpenVPN AS 是由開發 OpenVPN 的公司所開發的商業性版本,提供了簡單的 Web 設定介面,安裝完成之後幾乎就已經設定完成,防火牆的部分也會自動完成,非常容易使用,但免費的版本,只能同時提供二個 Client 端連線。

Access Server Overview 官方網站:
https://openvpn.net/index.php/access-server/overview.html
[@more@]支援的作業系統版本

CentOS
6.x
http://swupdate.openvpn.org/as/openvpn-as-2.1.4-CentOS6.i386.rpm
http://swupdate.openvpn.org/as/openvpn-as-2.1.4-CentOS6.x86_64.rpm
7.x
http://swupdate.openvpn.org/as/openvpn-as-2.1.4-CentOS7.x86_64.rpm

Ubuntu 16.04
http://swupdate.openvpn.org/as/openvpn-as-2.1.4b-Ubuntu16.i386.deb
http://swupdate.openvpn.org/as/openvpn-as-2.1.4b-Ubuntu16.amd_64.deb

Debian 8
http://swupdate.openvpn.org/as/openvpn-as-2.1.4-Debian8.i386.deb
http://swupdate.openvpn.org/as/openvpn-as-2.1.4-Debian8.amd_64.deb

3. 進行下載及安裝,以 CentOS 7.3 1611 x64 為例
# wget http://swupdate.openvpn.org/as/openvpn-as-2.1.4-CentOS7.x86_64.rpm

4. 進行安裝
# rpm -ivh openvpn-as-2.1.4-CentOS7.x86_64.rpm

The Access Server has been successfully installed in /usr/local/openvpn_as
Configuration log file has been written to /usr/local/openvpn_as/init.log
Please enter “passwd openvpn” to set the initial
administrative password, then login as “openvpn” to continue
configuration here: https://192.168.131.219:943/admin
To reconfigure manually, use the /usr/local/openvpn_as/bin/ovpn-init tool.

Access Server web UIs are available here:
Admin  UI: https://192.168.131.219:943/admin
Client UI: https://192.168.131.219:943/

192.168.131.219 是安裝時的主機 IP

5. 系統新增二個帳號
# tail -2 /etc/passwd
openvpn:x:1000:1000::/home/openvpn:/sbin/nologin
openvpn_as:x:1001:1001::/home/openvpn_as:/sbin/nologin

6. 設定 openvpn 管理帳號的密碼
# passwd openvpn
更改使用者 openvpn 的密碼。
新 密碼:
再次輸入新的 密碼:
passwd:所有驗證 token 都已成功更新。

建置使用帳號及密碼認證的 OpenConnect Server – 1

建置方式可以參考以下二篇文章:
頭城國小資訊組 | 在 Ubuntu 16.04.1 Server 上建置 OpenConnect SSL VPN Server
頭城國小資訊組 | 在 CentOS 7.x 上建置 OpenConnect SSL VPN Server

本來一直都是直接使用 key 來做認證,但在手機及平板上沒有對應的程式可以使用,所以改用帳號及密碼來做認證,OpenConnect Server 可以同時使用 key 及帳號密碼認證。
1. 修改 /etc/ocserv/ocserv.conf 設定檔
# vim /etc/ocserv/ocserv.conf
取消使用憑證認證
# sed -i ‘s/^auth = “certificate”/#auth = “certificate”/’ /etc/ocserv/ocserv.conf
在 auth 認證區段加入
auth = “plain[passwd=/etc/ocserv/ocpasswd]”[@more@]2. 建立帳號及密碼
# /usr/bin/ocpasswd -c /etc/ocserv/ocpasswd test
Enter password:
Re-enter password:

3. 測試有沒有建立使用者
# grep tces /etc/ocserv/ocpasswd | awk -F: ‘{print $1}’
test

4. 重新啟動 OpenConnect Server
# systemctl restart ocserv

5. 檢查系統是否有正常啟動
# systemctl status ocserv

Linux 下壓縮程式比較

原檔
$ ls -l UNUBeaconLogo128.png
-rw-r–r– 1 bananapi bananapi 25102 10月 12 17:16 UNUBeaconLogo128.png

使用 zip 格式
壓縮
# zip UNUBeaconLogo128.png.zip UNUBeaconLogo128.png
解壓縮
# unzip UNUBeaconLogo128.png.zip[@more@]

使用 7z 格式
壓縮
# 7z a
UNUBeaconLogo128.png.7z UNUBeaconLogo128.png
解壓縮
# 7z x UNUBeaconLogo128.png.7z

使用 gz 格式
壓縮(壓縮後原檔會不見)
# gzip
UNUBeaconLogo128.png
解壓縮(解壓縮後壓縮檔會不見)
# gzip -d UNUBeaconLogo128.png.gz
# gunzip UNUBeaconLogo128.png.gz

使用 xz 格式
壓縮(壓縮後原檔會不見)
# xz -z
UNUBeaconLogo128.png
解壓縮(解壓縮後壓縮檔會不見)
# xz -d UNUBeaconLogo128.png.xz
# unxz UNUBeaconLogo128.png.xz

綜合比較:在預設的情況下,不特別加上壓縮參數
$ ls -l UNUBeaconLogo128.png*
-rw-r–r– 1 bananapi bananapi 25102 10月 12 17:16 UNUBeaconLogo128.png
-rw-rw-r– 1 bananapi bananapi 11322 12月 24 13:54 UNUBeaconLogo128.png.7z
-rw-r–r– 1 bananapi bananapi 11378 10月 12 17:16 UNUBeaconLogo128.png.gz
-rw-r–r– 1 bananapi bananapi 11244 10月 12 17:16 UNUBeaconLogo128.png.xz
-rw-rw-r– 1 bananapi bananapi 11529 12月 24 13:54 UNUBeaconLogo128.png.zip

xz > 7z > gz > zip

gz / bz2 / xz 搭配 tar 使用
壓縮
# tar cjzf filename.tar.gz dirname
# tar cvjf filename.tar.bz2 dirname
# tar cvJf filename.tar.xz dirname

解壓縮
# tar xjzf filename.tar.gz
# tar xvjf filename.tar.bz2
# tar xvJf filename.tar.xz

Linux 下 7z 的使用方式

CentOS 7.x 安裝
# yum install epel-release
# yum update
# yum install p7zip

Arch Linux 安裝
# pacman -S p7zip

Ubuntu / Debian
# apt-get install p7zip-full 

# apt-get install p7zip[@more@]CentOS 可用指令 7za
Arch Linux / Debian / Ubuntu 可用指令 7z / 7za

常用參數
壓縮
# 7z a 壓縮檔名.7z 要壓縮的檔案或目錄1 要壓縮的檔案或目錄2

解壓縮
# 7z x 壓縮檔名.7z

# 7z e 壓縮檔名.7z

xe 差別,如果建立壓縮檔時有包含目錄,則 x 會依照原本壓縮時的樣子來還原,e 會建立原來的空目錄名稱,並把檔案解開在目錄名稱的外面
原則上會建議使用 x

列出壓縮檔的內容
# 7z l 壓縮檔名.7z

解壓縮時指定目錄
# 7z x 壓縮檔名.7z -o目錄位置
# 7z x 123.7z -o/tmp

更多的參數
# 7z –help

<Commands>
  a : Add files to archive
  b : Benchmark
  d : Delete files from archive
  e : Extract files from archive (without using directory names)
  h : Calculate hash values for files
  i : Show information about supported formats
  l : List contents of archive
  rn : Rename files in archive
  t : Test integrity of archive
  u : Update files to archive
  x : eXtract files with full paths

active (exited) 和 active (running)

啟動 OpenVPN Server 後,檢查是否有正常運作
# systemctl start openvpn
# systemctl status openvpn
● openvpn.service – OpenVPN service
Loaded: loaded (/lib/systemd/system/openvpn.service; enabled; vendor preset:
Active: active (exited) since 五 2016-12-23 21:35:43 CST; 28s ago

使用 netstat 來檢查
# netstat -antp | grep :1194
tcp 0 0 0.0.0.0:1194 0.0.0.0:* LISTEN 3146/openvpn

似乎有正常運作[@more@]解決方式:
# systemctl start openvpn@server.service
# systemctl status openvpn@server.service
● openvpn@server.service – OpenVPN connection to server
Loaded: loaded (/lib/systemd/system/openvpn@.service; disabled; vendor preset
Active: active (running) since 五 2016-12-23 21:33:19 CST; 5s ago

關於這二者的說明,可以參考:
[Linux] systemctl 列出來的 loaded active exited 是什麼意思? @ 亂打一通的心情日記 :: 痞客邦 PIXNET ::

只不過我以前都是習慣使用前一種方式來執行

試用 Banana Pi M3 – CentOS Linux 安裝 LAMP Server

1. 更新套件庫
# yum update

2. 安裝 LAMP 套件
# yum install httpd mariadb-server php php-gd php-mbstring php-mysql php-pdo php-pear php-soap php-xml php-xmlrpc

3. 設定開機時啟動
# systemctl enable httpd
Created symlink from /etc/systemd/system/multi-user.target.wants/httpd.service to /usr/lib/systemd/system/httpd.service.
# systemcrl enable mariadb
Created symlink from /etc/systemd/system/multi-user.target.wants/mariadb.service to /usr/lib/systemd/system/mariadb.service.[@more@]4. 防火牆設定
# /usr/bin/firewall-cmd –permanent –zone=public –add-service=http
# /usr/bin/firewall-cmd –reload

5. 啟動 Apache / MariaDB
# systemctl start httpd
# systemctl start mariadb

6. 瀏覽網頁 http://Server’IP

在 CentOS 7.x 上建置 OpenConnect SSL VPN Server

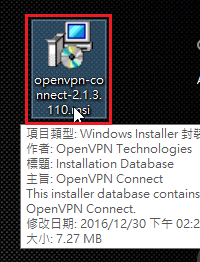
關於 OpenConnect 可以參考:
用樹莓派架設SSL VPN 最低成本打造窮人翻牆梯 – 技術專欄 – 網管人NetAdmin
本篇文章參考:
CentOS 7 安装 ocserv (OpenConnect Server) 并实现证书登录 – 奇遇·奇玉
在 CentOS 7 上搭建 Cisco AnyConnect VPN · ifreedomlife
老天尊的死期: Linode CentOS 7主機搭建Cisco AnyConnect VPN

1. 新增 epel  套件庫
# yum install epel-release

2. 更新套件庫
# yum update[@more@]3. 安裝 ocserv 套件
# yum install ocserv

4. 建立目錄及切換目錄
# mkdir certificates
# cd certificates

5. 建立 CA 金鑰
# certtool –generate-privkey –outfile ca-key.pem
Generating a 2048 bit RSA private key…

建立 ca.tmpl
# cat ca.tmpl
cn = “VPN CA”
organization = “Home”
serial = 1
expiration_days = 3650
ca
signing_key
cert_signing_key
crl_signing_key

# certtool –generate-self-signed –load-privkey ca-key.pem –template ca.tmpl –outfile ca-cert.pem

複製 ca-cert.pem 到 /etc/ocserv 目錄
# cp ca-cert.pem /etc/ocserv

6. 建立本機 Server 證書
# certtool –generate-privkey –outfile server-key.pem
Generating a 2048 bit RSA private key…

建立 server.tmpl
# cat server.tmpl
cn = “nas.test.com”
organization = “Home”
serial = 2
expiration_days = 3650
encryption_key
signing_key
tls_www_server

# certtool –generate-certificate –load-privkey server-key.pem –load-ca-certificate ca-cert.pem –load-ca-privkey ca-key.pem –template server.tmpl –outfile server-cert.pem

將 server-cert.pem 和 server-key.pem 複製到 /etc/ocserv
# cp server-cert.pem server-key.pem /etc/ocserv

7. 產生使用者端證書(連線時可以輸入帳號及密碼)
# cat gen-client-cert.sh
#!/bin/bash
USER=$1
CA_DIR=$2
SERIAL=`date +%s`
certtool –generate-privkey –outfile $USER-key.pem
cat << _EOF_ >user.tmpl
cn = “$USER”
unit = “users”
serial = “$SERIAL”
expiration_days = 9999
signing_key
tls_www_client
_EOF_
certtool –generate-certificate –load-privkey $USER-key.pem –load-ca-certificate $CA_DIR/ca-cert.pem –load-ca-privkey $CA_DIR/ca-key.pem –template user.tmpl –outfile $USER-cert.pem
openssl pkcs12 -export -inkey $USER-key.pem -in $USER-cert.pem -name “$USER VPN Client Cert” -certfile $CA_DIR/ca-cert.pem -out $USER.p12

更改檔案權限
# chmod 700 gen-client-cert.sh

建立目錄來存放使用者證書
# mkdir home
# 切換目錄
# cd home
# home 是使用者的名稱,.. 是指 ca 證書所在的目錄
# ../gen-client-cert.sh home ..
可以直接按 Enter 鍵跳過,就不用設定密碼
Signing certificate…
Enter Export Password:
Verifying – Enter Export Password:

產生之後可以將 home.p12 複製給使用者用戶端導入即可

8. 修改 /etc/ocserv/ocserv.conf 設定檔
# cp /etc/ocserv/ocserv.conf /etc/ocserv/ocserv.conf.$(date +%F)
取消 pam 認證
# sed -i ‘s/auth = “pam”/#auth = “pam”/’ /etc/ocserv/ocserv.conf
採用 certificate 認證
# sed -i ‘s/#auth = “certificate”/auth = “certificate”/’ /etc/ocserv/ocserv.conf
設定同一個用戶最多的登入數
# sed -i ‘s/max-same-clients = 2/max-same-clients = 10/’ /etc/ocserv/ocserv.conf
設定憑證檔的位置
# sed -i ‘s|#server-cert = /etc/pki/ocserv/public/server.crt|server-cert = /etc/ocserv/server-cert.pem|’ /etc/ocserv/ocserv.conf
# sed -i ‘s|#server-key = /etc/pki/ocserv/private/server.key|server-key = /etc/ocserv/server-key.pem|’ /etc/ocserv/ocserv.conf
# sed -i ‘s|#ca-cert = /etc/pki/ocserv/cacerts/ca.crt|ca-cert = /etc/ocserv/ca-cert.pem|’ /etc/ocserv/ocserv.conf
從證書中提取用戶名的方式,這裡提取的是證書中的 CN 欄位作為用戶名
# sed -i ‘s/cert-user-oid = 0.9.2342.19200300.100.1.1/cert-user-oid = 2.5.4.3/’ /etc/ocserv/ocserv.conf
分配給 VPN 用戶端的 IP 網段
# sed -i ‘s/#ipv4-network = 192.168.1.0/ipv4-network = 10.12.0.0/’ /etc/ocserv/ocserv.conf
# sed -i ‘s/#ipv4-netmask = 255.255.255.0/ipv4-netmask = 255.255.255.0/’ /etc/ocserv/ocserv.conf
設定 DNS
# sed -i ‘s/#dns = 192.168.1.2/dns = 8.8.8.8/’ /etc/ocserv/ocserv.conf
# 解決 GnuTLS error (at worker-vpn.c 問題
# sed -i ‘s/isolate-workers = true/isolate-workers = false/’ /etc/ocserv/ocserv.conf

9. 設定網路 Forward
# echo “net.ipv4.ip_forward = 1” >> /etc/sysctl.conf
# sysctl -p /etc/sysctl.conf

10. 設定防火牆規則
# iptables -t nat -A POSTROUTING -s 10.12.0.0/24 -o eth0 -j MASQUERADE
# iptables -A FORWARD -i vpns+ -j ACCEPT
# iptables -A FORWARD -o vpns+ -j ACCEPT

11. 儲存防火牆規則
# iptables-save > /etc/sysconfig/iptables

12. 設定開機時啟動
# systemctl enable ocserv
Created symlink from /etc/systemd/system/multi-user.target.wants/ocserv.service to /usr/lib/systemd/system/ocserv.service.

12. 啟動 OpenConnect Server
# systemctl start ocserv
# systemctl status ocserv

試用 Banana Pi M3 – CentOS Linux

燒錄了三次的 Image 才成功,有些辛苦。
預設登入的帳號及密碼:root / bananapi
登入後 root 目錄下有 README 檔案,是關於擴展 /root 分割區及無線網路相關的設定
# cat /root/README
== CentOS 7 userland ==

If you want to automatically resize your / partition, just type the following (as root user):
touch /.rootfs-repartition
systemctl reboot

For wifi on the rpi3, just proceed with those steps :

curl –location https://github.com/RPi-Distro/firmware-nonfree/raw/54bab3d6a6d43239c71d26464e6e10e5067ffea7/brcm80211/brcm/brcmfmac43430-sdio.bin > /usr/lib/firmware/brcm/brcmfmac43430-sdio.bin

curl –location https://github.com/RPi-Distro/firmware-nonfree/raw/54bab3d6a6d43239c71d26464e6e10e5067ffea7/brcm80211/brcm/brcmfmac43430-sdio.txt > /usr/lib/firmware/brcm/brcmfmac43430-sdio.txt

systemctl reboot

[@more@]修改套件庫來源
備份原檔
# cp /etc/yum.repos.d/CentOS-Base.repo /etc/yum.repos.d/CentOS-Base.repo.$(date +%F)

修改 CentOS-Base.repo
# sed -i ‘s|^baseurl=http://mirror.centos.org/altarch|baseurl=ftp://140.111.74.109/Linux/CentOS/altarch|’ /etc/yum.repos.d/CentOS-Base.repo

清除舊有及更新
# yum clean all;yum update

更新前
# cat /etc/redhat-release
Derived from Red Hat Enterprise Linux 7.2 (Source)

更新後
# cat /etc/redhat-release
CentOS Linux release 7.3.1611 (Core)

系統有些精簡,有些個人習慣使用的工具都沒有,底下特別補上
# yum install which unzip zip bind-utils vim nano mlocate screen lftp wget