在 CentOS 6.x 安裝 ProFTPd FTP Server

在 CentOS 6.x 上安裝 ProFTPd FTP Server
# yum install proftpd proftpd-ldap proftpd-mysql –enablerepo=epel

啟動 ProFTPd FTP Server
# service proftpd start

設定開機時啟動 ProFTPd FTP Server
# chkconfig –level 3 proftpd on

連線測試
# lftp -u test 192.168.1.20
密碼:
lftp test@192.168.1.20:~> ls
ls: 登入錯誤: 530 Login incorrect.

在 /var/log/proftpd/proftpd.log 中找到登入錯誤的記錄
# grep test /var/log/proftpd/proftpd.log
Jan 03 16:17:39 . proftpd[2441] 192.168.1.9 (192.168.1.20[192.168.1.20]): USER test (Login failed): Incorrect password.

但明明密碼是對的,而且改用 vsFTPd FTP Server 就可以正常登入
# service proftpd stop
正在關閉 proftpd:                                         [  確定  ]
# service vsftpd start
正在啟動 vsftpd 中的 vsftpd:                              [  確定  ]
# lftp -u test 192.168.1.20
密碼:
lftp test@192.168.1.20:~> ls -l
-rw-r–r–    1 0        0             358 Jan 03 08:10 groups.sql
-rw-r–r–    1 0        0             563 Jan 03 08:10 users.sql
[@more@]後來在 CentOS 6.x 如何安裝 Proftpd | Vixual 找到了解決的方式
檢查 /var/log/secure 發現有錯誤的訊息
# grep proftpd /var/log/secure | tail -2
Jan  3 16:10:42  proftpd: PAM unable to dlopen(/lib64/security/pam_stack.so): /lib64/security/pam_stack.so: cannot open shared object file: No such file or directory
Jan  3 16:10:42  proftpd: PAM adding faulty module: /lib64/security/pam_stack.so

解決方式:
先備份原檔
# cp /etc/pam.d/proftpd /etc/pam.d/proftpd_$(date +%F)

修改 /etc/pam.d/proftpd
# vim /etc/pam.d/proftpd

#%PAM-1.0
auth       required     pam_listfile.so item=user sense=deny file=/etc/ftpusers onerr=succeed
auth       required     pam_stack.so service=system-auth
auth       required     pam_shells.so
account    required     pam_stack.so service=system-auth
session    required     pam_stack.so service=system-auth
改成
#%PAM-1.0
auth       required     pam_listfile.so item=user sense=deny file=/etc/ftpusers onerr=succeed
auth       required     pam_shells.so
account    include      password-auth
session    required     pam_loginuid.so

重新啟動 ProFTPd FTP Server
# service proftpd restart

使用者可以正常登入了!
# lftp -u test 192.168.1.20
密碼:
lftp t0880001@192.168.1.20:~> ls -l
drwx——   2 test teacher      4096 Jan  3 08:10 .
drwx——   2 test teacher      4096 Jan  3 08:10 ..
-rw-r–r–   1 test teacher        18 Jul 18 13:19 .bash_logout
-rw-r–r–   1 test teacher       176 Jul 18 13:19 .bash_profile
-rw-r–r–   1 test teacher       124 Jul 18 13:19 .bashrc
-rw-r–r–   1 root     root          358 Jan  3 08:10 groups.sql
-rw-r–r–   1 root     root          563 Jan  3 08:10 users.sql

在 CentOS 6.x 上安裝 Lighttpd Web Server

Lighttpd Web Server 是另外一套輕量級的 Web Server,更詳細的介紹可以參考 lighttpd – 維基百科,自由的百科全書

lighttpd Web Server 官方網站: http://www.lighttpd.net/
[@more@]

在 CentOS 6.x 下安裝
# yum install lighttpd lighttpd-fastcgi  lighttpd-mod_mysql_vhost –enablerepo=epel

lighttpd Web Server 設定檔
設定檔在 /etc/lighttpd
網頁根目錄 在 /var/www/lighttpd

# rpm -qc lighttpd
/etc/lighttpd/conf.d/access_log.conf
/etc/lighttpd/conf.d/auth.conf
/etc/lighttpd/conf.d/cgi.conf
/etc/lighttpd/conf.d/cml.conf
/etc/lighttpd/conf.d/compress.conf
/etc/lighttpd/conf.d/debug.conf
/etc/lighttpd/conf.d/dirlisting.conf
/etc/lighttpd/conf.d/evhost.conf
/etc/lighttpd/conf.d/expire.conf
/etc/lighttpd/conf.d/fastcgi.conf
/etc/lighttpd/conf.d/geoip.conf
/etc/lighttpd/conf.d/magnet.conf
/etc/lighttpd/conf.d/mime.conf
/etc/lighttpd/conf.d/mod.template
/etc/lighttpd/conf.d/mysql_vhost.conf
/etc/lighttpd/conf.d/proxy.conf
/etc/lighttpd/conf.d/rrdtool.conf
/etc/lighttpd/conf.d/scgi.conf
/etc/lighttpd/conf.d/secdownload.conf
/etc/lighttpd/conf.d/simple_vhost.conf
/etc/lighttpd/conf.d/ssi.conf
/etc/lighttpd/conf.d/status.conf
/etc/lighttpd/conf.d/trigger_b4_dl.conf
/etc/lighttpd/conf.d/userdir.conf
/etc/lighttpd/conf.d/webdav.conf
/etc/lighttpd/lighttpd.conf
/etc/lighttpd/modules.conf
/etc/lighttpd/vhosts.d/vhosts.template
/etc/logrotate.d/lighttpd
/var/www/lighttpd/index.html

修改設定檔
開啟模組
# vim /etc/lighttpd/modules.conf
##
## mod_userdir
##
include “conf.d/userdir.conf”
##
## FastCGI (mod_fastcgi)
##
include “conf.d/fastcgi.conf”

開啟 PHP 功能
# vim /etc/lighttpd/conf.d/fastcgi.conf
fastcgi.server = ( “.php” =>
                   ( “php-local” =>
                     (
                       “socket” => “/var/run/lighttpd/php-fastcgi.socket”
                       “bin-path” => “/usr/bin/php-cgi”,
                       “max-procs” => 1,
                       “broken-scriptfilename” => “enable”,
                     )
                    )
                  )
#                   ),
#                   ( “php-tcp” =>
#                     (
#                       “host” => “127.0.0.1”,
#                       “port” => 9999,
#                       “check-local” => “disable”,
#                       “broken-scriptfilename” => “enable”,
#                     )
#                   ),
#
#                   ( “php-num-procs” =>
#                     (
#                       “socket” => socket_dir + “/php-fastcgi-2.socket”,
#                       “bin-path” => server_root + “/cgi-bin/php5”,
#                       “bin-environment” => (
#                         “PHP_FCGI_CHILDREN” => “16”,
#                         “PHP_FCGI_MAX_REQUESTS” => “10000”,
#                       ),
#                       “max-procs” => 5,
#                       “broken-scriptfilename” => “enable”,
#                     )
#                   ),
#                )

設定網頁預設編碼
# vim /etc/lighttpd/conf.d/mime.conf
  “.css”          =>      “text/css; charset=utf-8”,
  “.html”         =>      “text/html; charset=utf-8”,
  “.htm”          =>      “text/html; charset=utf-8”,
  “.js”           =>      “text/javascript; charset=utf-8”,

安裝 php-cli 套件
# yum install php-cli

啟動 lighttpd Web Server
# service lighttpd start

# vim /var/www/lighttpd/index.php
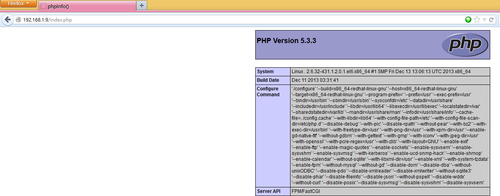
測試 PHP 功能

測試中文顯示

在 CentOS 6.x 安裝 Nginx Light Web Server

Nginx 是一套輕量級的 Web Server,和 Apache Web Server 比起來,由俄羅斯程式設計師 Igor Sysoev 所開發輕量級的網頁伺服器,軟體以 BSD-like 授權,可以在 UNIX、GNU/Linux、BSD、Mac OS X、Solaris,以及Microsoft Windows 等作業系統中執行。

Nginx 官方網站:http://nginx.org/

目前有人在 Linux 使用它來取代 Apache Web Server,並把這個組合稱為 LNMP(Linux + Nginx + MySQL + PHP)[@more@]安裝方式:
因為 Nginx 並不是 CentOS 官方套件,所以必須先新增 Nginx 官方所提供的第三方套件庫
# vim /etc/yum.repos.d/nginx.repo
[nginx]
name=nginx repo
baseurl=http://nginx.org/packages/centos/$releasever/$basearch/
gpgcheck=0
enabled=1

匯入憑證
# rpm –import http://nginx.org/keys/nginx_signing.key


# wget http://nginx.org/packages/centos/6/noarch/RPMS/nginx-release-centos-6-0.el6.ngx.noarch.rpm
# rpm -ivh http://nginx.org/packages/centos/6/noarch/RPMS/nginx-release-centos-6-0.el6.ngx.noarch.rpm

更新套件庫
# yum update

安裝 Nginx Web Server
# yum install nginx

執行 Nginx Web Server
# service nginx start
Starting nginx:                                            [  OK  ]

設定開機預設啟動 Nginx 和關閉 Apache Web Server
# chkconfig –level 3 nginx on
# chkconfig –level 3 httpd off

開啟瀏覽器,連線到 Nginx Web Server

在 CentOS 6.x 上安裝 ProFTPD FTP Server

安裝 ProFTPD FTP Server
# yum install proftpd –enablerepo=epel

啟動 ProFTPD FTP Server
# service proftpd start
Starting proftpd:                                          [FAILED]

檢查錯誤的地方
# proftpd –configtest
Checking syntax of configuration file
. proftpd[2211]: warning: unable to determine IP address of ‘.’
. proftpd[2211]: error: no valid servers configured
. proftpd[2211]: Fatal: error processing configuration file ‘/etc/proftpd.conf’

看起來似乎是 ProFTPD FTP Server 沒有 IP Address[@more@]解決方式:
加入紅色一行
# vim /etc/proftpd.conf
ServerName                      “ProFTPD server”
ServerIdent                     on “FTP Server ready.”
ServerAdmin                     root@localhost
ServerType                      standalone
#ServerType                     inetd
DefaultServer                   on
DefaultAddress                  192.168.1.9
AccessGrantMsg                  “User %u logged in.”
#DisplayConnect                 /etc/ftpissue
#DisplayLogin                   /etc/ftpmotd
#DisplayGoAway                  /etc/ftpgoaway
DeferWelcome                    off

重新啟動 ProFTPD FTP Server
# /etc/init.d/proftpd start
Starting proftpd:                                          [  OK  ]

在 CentOS 6.x 上安裝 phpLDAPAdmin

phpLDAPAdmin 是一套以網頁介面來管理 LDAP Server 的 PHP 程式,功能和 phpMyAdmin 類似。
phpLDAPAdmin 官方網站:http://phpldapadmin.sourceforge.net/wiki/index.php/Main_Page

安裝方式:
1. 增加 EPEL 套件庫
# wget http://dl.fedoraproject.org/pub/epel/6/x86_64/epel-release-6-8.noarch.rpm
# rpm -ivh epel-release-6-8.noarch.rpm

2. 更新套件庫
# yum update[@more@]3. 搜尋 phpLDAPAdmin 套件
# yum search phpLDAPAdmin
phpldapadmin.noarch : Web-based tool for managing LDAP servers

4. 進行安裝
# yum install phpLDAPAdmin

5. 限定可以連線的 IP 網頁
# vim /etc/httpd/conf.d/phpldapadmin.conf
<Directory /usr/share/phpldapadmin/htdocs>
  Order Deny,Allow
    Deny from all
    Allow from 127.0.0.1 192.168.1.0/24
    Allow from ::1
</Directory>

6. 重新啟動 Web Server
# service httpd restart

7. 進行連線

安裝 Open LDAP Server

LDAP(Lightweight Directory Access Protocol) 輕量級的目錄存取協定,運作在 TCP/IP 四曾架構上,跟運作於 OSI 七層的重量級協定 X.500 相比起來,才被稱為輕量級。

1. 安裝套件
# yum install openldap openldap-servers openldap-clients

2. 複製範例檔
# cp /usr/share/openldap-servers/slapd.conf.obsolete /etc/openldap/slapd.conf
# cp /usr/share/openldap-servers/DB_CONFIG.example /var/lib/ldap/DB_CONFIG

3. 設定管理密碼
# slappasswd
New password:
Re-enter new password:
{SSHA}IYAqaRIJsz+xxxx3wDZXe0ZYKyxxxEHzk[@more@]4. 修改設定檔
# vim /etc/openldap/slapd.conf
修改 dc Domain Componet
:%s/dc=my-domain,dc=com/dc=ldap,dc=tces.ilc.edu.tw/g
設定密碼
rootpw         {SSHA}IYAqaRIJsz+xxxx3wDZXe0ZYKyxxxEHzk

5.  安裝 migrationtools 工具
# yum install migrationtools

6. 修改設定檔 /usr/share/migrationtools/migrate_common.ph
# vim /usr/share/migrationtools/migrate_common.ph
# Default DNS domain
$DEFAULT_MAIL_DOMAIN = “ilc.edu.tw”;

# Default base
$DEFAULT_BASE = “dc=ldap,dc=tces.ilc.edu.tw”;

7. 產生新的設定,並修改權限
# mv /etc/openldap/slapd.d /etc/openldap/slapd.d.orig
# mkdir /etc/openldap/slapd.d
# chown -R ldap.ldap /etc/openldap/slapd.d
# chown -R ldap.ldap /var/lib/ldap

8. 測試設定檔
# slaptest -f /etc/openldap/slapd.conf -F /etc/openldap/slapd.d
config file testing succeeded

9. 如果出現下面的錯誤訊息,代表目錄的權限有問題
# service slapd start
/var/lib/ldap/__db.005 is not owned by “ldap”              [警告]
/var/lib/ldap/__db.006 is not owned by “ldap”              [警告]
/var/lib/ldap/__db.002 is not owned by “ldap”              [警告]
/var/lib/ldap/__db.001 is not owned by “ldap”              [警告]
/var/lib/ldap/__db.004 is not owned by “ldap”              [警告]
/var/lib/ldap/__db.003 is not owned by “ldap”              [警告]
/var/lib/ldap/alock is not owned by “ldap”                 [警告]
正在為 slapd 檢查設定檔案:                                [失敗]
ldif_read_file: Permission denied for “/etc/openldap/slapd.d/cn=config.ldif”
slaptest: bad configuration file!

要做下面的權限設定
# chown -R ldap.ldap /etc/openldap/slapd.d
# chown -R ldap.ldap /var/lib/ldap

10. 如果有使用 SELinux 的話,還要做下面的設定
# service slapd start
ls: cannot access /etc/openldap/slapd.d//cn=config/olcDatabase*.ldif: No such file or directory
Starting slapd:                                            [  OK  ]
# restorecon -R /etc/openldap/slapd.d

11. 設定開機時啟動
# chkconfig –level 3 slapd on

12. 設定防火牆
# iptables -A INPUT -p tcp -s 192.168.1.0/24 -m state –state NEW –dport 389 -j ACCEPT

讓 vsftpd FTP Server 同時支援 IPv4 及 IPv6

CentOS Linux 上安裝的 vsftpd FTP Server 預設只支援 IPv4,並不支援 IPv6,
# lftp 2001:288:a229:1::109
lftp 2001:288:a229:1::109:~> ls
‘ls’ 位置 0 [重新連接前延遲(秒): 51]

可以發現無法以 IPv6 的方式連線

啟用 IPv6 的方式
# vim /etc/vsftpd/vsftpd.conf

listen=YES
改成
#listen=YES


#listen_ipv6=YES
改成
listen_ipv6=YES

重新啟動 vsftpd FTP Server
# service vsftpd restart
正在關閉 vsftpd:                                          [  確定  ]
正在啟動 vsftpd 中的 vsftpd:                       [  確定  ][@more@]以 IPv6 的方式連線
# lftp 2001:288:a229:1::109
lftp 2001:288:a229:1::109:~> ls
drwxrwxr-x   37 504      504          4096 Dec 01 07:34 CentOS
drwxr-xr-x    3 0        0            4096 Oct 17 15:57 Linux
drwxr-xr-x    2 0        0            4096 Nov 23 03:00 ezgo
drwxr-xr-x    2 0        0            4096 Dec 05 12:19 ezgo_New
drwxr-xr-x    8 0        0            4096 Nov 25 09:34 raspbian
lftp 2001:288:a229:1::109:/>

但可以以 IPv6 連線,却會發現無法以 IPv4 的方式連線
# lftp 140.111.74.109
lftp 140.111.74.109:~> ls
‘ls’ 位置 0 [重新連接前延遲(秒): 28]

但是不能同時開啟 IPv4 和 IPv6,否則啟動時會出現錯誤訊息
# service vsftpd restart
正在關閉 vsftpd:                                          [  確定  ]
正在啟動 vsftpd 中的 vsftpd:500 OOPS: run two copies of vsftpd for IPv4 and IPv6
                                                           [失敗]

如果要同時能以 IPv4 和 IPv6 的方式來連線,則要在 /etc/vsftpd 目錄下增加 vsftpd_ipv6.conf 設定檔
# cp /etc/vsftpd/vsftpd.conf /etc/vsftpd/vsftpd_ipv6.conf

修改 /etc/vsftpd/vsftpd.conf
改成下面的設定
# vim /etc/vsftpd/vsftpd.conf
改成下面的設定
listen=YES
#listen_ipv6=YES

修改 /etc/vsftpd/vsftpd_ipv6.conf
# vim /etc/vsftpd/vsftpd_ipv6.conf
改成下面的設定
#listen=YES
listen_ipv6=YES

重新啟動 vsftpd FTP Server
# service vsftpd restart
正在關閉 vsftpd:                                          [  確定  ]
正在啟動 vsftpd 中的 vsftpd:                       [  確定  ]
正在啟動 vsftpd_ipv6 中的 vsftpd:               [  確定  ]

測試發現以 IPv4 和 IPv6 均可以正常連線
# lftp 140.111.74.109
lftp 140.111.74.109:~> ls
drwxrwxr-x   37 504      504          4096 Dec 01 07:34 CentOS
drwxr-xr-x    3 0        0            4096 Oct 17 15:57 Linux
drwxr-xr-x    2 0        0            4096 Nov 23 03:00 ezgo
drwxr-xr-x    2 0        0            4096 Dec 05 12:19 ezgo_New
drwxr-xr-x    8 0        0            4096 Nov 25 09:34 raspbian
lftp 140.111.74.109:/> bye

# lftp 2001:288:a229:1::109
lftp 2001:288:a229:1::109:~> ls
drwxrwxr-x   37 504      504          4096 Dec 01 07:34 CentOS
drwxr-xr-x    3 0        0            4096 Oct 17 15:57 Linux
drwxr-xr-x    2 0        0            4096 Nov 23 03:00 ezgo
drwxr-xr-x    2 0        0            4096 Dec 05 12:19 ezgo_New
drwxr-xr-x    8 0        0            4096 Nov 25 09:34 raspbian
lftp 2001:288:a229:1::109:/> bye

試裝 Red Hat Enterprise Linux 6.5

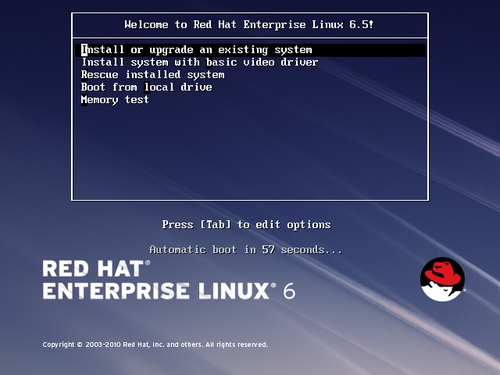
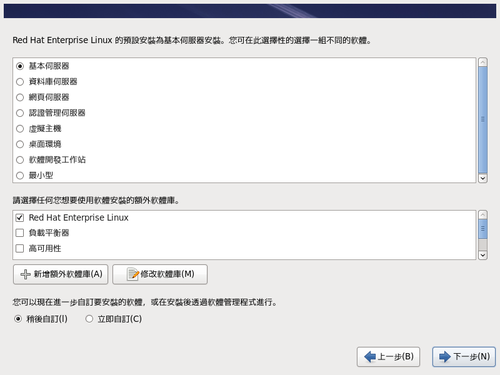
試裝了一下 Red Hat Enterprise Linux 6.5,感覺 Red Hat Linux 系統作業安裝的方式變化不大
光碟開機畫面

套件安裝選單

[@more@]

系統開機

除了開機畫面是紅色的外,與 CentOS 有些差別

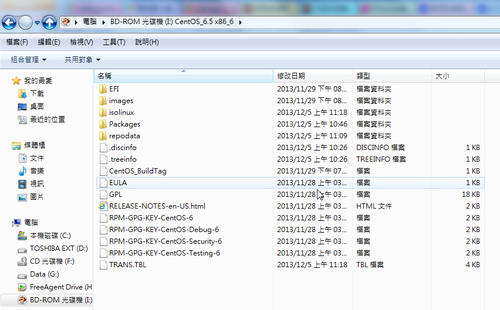
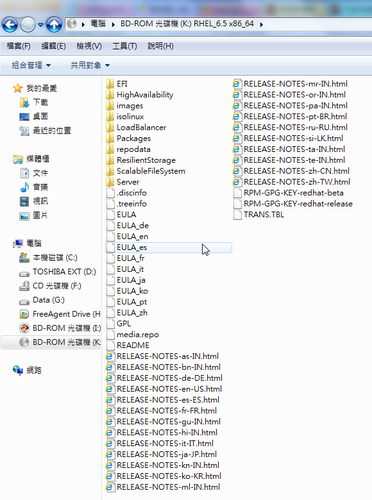
客製化光碟的制作方式和 CentOS 一樣,但安裝的套件比 CentOS 少, ISO 光碟的容量却比 CentOS 大,可能是 Red Hat Enterprise Linux 光碟根目錄的檔案比較多。
CentOS

Red Hat Enterprise Linux

最後,其實如果沒有訂購 Red Hat Network(RHN),安裝 Red Hat Enterprise Linux 的意義不大,因為套件後續並無法正常更新。

CentOS Linux 6.5 x86 Server 安裝光碟

本來是不想作這一片 x86 光碟的,因為現在稍微新一點的電腦都可以直接安裝 x86_64,但手邊剛好還有一些 7~8 年的舊電腦,自己常常會利用這些舊電腦來執行一些實驗性的服務,雖然可以用 VM 的方式來做,但安裝在實體的機器上,感覺會比較習慣一些。
一樣是實際上只要設定 root 密碼和分割硬碟

因為圖都一樣,所以不另外抓圖,覺得用 Linux 是很快樂的事,可以視自己的需求來修改成自己想要的光碟,來簡化繁瑣的安裝步驟。[@more@]安裝光碟特色:
1. 簡化安裝步驟
2. 更新套件來源改成國內 Mirror 網站
3. 套件更新至 2013-12-05
4. 預設增加啟動 Apache Web Server / MySQL Server / vsFTPd FTP Server
5. 關閉 cups / kdump / mdmonitor / netfs / nfslock / rpcbind / rpcgssd 服務

CentOS Linux 6.5 x86-64 Server 安裝光碟

早上隨手做了一下,完成 CentOS Linux 6.5 x86-64 Server 安裝光碟
安裝 CentOS Linux Server 只要二大步驟,設定 root 密碼及分割硬碟
開機畫面,直接按 Enter 鍵即可
[@more@]放棄所有的資料 Yes,discard any data

設定 root 密碼

硬碟分割

安裝中

安裝完成

當然不是這樣就是一切 OK 了,還有一些伺服器的設定,如:網路組態、個別伺服器的設定、安全性的設定都還要手工打造。
不過因為是隨手做的,所以 ISO 光碟的容量已經超過 700 M,不過因為我都是使用卡碟機來安裝作業系統,不用光碟,所以就沒那麼急迫處理了。