OpenSSL 的 Heartbleed 漏洞被稱為是有史以來最危險的程式臭蟲,所以有使用 Linux/BSD Server 的系統管理者,都務必要檢測一下自己管理的伺服器是否安全。
底下列幾個網路上搜尋到的相關網站:
OpenSSL Heartbleed 漏洞檢測 @ CentOS 6 « Jamyy’s Weblog
修復CentOS 6.5 OpenSSL CVE-2014-0160資安漏洞的方法 | 阿維雜記本 (Wei’s Blog)
OpenSSL Heartbleed漏洞危機特別報導 | iThome
Test your server for Heartbleed
Proxy Server 磁碟空間已滿
最近在看學校 Server 的 Log 檔時,發現 Proxy Server 使用的 Cache 空間已經快要滿了!
/dev/sda2 20G 19G 451M 98% /cache1
/dev/sdb1 20G 19G 451M 98% /cache2
/dev/sda3 20G 19G 451M 98% /cache3
/dev/sdb2 20G 19G 450M 98% /cache4
/dev/sda2 => 98% Used. Warning. Disk Filling up.
/dev/sdb1 => 98% Used. Warning. Disk Filling up.
/dev/sda3 => 98% Used. Warning. Disk Filling up.
/dev/sdb2 => 98% Used. Warning. Disk Filling up.
[@more@]檢查一下設定檔,發現設定檔裡面並沒有設定磁碟空間使用的上限,所以加入了下面的設定,並且把 Proxy Server 重新啟動
cache_swap_low 90
cache_swap_high 95
這二行的意思是,當磁碟使用量達 95% 時,比較舊的快取資料將會被刪除,當刪除到剩下磁碟使用量達 90% 時,就停止持續刪除的動作。
但發現總空間使用容量還是一樣,並沒有減少,所以就決定把所有的 Cache 目錄下的檔案全部刪除,重新建立目錄
停止 Proxy Server
# service squid stop
刪除目錄
# rm -rf /cache{1..4}/*
重新建立 Proxy Server 目錄
# /usr/sbin/squid -z
啟動 Proxy Server
# service squid start
重新啟動 Proxy Server 後,Cache 空間的使用量就有變小了!
# df -h | grep /cache
/dev/sda2 20G 172M 19G 1% /cache1
/dev/sdb1 20G 172M 19G 1% /cache2
/dev/sda3 20G 172M 19G 1% /cache3
/dev/sdb2 20G 172M 19G 1% /cache4
在 CentOS 6.x 上安裝 BandwidthD
BandwidthD 是一套可以在區域網路上顯示各個 IP 網路使用情形的程式,由 David Hinkle 所開發。
BandwidthD 官方網站:http://bandwidthd.sourceforge.net/
底下是在 CentOS 6.x 下安裝[@more@]1. 安裝編譯套件
# yum groupinstall ‘Development Tools’ -y
2. 安裝另外所須套件
# yum install libpcap-devel libpng-devel gd-devel zlib-devel
3. 下載 BandwidthD
# wget http://downloads.sourceforge.net/project/bandwidthd/bandwidthd/bandwidthd%202.0.1/bandwidthd-2.0.1.tgz
4. 解壓縮
# tar xvzf bandwidthd-2.0.1.tgz
5. 切換目錄
# cd bandwidthd-2.0.1
6. 進行編及安裝
# ./configure
# make
# make install
/usr/bin/install -c -d /usr/local/bandwidthd/etc
/usr/bin/install -c -d /usr/local/bandwidthd/htdocs
/usr/bin/install -c -m755 -s bandwidthd /usr/local/bandwidthd
if [ ! -f /usr/local/bandwidthd/etc/bandwidthd.conf ] ; then /usr/bin/install -c -m644 etc/bandwidthd.conf /usr/local/bandwidthd/etc/ ; fi
/usr/bin/install -c -m644 htdocs/legend.gif /usr/local/bandwidthd/htdocs
/usr/bin/install -c -m644 htdocs/logo.gif /usr/local/bandwidthd/htdocs
7. 進行設定
# vim /etc/httpd/conf.d/bandwidthd.conf
Alias /bandwidthd /usr/local/bandwidthd/htdocs
<Location /bandwidthd>
Order deny,allow
Deny from all
Allow from 127.0.0.1 192.168.53.0/24
Allow from ::1
# Allow from your-workstation.com
</Directory>
8. 修改 BandwidthD 設定檔
# vim /usr/local/bandwidthd/etc/bandwidthd.conf
加入要偵測的網段
subnet 192.168.53.0/24
加入要偵測的網路卡代號
dev “eth0”
9. 執行 BandwidthD
# /usr/local/bandwidthd/bandwidthd &
10. 觀看成果
11.可以分別列出每一個 IP 的網路使用情形
迷你雲(Miniyun) 檔案上傳及下載
登入後,選擇 上傳文件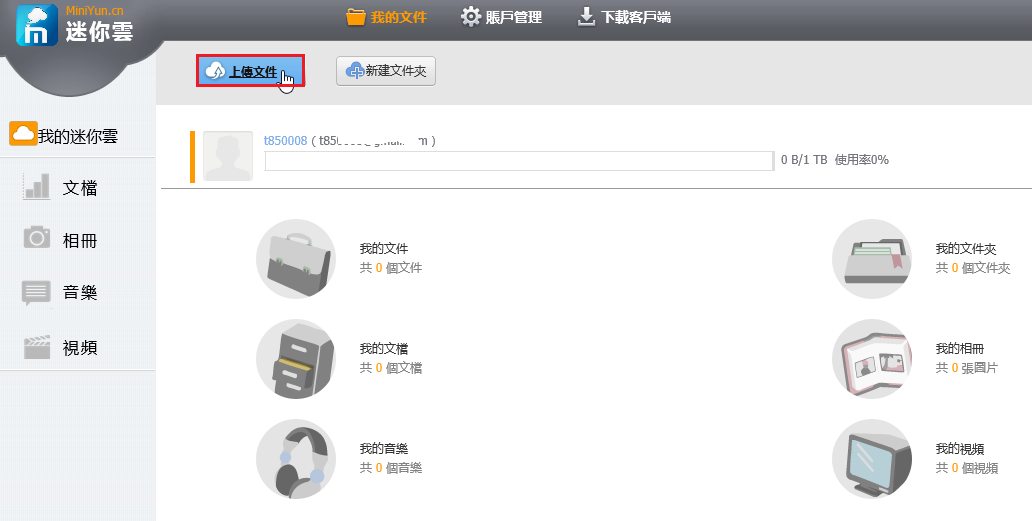
選擇 添加文件,可以一次上傳一個或多個檔案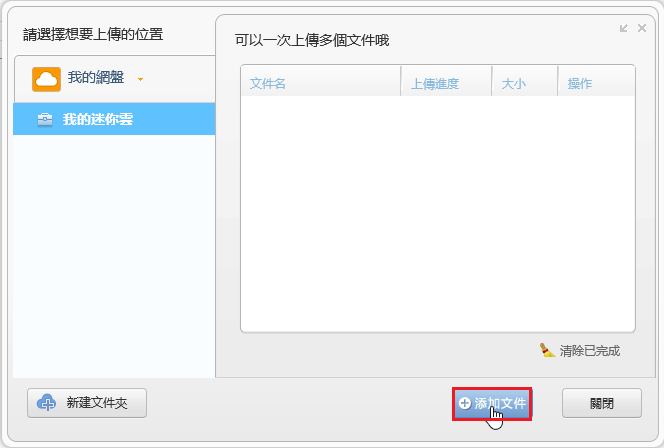
[@more@]
選擇要上傳的檔案,然後按 開啟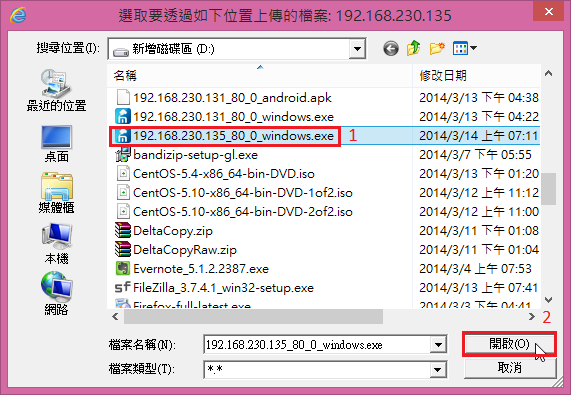
上傳完畢,上傳進度會打一個綠色的勾
可以按 清除已完成,清空檔案列表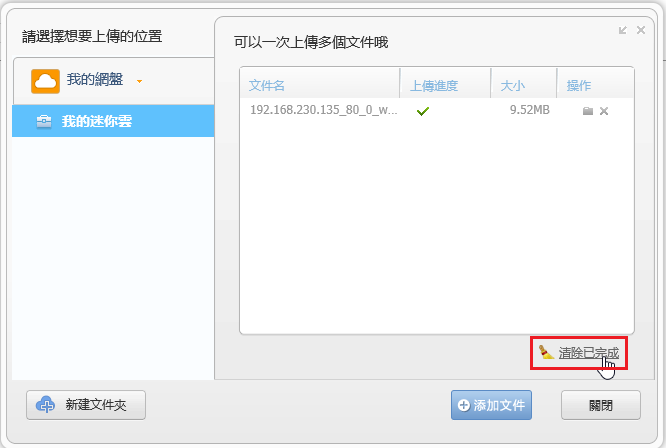
檔案列表會被清空
最後按 關閉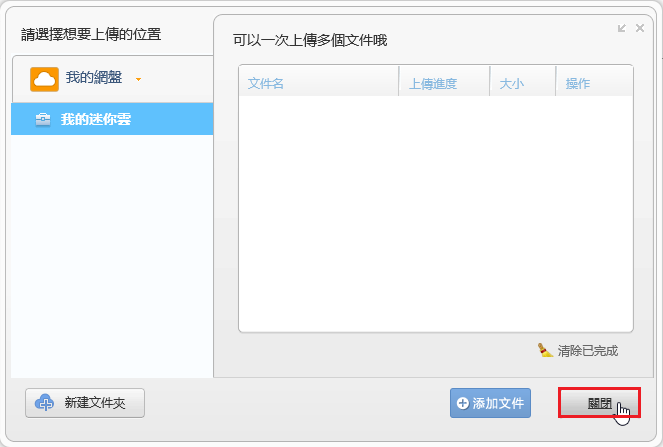
上傳圖片,會自動歸類在 相冊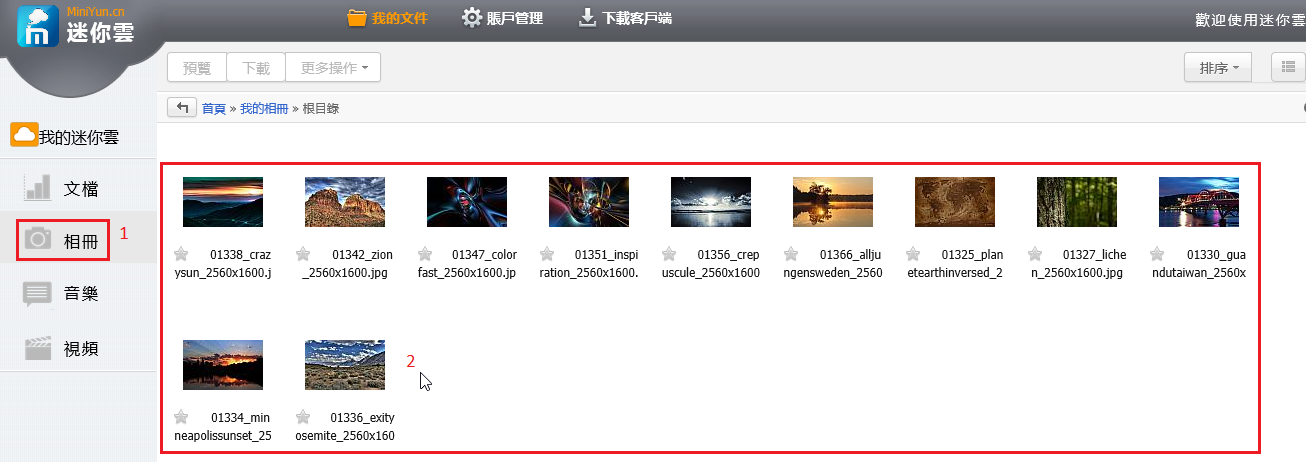
勾選要下載的檔案,然後按 下載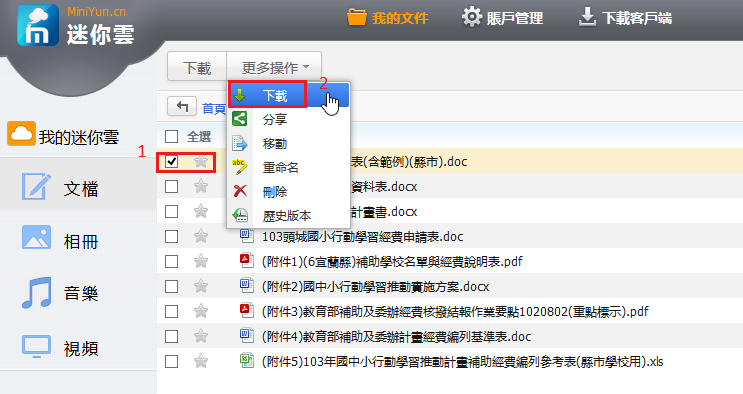
中文檔案可以正常下載(Firefox)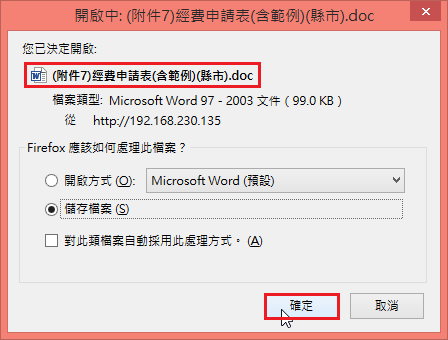
一次下載多個檔案或是整個目錄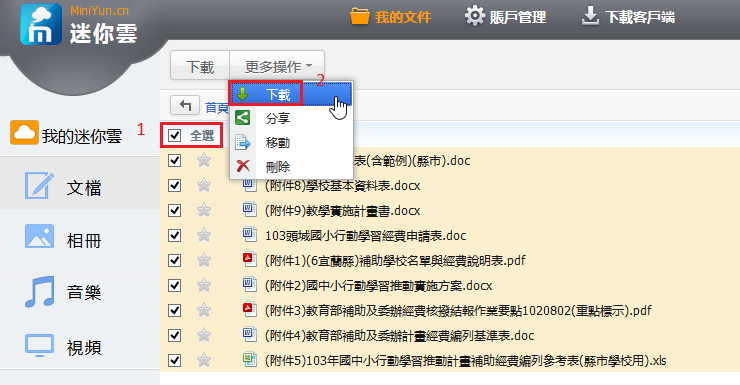
不會自動打包下載,而是一個一個檔案下載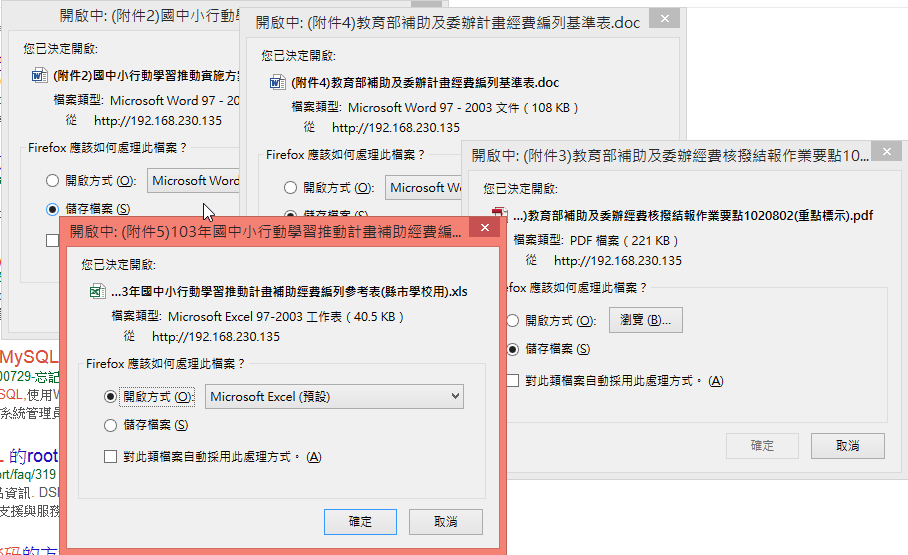
在 Windows 8.1 x64 IE11 勾選要下載的檔案,然後按 下載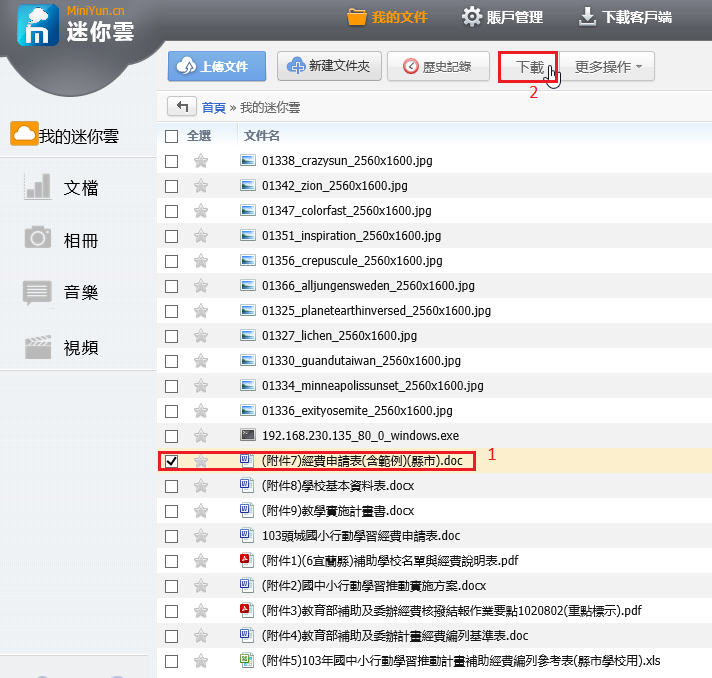
檔案名稱變成亂碼(IE 11)
在 Mac 的 Safari 中文檔名正常
Google Chrome 下載中文檔名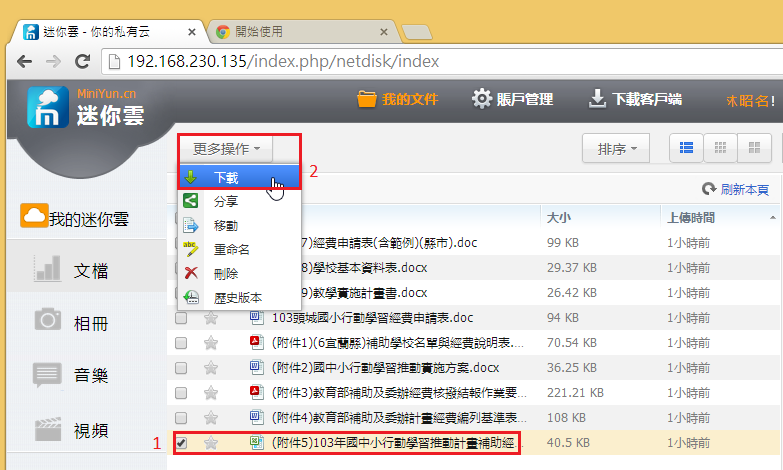
中文檔名是正常的(Google Chrome)
迷你雲(Miniyun) 使用者管理
以管理者身分登入,選擇 管理後台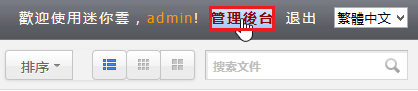
選擇左方功能表列中的,用戶管理 / 新建用戶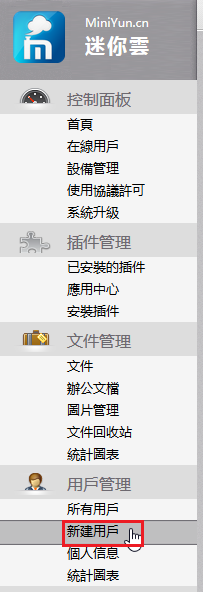 [@more@]輸入使用者的相關資料,選擇 立即保存
建立的使用者
以新建立的使用者登入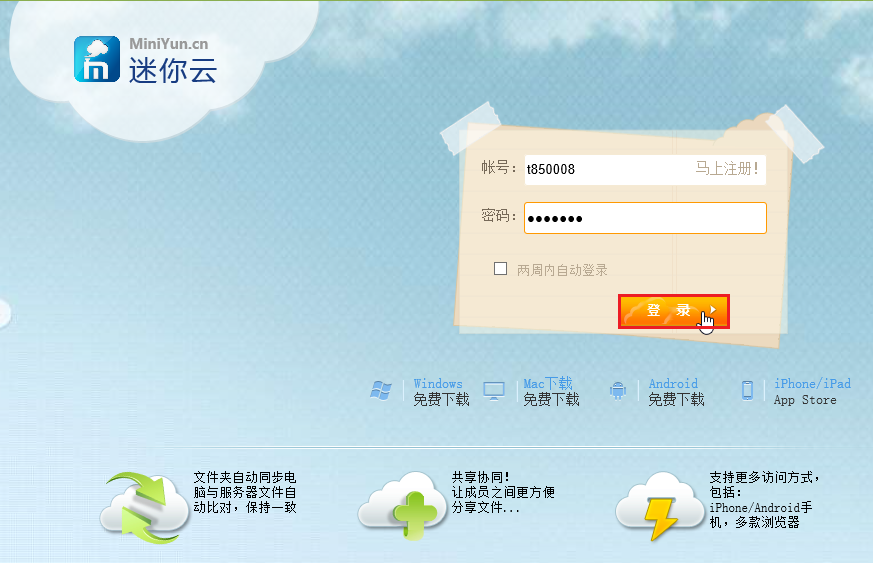
登入後畫面,預設是簡體中文畫面
請選擇簡體中文右方向下的黑色三角形,然後選 繁體中文
畫面就會是繁體中文的了!
迷你雲(Miniyun)升級
登入後台後,可以發現新版本的更新通知,可以選擇 立即更新
不過這裡的版本應該是錯的,因為最新的版本應該是 1.3.0 版
可以選擇 線上直接更新 或 下載下來再上傳更新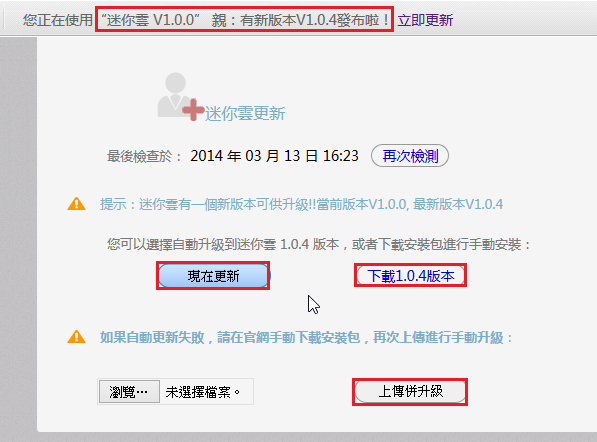
 [@more@]
選擇 現在更新
會出現更新錯誤的訊息
所以採用下載下來再做更新,瀏覽選擇下載下來的檔案
選擇下載下來的檔案,並按 開啟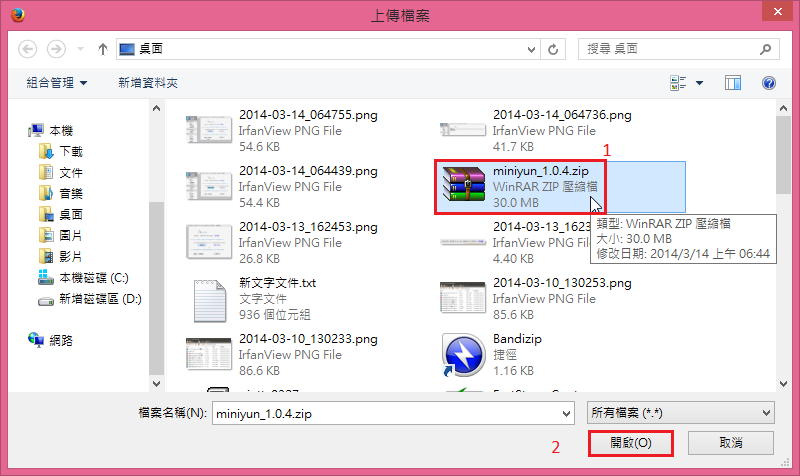
選擇 上傳併升級
更新完成
已升級到最新的 1.3.0 版
使用官方快速安裝的迷你雲(Miniyun)
套件安裝的位置是在
/www/web/miniyun
不是使用 Apache Web Server,而是使用 nginx,設定檔位置在
/etc/nginx/conf.d/miniyun.conf
網站關於資料庫的設定檔
/www/web/miniyun/protected/config/miniyun-config.php
# head -8 /www/web/miniyun/protected/config/miniyun-config.php
<?php
define(‘DB_NAME’, ‘miniyun’);
define(‘DB_USER’, ‘miniyun’);
define(‘DB_PASSWORD’, ‘miniyun’);
defined(‘DB_PORT’) or define(‘DB_PORT’, ‘3306’);
define(‘DB_HOST’, ‘localhost’);
define(‘DB_CHARSET’, ‘utf8’);
define(‘DB_PREFIX’,’miniyun’);
會建立一個 miniyun 的資料庫,和一個 miniyun 的使用者,密碼是 miniyum,建議要做更改[@more@]更改分成二個部份
1. 一個是修改 /www/web/miniyun/protected/config/miniyun-config.php 設定檔
# cp /www/web/miniyun/protected/config/miniyun-config.php.$(date +%F)
# vim /www/web/miniyun/protected/config/miniyun-config.php
將
define(‘DB_PASSWORD’, ‘miniyun’);
改成
define(‘DB_PASSWORD’, ‘Your’s_Password’);
2. 修改 MySQL 資料庫 miniyun 使用者的密碼
# /usr/bin/mysql -u root -p
mysql> SET PASSWORD FOR ‘miniyun’@’localhost’ = PASSWORD(‘Your’s_Password’);
mysql> flush privileges;
更改迷你雲(Miniyun) 預設管理者密碼
以管理者登入後,點選 賬戶管理
可以修改 個人資料
也可以修改密碼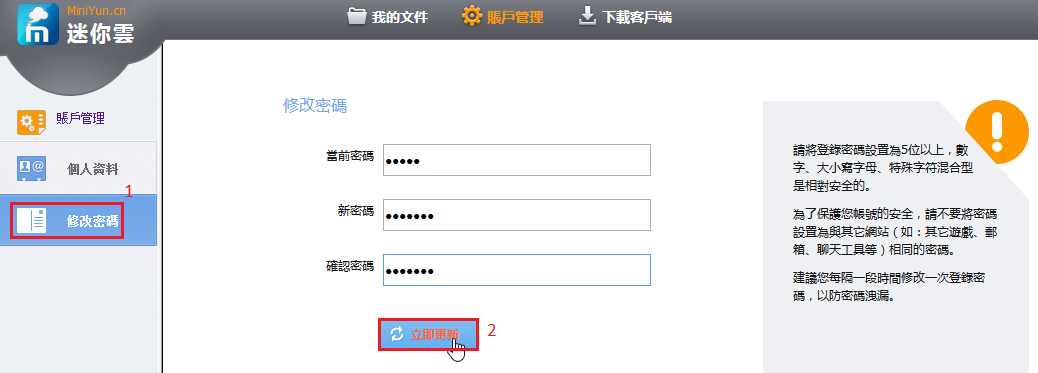
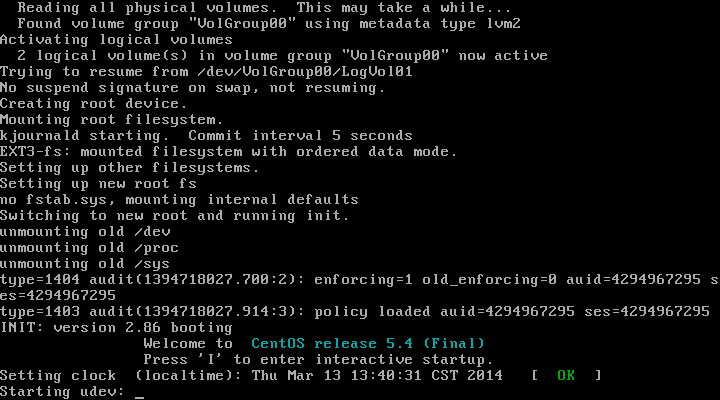
在 CentOS 5.4 x64 安裝迷你雲(miniyun)
因為在官方網站上的快速安裝,在 CentOS 只支援 5.4,5.10 經過測試,是無法安裝的,所以要花了一些時間,找到了 5.4 版,重新安裝。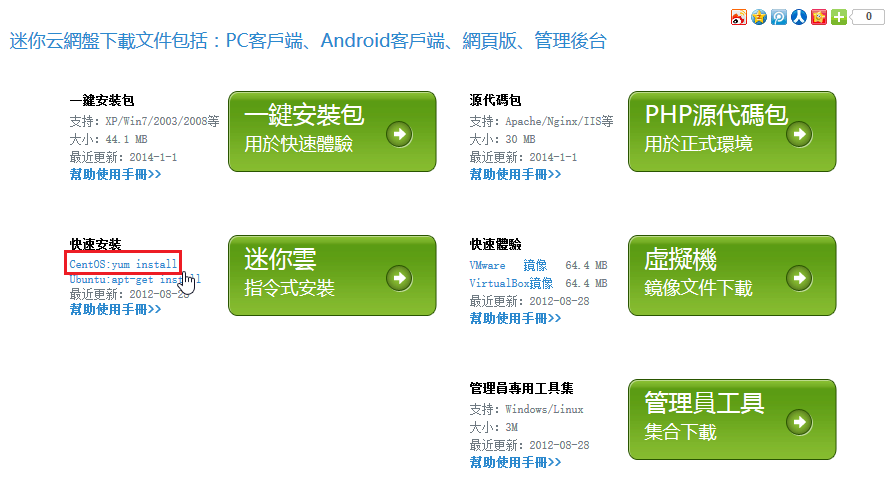 [@more@]安裝方式參考官方網站上的說明:http://help.miniyun.cn/index.php?title=Yum_Install
1. 增加 miniyun 套件庫來源
# cd /etc/yum.repos.d
# wget http://centos.miniyun.cn/miniyun.repo
# yum clean all
# yum update
2. 開始安裝
# yum install miniyun
須要安裝的套件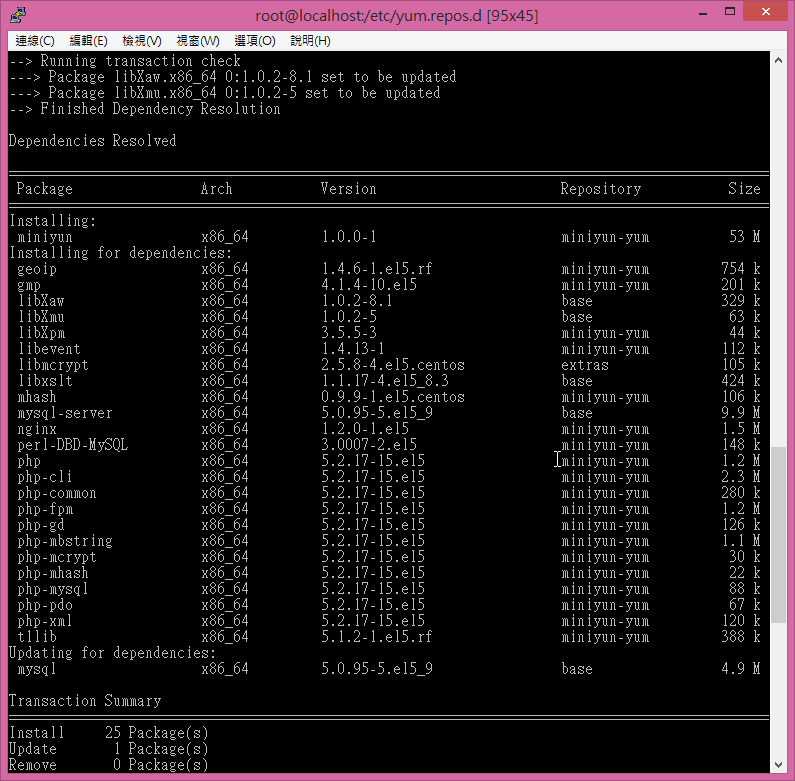
3. 設定 miniyun’Server 的 Domain Name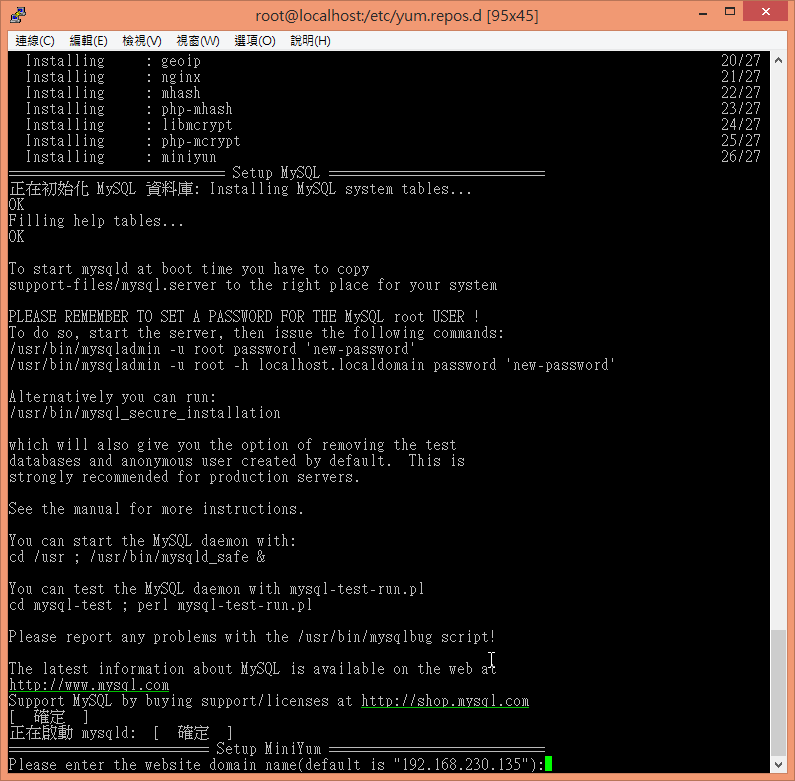
4. 安裝完成
5. 開啟瀏覽器輸入 Server’IP,預設帳號及密碼 admin / admin
稍微試了一下,原本使用 SQlite 資料庫常常會出現的錯誤訊息,都不會再出現了!
Linux 分割區加密
使用過 Linux 一段時間會發現,雖然大家都認為 Linux 比起 Windows,相對安全一些,但其實只要 Linux 機器,放在一般人可以接觸到的地方,它的安全性就會變得很低,可以被重新開機,進入單人模式,改掉 root 密碼……。
如果非常在意安全性上的問題,也可以考慮將分割區加密,即使 Linux 機器硬碟被拆解下來,也不容易被讀取其中的資料。
以 CentOS 為例,可以在安裝的時候,選擇 加密系統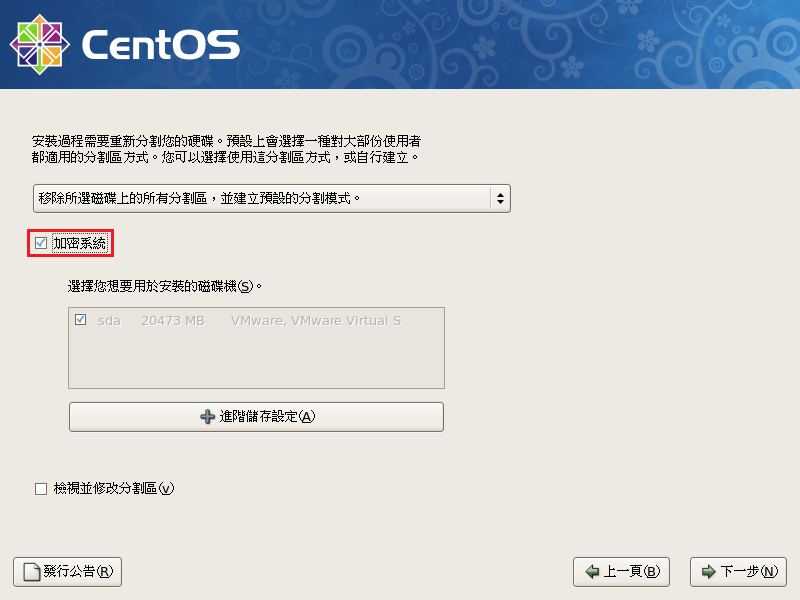 [@more@]輸入加密使用的密碼
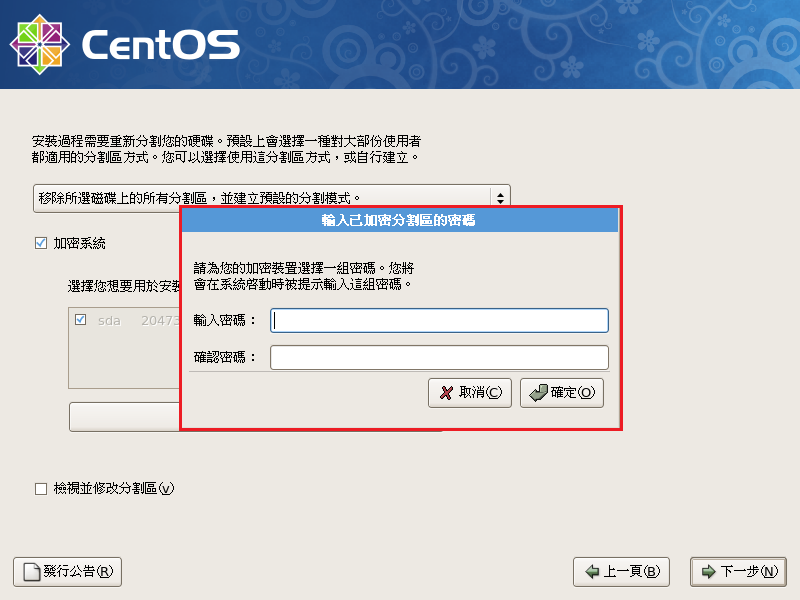
至少要有8個字元
安裝完成之後,每次重新開機時,都會出現要輸入密碼的畫面
有輸入密碼,系統才能繼續開機,否則就一直卡在那裡