在 Vmware Workstation 中試安裝 CentOS 7.2.1511 x86,發現找不到網路卡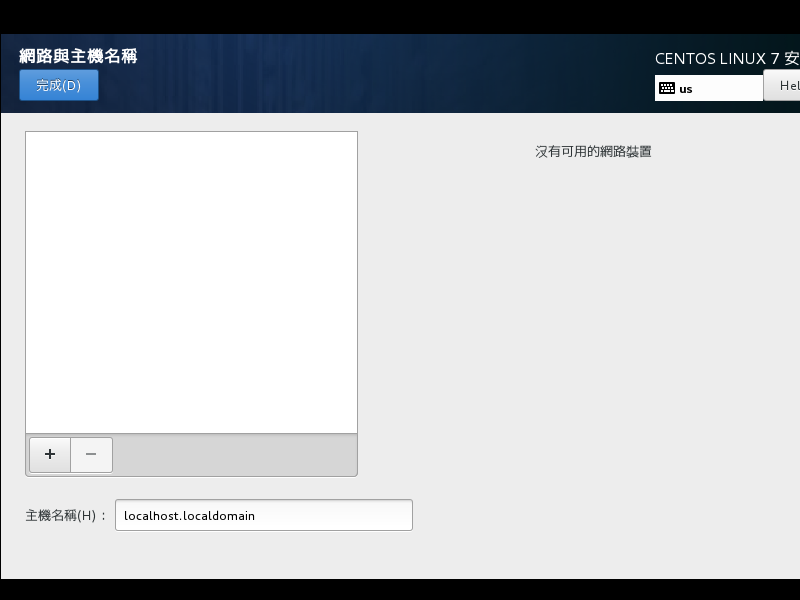 [@more@]後來在 Linuksovi – Linux Storage / vmware articles: RHEL 7, CENTOS 7 in VMware no network adapter 找到解決的方式
修改 vmx 檔案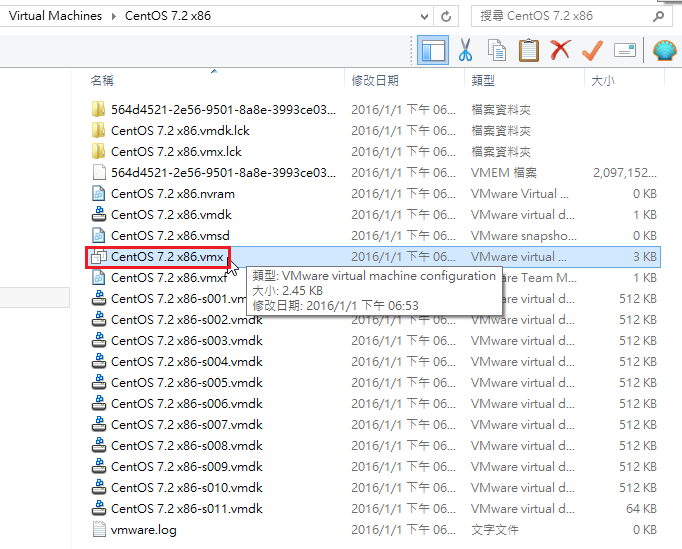
加入下面這一行
ethernet0.virtualDev = “e1000”
就可以正常抓到網路卡了!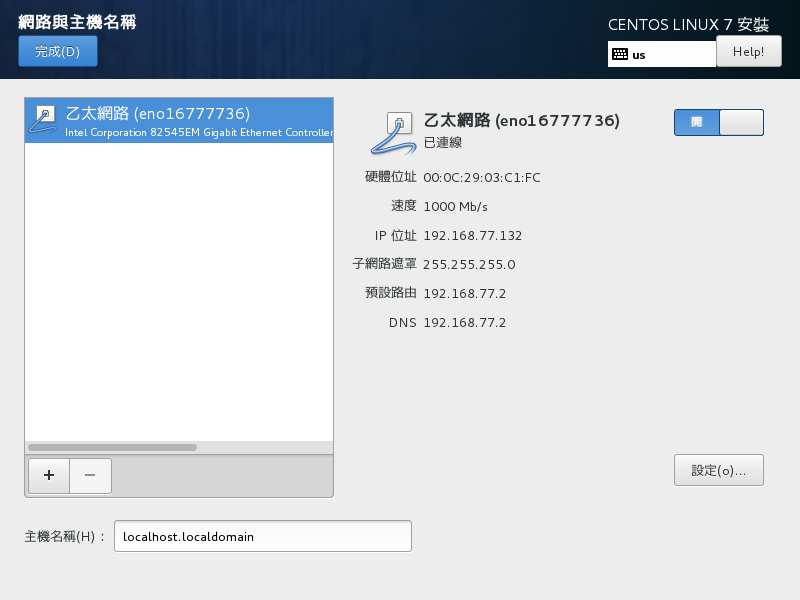

全新的繁體中文 WordPress 網站《宜蘭部落格教育平台 網站》
在 Vmware Workstation 中試安裝 CentOS 7.2.1511 x86,發現找不到網路卡[@more@]後來在 Linuksovi – Linux Storage / vmware articles: RHEL 7, CENTOS 7 in VMware no network adapter 找到解決的方式
修改 vmx 檔案
加入下面這一行
ethernet0.virtualDev = “e1000”
就可以正常抓到網路卡了!
在使用 Raspberry Pi / Banana Pi / CubieTurck 這些控制板時,覺得比較困擾的是,它支援的 Linux 大部分都是 Arch Linux / Debian / Ubuntu …等等,個人比較習慣的 CentOS 卻一直沒有釋出相對的版本。終於在 2015 年末 、2016 年初時,盼到了 CentOS 支援的版本。
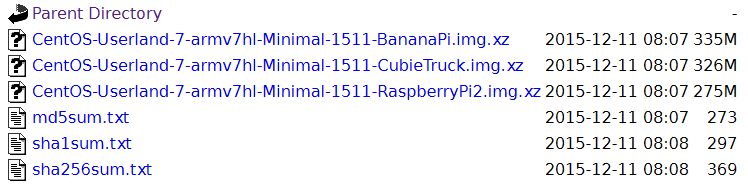
CentOS 7 arm 版本下載路徑:
http://mirror.centos.org/altarch/7.2.1511/isos/armhfp/
看檔案名稱,似乎有支援的是 BananaPi / CubieTruck / Raspberry Pi 2
更詳細的介紹可以參考下列網站:
Raspberry Pi 的基礎 – 安裝 CentOS 7 for ARM ~ IT 技術家
CentOS 7 AMR版正式發布:支持樹莓派2/香蕉派/CubieTruck - 今日頭條
目前手上還有一塊閒置的 Banana Pi,有空的話再來仔細測試看看!
在 CentOS 7.x Mirror 的站台上似乎只找到支援 x86_64 平台的版本,x86 的版本似乎不再支援,偶然在查詢的時候,發現了 CentOS 7.x 有支援 i386 的版本,這個版本是 CentOS AltArch 特別興趣小組 所建立及維護的其它平台,共有支援 i686、aarch64、armhp、ppc64、ppc64le 等版本。
CentOS 7.2.1511 i386 版本下載:
http://mirror.centos.org/altarch/7.2.1511/isos/i386/
安裝起來和 CentOS 7.2.1511 x86_64 版本並無太大的不同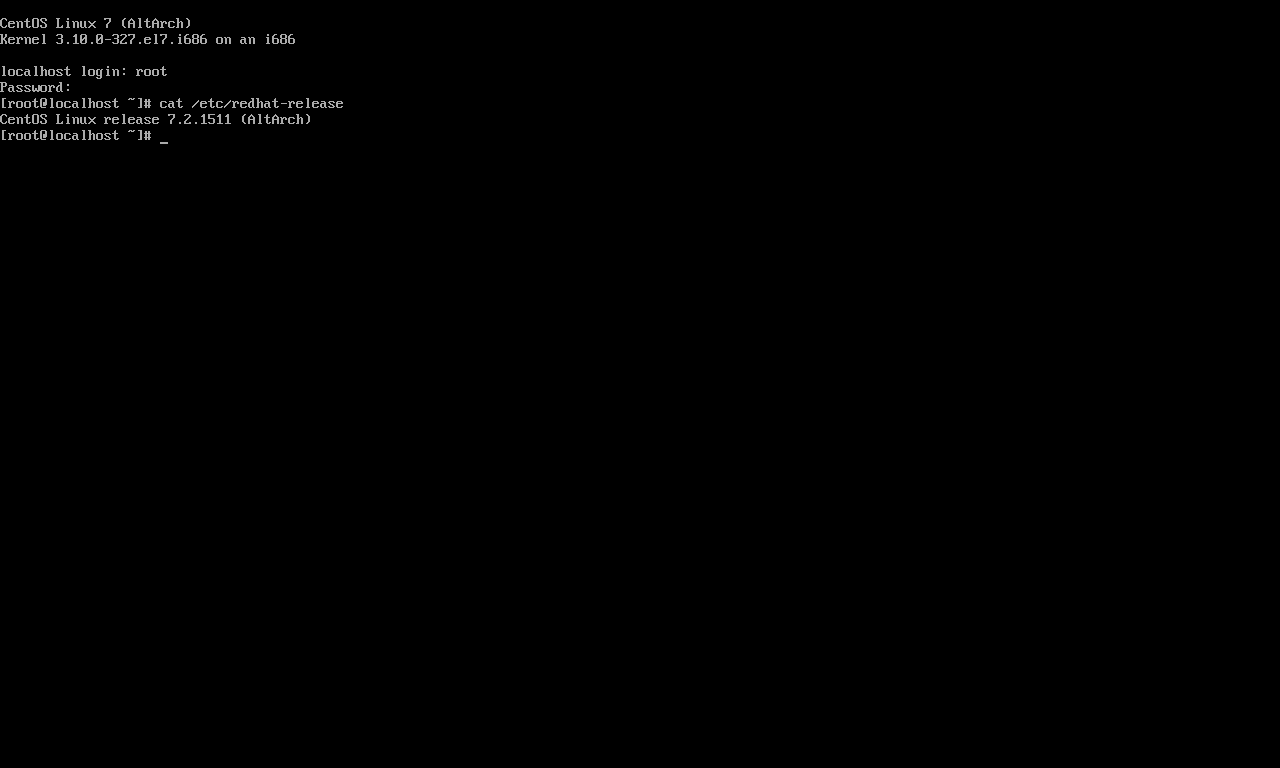
會需要 i386 版本是因為有些舊的機器,因為受限於硬體,所以只能安裝 i386 的版本。
1. 在 grub 功能表上按 e 鍵,進行修改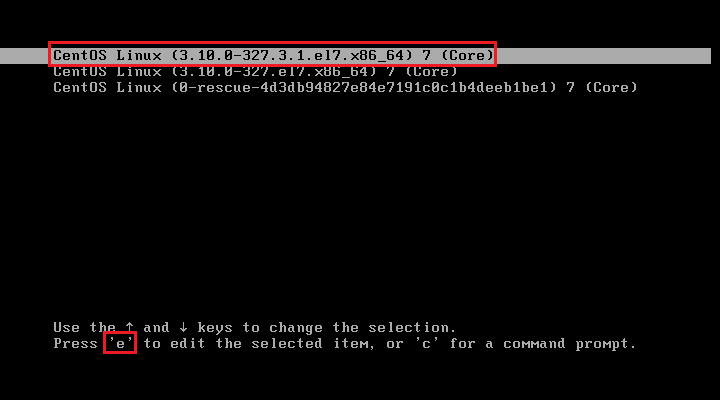 [@more@]2. 找到 linux16 那一行,在最後面加上 rd.break,並按 Ctrl+x
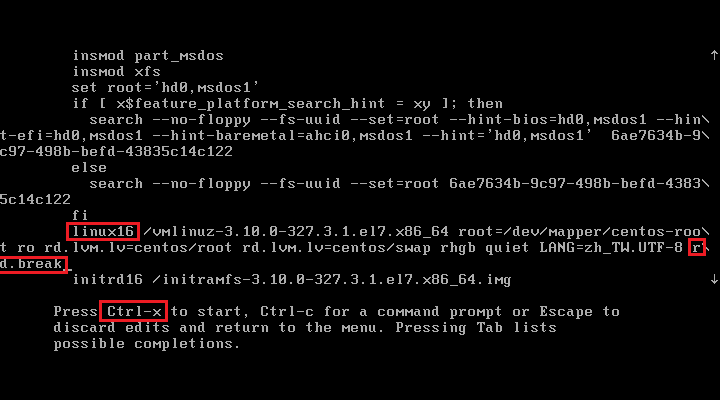
3. 掛載目錄 /sysroot
# mount -o remount,rw /sysroot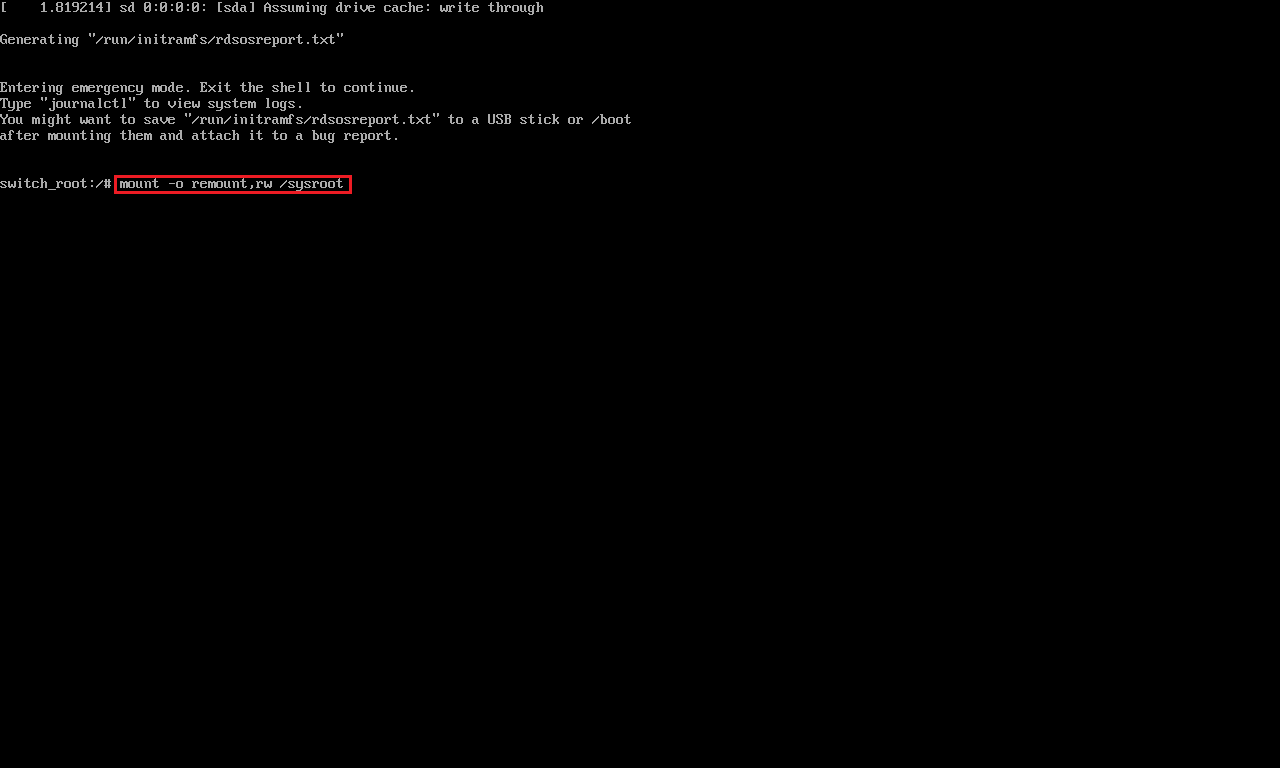
4. chroot 到 /sysroot 目錄。
# chroot /sysroot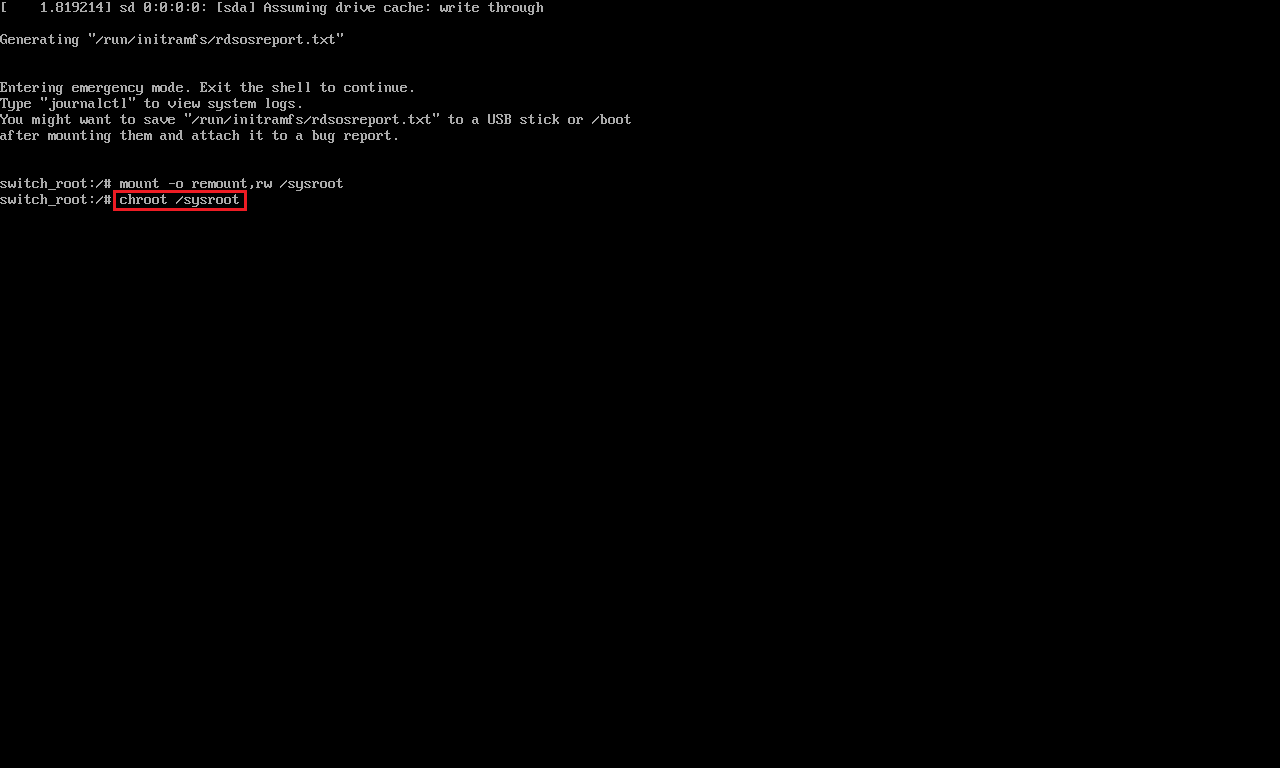
5. 輸入 passwd 修改密碼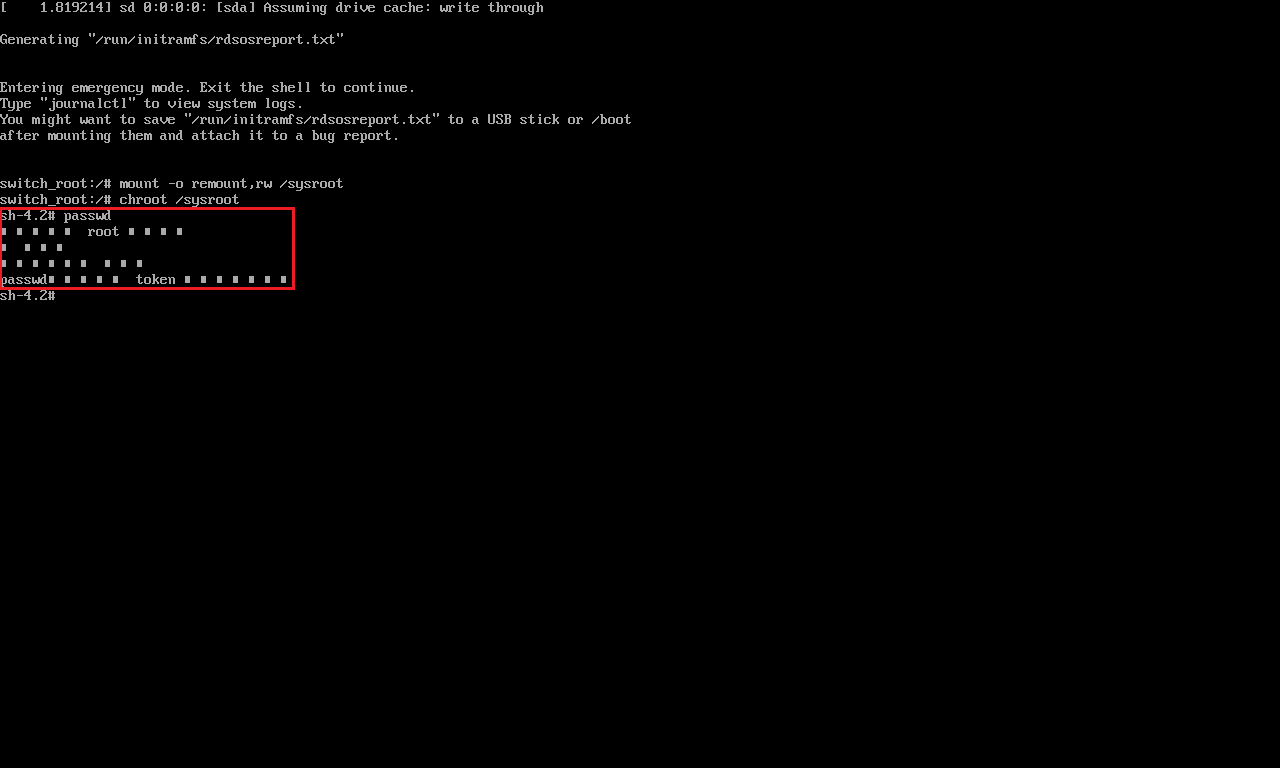
6. 解決可能因為 SELinux Context 權限的問題
# touch /.autorelabel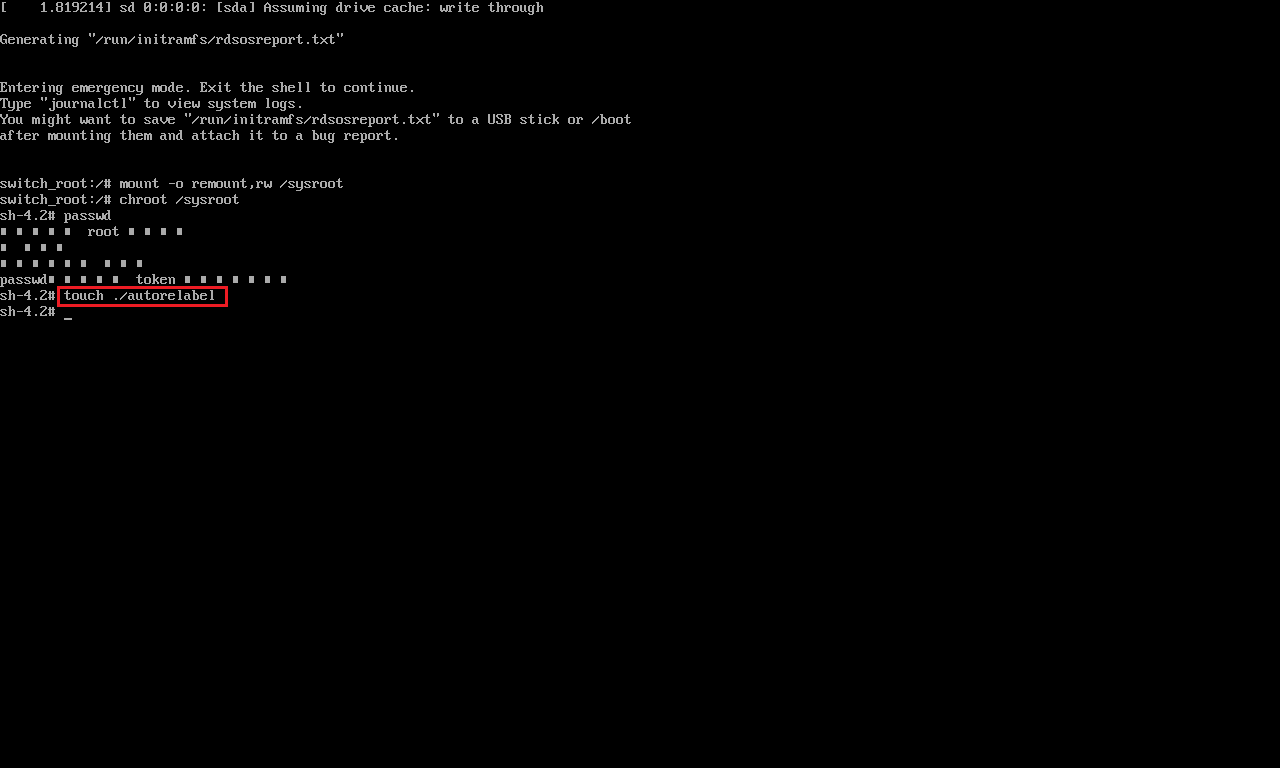
7. 輸入 exit 退出
8. 輸入 reboot 重新開機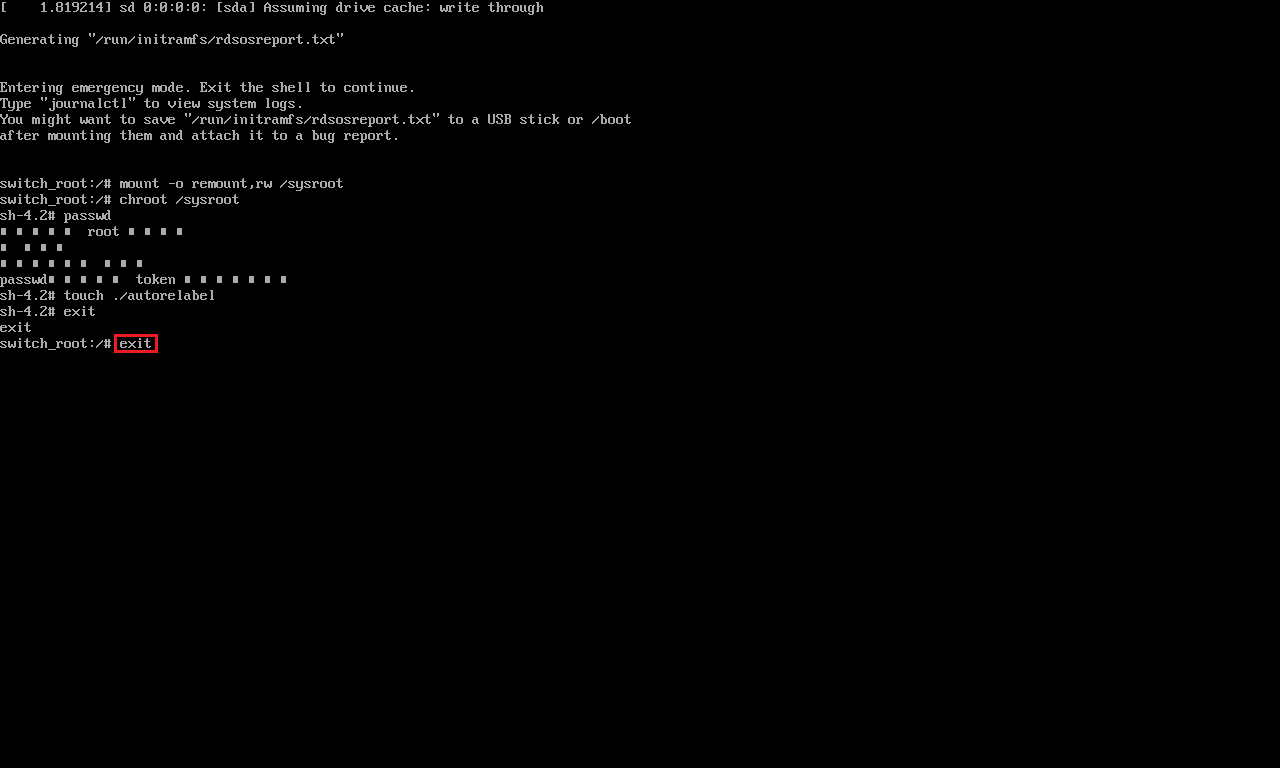
本來一直很抗拒升級或是安裝 CentOS 7.x,因為覺得 CentOS 7.x 和之前的 CentOS 6.x 相差很多,在 CentOS 6.x 支援期還很久的情況下,實在沒有什麼動力去仔細研究 CentOS 7.x,不過最近因為一直在使用 Arch Linux 和 Debian 8,所以慢慢習慣了 CentOS 7.x 中的 systemctl 指令,唯一感覺還不太習慣的是 FirewallD 設定防火牆的部分。
光碟開機畫面,預設取消倒數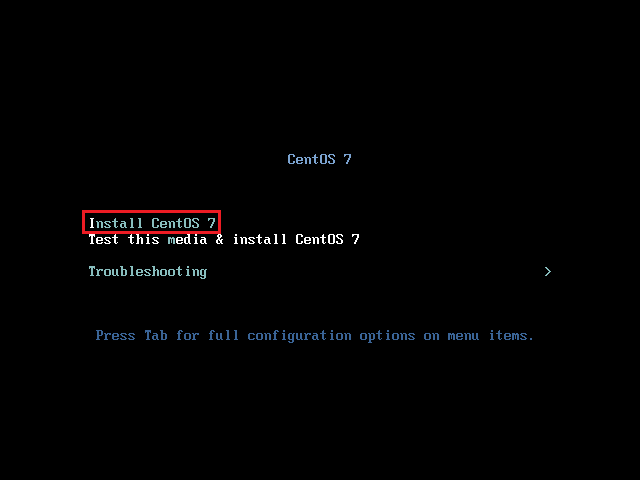 [@more@]安裝畫面
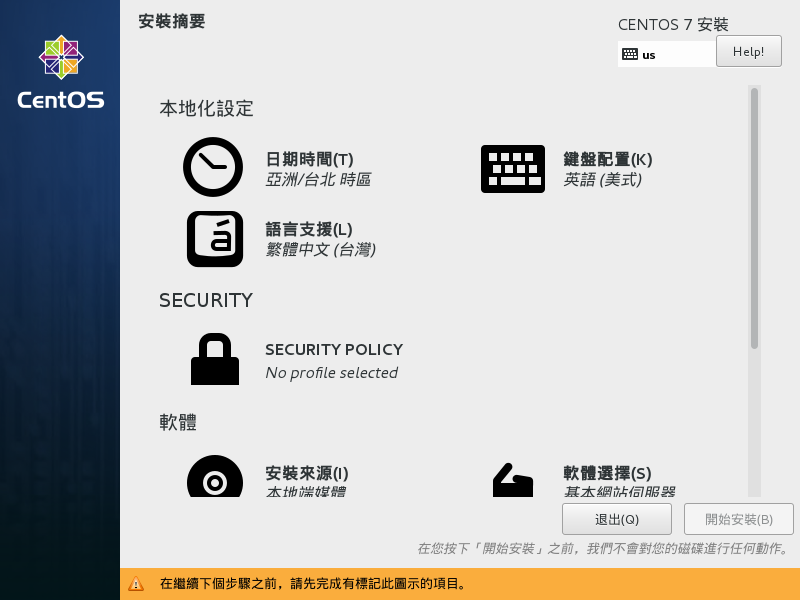
分割硬碟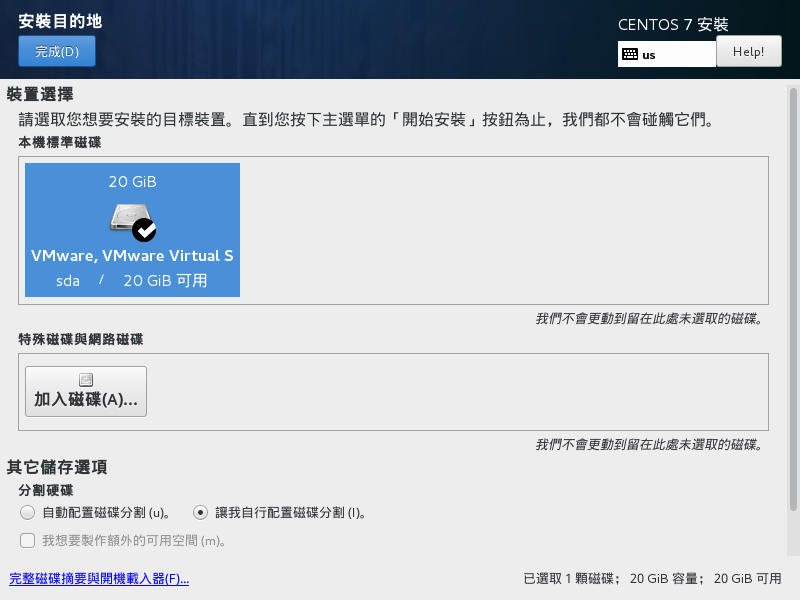
設定網路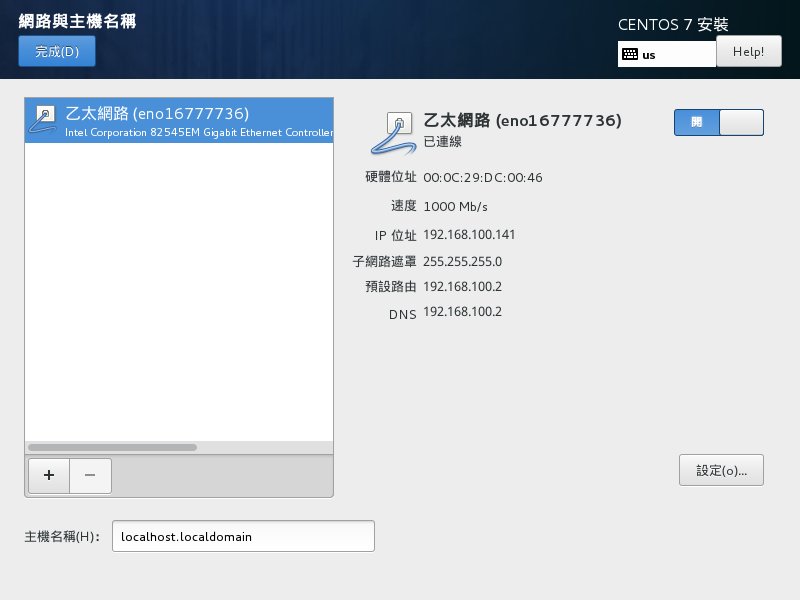
開始安裝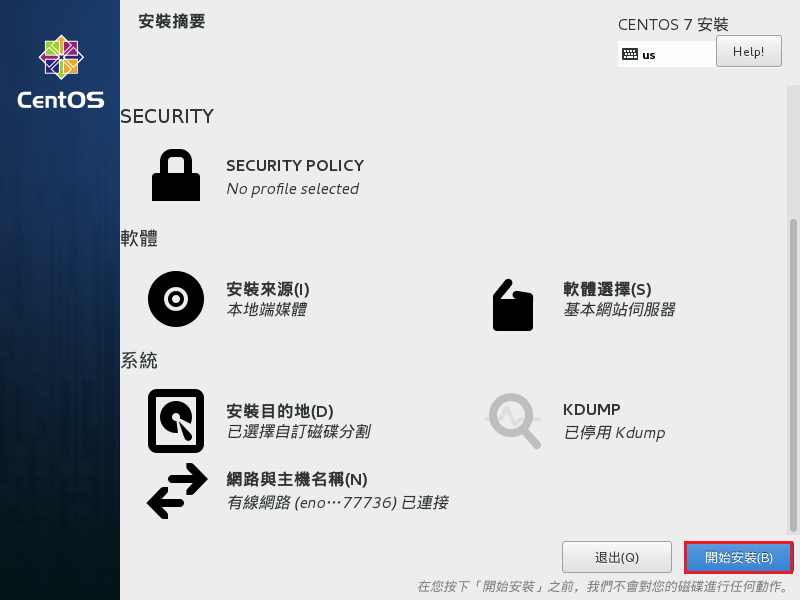
設定 root 密碼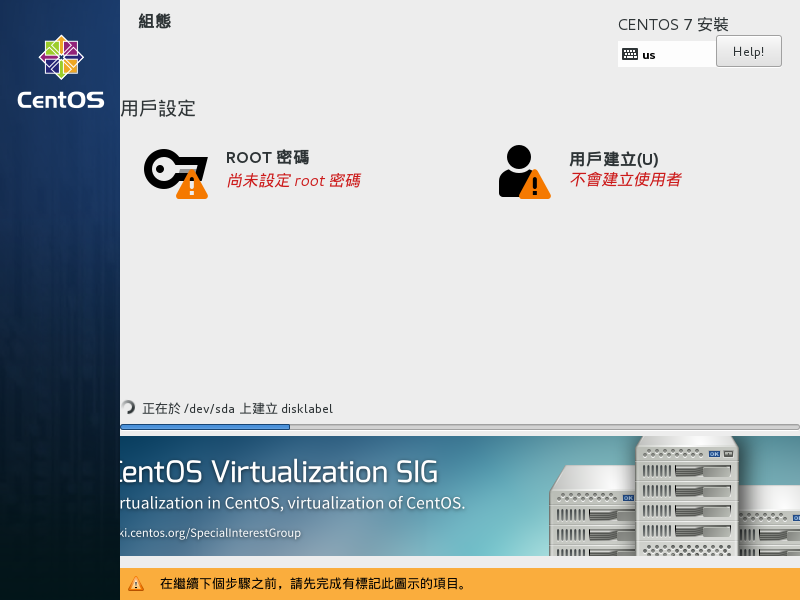

完成安裝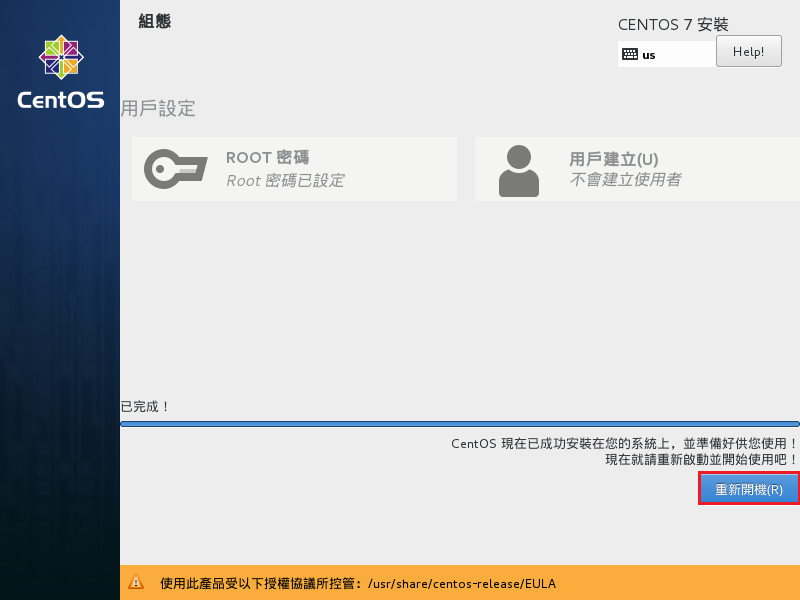
預設只要三個步驟:分割硬碟、設定網路、設定 root 密碼。
客製化內容:
1. 預設安裝 Apache Web Server / PHP / MariaDB SQL Server,並啟動 Apache Web Server 及 MariaDB SQL Server
2. 新增一些 Apache Web Server 的安全性設定
3. MariaDB MySQL Server 修改成 UTF-8 的使用環境
4. 修改 php 設定,包含:上傳的檔案大小到 200M,時區改成 Asis/Taipei……等等。
5. 套件更新到 2015_12_29
6. 套件更新伺服器改成臺灣
7. 每天早上 6 點對時
在 MySQL Server 啟動後的 /var/log/mysqld.log 中發現有下列的警告訊息
151202 4:23:49 [Warning] ‘–default-character-set’ is deprecated and will be removed in a future release. Please use ‘–character-set-server’ instead.
151202 4:23:49 [Warning] ‘–default-collation’ is deprecated and will be removed in a future release. Please use ‘–collation-server’ instead.
解決方式:[@more@]修改 /etc/my.cnf 設定檔
# vim /etc/my.cnf
character-set-server=utf8
collation-server=utf8_general_ci
init-connect=’SET NAMES utf8′
# default-character-set=utf8
# default-collation=utf8_general_ci
重新啟動 MySQL Server
# /etc/init.d/mysqld restart
參考網頁:解決 smbd 錯誤訊息 Unable to connect to CUPS server localhost:631 – Connection refused | Mr. 沙先生
在看系統 log 檔時,發現 Samba Server 出現如下的錯誤訊息
Aug 31 12:42:54 localhost smbd[30235]: Unable to connect to CUPS server localhost:631 – 連線被拒絕
Aug 31 12:42:54 localhost smbd[30226]: [2015/08/31 12:42:54.544213, 0] printing/print_cups.c:528(cups_async_callback)
Aug 31 12:42:54 localhost smbd[30226]: failed to retrieve printer list: NT_STATUS_UNSUCCESSFUL
可能的原因是,Samba Server 安裝預設會啟用 Printer Server,但這一台 Samba Server 只負責檔案儲存及分享使用,並沒有擔任 Printer Server 的工作,所以要把 Samba Server 設定檔中關於 Printer Server 的設定關閉。[@more@]1. 修改 /etc/samba/smb.conf
# vim /etc/samba/smb.conf
原本
; load printers = yes
; printing = cups
改成
load printers = no
printing = bsd
2. 重新啟動 Samba Server
# service smb restart
主要是利用 autofs 和 NFS Server,將 Server 的資料備份到 NAS,備份到 NAS 的資料,可能是 Server 的設定檔、網頁或資料庫及師生檔案。
設定檔的部分可以加上每天的日期區別,網頁或資料庫可以使用 tarball 的方式來做備份,也可以加上日期做區隔,數量比較大的師生檔案,可以採用 rsync 或是 mirrordir 的方式來做同步。
NAS Server IP:192.168.1.5
CentOS 6.x Server IP:192.168.1.1
@at NAS Server
1. 建立 NFS Server,並限定連線來源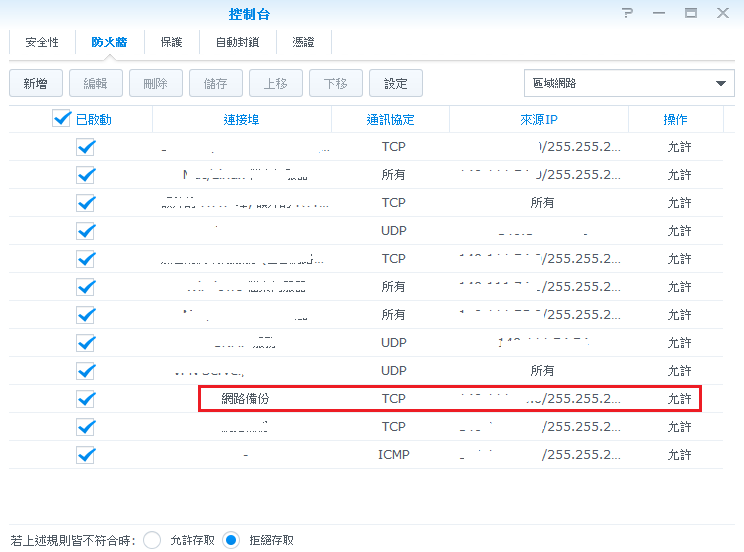
2. 建立要備份資料時儲放的資料
[@more@]
@at CentOS Server
1. 開啟必要服務 autofs / rpcbind / nfslock
# chkconfig –level 3 autofs on
# chkconfig –level 3 rpcbind on
# chkconfig –level 3 nfslock on
for CentOS 7.x
# yum install autofs nfs-utils rpcbind
# systemctl enable autofs
# systemctl enable rpcbind
2. 啟用服務
# service autofs start
# service rpcbind start
# service nfslock start
for CentOS 7.x
# systemctl start autofs
# systemctl start rpcbind
3. 修改 autofs 設定檔
# echo “/mnt/nasnfs /etc/auto.nas” >> /etc/auto.master
# echo “drbl 192.168.1.5:/volume1/homes/t850008/Server/drbl” > /etc/auto.nas
4. 重新啟動 autofs 服務
# service autofs restart
for CentOS 7.x
# systemctl restart autofs
5. 開啟防火牆讓 CentOS Server 可以連線到 NAS 的 NFS Server,預設情況是有限制對外連線
# iptables -P OUTPUT DROP
# iptables -A OUTPUT -o eth0 -p tcp -d 192.168.1.5 –dport 2049 –syn -m state –state NEW -j ACCEPT
# iptables -A OUTPUT -m state –state ESTABLISHED,RELATED -j ACCEPT
6. 切換到 /mnt/nasnfs/drbl 目錄,如果可以正常切換到該目錄,代表上面的設定成功
# cd /mnt/nasnfs/drbl
7. 將要備份的設定檔及資料寫入到 Script,並放入工作排程
例:
# cat /usr/local/bin/backuptonas
!/bin/bash
# 備份帳號密檔
cp /etc/passwd /mnt/nasnfs/drbl/set/passwd_`date +%F`
cp /etc/shadow /mnt/nasnfs/drbl/set/shadow_`date +%F`
cp /etc/group /mnt/nasnfs/drbl/set/group_`date +%F`
cp /etc/gshadow /mnt/nasnfs/drbl/set/gshadow_`date +%F`
# mirror 網頁資料
# /mnt/nasnfs/drbl/html 目錄要先建好
/usr/bin/mirrordir /var/www/html /mnt/nasnfs/drbl/html
8. 更改檔案屬性
# chmod +x /usr/local/bin/backuptonas
9. 加入工作排程,每天早上 3 時備份
# echo “0 3 * * * /usr/local/bin/backuptonas” >> /var/spool/cron/root
1. 進行備份學生帳號及密碼
# tar cvjfp /Backup/Stu_account.tar.bz2 /etc/passwd /etc/shadow /etc/group /etc/gshadow
2. 學生檔案備份
# tar cvjfp /Backup/Stu.tar.bz2 /etc/samba/smb.conf /home/s0990 /home/s0100 /var/lib/samba/private
3. 資料還原
# tar xvjfp /Backup/Stu.tar.bz2 -C /[@more@]4. 處理 Samba 與 SELinux 之間的安全性設定
# getsebool -a | grep samba
bacula_use_samba –> off
samba_create_home_dirs –> off
samba_domain_controller –> off
samba_enable_home_dirs –> on
samba_export_all_ro –> off
samba_export_all_rw –> off
samba_load_libgfapi –> off
samba_portmapper –> off
samba_run_unconfined –> off
samba_share_fusefs –> off
samba_share_nfs –> off
sanlock_use_samba –> off
use_samba_home_dirs –> off
virt_use_samba –> off
# setsebool -P samba_enable_home_dirs on
# chcon -R -t samba_share_t /home/s0990
# chcon -R -t samba_share_t /home/s0100
5. 防火牆設定
# iptables -A INPUT -s 192.168.1.0/24 -m state –state NEW -m udp -p udp –dport 137 -j ACCEPT
# iptables -A INPUT -s 192.168.1.0/24 -m state –state NEW -m udp -p udp –dport 138 -j ACCEPT
# iptables -A INPUT -s 192.168.1.0/24 -m state –state NEW -m tcp -p tcp –dport 139 -j ACCEPT
# iptables -A INPUT -s 192.168.1.0/24 -m state –state NEW -m tcp -p tcp –dport 445 -j ACCEPT
# iptables -A INPUT -s 192.168.1.0/24 -m state –state NEW -m udp -p udp –dport 445 -j ACCEPT