1. 安裝 mdadm 套件
# yum install mdadm
2. 查看目前磁碟狀態
# fdisk -l | grep ‘^Disk /dev/sd’
Disk /dev/sda: 10.7 GB, 10737418240 bytes
Disk /dev/sdb: 21.5 GB, 21474836480 bytes
Disk /dev/sdc: 21.5 GB, 21474836480 bytes
Disk /dev/sdd: 21.5 GB, 21474836480 bytes
Disk /dev/sde: 21.5 GB, 21474836480 bytes[@more@]
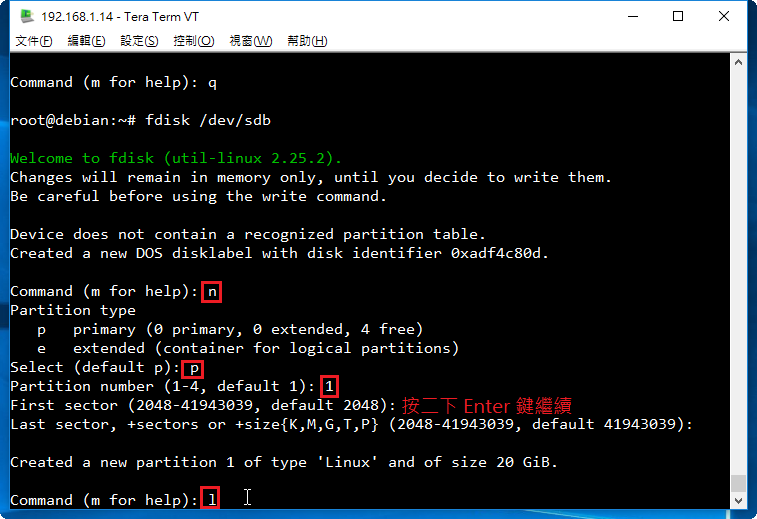
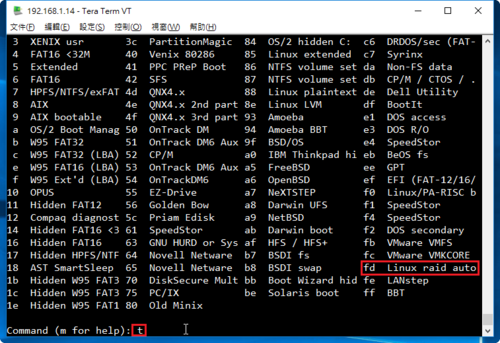
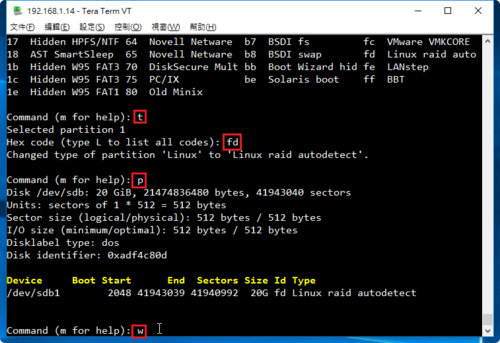
3. 建立磁碟分割區
# fdisk /dev/sdb
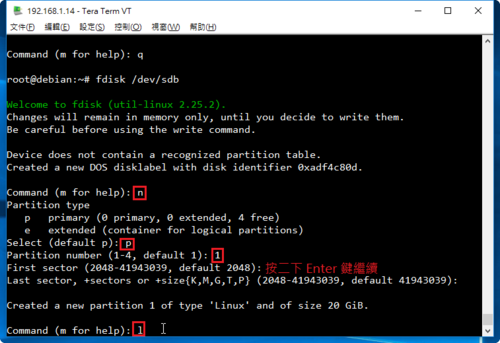
重複上面的動作,完成所有的磁碟
# fdisk /dev/sdc
# fdisk /dev/sdd
# fdisk /dev/sde
4. 建立 /dev/md0 磁碟陣列分割區
# mdadm –create –verbose –auto=yes /dev/md0 –level=5 –raid-devices=4 /dev/sd[b-e]
mdadm: layout defaults to left-symmetric
mdadm: layout defaults to left-symmetric
mdadm: chunk size defaults to 512K
mdadm: /dev/sdb appears to be part of a raid array:
level=raid0 devices=0 ctime=Thu Jan 1 08:00:00 1970
mdadm: partition table exists on /dev/sdb but will be lost or
meaningless after creating array
mdadm: /dev/sdc appears to be part of a raid array:
level=raid0 devices=0 ctime=Thu Jan 1 08:00:00 1970
mdadm: partition table exists on /dev/sdc but will be lost or
meaningless after creating array
mdadm: /dev/sdd appears to be part of a raid array:
level=raid0 devices=0 ctime=Thu Jan 1 08:00:00 1970
mdadm: partition table exists on /dev/sdd but will be lost or
meaningless after creating array
mdadm: /dev/sde appears to be part of a raid array:
level=raid0 devices=0 ctime=Thu Jan 1 08:00:00 1970
mdadm: partition table exists on /dev/sde but will be lost or
meaningless after creating array
mdadm: size set to 20955136K
Continue creating array? yes
mdadm: Defaulting to version 1.2 metadata
mdadm: array /dev/md0 started.
5. 查看建置結果
# fdisk -l | grep /dev/md0
Disk /dev/md0: 64.4 GB, 64374177792 bytes
# cat /proc/mdstat
Personalities : [raid6] [raid5] [raid4]
md0 : active raid5 sde[4] sdd[2] sdc[1] sdb[0]
62865408 blocks super 1.2 level 5, 512k chunk, algorithm 2 [4/3] [UUU_]
[>………………..] recovery = 2.8% (607044/20955136) finish=6.7min speed=50587K/sec
unused devices: <none>
# mdadm -D /dev/md0
/dev/md0:
Version : 1.2
Creation Time : Wed Jun 29 08:16:51 2016
Raid Level : raid5
Array Size : 62865408 (59.95 GiB 64.37 GB)
Used Dev Size : 20955136 (19.98 GiB 21.46 GB)
Raid Devices : 4
Total Devices : 4
Persistence : Superblock is persistent
Update Time : Wed Jun 29 08:17:14 2016
State : clean, degraded, recovering
Active Devices : 3
Working Devices : 4
Failed Devices : 0
Spare Devices : 1
Layout : left-symmetric
Chunk Size : 512K
Rebuild Status : 6% complete
Name : localhost.localdomain:0 (local to host localhost.localdomain)
UUID : 17b9df4d:e3542df5:34c1a172:298a07a5
Events : 2
Number Major Minor RaidDevice State
0 8 16 0 active sync /dev/sdb
1 8 32 1 active sync /dev/sdc
2 8 48 2 active sync /dev/sdd
4 8 64 3 spare rebuilding /dev/sde
6. 格式化分割區
# mkfs -t ext4 /dev/md0
mke2fs 1.41.12 (17-May-2010)
Filesystem label=
OS type: Linux
Block size=4096 (log=2)
Fragment size=4096 (log=2)
Stride=128 blocks, Stripe width=384 blocks
3932160 inodes, 15716352 blocks
785817 blocks (5.00%) reserved for the super user
First data block=0
Maximum filesystem blocks=4294967296
480 block groups
32768 blocks per group, 32768 fragments per group
8192 inodes per group
Superblock backups stored on blocks:
32768, 98304, 163840, 229376, 294912, 819200, 884736, 1605632, 2654208,
4096000, 7962624, 11239424
Writing inode tables: done
Creating journal (32768 blocks): done
Writing superblocks and filesystem accounting information: done
This filesystem will be automatically checked every 35 mounts or
180 days, whichever comes first. Use tune2fs -c or -i to override.
7. 建立掛載目錄並掛載
# mkdir /mnt/raid5
# mount /dev/md0 /mnt/raid5
# df -h
Filesystem Size Used Avail Use% Mounted on
/dev/mapper/VolGroup-lv_root
8.3G 1022M 6.9G 13% /
tmpfs 931M 0 931M 0% /dev/shm
/dev/sda1 477M 63M 389M 14% /boot
/dev/md0 59G 52M 56G 1% /mnt/raid5
8. 查看硬碟的 UUID
# blkid | grep /dev/md0
/dev/md0: UUID=”a24bbe2b-c0f1-4417-99d9-866ea1f2a33d” TYPE=”ext4″
9. 修改 /etc/fstab
# vim /etc/fstab
加入下面一行
UUID=a24bbe2b-c0f1-4417-99d9-866ea1f2a33d /mnt/raid5 ext4 defaults 1 1
10. 編輯 /etc/mdadm.conf 設定檔
# mdadm –detail –scan –verbose >> /etc/mdadm.conf
ARRAY /dev/md0 level=raid5 num-devices=4 metadata=1.2 name=localhost.localdomain:0 UUID=232bc54c:6583d975:ab90c836:78be7854
devices=/dev/sdb,/dev/sdc,/dev/sdd,/dev/sde
11. 重新啟動電腦
# reboot
12. 磁碟分割資訊
# fdisk -l | grep /dev/sd
Disk /dev/sda: 10.7 GB, 10737418240 bytes
/dev/sda1 * 1 64 512000 83 Linux
/dev/sda2 64 1306 9972736 8e Linux LVM
Disk /dev/sdb: 21.5 GB, 21474836480 bytes
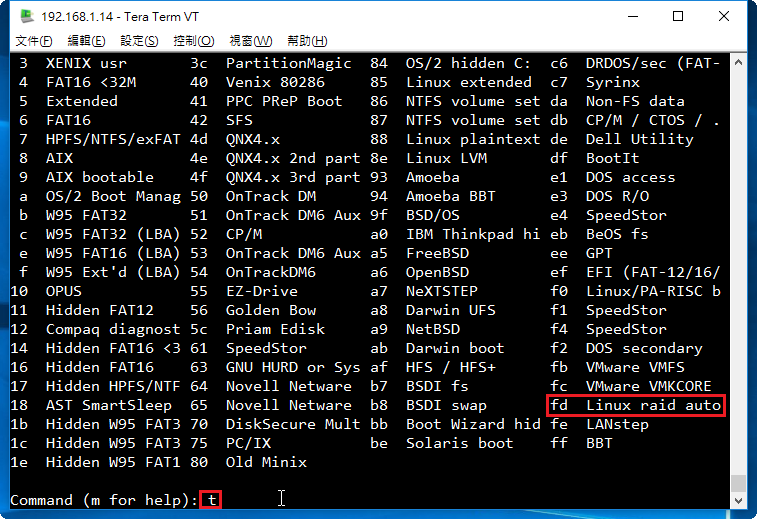
/dev/sdb1 1 2610 20964793+ fd Linux raid autodetect
Disk /dev/sdc: 21.5 GB, 21474836480 bytes
/dev/sdc1 1 2610 20964793+ fd Linux raid autodetect
Disk /dev/sdd: 21.5 GB, 21474836480 bytes
/dev/sdd1 1 2610 20964793+ fd Linux raid autodetect
Disk /dev/sde: 21.5 GB, 21474836480 bytes
/dev/sde1 1 2610 20964793+ fd Linux raid autodetect
13. 檢查是否有正確掛載
# df -h
Filesystem Size Used Avail Use% Mounted on
/dev/mapper/VolGroup-lv_root
8.3G 1022M 6.9G 13% /
tmpfs 931M 0 931M 0% /dev/shm
/dev/sda1 477M 63M 389M 14% /boot
/dev/md0 59G 52M 56G 1% /mnt/raid5