在 CentOS 7.x 下安裝 Proftpd Server

參考網站:
Linux . 無限: 在 CentOS7/RHEL7 上架設 Proftpd Server

1. 安裝 EPEL 套件庫
# yum install epel-release
# yum update

2. 安裝 Proftpd Server 相關套件
# yum install proftpd proftpd-ldap proftpd-mysql proftpd-utils

3. 防火牆設定
# firewall-cmd –permanent –add-service=ftp
# firewall-cmd –reload

# iptables -A INPUT -p tcp –syn -m state –state NEW –dport 21 -j ACCEPT
[@more@]
4.
# cp /etc/proftpd.conf /etc/proftpd.conf.$(date +%F)

# yum install openssl

# openssl req -x509 -newkey rsa:1024 -keyout /etc/proftpd.d/proftpd.key -out /etc/proftpd.d/proftpd.crt -nodes -days 3650
Generating a 1024 bit RSA private key
……….++++++
……++++++
writing new private key to ‘/etc/proftpd.d/proftpd.key’
—–
You are about to be asked to enter information that will be incorporated
into your certificate request.
What you are about to enter is what is called a Distinguished Name or a DN.
There are quite a few fields but you can leave some blank
For some fields there will be a default value,
If you enter ‘.’, the field will be left blank.
—–
Country Name (2 letter code) [TW]:
State or Province Name (full name) [Yilan]:
Locality Name (eg, city) [TouCheng]:
Organization Name (eg, company) [Elementary School]:
Organizational Unit Name (eg, section) [Proxy Server]:FTP Server
Common Name (eg, your name or your server’s hostname) []:
Email Address []:

4. 啟動 Proftpd Serve,並設定開機時啟動
# systemctl start proftpd.service
# systemctl enable proftpd.service

客製化 CentOS 7.4-1708 x86_64 Server 安裝光碟

為了測試系統比較方便,所以花了將近一個小時製作了這一片光碟。
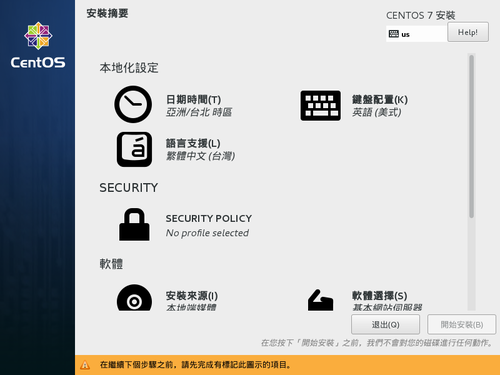
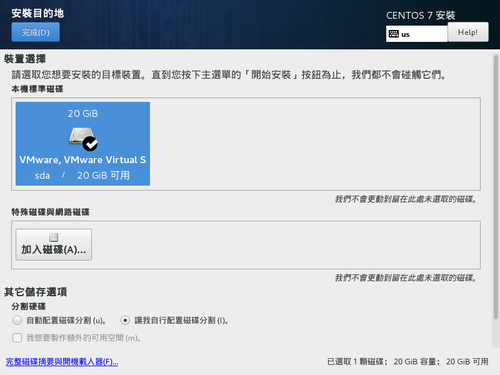
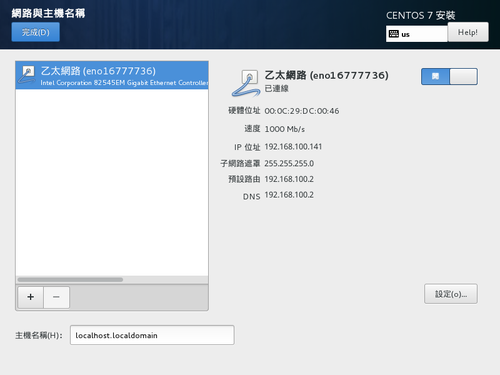
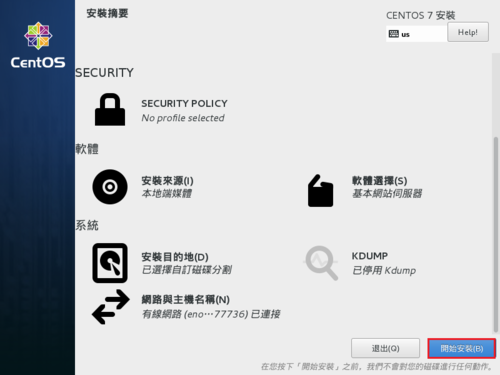
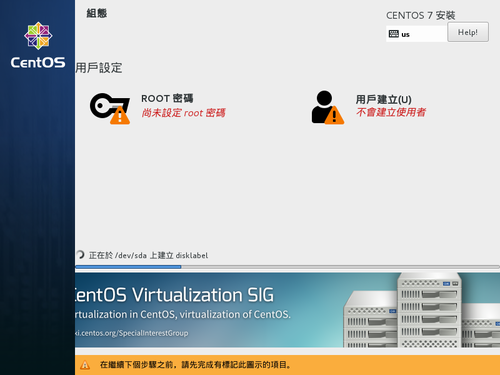
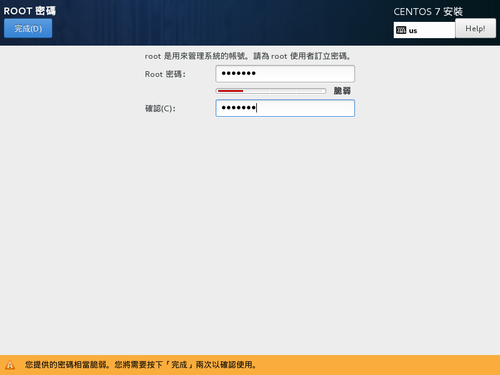
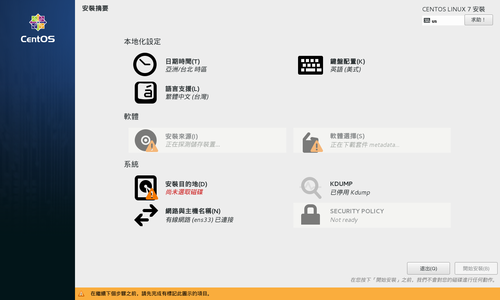
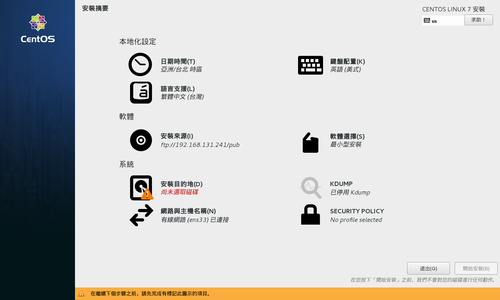
安裝時只要三個步驟:分割硬碟、設定網路、設定 root  管理者密碼

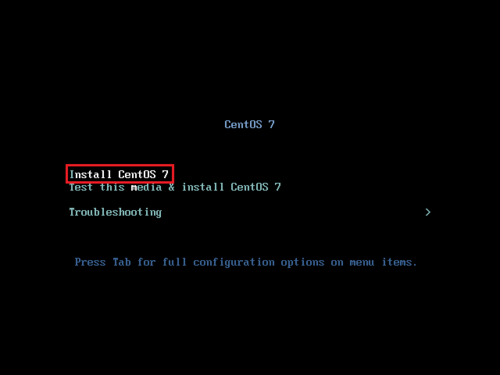
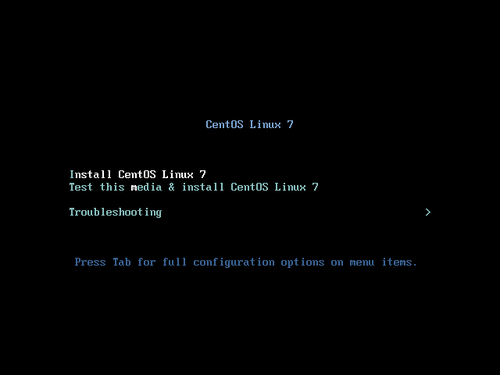
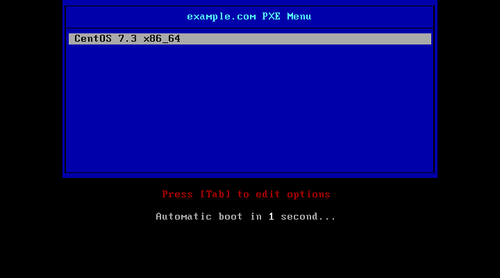
1. 光碟開機畫面,取消倒數計時,預設 Install CentOS 7

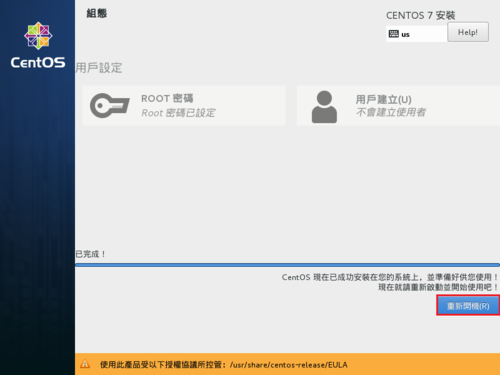
[@more@]安裝畫面

分割硬碟

設定網路

開始安裝

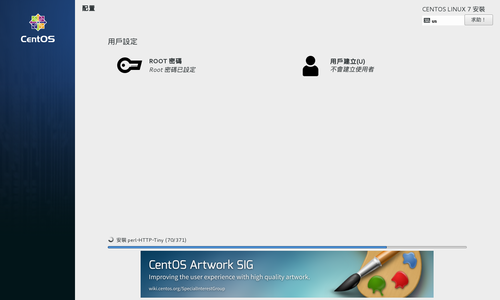
設定 root 密碼

完成安裝

這個版本的特點:
1. 最小化安裝,再補上所需套件,x86-64 光碟容量 795M
2. 套件更新到 2017-08-19
3. 套件更新伺服器改成 頭城國小
4. 加入第三方套件庫 EPEL(Extra Packages for Enterprise Linux)
5. 預設安裝 Apache Web Server / PHP / MariaDB SQL Server,並啟動 Apache Web Server 及 MariaDB SQL Server
6. 新增一些 Apache Web Server 的安全性設定
7. MariaDB MySQL Server 修改成 UTF-8 的使用環境
8. 修改 php 設定,包含:上傳的檔案大小到 200M,時區改成 Asis/Taipei……等等。
9. 每天早上 6 點向 time.stdtime.gov.tw 對時
10. 個人使用環境的設定…..等等

安裝完後,要設定 MariaDB SQL Server 管理者密碼。
# /usr/bin/mysql_secure_installation

CentOS Linux 7.4.1708 release

關於 CentOS 7.4.1708 版本說明,可以參考:CentOS-7(1708)發行注記 – CentOS Wiki

CentOS 7.x 版使用者可以直接使用 yum update 來更新到最新版本。
# yum update

更新後版本代號
# cat /etc/redhat-release
CentOS Linux release 7.4.1708 (Core)

[@more@]CentOS 7.4.1708 ISO 檔下載:
樹德科技大學
元智大學
交通大學資訊工程學系
南臺科技大學(目前無法連線)
中山大學
國家高速網路與計算中心
崑山科技大學
義守大學
中華電信
臺中市教育網路中心
頭城國小

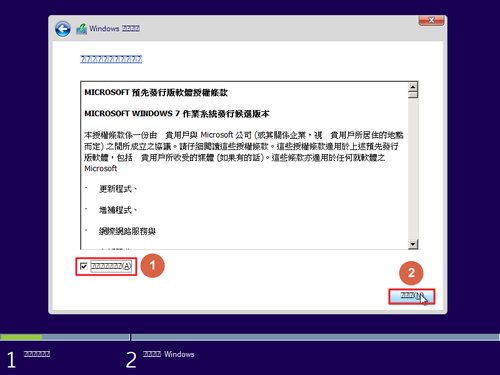
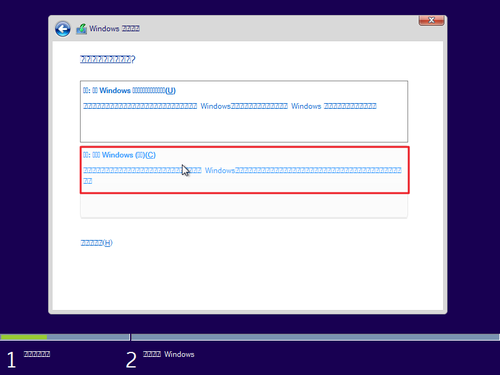
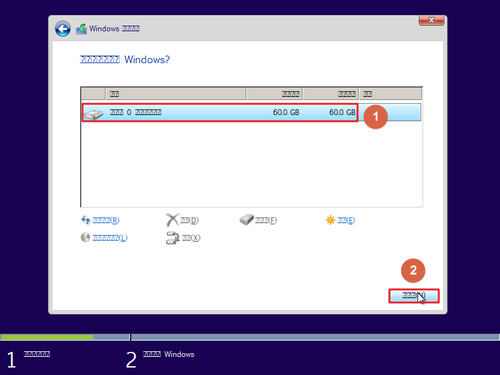
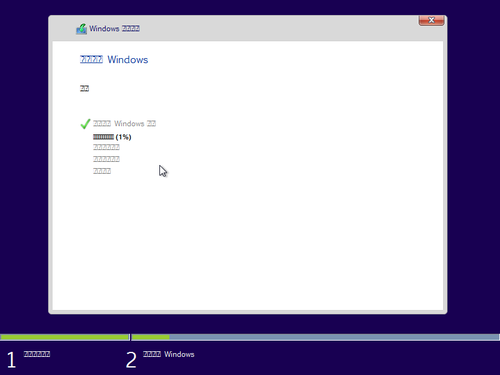
使用 PXE Server 來安裝 Windows

參考網站:
Setting Up Prerequisites to ‘Install Windows 7’ over ‘PXE Network Boot Server’ on RHEL/CentOS 7 – Part 1
SANDeploy iSCSI Boot – Diskless Boot of Windows 7 from SANDeploy iSCSI Boot SAN
用Ubuntu建立一個由網路開機「載入WinPE 自動化安裝Windows OS」的環境 | Jerry-Yang’s Log

1. 安裝 Samba Server
# yum install samba samba-winbind

2. 備份 Samba Server 設定檔
# cp /etc/samba/smb.conf /etc/samba/smb.conf.$(date +%F)

[@more@]3. 修改 Samba Server 設定檔 /etc/samba/smb.conf
# vim /etc/samba/smb.conf
[global]
workgroup = PXISSERVER
server string = Samba Server Version %v
log file = /var/log/samba/log.%m
max log size = 50
idmap config * : backend = tdb
cups options = raw
netbios name = pxis
map to guest = bad user
dns proxy = no
public = yes
## For multiple installations the same time – not lock kernel
kernel oplocks = no
nt acl support = no
security = user
guest account = nobody
[install]
comment = Windows 7 Image
path = /Windows
read only = no
browseable = yes
public = yes
printable = no
guest ok = yes
oplocks = no
level2 oplocks = no
locking = no

4. 檢查設定檔
# /usr/bin/testparm
Load smb config files from /etc/samba/smb.conf
rlimit_max: increasing rlimit_max (1024) to minimum Windows limit (16384)
Processing section “[install]”
Loaded services file OK.
Server role: ROLE_STANDALONE

Press enter to see a dump of your service definitions

# Global parameters
[global]
        netbios name = PXIS
        server string = Samba Server Version %v
        workgroup = PXISSERVER
        log file = /var/log/samba/log.%m
        max log size = 50
        map to guest = Bad User
        security = USER
        dns proxy = No
        idmap config * : backend = tdb
        cups options = raw
        nt acl support = No
        guest ok = Yes

[install]
        comment = Windows 7 Image
        path = /Windows
        level2 oplocks = No
        locking = No
        oplocks = No
        read only = No

5. 建立所須目錄
# mkdir -p /Windows/{7,x86,x64}

6. 將 Windows 7 安裝光碟上傳到 Server,並掛載在 /mnt 目錄
# mount -o loop tw_windows_7_Enterprise_IE11_Update_with_SP1_x86_x64_dvd_20170425.iso /mnt
mount: /dev/loop0 is write-protected, mounting read-only

7. 將檔案複製到 /Windows/7,然後卸載光碟
# cp -rf /mnt/* /Windows/7
# umount /mnt

8. 修改檔案擁有者及權限
# chown -R 755 /Windows
# chown -R nobody:nobody /Windows

9. 處理 SELinux
# /usr/sbin/semanage fcontext -a -t samba_share_t ‘/Windows(/.*)?’
# /usr/sbin/restorecon -R -F -v /Windows

10. 防火牆設定
# firewall-cmd –permanent –add-service=samba
success
# firewall-cmd –reload
success

11. 啟用 Samba Server 相關服務
# systemctl enable smb.service
Created symlink from /etc/systemd/system/multi-user.target.wants/smb.service to /usr/lib/systemd/system/smb.service.
# systemctl start smb.service
# systemctl enable nmb.service
Created symlink from /etc/systemd/system/multi-user.target.wants/nmb.service to /usr/lib/systemd/system/nmb.service.
# systemctl start nmb.service
# systemctl enable winbind.service
Created symlink from /etc/systemd/system/multi-user.target.wants/winbind.service to /usr/lib/systemd/system/winbind.service.
# systemctl start winbind.service

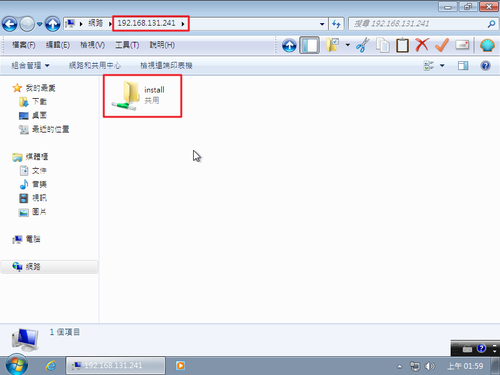
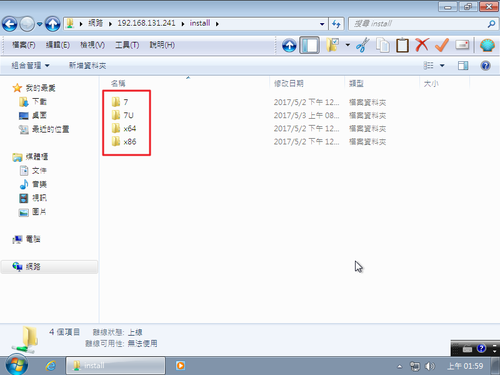
12. 測試是否能存取 Samba Server 分享的資源

13. 下載 Windows 7 Automated Installation Kit
下載網頁:https://www.microsoft.com/zh-tw/download/details.aspx?id=5753
請參考 頭城國小資訊組 | 建立 Windows 7 / 10 PE 光碟 完成 Windows PE 的製作

14. 建立目錄
# mkdir /var/lib/tftpboot/Windows

15. 將建立好的 Windows PE ISO 上傳到 /var/lib/tftpboot/Windows 目錄
# ls -l /var/lib/tftpboot/Windows/*.iso
-rw-r–r–. 1 nobody nobody 280020992  5月  2 21:09 /var/lib/tftpboot/Windows/Win10PE_amd64.iso
-rw-r–r–. 1 nobody nobody 226654208  5月  2 21:09 /var/lib/tftpboot/Windows/Win10PE_x86.iso
-rw-r–r–. 1 nobody nobody 217577472  5月  2 12:52 /var/lib/tftpboot/Windows/WinPE_amd64.iso
-rw-r–r–. 1 nobody nobody 192131072  5月  2 12:52 /var/lib/tftpboot/Windows/WinPE_x86.iso

16. 處理 SELinux 設定
# /usr/sbin/restorecon -R -F -v /var/lib/tftpboot/Windows

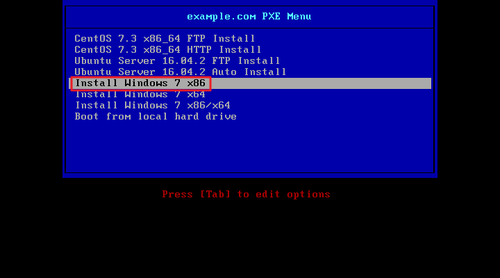
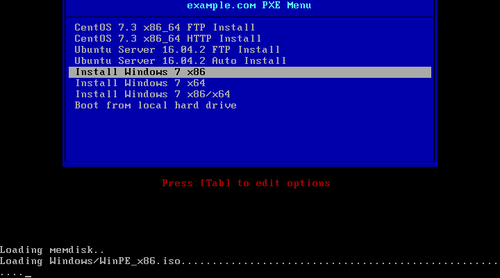
17. 修改 PXE Server 開機功能表
# vim /var/lib/tftpboot/pxelinux.cfg/default
加入
LABEL Install Windows 7 x86
MENU LABEL Install Windows 7 x86
KERNEL memdisk
INITRD Windows/WinPE_x86.iso
APPEND iso raw

LABEL Install Windows 7 x64
MENU LABEL Install Windows 7 x64
KERNEL memdisk
INITRD Windows/WinPE_amd64.iso
APPEND iso raw

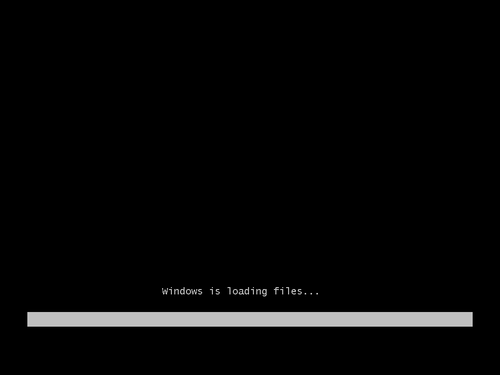
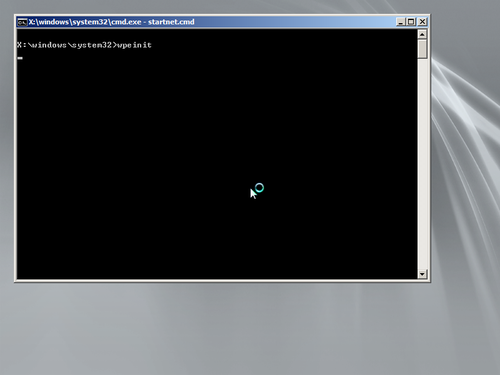
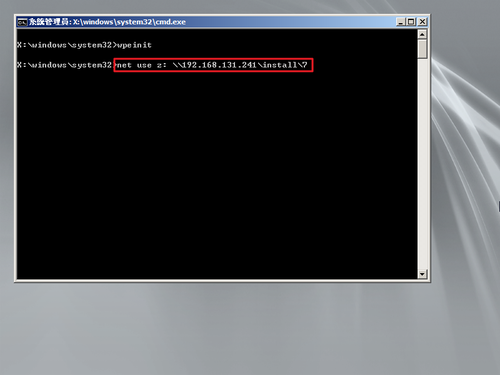
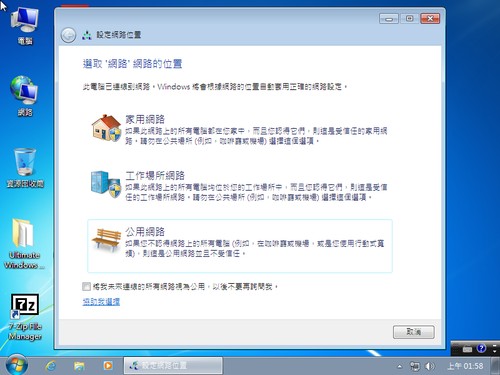
18. 設定使用網路開機,進行 Windows 7 安裝

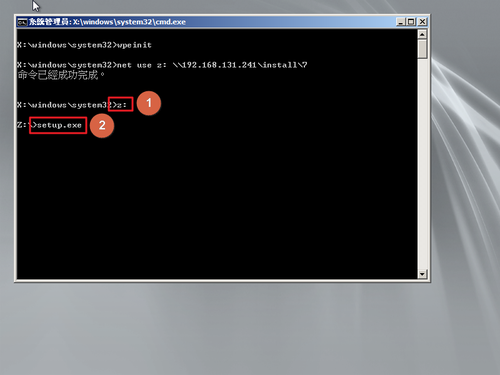
將 Windows 7 安裝目錄掛載成 z 磁碟機
net use z: 192.168.131.241install7

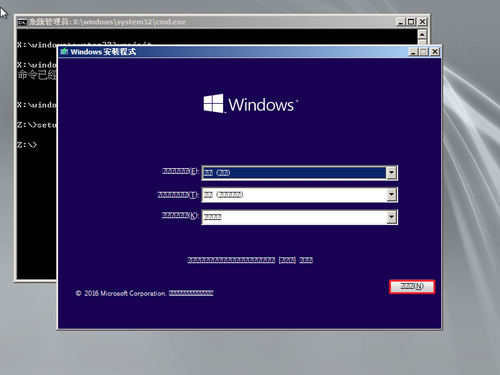
切換到 z 磁碟機並執行 setup.exe 進行安裝
z:
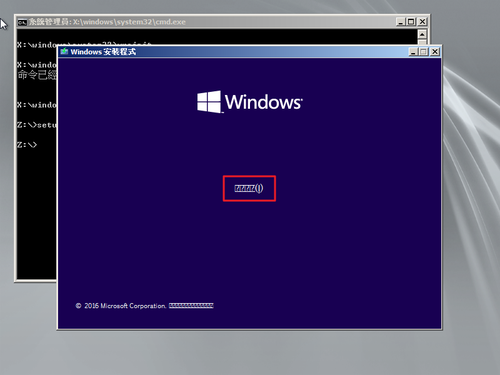
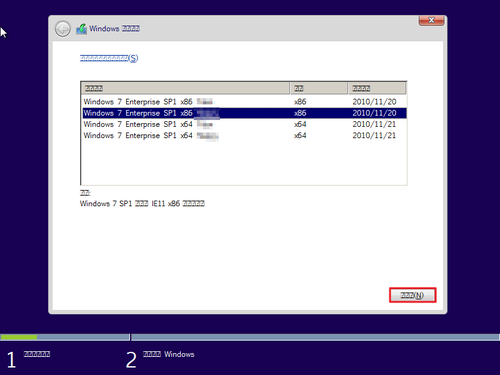
setup.exe

安裝光碟為縮減容量已改用以 Windows 10 為底,中文字的部份會出現亂碼

終於安裝完成!

CentOS 7.x 安裝 PXE Server

參考網頁:
Linux . 無限: 在 CentOS7/RHEL7 上架設 PXE 系統(一)
Install PXE Server On CentOS 7 | Unixmen
CentOS 7 : PXE Boot : Network Install : Server World
Install PXE Server And Configure PXE Client On CentOS 7 | Unixmen
CentOS 7 : PXE Boot : Configure PXE Server : Server World

1. 安裝所需套件
# yum install tftp-server dhcp syslinux vsftpd httpd

2. 設定 DHCP Server
# vim /etc/dhcp/dhcpd.conf
Authoritative;
default-lease-time                      259200;
max-lease-time                          518400;
option routers                          192.168.1.254;
option broadcast-address                192.168.1.255;
option subnet-mask                      255.255.255.0;
option domain-name-servers              168.95.1.1,140.111.66.1,8.8.8.8;
ddns-update-style                       interim;
ignore client-updates;
allow booting;
allow bootp;
allow unknown-clients;
server-name                             pxis;

subnet 192.168.1.0 netmask 255.255.255.0 {
    range 192.168.1.56 192.168.1.60;
    option subnet-mask                  255.255.255.0;
    option domain-name                  “test.ilc.edu.tw”;
    next-server 192.168.1.41;
    filename “pxelinux.0”;

}[@more@]3. 設定 tftp Server
# cp /usr/lib/systemd/system/tftp.service /root/tftp.service.$(date +%F)
# vim /usr/lib/systemd/system/tftp.service
[Unit]
Description=Tftp Server
Requires=tftp.socket
Documentation=man:in.tftpd

[Service]
ExecStart=/usr/sbin/in.tftpd -s /tftpboot
StandardInput=socket

[Install]
Also=tftp.socket

4. 複製 syslinux 必要檔案到 tftp Server 分享的目錄
# cd /usr/share/syslinux
# cp pxelinux.0 menu.c32 memdisk mboot.c32 chain.c32 /tftpboot

5. 在 tftp Server 目錄下,建立可供 Linux 開機核心的目錄
# mkdir /tftpboot/{pxelinux.cfg,netboot}

6. 將 Linux ISO 檔內容複製到 vfftpd Server 目錄
# mount -o loop CentOS-LEMP-7.3-x86_64-1611_20170320.iso /mnt
mount: /dev/loop0 is write-protected, mounting read-only
# cp -a /mnt/* /var/ftp/pub

7. 將 Linux PXE 開機核心檔案,複製到 vfftpd Server 目錄
# cd /var/ftp/pub/images/pxeboot
# cp vmlinuz initrd.img /tftpboot/netboot

8. 複製 CentOS Linux 自動安裝設定檔 ks.cfg 到 /var/ftp/pub  目錄之下
# cp /root/ks.cfg /var/ftp/pub
# chmod 644 /var/ftp/pub/ks.cfg

9. 修改 SELinux 相關設定
# yum install policycoreutils-python
# semanage fcontext -a -t public_content_t “/tftpboot(/.*)?”
# restorecon -F -R -v /tftpboot
# restorecon -R -F -v /var/ftp/pub/

10. 建立 PXE Server 開機選單
# vim /tftpboot/pxelinux.cfg/default
default menu.c32
prompt 0
timeout 30
MENU TITLE example.com PXE Menu
LABEL CentOS7_x64
MENU LABEL CentOS 7.3 x86_64
KERNEL /netboot/vmlinuz
APPEND initrd=/netboot/initrd.img inst.repo=ftp://192.168.5.104/pub ks=ftp://192.168.5.104/pub/ks.cfg

11. 啟動相關服務
# systemctl enable vsftpd
Created symlink from /etc/systemd/system/multi-user.target.wants/vsftpd.service to /usr/lib/systemd/system/vsftpd.service
# systemctl start vsftpd
# systemctl enable tftp
Created symlink from /etc/systemd/system/sockets.target.wants/tftp.socket to /usr/lib/systemd/system/tftp.socket.
# systemctl start tftp
# systemctl daemon-reload
# systemctl enable dhcpd
Created symlink from /etc/systemd/system/multi-user.target.wants/dhcpd.service to /usr/lib/systemd/system/dhcpd.service.
# systemctl start dhcpd
# systemctl enable httpd
Created symlink from /etc/systemd/system/multi-user.target.wants/httpd.service to /usr/lib/systemd/system/httpd.service
# systemctl start httpd

12. 防火牆上設定
# firewall-cmd –permanent –add-service=dhcp
# firewall-cmd –permanent –add-service=ftp
# firewall-cmd –permanent –add-service=http
# firewall-cmd –permanent –add-service=tftp
# firewall-cmd –reload

在 CentOS 6 下安裝 iSCSI Initiator

參考網頁:
鳥哥的 Linux 私房菜 — 網路磁碟裝置:iSCSI伺服器

iSCSI Target:192.168.1.18
iSCSI  Initiator:192.168.1.20

1. 安裝 iSCSI Initiator
# yum install iscsi-initiator-utils

2. 修改 /etc/iscsi/initiatorname.iscsi 設定檔
# vim /etc/iscsi/initiatorname.iscsi
InitiatorName=iqn.2017-04.tces.test:centos6

3. 修改 /etc/iscsi/iscsid.conf  設定檔
# cp /etc/iscsi/iscsid.conf /etc/iscsi/iscsid.conf.$(date +%F)
# vim /etc/iscsi/iscsid.conf

#node.session.auth.authmethod = CHAP
#node.session.auth.username = username
#node.session.auth.password = password
修改成
node.session.auth.authmethod = CHAP
node.session.auth.username = username
node.session.auth.password = password[@more@]
4. 啟用相關服務
# chkconfig –level 3 iscsi on
# /etc/init.d/iscsi start
# chkconfig –level 3 iscsid on
# /etc/init.d/iscsid start

5. 偵測 iSCSI Server 設備的相關資料
-m discovery   :使用偵測的方式進行 iscsiadmin 指令功能;
-t sendtargets :透過 iscsi 的協定,偵測後面的設備所擁有的 target 資料
-p IP:port     :就是那部 iscsi 設備的 IP 與埠口,不寫埠口預設是 3260
# /sbin/iscsiadm -m discovery -t sendtargets -p 192.168.1.18
192.168.1.18:3260,1 iqn.2017-04.tces.test:centos6-disk

6. 利用 iscsiadm 偵測到的 target 結果
# ll -R /var/lib/iscsi/nodes/
/var/lib/iscsi/nodes/:
total 4
drw——-. 3 root root 4096 Apr  9 12:49 iqn.2017-04.tces.test:centos6-disk

/var/lib/iscsi/nodes/iqn.2017-04.tces.test:centos6-disk:
total 4
drw——-. 2 root root 4096 Apr  9 12:49 192.168.1.18,3260,1

/var/lib/iscsi/nodes/iqn.2017-04.tces.test:centos6-disk/192.168.1.18,3260,1:
total 4
-rw——-. 1 root root 2117 Apr  9 12:49 default

7. 顯示目前系統上面所有的 target 資料
# /sbin/iscsiadm -m node
192.168.1.18:3260,1 iqn.2017-04.tces.test:centos6-disk

8. 登入使用
# /sbin/iscsiadm -m node -T iqn.2017-04.tces.test:centos6-disk -p 192.168.1.18 –login
Logging in to [iface: default, target: iqn.2017-04.tces.test:centos6-disk, portal: 192.168.1.18,3260] (multiple)
Login to [iface: default, target: iqn.2017-04.tces.test:centos6-disk, portal: 192.168.1.18,3260] successful.

9. 不使用時可以退出並刪除
# /sbin/iscsiadm -m node -T iqn.2017-04.tces.test:centos6-disk -p 192.168.1.18 –logout
Logging out of session [sid: 1, target: iqn.2017-04.tces.test:centos6-disk, portal: 192.168.1.18,3260]
Logout of [sid: 1, target: iqn.2017-04.tces.test:centos6-disk, portal: 192.168.1.18,3260] successful.

# /sbin/iscsiadm -m node
192.168.1.18:3260,1 iqn.2017-04.tces.test:esxi-disk

# /sbin/iscsiadm -m node -o delete

# /sbin/iscsiadm -m node
iscsiadm: No records found

10. 重新偵測一次
# /etc/init.d/iscsi restart
Stopping iscsi:                                            [  OK  ]

# /sbin/iscsiadm -m discovery -t sendtargets -p 192.168.1.18
192.168.1.18:3260,1 iqn.2017-04.tces.test:centos6-disk

# /sbin/iscsiadm -m node -T iqn.2017-04.tces.test:centos6-disk -p 192.168.1.18 –login
Logging in to [iface: default, target: iqn.2017-04.tces.test:centos6-disk, portal: 192.168.1.18,3260] (multiple)
Login to [iface: default, target: iqn.2017-04.tces.test:centos6-disk, portal: 192.168.1.18,3260] successful.

11. 新增的磁碟機
# fdisk -l /dev/sdb

WARNING: GPT (GUID Partition Table) detected on ‘/dev/sdb’! The util fdisk doesn’t support GPT. Use GNU Parted.

Disk /dev/sdb: 21.5 GB, 21474836480 bytes
255 heads, 63 sectors/track, 2610 cylinders
Units = cylinders of 16065 * 512 = 8225280 bytes
Sector size (logical/physical): 512 bytes / 512 bytes
I/O size (minimum/optimal): 512 bytes / 4194304 bytes
Disk identifier: 0x00000000

   Device Boot      Start         End      Blocks   Id  System
/dev/sdb1               1        2611    20971519+  ee  GPT

12. 建立掛目錄及格式化硬碟
# mkdir /iscsidisk
# mkfs.ext4 /dev/sdb
mke2fs 1.41.12 (17-May-2010)
/dev/sdb is entire device, not just one partition!
Proceed anyway? (y,n) y
Filesystem label=
OS type: Linux
Block size=4096 (log=2)
Fragment size=4096 (log=2)
Stride=0 blocks, Stripe width=1024 blocks
1310720 inodes, 5242880 blocks
262144 blocks (5.00%) reserved for the super user
First data block=0
Maximum filesystem blocks=4294967296
160 block groups
32768 blocks per group, 32768 fragments per group
8192 inodes per group
Superblock backups stored on blocks:
        32768, 98304, 163840, 229376, 294912, 819200, 884736, 1605632, 2654208,
        4096000

Writing inode tables: done
Creating journal (32768 blocks): done
Writing superblocks and filesystem accounting information: done

This filesystem will be automatically checked every 27 mounts or
180 days, whichever comes first.  Use tune2fs -c or -i to override.

13. 進行掛載
# mount /dev/sdb /iscsidisk
# df -h
Filesystem            Size  Used Avail Use% Mounted on
/dev/mapper/VolGroup-lv_root
                       18G  3.5G   13G  22% /
tmpfs                 931M     0  931M   0% /dev/shm
/dev/sda1             477M   94M  358M  21% /boot
/dev/sdb               20G   44M   19G   1% /iscsidisk

14. 寫入 /etc/fstab,_netdev 代表這一個分割區是在網路上,要等開機網路啟動完成才會掛載
# vim /etc/fstab
/dev/sdb /iscsidisk                   ext4    defaults,_netdev        1 2

在 CentOS 6 下安裝 iSCSI Target

參考網頁:
鳥哥的 Linux 私房菜 — 網路磁碟裝置:iSCSI伺服器

1. 安裝 scsi-target-utils
# yum install scsi-target-utils

2. 建立目錄
# mkdir /iscsi_disks

3. 建立檔案 10G 分享
# dd if=/dev/zero of=/iscsi_disks/centos6-disk.img bs=1M count=10240
10240+0 records in
10240+0 records out
10737418240 bytes (11 GB) copied, 125.961 s, 85.2 MB/s
[@more@]4. 設定 tgt 設定檔 /etc/tgt/targets.conf
backing-store – 虛擬裝置
initiator-address – 可以連線的來源 IP 網段,也可以在防火牆上設定
incominguser – 使用者帳號及密碼設定
write-cache – 是否要使用快取
# vim /etc/tgt/targets.conf
<target iqn.2017-04.tces.test:centos6>
    backing-store /iscsi_disks/centos6-disk.img
    initiator-address 192.168.1.0/24
    incominguser username password
    write-cache off
</target>

5. 啟動服務
# chkconfig –level 3 tgtd on
# /etc/init.d/tgtd start
正在啟動 SCSI target daemon:                              [  確定  ]

# netstat -antulp | grep 3260
tcp        0      0 0.0.0.0:3260                0.0.0.0:*                   LISTEN      1682/tgtd
tcp        0      0 :::3260                     :::*                        LISTEN      1682/tgtd

6. 防火牆設定
# iptables -A INPUT -s 192.168.1.0/24 -m tcp -p tcp -m state –state NEW –dport 3260 -j ACCEPT

7. 顯示 target 相關資訊
# /usr/sbin/tgt-admin –show
Target 1: iqn.2017-04.tces.test:centos6
    System information:
        Driver: iscsi
        State: ready
    I_T nexus information:
    LUN information:
        LUN: 0
            Type: controller
            SCSI ID: IET     00010000
            SCSI SN: beaf10
            Size: 0 MB, Block size: 1
            Online: Yes
            Removable media: No
            Prevent removal: No
            Readonly: No
            Backing store type: null
            Backing store path: None
            Backing store flags:
    Account information:
    ACL information:

在 CentOS 7 下安裝 iSCSI Initiator

參考網站:
CentOS 7 : Configure iSCSI Initiator(CentOS) : Server World
CentOS 7 安裝 iSCSI Server

1. 安裝 iscsi-initiator-utils 套件
# yum -y install iscsi-initiator-utils

2. 修改 /etc/iscsi/initiatorname.iscsi 設定檔
# vim /etc/iscsi/initiatorname.iscsi
InitiatorName=iqn.2017-04.tces.test:linux-pc

3. 修改 /etc/iscsi/iscsid.conf  設定檔
# cp /etc/iscsi/iscsid.conf /etc/iscsi/iscsid.conf.$(date +%F)
# vim /etc/iscsi/iscsid.conf

#node.session.auth.authmethod = CHAP
#node.session.auth.username = username
#node.session.auth.password = password
修改成
node.session.auth.authmethod = CHAP
node.session.auth.username = username
node.session.auth.password = password[@more@]
4. 尋找 iSCSI Server 分享的設備
# /usr/sbin/iscsiadm -m discovery -t sendtargets -p 192.168.1.46
192.168.1.46:3260,1 iqn.2017-04.tces.test:linux.disk

5. 顯示 iSCSI Server 狀態
# /usr/sbin/iscsiadm -m node -o show
# BEGIN RECORD 6.2.0.873-35
node.name = iqn.2017-04.tces.test:linux.disk
node.tpgt = 1
node.startup = automatic
node.leading_login = No
iface.hwaddress = <empty>
iface.ipaddress = <empty>
iface.iscsi_ifacename = default
iface.net_ifacename = <empty>
iface.gateway = <empty>
iface.subnet_mask = <empty>
iface.transport_name = tcp
iface.initiatorname = <empty>
iface.state = <empty>
iface.vlan_id = 0
iface.vlan_priority = 0
iface.vlan_state = <empty>
iface.iface_num = 0
iface.mtu = 0
iface.port = 0
iface.bootproto = <empty>
iface.dhcp_alt_client_id_state = <empty>
iface.dhcp_alt_client_id = <empty>
iface.dhcp_dns = <empty>
iface.dhcp_learn_iqn = <empty>
iface.dhcp_req_vendor_id_state = <empty>
iface.dhcp_vendor_id_state = <empty>
iface.dhcp_vendor_id = <empty>
iface.dhcp_slp_da = <empty>
iface.fragmentation = <empty>
iface.gratuitous_arp = <empty>
iface.incoming_forwarding = <empty>
iface.tos_state = <empty>
iface.tos = 0
iface.ttl = 0
iface.delayed_ack = <empty>
iface.tcp_nagle = <empty>
iface.tcp_wsf_state = <empty>
iface.tcp_wsf = 0
iface.tcp_timer_scale = 0
iface.tcp_timestamp = <empty>
iface.redirect = <empty>
iface.def_task_mgmt_timeout = 0
iface.header_digest = <empty>
iface.data_digest = <empty>
iface.immediate_data = <empty>
iface.initial_r2t = <empty>
iface.data_seq_inorder = <empty>
iface.data_pdu_inorder = <empty>
iface.erl = 0
iface.max_receive_data_len = 0
iface.first_burst_len = 0
iface.max_outstanding_r2t = 0
iface.max_burst_len = 0
iface.chap_auth = <empty>
iface.bidi_chap = <empty>
iface.strict_login_compliance = <empty>
iface.discovery_auth = <empty>
iface.discovery_logout = <empty>
node.discovery_address = 140.111.74.46
node.discovery_port = 3260
node.discovery_type = send_targets
node.session.initial_cmdsn = 0
node.session.initial_login_retry_max = 8
node.session.xmit_thread_priority = -20
node.session.cmds_max = 128
node.session.queue_depth = 32
node.session.nr_sessions = 1
node.session.auth.authmethod = CHAP
node.session.auth.username = test
node.session.auth.password = ********
node.session.auth.username_in = <empty>
node.session.auth.password_in = <empty>
node.session.timeo.replacement_timeout = 120
node.session.err_timeo.abort_timeout = 15
node.session.err_timeo.lu_reset_timeout = 30
node.session.err_timeo.tgt_reset_timeout = 30
node.session.err_timeo.host_reset_timeout = 60
node.session.iscsi.FastAbort = Yes
node.session.iscsi.InitialR2T = No
node.session.iscsi.ImmediateData = Yes
node.session.iscsi.FirstBurstLength = 262144
node.session.iscsi.MaxBurstLength = 16776192
node.session.iscsi.DefaultTime2Retain = 0
node.session.iscsi.DefaultTime2Wait = 2
node.session.iscsi.MaxConnections = 1
node.session.iscsi.MaxOutstandingR2T = 1
node.session.iscsi.ERL = 0
node.conn[0].address = 192.168.1.46
node.conn[0].port = 3260
node.conn[0].startup = manual
node.conn[0].tcp.window_size = 524288
node.conn[0].tcp.type_of_service = 0
node.conn[0].timeo.logout_timeout = 15
node.conn[0].timeo.login_timeout = 15
node.conn[0].timeo.auth_timeout = 45
node.conn[0].timeo.noop_out_interval = 5
node.conn[0].timeo.noop_out_timeout = 5
node.conn[0].iscsi.MaxXmitDataSegmentLength = 0
node.conn[0].iscsi.MaxRecvDataSegmentLength = 262144
node.conn[0].iscsi.HeaderDigest = None
node.conn[0].iscsi.IFMarker = No
node.conn[0].iscsi.OFMarker = No
# END RECORD

6. 登入使用 iSCSI 設備
# /usr/sbin/iscsiadm -m node –login
Logging in to [iface: default, target: iqn.2017-04.tces.test:linux.disk, portal: 192.168.1.46,3260] (multiple)
Login to [iface: default, target: iqn.2017-04.tces.test:linux.disk, portal: 192.168.1.46,3260] successful.

7. 顯示連線狀態
# /usr/sbin/iscsiadm -m session -o show
tcp: [1] 192.168.1.46:3260,1 iqn.2017-04.tces.test:linux.disk (non-flash)

8. 檢查是否有多個一個硬碟
# cat /proc/partitions
major minor  #blocks  name

   8        0   20971520 sda
   8        1    1048576 sda1
   8        2   19921920 sda2
  11        0    4277248 sr0
 253        0   17821696 dm-0
 253        1    2097152 dm-1
   8       16   10485760 sdb

# fdisk -l

Disk /dev/sda: 21.5 GB, 21474836480 bytes, 41943040 sectors
Units = sectors of 1 * 512 = 512 bytes
Sector size (logical/physical): 512 bytes / 512 bytes
I/O 大小 (最小/最佳化):512 位元組 / 512 位元組
Disk label type: dos
磁碟識別碼:0x000a2798

所用裝置 開機      開始         結束      區塊   識別號  系統
/dev/sda1   *        2048     2099199     1048576   83  Linux
/dev/sda2         2099200    41943039    19921920   8e  Linux LVM

Disk /dev/mapper/cl-root: 18.2 GB, 18249416704 bytes, 35643392 sectors
Units = sectors of 1 * 512 = 512 bytes
Sector size (logical/physical): 512 bytes / 512 bytes
I/O 大小 (最小/最佳化):512 位元組 / 512 位元組

Disk /dev/mapper/cl-swap: 2147 MB, 2147483648 bytes, 4194304 sectors
Units = sectors of 1 * 512 = 512 bytes
Sector size (logical/physical): 512 bytes / 512 bytes
I/O 大小 (最小/最佳化):512 位元組 / 512 位元組

Disk /dev/sdb: 10.7 GB, 10737418240 bytes, 20971520 sectors
Units = sectors of 1 * 512 = 512 bytes
Sector size (logical/physical): 512 bytes / 512 bytes
I/O 大小 (最小/最佳化):512 位元組 / 4194304 位元組

# file /dev/sdb
/dev/sdb: block special

9. 建立掛目錄及格式化硬碟
# mkdir /iscsidisk
# mkfs.xfs /dev/sdb
meta-data=/dev/sdb               isize=512    agcount=4, agsize=655360 blks
         =                       sectsz=512   attr=2, projid32bit=1
         =                       crc=1        finobt=0, sparse=0
data     =                       bsize=4096   blocks=2621440, imaxpct=25
         =                       sunit=0      swidth=0 blks
naming   =version 2              bsize=4096   ascii-ci=0 ftype=1
log      =internal log           bsize=4096   blocks=2560, version=2
         =                       sectsz=512   sunit=0 blks, lazy-count=1
realtime =none                   extsz=4096   blocks=0, rtextents=0

# mount /dev/sdb /iscsidisk
# df -h
檔案系統             容量  已用  可用 已用% 掛載點
/dev/mapper/cl-root   17G   11G  7.0G   60% /
devtmpfs             982M     0  982M    0% /dev
tmpfs                993M     0  993M    0% /dev/shm
tmpfs                993M  8.7M  984M    1% /run
tmpfs                993M     0  993M    0% /sys/fs/cgroup
/dev/sda1           1014M  176M  839M   18% /boot
tmpfs                199M     0  199M    0% /run/user/0
/dev/sdb              10G   33M   10G    1% /iscsidisk

10. 寫入到 /etc/fstab
# blkid | grep /dev/sdb
/dev/sdb: UUID=”8f933fbf-a56d-40bb-8c88-cb9ec851095f” TYPE=”xfs”

# vim /etc/fstab
加入下面一行
/dev/sdb: UUID=8f933fbf-a56d-40bb-8c88-cb9ec851095f /iscsidisk xfs default,_netdev 0 0

在 CentOS 7 下安裝 iSCSI Target

參考網站:
CentOS 7 : Configure iSCSI Target : Server World
CentOS 7 安裝 iSCSI Server
Configure iSCSI Target & Initiator on CentOS 7 / RHEL7

1. 安裝 targetcli 套件
# yum -y install targetcli

2. 建立目錄
# mkdir /iscsi_disks[@more@]
3. 進入 iscsi 管理介面
# /usr/bin/targetcli
Warning: Could not load preferences file /root/.targetcli/prefs.bin.
targetcli shell version 2.1.fb41
Copyright 2011-2013 by Datera, Inc and others.
For help on commands, type ‘help’.

/> cd backstores/fileio
/backstores/fileio> create linux-disk /iscsi_disks/linux-disk.img 10G
Created fileio linux-disk with size 10737418240
/backstores/fileio> cd /iscsi
/iscsi> create iqn.2017-04.tces.test:linux.disk
Created target iqn.2017-04.tces.test:linux.disk.
Created TPG 1.
Global pref auto_add_default_portal=true
Created default portal listening on all IPs (0.0.0.0), port 3260.
/iscsi> cd iqn.2017-04.tces.test:linux.disk/tpg1/luns
/iscsi/iqn.20…isk/tpg1/luns> create /backstores/fileio/linux-disk
Created LUN 0.
/iscsi/iqn.20…isk/tpg1/luns> cd ../acls
/iscsi/iqn.20…isk/tpg1/acls> create iqn.2017-04.tces.test:linux-pc
Created Node ACL for iqn.2017-04.tces.test:linux-pc
Created mapped LUN 0.
/iscsi/iqn.20…isk/tpg1/acls> cd iqn.2017-04.tces.test:linux-pc
/iscsi/iqn.20…test:linux-pc> set auth userid=user
Parameter userid is now ‘user.
/iscsi/iqn.20…test:linux-pc> set auth password=password
Parameter password is now ‘password’.
/iscsi/iqn.20…test:linux-pc> exit
Global pref auto_save_on_exit=true
Last 10 configs saved in /etc/target/backup.
Configuration saved to /etc/target/saveconfig.json

4. 檢查是否有正常執行
# ss -napt | grep 3260
LISTEN     0      256          *:3260                     *:*

# netstat -napt | grep 3260
tcp        0      0 0.0.0.0:3260            0.0.0.0:*               LISTE

5. 防火牆設定
# firewall-cmd –permanent –add-service=iscsi-target
# firewall-cmd –reload

# firewall-cmd –permanent –add-port=3260/tcp
# firewall-cmd –reload

# iptables -A INPUT -s 192.168.1.0/24 -p tcp -m state –state NEW –dport 3260 -j ACCEPT

For Windows
# /usr/bin/targetcli
Warning: Could not load preferences file /root/.targetcli/prefs.bin.
targetcli shell version 2.1.fb41
Copyright 2011-2013 by Datera, Inc and others.
For help on commands, type ‘help’.

/> cd backstores/fileio

/backstores/fileio> create windows-disk /iscsi_disks/windows-disk.img 4G
Created fileio windows-disk with size 4294967296
/backstores/fileio> cd /iscsi
/iscsi> create iqn.2017-04.tces.test:windows.disk
Created target iqn.2017-04.tces.test:windows.disk.
Created TPG 1.
Global pref auto_add_default_portal=true
Created default portal listening on all IPs (0.0.0.0), port 3260.
/iscsi> cd iqn.2017-04.tces.test:windows.disk/tpg1/luns
/iscsi/iqn.20…isk/tpg1/luns> create /backstores/fileio/windows-disk
Created LUN 0.
/iscsi/iqn.20…isk/tpg1/luns> cd ../acls
/iscsi/iqn.20…isk/tpg1/acls> create iqn.2017-04.tces.test:windows-pc
Created Node ACL for iqn.2017-04.tces.test:windows-pc
Created mapped LUN 0.
/iscsi/iqn.20…isk/tpg1/acls> cd /iscsi/iqn.2017-04.tces.test:windows.disk/tpg1/
/iscsi/iqn.20…ows.disk/tpg1> set attribute authentication=0
Parameter authentication is now ‘0’.
/iscsi/iqn.20…ows.disk/tpg1> cd /iscsi/iqn.2017-04.tces.test:windows.disk/tpg1/
/iscsi/iqn.20…ows.disk/tpg1> set attribute generate_node_acls=0
Parameter generate_node_acls is now ‘0’.
/iscsi/iqn.20…ows.disk/tpg1> exit
Global pref auto_save_on_exit=true
Last 10 configs saved in /etc/target/backup.
Configuration saved to /etc/target/saveconfig.json