Kano 官方網站:http://kano.me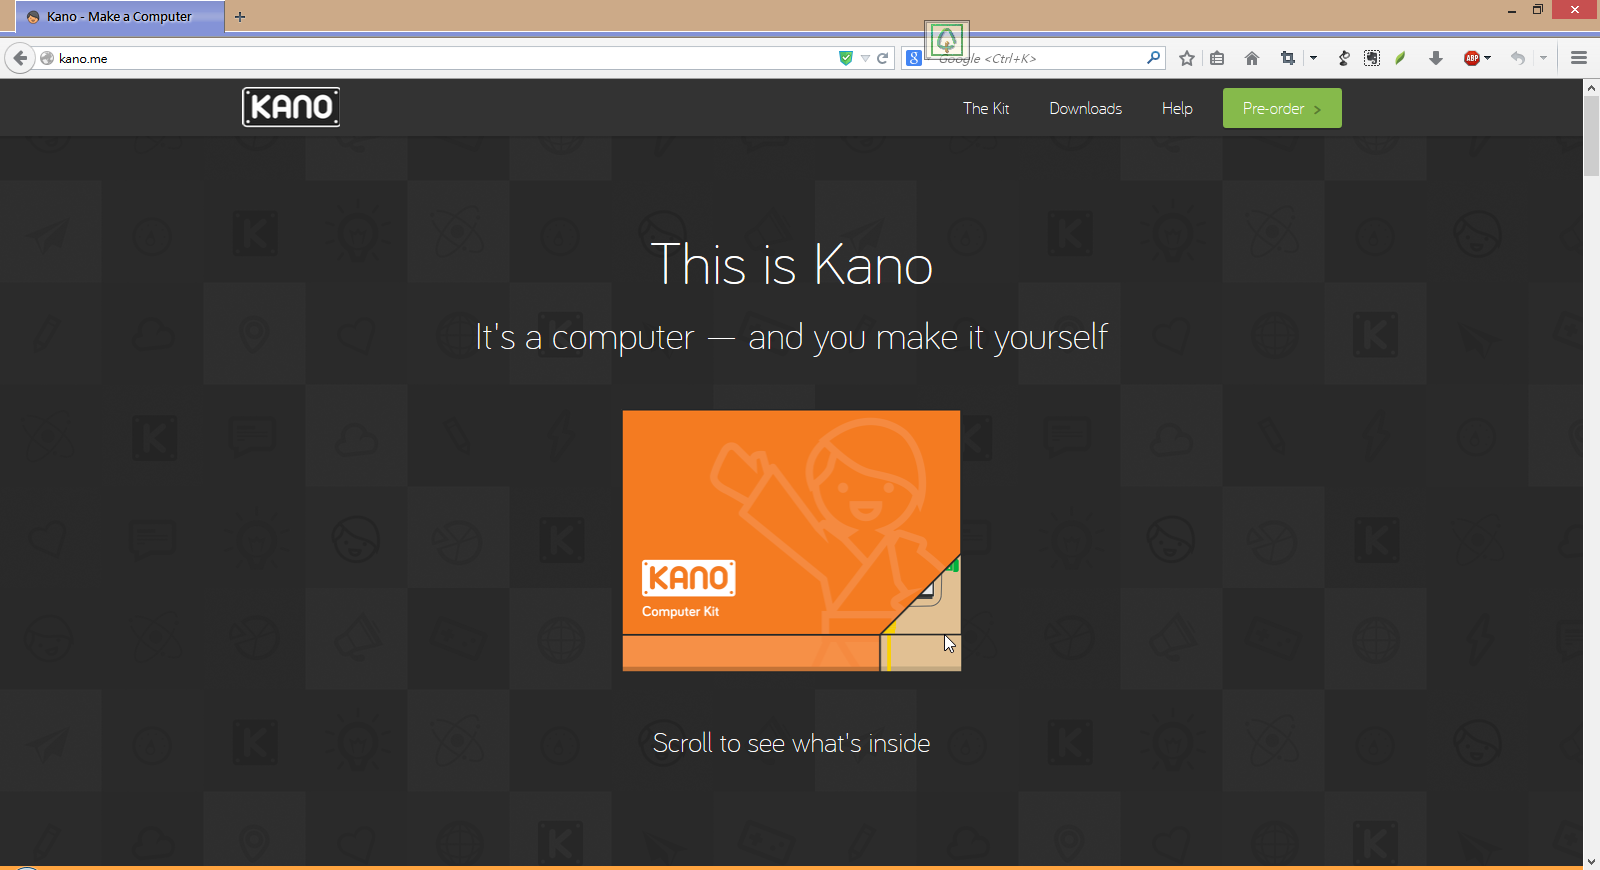
下載 Kano
選擇 Downloads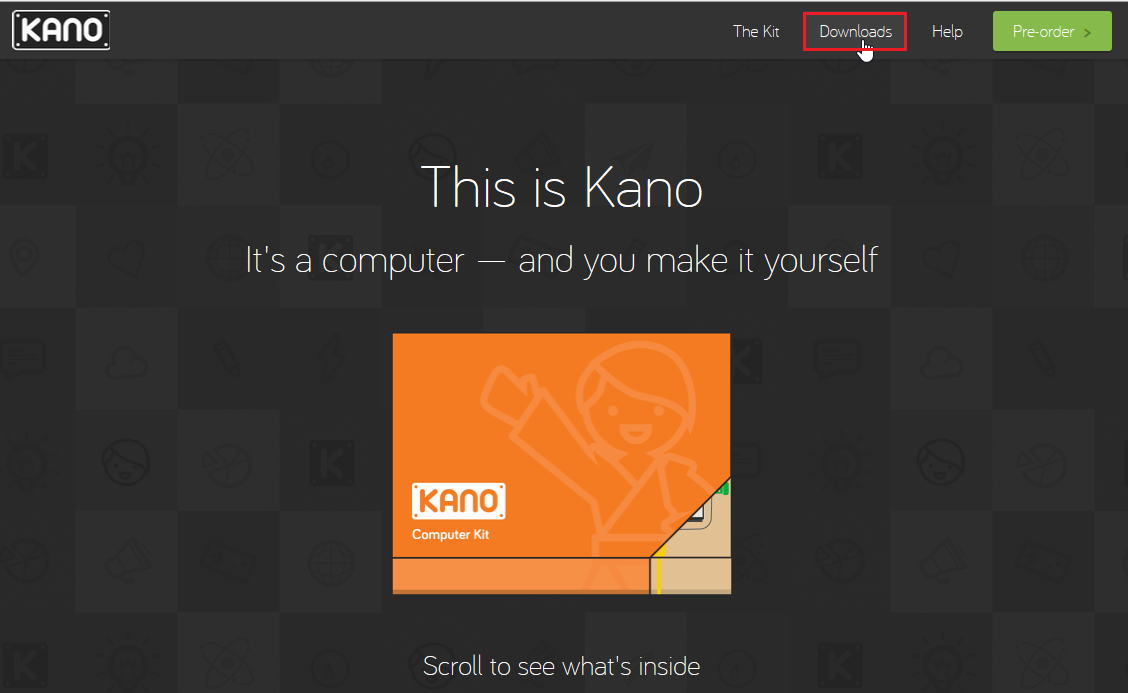 [@more@]Kano OS Burner 是可以線上下載最新版的 Kano OS 並燒錄到記憶卡中
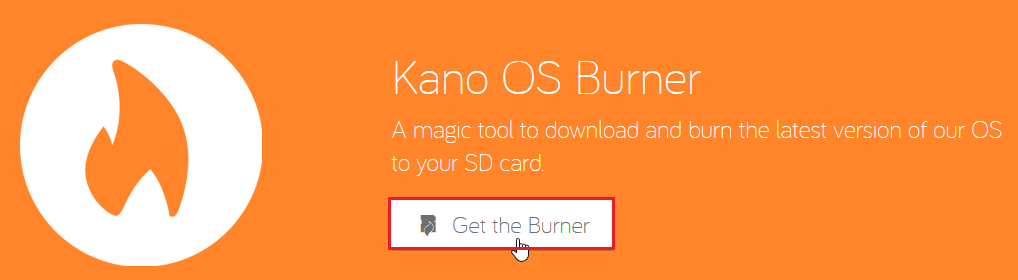
下方是直接下載 Kano OS Beta 1.2.3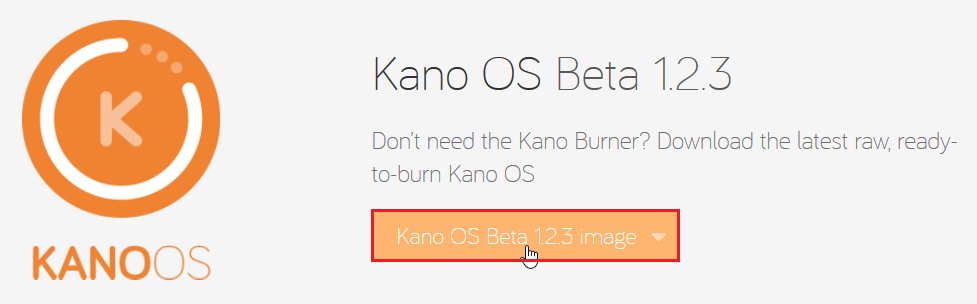
底下是操作 Kano OS Burner 來下載最新版本的 Kano OS
選擇要燒錄的記憶卡代號
選擇 BRUN!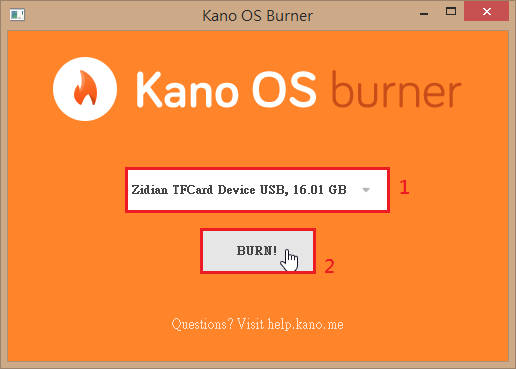
軟體授權和提示訊息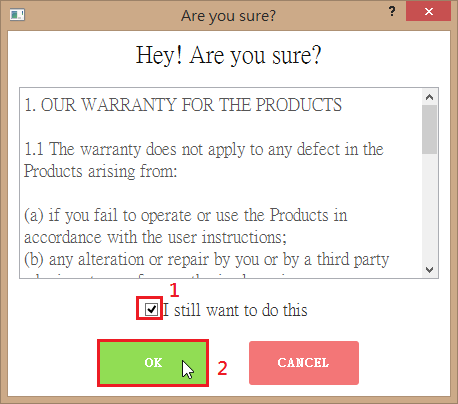
下載並燒錄中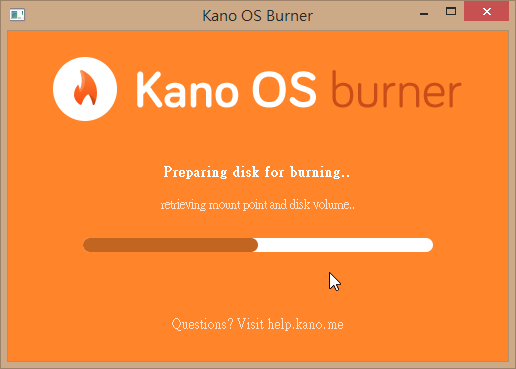
Kano OS Iamge 則是解壓縮,再用 Win32DiskImager 燒錄即可!

全新的繁體中文 WordPress 網站《宜蘭部落格教育平台 網站》
Kano 官方網站:http://kano.me
下載 Kano
選擇 Downloads[@more@]Kano OS Burner 是可以線上下載最新版的 Kano OS 並燒錄到記憶卡中
下方是直接下載 Kano OS Beta 1.2.3
底下是操作 Kano OS Burner 來下載最新版本的 Kano OS
選擇要燒錄的記憶卡代號
選擇 BRUN!
軟體授權和提示訊息
下載並燒錄中
Kano OS Iamge 則是解壓縮,再用 Win32DiskImager 燒錄即可!

看到時覺得好可愛,有一股衝動,很想買一台來玩玩,但一台並不便宜,要價 USD 129.00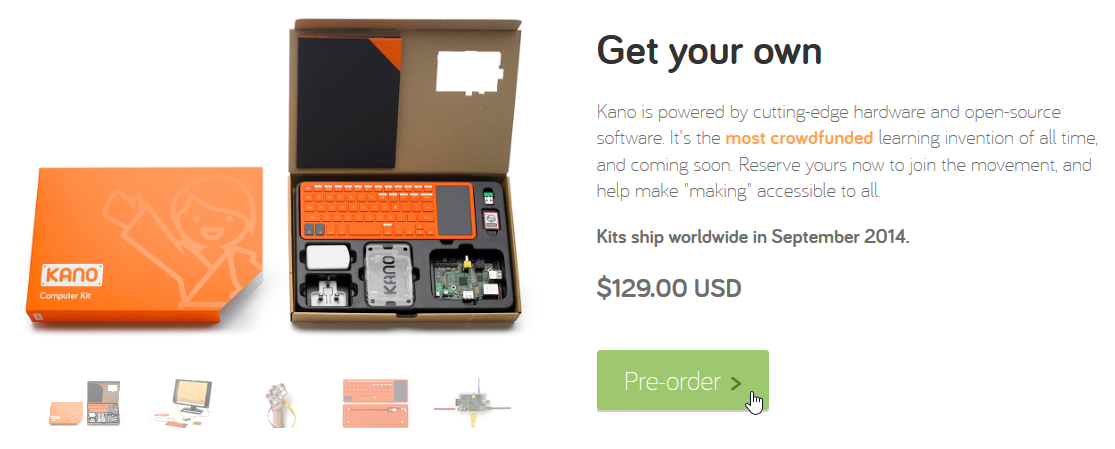
[@more@]再加上看到裡面的內容配件,我就放棄了!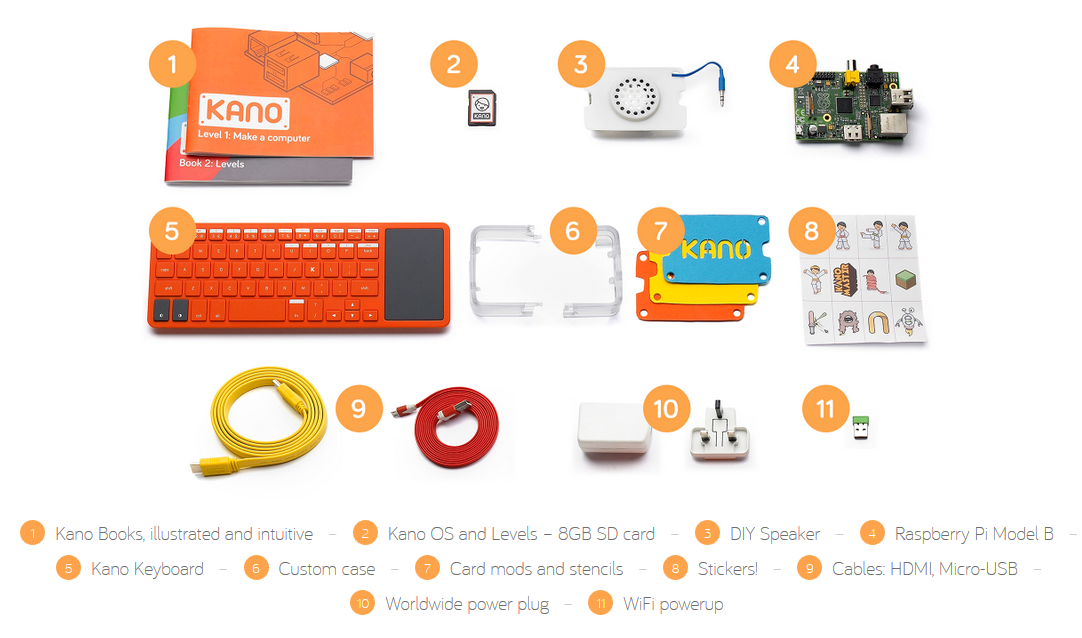
因為這些配件說實在的,就是五顏六色、色彩鮮艷,其餘都還好,加上它是使用 Raspberry Pi Mode B,所以就不買了!
只是覺得它的作業系統好可愛,可以下載來用看看!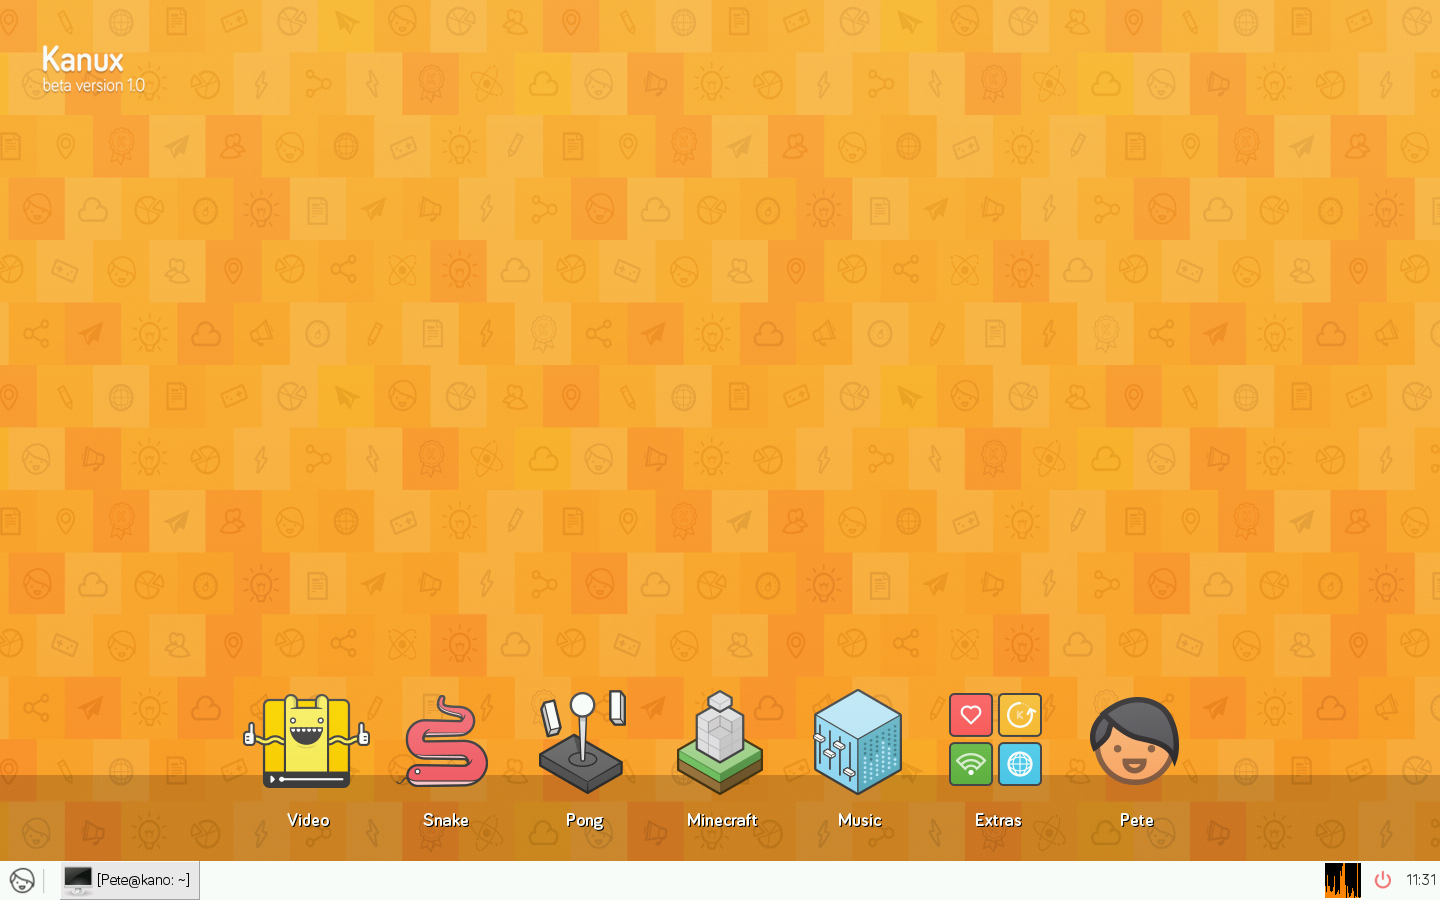
S4A 是一個縮寫,其中 S 代表的是 Scratch ,4 代表的是 for ,A 代表的是 Arduino,更詳細的介紹可以使用 Google 來搜尋。
S4A 官方網站:http://s4a.cat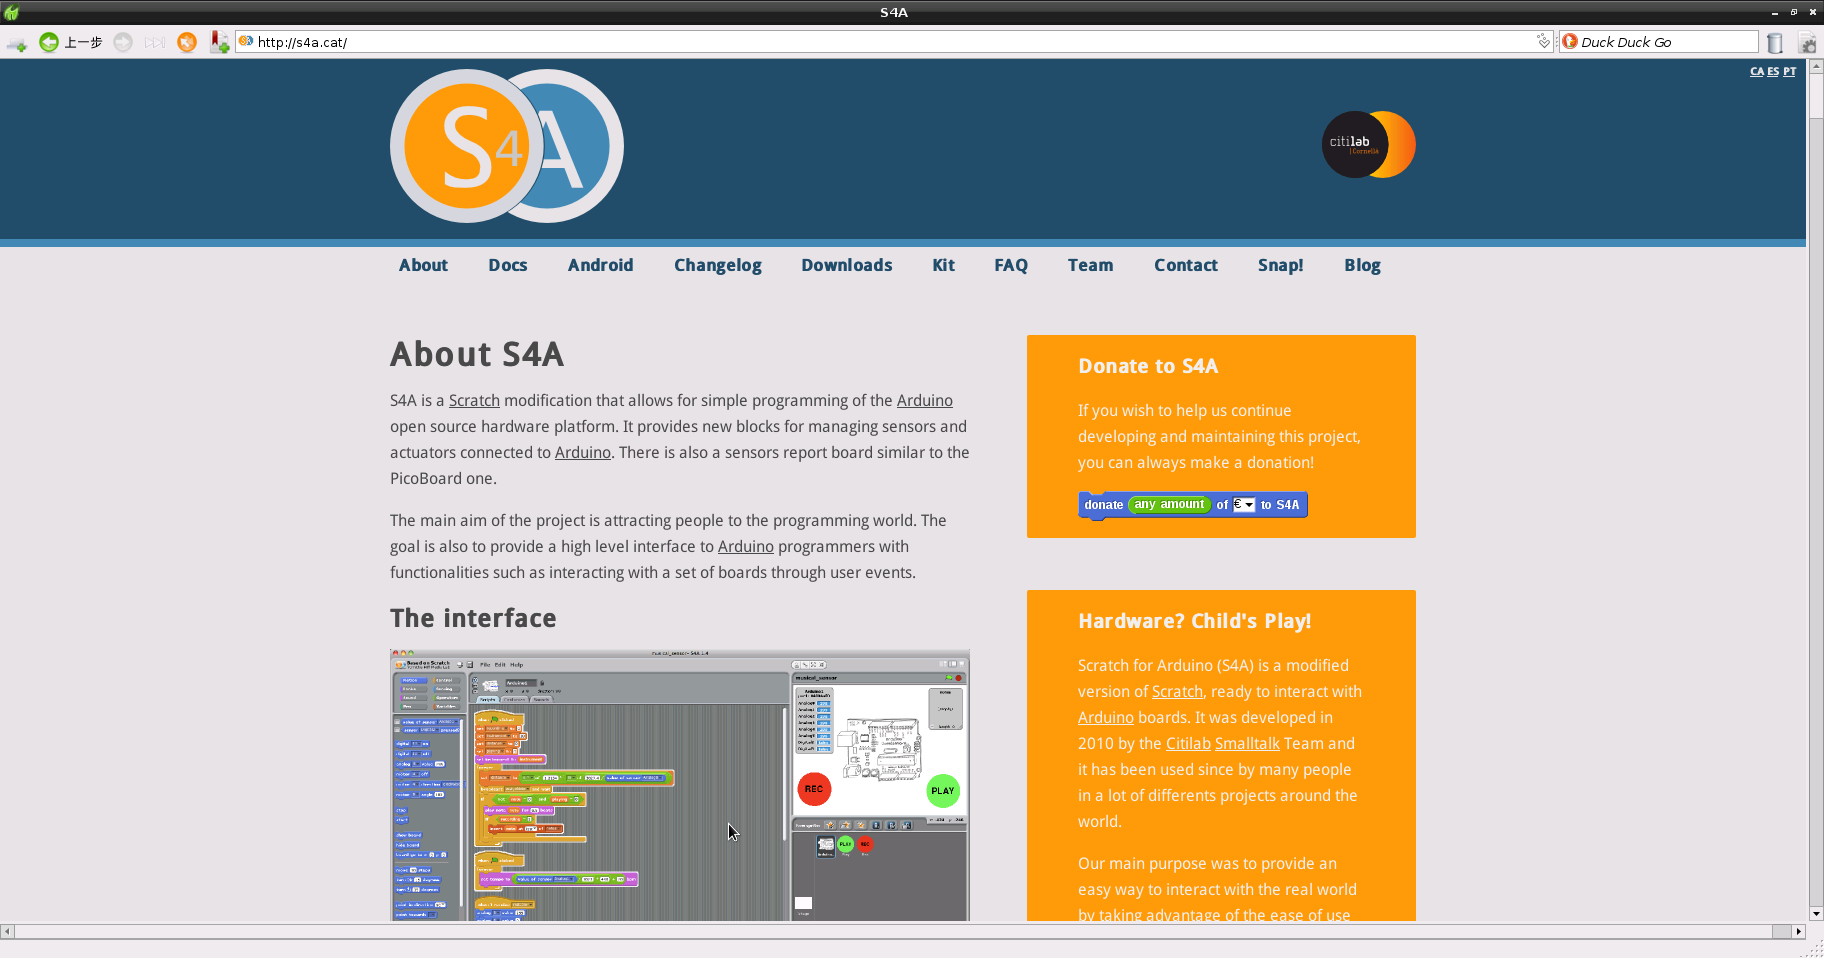 [@more@]首先點選 Downloads
共要下載 Raspbian (Debian for RaspberryPi) 和 S4A 的 fireware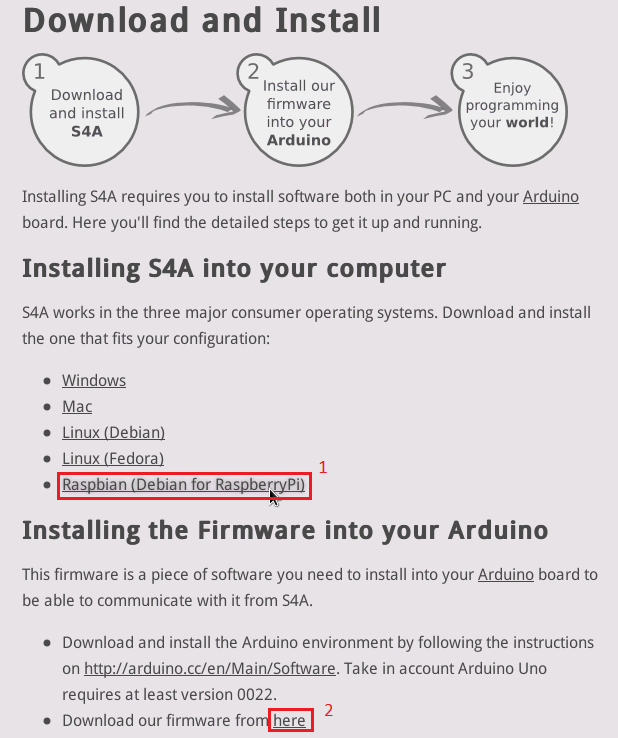
開啟終端機下載 Raspbian (Debian for RaspberryPi)
$ wget http://vps34736.ovh.net/S4A/S4A15_RP.deb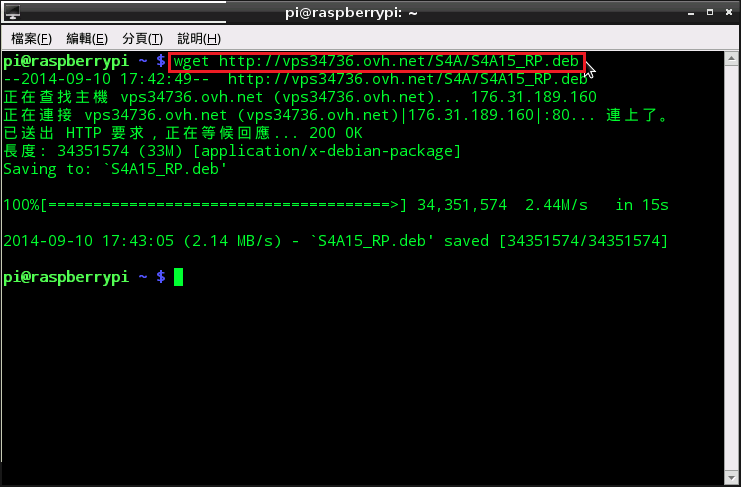
下載 S4A 的 fireware
$ wget http://vps34736.ovh.net/S4A/S4AFirmware15.ino
安裝 Raspbian (Debian for RaspberryPi) 套件
$ sudo dpkg -i S4A15_RP.deb
安裝完成後,可以在功能表中找到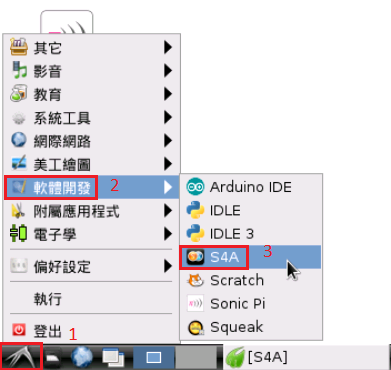
也可以將程式類似捷徑的部分複製到桌面,可以比較方便執行
$ cp /usr/share/applications/s4a.desktop Desktop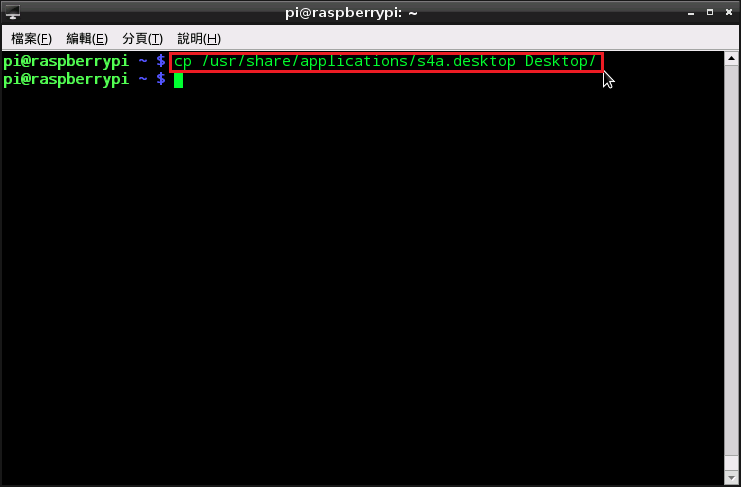
在桌面上可以看到 S4A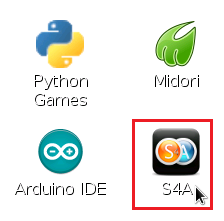
執行 Arduino IDE 開啟 S4A 的 fireware
選擇 檔案 / 開啟
選擇下載下來的 S4A fireware
選擇 上傳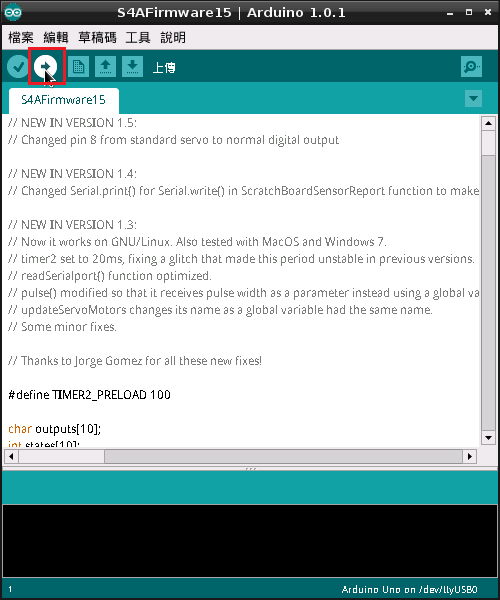
上傳完畢
關閉 Arduino IDE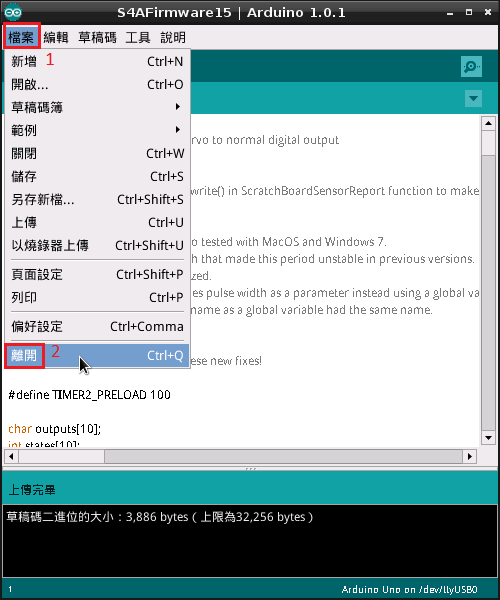
執行 S4A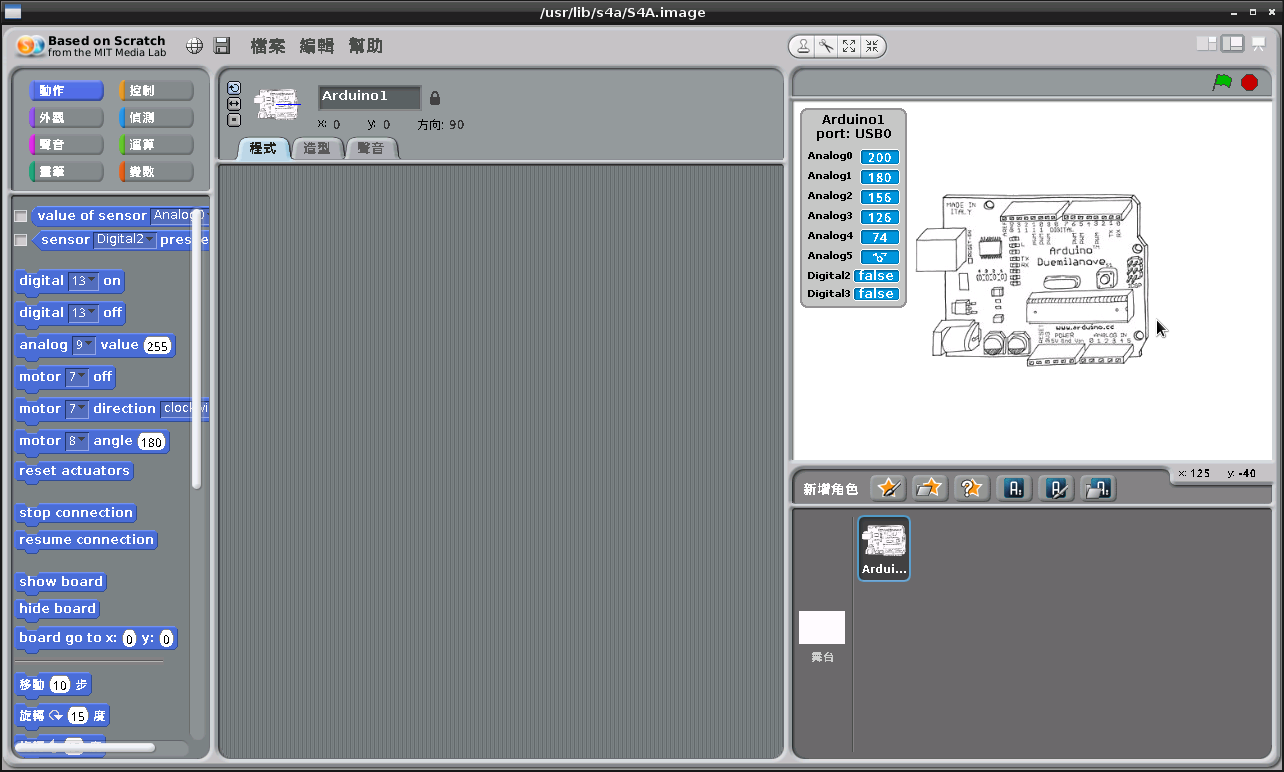
利用 S4A 來寫程式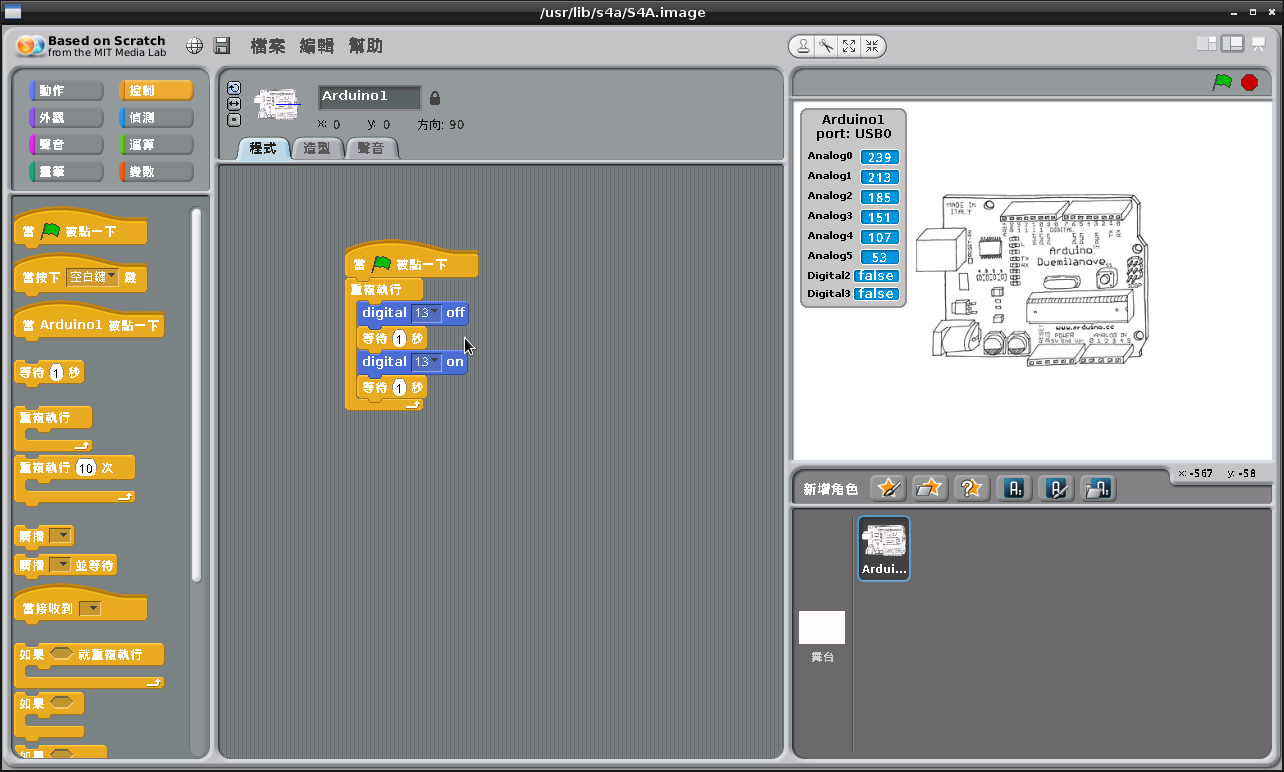
因為借測的 Banana Pi 已經歸還,所以把之前覺得很慢的 Raspberry Pi 又拿出來重新玩了一下,經過一番個人使用環境的調整及超頻之後,覺得速度還在可以接受的範圍。
之後打算用這一片 Raspberry Pi 來練習 Linux Shell Script 和 Arduino,所以安裝 Arduino。
1. 首先將 Arduino 板子連接到 Raspberry Pi
執行 dmesg 查詢連接 Port
$ dmesg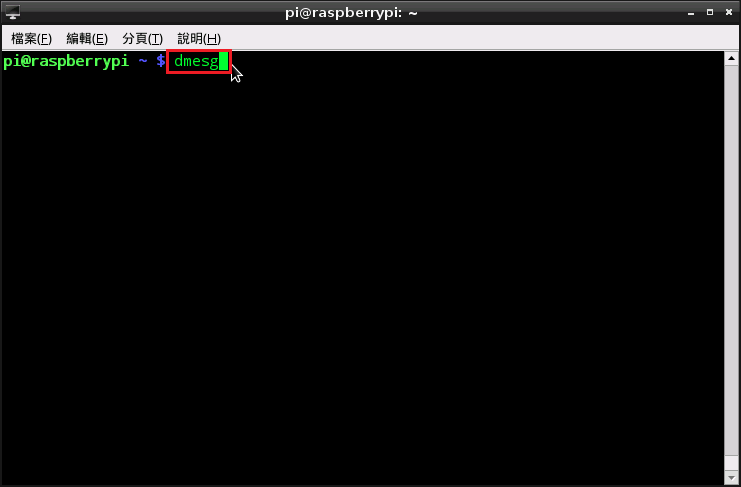 [@more@]
Port 為 /dev/ttyUSB0
安裝 Arduino
$ sudo apt-get install arduino arduino-mk
安裝完畢在功能表中的電子學,可以找到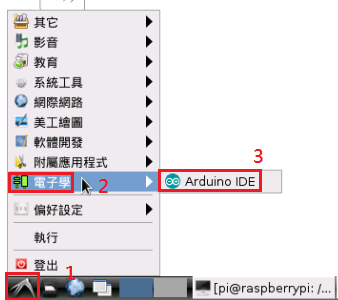
執行 Arduino 後,介面改成 繁體中文畫面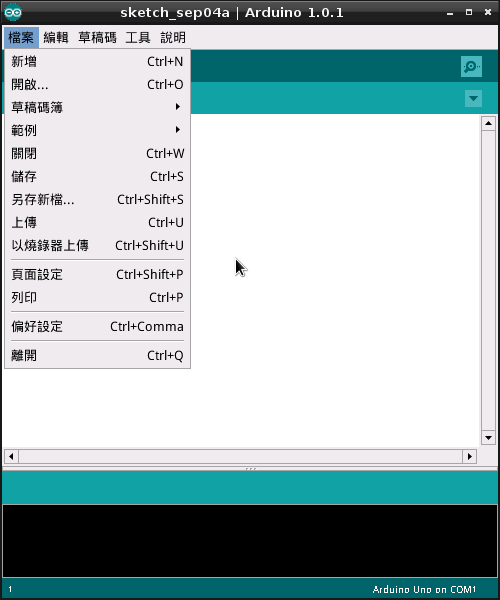
不過版本有些舊,還是 1.0.1 版
設定與 Arduino 的連線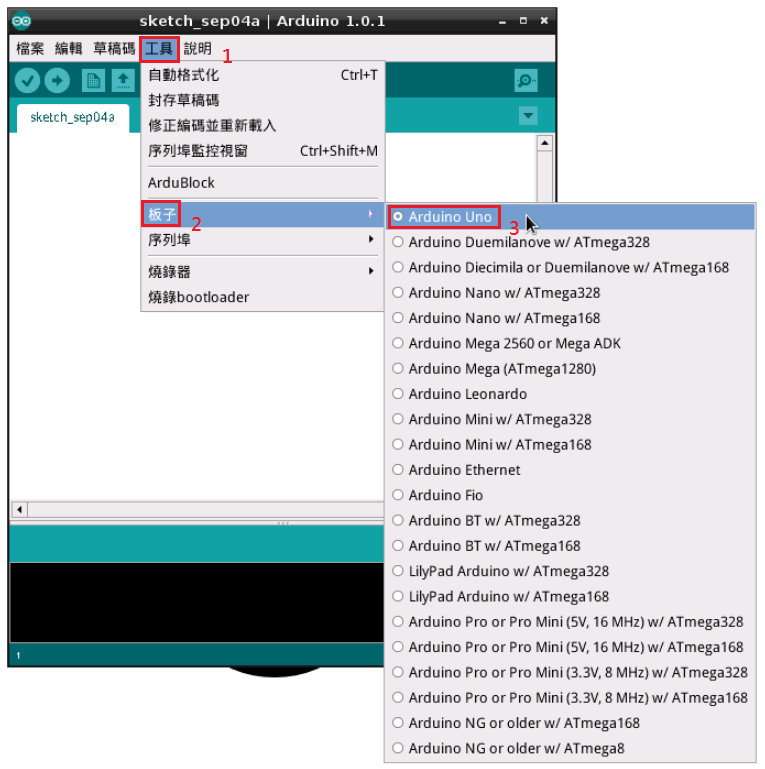

加上 ArduBlock
建立目錄
$ sudo mkdir -p /usr/share/arduino/tools/ArduBlockTool/tool
切換目錄
$ cd /usr/share/arduino/tools/ArduBlockTool/tool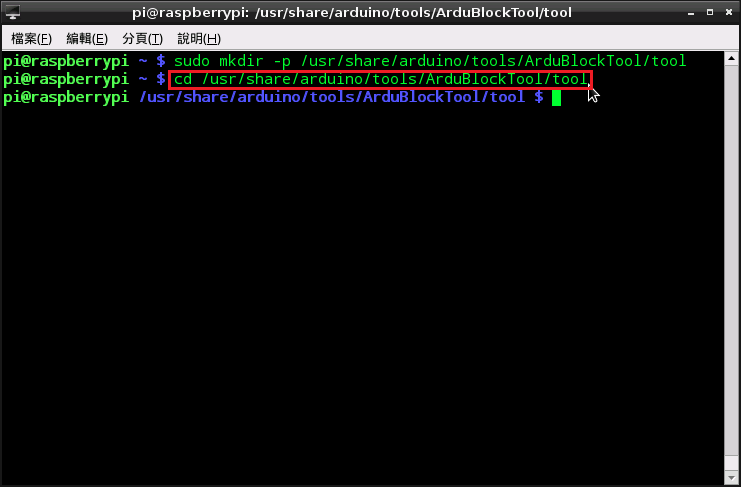
下載 ArduBlock
$ sudo wget http://sourceforge.net/projects/ardublock/files/ardublock-beta-20140828.jar
重新執行 Arduino 後可以 工具 功能表下找到 ArduBlock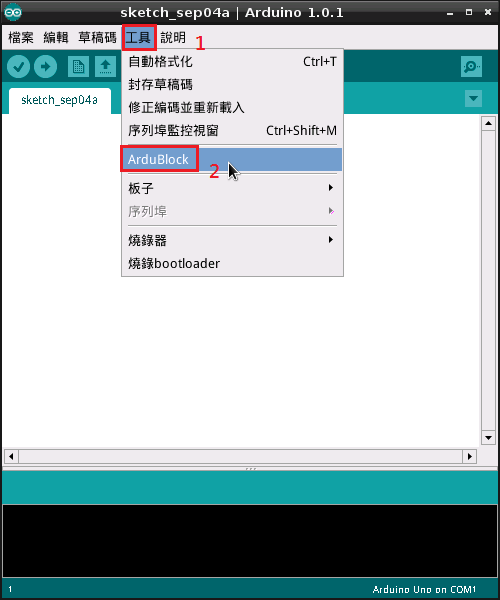
ArduBlock 執行畫面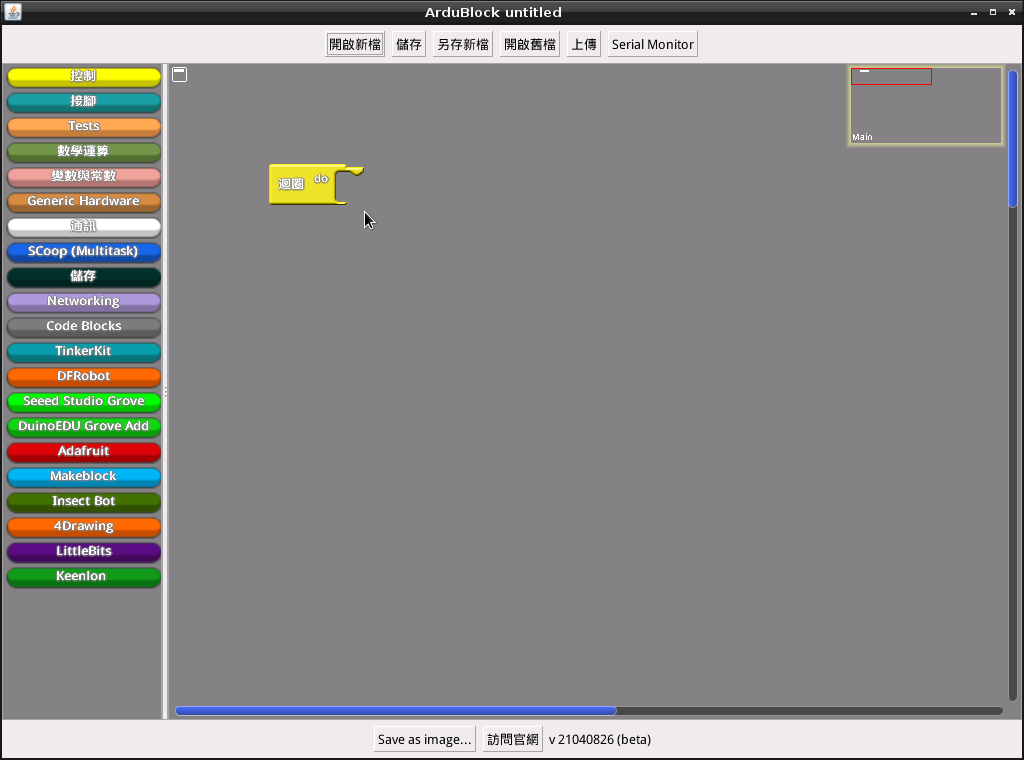
Kali Linux 是一套 base Debian 的 Linux,被設計用於數位取證和滲透測試,對於 Kali Linux 大家可能比較陌生,但它的前身可是大大有名的 BackTrack。
Kali Linux 官方網站:http://www.kali.org/
Kali Linux 的 Raspberry Pi Image 下載:http://www.offensive-security.com/kali-linux-vmware-arm-image-download/ [@more@]啟動 Raspberry Pi 後畫面
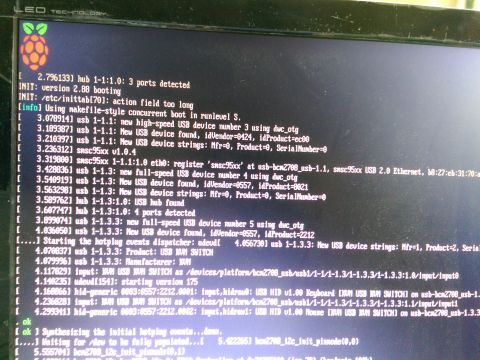
輸入登入的帳號/密碼:root/toor
執行 startx 進入桌面環境
選擇 Use default config 設定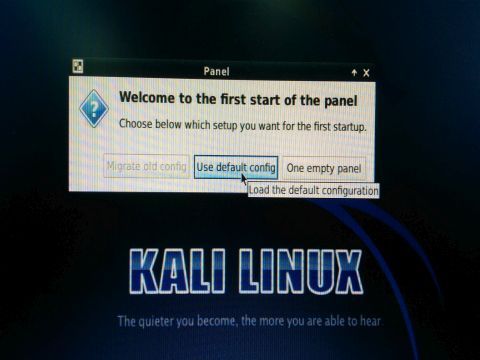
Kali Linux 桌面
是採用 xfce 為預設的桌面環境
做一些簡單的使用上調整
安裝套件
# apt-get install vim mlocate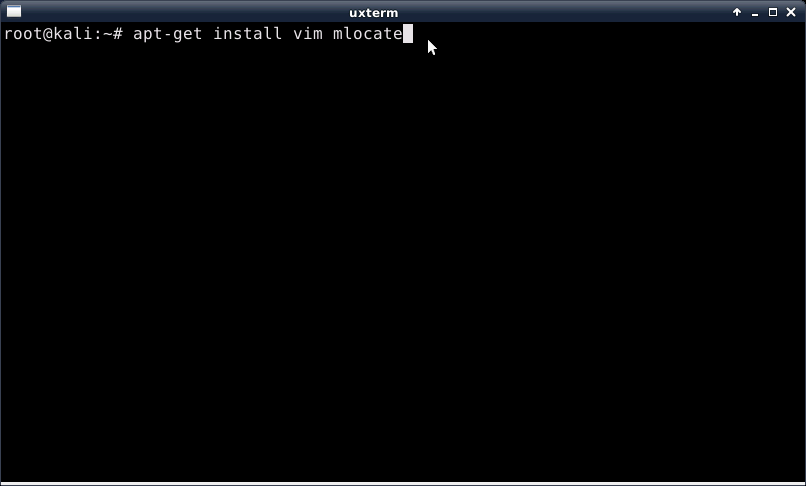
修改 .bashrc 設定
# vim $HOME/.bashrc
# You may uncomment the following lines if you want `ls’ to be colorized:
export LS_OPTIONS=’–color=auto’
eval “`dircolors`”
alias ls=’ls $LS_OPTIONS’
# alias ll=’ls $LS_OPTIONS -l’
# alias l=’ls $LS_OPTIONS -lA’
#
# Some more alias to avoid making mistakes:
alias rm=’rm -i’
alias cp=’cp -i’
alias mv=’mv -i’
alias cls=’clear’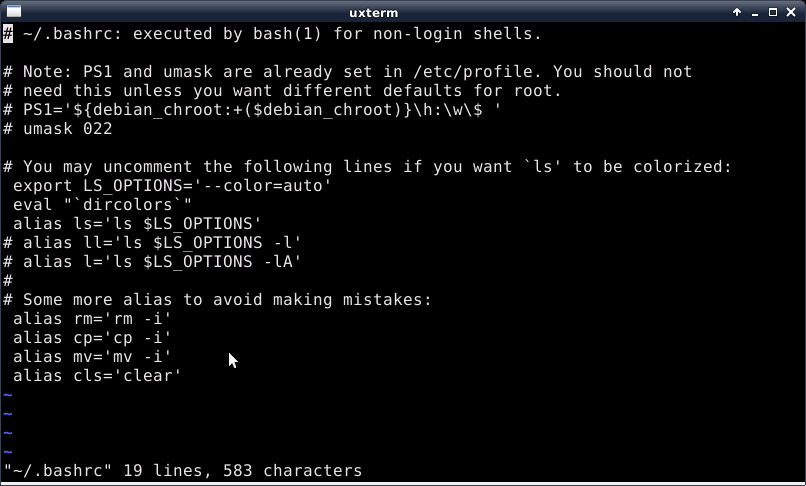
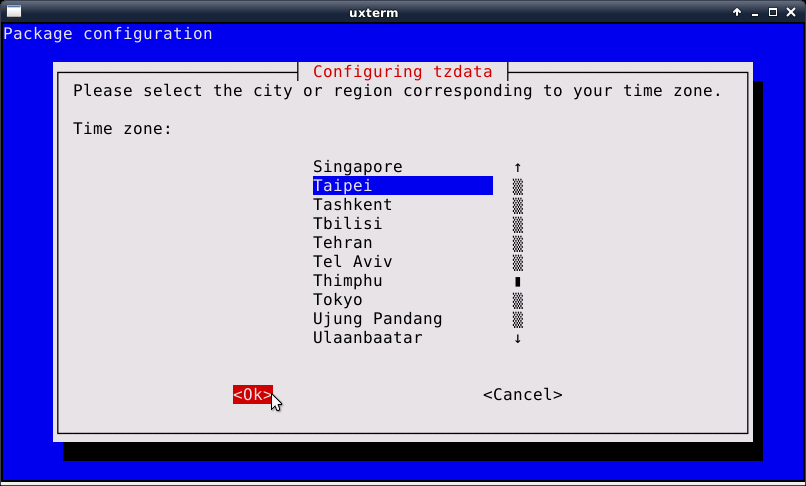
時區設定
# dpkg-reconfigure tzdata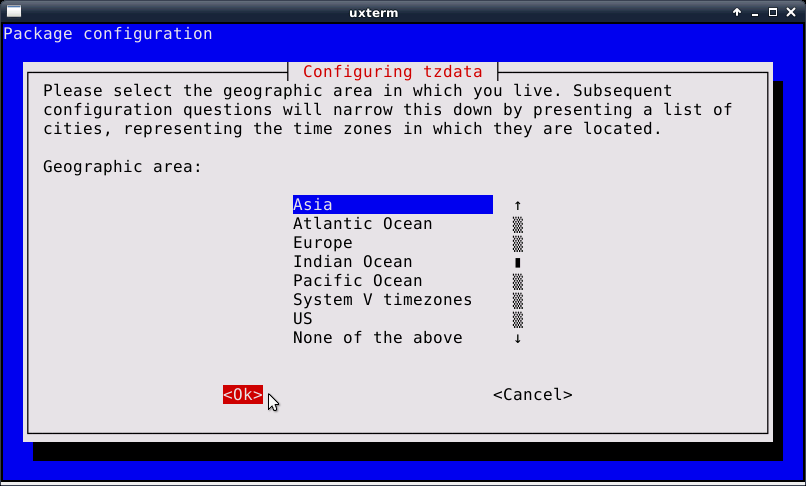

之前有在 BackTrack 上使用過 metasploit,現在大概都忘光了!不過我發現這個版本似乎沒有把一些工具都放在功能表中。
# apt-cache search metasploit
armitage – Cyber attack management for Metasploit
framework2 – Metasploit Framework 2
hexorbase – Multiple database management and audit application
metasploit-framework – Framework for exploit development and vulnerability research
recon-ng – Web Reconnaissance framework written in Python
ruby-msfrpc-client – Ruby API for the Rapid7 Metasploit Pro RPC service
sandi – Exploit search engine
sqlninja – SQL server injection and takeover tool
teamsploit – Tools for group based penetration testing
w3af – framework to find and exploit web application vulnerabilities
w3af-console – framework to find and exploit web application vulnerabilities (CLI only)
metasploit – Penetration testing and exploit development tool with web-based interface
因為測試系統的需要,所以手動 Mirror Banana Pi & Raspberry Pi Image 在學校的 Server。
Banana Pi Image 下載:http://www.lemaker.org/resources/9-38/image_files.html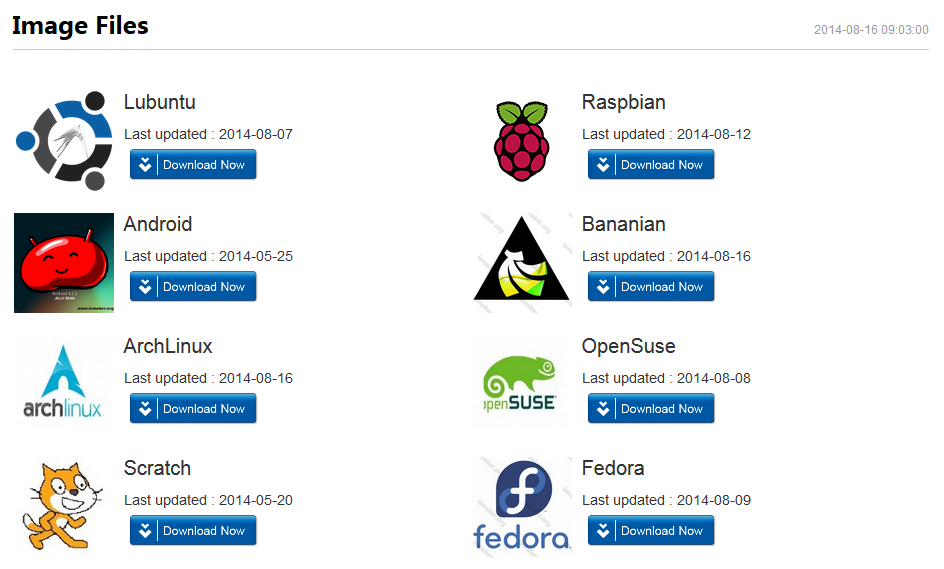
學校:
ftp://140.111.74.109/BananaPi
[@more@]
Raspberry Pi Image 下載:http://www.raspberrypi.org/downloads/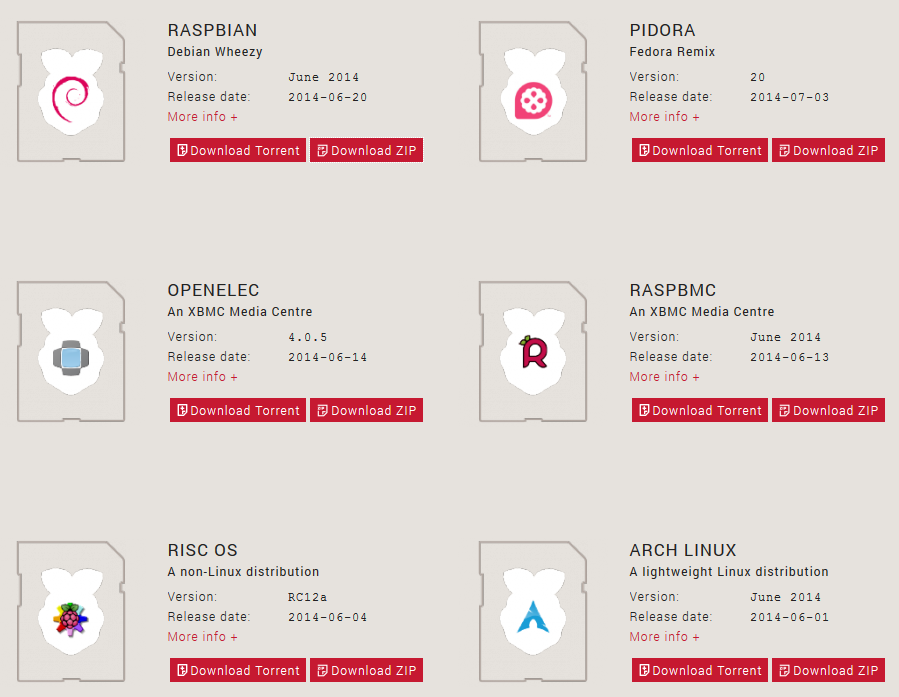
剛安裝完的 Pidora 介面是英文的,底下把它改成中文的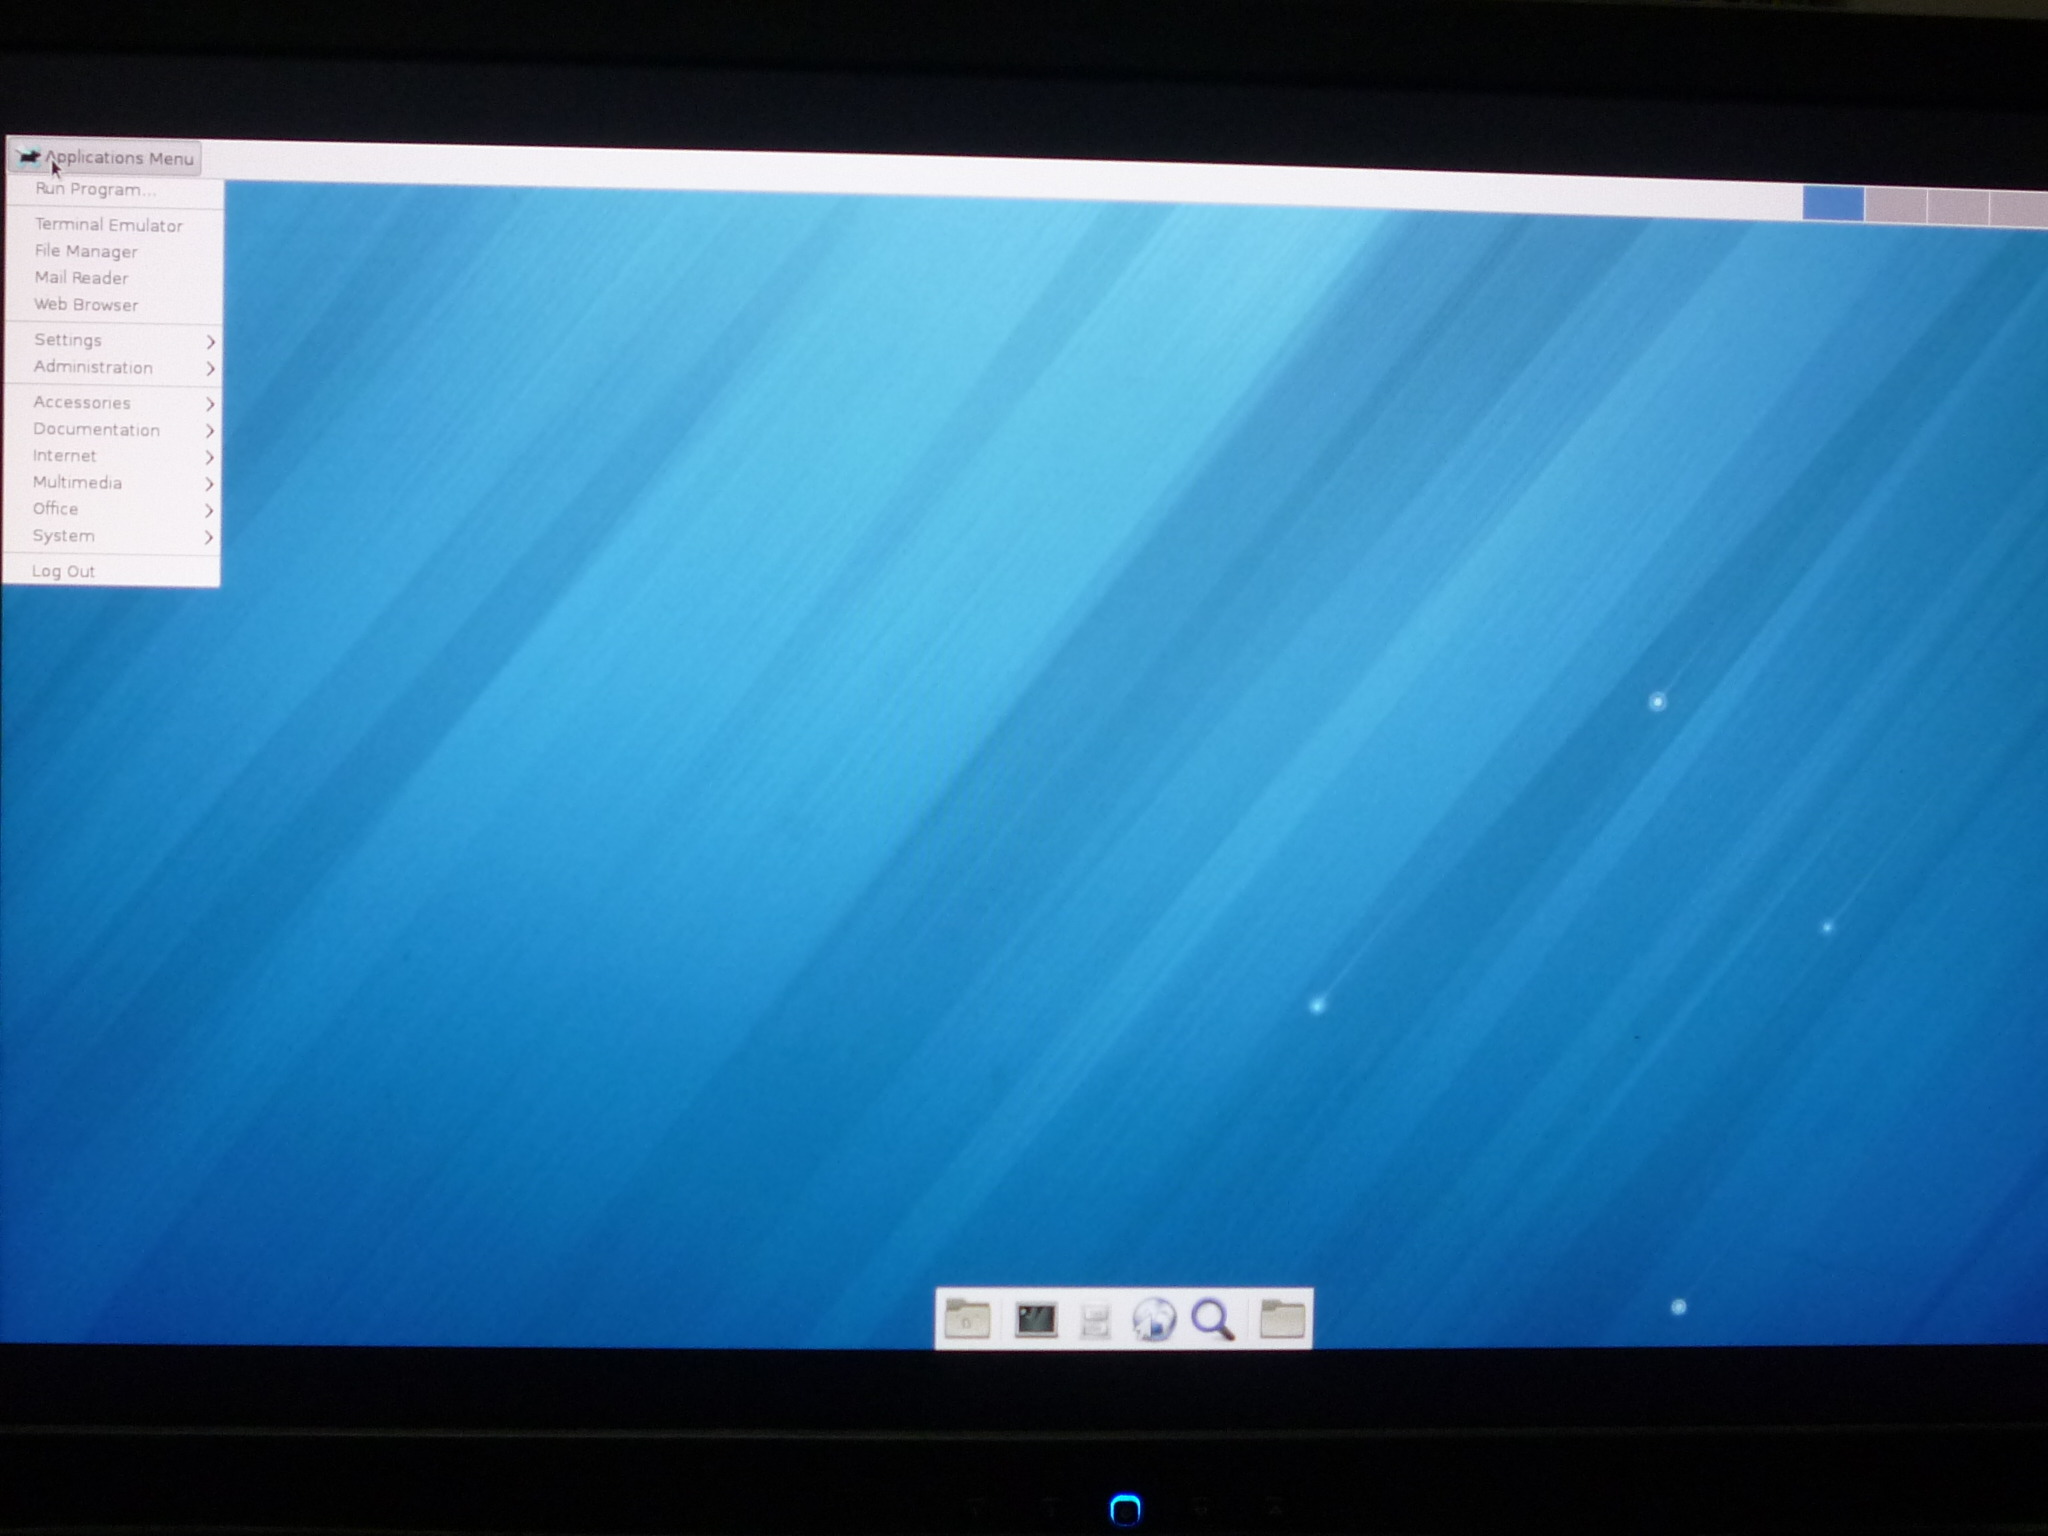 [@more@]
1. 安裝中文字形
# yum install cjkuni-ukai-fonts cjkuni-uming-fonts taipeifonts wqy-bitmap-fonts wqy-microhei-fonts
2. 安裝中文輸入法 gcin 或 scim
# yum install gcin
或
# yum install scim scim-tables scim-tables-chinese scim-tables-chinese-extra scim-array scim-chewing
3. 修改中文環境設定
# vi /etc/sysconfig/i18n
把
LANG=”en_US.UTF-8″
改成
LANG=”zh_TW.UTF-8″
4. 重新開機
功能表已改成中文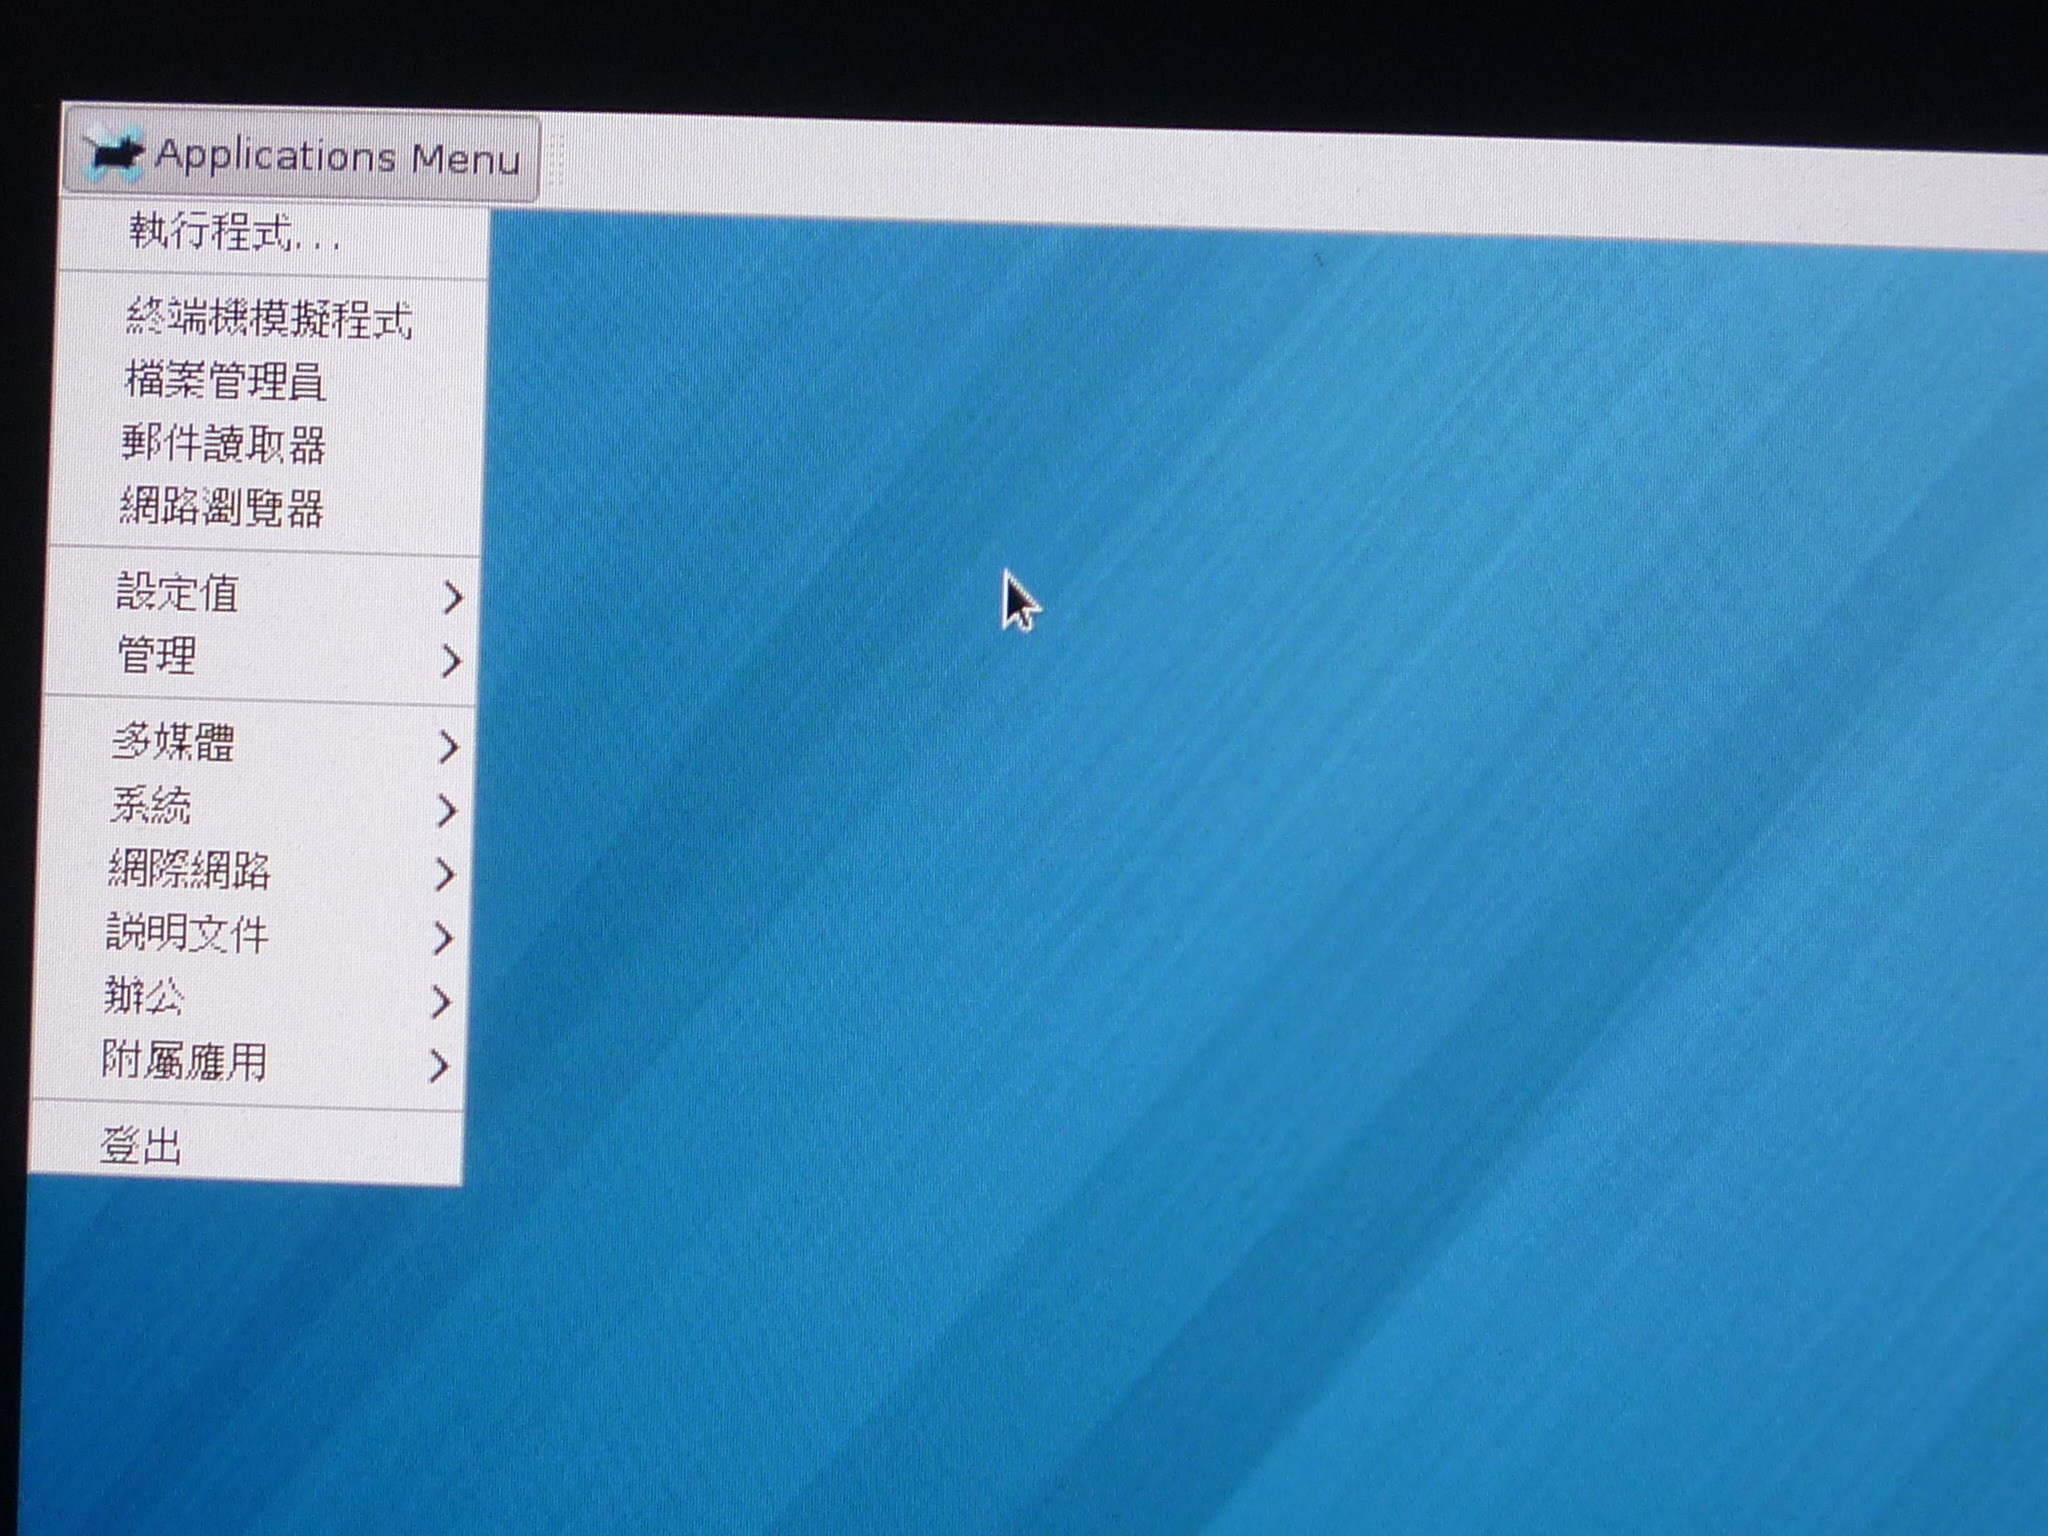
瀏覽中文網頁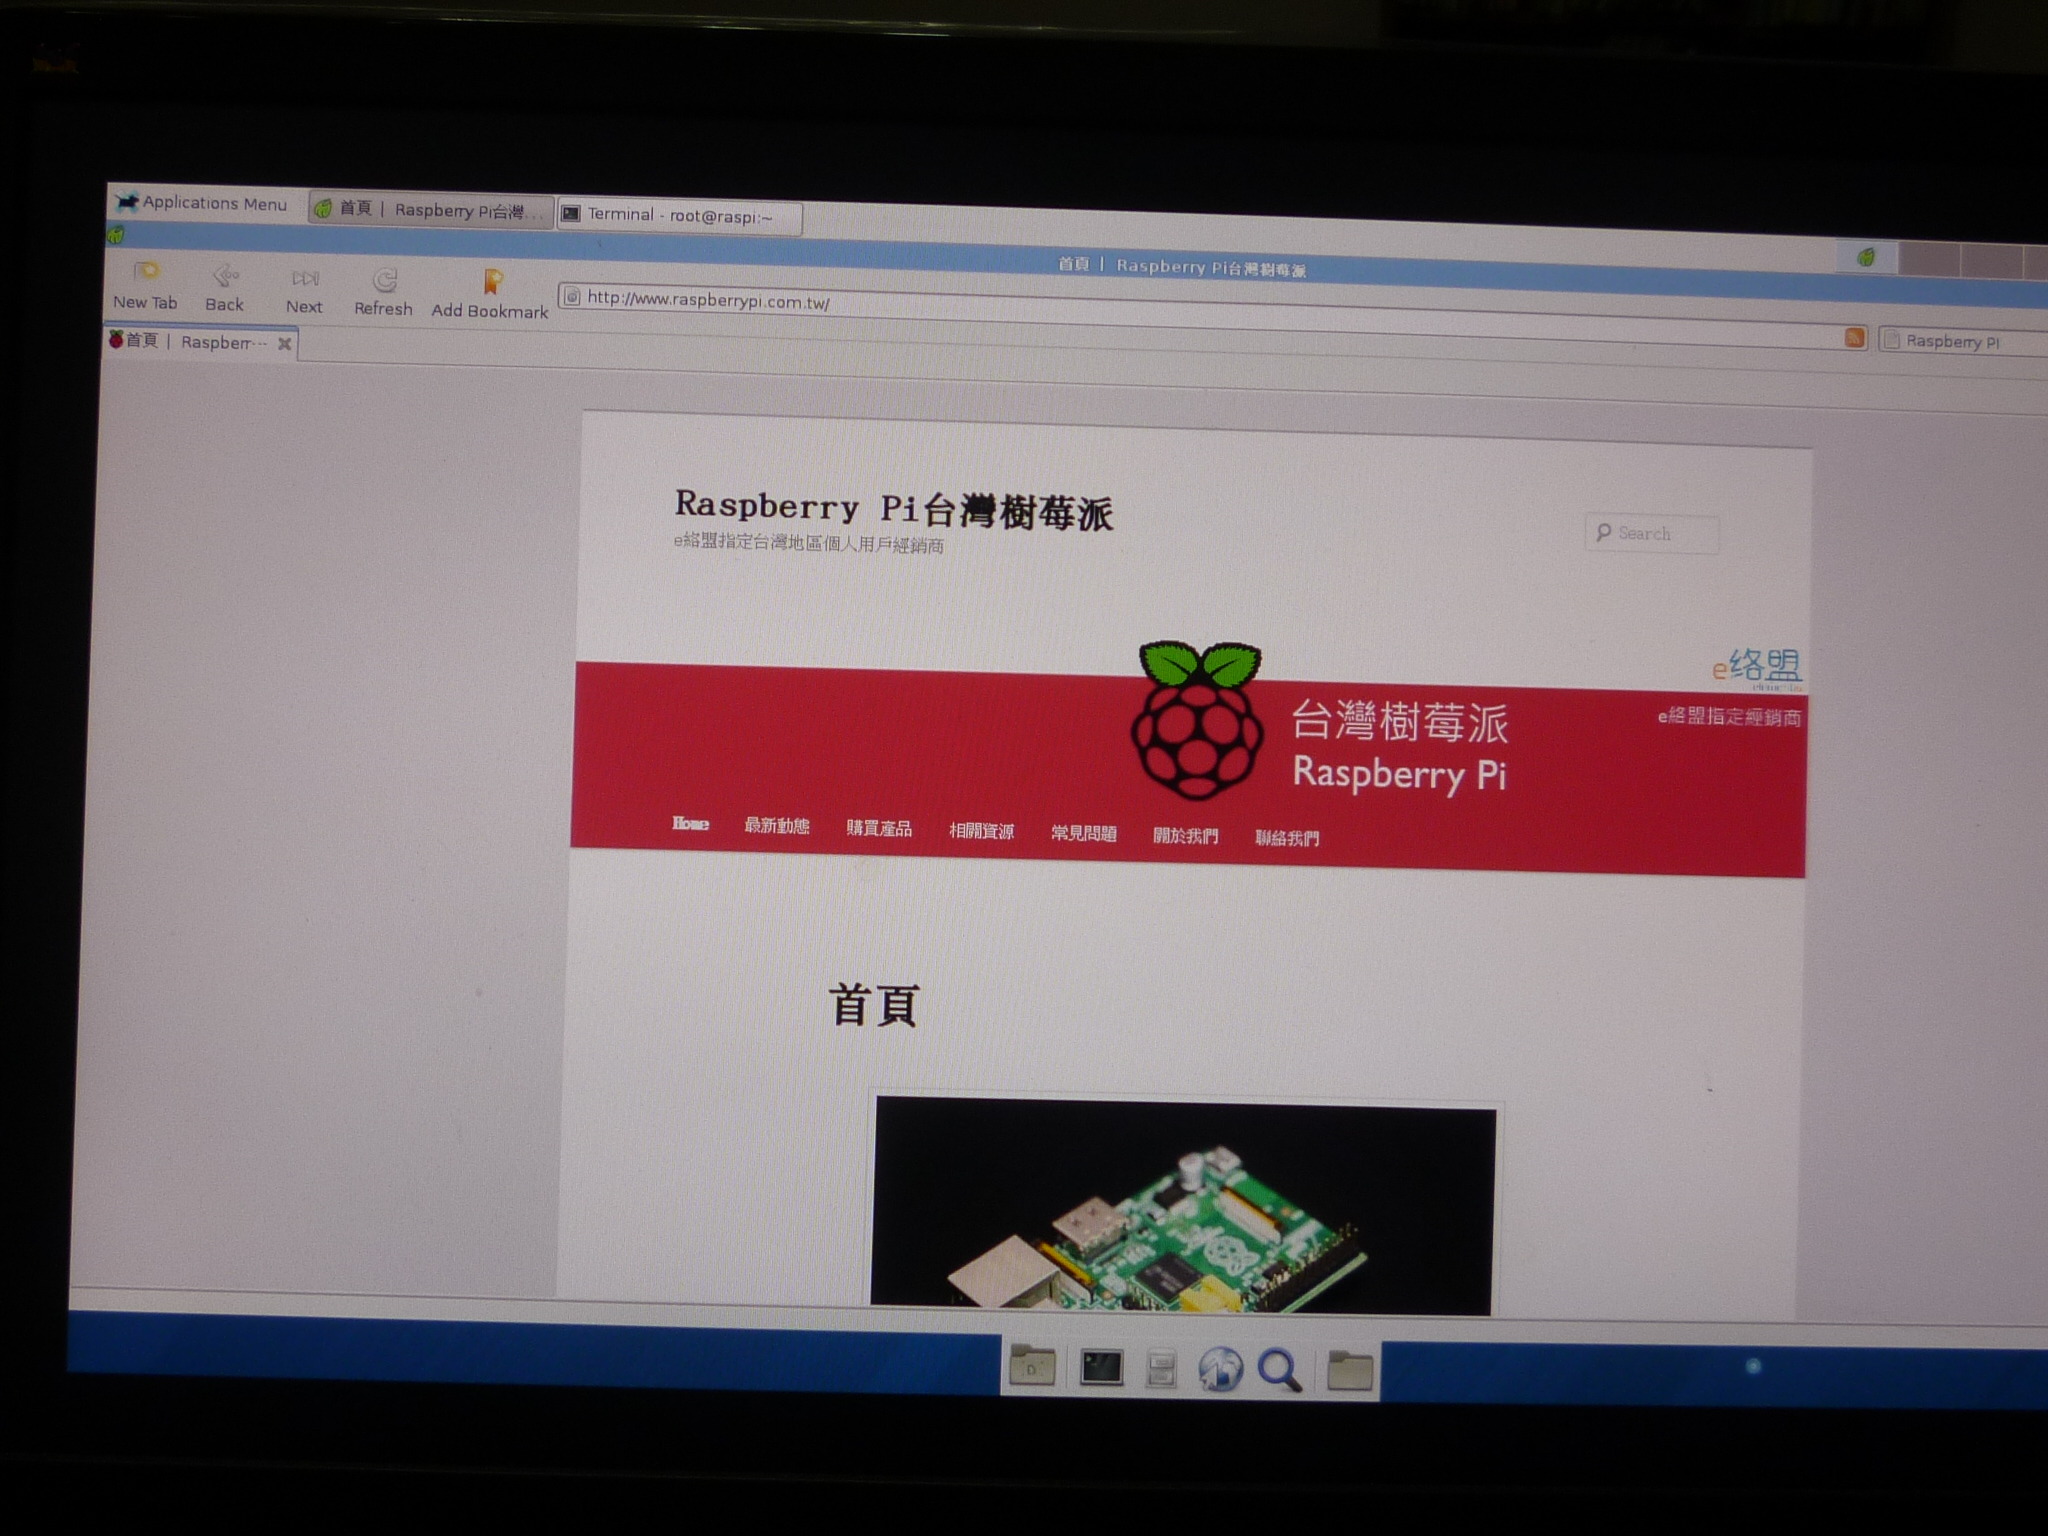
gcin 中文設定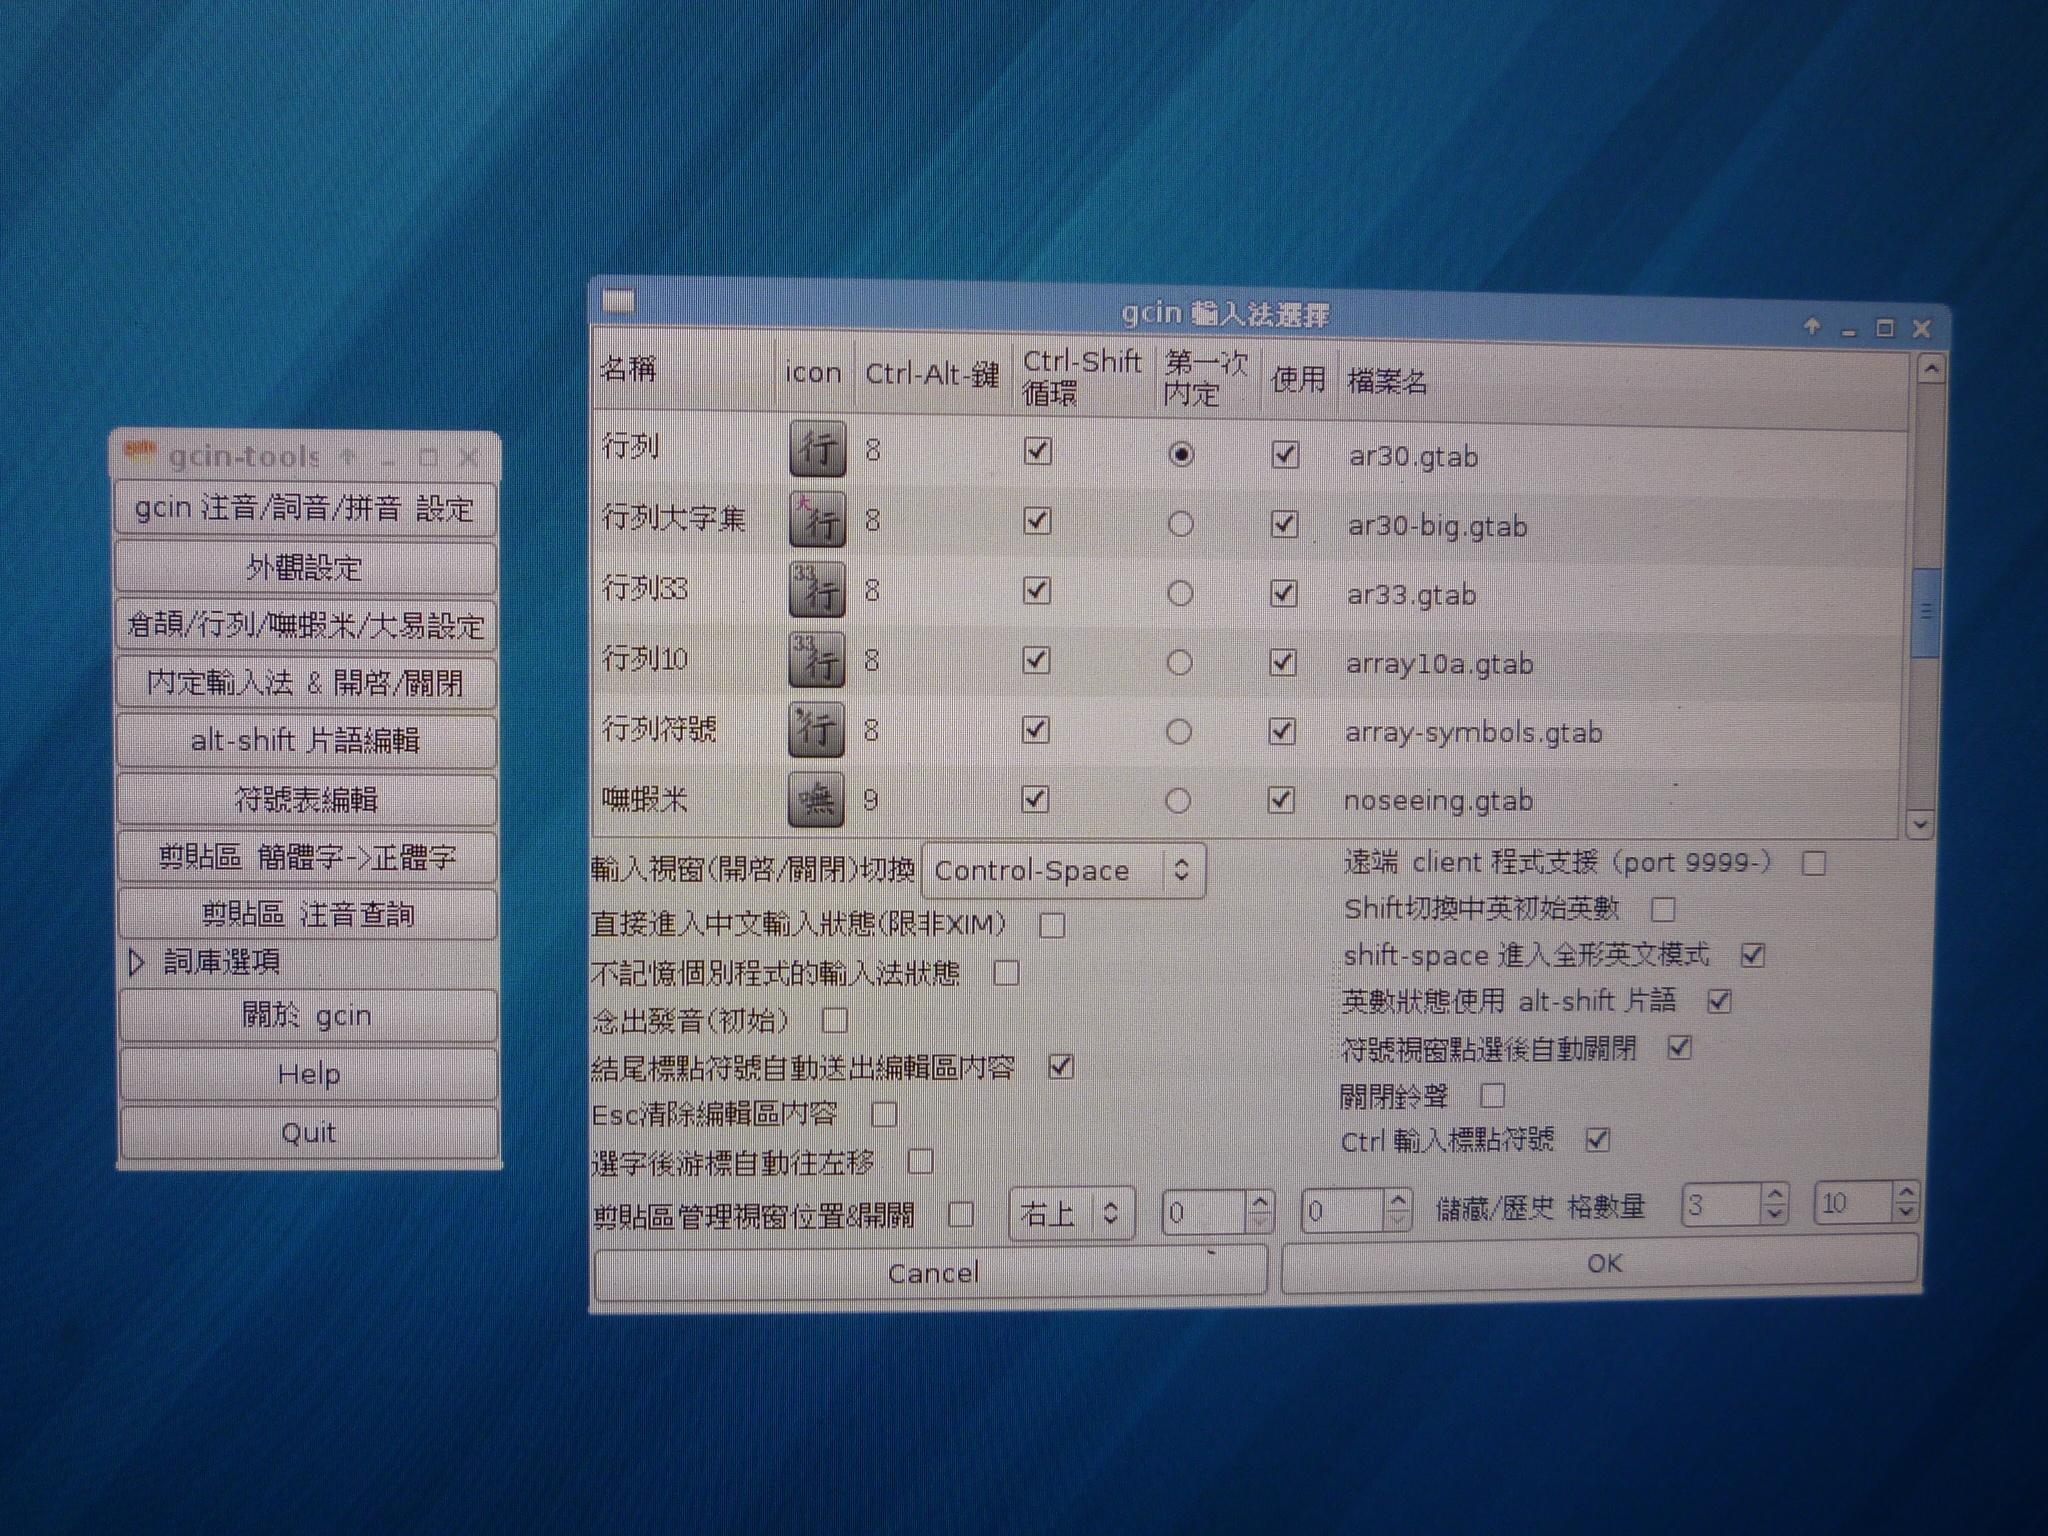
Raspberry PI 上的 Pedora 安裝完成後第一次更新,就要更新 3xx 個套件,更新完畢後,出現下面的錯誤訊息
Failed:
lightdm.armv6hl 0:1.4.0-2.fc18 mdadm.armv6hl 0:3.2.6-1.fc18
openssh-server.armv6hl 0:6.1p1-6.fc18 raspberrypi-kernel.armv6hl 0:3.6.11-7.20130415git197d15b.rpfr18
看起來有 4 個套件更新失敗[@more@]經過檢查發現,這 4 個套件都有重複安裝的問題,所以要把多餘的套件移除
# rpm -qa | grep lightdm
lightdm-1.4.0-2.fc18.armv6hl
lightdm-gtk-1.3.1-4.fc18.armv6hl
lightdm-1.4.1-3.fc18.1307170533kf.armv6hl
lightdm-gobject-1.4.1-3.fc18.1307170533kf.armv6hl
# yum remove lightdm-1.4.1-3.fc18.1307170533kf.armv6hl
# rpm -qa | grep openssh-server
openssh-server-6.1p1-9.fc18.armv6hl
openssh-server-6.1p1-6.fc18.armv6hl
# yum remove openssh-server-6.1p1-9.fc18.armv6hl
# rpm -qa | grep mdadm
mdadm-3.2.6-21.fc18.armv6hl
mdadm-3.2.6-1.fc18.armv6hl
# yum remove mdadm-3.2.6-21.fc18.armv6hl
# rpm -qa | grep raspberrypi-kernel
raspberrypi-kernel-headers-3.12.0-4.20131106git839f349.rpfr18.armv6hl
raspberrypi-kernel-3.6.11-7.20130415git197d15b.rpfr18.armv6hl
raspberrypi-kernel-3.12.0-4.20131106git839f349.rpfr18.armv6hl
# yum remove raspberrypi-kernel-3.12.0-4.20131106git839f349.rpfr18.armv6hl
不過重新更新之後,這 4 個套件又會跑出來,所以只能在 /etc/yum.conf 中先排除這些套件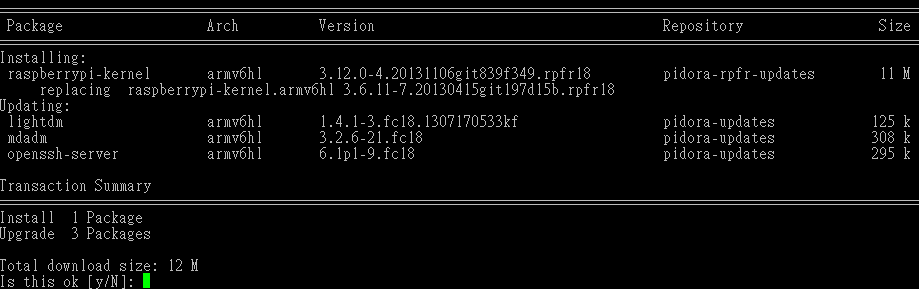
不知道是我操作上的問題,還是 Pidora 的套件庫有問題?
感謝佛光大學惠美老師提供一片 Raspberry Pi 測試,一般大家在介紹 Raspberry Pi 時,作業系統大都是安裝 Raspbian,但因為它是 base on Debian,而且桌面環境是使用 LXDE,操作起來總是覺得介面不是很美觀,功能表上的項目又太多了,所以改安裝 Pidora。
Pidora 是一套 base on Fedora 的 Linux 系統,和 Raspbian 一樣經過一番最佳化,底下是安裝的步驟。
1. 到 Raspberry Pi 官方網站下載 Pidora
http://www.raspberrypi.org/downloads [@more@]2. 下載完畢要使用 win32diskimager 把映像檔寫入到 SDHC 卡
3. 開機之後要進入設定的畫面
歡迎畫面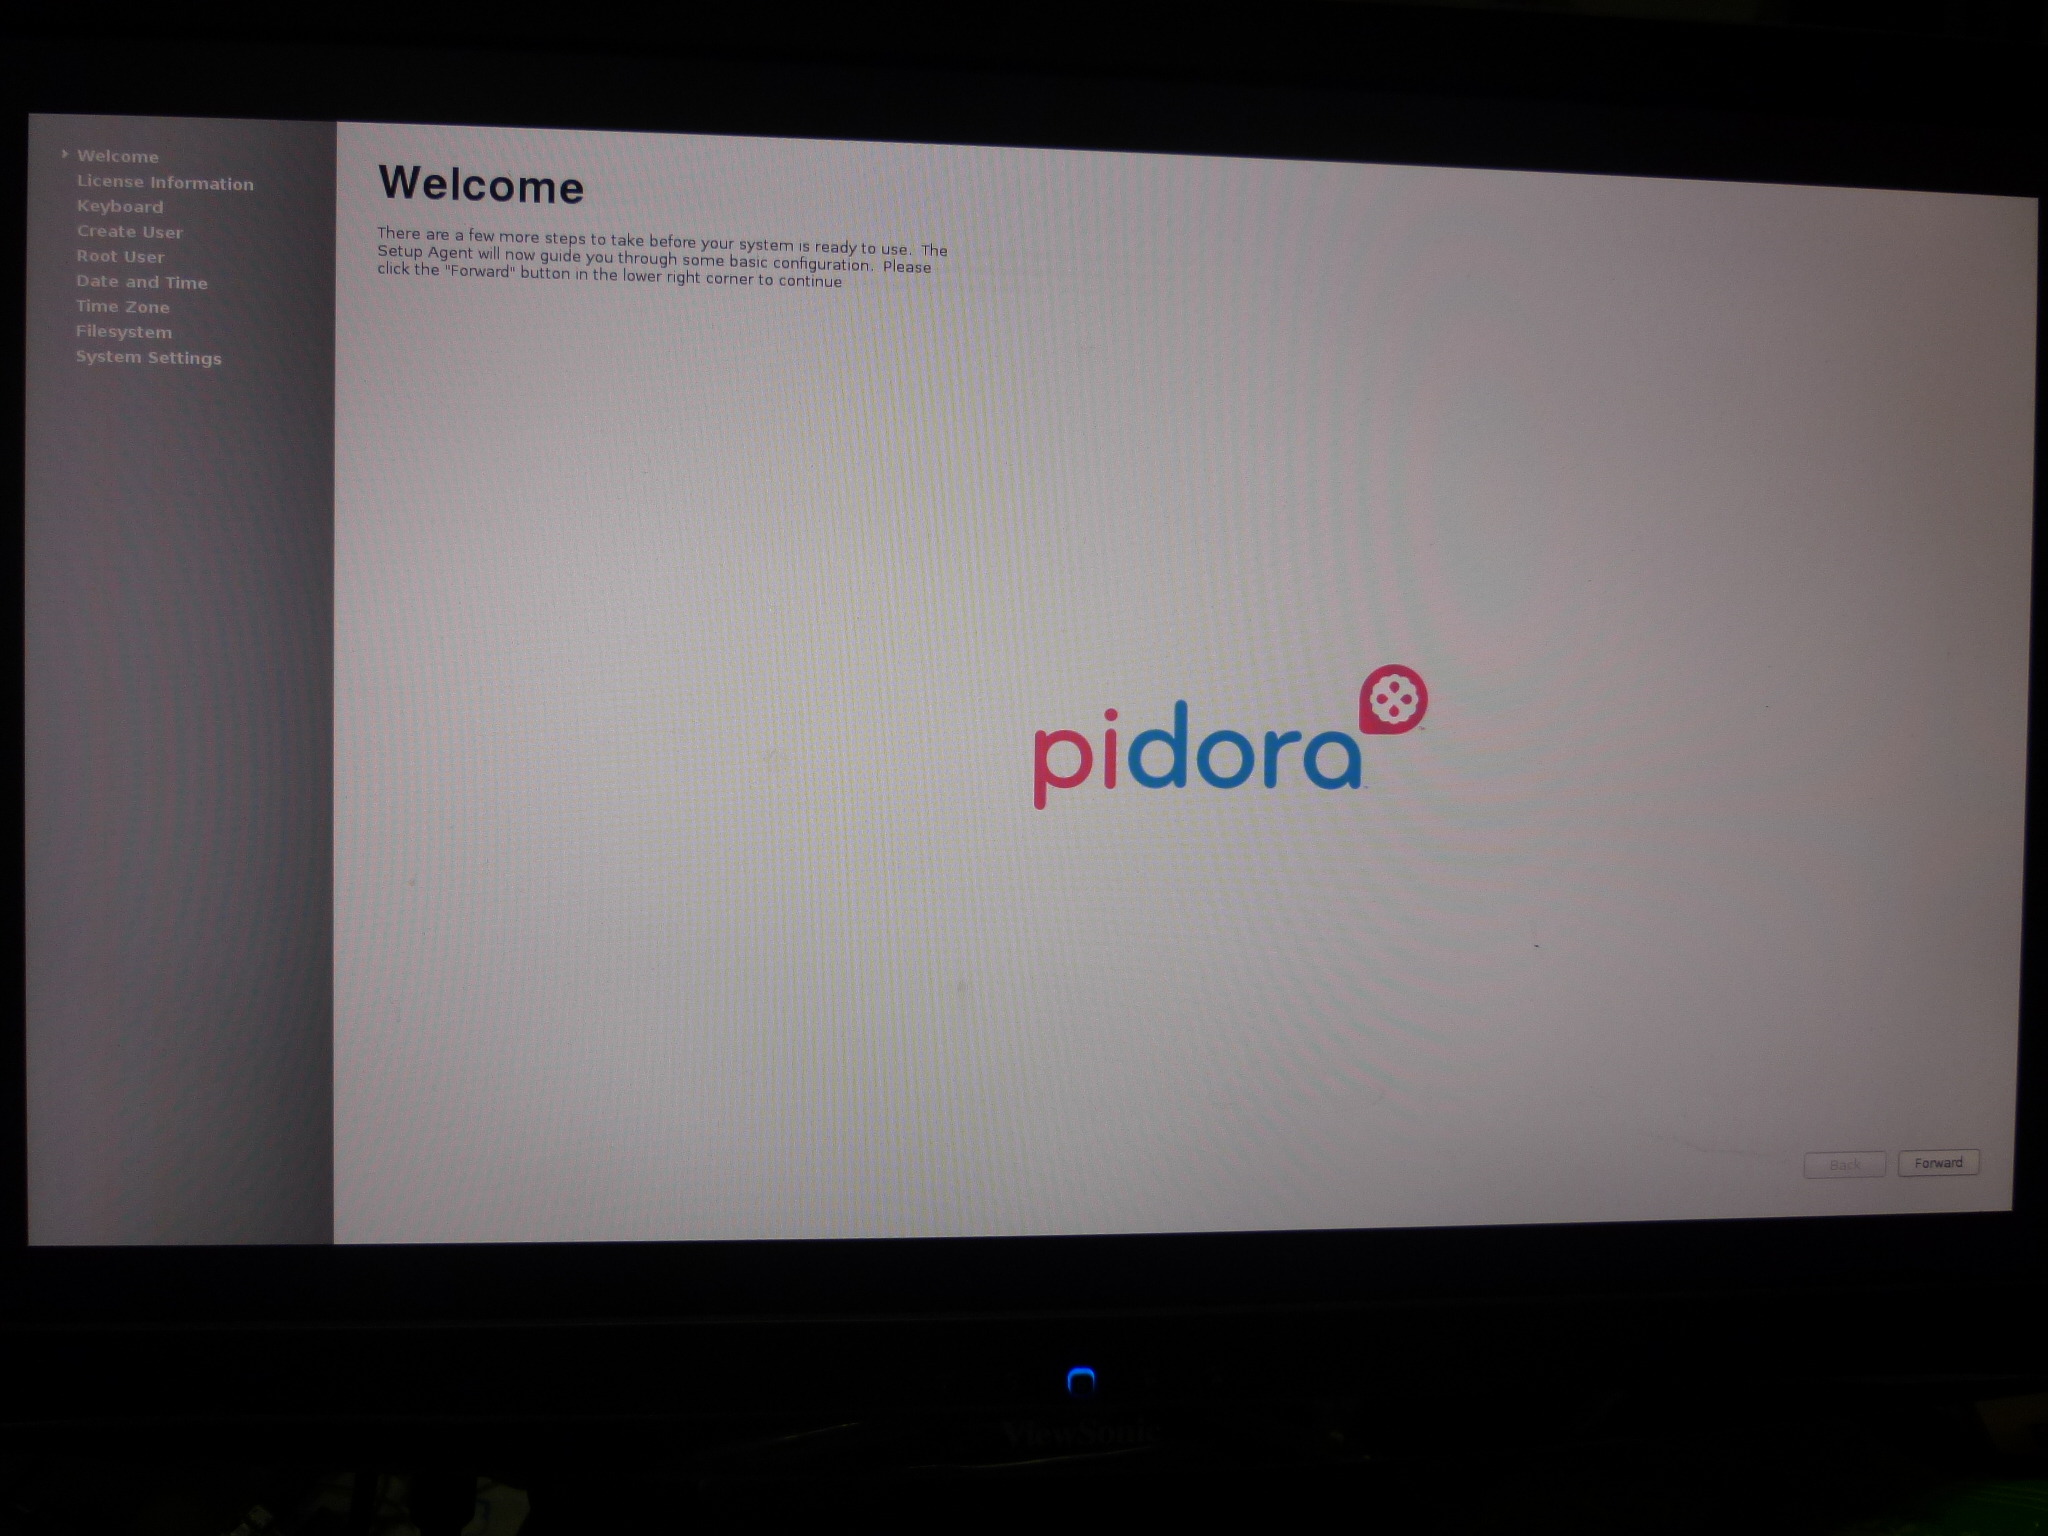
4. 授權資訊
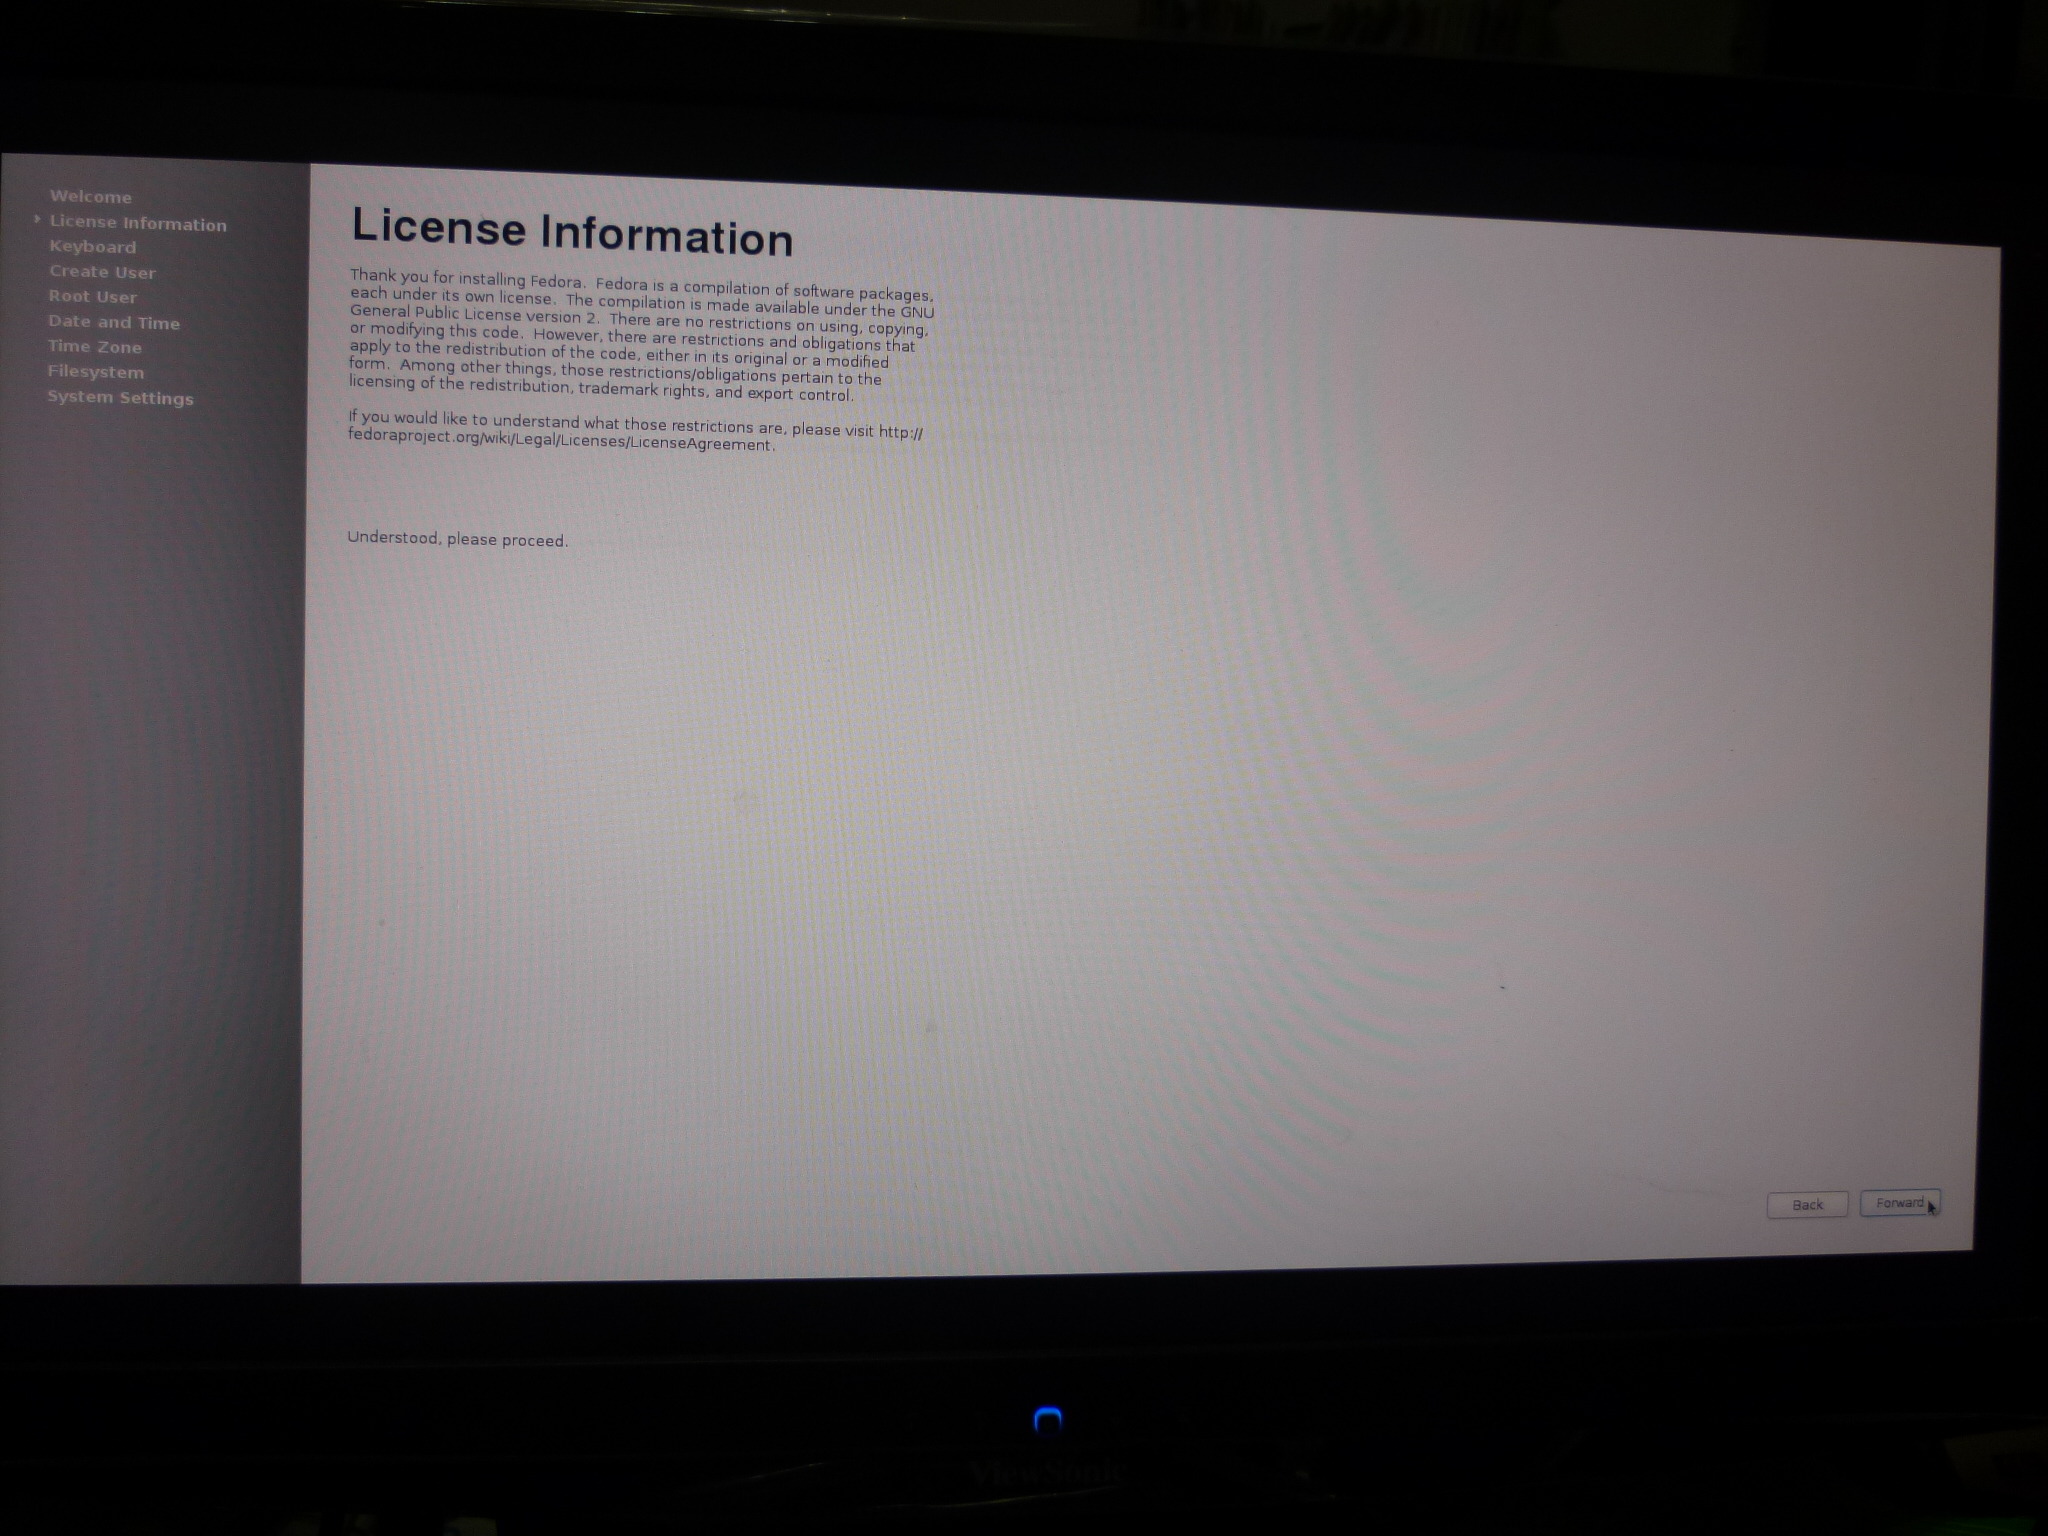
5.選擇鍵盤的型式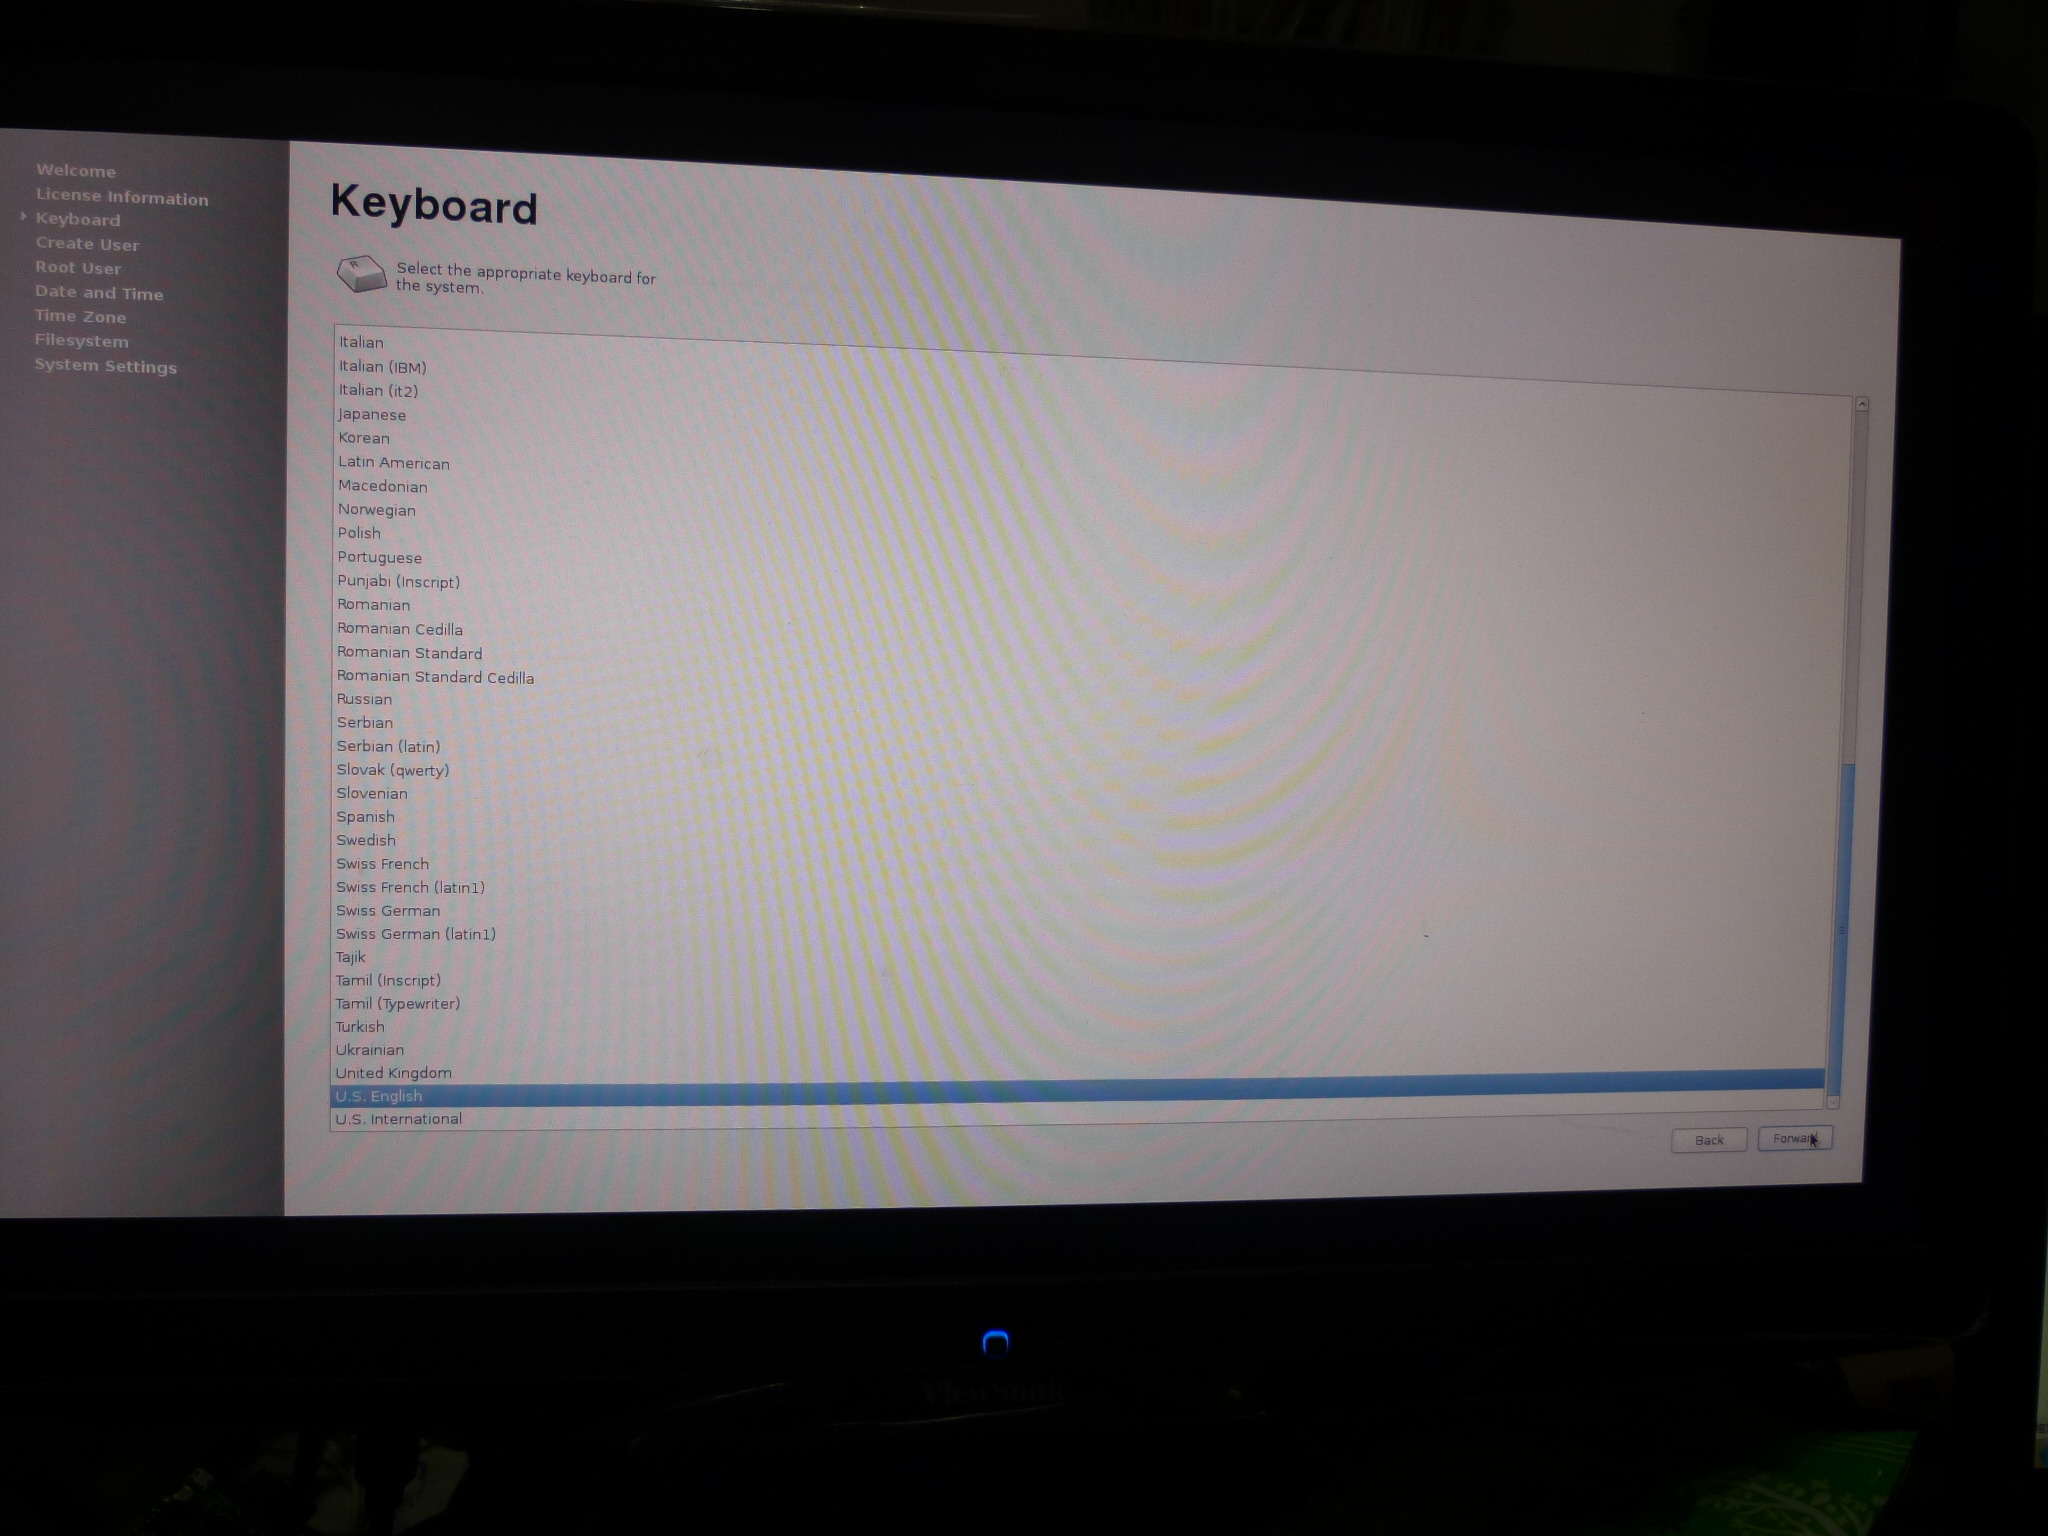
6. 建立使用者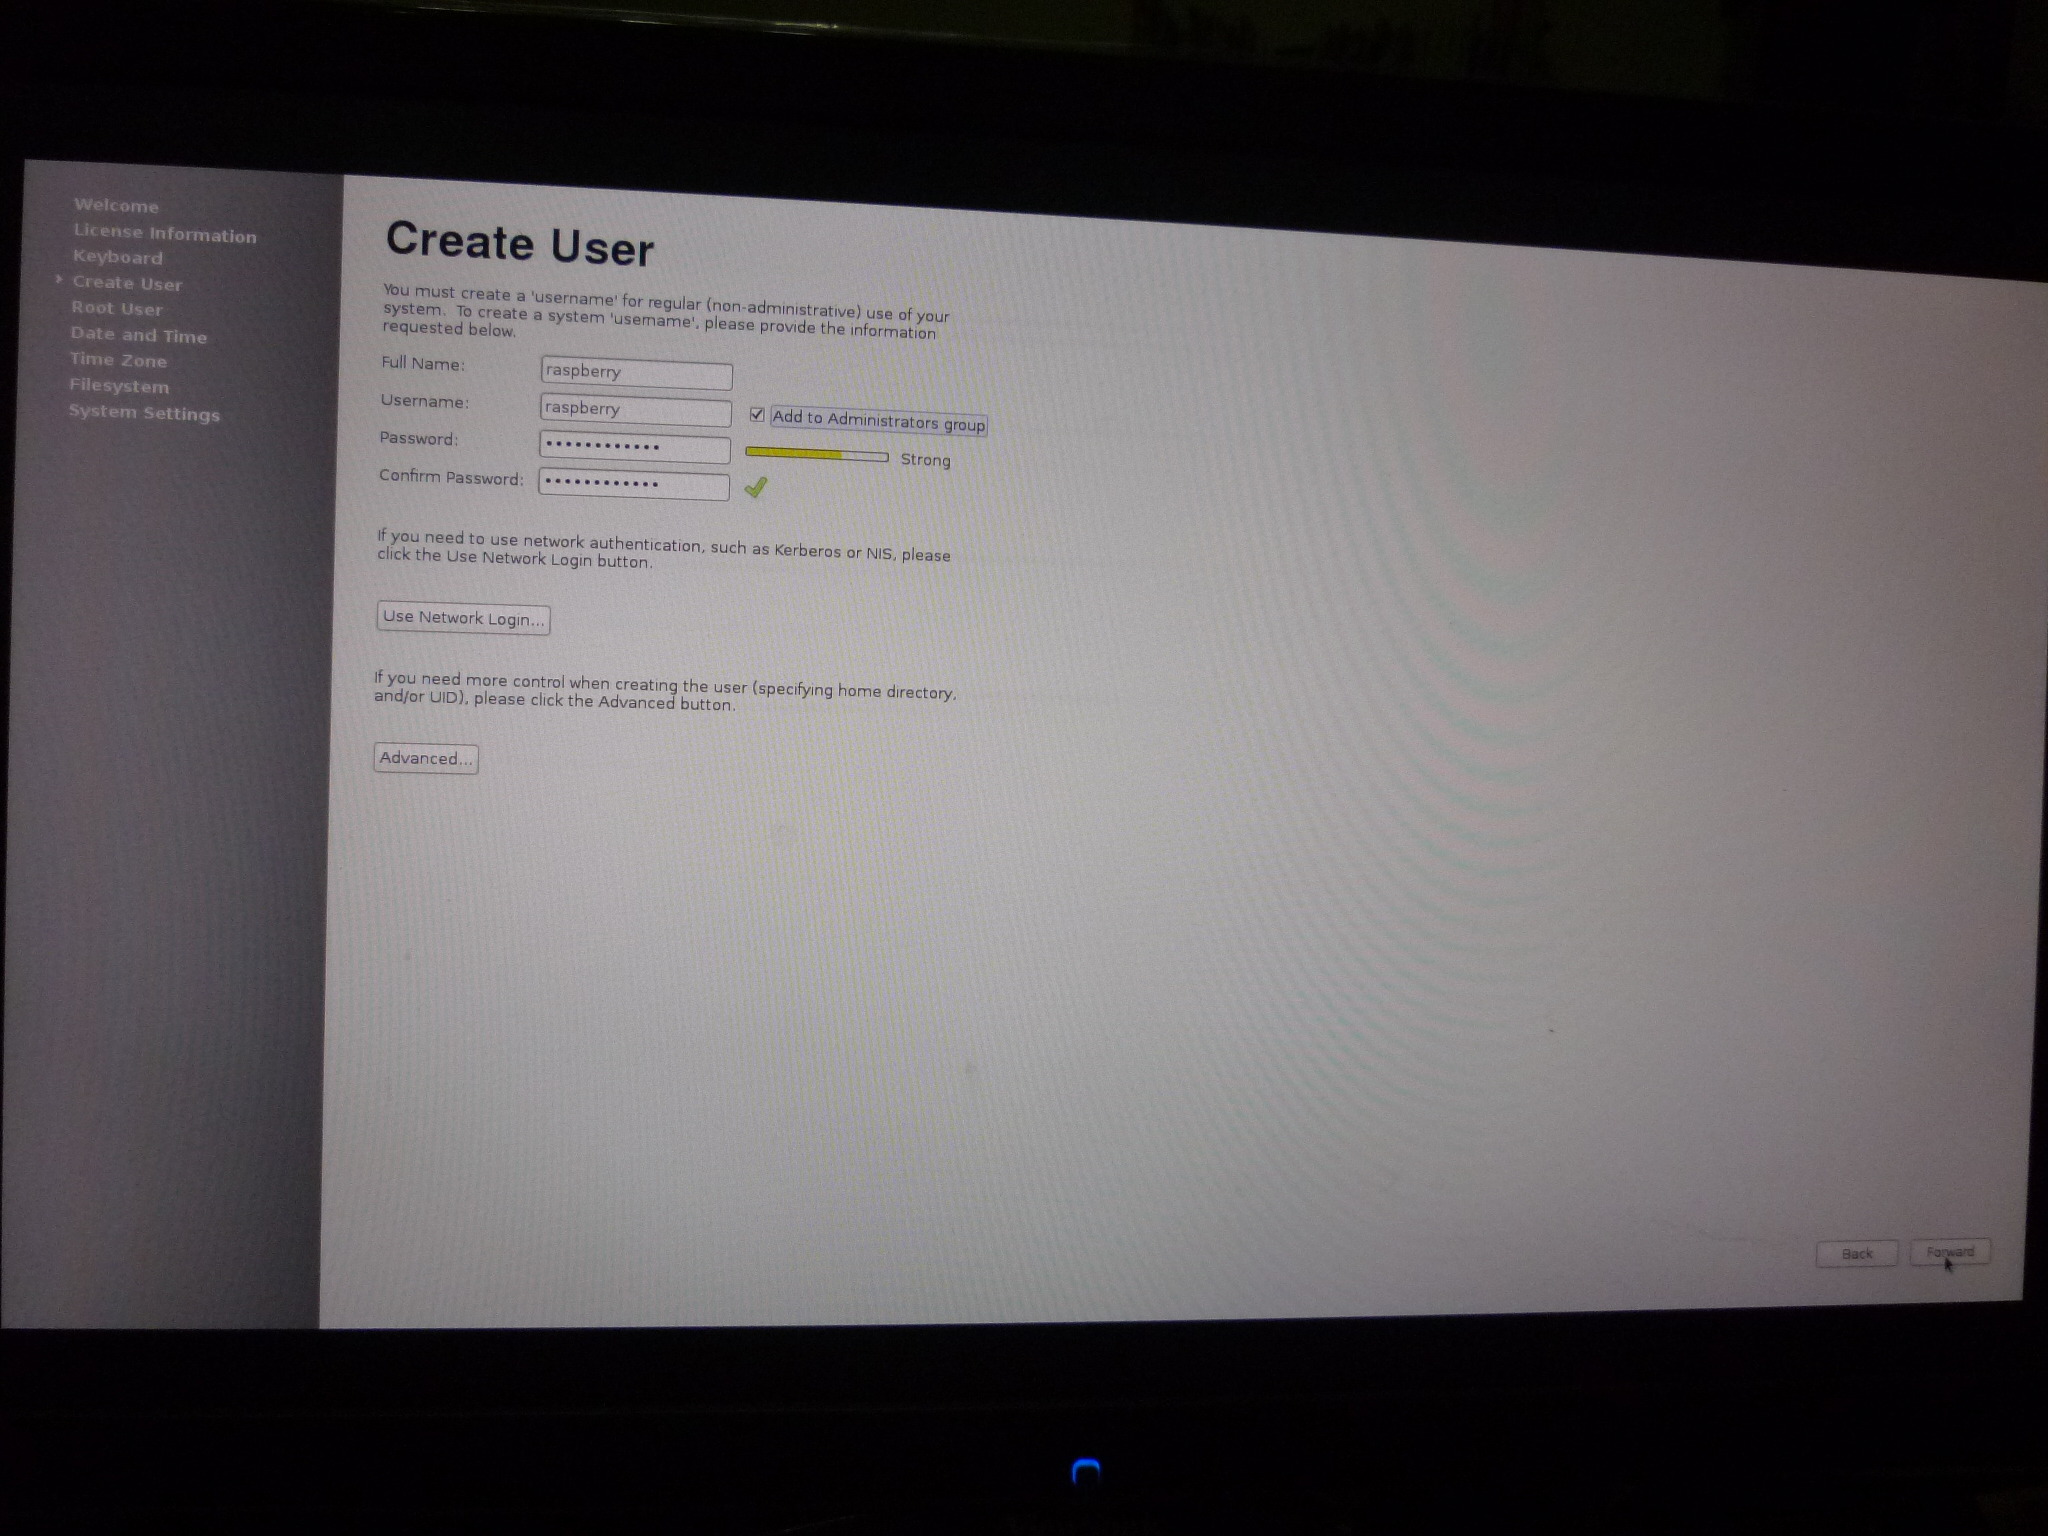
7. 設定 root 的密碼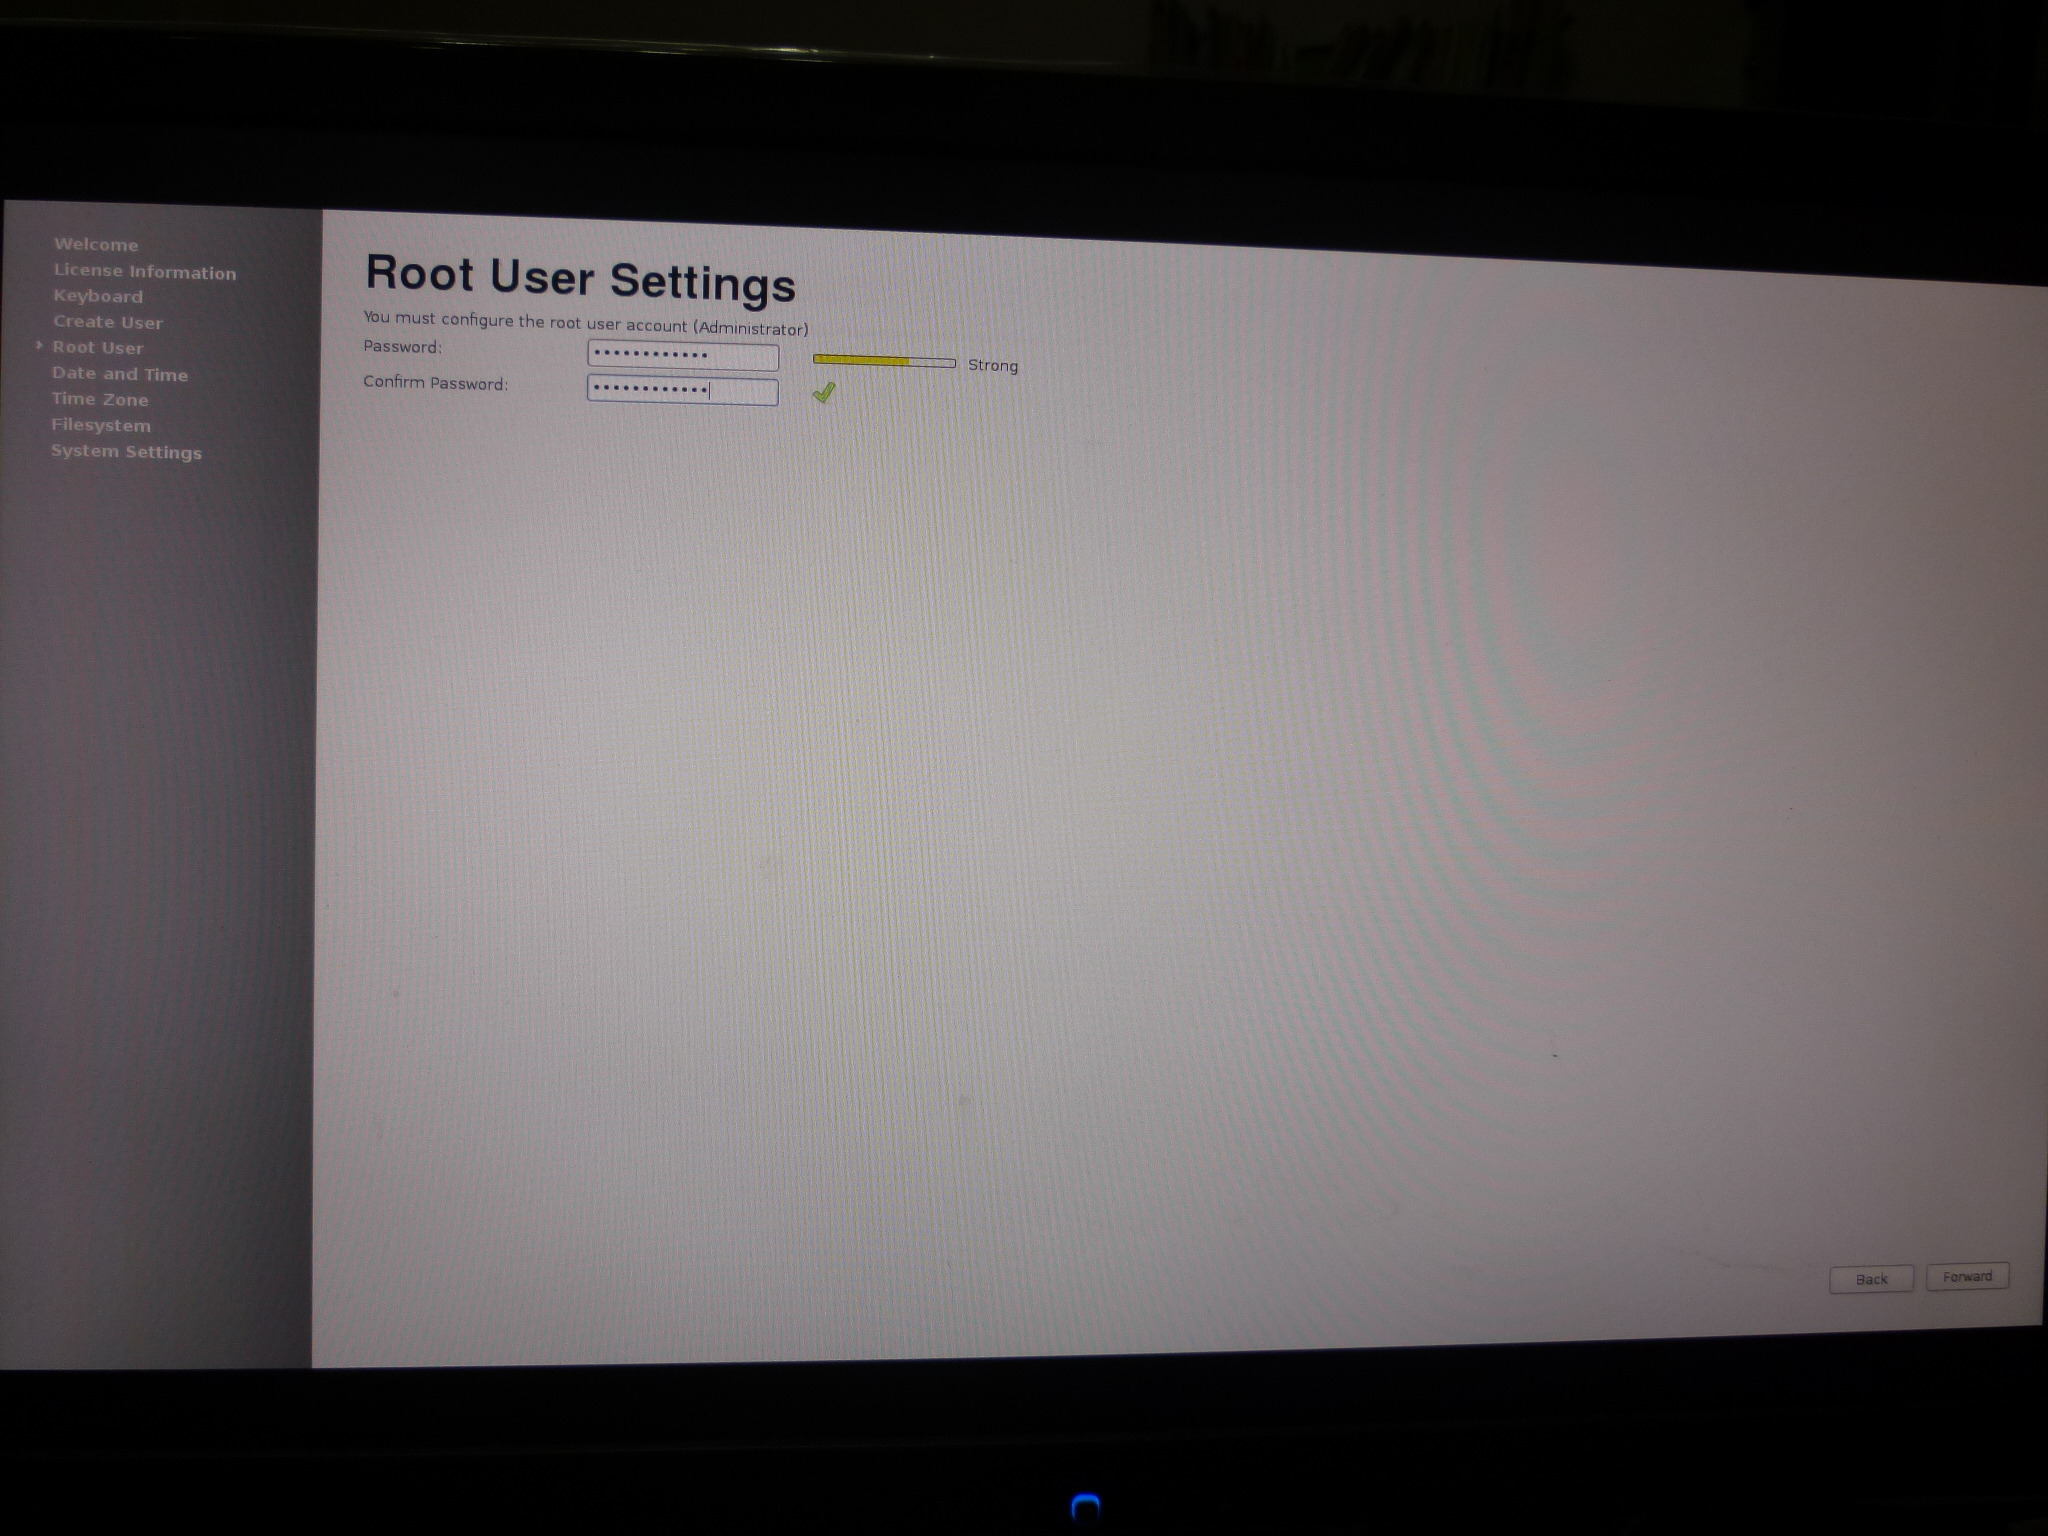
8. 設定日期和時間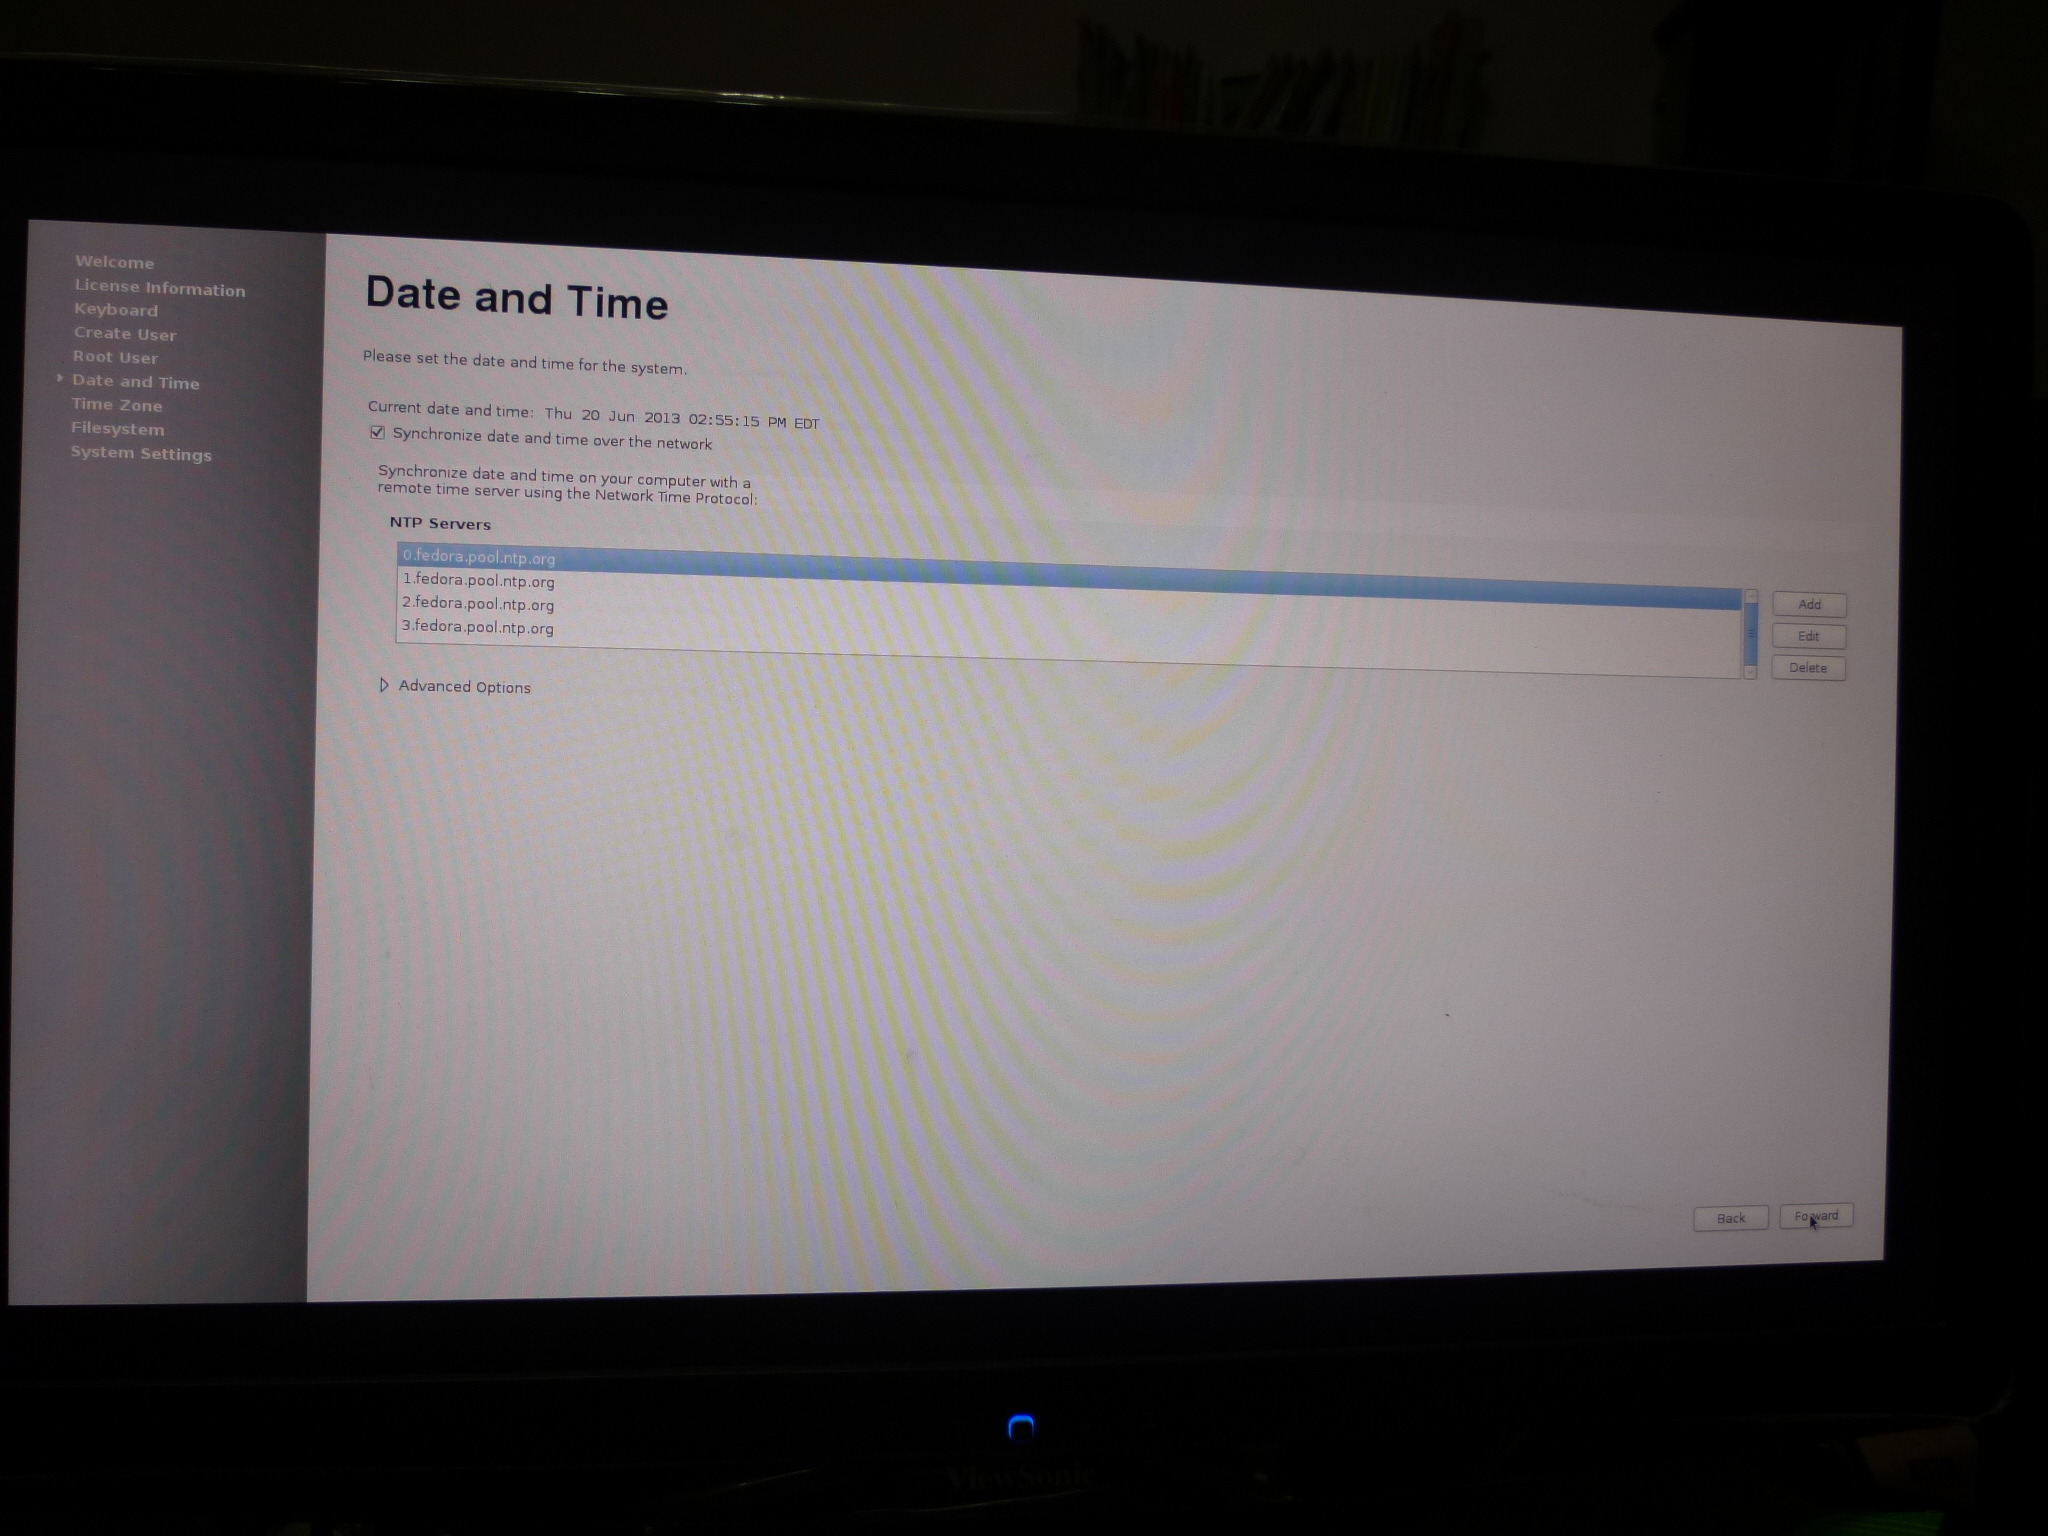
9. 設定時區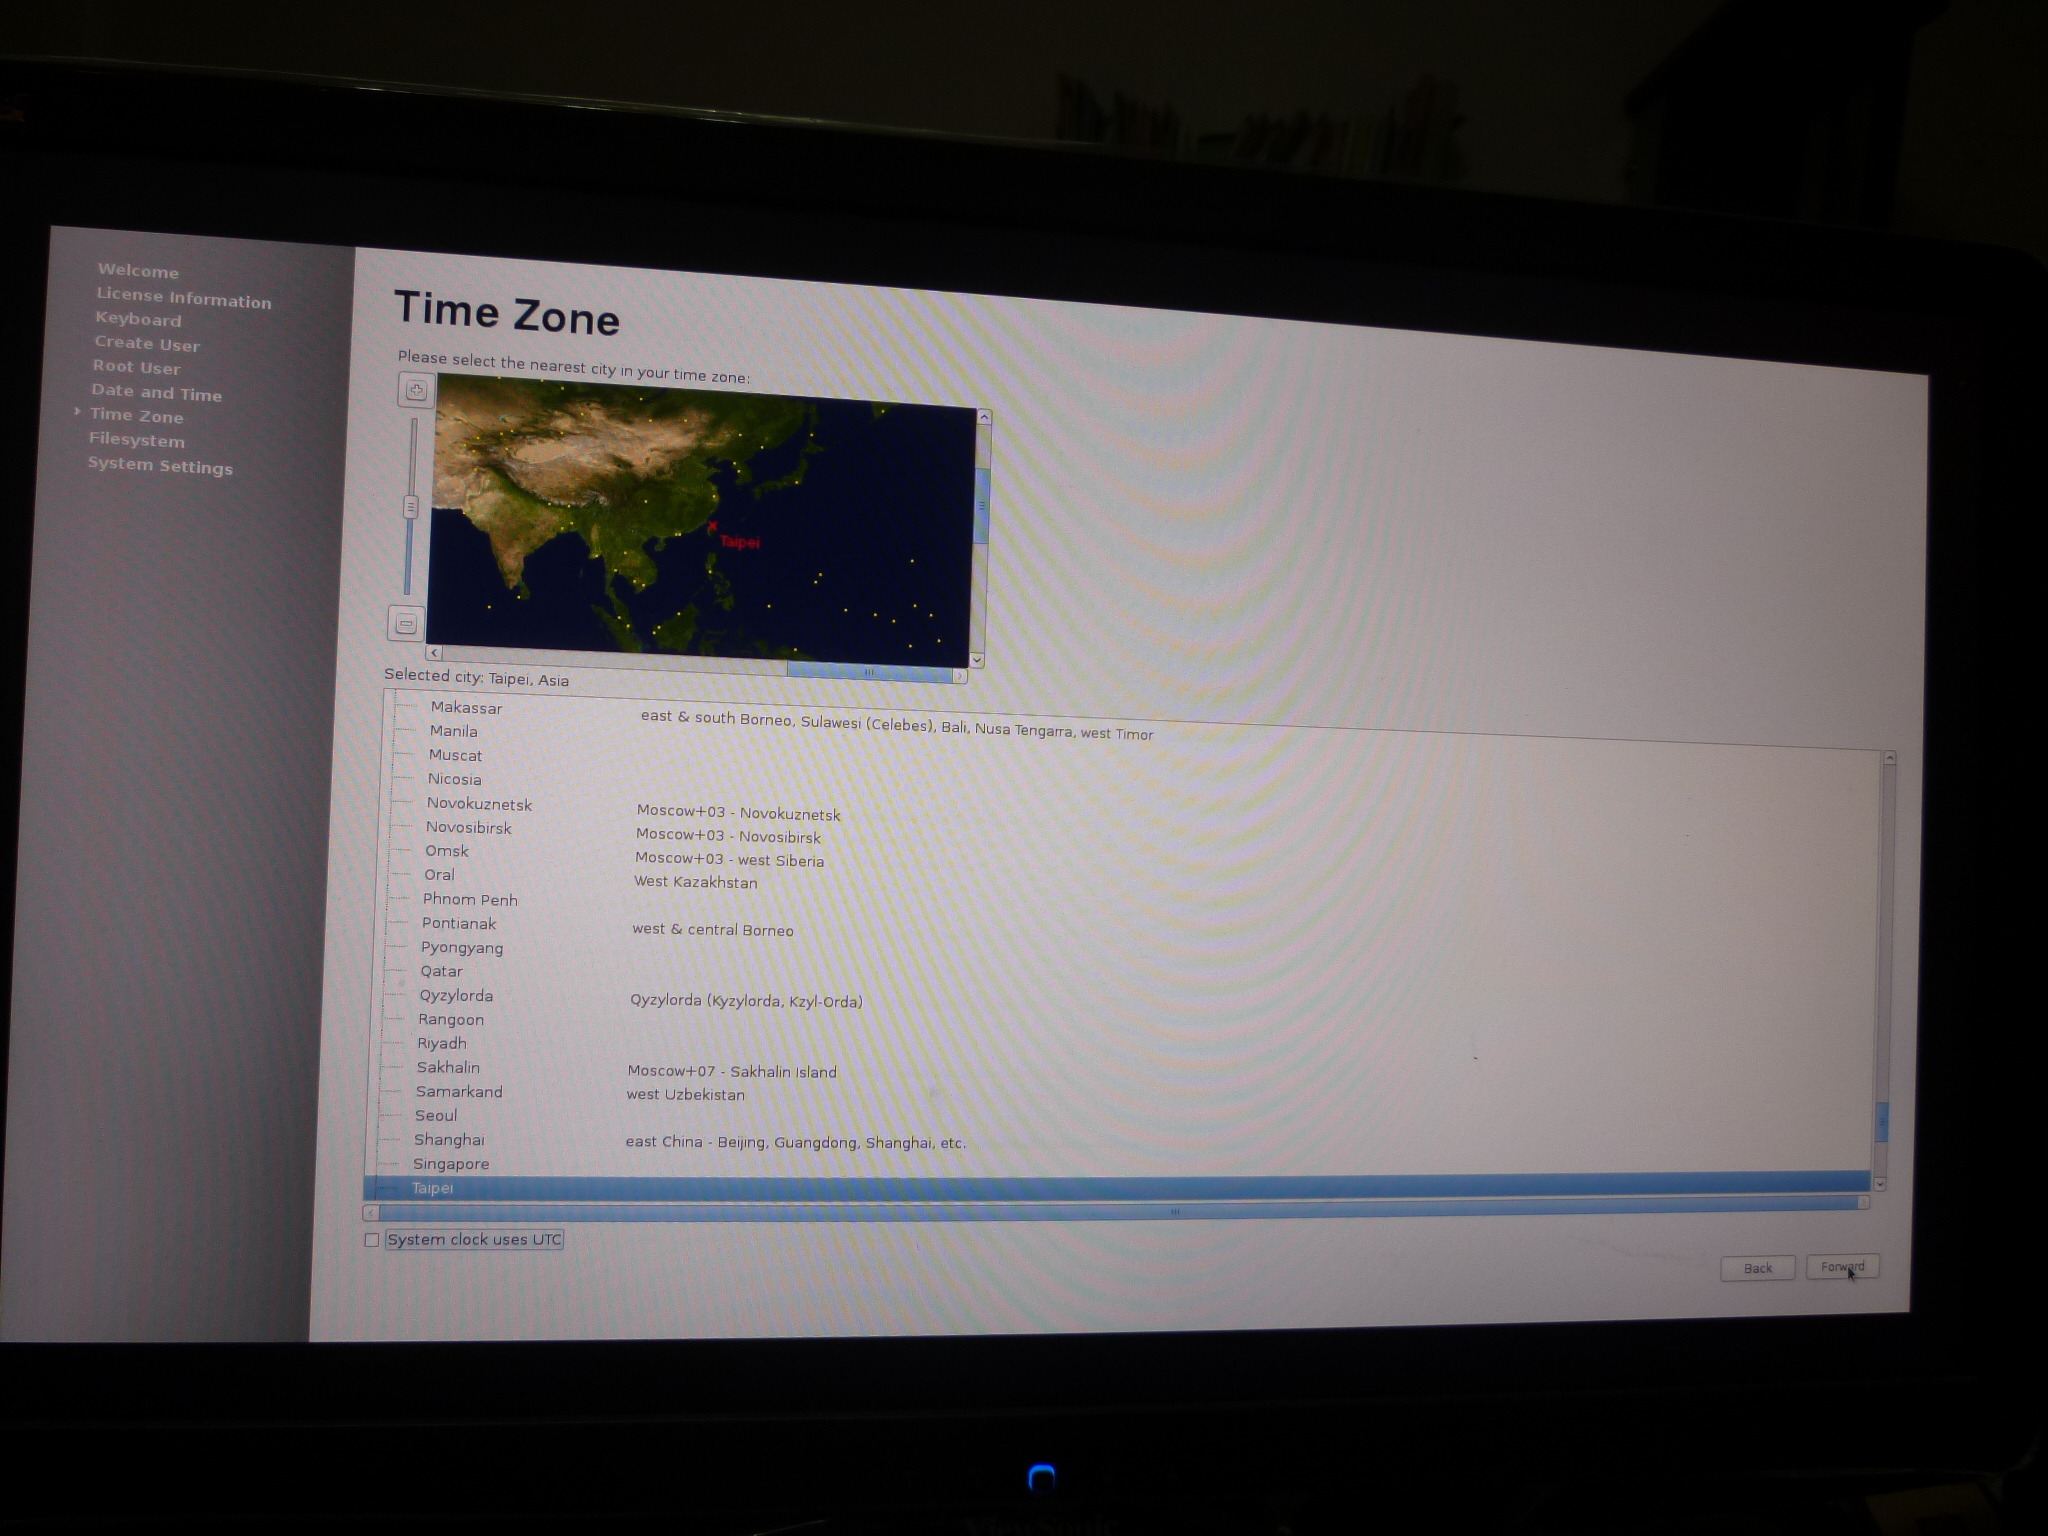
10. 檔案系統設定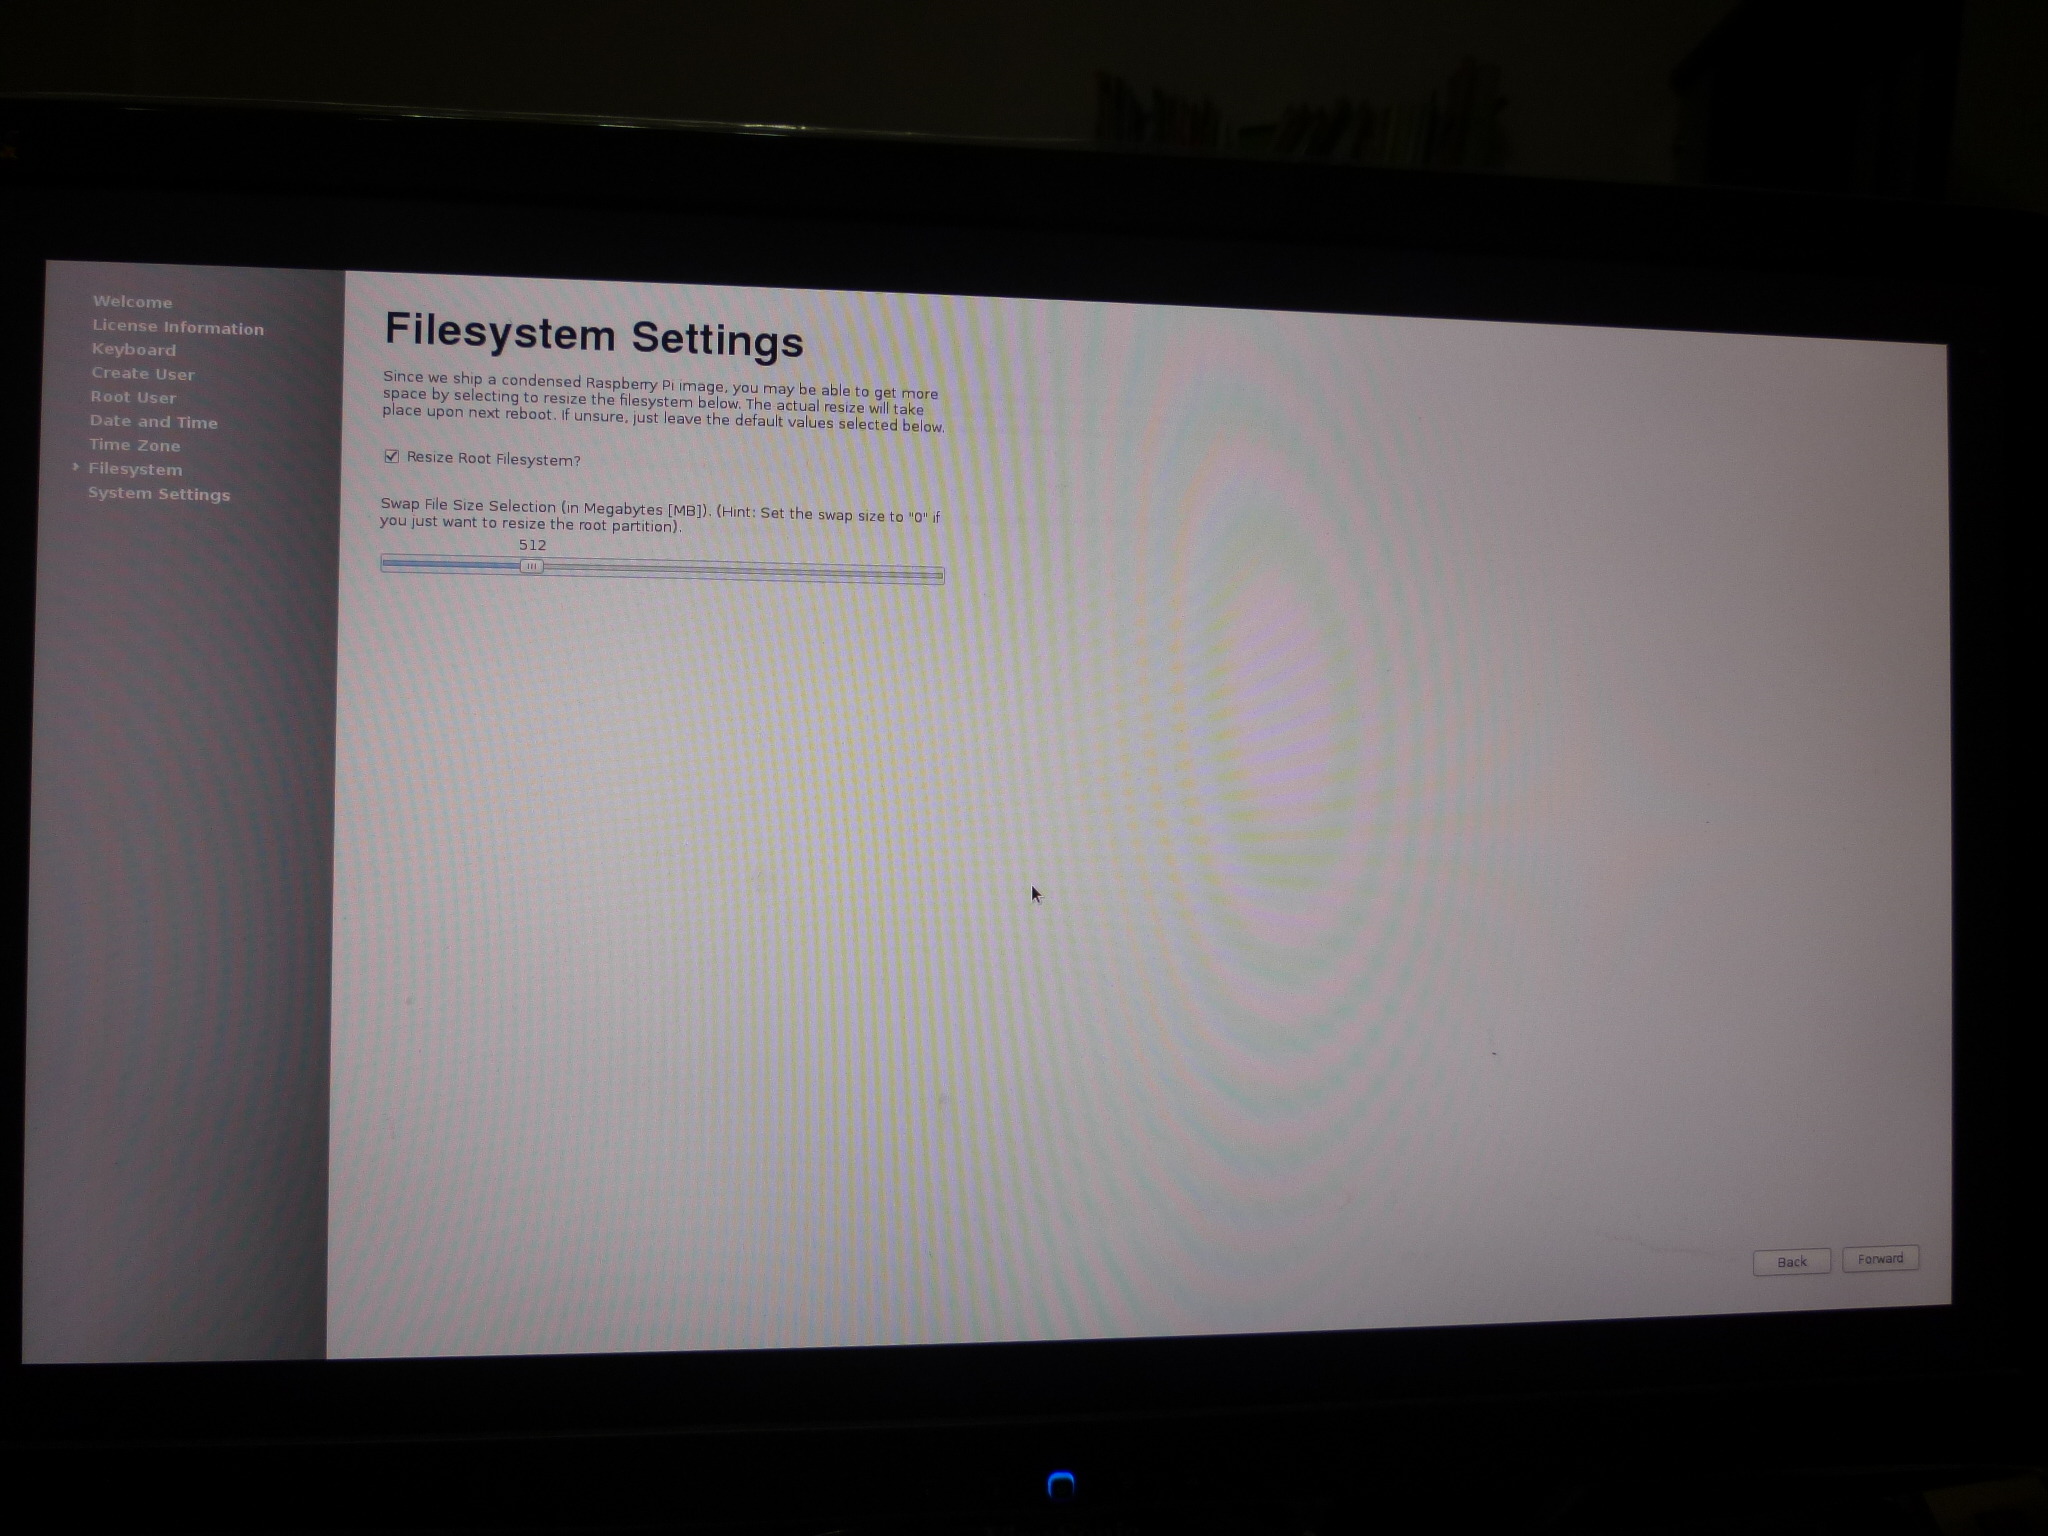
11. 設定主機名稱和螢幕連接方式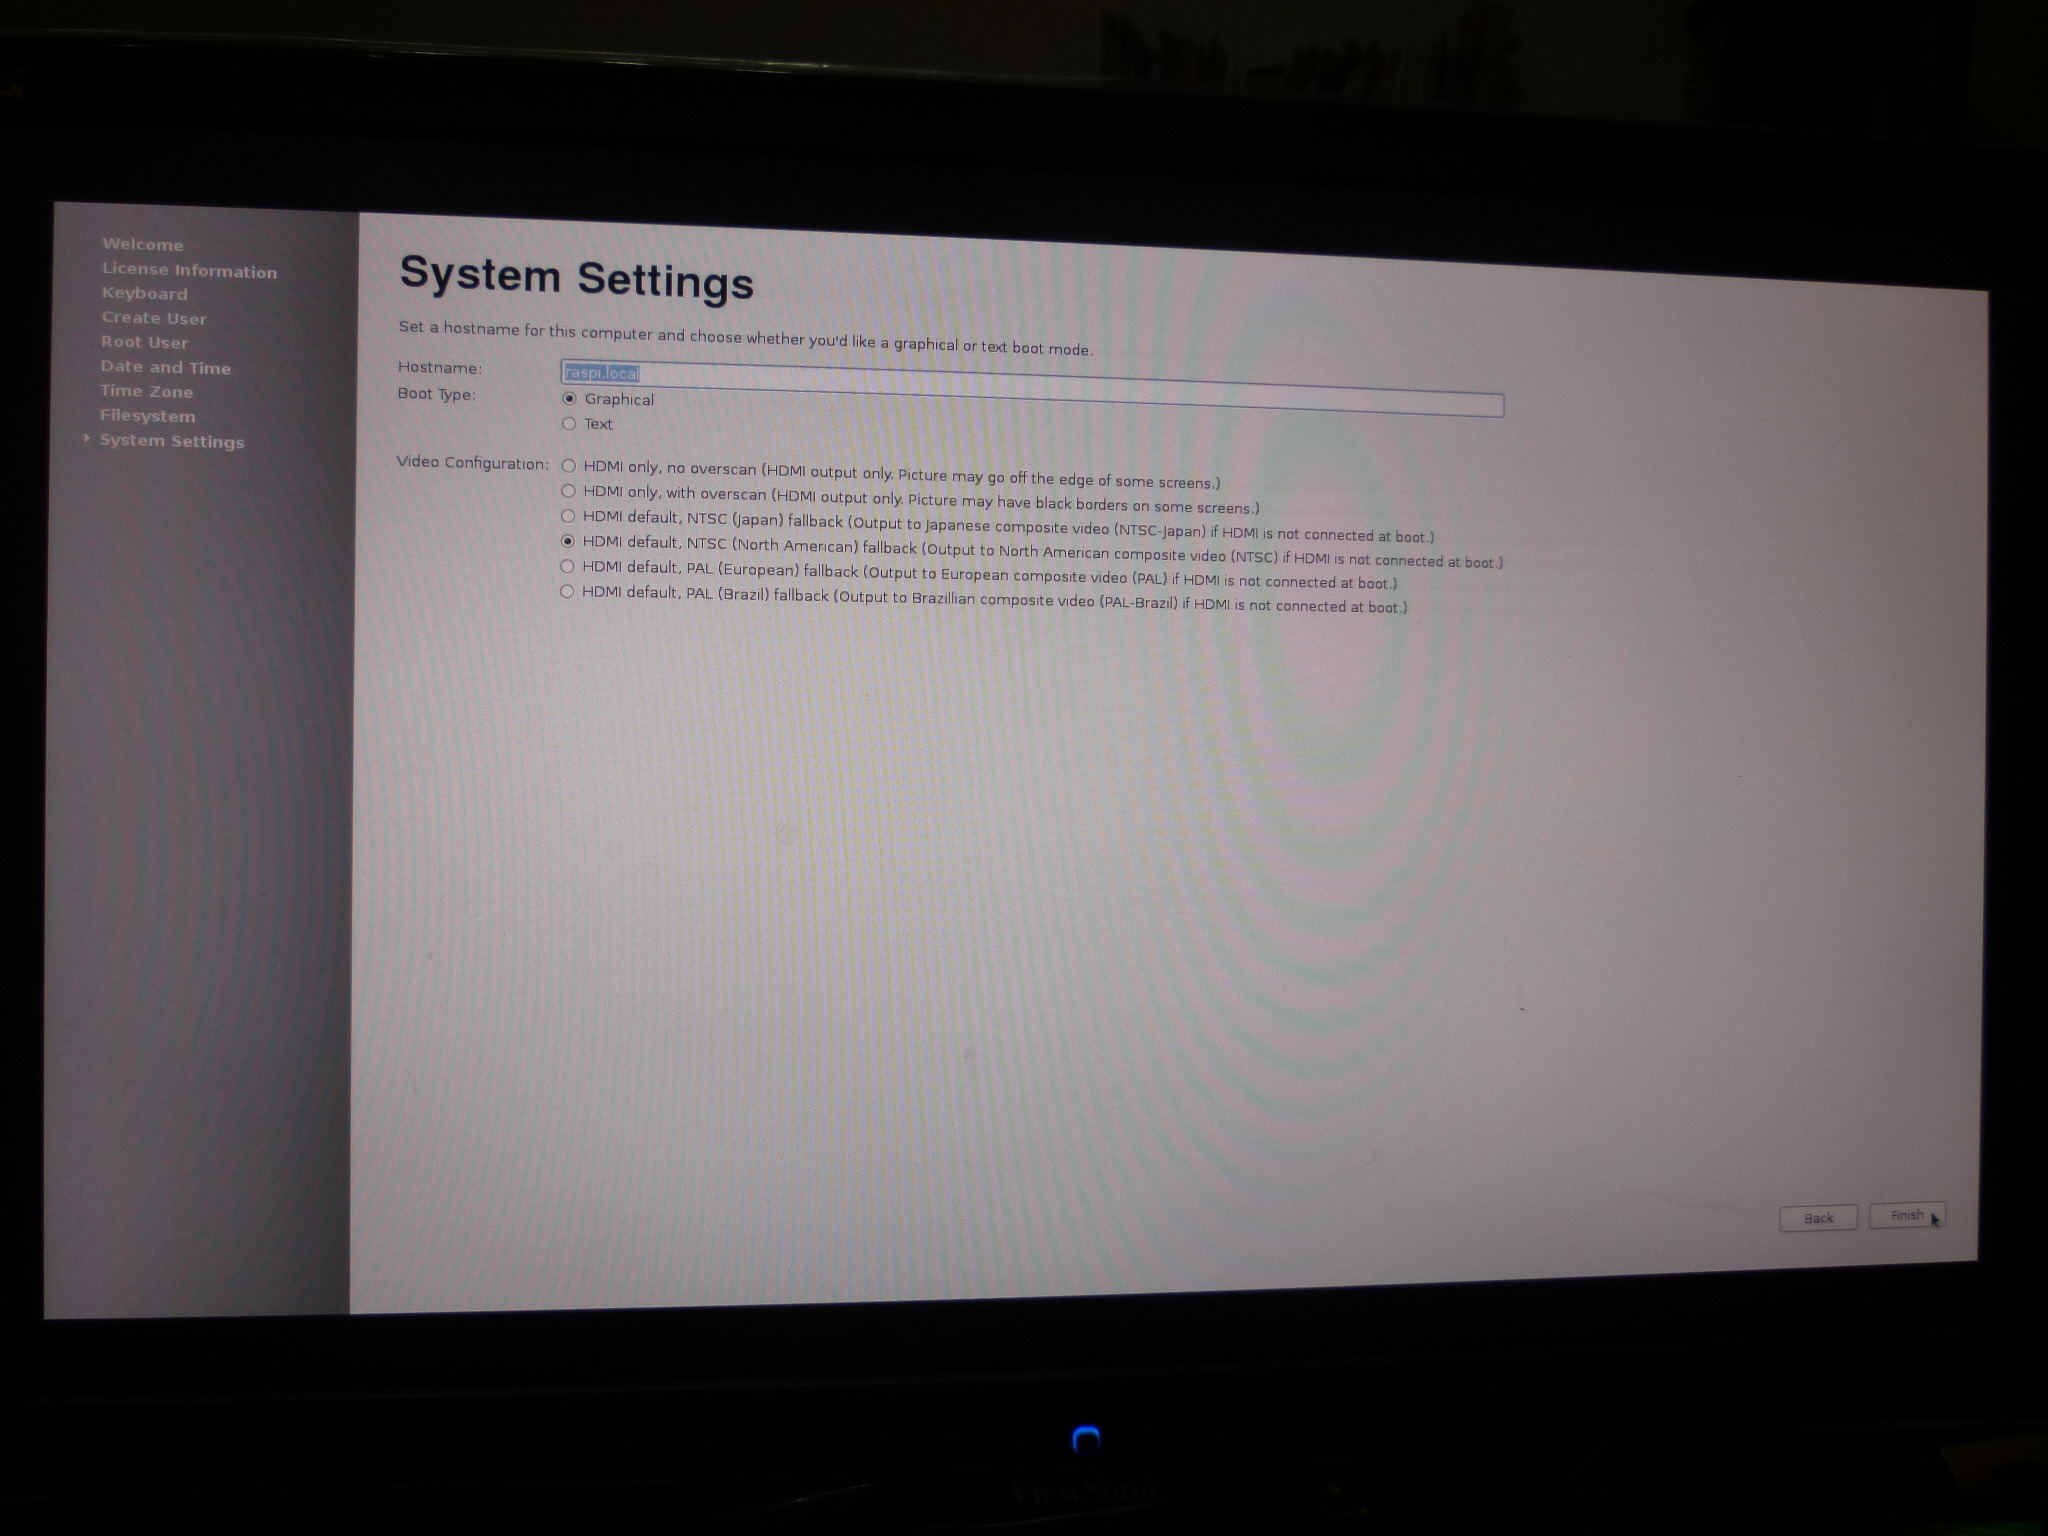
12. 設定完成後,系統會自動重新開機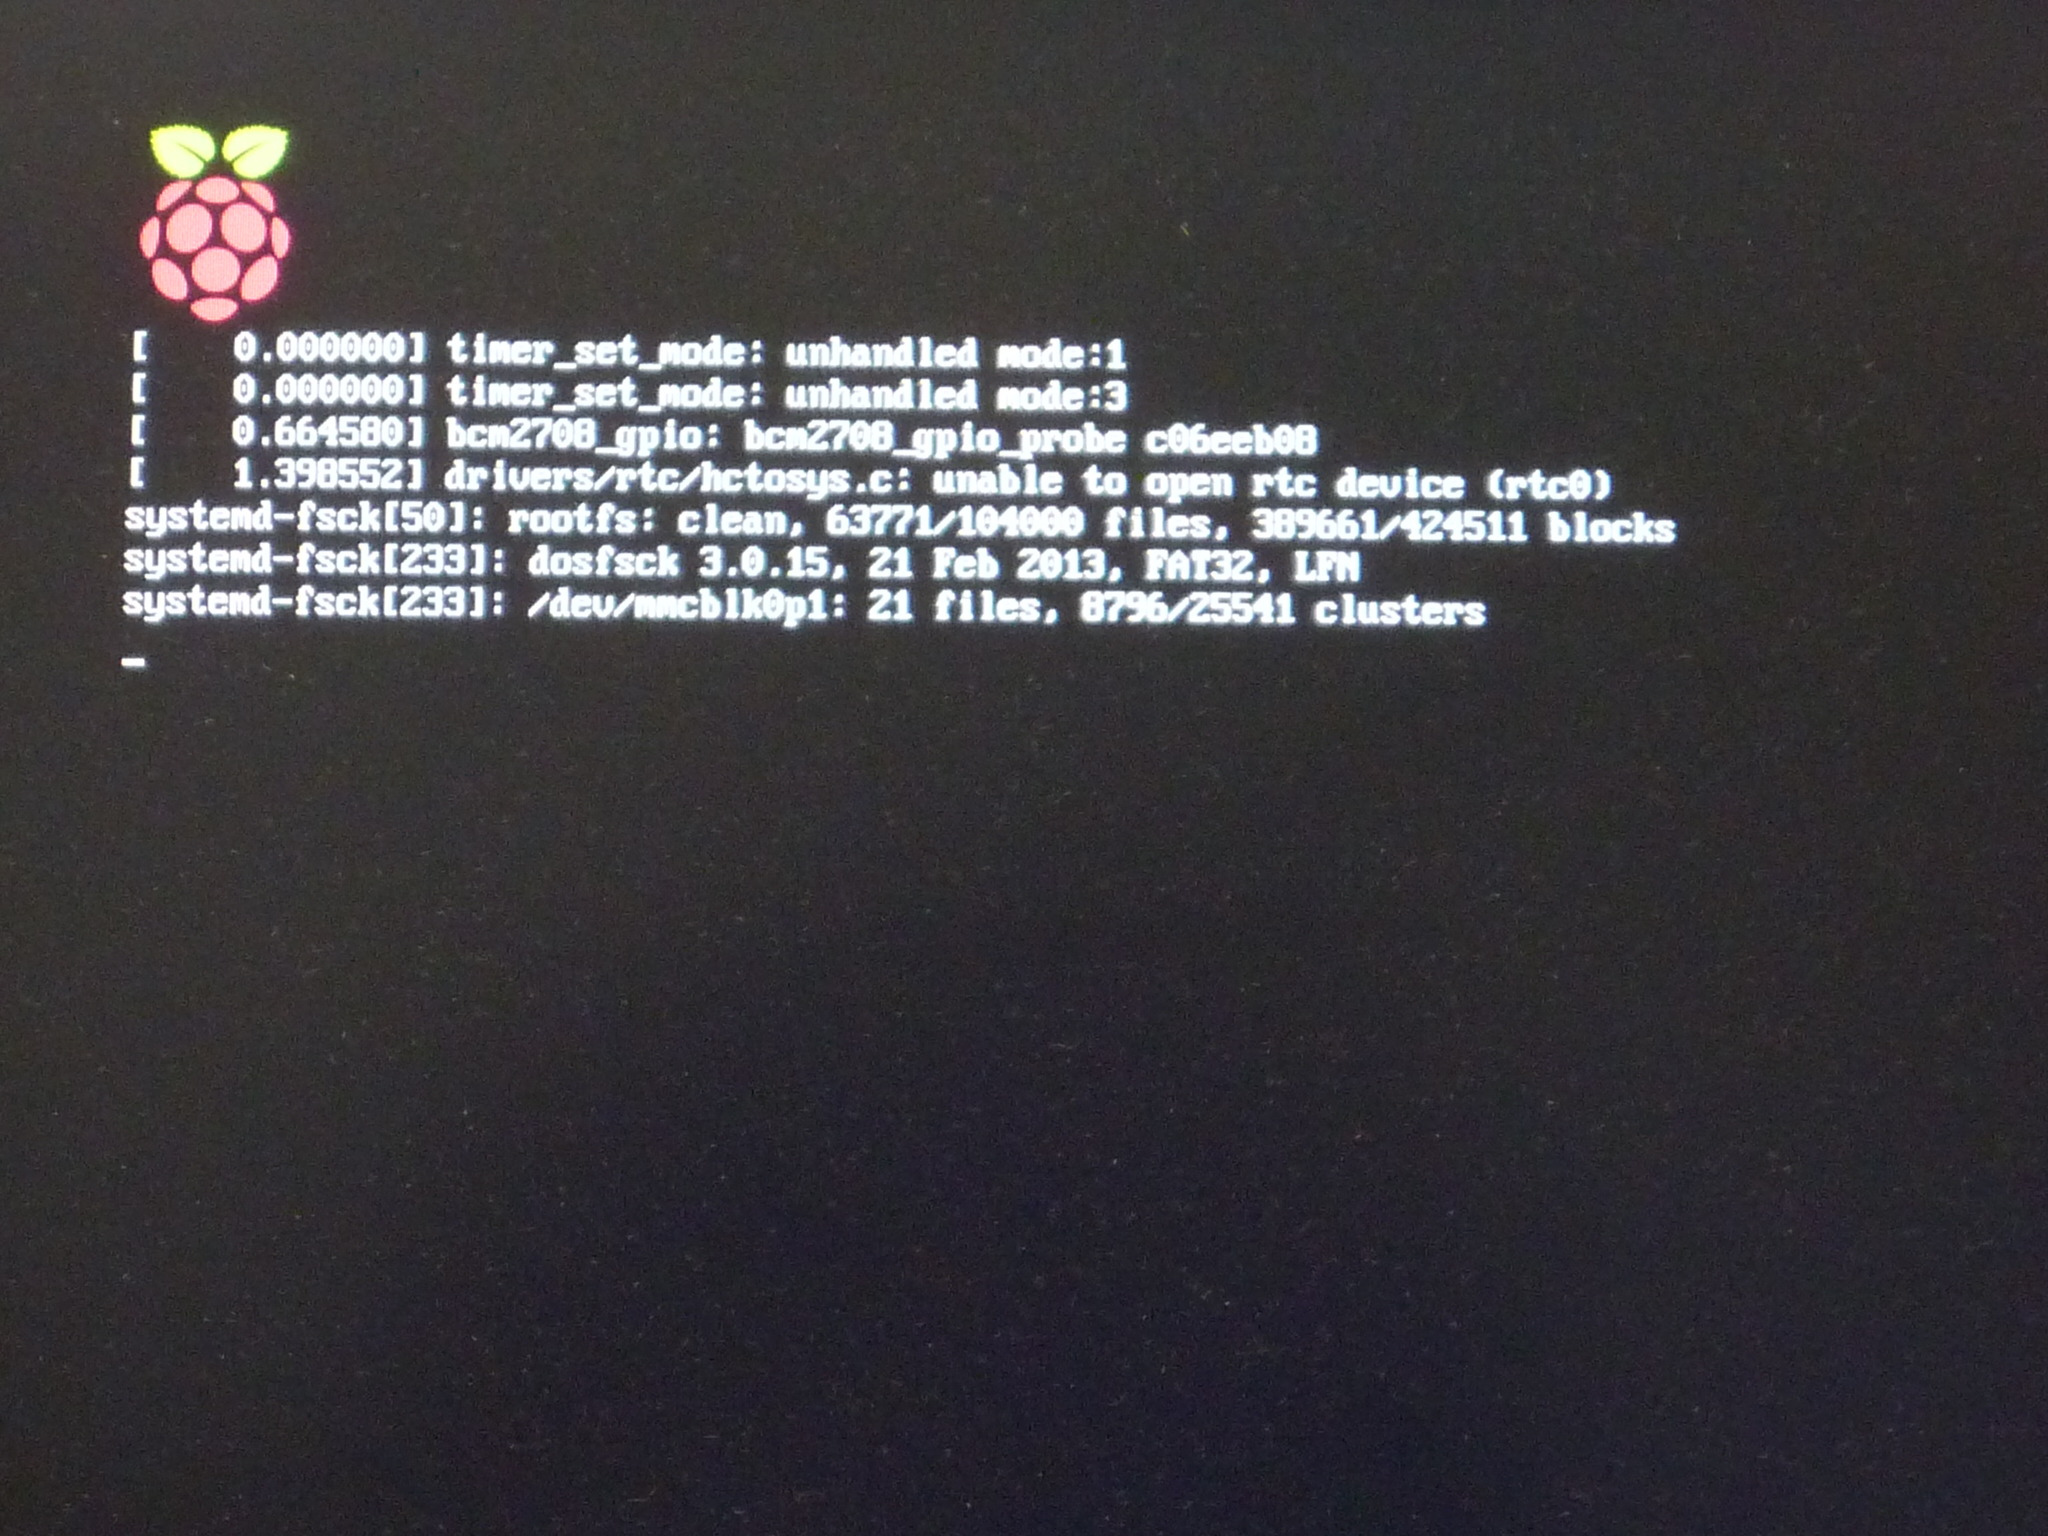
13. 會閃動的 Logo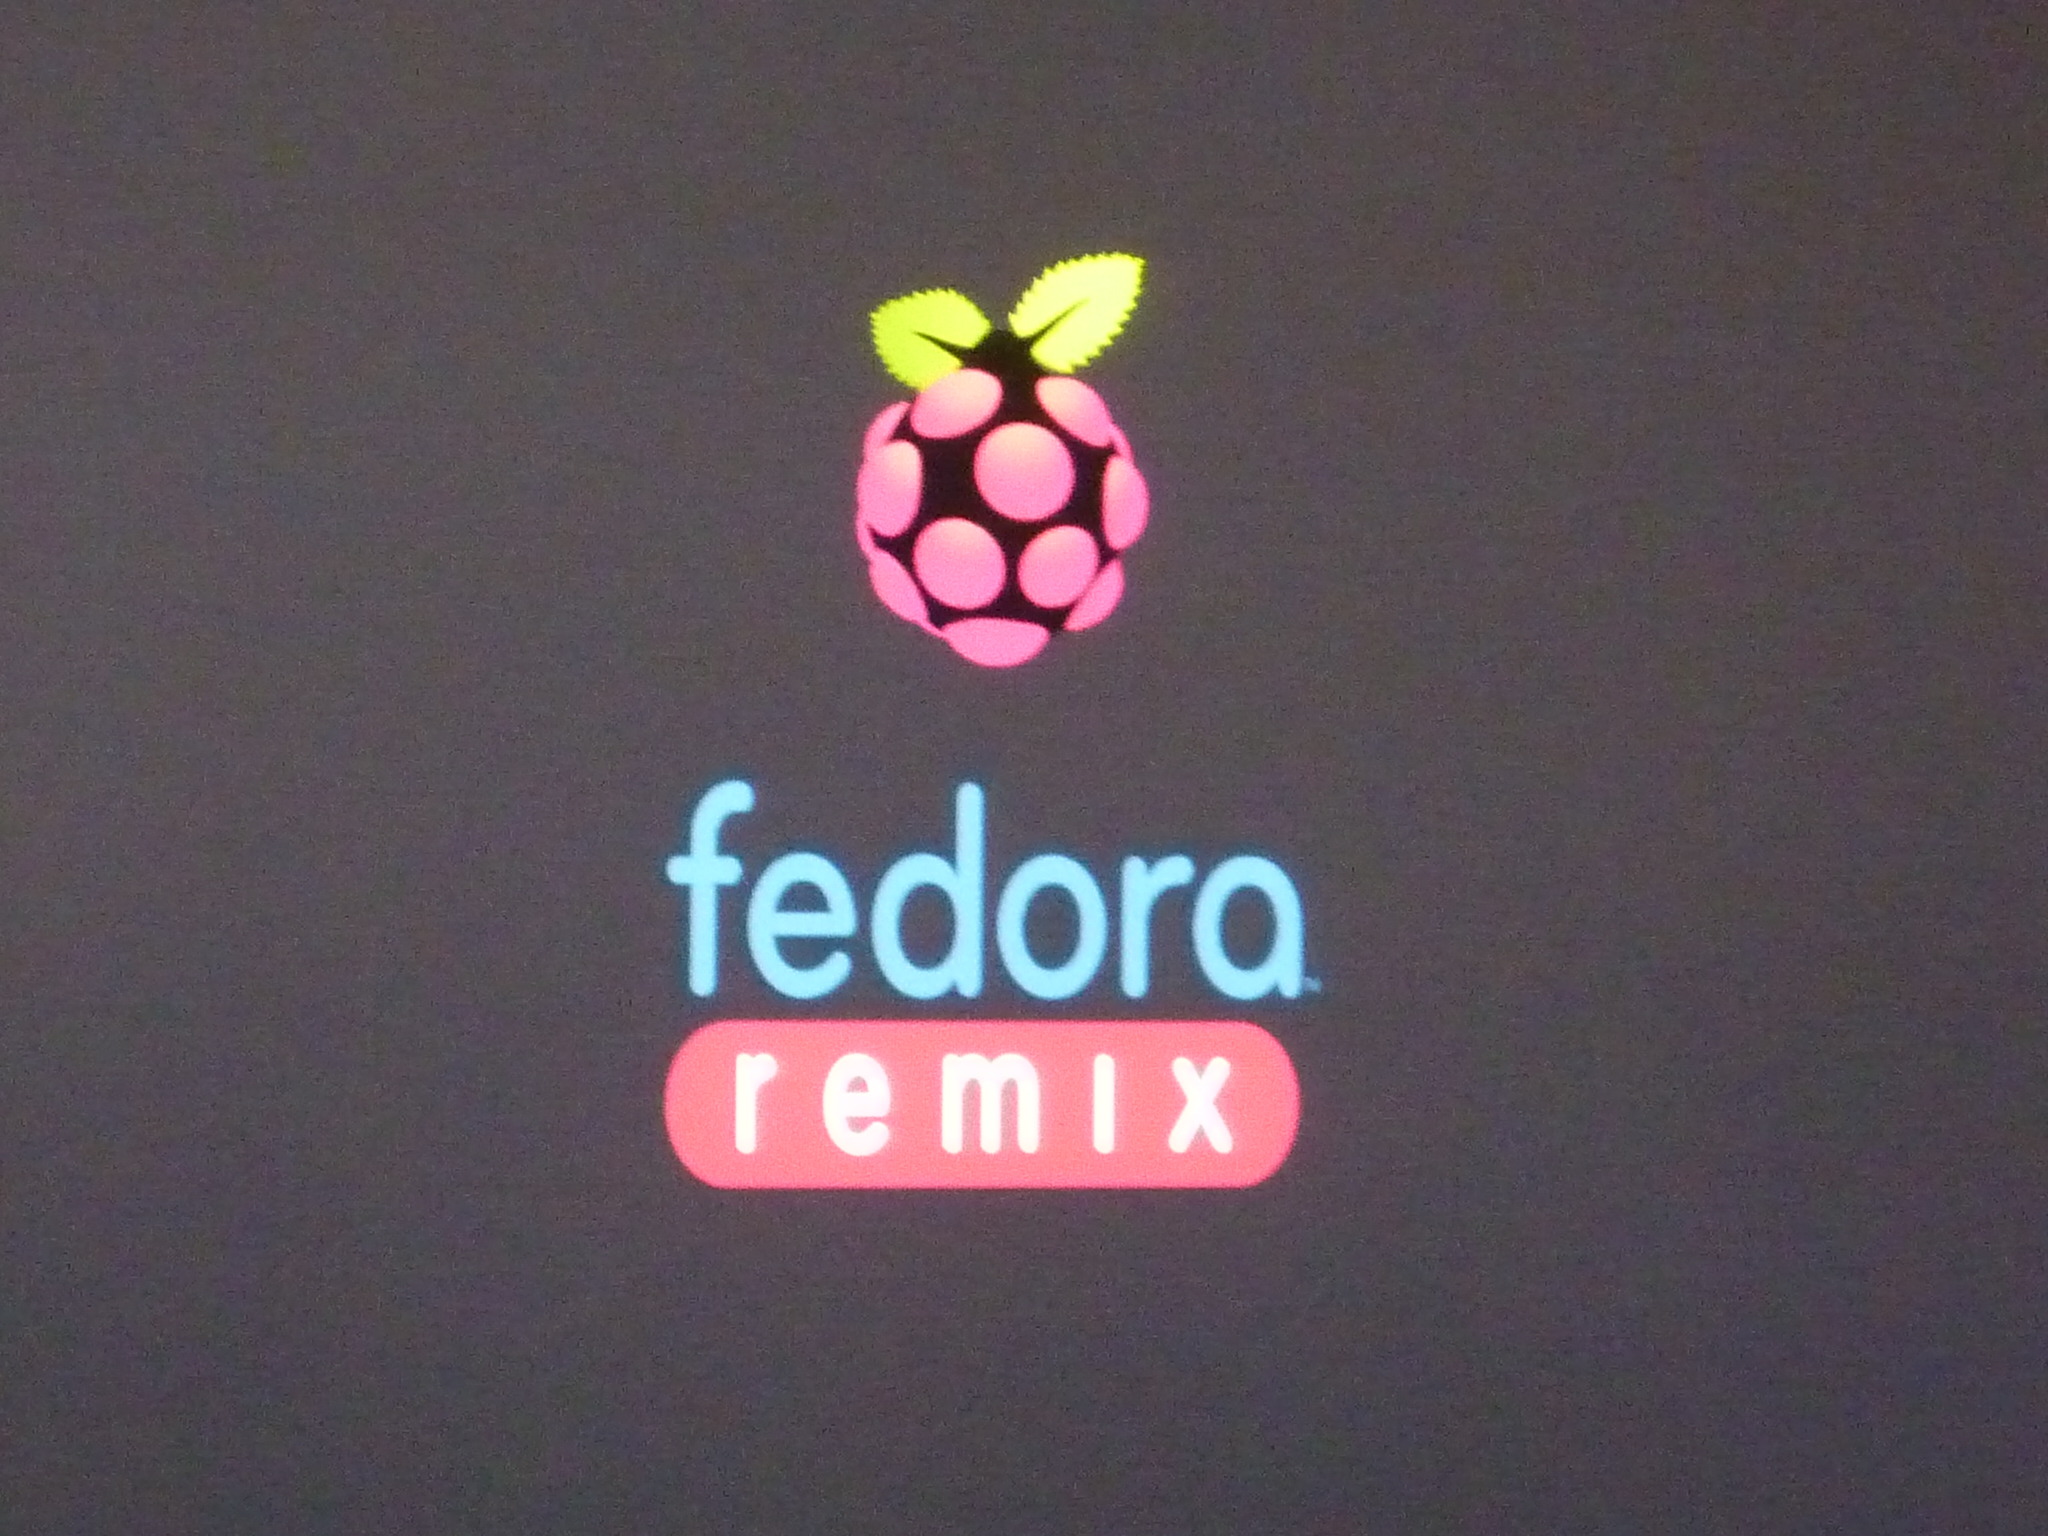
14. 使用者登入畫面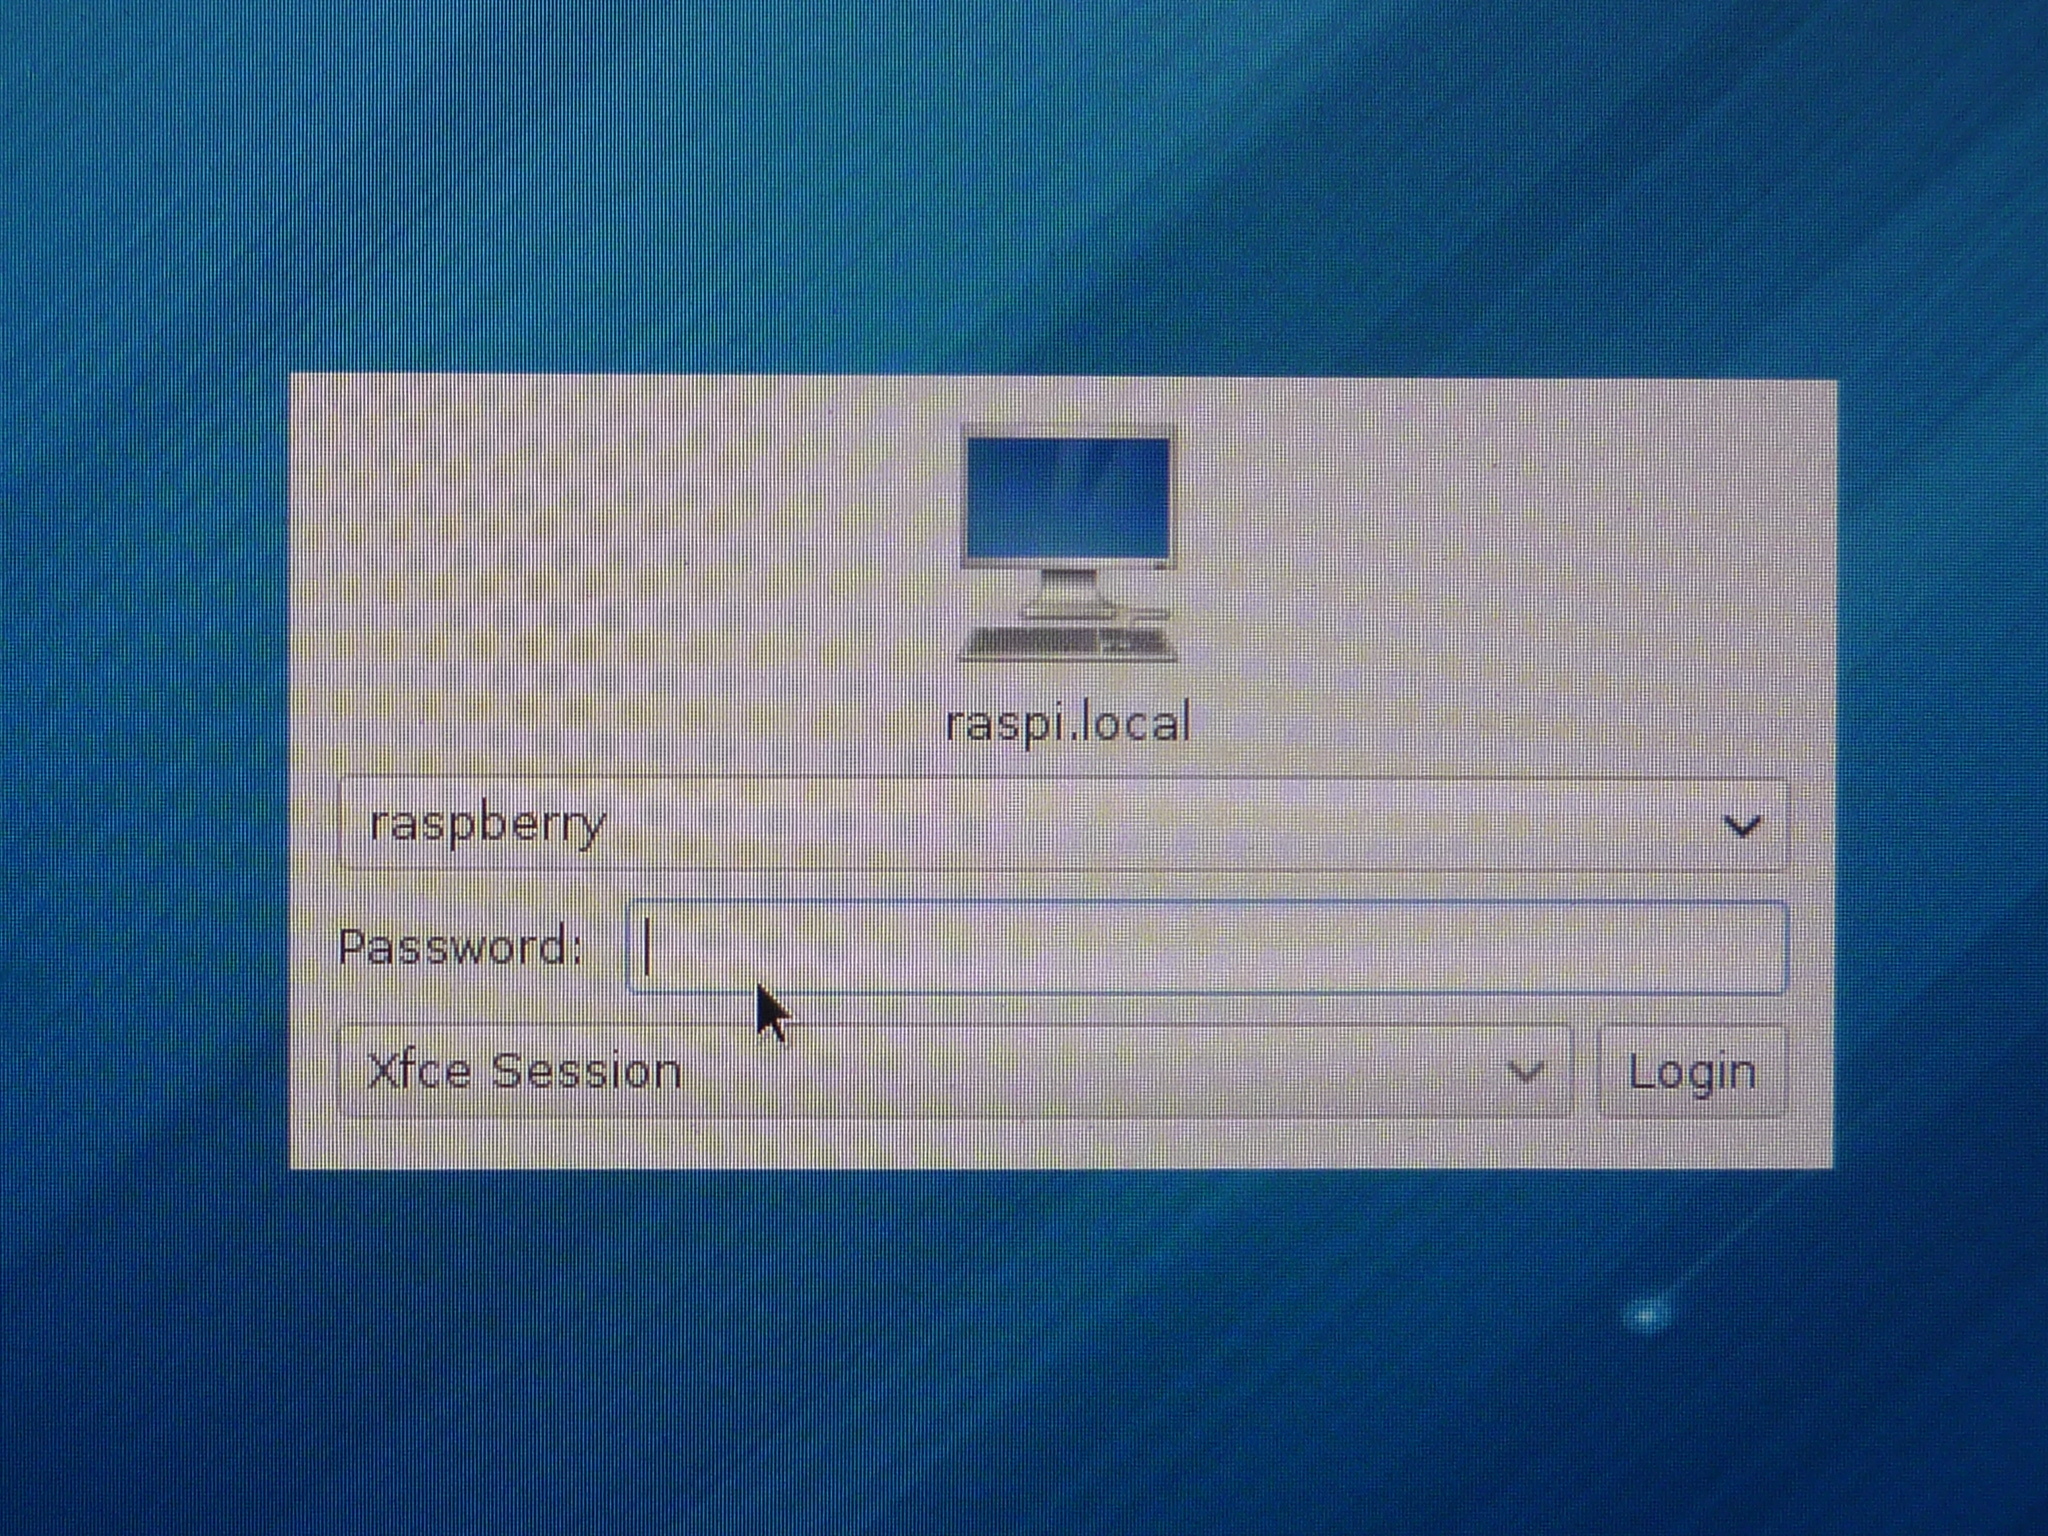
15. 登入之後畫面,桌面環境是 XFCE,操作介面還是英文的
後續就要加以中文化,並安裝一些常用的軟體,也移除一些自己用不到的軟體,讓整個系統能用起來方便,執行速度也在能接受的範圍之內。