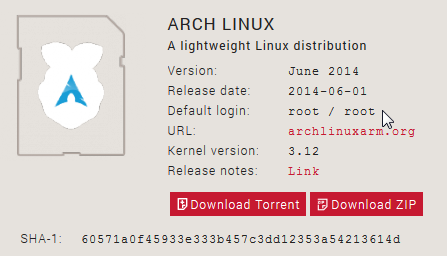
LEMP for Raspberry Pi

如果覺得自己修改 RASPBIAN 很麻煩,或自己從 ArchLinux 安裝 LNMP(Linux Nginx + MariaDB+PHP) 很辛苦,可以考慮下載由 Hayden James 製作的 LEMP for Raspberry Pi

LEMP for Raspberry Pi 網站:
http://haydenjames.io/download-lemp-raspberry-pi-nginx-mariadb-mysql-php/

下載網站:
http://sourceforge.net/projects/lemp-raspberry-pi/files/latest/download[@more@]預設登入的帳號及密碼:root / root
# passwd
Enter new UNIX password:
Retype new UNIX password:
passwd: password updated successfully

設定時區
# date
Sun Sep 28 09:13:30 MDT 2014
# ls -l /etc/localtime
lrwxrwxrwx 1 root root 34 Aug 13  2013 /etc/localtime -> /usr/share/zoneinfo/America/Denver

刪除舊有設定
# rm -rf /etc/localtime

連結到 Asis/Taipei
# ln -s /usr/share/zoneinfo/Asia/Taipei /etc/localtime

# timedatectl set-timezone Asia/Taipei
# date
Sun Sep 28 23:16:19 CST 2014

更換成台灣的 Server
# sed -i ‘s/^Server/#Server/’ /etc/pacman.d/mirrorlist
# sed -i ’53s/# Server/Server/g’ /etc/pacman.d/mirrorlist

安裝的 Nginx Web Server 版本
# pacman -Qi nginx | grep Version
Version        : 1.6.0-5

安裝的 PHP 版本
# pacman -Qi php | grep Version
Version        : 5.5.14-1

安裝的 MariaDB SQL Server 版本
# pacman -Qi mariadb | grep Version
Version        : 10.0.12-1

更新套件庫
# pacman -Syy

更新已安裝的套件
# pacman -Syu

Niginx Web Server 預設網頁根目錄
/usr/share/nginx/html

MariaDB SQL Server 預設帳號及密碼
root / changeme

進行密碼更改及安全性上設定
/usr/bin/mysql_secure_installation

Raspberry Pi 測試 – 修改 RASPBIAN

因為 Raspberry Pi 除了 ArchLinux 外,並沒有完全對 Server 提出的解決方案,如果對 ArchLinux 不熟悉的話,可以考慮把 RASPBIAN 修改成文字模式,就是去除 XWindow 的圖形化介面程式。
底下文章參考:
Linux Pi的奇幻旅程(15)-大改造 – iT邦幫忙::IT知識分享社群
Linux Pi的奇幻旅程(16)-大改造(續) – iT邦幫忙::IT知識分享社群
Linux Pi的奇幻旅程(17)-大改造(結) – iT邦幫忙::IT知識分享社群

[@more@]1. 設定 RASPBIAN 開機後進入文字模式
$ sudo raspi-config
選擇 3 Enable Boot to Desktop/Scratch

選擇 Console Text console, requiring login (default)


移除 S03lightdm 連結
$ ls -l /etc/rc2.d/S03lightdm
lrwxrwxrwx 1 root root 17 Sep 29 18:32 /etc/rc2.d/S03lightdm -> ../init.d/lightdm
$ sudo update-rc.d lightdm disable 2
update-rc.d: using dependency based boot sequencing
insserv: warning: current start runlevel(s) (3 4 5) of script `lightdm’ overrides LSB defaults (2 3 4 5).
insserv: warning: current stop runlevel(s) (0 1 2 6) of script `lightdm’ overrides LSB defaults (0 1 6).
$ ls -l /etc/rc2.d/S03lightdm
ls: cannot access /etc/rc2.d/S03lightdm: No such file or directory

2. 移除 x11 相關套件
$ sudo  apt-get remove –purge dbus-x11 gsfonts-x11 libx11-6 libx11-data libx11-xcb1 x11-common x11-utils x11-xkb-utils
移除不須要的套件
$ sudo  apt-get autoremove
$ sudo  apt-get remove –purge xkb-data menu-xdg desktop-file-utils lxde-icon-theme libx264-130 libxapian-dev libxapian22 libxvidcore4 libxml2 gnome-themes-standard-data
$ sudo apt-get remove –purge alsa-base alsa-utils gstreamer1.0-alsa gstreamer1.0-omx omxplayer libraspberrypi-dev libraspberrypi-doc raspberrypi-artwork
$ sudo  apt-get autoremove

3.重新分配記憶體
$ sudo raspi-config
選擇 8 Advanced Options

選擇 A3 Memory Split

分配給 GPU 的 RAM 改成 16M,因為不使用圖形模式

4. 做一下套件庫及套件更新、系統升級
# apt-get update
# apt-get upgrade
# apt-get dist-upgrade

5.查看成果
# df -m
# free -m

Raspberry Pi 測試 – ArchLinux Server 篇 超頻 Overclock

參考網站:
Cortex-A/M: Raspberry Pi: Overclocking on Arch linux
Raspberry Pi Safe Overclocking – Hayden James
修改 /boot/config.txt
# vim /boot/config.txt
##None(未超頻)
#arm_freq=700
#core_freq=250
#sdram_freq=400
#over_voltage=0

##Modest(超頻一些)
#arm_freq=800
#core_freq=300
#sdram_freq=400
#over_voltage=0

##Medium(中等)
#arm_freq=900
#core_freq=333
#sdram_freq=450
#over_voltage=2

##High(快)
#arm_freq=950
#core_freq=450
#sdram_freq=450
#over_voltage=6

##Turbo(最快)
#arm_freq=1000
#core_freq=500
#sdram_freq=500
#over_voltage=6[@more@]

這裡改用 Turbo
##Turbo
arm_freq=1000
core_freq=500
sdram_freq=500
over_voltage=6

重新啟動電腦
# reboot

Raspberry Pi 測試 – ArchLinux Server 篇 擴展 root 分割區

參考網站:Cubiksoundz – Technically Speaking…: Expanding Raspberry Pi SD Card Partition on Arch Linux
分割硬碟
# fdisk /dev/mmcblk0

[@more@]刪除第 2 個分割區
Command (m for help): d
Partition number (1,2,5, default 5): 2

Partition 2 has been deleted.

建立 extended 分割區
Command (m for help): n

Partition type:
   p   primary (1 primary, 0 extended, 3 free)
   e   extended
Select (default p): e
Partition number (2-4, default 2): 2
First sector (186368-30881791, default 186368):
Last sector, +sectors or +size{K,M,G,T,P} (186368-30881791, default 30881791):

Created a new partition 2 of type ‘Extended’ and of size 14.7 GiB.

建立 logical 分割區
Command (m for help): n

Partition type:
   p   primary (1 primary, 1 extended, 2 free)
   l   logical (numbered from 5)
Select (default p): l

Adding logical partition 5
First sector (188416-30881791, default 188416):
Last sector, +sectors or +size{K,M,G,T,P} (188416-30881791, default 30881791):

Created a new partition 5 of type ‘Linux’ and of size 14.7 GiB.

寫入並結束

重新啟動電腦
# reboot

使用 resize2fs 擴大分割區的大小
# resize2fs /dev/mmcblk0p5
resize2fs 1.42.9 (28-Dec-2013)
Filesystem at /dev/mmcblk0p5 is mounted on /; on-line resizing required
old_desc_blocks = 1, new_desc_blocks = 1
The filesystem on /dev/mmcblk0p5 is now 3836672 blocks long.

Raspberry Pi 測試 – ArchLinux Server 篇

測試的主角
下載網頁:http://www.raspberrypi.org/downloads/

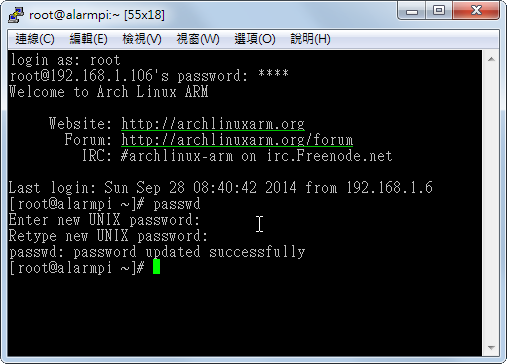
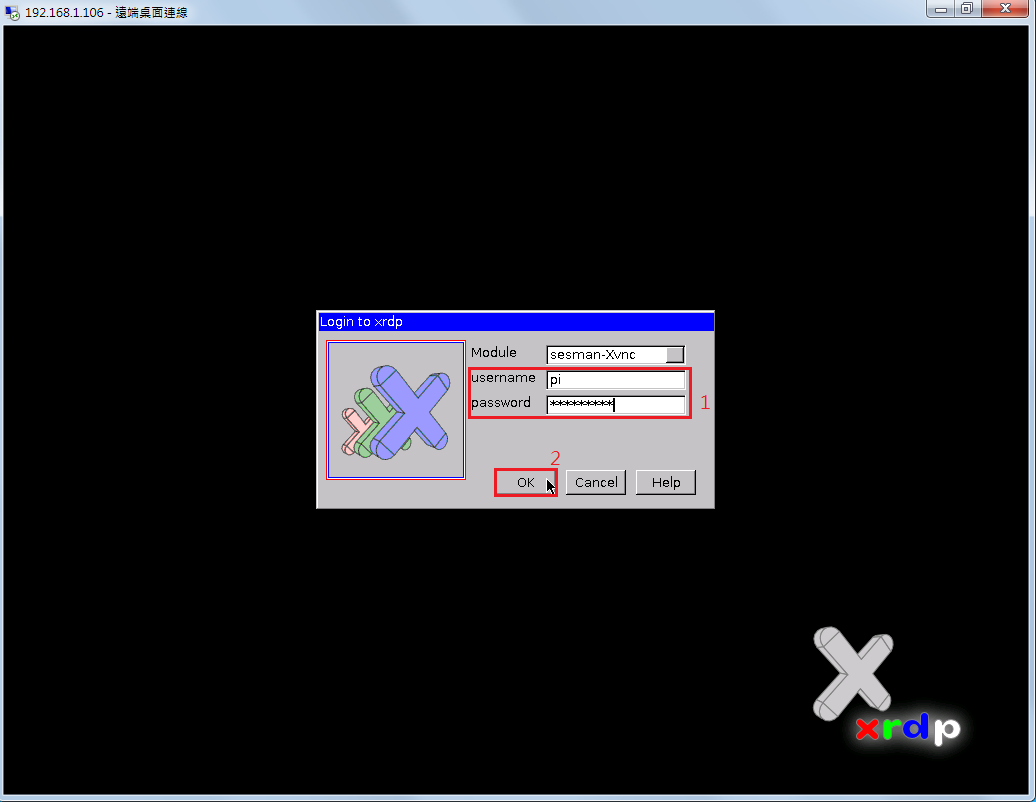
開機登入,預設帳號密碼:root / root
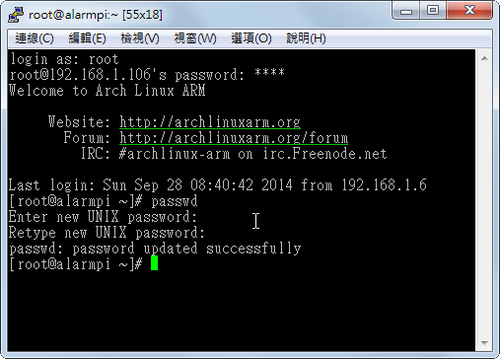
請更改密碼
# passwd
Enter new UNIX password:
Retype new UNIX password:
passwd: password updated successfully[@more@]底下文章參考:
ArchWiki
Nginx + PHP-FPM + MariaDB on Arch Linux for Raspberry PIs
homecomputerlab » NginX + PHP + MariaDB + WordPress on ArchLinux on a Raspberry Pi

設定時區
# date
Sun Sep 28 09:13:30 MDT 2014
# ls -l /etc/localtime
lrwxrwxrwx 1 root root 34 Aug 13  2013 /etc/localtime -> /usr/share/zoneinfo/America/Denver

刪除舊有設定
# rm -rf /etc/localtime

連結到 Asis/Taipei
# ln -s /usr/share/zoneinfo/Asia/Taipei /etc/localtime

# timedatectl set-timezone Asia/Taipei
# date
Sun Sep 28 23:16:19 CST 2014

更換成台灣的 Server
# sed -i ‘s/^Server/#Server/’ /etc/pacman.d/mirrorlist
# sed -i ’49s/# Server/Server/g’ /etc/pacman.d/mirrorlist

更新套件庫
# pacman -Syy
:: Synchronizing package databases…
 core                       159.0 KiB  2.72M/s 00:00 [############################] 100%
 extra                        2.2 MiB  4.66M/s 00:00 [############################] 100%
 community                    2.4 MiB  5.17M/s 00:00 [############################] 100%
 alarm                       29.0 KiB  4.72M/s 00:00 [############################] 100%
 aur                         61.7 KiB  2.87M/s 00:00 [############################] 100%

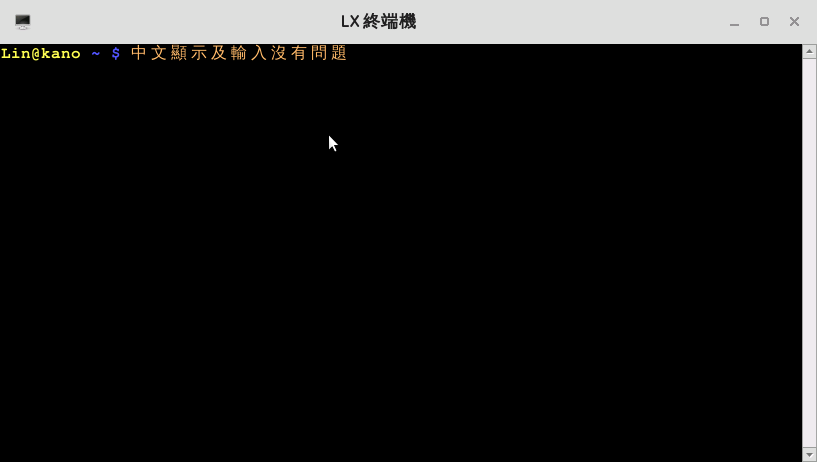
設定中文化環境,加入 en_US.UTF-8 和 zh-TW.UTF-8
# sed -i ‘s/#en_US.UTF-8/en_US.UTF-8/’ /etc/locale.gen
# sed -i ‘s/#zh_TW.UTF-8/zh_TW.UTF-8/’ /etc/locale.gen

產生 locale.gen 內指定的語系
locale-gen

設定預設語系
# echo ‘LANG=”en_US.UTF-8″‘ > /etc/locale.conf

檢視設定
# grep -v ^# /etc/locale.gen
en_US.UTF-8 UTF-8
zh_TW.UTF-8 UTF-8

安裝 vim 及 mlocate / dnsutils 套件
# pacman -S vim mlocate dnsutils

安裝 Nginx Web Server
# pacman -S nginx

啟動 Nginx Web Server
# systemctl start nginx

安裝的 Nginx Web Server 版本
# /usr/bin/nginx -v
nginx version: nginx/1.6.1

設定開機時啟動
# systemctl enable nginx
ln -s ‘/usr/lib/systemd/system/nginx.service’ ‘/etc/systemd/system/multi-user.target.wants/nginx.service’

取消開機時啟動
# systemctl disable nginx
rm ‘/etc/systemd/system/multi-user.target.wants/nginx.service’

設定 Nginx Web Server
備份設定檔
# mv /etc/nginx/nginx.conf /etc/nginx/nginx.conf.$(date +%F_%T)

建立 Nginx Web Server 設定檔
# vim /etc/nginx/nginx.conf
#user http;
worker_processes 1;

#error_log logs/error.log;
#error_log logs/error.log notice;
#error_log logs/error.log info;

#pid logs/nginx.pid;

events {
  worker_connections 2048;
}

http {
  include mime.types;
  default_type application/octet-stream;

#log_format main ‘$remote_addr – $remote_user [$time_local] “$request” ‘
# ‘$status $body_bytes_sent “$http_referer” ‘
# ‘”$http_user_agent” “$http_x_forwarded_for”‘;

#access_log logs/access.log main;

  sendfile on;

  keepalive_timeout 60;

  gzip on;
  gzip_comp_level 1;

  server {

    listen 80;
    server_name localhost;

    location ~ .php {
      root /srv/http;
      fastcgi_pass unix:/var/run/php-fpm/php-fpm.sock;
      fastcgi_index index.php;
      fastcgi_param SCRIPT_FILENAME $document_root$fastcgi_script_name;
      include fastcgi_params;
    }

    location / {
      root /srv/http;
      index index.php index.html index.htm home.php home.html home.htm;
    }
  }

}

重新啟動 Nginx Web Server
# systemctl restart nginx

安裝 PHP 和 PHP-FPM
# pacman -S php php-gd php-geoip php-pear php-cgi php-mcrypt php-odbc php-fpm

啟動 PHP-FPM
# systemctl start php-fpm

設定開機時啟動 PHP-FPM
# systemctl enable php-fpm
ln -s ‘/usr/lib/systemd/system/php-fpm.service’ ‘/etc/systemd/system/multi-user.target.wants/php-fpm.service’

設定 PHP 和 PHP-FPM
備份設定檔
# cp /etc/php/php.ini /etc/php/php.ini.$(date +%F)

修改 /etc/php/php.ini 設定檔
# sed -i ‘s/;extension=mysqli.so/extension=mysqli.so/’ /etc/php/php.ini
# sed -i ‘s/;extension=mysql.so/extension=mysql.so/’ /etc/php/php.ini
# sed -i ‘s/;extension=mcrypt.so/extension=mcrypt.so/’ /etc/php/php.ini
# sed -i ‘s/;mysqli.allow_local_infile = On/mysqli.allow_local_infile = On/’ /etc/php/php.ini
# sed -i ‘s|;date.timezone =|date.timezone = Asia/Taipei|’ /etc/php/php.ini

重新啟動 PHP-FPM
# systemctl restart php-fpm

安裝 mariadb SQL Server
# pacman -S mysql
:: There are 2 providers available for mysql:
:: Repository extra
   1) mariadb
:: Repository community
   2) percona-server

Enter a number (default=1): 1

啟動 mariadb SQL Server
# systemctl start mysqld

設定開機時啟動 mariadb SQL Server
# systemctl enable mysqld
ln -s ‘/usr/lib/systemd/system/mysqld.service’ ‘/etc/systemd/system/multi-user.target.wants/mysqld.service’

設定 mariadb SQL Server
備份設定檔
# mv /etc/mysql/my.cnf /etc/mysql/my.cnf.$(date +%F)

建立設定檔
# vim /etc/mysql/my.cnf
[mysqld]
default-storage-engine = myisam
key_buffer = 1M
query_cache_size = 1M
query_cache_limit = 128k
max_connections=25
thread_cache=1
skip-innodb
query_cache_min_res_unit=0
tmp_table_size = 1M
max_heap_table_size = 1M
table_cache=256
concurrent_insert=2
max_allowed_packet = 1M
sort_buffer_size = 64K
read_buffer_size = 256K
read_rnd_buffer_size = 256K
net_buffer_length = 2K
thread_stack = 64K

重新啟動 mariadb SQL Server
# systemctl restart mysqld

安裝後設定
# /usr/bin/mysql_secure_installation

測試 PHP 功能
# cat /srv/http/index.php
<?php
phpinfo();
?>

Raspberry Pi 測試 – RISC OS 篇

RISC OS 是開發給 ARM 架構使用的基於圖形用戶界面的電腦作業系統,更詳細的介紹可以參考:RISC OS – 維基百科,自由的百科全書

RISC OS for Raspberry Pi 下載頁面:http://www.raspberrypi.org/downloads/
[@more@]開機畫面

開機速度很快,只要 5-10 秒就完成到圖形的桌面環境

不過,是英文介面

可以執行桌面上的 !PackMan 來安裝軟體

!PackMan 執行畫面,軟體名稱前面打綠色的勾,代表是已經安裝的軟體

點選要安裝的軟體,再按左上角的圖示

選擇 Install 安裝

下載軟體中

安裝完成

因為一直找不到中文的相關套件,而且更慘的是,我還找不到可以關機的地方,所以雖然開機很快,還是放棄了!

Raspberry Pi XRDP 遠端桌面連線

一般連線到 Raspberry Pi 時,大都是使用 ssh 連線,因為它的連線速度比較快,但有時必須在 X Window 環境操作時,就須要使用到 rdp(Remote Desktop Protocol)。

首先在 Raspberry Pi 安裝 xrdp
$ sudo apt-get install xrdp

在 Windows 中執行 遠端桌面連線程式
輸入 Raspberry Pi 的 IP

[@more@]選擇 顯示選項

選擇 顯示
畫面大小不要太大,1024×768
色彩 高彩(16位元)

選擇 連線

點選 是(Y)

Module 有許多可以選擇,這裡不做更動

輸入 Raspberry Pi 的帳號及密碼,然後按 OK

連線到 Raspberry Pi 的桌面環境

嘗試 Kano for Raspberry Pi 中文化

其實這一篇應該是多寫的,因為 Kano OS 本身是 base on Debian,所以中文化的方式和 RASPBIAN 一樣。
[@more@]中文化的四個步驟:
不過這個要特別注意的是 sudo 的密碼,我一直以為是我在建立個人檔案中的密碼,結果試了很多次都不行,害我一直還想再重新跑一次之前的流程,後來在無意中亂打,竟然被矇對了,密碼是:kano

1. 安裝字形:
$ sudo apt-get install ttf-wqy-microhei ttf-wqy-zenhei xfonts-wqy

2. 設定中文環境
$ sudo dpkg-reconfigure locales

3. 安裝中文輸入法
$ sudo apt-get install gcin

4. 補足一些套件的中文語言套件 chromium-browser
$ sudo apt-get install chromium-browser-l10n

重新啟動電腦即可

中文輸入及顯示沒有問題

可以正常瀏覽網頁

功能表中文

但主選單還是英文的,一時之間找不到地方改

試用 Kano for Raspberry Pi

底下的圖片都是用手機照的,所以畫面可能都不是很理想。

開機畫面,有些像駭客任務中一直掉落的符號
[@more@]開機畫面

輸入您的名字

有些像是愛麗絲夢遊仙境中的兔子進入到洞裡一樣,一個不一樣的世界
輸入 cd rabbithole

畫面上會有一隻兔子在奔跑

輸入 startx,進入圖形模式(倒數 15 秒)

選擇 START SETUP 開始進行設定

選擇鍵盤型式,最後按 APPLY CHANGES

選擇 UPDATE NOW 進行更新

更新中

共分五個部分,第一個步驟是:下載更新的套件

第二步驟是:更新更新工具

第三步驟是:更新 Python

第四步驟是:更新作業系統

第五步驟是:完成設定

選擇 TEST SOUND 測試聲音

選擇 PLAY SOUND 播放聲音

有聽到音樂聲就選擇 YES

選擇 REBOOT,重新開機

進入設定

選擇 CREATE 建立個人資料

選擇 性別及出生年月日,並按 NEXT 繼續

輸入 Username 使用者名稱,Email 電子郵件,Password 密碼,勾選 I accept the terms and condition
最後按 REGISTER

如果是已經有人註冊過,會出現提示訊息

重新註冊

建立成功

終於快要可以開始了!LET’S GO

接著會有一段影片說明如何操作

終於完成了!

選單

類似貪吃蛇

可以做程式的管理

Scratch 程式

試用的感覺:
1. 系統真的有些慢,而且容易整個當住,常常要拔電源。
2. 大部分介面都是英文的,如果要給小孩子使用,有些難度。
3. 設定的步驟有些多。
4. 整體風格充滿童趣。
5. Kano OS base on Debian。

也許有機會,可以把 Kano 的 Image 放在 Banana Pi 上執行,看看是否能夠正常執行,如果可以的話,效能應該會好一些。
後來有試了一下,但好像是開不了機!