
OpenSSL 的 Heartbleed 漏洞被稱為是有史以來最危險的程式臭蟲,所以有使用 Linux/BSD Server 的系統管理者,都務必要檢測一下自己管理的伺服器是否安全。
底下列幾個網路上搜尋到的相關網站:
OpenSSL Heartbleed 漏洞檢測 @ CentOS 6 « Jamyy’s Weblog
修復CentOS 6.5 OpenSSL CVE-2014-0160資安漏洞的方法 | 阿維雜記本 (Wei’s Blog)
OpenSSL Heartbleed漏洞危機特別報導 | iThome
Test your server for Heartbleed
在 CentOS 6.x 上安裝 Monitorix
Monitorix 官方網站:http://www.monitorix.org/
安裝 Monitorix 所須套件
# yum install perl-Config-General perl-HTTP-Server-Simple perl-MIME-Lite perl-MailTools perl-XML-Simple rrdtool rrdtool-perl
下載 Monitorix
# wget http://www.monitorix.org/monitorix-3.4.0-1.noarch.rpm
進行安裝
# rpm -ivh monitorix-3.4.0-1.noarch.rpm
或
# yum install monitorix –enablerepo=epel
啟動 Monitorix 服務
# service monitorix start
正在啟動 monitorix: [ 確定 ]
設定開機時啟動
# chkconfig –level 3 monitorix on
檢查 Monitorix 服務是否有正常啟動
# netstat -antulp | grep monitorix
tcp 0 0 0.0.0.0:8080 0.0.0.0:* LISTEN 47040/monitorix-htt
[@more@]
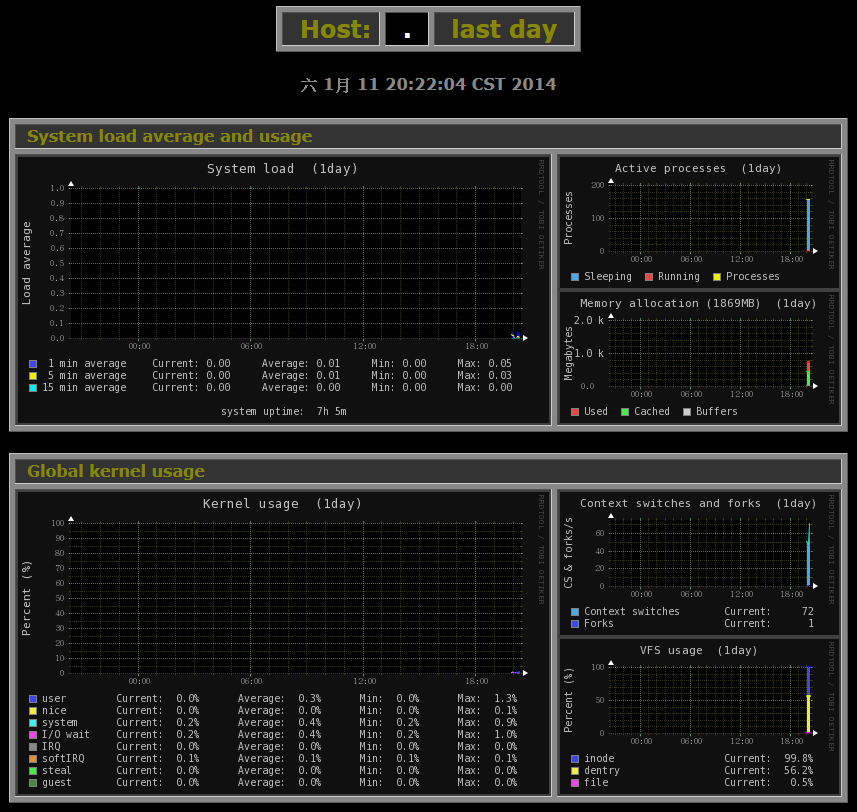
開啟瀏覽器,輸入 http://Server’IP:8080/monitorix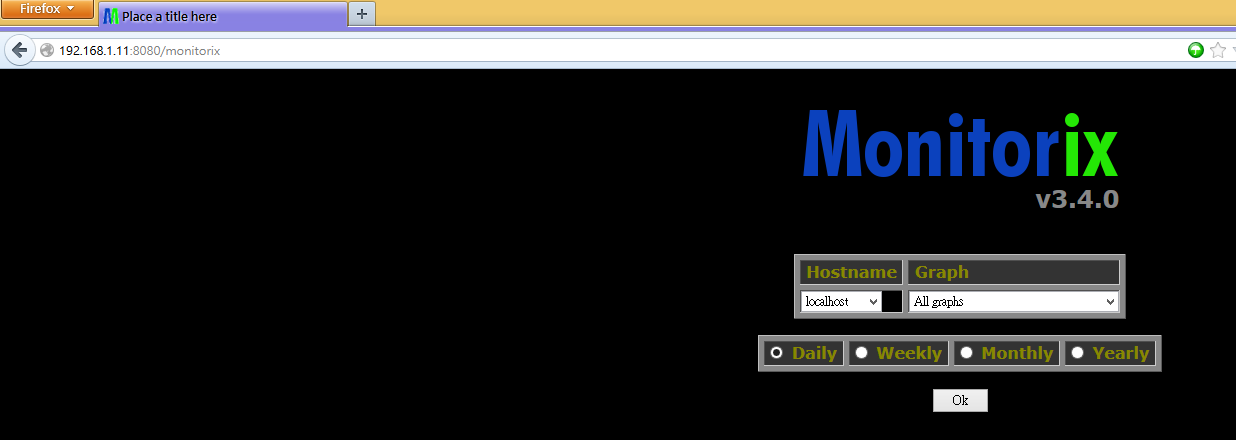
限制可以連線的範圍 192.168.1.0/24
# sed -i ‘s/hosts_deny =/hosts_deny = all/’ /etc/monitorix.conf
# sed -i ‘s/hosts_allow =/hosts_allow = 192.168.1.0/24/’ /etc/monitorix.conf
設定連線時須要輸入密碼
# sed -i ’34s/enabled = n/enabled = y/’ /etc/monitorix.conf
設定可以連線的使用者 admin 密碼 123456
# htpasswd -cb /var/lib/monitorix/htpasswd admin 123456
Adding password for user admin
快速產生 DHCP Server 的 dhcpd.conf 格式檔
從 /var/lib/dhcpd/dhcpd.leases 取出要的網路卡卡號
# cat /var/lib/dhcpd/dhcpd.leases | grep hard | awk ‘{print $3}’
d0:df:c7:f9:5c:ef;
00:26:51:0d:53:40;
00:11:93:88:7a:00;
00:15:58:6b:7d:da;
00:15:58:6b:7d:da;
00:15:58:6b:7d:da;
00:15:58:6b:7d:da;
經過處理,只取出想要的部分
# cat /var/lib/dhcpd/dhcpd.leases | grep hard | awk ‘{print $3}’ | sed ‘s/.$//’ | sort | uniq
00:11:93:88:7a:00
00:15:58:6b:7d:da
00:26:51:0d:53:40
d0:df:c7:f9:5c:ef
整理完的資料檔
# cat /root/mac
server1,00:11:93:88:7a:00,192.168.1.11
server2,00:15:58:6b:7d:da,192.168.1.12
server3,00:26:51:0d:53:40,192.168.1.13
server4,d0:df:c7:f9:5c:ef,192.168.1.14
[@more@]
使用 awk
# cat /usr/local/bin/mkdhcpd
#!/bin/bash
cat /root/mac | awk -F”,” ‘BEGIN{OFS=” “}{print $1,$2,$3 }’ | while read i j k
do
echo “host $i {“
echo ” hardware ethernet $j;”
echo ” fixed-address $k;”
echo “}”
done
使用 sed
# cat /usr/local/bin/mkdhcpd
#!/bin/bash
cat /root/mac | sed ‘s/,/ /g’ | while read i j k
do
echo “host $i {“
echo ” hardware ethernet $j;”
echo ” fixed-address $k;”
echo “}”
done
測試
# sh /usr/local/bin/mkdhcpd
host server1 {
hardware ethernet 00:11:93:88:7a:00;
fixed-address 192.168.1.11;
}
host server2 {
hardware ethernet 00:15:58:6b:7d:da;
fixed-address 192.168.1.12;
}
host server3 {
hardware ethernet 00:26:51:0d:53:40;
fixed-address 192.168.1.13;
}
host server4 {
hardware ethernet d0:df:c7:f9:5c:ef;
fixed-address 192.168.1.14;
}
架設 NTP Time Server
時間對於 Server 來說是非常重要,舉凡排程、備份,如果時間不對,可能會造成一些問題,所以一般都會在 cron 中排程,自動對時。
底下是每天晚上 12:00 自動對時
# crontab -l
0 0 * * * /usr/sbin/ntpdate -s time.stdtime.gov.tw;/sbin/hwclock -w[@more@]但如果 Server 的數量非常的多,所有的 Server 都要對外對時,比較方便是在內部網路中自行架設 NTP Time Server。
底下是安裝步驟
1. 安裝 ntp 套件
# yum install ntp
2. 修改 /etc/ntp.conf 設定檔
# vim /etc/ntp.conf
加上可以使用這一台 NTP Time Server 的網段
nomodify 用戶端不能更改 NTP Time Server 的時間參數
notrap 不提供 trap 這個遠端事件登錄的功能
# Hosts on local network are less restricted.
restrict 192.168.1.0 mask 255.255.255.0 nomodify notrap
指定要和遠端 NTP Time Server 進行時間同步的 Server,prefer 表示優先使用的主機
server tock.stdtime.gov.tw perfer
server csie.cyut.edu.tw
server watch.stdtime.gov.tw
server time.stdtime.gov.tw
server clock.stdtime.gov.tw
3. 修改 /etc/sysconfig/ntpd,設定 BIOS 的時間也同步調整
# vim /etc/sysconfig/ntpd
# Drop root to id ‘ntp:ntp’ by default.
OPTIONS=”-u ntp:ntp -p /var/run/ntpd.pid -g”
SYNC_HWCLOCK=yes
4. 啟動 NTP Time Server
# service ntpd start
5. 設定開機時啟動
# chkconfig –level 3 ntpd on
6. 檢查是否有正常啟動
# netstat -tulnp | grep 123
udp 0 0 192.168.1.109:123 0.0.0.0:* 8829/ntpd
udp 0 0 127.0.0.1:123 0.0.0.0:* 8829/ntpd
udp 0 0 0.0.0.0:123 0.0.0.0:* 8829/ntpd
udp 0 0 ::1:123 :::* 8829/ntpd
udp 0 0 :::123 :::* 8829/ntpd
7. 在防火牆中設定
iptables -A INPUT -p UDP -s 192.168.1.0/24 –dport 123 -j ACCEPT
8. 在別台 Server 中做測試
目前時間
# date
一 12月 23 11:45:18 CST 2013
9. 隨便更改一個時間
# date 072816332011
四 7月 28 16:33:00 CST 2011
10. 進行對時
# /usr/sbin/ntpdate -s 192.168.1.109
11. 檢查時間是否正確
# date
一 12月 23 11:47:08 CST 2013
Samba Server 的使用者帳號及密碼備份
Samba Server 自從 3.x 後改成使用 tdbsam 的方式來管理使用者的帳號及密碼,原本的帳號密碼都是存放在 /etc/samba 目錄之下,最近要做備份時,一時之間竟然找不到 Samba Server 存放使用者帳號及密碼的地方。
後來有想到,可以先把 tdbsam 格式匯出成 smbpasswd 格式,再把 smbpasswd 格式轉成 tdbsam 格式
把 tdbsam 匯出成為 smbpasswd 格式
# /usr/bin/pdbedit -i tdbsam -e smbpasswd
把 smbpasswd 匯出成 tdbsam 格式
# /usr/bin/pdbedit -i smbpasswd -e tdbsam
或指定完整目錄
把 tdbsam 匯出成為 smbpasswd 格式
# /usr/bin/pdbedit -i tdbsam:/var/lib/samba/private/passdb.tdb -e smbpasswd:/etc/samba/smbpasswd
把 smbpasswd 匯出成 tdbsam 格式
# /usr/bin/pdbedit -i smbpasswd:/etc/samba/smbpasswd -e tdbsam:/var/lib/samba/private/passdb.tdb
不過這樣的手續有些煩雜,如果可以直接備份應該會更好。[@more@]後來很努力找了一下,終於找到了,在 /var/lib/samba/private 目錄之下
# ls -l /var/lib/samba/private/
-rw——- 1 root root 532480 2013-10-11 13:26 passdb.tdb
-rw——- 1 root root 45056 2011-09-02 14:49 secrets.tdb
解決 /lib/security/pam_fprintd.so 的錯誤訊息
在 Linux logwatch 記錄檔中發現下以下的錯誤訊息:
——————— Connections (secure-log) Begin ————————
Root logins on tty’s: 2 Time(s).
**Unmatched Entries**
login: PAM adding faulty module: /lib/security/pam_fprintd.so: 2 Time(s)
login: PAM unable to dlopen(/lib/security/pam_
fprintd.so): /lib/security/pam_fprintd.so: cannot open shared object file: No such file or directory: 2 Time(s)
———————- Connections (secure-log) End ————————-[@more@]看起來似乎是找不到這一個檔案
# ls -l /lib/security/pam_fprintd.so
ls: 無法存取 /lib/security/pam_fprintd.so: 沒有此一檔案或目錄
這一個檔案的功用似乎和最近很流行的指紋辨識有關,可是 Linux Server 應該不須要這一項功能
取消方式:
# authconfig –disablefingerprint –update
如果真的須要這一項功能,請安裝下面的套件
# yum install fprintd-pam
SMART error (OfflineUncorrectableSector)
今天收信時,在信箱中有一封標題為 SMART error (OfflineUncorrectableSector) 的信件,內文為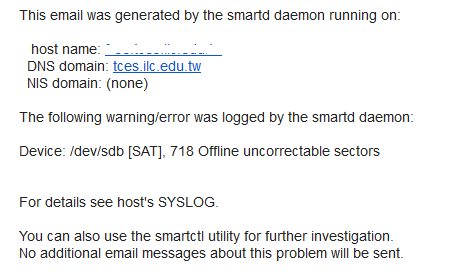
[@more@]看起來似乎是 sdb 這一顆硬碟有問題,經仔細檢測後,果然是有問題,可以準備更換硬碟了。
# smartctl -H /dev/sdb
smartctl 5.43 2012-06-30 r3573 [x86_64-linux-2.6.32-358.18.1.el6.x86_64] (local build)
Copyright (C) 2002-12 by Bruce Allen, http://smartmontools.sourceforge.net
=== START OF READ SMART DATA SECTION ===
SMART overall-health self-assessment test result: PASSED
# smartctl -l selftest /dev/sdb
smartctl 5.43 2012-06-30 r3573 [x86_64-linux-2.6.32-358.18.1.el6.x86_64] (local build)
Copyright (C) 2002-12 by Bruce Allen, http://smartmontools.sourceforge.net
=== START OF READ SMART DATA SECTION ===
SMART Self-test log structure revision number 1
Num Test_Description Status Remaining LifeTime(hours) LBA_of_first_error
# 1 Short offline Completed: read failure 90% 36469 353066
# 2 Vendor (0x50) Aborted by host 10% 24707 –
# 3 Short offline Completed without error 00% 24706 –
# 4 Vendor (0x50) Completed without error 00% 24704 –
# 5 Short offline Completed without error 00% 24704 –
# 6 Vendor (0x50) Completed without error 00% 24703 –
# 7 Short offline Completed without error 00% 24703 –
# 8 Vendor (0x50) Completed without error 00% 24677 –
# 9 Short offline Completed without error 00% 24676 –
#10 Vendor (0x50) Completed without error 00% 24662 –
#11 Short offline Completed without error 00% 24662 –
安裝 mirrordir
mirrordir 是一套可以同步目錄及檔案的程式,在備份時非常好用,但印象中似乎有單一檔案不能超過 2G 的限制,如果有這樣的問題時,可以改用 rsync 來處理。
沒有第一時間使用 rsync 的原因是,因為我的備份是用 NFS Server 直接掛載目錄的方式,可以直接在本機端備份所需的檔案及目錄,不用做太多的設定,如果改用 rsync,伺服器端和本地端都要做設定。
底下是 mirrordir 的安裝方式:
因為 mirrordir 並不是 CentOS 內定就有的套件,而 rpmforge 和 epel 似乎也沒有,就要使用手動下載下來安裝
檔案下載目錄:
http://pkgs.repoforge.org/mirrordir/
目錄中有支援不同的 CentOS Linux 的版本(/2/3/4/5/6)和不同的平台(i386/i686/x86_64)
以 CentOS Linux 6 x86_64 平台為例
# wget http://pkgs.repoforge.org/mirrordir/mirrordir-0.10.49-1.2.el5.rf.x86_64.rpm
# rpm -ivh mirrordir-0.10.49-1.2.el5.rf.x86_64.rpm
或
# rpm -ivh http://pkgs.repoforge.org/mirrordir/mirrordir-0.10.49-1.2.el5.rf.x86_64.rpm
上面是以 el5 版本為例,因為目錄中沒有給 el6 的 x86_64 版本
詳細的 mirrordir 用法,可以使用下面的方式列出使用的參數
# /usr/bin/mirrordir –help
[@more@]後記:2013-10-30
確認檔案是不能超過 2G
# /usr/bin/mirrordir /home/global /mnt/school/全校授權
mirrordir: error trying to stat file: /home/global/Windows_8/Windows_8_64bit_KMS.iso: Value too large for defined data type
mirrordir: error trying to stat file: /home/global/Windows_8/Windows_8_32bit_KMS.iso: Value too large for defined data type
mirrordir: error trying to stat file: /mnt/school/全校授權/Windows_8/Windows_8_64bit_KMS.iso: Value too large for defined data type
mirrordir: error trying to stat file: /mnt/school/全校授權/Windows_8/Windows_8_32bit_KMS.iso: Value too large for defined data type
mirrordir: error trying to stat file: /home/global/Windows_7/Windows_7_Enterprise_SP1_64bit_KMS.iso: Value too large for defined data type
mirrordir: error trying to stat file: /home/global/Windows_7/Windows_7_Enterprise_SP1_32bit_KMS.iso: Value too large for defined data type
mirrordir: error trying to stat file: /mnt/school/全校授權/Windows_7/Windows_7_Enterprise_SP1_32bit_KMS.iso: Value too large for defined data type
mirrordir: error trying to stat file: /mnt/school/全校授權/Windows_7/Windows_7_Enterprise_SP1_64bit_KMS.iso: Value too large for defined data type
mirrordir: error trying to stat file: /home/global/Music Maker 16 Premium 酷樂大師/MM16Premium.iso: Value too large for defined data type
mirrordir: error trying to stat file: /mnt/school/全校授權/Music Maker 16 Premium 酷樂大師/MM16Premium.iso: Value too large for defined data type
解決換機器後網路卡無法啟動的問題
有時候用 Virtaulbox 或是 VMware 安裝的虛擬主機,或是真實的主機,更換了網路卡或換了主機,網路卡常常會無法啟動,有一部分是網路卡的設定檔案中,有設定了網路卡卡號,
# cat ifcfg-eth2
DEVICE=eth2
HWADDR=00:02:b3:41:47:bf
TYPE=Ethernet
UUID=4da519dc-7ada-4082-b7ae-6aee62150f5b
ONBOOT=yes
只要去除卡號和 UUID 的設定,再重新啟動網路卡即可。
[@more@]另外一種可能是現在的 Linux 大部分都是使用 udev 來管理設備,所以可能是舊的設定,使新的網路卡無法正常啟動,解決方式是刪除舊的設定檔,再重新啟動電腦即可。
刪除舊的設定檔
# rm -rf /etc/udev/rules.d/70-persistent-net.rules
重新啟動
# sync;sync;sync;sync;init 6
解決螢幕畫面出現 EDAC MC0: CE page 0x0 訊息
在家裡時發現學校負責公告和電腦教室學生上課的那一台 ASUS TS300-E4 Server 無法連線,到了學校查看了一下,發現電源無法開機,試了很多種方式然無法開機,可是這一台 Server 很重要,如果沒有復原,星期一可能無法上課,學校公告也會無法正常使用。
於是找了一台型號比較接近的電腦,先做硬碟的對換,想說先讓它可以上線。電腦重新啟動後,螢幕卻一直出現下面的訊息
Oct 26 15:36:36 drbl kernel: EDAC MC0: UE page 0x0, offset 0x0, grain 1073741824, row 2, labels “:”: i3200 UE
Oct 26 15:36:36 drbl kernel: EDAC MC0: UE page 0x0, offset 0x0, grain 1073741824, row 6, labels “:”: i3200 UE
Oct 26 15:36:37 drbl kernel: EDAC MC0: UE page 0x0, offset 0x0, grain 1073741824, row 2, labels “:”: i3200 UE
Oct 26 15:36:37 drbl kernel: EDAC MC0: UE page 0x0, offset 0x0, grain 1073741824, row 6, labels “:”: i3200 UE
根本無法操作,網路卡也無法正常啟動,無論在本機端或網路連線都是一樣。[@more@]
正想放棄的時候,到網路上搜尋了一下,找到了幾篇有關的訊息
鳥哥的 Linux 私房菜-新手討論區 • 檢視主題 – Terminal 連續跳出錯誤
ASUSTeK Computer Inc. -Support- 常見問題 P5BV-C
edac mc0 – 土狗的部落格 – Yahoo!奇摩部落格
EDAC 是 Error Detection And Correction 的縮寫,後來在上面的第三篇找到了解決方式,就是停用和 edac 有關的模組
# lsmod | grep edac
i3200_edac 9545 0
edac_core 26513 1 i3200_edac
# rmmod i3200_edac
# rmmod edac_core
不過,有的文章說明可能是記憶體出了問題,不過因為這二台 Server 都可以正常運作,並沒有出現問題,所以就暫且處理到這裡,有空的話,再用 memtest 程式來仔細測試。