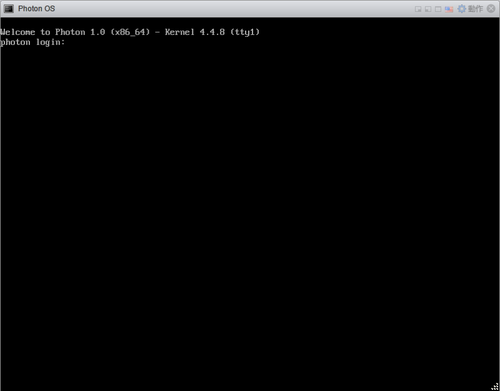
Photon OS – 更新指令 tdnf

在 Photon OS 中是採用與 yum 相類似的套件管理程式 tdnf。
# which tdnf
/usr/bin/tdnf

列出比較常用的參數用法:
移除套件
# tdnf erase package
# tdnf remove package
# tdnf remove nano

Removing:
nano                                                                                x86_64                         2.5.2-2.ph1                                                        1.81 M

Total installed size: 1.81 M
Is this ok [y/N]:

安裝套件
# tdnf install package
# tdnf install nano

Installing:
nano                                                                                x86_64                         2.5.2-2.ph1                                                        1.81 M

Total installed size: 1.81 M
Is this ok [y/N]:y

Downloading:
nano                                    737468    100%
Testing transaction
Running transaction

Complete![@more@]檢查可以更新的套件
# tdnf check-update

清除 Cache
# tdnf clean all

尋找套件
# tdnf search package

顯示套件相關資訊
# tdnf info package

更新已安裝的程式
# tdnf distro-sync

更多的用法:
# tdnf
You need to give some command
usage: tdnf [options] COMMAND

options    [-c [config file]]
           [–debugsolver]
           [–rpmverbosity [debug level name]] [-v] [-y] [–assumeno]
           [–version] [–installroot [path]]
           [–nogpgcheck]
           [–releasever RELEASEVER] [–setopt SETOPTS]
           [–refresh] [-4] [-6] [-h]
List of Main Commands

check-local               Checks local rpm folder for problems
check-update              Check for available package upgrades
clean                     Remove cached data
distro-sync               Synchronize installed packages to the latest available versions
downgrade                 downgrade a package
erase                     Remove a package or packages from your system
help                      Display a helpful usage message
info                      Display details about a package or group of packages
install                   Install a package or packages on your system
list                      List a package or groups of packages
makecache                 Generate the metadata cache
provides                  Find what package provides the given value
remove                    Remove a package or packages from your system
reinstall                 reinstall a package
repolist                  Display the configured software repositories
search                    Search package details for the given string
updateinfo                Display advisories about packages
upgrade                   Upgrade a package or packages on your system
upgrade-to                Upgrade a package on your system to the specified version

VMware ESXi – 利用 Photon OS 虛擬機建立 Docker 環境

參考網站:
用ESXi建Photon OS虛擬機 打造超輕量Docker環境 – 專題報導 – 網管人NetAdmin
Basic Commands for VMware Photon and Docker | Virten.net

1. 執行內建的 Nginx 網站
連上網路下載
-d 以 Daemonized 形式執行
# docker run -d -p 80:80 vmwarecna/nginx
Unable to find image ‘vmwarecna/nginx:latest’ locally
latest: Pulling from vmwarecna/nginx
a3ed95caeb02: Pull complete
b6f2388a20dd: Pull complete
a305e4b888ce: Pull complete
80596a504ef3: Pull complete
99c028eff2a4: Pull complete
a1cee46bc434: Pull complete
9bd9868012b9: Pull complete
6fa7100a2613: Pull complete
Digest: sha256:f73bbae0f31823c06478b1fa5efb4957bc25239802fd5ea94e4442c0a6090d23
Status: Downloaded newer image for vmwarecna/nginx:latest
085923c591c6b63b477d3267e4f42945a02ea8ebf828e030740b4c299f0e6d57[@more@]執行之後,會新增 docker0 網路介面
# ifconfig docker0
docker0   Link encap:Ethernet  HWaddr 02:42:fa:50:60:86
          inet addr:172.17.0.1  Bcast:0.0.0.0  Mask:255.255.0.0
          inet6 addr: fe80::42:faff:fe50:6086/64 Scope:Link
          UP BROADCAST RUNNING MULTICAST  MTU:1500  Metric:1
          RX packets:69 errors:0 dropped:0 overruns:0 frame:0
          TX packets:90 errors:0 dropped:0 overruns:0 carrier:0
          collisions:0 txqueuelen:0
          RX bytes:101690 (101.6 KB)  TX bytes:7392 (7.3 KB)

防火牆部分也會新增規則
# iptables -L DOCKER -n
Chain DOCKER (1 references)
target     prot opt source               destination
ACCEPT     tcp  —  0.0.0.0/0            172.17.0.2           tcp dpt:80

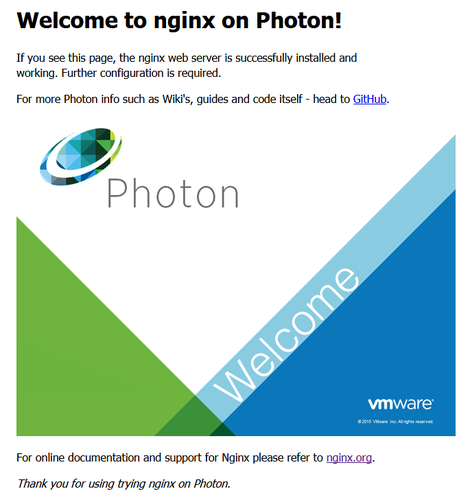
2. 開啟瀏覽器,輸入 Photon OS IP

3. Docker 版本
# docker version
Client:
 Version:      1.11.0
 API version:  1.23
 Go version:   go1.5.4
 Git commit:   4dc5990
 Built:        Wed Apr 13 19:36:04 2016
 OS/Arch:      linux/amd64

Server:
 Version:      1.11.0
 API version:  1.23
 Go version:   go1.5.4
 Git commit:   4dc5990
 Built:        Wed Apr 13 19:36:04 2016
 OS/Arch:      linux/amd64

#Download a Docker container (https://registry.hub.docker.com/)
docker pull vmwarecna/nginx

#Display local stored Docker images
docker images

#Start Docker Container
# -d       – Run the container in the background
# -p 80:80 – Publish the container’s port to the host
docker run -d -p 80:80 vmwarecna/nginx

#List running Docker Containers
docker ps

#Display the public-facing port that is NAT-ed to the container
#(Container ID from docker ps command)
docker port 5f6b0e03c6de

#Stop Docker Container
docker stop 5f6b0e03c6de

#Automatically start Docker containers at boot time
#To start a container at boot time the restart policy parameter is used. 
docker run –restart=always -d -p 80:80 vmwarecna/nginx

VMware ESXi – 安裝 Photon OS 虛擬機器

Photon OS 官方網站:https://vmware.github.io/photon/

1. 下載 Photon OS,這裡下載的是 Full ISO

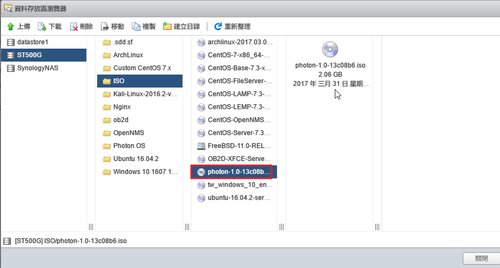
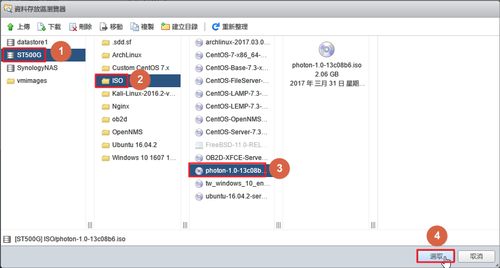
[@more@]2. 先把 ISO 檔上傳到 ESXi Server 資料存放區

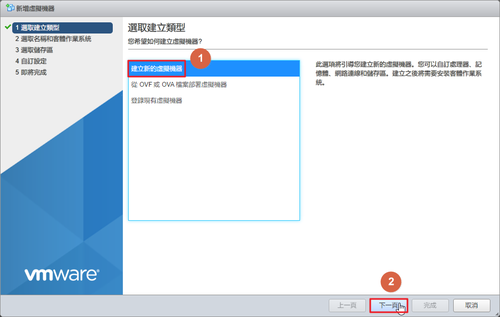
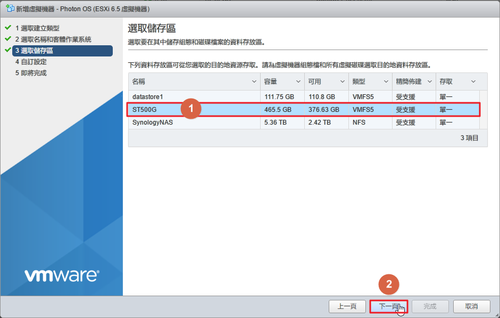
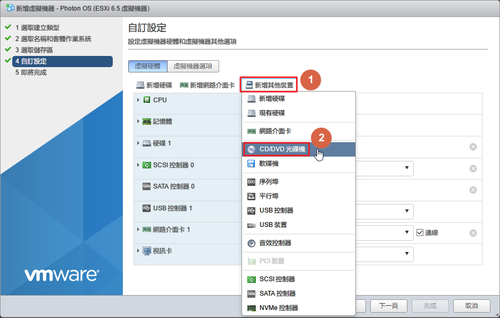
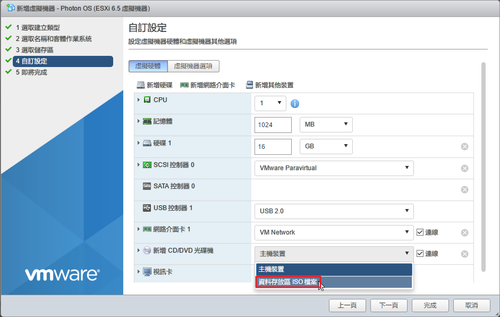
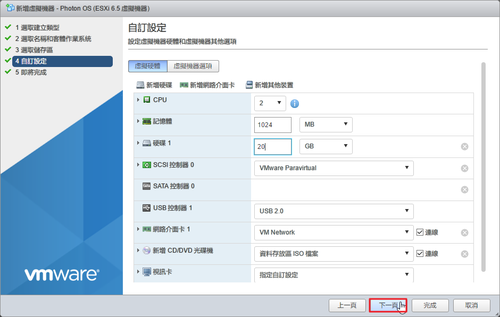
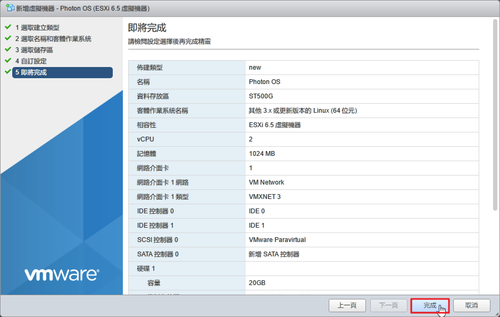
3. 建立虛擬機器

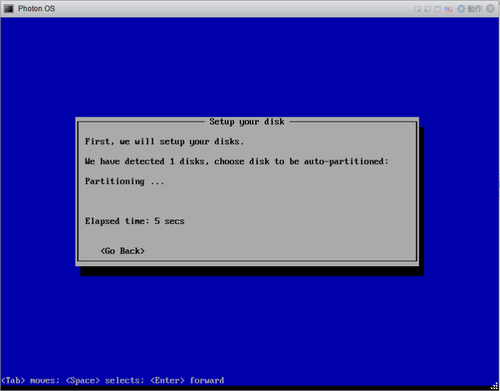
4. 進行安裝
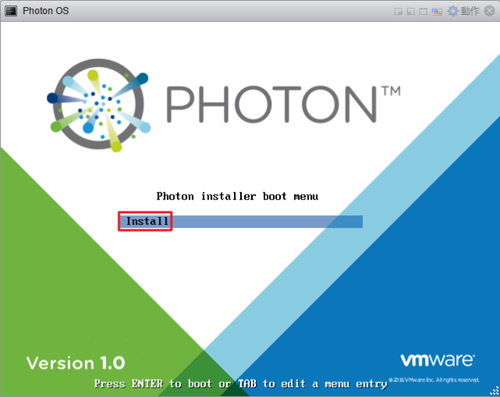
    選擇 Install   

  
    選擇 Accept

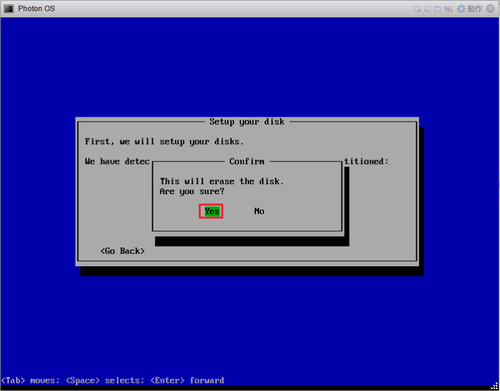
    選擇 Yes

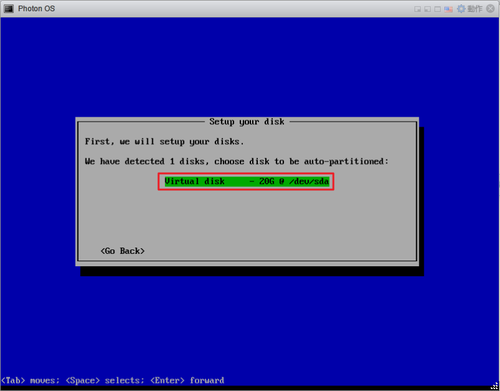
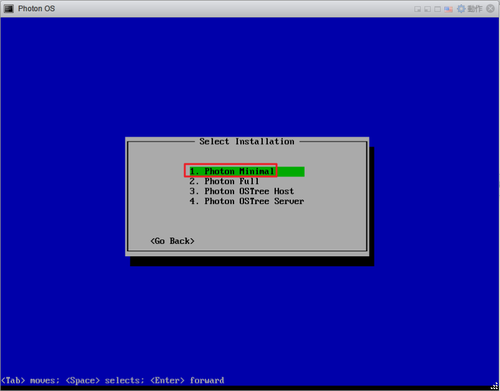
    選擇安裝的方式,詳細可以參考 用ESXi建Photon OS虛擬機 打造超輕量Docker環境 – 專題報導 – 網管人NetAdmin

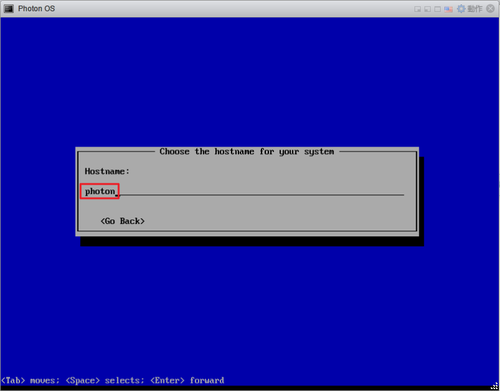
    設定主機名稱

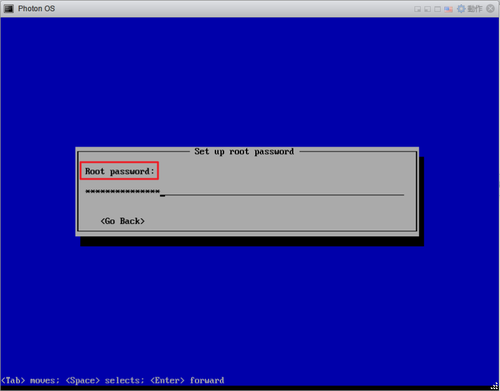
    設定 root 密碼

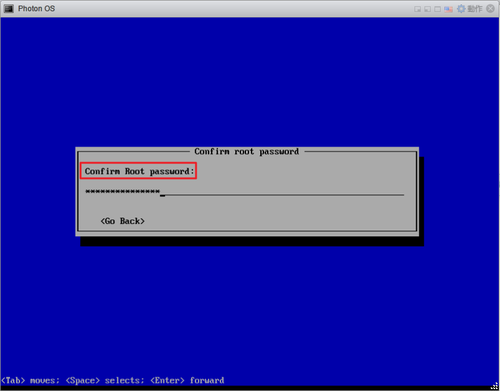
    確認 root 密碼

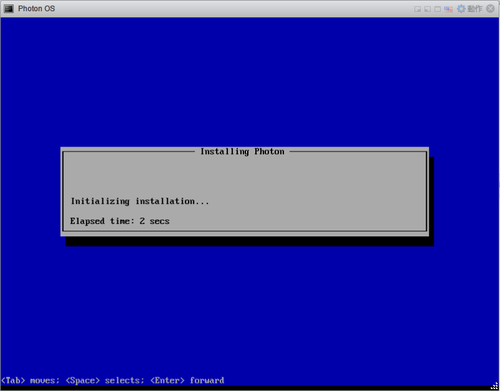
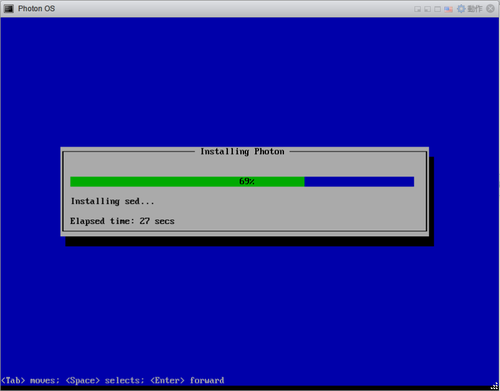
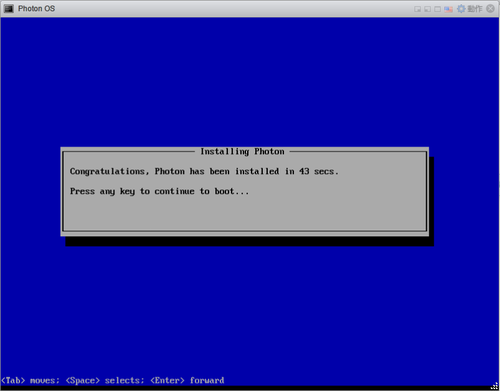
    按任意鍵重新開機

5. 開機畫面

    登入畫面

    登入完成

6. 進行設定
SSH Server 設定
# cp /etc/ssh/sshd_config /etc/ssh/sshd_config.$(date +%F)
# sed -i ‘s/PermitRootLogin no/PermitRootLogin yes/’ /etc/ssh/sshd_config
# systemctl restart sshd.service

7. 設定網路
# sed -i ‘s/DHCP=yes/DHCP=no/’ /etc/systemd/network/10-dhcp-en.network

# networkctl | grep configured
  2 eth0             ether              routable    configured

設定網路
# vim /etc/systemd/network/10-static-en.network
[Match]
Name=eth0

[Network]
Address=192.168.1.134/24
Gateway=192.168.1.2
Address=2001:288:a229:1::134/64
Gateway=2001:288:a229:1::ffff
DNS=8.8.8.8
DNS=168.95.1.1

Domains=photon.local

# chmod 644 /etc/systemd/network/10-static-en.network

重新啟動網路
# systemctl restart systemd-networkd.service

測試 DNS 查詢是否正常
# ping -c 3 www.ilc.edu.tw
PING www.ilc.edu.tw (140.111.66.96) 56(84) bytes of data.
64 bytes from server96.ilc.edu.tw (140.111.66.96): icmp_seq=1 ttl=126 time=1.06 ms
64 bytes from server96.ilc.edu.tw (140.111.66.96): icmp_seq=2 ttl=126 time=1.16 ms
64 bytes from server96.ilc.edu.tw (140.111.66.96): icmp_seq=3 ttl=126 time=0.983 ms

# ping6 -c 3 www.ilc.edu.tw
PING www.ilc.edu.tw(2001:288:a201::66:96) 56 data bytes
64 bytes from 2001:288:a201::66:96: icmp_seq=1 ttl=126 time=1.67 ms
64 bytes from 2001:288:a201::66:96: icmp_seq=2 ttl=126 time=1.68 ms
64 bytes from 2001:288:a201::66:96: icmp_seq=3 ttl=126 time=1.53 ms

8. 設定防火牆
# vim /etc/systemd/scripts/iptables

iptables -A INPUT -p tcp –dport 22 -j ACCEPT
修改成
iptables -A INPUT -p tcp -s 192.168.1.0/24 –dport 22 -j ACCEPT

# systemctl restart iptables.service
# iptables -L -n
Chain INPUT (policy DROP)
target     prot opt source               destination
ACCEPT     all  —  0.0.0.0/0            0.0.0.0/0
ACCEPT     all  —  0.0.0.0/0            0.0.0.0/0            ctstate RELATED,ESTABLISHED
ACCEPT     tcp  —  192.168.1.0/24      0.0.0.0/0            tcp dpt:22

Chain FORWARD (policy DROP)
target     prot opt source               destination

Chain OUTPUT (policy DROP)
target     prot opt source               destination
ACCEPT     all  —  0.0.0.0/0            0.0.0.0/0

9. 設定時區
# rm -rf /etc/localtime
# ln -s /usr/share/zoneinfo/Asia/Taipei /etc/localtime
# date
Fri Mar 31 17:57:10 CST 2017

10. 設定開機時啟動 docker
# systemctl enable docker.service
Created symlink from /etc/systemd/system/multi-user.target.wants/docker.service to /usr/lib/systemd/system/docker.service.
# systemctl start docker.service