參考網站:
ghettoVCB 備份 ESXI Guest OS
ESXi 5.1 / 5.5 定期排程備份線上VM;NFS、sendmail-ghettoVCB | Mr. 沙先生
Backing up VMware ESXi VMs with ghettoVCB – Miscellaneous Knowledge
虛擬機器不用先關機,ghettoVCB.sh 會先為虛擬機器建立快照,然後進行備份,當備份完成之後會刪除快照。
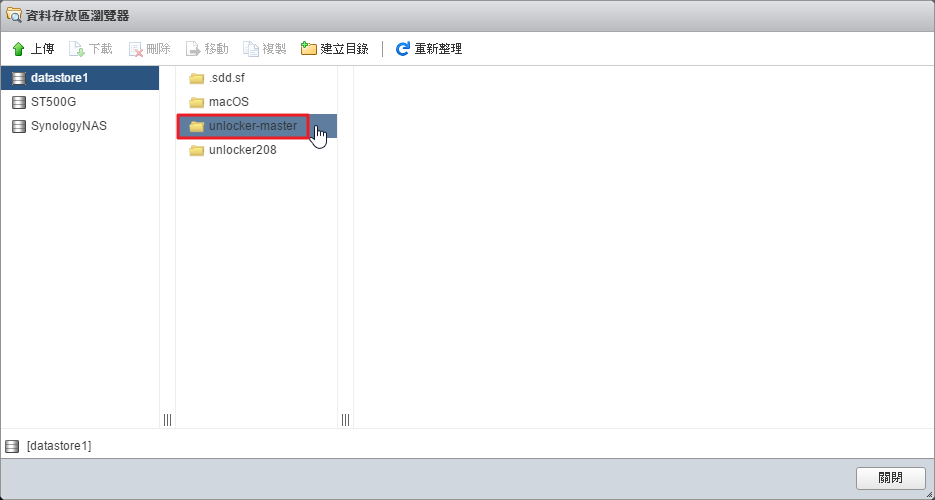
1.下載 ghettoVCB
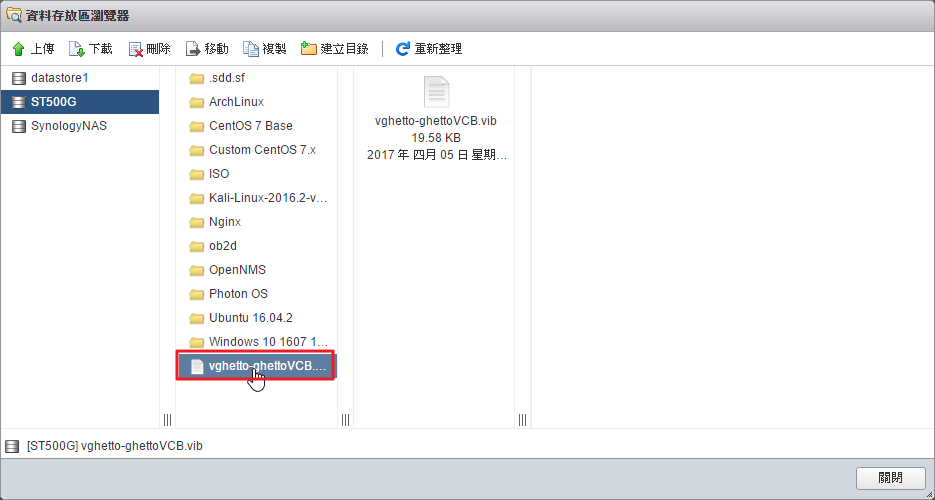
2. 上傳到 資料存放區

3. 開啟 ESXi 伺服器可安裝非原廠的額外套件
[root@esxi:~] esxcli software acceptance set –level=CommunitySupported
Host acceptance level changed to ‘CommunitySupported’.
4. 進行安裝 ghettoVCB,似乎沒有進行第 3 步驟,也可以進行安裝
[root@esxi:~] esxcli software vib install -v /vmfs/volumes/ST500G/vghetto-ghettoVCB.vib -f
Installation Result
Message: Operation finished successfully.
Reboot Required: false
VIBs Installed: virtuallyGhetto_bootbank_ghettoVCB_1.0.0-0.0.0
VIBs Removed:
VIBs Skipped:
檔案安裝位置
[root@esxi:~] ls -l /opt/ghettovcb/bin/*
-r-xr-xr-x 1 root root 17555 Jan 11 14:31 /opt/ghettovcb/bin/ghettoVCB-restore.sh
-r-xr-xr-x 1 root root 65458 Jan 11 14:31 /opt/ghettovcb/bin/ghettoVCB.sh[@more@]
5. 建立 ghettoVCB.conf 設定檔
[root@esxi:~] vi /opt/ghettoVCB/ghettoVCB.conf
# 備份到 SynologyNAS
VM_BACKUP_VOLUME=/vmfs/volumes/SynologyNAS
# 備份虛擬機格式,採用精簡建
DISK_BACKUP_FORMAT=thin
# 定義備份保留的數量
VM_BACKUP_ROTATION_COUNT=3
# 虛擬機器 POWER OFF 時不會要求 snapshottting
POWER_VM_DOWN_BEFORE_BACKUP=0
# 定義沒有安裝 VMware Tools 的虛擬機器是否可以在硬碟 POWER OFF 時啟用
ENABLE_HARD_POWER_OFF=0
# 如果啟用 ENABLE_HARD_POWER_OFF,將強制執行關閉時會侄數運算,時間是 3 分鐘
ITER_TO_WAIT_SHUTDOWN=3
# 設定 POWER DOWN 的時間,等待關閉時,VM 會放棄或忽略特定的 VM 備份。時間是 5 分鐘
POWER_DOWN_TIMEOUT=5
# 不進行壓縮
ENABLE_COMPRESSION=0
# 不啟用 VM 虛擬機器的快照記憶體
VM_SNAPSHOT_MEMORY=0
# 不啟用對停止的 VM 虛擬機器使用快照(需要有安裝 VMware Tools)
VM_SNAPSHOT_QUIESCE=0
ALLOW_VMS_WITH_SNAPSHOTS_TO_BE_BACKEDUP=0
# 開啟 NFS
ENABLE_NON_PERSISTENT_NFS=1
# 執行完畢就 unmount
UNMOUNT_NFS=0
# NFS Server IP
NFS_SERVER=xxx.xxx.xxx.xxx
# NFS 版本
NFS_VERSION=nfs
# NFS Host 掛載目錄
NFS_MOUNT=/volume1/homes/test/Server/esxi
NFS_LOCAL_NAME=SynologyNAS
NFS_VM_BACKUP_DIR=mybackups
6. 建立 log 檔存放目錄
[root@esxi:~] mkdir /vmfs/volumes/ST500G/ghettoVCB_log
7. 修改 /opt/ghettovcb/bin/ghettoVCB.sh
[root@esxi:~] vi /opt/ghettovcb/bin/ghettoVCB.sh
找到
#if no logfile then provide default logfile in /tmp
if [[ -z “${LOG_OUTPUT}” ]] ; then
LOG_OUTPUT=”/tmp/ghettoVCB-$(date +%F_%H-%M-%S)-$$.log”
echo “Logging output to “${LOG_OUTPUT}” …”
fi
修改成
#if no logfile then provide default logfile in /tmp
if [[ -z “${LOG_OUTPUT}” ]] ; then
LOG_OUTPUT=”//vmfs/volumes/ST500G/ghettoVCB_log/ghettoVCB-$(date +%F_%H-%M-%S)-$$.log”
echo “Logging output to “${LOG_OUTPUT}” …”
fi
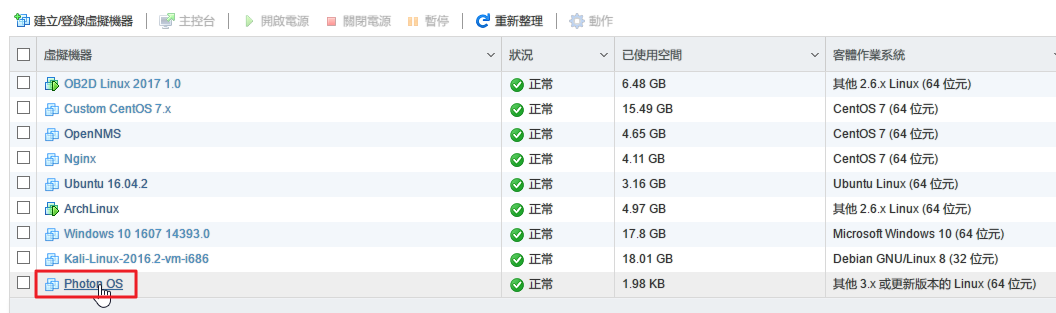
8. 列出安裝的虛擬機器
[root@esxi:~] vim-cmd vmsvc/getallvms
Vmid Name File Guest OS Version Annotation
1 OB2D Linux 2017 1.0 [ST500G] ob2d/ob2d.vmx other26xLinux64Guest vmx-13
2 Custom CentOS 7.x [ST500G] Custom CentOS 7.x/Custom CentOS 7.x.vmx centos7_64Guest vmx-13
21 OpenNMS [ST500G] OpenNMS/OpenNMS.vmx centos7_64Guest vmx-13
22 Nginx [ST500G] Nginx/Nginx.vmx centos7_64Guest vmx-13
24 Ubuntu 16.04.2 [ST500G] Ubuntu 16.04.2/Ubuntu 16.04.2.vmx ubuntu64Guest vmx-13
25 ArchLinux [ST500G] ArchLinux/ArchLinux.vmx other26xLinux64Guest vmx-13
26 Windows 10 1607 14393.0 [ST500G] Windows 10 1607 14393.969/Windows 10 1607 14393.969.vmx windows9_64Guest vmx-13
31 Photon OS [ST500G] Photon OS/Photon OS.vmx other3xLinux64Guest vmx-13
32 CentOS 7 Base [ST500G] CentOS 7 Base/CentOS 7 Base.vmx centos7_64Guest vmx-13
9. 進行備份
備份 CentOS 7 Base
[root@esxi:~] /opt/ghettovcb/bin/ghettoVCB.sh -g /opt/ghettovcb/ghettoVCB.conf -m “CentOS 7 Base” -l /vmfs/volumes/ST500G/ghettoVCB_log/ghettoVCB-backup.$(date +%F)
備份全部
[root@esxi:~] /opt/ghettovcb/bin/ghettoVCB.sh -g /opt/ghettovcb/ghettoVCB.conf -a -l /vmfs/volumes/ST500G/ghettoVCB_log/ghettoVCB-backup.$(date +%F)
備份清單
[root@esxi:~] cat /vmfs/volumes/ST500G/vm_to_backup.lst
OpenNMS
Nginx
ArchLinux
[root@esxi:~] /opt/ghettovcb/bin/ghettoVCB.sh -g /opt/ghettovcb/ghettoVCB.conf -f /vmfs/volumes/ST500G/vm_to_backup.lst -l /vmfs/volumes/ST500G/ghettoVCB_log/ghettoVCB-backup.$(date +%F)
10. ghettoVCB.sh 指令用法
[root@esxi:~] /opt/ghettovcb/bin/ghettoVCB.sh
###############################################################################
#
# ghettoVCB for ESX/ESXi 3.5, 4.x+, 5.x & 6.x
# Author: William Lam
# http://www.virtuallyghetto.com/
# Documentation: http://communities.vmware.com/docs/DOC-8760
# Created: 11/17/2008
# Last modified: 2016_11_20 Version 1
#
###############################################################################
Usage: ghettoVCB.sh [options]
OPTIONS:
-a Backup all VMs on host(備份所有的 VM)
-f List of VMs to backup(備份清單中的 VM,一行一個 VM)
-m Name of VM to backup (overrides -f)(備份 VM)
-c VM configuration directory for VM backups
-g Path to global ghettoVCB configuration file(ghettoVCB.conf 設定檔位置)
-l File to output logging(log 檔位置)
-w ghettoVCB work directory (default: /tmp/ghettoVCB.work)
-d Debug level [info|debug|dryrun] (default: info)
(e.g.)
Backup VMs stored in a list
/opt/ghettovcb/bin/ghettoVCB.sh -f vms_to_backup
Backup a single VM
/opt/ghettovcb/bin/ghettoVCB.sh -m vm_to_backup
Backup all VMs residing on this host
/opt/ghettovcb/bin/ghettoVCB.sh -a
Backup all VMs residing on this host except for the VMs in the exclusion list
/opt/ghettovcb/bin/ghettoVCB.sh -a -e vm_exclusion_list
Backup VMs based on specific configuration located in directory
/opt/ghettovcb/bin/ghettoVCB.sh -f vms_to_backup -c vm_backup_configs
Backup VMs using global ghettoVCB configuration file
/opt/ghettovcb/bin/ghettoVCB.sh -f vms_to_backup -g /global/ghettoVCB.conf
Output will log to /tmp/ghettoVCB.log (consider logging to local or remote datastore to persist logs)
/opt/ghettovcb/bin/ghettoVCB.sh -f vms_to_backup -l /vmfs/volume/local-storage/ghettoVCB.log
Dry run (no backup will take place)
/opt/ghettovcb/bin/ghettoVCB.sh -f vms_to_backup -d dryrun