利用 fail2ban 阻擋來自網路的 SSH 連線攻擊

在 /var/log/secure 中嘗試以 root 帳號登入的錯誤記錄
# grep Failed /var/log/secure | grep -v invalid | tail -5
Jan  1 01:39:54  sshd[6417]: Failed password for root from 192.168.1.1 port 53355 ssh2
Jan  1 01:39:57  sshd[6417]: Failed password for root from 192.168.1.1 port 53355 ssh2
Jan  1 12:18:38  sshd[1556]: Failed password for root from 192.168.1.1 port 54849 ssh2
Jan  1 12:18:41  sshd[1556]: Failed password for root from 192.168.1.1 port 54849 ssh2
Jan  1 12:18:44  sshd[1556]: Failed password for root from 192.168.1.1 port 54849 ssh2

設定方式:
# vim /etc/fail2ban/jail.conf
[ssh-iptables]

enabled  = true
filter   = sshd
action   = iptables[name=SSH, port=ssh, protocol=tcp]
#           sendmail-whois[name=SSH, dest=you@example.com, sender=fail2ban@example.com]
logpath  = /var/log/secure
maxretry = 3
bantime  = 86400[@more@]啟用 ssh-iptables
enabled = true

filter 是指使用 sshd 的 filter 來檢查 log 檔中是否有符合判斷規則的樣式(在 /etc/fail2ban/filter.d 目錄之下)
filter   = sshd

action 是指偵測到之後要採取的行動,這裡有二種方式,iptables 是使用 iptables 來阻擋,sendmail-whois 是寄信給管理者,這二種行動的設定,可以在 /etc/fail2ban/action.d 目錄下找到相關的設定
action   = iptables[name=SSH, port=ssh, protocol=tcp]
這裡只使用 iptables 來阻擋,不寄信給管理者

SSH Server 登錄錯誤的 Log 檔
logpath  = /var/log/secure

maxretry 是指嘗試錯誤 3 次,就阻擋,bantime = 86400 是指阻擋的時間,86400 是指秒,所以是阻擋 1 天
maxretry = 3
bantime  = 86400

重新啟動 fail2ban 服務
# server fail2ban restart

檢查 fail2ban 的狀態
# fail2ban-client status
Status
|- Number of jail:      1
`- Jail list:           ssh-iptables

列出目前的防火牆規則
# iptables -L -n
Chain INPUT (policy ACCEPT)
target     prot opt source               destination
fail2ban-VSFTPD  tcp  —  0.0.0.0/0            0.0.0.0/0           tcp dpt:21
fail2ban-SSH  tcp  —  0.0.0.0/0            0.0.0.0/0           tcp dpt:22
ACCEPT     all  —  0.0.0.0/0            0.0.0.0/0           state RELATED,ESTABLISHED
ACCEPT     icmp —  0.0.0.0/0            0.0.0.0/0
ACCEPT     all  —  0.0.0.0/0            0.0.0.0/0
ACCEPT     tcp  —  0.0.0.0/0            0.0.0.0/0           state NEW tcp dpt:22
ACCEPT     tcp  —  0.0.0.0/0            0.0.0.0/0           state NEW tcp dpt:21
REJECT     all  —  0.0.0.0/0            0.0.0.0/0           reject-with icmp-host-prohibited

Chain FORWARD (policy ACCEPT)
target     prot opt source               destination
REJECT     all  —  0.0.0.0/0            0.0.0.0/0           reject-with icmp-host-prohibited

Chain OUTPUT (policy ACCEPT)
target     prot opt source               destination

Chain fail2ban-SSH (1 references)
target     prot opt source               destination
RETURN     all  —  0.0.0.0/0            0.0.0.0/0

以 Client  IP 192.168.1.1 嘗試對 Server IP 192.168.1.9 嘗試連線錯誤幾次之後
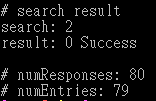
列出 fail2ban 偵測到的 SSH 攻擊
# fail2ban-client status ssh-iptables
Status for the jail: ssh-iptables
|- filter
|  |- File list:        /var/log/secure
|  |- Currently failed: 0
|  `- Total failed:     4
`- action
   |- Currently banned: 1
   |  `- IP list:       192.168.1.1
   `- Total banned:     1

列出 fail2ban-SSH 的規則
# iptables -t filter -L fail2ban-SSH -n
Chain fail2ban-SSH (1 references)
target     prot opt source               destination
DROP       all  —  192.168.1.1          0.0.0.0/0
RETURN     all  —  0.0.0.0/0            0.0.0.0/0

解除方式:
# iptables -D fail2ban-SSH  -s 192.168.1.1 -j DROP

安裝 fail2ban 阻擋來自網路上的嘗試攻擊

Server 安裝完成提供對外的服務,如果沒有設定防火牆,或是限定連線來源,隨時隨地都會受到來自網路上的各種嘗試攻擊,所以必須耤助相關的工具,來協助解決這樣的問題。
底下是來自 SSH 的嘗試攻擊
# grep Failed /var/log/secure
sshd[7935]: Failed password for invalid user cacti from 66.197.211.18 port 39463 ssh2
sshd[7937]: Failed password for invalid user test1 from 66.197.211.18 port 40185 ssh2
sshd[7939]: Failed password for root from 66.197.211.18 port 40773 ssh2
sshd[7966]: Failed password for invalid user git from 66.197.211.18 port 41463 ssh2
sshd[7968]: Failed password for invalid user git from 66.197.211.18 port 42190 ssh2
sshd[7970]: Failed password for mysql from 66.197.211.18 port 42754 ssh2
sshd[7972]: Failed password for mysql from 66.197.211.18 port 43388 ssh2[@more@]來自網頁上的攻擊
# grep admin /var/log/httpd/error_log
[error] [client 70.87.15.74] File does not exist: /var/www/html/admin
[error] [client 70.87.15.74] File does not exist: /var/www/html/dbadmin
[error] [client 70.87.15.74] File does not exist: /var/www/html/myadmin
[error] [client 70.87.15.74] File does not exist: /var/www/html/mysqladmin
[error] [client 70.87.15.74] File does not exist: /var/www/html/phpadmin
[error] [client 70.87.15.74] File does not exist: /var/www/html/phpmyadmin
[error] [client 70.87.15.74] File does not exist: /var/www/html/php-my-admin
[error] [client 70.87.15.74] File does not exist: /var/www/html/phpmyadmin1
[error] [client 70.87.15.74] File does not exist: /var/www/html/phpmyadmin2

這一類的工具非常的多,如:SSHBlock / DenyHosts / Fail2ban 等等,這些工具都很不錯,但這裡我選用的是 fail2ban,因為它支援多種常見的服務,如:SSH / FTP / Apache 等等。


Fail2ban 官方網站:http://www.fail2ban.org/wiki/index.php/Main_Page
底下是它的安裝方式:
以 CentOS 6.x 為例,因為 fail2ban 不是官方套件庫中的套件,所以必須先安裝第三方套件庫 epel 或 rpmforge
安裝 epel 第三方套件庫
# wget http://dl.fedoraproject.org/pub/epel/6/x86_64/epel-release-6-8.noarch.rpm
# rpm -ivh epel-release-6-8.noarch.rpm

更新套件庫來源
# yum update

安裝 fail2ban
# yum install fail2ban

fail2ban 預設開機就會啟動
# chkconfig –list fail2ban
fail2ban        0:off   1:off   2:off   3:on    4:on    5:on    6:off

產生大量的學生的 Moodle 帳號

為了方便學生使用 Moodle,所以除了可以使用 LDAP 做帳號的認證外,也可以採用一次匯入的方式來處理。
學生的帳號
# head -2 102_class41.lst
四忠 01 蔡中火 s0990499 123456 s0990
四忠 02 陳大水 s0990999 234567 s0990

在 Moodle 中,大批匯入帳號,有固定的格式,有固定的格式用 awk 就是很方便的處理方式
[@more@]# vim mkmoodleuser.awk
# 帳號密碼檔格式
# 一忠 1 林○○   s0990001 NHw113 s0990

{print $4″,”$4″,”$1$2$3″,”$4″@tces.ilc.edu.tw,”$5 }

大批產生 Moodle 帳號
# awk -f mkmoodleuser.awk 102_class41.lst
s0990499,s0990499,四忠01蔡中火,s0990499@tces.ilc.edu.tw,123456
s0990999,s0990999,四忠02陳大水,s0990999@tces.ilc.edu.tw,234567

如果產生的格式沒問題,導引到輸出檔
# awk -f mkmoodleuser.awk 102_class41.lst > MoodleUser.txt

大在檔案的上面加上一行,變成
# cat MoodleUser.txt
username,firstname,lastname,email,password
s0990499,s0990499,四忠01蔡中火,s0990499@tces.ilc.edu.tw,123456
s0990999,s0990999,四忠02陳大水,s0990999@tces.ilc.edu.tw,234567

在 Moodle 中匯入
1. 首頁 / 網站管理 / 用戶 / 帳戶

2. 上傳使用者

3.  將使用者檔案拉到上傳使用者的框框,也可以用 選擇一個檔案的方式,來指定檔案
 

4.  預覽上的使用者帳號

5. 按 上傳使用者

6. 如果密碼過於簡單,或是不符 Moodle 的規定時,要出現警告

7. 過於簡單的密碼,登入之後,系統會要求一定要更改密碼

安裝 Moodle 2.6

有一段時間沒有好好使用 Moodle 了,因為最初記錄自己工作或學習是使用部落格,後來因為部落格不夠封閉,改用了 Moodle,也用了一段很長的時間,累積很多個人的資料,目前除了學生上課還有用到之外,自己的一些工作或是一些有的沒有的,都轉移到 evernote 上面去了,因為它支援多種平台及行動裝置,也可以在下載之後離線瀏覽,最近因為要研究 Moodle 和 LDAP 之間的配合,才又重新安裝了 Moodle。

下載 Moodle
Moodle 官方網站:http://moodle.org
# wget http://downloads.sourceforge.net/project/moodle/Moodle/stable26/moodle-latest-26.tgz

下載正體中文語系
# wget http://download.moodle.org/download.php/direct/langpack/2.6/zh_tw.zip [@more@]解壓縮
# tar xvzf moodle-latest-26.tgz -C /var/www/html/moodle

建立存放 Moodle 課程資料的目錄
# mkdir /var/www/moodledata

解壓縮正體中文語系
# unzip zh_tw.zip -d /var/www/moodledata

改變目錄權限
# chown -R apache:apache /var/www/moodledata

進行安裝,開啟瀏覽器在網址列輸入
http://Server’s IP/moodle

安裝過程

有二個檢查的地方要處理
第 1 個要安裝 intl 延伸套件
# yum install php-intl

第 2 個要安裝 PHP 的 opcode 快取,不過 PHP 的版本要到 5.5,但 CentOS 6.x 的 PHP 版本只到 5.3.3,所以第二個問題,就暫不處理。

重新啟動 Apache Web Server
# service httpd restart

安裝完成

同步 LDAP Server – mirrotmode 方式

通常 LDAP Server 的負載並不會很大,因為主要都是做資料的查詢,但架設同步 LDAP Server 可以用來同步 LDAP Server 的工作,保持資料同步,做為備份及互相備援使用。

本篇文章參考: openldap 2.4 同步使用mirror mode @ Hello World :: 痞客邦 PIXNET
                              基于OpenLdap 2.4的双向同步 – iceblood的日志 – 网易博客
LDAP Server 1
HostName:ldap1.tces.ilc.edu.tw
IP:192.168.1.17

LDAP Server 2
HostName:ldap2.tces.ilc.edu.tw
IP:192.168.1.23

原本運作中的 LDAP Server 是 LDAP 1,LDAP 2 是用來保持同步的新 Server

[@more@]修改 LDAP Server 1(192.168.1.17) 的 /etc/openldap/slapd.conf
# vim /etc/openldap/slapd.conf
找到 # Replicas of this database 這一段後
加入下面的設定
# 開啟同步
moduleload  syncprov
# 設定唯一的 ID 編號
serverID    1
# 設定要從 ldap2 伺服器同步資料
# rid 編號和 ldap2 保持一樣
syncrepl      rid=001
# ldap2 伺服器的 IP 和 Port
  provider=ldap://192.168.1.23:389
# 密碼驗證方式為簡單模式,就是使用明碼
  bindmethod=simple
# Bind DN
  binddn=”cn=Manager,dc=ldap,dc=tces.ilc.edu.tw”
# ldap2 伺服器的管理密碼
  credentials=ldap2
# 與 ldap2 伺服器同步的
  searchbase=”dc=ldap,dc=tces.ilc.edu.tw”
# sche,a 驗證開啟
  schemachecking=on
# 設定為持續保持同步
  type=refreshAndPersist
# 設定為 60 秒同步一次,60 和 + 之間要空一格
  retry=”60 +”

# 開啟鏡像模式
mirrormode on

overlay syncprov
syncprov-checkpoint 100 10
syncprov-sessionlog 100

在 ldap2(192.168.1.23) 上安裝 openldap 套件
# yum install openldap openldap-clients openldap-servers

設定方式和 ldap1 一樣
# vim /etc/openldap/slapd.conf
moduleload  syncprov

serverID    2
syncrepl      rid=001
  provider=ldap://192.168.1..17
  bindmethod=simple
  binddn=”cn=Manager,dc=ldap,dc=tces.ilc.edu.tw”
  credentials=ldap1
  searchbase=”dc=ldap,dc=tces.ilc.edu.tw”
  schemachecking=on
  type=refreshAndPersist
  retry=”60 +”

mirrormode on

overlay syncprov
syncprov-checkpoint 100 10
syncprov-sessionlog 100

修改完 /etc/openldap/slapd.conf 後,二台 LDAP Server 都要做下面的動作
# rm -rf /etc/openldap/slapd.d/*
# slaptest -f /etc/openldap/slapd.conf -F /etc/openldap/slapd.d
# chown -R ldap:ldap /etc/openldap/slapd.d
# service slapd restart

重新啟動 LDAP Server,二台 Server 之間即會展開連線進行同步
192.168.1.17 ldap1

192.168.1.23 ldap2 Server

原本的資料筆數

同步後資料筆數

CactiEZ 0.7 和 CactiEZ 10.1 的比較

CactiEZ 0.7 和 CactiEZ 10.1 二套都是用來幫助使用者能快速安裝及使用 Cacti 的工具,二套都有試著安裝一下,稍微比較一下二者之間的差異。

CactiEZ 0.7 官方網站:http://cactiez.cactiusers.org/


CactiEZ 10.1 官方網站:http://www.cactiez.com (目前連不上)[@more@]比較如下:
1. CactiEZ 0.7 和 CactiEZ 10.1 都是 base on CentOS
    CactiEZ 0.7 是 CentOS 6.3

    CactiEZ 10.1 是 CentOS 6.0

2. CactiEZ 0.7 提供手動及自動安裝,而 CactiEZ 10.1 則只提供自動安裝
CactiEZ 0.7 有提供手動安裝,可以讓使用自行設定網路組態、硬碟分割、root 管理密碼等等,提供有經驗的管理者更多的彈性,CactiEZ 0.7 和 CactiEZ 10.1 的自動安裝,在網路設定上不太相同,CactiEZ 0.7 是使用 DHCP 取得 IP,而 CactiEZ 10.1 是指定一個 192.168.0.64 的 IP。

3. CactiEZ 0.7 中的 cacti 安裝方式是利用 rpm 的方式來安裝,CactiEZ 10.1 則是利用 .tgz 的檔案在安裝過程中解壓縮安裝。
使用 rpm 的好處是比較方便使用者安裝新的版本或移除舊的版本,但要受限套件庫的維護者更新版本的速度,使用 .tgz 的版本則是純粹手工處理。

4. CactiEZ 0.7 的 Cacti 介面是英文的,而 CactiEZ 10.1 的介面是簡體中文的

5. CactiEZ 0.7 預設安裝的 cacti 版本是 0.8.8a,而 CactiEZ 10.1 安裝的是 0.8.7g

6. CactiEZ 0.7 和 CactiEZ 10.1 自動安裝的管理者密碼
     root / CactiEZ
     MySQL Server 管理者預設沒有密碼

7. CactiEZ 0.7 安裝套件數 311 個,CactiEZ 10.1 安裝套件數 277 個

8. CactiEZ 0.7 似乎只有 x86_64 版本,而 CactiEZ 10.1 則有 x86 和 x86_64 版本

最後,這二片光碟都是研究自動安裝 Linux 一個很不錯的教材,從其中收穫很多。

IE 相容性檢視設定 – 解決行政人員升級到新版本 Internet Explorer 的問題

學校行政人員常常會因為把 Windows 7 / 8  設成自動更新,而把 Internet Explorer 更新成 9 / 10 / 11,造成公文系統無法常執行,以前的處理方式就是把新版的 Internet Explorer 移除,改成舊版的 Internet Explorer,或者是在新版的 Internet Explorer 上做 IE 相容性檢視設定的設定。
1. 首先先開啟 Internet Explorer,連線到 員工業務網

2. 選擇 工具 / IE 相容性檢視設定

[@more@]
在新增此網站的地方,Internet Explorer 會自動把  網域名稱帶入,這時候只要按 新增 就可以了!

按完新增之後, e-land.gov.tw 就會加入到 相容性檢視的網站,最後只要按 關閉 即可。

雖然看起來步驟很簡單,但對於多數人來說,還是有些麻煩,有沒有可能是:
1. 按二下就安裝完成
或是
2. Windows 安裝完成就已經完成設定
底下是可能的解決方式

解決的方式是使用登錄檔來做處理
1. 首先先下載已經處理好的檔案,請按 這裡

2. 下載下來之後,以 7zip 解壓縮

3. 解壓縮之後會出現二個登錄檔,一個設定 IE 相容性設定,一個是還原

4. 按二下 IE 相容性檢視設定.reg

5. 要還原,只要按二下 IE 相容性檢視設定復原.reg 即可,但要特別注意的是,它會把所有的 IE 相容性設定的值完全清空

如果要在 Windows 安裝完成就完成設定,就把登錄檔中的設定,加入到 SetupComplete.cmd 中即可。

讀取 Mac 的硬碟

先前把 MacBook Pro 的硬碟換成 SSD,原本的硬碟則裝在硬碟盒中當成隨身硬碟,想要把它格式化成 NTFS 格式,讓 Mac 和 Windows 等平台都能使用,所以首先要先把硬碟中的資料備份出來。
不過,在 Windows 上把硬碟接到電腦,看起來是有抓到硬碟,但是在我的電腦或是檔案總管中找不到硬碟,所以無法讀取。

在電腦管理中有看到硬碟 ,編號是磁碟 4

但在我的電腦中找不到硬碟

[@more@] 這時候可以下載 HFSExplorer 來安裝,它是一套免費軟體,可以讀取 Mac 的 HFS 格式的硬碟,但無法寫入,如果要寫入的話,則要藉助其它的軟體。
HFSExplorer 官方網站: http://www.catacombae.org/hfsx.html
目前最新版本是 0.21 版,也有將近 5 年沒有更新了!2008 Dec 23

安裝完成後,可以在開始功能表中找到

執行後,選擇 Load file system from device

選擇在 電腦管理找到的硬碟編號

選擇下方的 Load

選擇 確定

就可以看到原本硬碟的資料了,個人資料夾在 /Users/username

安裝 LDAP Account Manager

LDAP Account Manager 是一套可以利用網頁來管理 LDAP 帳號的工具,可以管理 LDAP 目錄上的 Unix / Samba 帳號, 並能同時建立 / 刪除使用者家目錄。
LDAP Account Manager 官方網站:https://www.ldap-account-manager.org/lamcms/

安裝參考文件:在 CentOS 5.1 安裝 LDAP Account Manager « Jamyy’s Weblog
                              Linux 技術文件: 安裝LAM做為LDAP管理工具
1. 安裝所需的套件
# yum install php-ldap

2. 下載 LDAP Account Manager:https://www.ldap-account-manager.org/lamcms/releases

請選擇適合的版本,這裡用的是 CentOS,所以下載的是 For Fedora 的版本
# wget http://prdownloads.sourceforge.net/lam/ldap-account-manager-4.4-0.fedora.1.noarch.rpm[@more@]3. 安裝套件
# rpm -ivh ldap-account-manager-4.4-0.fedora.1.noarch.rpm

4. 設定 LDAP Account Manager
建立所需目錄
# mkdir /usr/share/ldap-account-manager/config/profiles/lam
# mkdir -p /usr/share/ldap-account-manager/config/pdf/lam/logos

5. 改變目錄擁有者
# cd /usr/share/ldap-account-manager
# chown -Rf apache.apache sess/* tmp/* lib/* config/*

6. 修改 /etc/php.ini
# sed -i ‘s/memory_limit = 128M/memory_limit = 64M/’ /etc/php.ini

7. 重新啟動 Apache Web Server
# service httpd restart

8. 開啟瀏覽器在網址列輸入 http://Server’s IP/lam
出現登入畫面,輸入設定的密碼,語言選 繁體中文(台灣)

9.登入後畫面

10. 列出使用者

11. 列出群組

12. 新增使用者

13. 新增群組

CactiEZ 0.7 客製化

為了安裝的方便,所以將 CactiEZ 做了一番客製化,主要是將系統升級,並加裝一些自己會用到的套件及更改一些設定。
[@more@]自動安裝的方式
在 boot: 後面輸入 auto

主要修改的地方:
1. CentOS Linux 的版本由 6.3 x86_64 升級到 6.5


升級到 6.5 版

2. cacti 的版本由 0.8.8a 版升級到 0.8.8b 版
3. 套件更新到 2013.12.29
4. 自動安裝時,時區修改成 Asia/Taipei
5. /etc/php.ini 的時區設定修正成 Asia/Taipei
6. 新增加 vim / lftp / php-mbstring / cjkuni-ukai-fonts / cjkuni-uming-fonts / wqy-zenhei-fonts 等套件
7. 光碟的檔案做了一番整理,讓目錄更加簡潔。

原本光碟目錄

修改過後