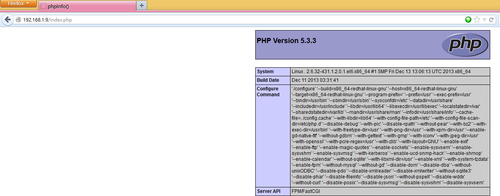
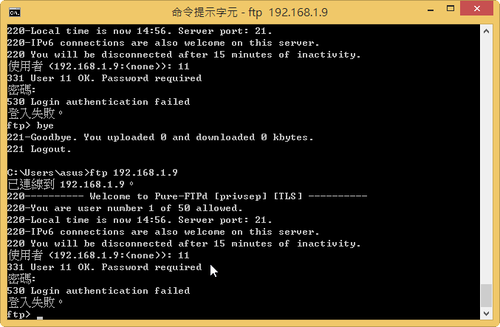
Pure-FTPd FTP Server 使用虛擬帳號登入

修改 /etc/pure-ftpd/pure-ftpd.conf 設定檔
# vim /etc/pure-ftpd/pure-ftpd.conf
# PureDB user database (see README.Virtual-Users)
PureDB /etc/pure-ftpd/pureftpd.pdb
# Automatically create home directories if they are missing
CreateHomeDir yes

重新啟動 Pure-FTPd FTP Server
# /etc/init.d/pure-ftpd restart
Stopping pure-ftpd:                                        [  OK  ]
Starting pure-ftpd:                                        [  OK  ]
[@more@]
新增虛擬群組及使用者
# groupadd virtualgrp
# useradd -d /home/virtualuser -g virtualgrp -s /sbin/nologin virtualuser

新增 s0990001 使用者,並設定 s0990001 使用者的密碼
# /usr/bin/pure-pw useradd s0990001 -u virtualuser -d /home/virtualuser/s0990001
Password:
Enter it again:

密碼檔位置
# ls -l /etc/pure-ftpd/pureftpd.passwd
-rw——-. 1 root root 95 Jan 1 23:41 /etc/pure-ftpd/pureftpd.passwd

建立認證資料庫
建立認證資料庫 /etc/pure-ftpd/pureftpd.pdb
# /usr/bin/pure-pw mkdb

上面二個步驟,也可以用下面的指令一行完成
# /usr/bin/pure-pw useradd s0990001 -u virtualuser -d /home/virtualuser/s0990001 -m

如果系統沒有自動建立使用者的家目錄,必須要手動建立
# mkdir /home/virtualuser/s0990001
# chown -R virtualuser:virtualgrp /home/virtualuser/s0990001

如果系統有使用 SELinux,要記得把家目錄的功能打開
# setsebool -P ftp_home_dir 1
# setsebool -P allow_ftpd_full_access=1

# 修改 s0990001 這一個使用者,下載最大頻寬 50kb,只能在 0800-1600 連線,ip 連線範圍 192.168.250.0/24,140.111.74.0/24
# /usr/bin/pure-pw usermod s0990001 -t 50 -z 0800-1600 -r 192.168.250.0/24,140.111.74.0/24 -m

也可以在建立使用者時就先限定
# /usr/bin/pure-pw useradd s0990001 -u virtualuser -d /home/virtualuser/s0990001 -t 50 -z 0800-1600 -r 192.168.250.0/24,140.111.74.0/24 -m

# 顯示 s0990001 使用者的狀況
# /usr/bin/pure-pw show s0990001

# 修改 s0990001 使用者的密碼
# /usr/bin/pure-pw passwd s0990001 -m

# 刪除 s0990001 使用者
# /usr/bin/pure-pw userdel s0990001 -m

# 列出所有的虛擬帳號使用者
# /usr/bin/pure-pw list

更詳細的 pure-pw 用法
# /usr/bin/pure-pw –help

Usage :

pure-pw useradd <login> [-f <passwd file>] -u <uid> [-g <gid>]
-D/-d <home directory> [-c <gecos>]
[-t <download bandwidth>] [-T <upload bandwidth>]
[-n <max number of files>] [-N <max Mbytes>]
[-q <upload ratio>] [-Q <download ratio>]
[-r <allow client ip>/<mask>] [-R <deny client ip>/<mask>]
[-i <allow local ip>/<mask>] [-I <deny local ip>/<mask>]
[-y <max number of concurrent sessions>]
[-z <hhmm>-<hhmm>] [-m]

pure-pw usermod <login> -f <passwd file> -u <uid> [-g <gid>]
-D/-d <home directory> -[c <gecos>]
[-t <download bandwidth>] [-T <upload bandwidth>]
[-n <max number of files>] [-N <max Mbytes>]
[-q <upload ratio>] [-Q <download ratio>]
[-r <allow client ip>/<mask>] [-R <deny client ip>/<mask>]
[-i <allow local ip>/<mask>] [-I <deny local ip>/<mask>]
[-y <max number of concurrent sessions>]
[-z <hhmm>-<hhmm>] [-m]

pure-pw userdel <login> [-f <passwd file>] [-m]

pure-pw passwd <login> [-f <passwd file>] [-m]

pure-pw show <login> [-f <passwd file>]

pure-pw mkdb [<puredb database file> [-f <passwd file>]]

pure-pw list [-f <passwd file>]

-d <home directory> : chroot user (recommended)
-D <home directory> : don’t chroot user
-<option> ” : set this option to unlimited
-m : also update the /etc/pure-ftpd/pureftpd.pdb database
For a 1:10 ratio, use -q 1 -Q 10
To allow access only between 9 am and 6 pm, use -z 0900-1800

參數說明:
-t :限制下載頻寬
-T :限制上傳頻寬
-q :限制上傳比率
-Q :限制下載比率
-r :限定能連線的 IP 範圍(遠端)
-R :限制不能連線的 IP 範圍(遠端)
-n :限定最多的檔案數
-N :限制檔案的大小
-z :限制連線的時間
-i :限制本地端的 IP 可以連線範圍
-I :限制本地端的 IP 不可以連線的範圍

在 CentOS 6.x 上安裝 Lighttpd Web Server

Lighttpd Web Server 是另外一套輕量級的 Web Server,更詳細的介紹可以參考 lighttpd – 維基百科,自由的百科全書

lighttpd Web Server 官方網站: http://www.lighttpd.net/
[@more@]

在 CentOS 6.x 下安裝
# yum install lighttpd lighttpd-fastcgi  lighttpd-mod_mysql_vhost –enablerepo=epel

lighttpd Web Server 設定檔
設定檔在 /etc/lighttpd
網頁根目錄 在 /var/www/lighttpd

# rpm -qc lighttpd
/etc/lighttpd/conf.d/access_log.conf
/etc/lighttpd/conf.d/auth.conf
/etc/lighttpd/conf.d/cgi.conf
/etc/lighttpd/conf.d/cml.conf
/etc/lighttpd/conf.d/compress.conf
/etc/lighttpd/conf.d/debug.conf
/etc/lighttpd/conf.d/dirlisting.conf
/etc/lighttpd/conf.d/evhost.conf
/etc/lighttpd/conf.d/expire.conf
/etc/lighttpd/conf.d/fastcgi.conf
/etc/lighttpd/conf.d/geoip.conf
/etc/lighttpd/conf.d/magnet.conf
/etc/lighttpd/conf.d/mime.conf
/etc/lighttpd/conf.d/mod.template
/etc/lighttpd/conf.d/mysql_vhost.conf
/etc/lighttpd/conf.d/proxy.conf
/etc/lighttpd/conf.d/rrdtool.conf
/etc/lighttpd/conf.d/scgi.conf
/etc/lighttpd/conf.d/secdownload.conf
/etc/lighttpd/conf.d/simple_vhost.conf
/etc/lighttpd/conf.d/ssi.conf
/etc/lighttpd/conf.d/status.conf
/etc/lighttpd/conf.d/trigger_b4_dl.conf
/etc/lighttpd/conf.d/userdir.conf
/etc/lighttpd/conf.d/webdav.conf
/etc/lighttpd/lighttpd.conf
/etc/lighttpd/modules.conf
/etc/lighttpd/vhosts.d/vhosts.template
/etc/logrotate.d/lighttpd
/var/www/lighttpd/index.html

修改設定檔
開啟模組
# vim /etc/lighttpd/modules.conf
##
## mod_userdir
##
include “conf.d/userdir.conf”
##
## FastCGI (mod_fastcgi)
##
include “conf.d/fastcgi.conf”

開啟 PHP 功能
# vim /etc/lighttpd/conf.d/fastcgi.conf
fastcgi.server = ( “.php” =>
                   ( “php-local” =>
                     (
                       “socket” => “/var/run/lighttpd/php-fastcgi.socket”
                       “bin-path” => “/usr/bin/php-cgi”,
                       “max-procs” => 1,
                       “broken-scriptfilename” => “enable”,
                     )
                    )
                  )
#                   ),
#                   ( “php-tcp” =>
#                     (
#                       “host” => “127.0.0.1”,
#                       “port” => 9999,
#                       “check-local” => “disable”,
#                       “broken-scriptfilename” => “enable”,
#                     )
#                   ),
#
#                   ( “php-num-procs” =>
#                     (
#                       “socket” => socket_dir + “/php-fastcgi-2.socket”,
#                       “bin-path” => server_root + “/cgi-bin/php5”,
#                       “bin-environment” => (
#                         “PHP_FCGI_CHILDREN” => “16”,
#                         “PHP_FCGI_MAX_REQUESTS” => “10000”,
#                       ),
#                       “max-procs” => 5,
#                       “broken-scriptfilename” => “enable”,
#                     )
#                   ),
#                )

設定網頁預設編碼
# vim /etc/lighttpd/conf.d/mime.conf
  “.css”          =>      “text/css; charset=utf-8”,
  “.html”         =>      “text/html; charset=utf-8”,
  “.htm”          =>      “text/html; charset=utf-8”,
  “.js”           =>      “text/javascript; charset=utf-8”,

安裝 php-cli 套件
# yum install php-cli

啟動 lighttpd Web Server
# service lighttpd start

# vim /var/www/lighttpd/index.php
測試 PHP 功能

測試中文顯示

設定 Nginx Web Server

Nginx Web Server 設定檔
# rpm -qc nginx
/etc/logrotate.d/nginx
/etc/nginx/conf.d/default.conf
/etc/nginx/conf.d/example_ssl.conf
/etc/nginx/fastcgi_params
/etc/nginx/koi-utf
/etc/nginx/koi-win
/etc/nginx/mime.types
/etc/nginx/nginx.conf
/etc/nginx/scgi_params
/etc/nginx/uwsgi_params
/etc/nginx/win-utf
/etc/sysconfig/nginx
[@more@]設定 Nginx Web Server
# vim /etc/nginx/nginx.conf
# 啟動 Nginx 的使用者
user  nginx;
worker_processes  1;

# Nginx Web Server Error Log 位置和記錄的層級
error_log  /var/log/nginx/error.log warn;
pid        /var/run/nginx.pid;

# 連線數量
events {
    worker_connections  1024;
}

http {
    include       /etc/nginx/mime.types;
    default_type  application/octet-stream;
# log 檔記錄的格式
    log_format  main  ‘$remote_addr – $remote_user [$time_local] “$request” ‘
                      ‘$status $body_bytes_sent “$http_referer” ‘
                      ‘”$http_user_agent” “$http_x_forwarded_for”‘;
# 連線記錄檔的位置
    access_log  /var/log/nginx/access.log  main;

    sendfile        on;
    #tcp_nopush     on;
# 保持連線的 timeout 時間
    keepalive_timeout  65;

    #gzip  on;
# 其它的設定檔在 /etc/nginx/conf.d 目錄之下
    include /etc/nginx/conf.d/*.conf;
}

修改 /etc/nginx/conf.d/default.conf 設定檔
# vim /etc/nginx/conf.d/default.conf
# 開啟的連線埠和主機名稱
server {
    listen       80;
    server_name  localhost;
# 編碼設定
    #charset koi8-r;
    #access_log  /var/log/nginx/log/host.access.log  main;
# 網頁根目錄 /usr/share/nginx/html 和預設首頁的檔案名稱
    location / {
        root   /usr/share/nginx/html;
        index  index.html index.htm;
    }
# 發生找不到檔案 404 錯誤編碼時,可以導引至
    #error_page  404              /404.html;

    # redirect server error pages to the static page /50x.html
    #
    error_page   500 502 503 504  /50x.html;
    location = /50x.html {
        root   /usr/share/nginx/html;
    }

    # proxy the PHP scripts to Apache listening on 127.0.0.1:80
    #
    #location ~ .php$ {
    #    proxy_pass   http://127.0.0.1;
    #}
# 開啟 PHP 功能
    # pass the PHP scripts to FastCGI server listening on 127.0.0.1:9000
    #
    location ~ .php$ {
        root           /usr/share/nginx/html;
        fastcgi_pass   127.0.0.1:9000;
        fastcgi_index  index.php;
        fastcgi_param  SCRIPT_FILENAME $document_root$fastcgi_script_name;
#        fastcgi_param  SCRIPT_FILENAME  /scripts$fastcgi_script_name;
        include        fastcgi_params;
    }

    # deny access to .htaccess files, if Apache’s document root
    # concurs with nginx’s one
    #
    #location ~ /.ht {
    #    deny  all;
    #}
}

安裝 php-fpm 套件
# yum install php-fpm

啟動 php-fpm
# /etc/init.d/php-fpm start
Starting php-fpm:                                          [  OK  ]

php-fpm 會使用到 tcp 9000 埠
# netstat -antulp | grep 9000
tcp        0      0 127.0.0.1:9000              0.0.0.0:*                   LISTEN      3769/php-fpm

設定開機時啟動 php-fpm
# chkconfig –list php-fpm
php-fpm         0:off   1:off   2:off   3:off   4:off   5:off   6:off
# chkconfig –level 3 php-fpm on

重新啟動 Nginx Web Server
# service nginx restart
Stopping nginx:                                            [  OK  ]
Starting nginx:                                            [  OK  ]

在防火牆上打開 9000 埠
-A INPUT -m state –state NEW -m tcp -p tcp –dport 9000 -j ACCEPT

測試 PHP 功能
# vim /usr/share/nginx/html/index.php
<?php
phpinfo();
?>

中文字顯示正常

在 CentOS 6.x 安裝 Nginx Light Web Server

Nginx 是一套輕量級的 Web Server,和 Apache Web Server 比起來,由俄羅斯程式設計師 Igor Sysoev 所開發輕量級的網頁伺服器,軟體以 BSD-like 授權,可以在 UNIX、GNU/Linux、BSD、Mac OS X、Solaris,以及Microsoft Windows 等作業系統中執行。

Nginx 官方網站:http://nginx.org/

目前有人在 Linux 使用它來取代 Apache Web Server,並把這個組合稱為 LNMP(Linux + Nginx + MySQL + PHP)[@more@]安裝方式:
因為 Nginx 並不是 CentOS 官方套件,所以必須先新增 Nginx 官方所提供的第三方套件庫
# vim /etc/yum.repos.d/nginx.repo
[nginx]
name=nginx repo
baseurl=http://nginx.org/packages/centos/$releasever/$basearch/
gpgcheck=0
enabled=1

匯入憑證
# rpm –import http://nginx.org/keys/nginx_signing.key


# wget http://nginx.org/packages/centos/6/noarch/RPMS/nginx-release-centos-6-0.el6.ngx.noarch.rpm
# rpm -ivh http://nginx.org/packages/centos/6/noarch/RPMS/nginx-release-centos-6-0.el6.ngx.noarch.rpm

更新套件庫
# yum update

安裝 Nginx Web Server
# yum install nginx

執行 Nginx Web Server
# service nginx start
Starting nginx:                                            [  OK  ]

設定開機預設啟動 Nginx 和關閉 Apache Web Server
# chkconfig –level 3 nginx on
# chkconfig –level 3 httpd off

開啟瀏覽器,連線到 Nginx Web Server

以 fail2ban 偵測網頁連線攻擊

使用 Apache / MySQL / PHP 來架設網站的人,可能都會有安裝 phpMyAdmin 來管理網頁資料庫,但因為 phpMyAdmin 這一個套件可能存在一些安全性上的漏洞,所以有些攻擊方式,就會搜尋網頁上是否有安裝 phpMyAdmin,並嘗試進行攻擊。
來自網頁上的攻擊
# grep admin /var/log/httpd/error_log
[error] [client 70.87.15.74] File does not exist: /var/www/html/admin
[error] [client 70.87.15.74] File does not exist: /var/www/html/dbadmin
[error] [client 70.87.15.74] File does not exist: /var/www/html/myadmin
[error] [client 70.87.15.74] File does not exist: /var/www/html/mysqladmin
[error] [client 70.87.15.74] File does not exist: /var/www/html/phpadmin
[error] [client 70.87.15.74] File does not exist: /var/www/html/phpmyadmin
[error] [client 70.87.15.74] File does not exist: /var/www/html/php-my-admin
[error] [client 70.87.15.74] File does not exist: /var/www/html/phpmyadmin1
[error] [client 70.87.15.74] File does not exist: /var/www/html/phpmyadmin2[@more@]阻擋的方式
底下文章內容參考 網路系統組 / Network Systems [security:fail2ban]
修改 fail2ban 設定檔,加入下面的設定檔
# vim /etc/fail2ban/jail.conf
[apache-notexist]

enabled  = true
filter   = apache-notexist
action   = iptables[name=HTTP, port=http, protocol=tcp]
logpath  = /var/log/httpd/*error_log
maxretry = 3
bantime  = 600

新增 fail2ban 的 apache-noexist filter 設定檔
# vim /etc/fail2ban/filter.d/apache-notexist.conf
[Definition]

# Option:  failregex
# Notes.:  regex to match the password failure messages in the logfile. The
#          host must be matched by a group named “host”. The tag “<HOST>” can
#          be used for standard IP/hostname matching and is only an alias for
#          (?:::f{4,6}:)?(?P<host>S+)
# Values:  TEXT
#
failregex = [[]client <HOST>[]] (File does not exist): .*

# Option:  ignoreregex
# Notes.:  regex to ignore. If this regex matches, the line is ignored.
# Values:  TEXT
#
ignoreregex =

# service fail2ban restart
Stopping fail2ban:                                         [  OK  ]
Starting fail2ban:                                         [  OK  ]

# fail2ban-client status
Status
|- Number of jail:      3
`- Jail list:           apache-notexist, pure-ftpd, ssh-iptables

嘗試幾次錯誤連線

# fail2ban-client status apache-notexist
Status for the jail: apache-notexist
|- filter
|  |- File list:        /var/log/httpd/ssl_error_log /var/log/httpd/error_log
|  |- Currently failed: 0
|  `- Total failed:     3
`- action
   |- Currently banned: 1
   |  `- IP list:       192.168.1.1
   `- Total banned:     1

# iptables -t filter -L fail2ban-HTTP -n
Chain fail2ban-HTTP (1 references)
target     prot opt source               destination
DROP       all  —  192.168.1.1          0.0.0.0/0
RETURN     all  —  0.0.0.0/0            0.0.0.0/0

以 fail2ban 偵測 ftp 連線攻擊 – Pure-FTPd 篇

在 CentOS 6.x 下安裝
# yum install pure-ftpd –enablerepo=rpmforge

啟動 Pure-FTPd FTP Server
# /etc/init.d/pure-ftpd start
Starting pure-ftpd:                                        [  OK  ]

修改 /etc/rsyslog.conf 設定檔,讓 Pure-FTPd FTP Server 設定檔能獨立成一個檔案
# vim /etc/rsyslog.conf
ftp.*                                                /var/log/pureftpd.log

重新啟動 Syslog Server
# /etc/init.d/rsyslog restart

檢查 log 檔是否有產生
# ls -l /var/log/pureftpd.log
-rw——-. 1 root root 0 Jan  1 14:54 /var/log/pureftpd.log
[@more@]修改 fail2ban 設定檔
# vim /etc/fail2ban/jail.conf
加入下面的設定
[pure-ftpd]
enabled  = true
filter   = pure-ftpd
action   = iptables[name=pure-ftpd, port=ftp, protocol=tcp]
logpath  = /var/log/pureftpd.log
maxretry = 3
bantime  = 86400

重新啟動 fail2ban
# service fail2ban restart

# fail2ban-client status
Status
|- Number of jail:      2
`- Jail list:           pure-ftpd, ssh-iptables

嘗試錯誤連線幾次

# fail2ban-client status pure-ftpd
Status for the jail: pure-ftpd
|- filter
|  |- File list:        /var/log/pureftpd.log
|  |- Currently failed: 0
|  `- Total failed:     3
`- action
   |- Currently banned: 1
   |  `- IP list:       192.168.1.1
   `- Total banned:     1

# iptables -t filter -L fail2ban-pure-ftpd -n
Chain fail2ban-pure-ftpd (1 references)
target     prot opt source               destination
DROP       all  —  192.168.1.1          0.0.0.0/0
RETURN     all  —  0.0.0.0/0            0.0.0.0/0

以 fail2ban 偵測 ftp 連線攻擊 – ProFTPD 篇

修改 /etc/proftpd.conf 讓 ProFTPD FTP Server 產生單獨的 log 檔
# vim /etc/proftpd.conf
# 產生 log 檔
SystemLog                       /var/log/proftpd/proftpd.log
TransferLog                     /var/log/proftpd/xferlog

重新啟動 ProFTPD Server
# service proftpd restart
Shutting down proftpd:                                     [  OK  ]
Starting proftpd:                                          [  OK  ]

在 /var/log/proftpd 目錄之下可以看到 Log 檔
# ls -l /var/log/proftpd/proftpd.log
-rw-r—–. 1 root root 129 Jan  1 14:24 /var/log/proftpd/proftpd.log[@more@]
修改 /etc/fail2ban/jail.conf 設定檔
# vim /etc/fail2ban/jail.conf
[proftpd-iptables]

enabled  = true
filter   = proftpd
action   = iptables[name=ProFTPD, port=ftp, protocol=tcp]
#           sendmail-whois[name=ProFTPD, dest=you@example.com]
logpath  = /var/log/proftpd/proftpd.log
maxretry = 3
bantime  = 86400

重新啟動 fail2ban
# service fail2ban restart
Stopping fail2ban:                                         [  OK  ]
Starting fail2ban:                                         [  OK  ]

# fail2ban-client status
Status
|- Number of jail:      2
`- Jail list:           proftpd-iptables, ssh-iptables

嘗試連線錯誤幾次之後
# fail2ban-client status proftpd-iptables
Status for the jail: proftpd-iptables
|- filter
|  |- File list:        /var/log/proftpd/proftpd.log
|  |- Currently failed: 0
|  `- Total failed:     3
`- action
   |- Currently banned: 1
   |  `- IP list:       192.168.1.1
   `- Total banned:     1

在防火牆中的規則
# iptables -t filter -L fail2ban-ProFTPD -n
Chain fail2ban-ProFTPD (1 references)
target     prot opt source               destination
DROP       all  —  192.168.1.1          0.0.0.0/0
RETURN     all  —  0.0.0.0/0            0.0.0.0/0

在 CentOS 6.x 上安裝 ProFTPD FTP Server

安裝 ProFTPD FTP Server
# yum install proftpd –enablerepo=epel

啟動 ProFTPD FTP Server
# service proftpd start
Starting proftpd:                                          [FAILED]

檢查錯誤的地方
# proftpd –configtest
Checking syntax of configuration file
. proftpd[2211]: warning: unable to determine IP address of ‘.’
. proftpd[2211]: error: no valid servers configured
. proftpd[2211]: Fatal: error processing configuration file ‘/etc/proftpd.conf’

看起來似乎是 ProFTPD FTP Server 沒有 IP Address[@more@]解決方式:
加入紅色一行
# vim /etc/proftpd.conf
ServerName                      “ProFTPD server”
ServerIdent                     on “FTP Server ready.”
ServerAdmin                     root@localhost
ServerType                      standalone
#ServerType                     inetd
DefaultServer                   on
DefaultAddress                  192.168.1.9
AccessGrantMsg                  “User %u logged in.”
#DisplayConnect                 /etc/ftpissue
#DisplayLogin                   /etc/ftpmotd
#DisplayGoAway                  /etc/ftpgoaway
DeferWelcome                    off

重新啟動 ProFTPD FTP Server
# /etc/init.d/proftpd start
Starting proftpd:                                          [  OK  ]

以 fail2ban 偵測 ftp 連線攻擊 – vsFTPd 篇

修改 vsFTPd FTP Server 設定
# vim /etc/vsftpd/vsftpd.conf
# The target log file can be vsftpd_log_file or xferlog_file.
# This depends on setting xferlog_std_format parameter
xferlog_enable=YES
#
# The name of log file when xferlog_enable=YES and xferlog_std_format=YES
# WARNING – changing this filename affects /etc/logrotate.d/vsftpd.log
xferlog_file=/var/log/xferlog
#
# Switches between logging into vsftpd_log_file and xferlog_file files.
# NO writes to vsftpd_log_file, YES to xferlog_file
#xferlog_std_format=YES

重新啟動 vsFTPd FTP Server
# service vsftpd restart
[@more@]修改 fail2ban 設定
# vim /etc/fail2ban/jail.conf
[vsftpd-iptables]

enabled  = true
filter   = vsftpd
action   = iptables[name=VSFTPD, port=ftp, protocol=tcp]
#           sendmail-whois[name=VSFTPD, dest=you@example.com]
logpath  = /var/log/vsftpd.log
maxretry = 3
bantime  = 86400

重新啟動 fail2ban
# service fail2ban restart

目前已經有二個阻擋的規則 ssh-iptables, vsftpd-iptables
# fail2ban-client status
Status
|- Number of jail:      2
`- Jail list:           ssh-iptables, vsftpd-iptables

以 Client IP 192.168.1.1 連線 Server IP 192.168.1.9 做錯誤連線

可以在 vsftpd-iptables 列出有偵測到的連線攻擊
# fail2ban-client status vsftpd-iptables
Status for the jail: vsftpd-iptables
|- filter
|  |- File list:        /var/log/vsftpd.log
|  |- Currently failed: 0
|  `- Total failed:     5
`- action
   |- Currently banned: 1
   |  `- IP list:       192.168.1.1
   `- Total banned:     1

在防火牆規則上的規則
# iptables -t filter -L fail2ban-VSFTPD -n
Chain fail2ban-VSFTPD (1 references)
target     prot opt source               destination
DROP       all  —  192.168.1.1          0.0.0.0/0
RETURN     all  —  0.0.0.0/0            0.0.0.0/0