設定完 Bananian 後,想要以 Pietty 0.3.27 連線時出現無線連線的訊息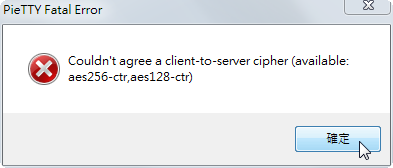
使用錯誤訊息在 Google 搜尋了一下,好像都是 SmartOS 相關,但我並不是使用 SmartOS。[@more@]後來以為是本機上沒有啟用 ssh 服務,或是防火牆上擋掉了,但都不是
後來改用 putty,發現竟然可以連線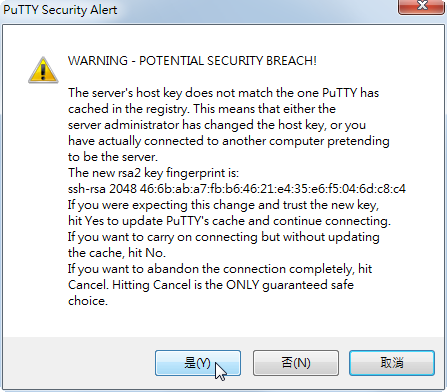
使用 Pietty 0.3.27 / 0.4.00(beta 14) 都無法連線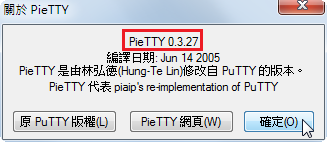
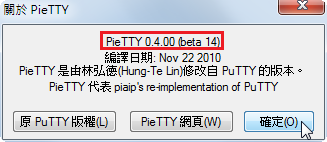
Pietty 0.4.00(beta 14) 出現的錯誤訊息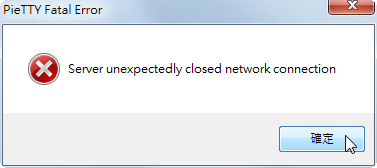
或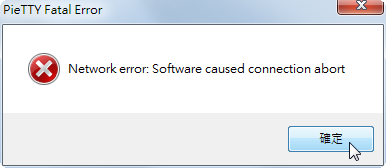

全新的繁體中文 WordPress 網站《宜蘭部落格教育平台 網站》
設定完 Bananian 後,想要以 Pietty 0.3.27 連線時出現無線連線的訊息
使用錯誤訊息在 Google 搜尋了一下,好像都是 SmartOS 相關,但我並不是使用 SmartOS。[@more@]後來以為是本機上沒有啟用 ssh 服務,或是防火牆上擋掉了,但都不是
後來改用 putty,發現竟然可以連線
使用 Pietty 0.3.27 / 0.4.00(beta 14) 都無法連線

Pietty 0.4.00(beta 14) 出現的錯誤訊息
或
Bananian v14-9 2014-09-20 版
http://www.lemaker.org/resources/9-116/bananian_for_bananapi.html [@more@]會再次使用這個版本的原因是想要拿 Banana Pi 來架設 Server
開機完成後可以看到
可以使用 bananian-config 來做設定
可以使用 bananian-update 來做系統更新
執行 bananian-config 進行設定
# bananian-config
設定鍵盤,預設是 us,不用做更動
因為是 Server,所以預設語系設定成 en_US.UTF-8
今天的主角 Berryboot,單單看名字一時之間還真不知道它是做什麼用的,不管如何,反正裝了就知道。
http://www.lemaker.org/resources/9-131/berryboot.html [@more@]使用 Win32DiskImager 製作好 Image,開機後看到的畫面
第 1 部份是畫面顯示的部分,如果有看到上下方的綠色的線條代表顯示部分沒有問題
第 2 部分是使用哪一種方式連上網路:Wired / 有線網路 Wifi / 無線網路
第 3 部分是聲音的部分
第 4 部分是時區和鍵盤的設定
如果沒有問題,就按 OK 繼續
選擇要用來儲存系統的磁碟,這裡是使用記憶卡,並且將記憶卡格式化 Format
這裡選擇一個自己沒有用過的 OLPC 的作業系統 Sugar,然後按 OK
一般個人使用 CentOS Linux 的習慣,小版本間的升級 6.4–> 6.5 就直接使用 yum update 來升級,大版本間的升級通常會先備份資料及設定檔後,重新安裝,比較少用升級的方式處理,因為升級可能會有些風險,倒不如重新安裝來的安全些。
底下文章參考:zh-tw/TipsAndTricks/CentOSUpgradeTool – CentOS Wiki
1. 在套件庫加入設定檔
# vim /etc/yum.repos.d/upgradetool.repo
[upg]
name=CentOS-$releasever – Upgrade Tool
baseurl=http://dev.centos.org/centos/6/upg/x86_64/
gpgcheck=1
enabled=1
gpgkey=file:///etc/pki/rpm-gpg/RPM-GPG-KEY-CentOS-6
2. 更新套件儲存庫
# yum update[@more@]3. 安裝升級所需套件
# yum install redhat-upgrade-tool preupgrade-assistant-contents
4. 列出升級事前助手的所有內容
# preupg -l
CentOS6_7
5. 匯入 CentOS 7 金鑰
# rpm –import http://mirror.centos.org/centos/RPM-GPG-KEY-CentOS-7
6. 進行升級
# centos-upgrade-tool-cli –network 7 –instrepo=ftp://140.111.74.109/CentOS/7/os/x86_64/
更新前
# cat /etc/redhat-release
CentOS release 6.5 (Final)
更新後
# cat /etc/redhat-release
CentOS Linux release 7.0.1406 (Core)
感想:
1. 升級完之後並沒有仔細去驗證所有的服務是否都能正常執行,通常如果有使用到第三方套件庫,如:rpmforge / epel …,或者是是使用桌面環境,如:GNOME / KDE….,失敗的機率會很大。
2. 升級所花的時間並沒有比重新安裝少,所以還是重新安裝新的系統比較實在,也可以順便把系統做一下清理。
$ sudo updatedb
$ sudo locate libgnome-keyring.so
/usr/lib/arm-linux-gnueabihf/libgnome-keyring.so.0
/usr/lib/arm-linux-gnueabihf/libgnome-keyring.so.0.2.0
$ sudo ./AdobeAIRInstaller.bin ./AdobeAIRInstaller.bin: 1: ./AdobeAIRInstaller.bin: Syntax error: “(” unexpected
S4A 是一個縮寫,其中 S 代表的是 Scratch ,4 代表的是 for ,A 代表的是 Arduino,更詳細的介紹可以使用 Google 來搜尋。
S4A 官方網站:http://s4a.cat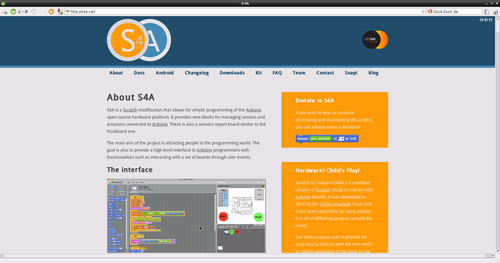 [@more@]首先點選 Downloads
共要下載 Raspbian (Debian for RaspberryPi) 和 S4A 的 fireware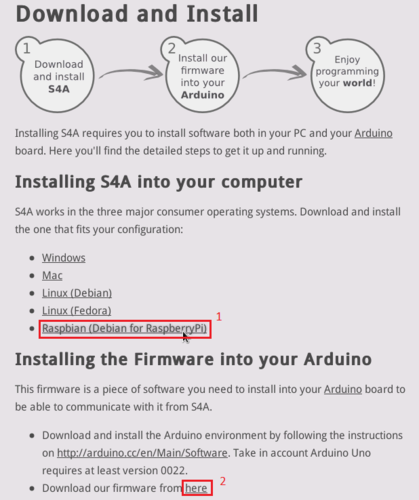
開啟終端機下載 Raspbian (Debian for RaspberryPi)
$ wget http://vps34736.ovh.net/S4A/S4A15_RP.deb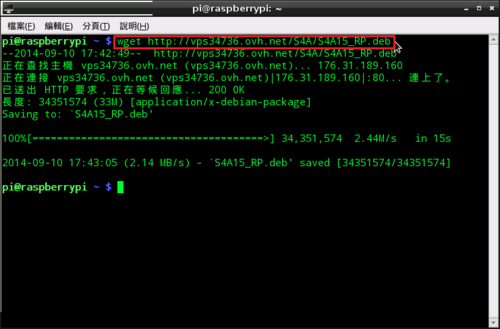
下載 S4A 的 fireware
$ wget http://vps34736.ovh.net/S4A/S4AFirmware15.ino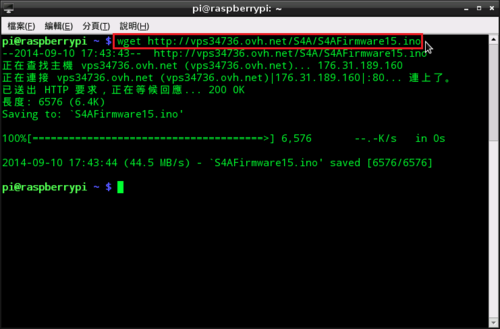
安裝 Raspbian (Debian for RaspberryPi) 套件
$ sudo dpkg -i S4A15_RP.deb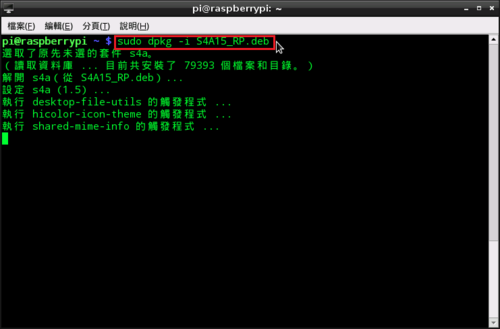
也可以將程式類似捷徑的部分複製到桌面,可以比較方便執行
$ cp /usr/share/applications/s4a.desktop Desktop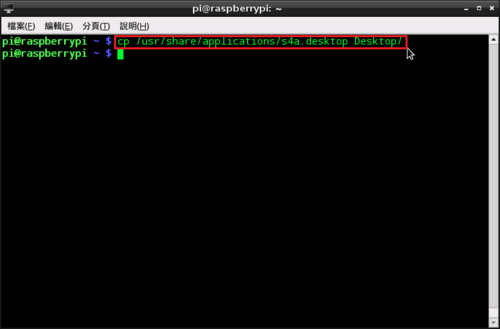
nVIDIA GeForce Driver 344.11 驅動程式
32Bit:
http://tw.download.nvidia.com/Windows/344.11/344.11-desktop-win8-win7-winvista-32bit-international-whql.exe
64Bit:
http://tw.download.nvidia.com/Windows/344.11/344.11-desktop-win8-win7-winvista-32bit-international-whql.exe
NoteBook
32Bit:
http://tw.download.nvidia.com/Windows/344.11/344.11-notebook-win8-win7-32bit-international-whql.exe
64Bit:
http://tw.download.nvidia.com/Windows/344.11/344.11-notebook-win8-win7-64bit-international-whql.exe