在 Banana Pi 測試 – 新增 SSD 資料硬碟

新增一顆 SSD 硬碟來當做網頁資料存取。
1. 連接好 SSD 硬碟

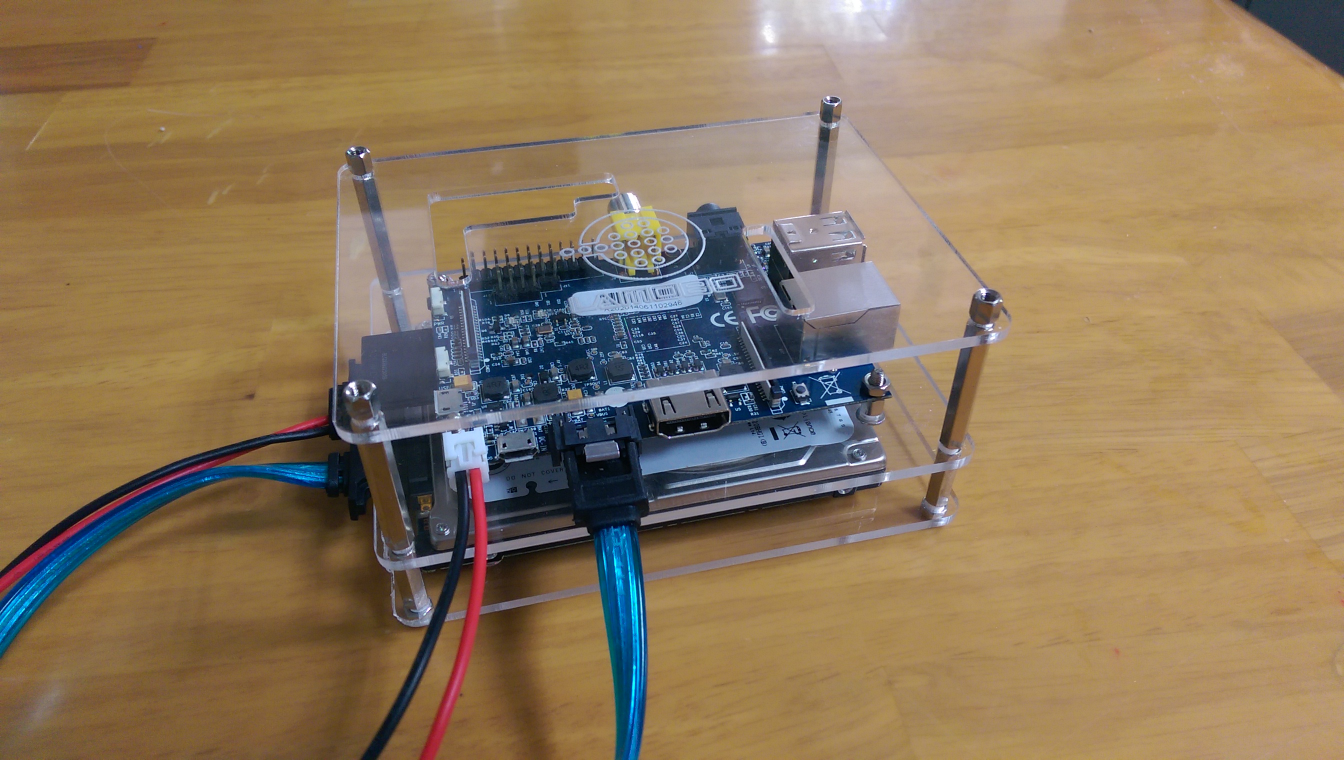
[@more@]2. 分割 SSD 硬碟
# fdisk /dev/sda
Device contains neither a valid DOS partition table, nor Sun, SGI or OSF disklabel
Building a new DOS disklabel with disk identifier 0x6de07098.
Changes will remain in memory only, until you decide to write them.
After that, of course, the previous content won’t be recoverable.

Warning: invalid flag 0x0000 of partition table 4 will be corrected by w(rite)

Command (m for help): p

Disk /dev/sda: 128.0 GB, 128035676160 bytes
255 heads, 63 sectors/track, 15566 cylinders, total 250069680 sectors
Units = sectors of 1 * 512 = 512 bytes
Sector size (logical/physical): 512 bytes / 512 bytes
I/O size (minimum/optimal): 512 bytes / 512 bytes
Disk identifier: 0x6de07098

   Device Boot      Start         End      Blocks   Id  System

Command (m for help): n
Partition type:
   p   primary (0 primary, 0 extended, 4 free)
   e   extended
Select (default p): p
Partition number (1-4, default 1):
Using default value 1
First sector (2048-250069679, default 2048):
Using default value 2048
Last sector, +sectors or +size{K,M,G} (2048-250069679, default 250069679):
Using default value 250069679

Command (m for help): t
Selected partition 1
Hex code (type L to list codes): 83

Command (m for help): wq
The partition table has been altered!

Calling ioctl() to re-read partition table.
Syncing disks.

3. 格式化 SSD 硬碟
# mkfs.ext4 /dev/sda1
mke2fs 1.42.5 (29-Jul-2012)
Discarding device blocks: done
Filesystem label=
OS type: Linux
Block size=4096 (log=2)
Fragment size=4096 (log=2)
Stride=0 blocks, Stripe width=0 blocks
7815168 inodes, 31258454 blocks
1562922 blocks (5.00%) reserved for the super user
First data block=0
Maximum filesystem blocks=0
954 block groups
32768 blocks per group, 32768 fragments per group
8192 inodes per group
Superblock backups stored on blocks:
        32768, 98304, 163840, 229376, 294912, 819200, 884736, 1605632, 2654208,
        4096000, 7962624, 11239424, 20480000, 23887872

Allocating group tables: done
Writing inode tables: done
Creating journal (32768 blocks): done
Writing superblocks and filesystem accounting information: done

4. 查看 SSD 硬碟分割區的 UUID
# blkid
/dev/sda1: UUID=”31bcc29f-70a8-46b5-85ad-51b52a30501b” TYPE=”ext4″
/dev/mmcblk0p1: SEC_TYPE=”msdos” UUID=”4D17-5A3B” TYPE=”vfat”
/dev/mmcblk0p2: UUID=”1af97748-34b7-4a6e-a16d-29c409d9c367″ TYPE=”ext4″

5. 建立掛載的目錄
# mkdir /var/www

6. 修改 /etc/fstab
# cp /etc/fstab /etc/fstab.$(date +%F)
# vim /etc/fstab
加入下面一行
UUID=31bcc29f-70a8-46b5-85ad-51b52a30501b /var/www ext4 noatime,nodiratime,discard,defaults 0 1

7. 重新啟動電腦
# sync;sync;sync;reboot

8. 驗收成果
# df -h
Filesystem      Size  Used Avail Use% Mounted on
rootfs          7.3G  947M  6.0G  14% /
/dev/root       7.3G  947M  6.0G  14% /
devtmpfs        486M     0  486M   0% /dev
tmpfs            98M  252K   97M   1% /run
tmpfs           5.0M     0  5.0M   0% /run/lock
tmpfs           195M     0  195M   0% /run/shm
/dev/sda1       118G  188M  112G   1% /var/www

Adobe Flash Player 16.0.0.257

Adobe Flash Player 16.0.0.257
檢查安裝版本:https://www.adobe.com/tw/software/flash/about/
[@more@]Windows 平台
Internet Explorer:
http://fpdownload.adobe.com/get/flashplayer/pdc/16.0.0.257/install_flash_player_ax.exe
Windows 8/8.1 版則要從 Windows Update 中更新

All Other Browsers(Firefox,Safari & Opera):
http://fpdownload.adobe.com/get/flashplayer/pdc/16.0.0.257/install_flash_player.exe

Mac
http://fpdownload.adobe.com/get/flashplayer/pdc/16.0.0.257/install_flash_player_osx.dmg

測試 Acer Chromebox

為了更進一步瞭解 Chomebook/Chromebox,所以借了一台 Acer Chomebox 來進行測試,感謝借測的單位。
Acer Chromebox 官方網站:
http://www.acer.com.tw/ac/zh/TW/content/professional-series/acer-chromebox-cxi

硬體規格
Model:Acer Chromebox CXI

OSGoogle Chrome OS
CPUIntel 2957U Processor
RAM4GB DDR3
HDD16GB Flash Disk
USB3.0*4
NetworkingIntegrated LAN 10/100/1000
WLANWireless LAN+Bluetooth

下面的圖片是用數位相機照的,所以有些模糊
1. 第一次開機進入的畫面,速度真的很快,幾乎在 10 秒內完成,請選擇 繼續
[@more@]2. 選擇 接受並繼續

3. 輸入 Google 的帳號及密碼,並按 登入

4. 選擇一個個人圖像,並按 確定

5. 已完成登入

6. 登入之後的桌面,非常簡潔

電腦關機
在 US 上按滑鼠左鍵,出現的功能表,就可以找到關機的地方了!

Ubuntu Chromium 瀏覽器 Cache 目錄設定

參考網頁:
將 Linux 的 Firefox、Chrome 暫存區設定到 RAM 裡面 – Tsung’s Blog

因為在 Ubuntu Chromium 瀏覽器中,沒有辦法像 Firefox 一樣,可以設定 Cache 暫存區的目錄,所以要改用直接修改 .desktop 的方式。
1. 備份原檔
$ cp /usr/share/applications/chromium-browser.desktop ~/chromium-browser.desktop.$(date +%F)
[@more@]2. 進行修改
$ sudo sed -i ‘s/Exec=chromium-browser/Exec=chromium-browser –disk-cache-dir=”/tmp”/’ /usr/share/applications/chromium-browser.desktop

3. 檢查設定是否有生效,前後做比較

在 Ubuntu Mac Style 12.04 中使用 SSD

參考網頁:
Solid State Drive (SSD): optimize it for Ubuntu 14.04, Linux Mint 17.1 and Debian – Easy Linux tips project
永遠的真田幸村: Linux平台使用SSD必讀 (範例為Ubuntu) – yblog.org

修改方式:
1. 備份原 /etc/fstab
$ sudo cp /etc/fstab /etc/fstab.$(date +%F)
[@more@]2. 修改 /etc/fstab
這裡 120G  SSD 的分割是
92G / 根目錄
2G swap
25G /windows 備份區
# vim /etc/fstab
加入紅字的部份
# <file system> <mount point>   <type>  <options>       <dump>  <pass>
proc            /proc           proc    nodev,noexec,nosuid 0       0
# / was on /dev/sda1 during installation
UUID=1bfa9571-c711-4d02-8a65-a61e6c2f790f /               ext4    noatime,nodiratime,discard,errors=remount-ro 0       1
# /windows was on /dev/sda2 during installation
UUID=85E0-42F0  /windows        vfat    utf8,umask=007,gid=46 0       1
# swap was on /dev/sda3 during installation
UUID=324d38ce-b71d-4872-82a3-bb262397c221 none            swap    sw              0       0
# 將 /tmp 以 tmpfs 形式掛上
tmpfs /tmp tmpfs nodev,nosuid,noexec,mode=1777 0 0
tmpfs   /var/spool tmpfs   defaults,noatime,mode=1777   0  0
tmpfs   /var/tmp   tmpfs   defaults,noatime,mode=1777   0  0
tmpfs   /var/log   tmpfs   defaults,noatime,mode=0755   0  0

3. 將 Firefox 瀏覽器的暫存檔指到 /tmp
開啟 Firefox 於瀏覽網址輸入
about:config

按我發誓,我一定會小心的!

於偏好設定名稱按 右鍵->新增->字
新增 browser.cache.disk.parent_directory
數值設定 /tmp

4. 改用 I/O Scheduler 提供系統效率
$ sudo cat /sys/block/sda/queue/scheduler
在 Ubuntu 12.04 顯示的可能是:
noop deadline [cfq]
修改 /etc/default/grub 設定檔
$ sudo vim /etc/default/grub

#GRUB_CMDLINE_LINUX_DEFAULT=”quiet splash”
改成
GRUB_CMDLINE_LINUX_DEFAULT=”elevator=deadline quiet splash”

5. 讓設定生效
$ sudo update-grub
Generating grub.cfg …
Found linux image: /boot/vmlinuz-3.2.0-74-generic-pae
Found initrd image: /boot/initrd.img-3.2.0-74-generic-pae
Found linux image: /boot/vmlinuz-3.2.0-67-generic-pae
Found initrd image: /boot/initrd.img-3.2.0-67-generic-pae
Found memtest86+ image: /boot/memtest86+.bin
done

6. 重新啟動電腦
$ sudo reboot

在 Debian 建置有 logging 功能的 DNS Server

在網路中,DNS Server 服務是非常重要的,由 DNS Server 的 log 中,可以查詢到一些非常重要的資料。

# tail dns-security.log
24-Dec-2014 00:49:26.723 security: info: client 192.3.96.146#48302: query (cache) ‘openresolver.com/A/IN’ denied
24-Dec-2014 02:11:25.169 security: info: client 89.248.172.169#46003: query (cache) ‘globe.gov/ANY/IN’ denied
24-Dec-2014 05:09:04.502 security: info: client 202.153.191.99#60017: query (cache) ‘./NS/IN’ denied
24-Dec-2014 08:31:24.675 security: info: client 204.42.253.2#58601: query (cache) ‘c526034a.openresolvertest.net/A/IN’ denied
24-Dec-2014 08:59:36.327 security: info: client 124.232.142.220#54455: query (cache) ‘www.google.com/A/IN’ denied
24-Dec-2014 12:44:44.954 security: info: client 74.82.47.8#54631: query (cache) ‘dnsscan.shadowserver.org/A/IN’ denied
24-Dec-2014 15:33:08.420 security: info: client 207.244.82.115#48706: query (cache) ‘./ANY/IN’ denied[@more@]設定方式:DNS Server 已經設定 chroot
參考網頁:Bind9 – Debian Wiki
1. 建立 /var/chroot/bind9/var/log 目錄
# mkdir /var/chroot/bind9/var/log

2. 更改目錄權限
# chown bind:bind /var/chroot/bind9/var/log

3. 修改 /etc/bind/named.conf
# vim /etc/bind/named.conf
加入下面一行
include “/etc/bind/named.conf.log”;

4. 建立 /etc/bind/named.conf.log
# vim /etc/bind/named.conf.log
logging {
        channel update_debug {
                file “/var/log/update_debug.log” versions 3 size 100k;
                severity debug;
                print-severity  yes;
                print-time      yes;
        };
        channel security_info {
                file “/var/log/security_info.log” versions 1 size 100k;
                severity info;
                print-severity  yes;
                print-time      yes;
        };
        channel bind_log {
                file “/var/log/bind.log” versions 3 size 1m;
                severity info;
                print-category  yes;
                print-severity  yes;
                print-time      yes;
        };

        category default { bind_log; };
        category lame-servers { null; };
        category update { update_debug; };
        category update-security { update_debug; };
        category security { security_info; };
};

5. 重新啟動 DNS Server 及 Log Server
# /etc/init.d/rsyslog restart; /etc/init.d/bind9 start

6. 驗收成果及收工
# ls -l /var/chroot/bind9/var/log/
total 4
-rw-r–r– 1 bind bind 1417 Dec 24 15:45 bind.log
-rw-r–r– 1 bind bind    0 Dec 24 15:45 security_info.log
-rw-r–r– 1 bind bind    0 Dec 24 15:45 update_debug.log

在 Debian 建置 chroot 的 DNS Server

在 Debian 上安裝的 DNS Server 預設和 ArchLinux 一樣是沒有 chroot 的,為了 DNS Server 的安全,通常都會建議要以 chroot 的方式來執行。
參考網頁:Mind Reference: How to chroot bind9 in Debian
                     Bind9 – Debian Wiki
底下以 Script 檔來自動處理這項工作
[@more@]Script 檔案來源,稍做修改
1. 建立 chroot-bind9
# vim /usr/local/bin/chroot-bind9
#!/bin/bash

/etc/init.d/bind9 stop

mkdir -p /var/chroot/bind9/{etc,dev,var/cache/bind,var/run/bind/run}
chown -R bind:bind /var/chroot/bind9/var/*

mknod /var/chroot/bind9/dev/null c 1 3
mknod /var/chroot/bind9/dev/random c 1 8
chmod 666 /var/chroot/bind9/dev/{null,random}

mv /etc/bind /var/chroot/bind9/etc
ln -s /var/chroot/bind9/etc/bind /etc/bind

chown -R bind:bind /etc/bind/*
chmod -R g+w /etc/bind/

echo “$AddUnixListenSocket /var/chroot/bind9/dev/log” > /etc/rsyslog.d/bind-chroot.conf

sed -e ‘s,”-u bind”,”-u bind -t /var/chroot/bind9″,’ /etc/default/bind9 > /tmp/x && mv /tmp/x /etc/default/bind9

/etc/init.d/bind9 start

2. 給予 root 執行權限
# chmod 700 /usr/local/bin/chroot-bind9

3. 執行
# /usr/local/bin/chroot-bind9

4. 驗收成果
# host 192.168.1.3 192.168.1.2
Using domain server:
Name: 192.168.1.2
Address: 192.168.1.2#53
Aliases:

3.1.168.192.in-addr.arpa domain name pointer ftp.test.ilc.edu.tw.

# host ftp.test.ilc.edu.tw 192.168.1.2
Using domain server:
Name: 192.168.1.2
Address: 192.168.1.2#53
Aliases:

ftp.test.ilc.edu.tw has address 192.168.1.3

解決執行 /etc/init.d/bind9 status 會出現的錯誤訊息
# /etc/init.d/bind9 status
 * bind9 is not running

先將 PIDFILE=/var/run/named/named.pid 前面加上 # 註解
# sed -i ‘s/^PIDFILE/#PIDFILE/’ /etc/init.d/bind9
#PIDFILE 後面插入一行
# sed -i ‘/#PIDFILE/ a PIDFILE=/var/chroot/bind9/var/run/named/named.pid’ /etc/init.d/bind9

/etc/init.d/bind9 status
 * bind9 is running