
參考網站:
Banana Pi R1 (BPi-R1) Part 1 vlan switch設定 | 講 iT
Banana Pi Router – BPi-R1 Manual for HW setup and basic router functionalities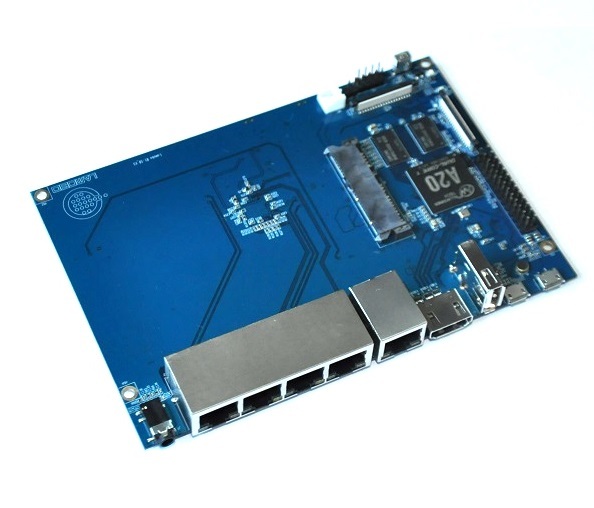
本來看到 Banana Pi R1 上面有五個網路介面,以為它有五個網路介面,後來才發現,它的上面只有一個 Reltek 8192CU 的網路晶片,所以和我想像的不太一樣。[@more@]
原本的網路設定
# ifconfig eth0
eth0 Link encap:Ethernet HWaddr 01:02:03:04:05:06
inet addr:192.168.1.85 Bcast:192.168.1.255 Mask:255.255.255.0
UP BROADCAST RUNNING MULTICAST MTU:1500 Metric:1
RX packets:91829 errors:0 dropped:0 overruns:0 frame:0
TX packets:23944 errors:0 dropped:0 overruns:0 carrier:0
collisions:0 txqueuelen:1000
RX bytes:70257253 (67.0 MiB) TX bytes:1820101 (1.7 MiB)
Interrupt:117 Base address:0xc000
因為所有的 Port 都是 eth0,所以要使用其它的 Port,就必須設定 vlan
# apt-get install vlan
一共有五個 Ports,把 Ports 分成對外的 WAN(接近 HDMI 那個),會被分配成 vlan 101,而剩下來的四個就是 LAN,分配成 vlan 102。
修改設定檔 /etc/network/if-pre-up.d/swconfig
# sed -i ‘s/exit 0/#exit 0/’ /etc/network/if-pre-up.d/swconfig
列出設定檔
# cat /etc/network/if-pre-up.d/swconfig
#—————————#
# BPI-R1 VLAN configuration #
#—————————#
#
# This will create the following ethernet ports:
# – eth0.101 = WAN (single port)
# – eth0.102 = LAN (4 port switch)
#
# You have to adjust your /etc/network/interfaces
#
# Comment out the next line to enable the VLAN configuration:
#exit 0
ifconfig eth0 up
# The swconfig port number are:
# |2|1|0|4| |3|
# (looking at front of ports)
swconfig dev eth0 set reset 1
swconfig dev eth0 set enable_vlan 1
swconfig dev eth0 vlan 101 set ports ‘3 8t’
swconfig dev eth0 vlan 102 set ports ‘4 0 1 2 8t’
swconfig dev eth0 set apply 1
修改網路設定檔
# vim /etc/network/interfaces
原本的設定
auto eth0
# dhcp configuration
iface eth0 inet dhcp
# static ip configuration
#iface eth0 inet static
# address 192.168.6.241
# netmask 255.255.255.0
# gateway 192.168.6.1
改成您所需要的設定
auto eth0.101
# dhcp configuration
iface eth0.101 inet dhcp
auto eth0.102
iface eth0.102 inet static
address 192.168.85.1
netmask 255.255.255.0
重新啟動網路
# /etc/init.d/networking restart
查看完成後的設定
# ifconfig eth0.101 🙁
eth0.101 Link encap:Ethernet HWaddr 01:02:03:04:05:06
inet addr:192.168.1.85 Bcast:192.168.1.255 Mask:255.255.255.0
UP BROADCAST RUNNING MULTICAST MTU:1500 Metric:1
RX packets:1073 errors:0 dropped:0 overruns:0 frame:0
TX packets:198 errors:0 dropped:0 overruns:0 carrier:0
collisions:0 txqueuelen:0
RX bytes:60243 (58.8 KiB) TX bytes:25955 (25.3 KiB)
# ifconfig eth0.102
eth0.102 Link encap:Ethernet HWaddr 01:02:03:04:05:06
inet addr:192.168.85.1 Bcast:192.168.85.255 Mask:255.255.255.0
UP BROADCAST RUNNING MULTICAST MTU:1500 Metric:1
RX packets:0 errors:0 dropped:0 overruns:0 frame:0
TX packets:6 errors:0 dropped:0 overruns:0 carrier:0
collisions:0 txqueuelen:0
RX bytes:0 (0.0 B) TX bytes:468 (468.0 B)
從上面可以看出二個的網路介面 Mac Address 是一樣的。