
[@more@]主要是更新 KB4022715 / KB4023834


全新的繁體中文 WordPress 網站《宜蘭部落格教育平台 網站》
[@more@]主要是更新 KB4022715 / KB4023834
檢查安裝版本:https://www.adobe.com/tw/software/flash/about/
https://get.adobe.com/tw/flashplayer/[@more@]Windows 7 平台
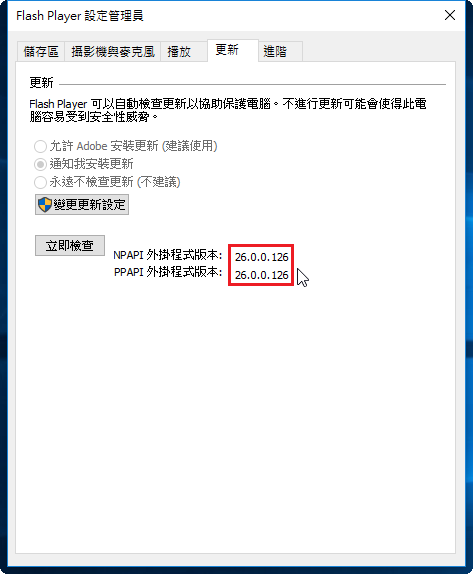
Internet Explorer:
http://fpdownload.adobe.com/get/flashplayer/pdc/26.0.0.126/install_flash_player_ax.exe
Windows 8 / 8.1 / 10 / Server 2012 R2 / Server 2016 要從 Windows Update 更新
All Other Browsers(Firefox…):
http://fpdownload.adobe.com/get/flashplayer/pdc/26.0.0.126/install_flash_player.exe
Google Chrome(Opera)
http://fpdownload.adobe.com/get/flashplayer/pdc/26.0.0.126/install_flash_player_ppapi.exe
Mac 平台:
http://fpdownload.adobe.com/get/flashplayer/pdc/26.0.0.126/install_flash_player_osx.dmg
參考網頁:
安裝 OpenNMS 17.0.0 on CentOS 7.0 @ Egg Chang 的部落格 :: 痞客邦 PIXNET ::
OpenNMS Installation Guide
主要是要研究是否有可能將 OpenNMS 直接整合在 CentOS 7 的安裝光碟之中!
安裝與設定 PostgreSQL Server
PostgreSQL Server 官方網站:https://www.postgresql.org
不使用 CentOS 7 內建套件庫版本,直接以官方網站上的最新版本來安裝
https://yum.postgresql.org/repopackages.php
2017.03.18 最新的穩定版本是 9.6
1. 下載 PostgreSQL 套件庫設定檔
# wget https://download.postgresql.org/pub/repos/yum/9.6/redhat/rhel-7-x86_64/pgdg-centos96-9.6-3.noarch.rpm
# rpm -ivh pgdg-centos96-9.6-3.noarch.rpm[@more@]
2. 列出套件庫 pgdg96 可安裝的套件
# yum list available –disablerepo=* –enablerepo=pgdg96
# yum list available –disablerepo=* –enablerepo=pgdg96 | egrep ‘postgresql|pgadmin’
pgadmin3_96-debuginfo.x86_64 1.22.1-2.rhel7 pgdg96
pgadmin3_96-docs.x86_64 1.22.1-2.rhel7 pgdg96
pgadmin4-v1.x86_64 1.3-1.rhel7 pgdg96
pgadmin4-v1-debuginfo.x86_64 1.3-1.rhel7 pgdg96
pgadmin4-v1-docs.noarch 1.3-1.rhel7 pgdg96
pgadmin4-v1-web.noarch 1.3-1.rhel7 pgdg96
postgresql-jdbc.noarch 42.0.0-1.rhel7 pgdg96
postgresql-jdbc-javadoc.noarch 42.0.0-1.rhel7 pgdg96
postgresql-unit96.x86_64 2.0-1.rhel7 pgdg96
postgresql-unit96-debuginfo.x86_64 2.0-1.rhel7 pgdg96
postgresql96-debuginfo.x86_64 9.6.2-2PGDG.rhel7 pgdg96
postgresql96-devel.x86_64 9.6.2-2PGDG.rhel7 pgdg96
postgresql96-docs.x86_64 9.6.2-2PGDG.rhel7 pgdg96
postgresql96-plperl.x86_64 9.6.2-2PGDG.rhel7 pgdg96
postgresql96-plpython.x86_64 9.6.2-2PGDG.rhel7 pgdg96
postgresql96-pltcl.x86_64 9.6.2-2PGDG.rhel7 pgdg96
postgresql96-tcl.x86_64 2.1.1-1.rhel7 pgdg96
postgresql96-tcl-debuginfo.x86_64 2.1.1-1.rhel7 pgdg96
postgresql96-test.x86_64 9.6.2-2PGDG.rhel7 pgdg96
3. 安裝 PostgreSQL Server
# yum install postgresql96 postgresql96-server postgresql96-contrib postgresql96-odbc postgresql96-libs pgadmin3_96
4. 啟動 PostgreSQL Server
# /usr/pgsql-9.6/bin/postgresql96-setup initdb
Initializing database … OK
# systemctl enable postgresql-9.6
Created symlink from /etc/systemd/system/multi-user.target.wants/postgresql-9.6.service to /usr/lib/systemd/system/postgresql-9.6.service.
# systemctl start postgresql-9.6
5. 修改 postgresql.conf 設定檔
# sed -i ‘s/^#listen/listen/’ /var/lib/pgsql/9.6/data/postgresql.conf
6. 修改 pg_hba.conf 設定檔
# sed -i ‘/^host/s/…..$/md5/’ /var/lib/pgsql/9.6/data/pg_hba.conf
7. 重新載入 PostgreSQL Server
# systemctl reload postgresql-9.6
安裝與設定 JDK
8. 下載 JDK
請到下方的 Oracle 官方網站下載:
http://www.oracle.com/technetwork/java/javase/downloads/index.html
9. 進行安裝
# rpm -ivh jdk-8u121-linux-x64.rpm
Preparing… ################################# [100%]
Updating / installing…
1:jdk1.8.0_121-2000:1.8.0_121-fcs ################################# [100%]
Unpacking JAR files…
tools.jar…
plugin.jar…
javaws.jar…
deploy.jar…
rt.jar…
jsse.jar…
charsets.jar…
localedata.jar…
10. 設定 Java 環境變數
# cat << EOF > /etc/profile.d/java.sh
export JAVA_HOME=/usr/java/default
export PATH=$JAVA_HOME/bin:$PATH
EOF
# cat << EOF > /etc/profile.d/java.csh
set JAVA_HOME=/usr/java/default
set PATH=$JAVA_HOME/bin:$PATH
EOF
11. 讓設定生效
# . /etc/profile.d/java.sh
12. 下載 OpenNMS 套件庫及 GPG Key
# wget http://yum.opennms.org/repofiles/opennms-repo-stable-rhel7.noarch.rpm
# wget http://yum.opennms.org/OPENNMS-GPG-KEY
13. 安裝設定檔及 GPG Ket
# rpm -ivh opennms-repo-stable-rhel7.noarch.rpm
# rpm –import OPENNMS-GPG-KEY
14. 更新套件庫
# yum update
15. 安裝 OpenNMS 套件
# yum install opennms opennms-docs mib2events grafana-opennms-plugin opennms-plugin-ticketer-centric opennms-remote-poller opennms-jmx-config-generator opennms-ncs opennms-plugins rrdtool jrrd2
16. 建立 PostgreSQL Server 管理者密碼
# su – postgres
$ psql -c “ALTER USER postgres WITH PASSWORD ‘YOUR-POSTGRES-PASSWORD’;”
ALTER ROLE
17. 建立使用者 opennms 和密碼
$ createuser -P opennms
Enter password for new role:
Enter it again:
18. 建立 OpenNMS 資料庫
$ createdb -O opennms opennms
$ psql -c “ALTER USER opennms WITH SUPERUSER;”
$ exit
19. 設定 OpenNMS 連線的帳號及密碼(123456 請替換成正確的密碼)
# sed -i -e ‘/password/s/password=”opennms”/password=”123456″/’ -e ‘/password/s/password=””/password=”YOUR-POSTGRES-PASSWORD“/’ /opt/opennms/etc/opennms-datasources.xml
<jdbc-data-source name=”opennms”
database-name=”opennms”
class-name=”org.postgresql.Driver”
url=”jdbc:postgresql://localhost:5432/opennms”
user-name=”opennms”
password=”123456″ />
<jdbc-data-source name=”opennms-admin”
database-name=”template1″
class-name=”org.postgresql.Driver”
url=”jdbc:postgresql://localhost:5432/template1″
user-name=”postgres”
password=”YOUR-POSTGRES-PASSWORD” />
20. 設定 OpenNMS
# /opt/opennms/bin/runjava -s
runjava: Looking for an appropriate JRE…
runjava: Checking for an appropriate JRE in JAVA_HOME…
runjava: skipping… JAVA_HOME not set
runjava: Checking JRE in user’s path: “/bin/java”…
runjava: found an appropriate JRE in user’s path: “/bin/java”
runjava: value of “/bin/java” stored in configuration file
21. 資料庫及系統 libraries 初始化
# /opt/opennms/bin/install -dis
22. 設定 rrdtool
# sed -i ‘/MultithreadedJniRrdStrategy/s/^#org/org/’ /opt/opennms/etc/rrd-configuration.properties
# sed -i ‘/rrd2/s/^#opennms/opennms/’ /opt/opennms/etc/rrd-configuration.properties
# sed -i ‘/rrd2/s/^#org/org/’ /opt/opennms/etc/rrd-configuration.properties
23. 鎖住資料庫權限
# su – postgres
$ psql -c “ALTER ROLE opennms NOSUPERUSER;”
$ psql -c “ALTER ROLE opennms NOCREATEDB;”
$ exit
24. 設定 Firewall
# firewall-cmd –permanent –add-port=8980/tcp
# firewall-cmd –reload
25. 關閉 OpenNMS 透過 yum 更新
# sed -i ‘/gpgcheck/aenabled=0’ /etc/yum.repos.d/opennms-repo-stable-rhel7.repo
26. 啟動 OpenNMS
# systemctl enable opennms.service
# systemctl start opennms.service
27. 開啟瀏覽器 http://Server’IP:8989,預設登入的帳號及密碼:admin / admin
第一次啟動或剛開機時,會耗費比較多的時間!
最後結論:沒有辦法全自動,因為 16~18 步驟要設定密碼,所以只能做成半自動的版本!
目前學校是使用 Proxmox Cluster 來當做虛擬機器,有一天突然無預警斷電,之後復電後,有一台 Proxmox Server 沒有自動開機啟動,所以其它台的 Proxmox Server 上的虛擬機器要執行時,都會出現下面的錯誤訊息。
# pct start 200
cluster not ready – no quorum?
# pvecm status
Quorum information
——————
Date: Sat Mar 18 14:04:32 2017
Quorum provider: corosync_votequorum
Nodes: 1
Node ID: 0x00000002
Ring ID: 2/160
Quorate: No
Votequorum information
———————-
Expected votes: 2
Highest expected: 2
Total votes: 1
Quorum: 2 Activity blocked
Flags:
Membership information
———————-
Nodeid Votes Name
0x00000002 1 192.168.1.39 (local)
造成 Cluster 錯誤的原因中,最常見的就是節點之間網路的斷線, Cluster 中節點數量低於 2 時, Cluster 就會被鎖住,會陷入「no quorum」的狀態。這是因為 Proxmox VE Cluster 預設期待 Cluster 中必須要有 2 個節點(Node)以上,可是因為網路斷線的緣故,才會出現「Quorum: 2 Activity blocked」這個狀態。[@more@]
解決方式:
參考網頁:
修復Proxmox VE:集叢未啟動 / Fix Proxmox VE: Cluster Not Ready – 布丁布丁吃什麼?
暫時把 Cluster 的期待數量從 2 降低為 1
# pvecm expected 1
重新啟動 Proxmox VE Cluster
# service pve-cluster restart
也可以用參考網頁中提到的方式,用 Script 工作排程來解除鎖定的狀態
方式很多種
以下針對 VMware 所架設的虛擬機器
1. 使用 lshw 指令
# yum install lshw
# lshw | grep -m 1 product
product: VMware Virtual Platform
2. 使用 lspci 指令
# yum install pciutils
# lspci | grep -m 1 System
00:07.7 System peripheral: VMware Virtual Machine Communication Interface (rev 10)
3. 使用 dmidecode 指令
# yum install dmidecode
# dmidecode | grep -m 1 Product
Product Name: VMware Virtual Platform[@more@]4. 使用 virt-what 指令
# yum install virt-what
# apt-get install virt-what
在 VMware
# virt-what
vmware
在 Proxmox
# virt-what
lxc
在 VirtualBox
# virt-what
virtualbox
最近稍微研究了一下 OpenNMS,在網路上搜尋了一下,找到了 OpenNMS Sans Effort,是由法國人Samuel Mutel 基於 CentOS 所整合的客製化光碟,目前可以下載的最新版本是 4.0。

OpenNMS Sans Effort 官方網站:http://ose-distrib.sourceforge.net/index.html
可以參考的中文網站:
10分鐘架好免費網管軟體 | 技術專題 | iThome online
OSE(OpenNMS Sans Effort):CentOS裝好,OpenNMS也就裝好了,真的! – 樂多閱讀[@more@]底下在 VM 中試著安裝一下
1. 光碟開機畫面,可以選擇不同的安裝方式
2. 這裡選擇安裝 opennms
3. 確認資料會清除
4. 安裝語系選擇
5. 鍵盤選擇
6. 時區選擇
7. 設定 root 管理者密碼
8. 硬碟分割
9. 進行安裝


10. 安裝完成
系統安裝版本
# cat /etc/redhat-release
CentOS release 6.4 (Final)
套件庫
# ls -l
-rw-r–r–. 1 root root 1926 2013-02-25 16:57 CentOS-Base.repo
-rw-r–r–. 1 root root 638 2013-02-25 16:57 CentOS-Debuginfo.repo
-rw-r–r–. 1 root root 630 2013-02-25 16:57 CentOS-Media.repo
-rw-r–r–. 1 root root 3664 2013-02-25 16:57 CentOS-Vault.repo
-rw-r–r–. 1 root root 957 2012-11-05 11:52 epel.repo
-rw-r–r–. 1 root root 1056 2012-11-05 11:52 epel-testing.repo
-rw-r–r–. 1 root root 739 2013-03-20 22:24 mirrors-rpmforge
-rw-r–r–. 1 root root 717 2013-03-20 22:24 mirrors-rpmforge-extras
-rw-r–r–. 1 root root 728 2013-03-20 22:24 mirrors-rpmforge-testing
-rw-r–r–. 1 root root 1386 2012-01-23 03:09 OPENNMS-GPG-KEY
-rw-r–r–. 1 root root 418 2012-01-23 03:09 opennms-stable-rhel6.repo
-rw-r–r–. 1 root root 200 2012-05-18 21:24 ose-stable-rhel5.repo
-rw-r–r–. 1 root root 436 2011-08-22 19:28 pgdg-91-redhat.repo
-rw-r–r–. 1 root root 1128 2013-03-20 22:24 rpmforge.repo
SELinux 預設設定
# getenforce
Disabled
更新套件有問題
# yum update
Loaded plugins: fastestmirror
Loading mirror speeds from cached hostfile
Error: Cannot retrieve metalink for repository: epel. Please verify its path and try again
預設開啟的服務
# chkconfig –list | grep 3:開啟
auditd 0:關閉 1:關閉 2:開啟 3:開啟 4:開啟 5:開啟 6:關閉
blk-availability 0:關閉 1:開啟 2:開啟 3:開啟 4:開啟 5:開啟 6:關閉
crond 0:關閉 1:關閉 2:開啟 3:開啟 4:開啟 5:開啟 6:關閉
ip6tables 0:關閉 1:關閉 2:開啟 3:開啟 4:開啟 5:開啟 6:關閉
iptables 0:關閉 1:關閉 2:開啟 3:開啟 4:開啟 5:開啟 6:關閉
iscsi 0:關閉 1:關閉 2:關閉 3:開啟 4:開啟 5:開啟 6:關閉
iscsid 0:關閉 1:關閉 2:關閉 3:開啟 4:開啟 5:開啟 6:關閉
jexec 0:開啟 1:開啟 2:開啟 3:開啟 4:開啟 5:開啟 6:開啟
lvm2-monitor 0:關閉 1:開啟 2:開啟 3:開啟 4:開啟 5:開啟 6:關閉
netfs 0:關閉 1:關閉 2:關閉 3:開啟 4:開啟 5:開啟 6:關閉
network 0:關閉 1:關閉 2:開啟 3:開啟 4:開啟 5:開啟 6:關閉
opennms 0:關閉 1:關閉 2:開啟 3:開啟 4:開啟 5:開啟 6:關閉
postfix 0:關閉 1:關閉 2:開啟 3:開啟 4:開啟 5:開啟 6:關閉
rsyslog 0:關閉 1:關閉 2:開啟 3:開啟 4:開啟 5:開啟 6:關閉
sshd 0:關閉 1:關閉 2:開啟 3:開啟 4:開啟 5:開啟 6:關閉
sysstat 0:關閉 1:開啟 2:開啟 3:開啟 4:開啟 5:開啟 6:關閉
udev-post 0:關閉 1:開啟 2:開啟 3:開啟 4:開啟 5:開啟 6:關閉
整體心得:
1. 因為版本有些舊,所以安裝起來可能會無法使用,即使更新到最新的 6.7 版。
2. 這個也是一片研究 RedHat / CentOS 自動安裝的好教材,如果有空的話,我會試著做一片看看!
使用 Nagios 來偵測無線 AP 時會出現 No OIDs specified 的警告訊息

[@more@]解決方式:
1. 修改 commands.cfg
# vim /etc/nagios/object/commands.cfg
或
# vim /usr/local/nagios/etc/objects/commands.cfg
把
# ‘check_snmp’ command definition
define command{
command_name check_snmp
command_line $USER1$/check_snmp -H $HOSTADDRESS$ $ARG1$
}
修改成
# ‘check_snmp’ command definition
define command{
command_name check_snmp
command_line $USER1$/check_snmp -H $HOSTADDRESS$ -C $ARG1$ -o $ARG2$
}
2. 重新啟動 Nagios Server
# systemctl restart nagios.service
check_snmp 指令用法
# /usr/local/nagios/libexec/check_snmp
check_snmp: Could not parse arguments
Usage:
check_snmp -H <ip_address> -o <OID> [-w warn_range] [-c crit_range]
[-C community] [-s string] [-r regex] [-R regexi] [-t timeout] [-e retries]
[-l label] [-u units] [-p port-number] [-d delimiter] [-D output-delimiter]
[-m miblist] [-P snmp version] [-N context] [-L seclevel] [-U secname]
[-a authproto] [-A authpasswd] [-x privproto] [-X privpasswd]
因為 Ubuntu 16.04 套件庫中的 Nagios 是 3.x 版,所以要改用手動的方式進行安裝
# apt-cache search nagios | grep ^nagios
nagios-images – Collection of images and icons for the nagios system
nagios-nrpe-plugin – Nagios Remote Plugin Executor Plugin
nagios-nrpe-server – Nagios Remote Plugin Executor Server
nagios-plugins – transitional dummy package (nagios-plugins to monitoring-plugins)
nagios-plugins-basic – transitional dummy package
nagios-plugins-standard – transitional dummy package
nagios3 – host/service/network monitoring and management system
nagios3-cgi – cgi files for nagios3
nagios3-common – support files for nagios3
nagios3-core – host/service/network monitoring and management system core files
nagios3-dbg – debugging symbols and debug stuff for nagios3
nagios3-doc – documentation for nagios3
nagios-check-xmppng – monitoring plugin to check XMPP servers
nagios-plugin-check-multi – run nagios checks as a group
nagios-plugins-common – transitional dummy package
nagios-plugins-contrib – Plugins for nagios compatible monitoring systems
nagios-plugins-extra – transitional dummy package
nagios-plugins-rabbitmq – Set of Nagios checks useful for monitoring a RabbitMQ server
nagios-snmp-plugins – SNMP Plugins for nagios
nagios2mantis – Automatically create Mantis issues on Nagios events
參考網頁:
How to Install Nagios on Ubuntu 16.04
How To Install Nagios Core 4.1.1 In Ubuntu 15.10/16.04 | Unixmen
Install Nagios core 4.1.1 on Ubuntu 16.04 (Xenial Xerus) Server | Ubuntu Geek
How To Install Nagios on Ubuntu 16.04 – idroot[@more@]請先安裝好 Apache / MySQL / PHP
1. 安裝編譯及必要套件
# apt-get install build-essential libgd-dev apache2-utils unzip
2. 建立使用者及群組資料
# useradd -m nagios
# groupadd nagcmd
# usermod -a -G nagcmd nagios
# usermod -a -G nagcmd www-data
3. 到 Nagios 官方網站下載所須程式
Nagios Core 下載網站:https://www.nagios.org/downloads/nagios-core/
Nagios Plugin 下載網頁:https://www.nagios.org/downloads/nagios-plugins/
下載時的最新版本 Nagios Core 4.3.1 / Nagios Plugin 2.1.4


# wget https://assets.nagios.com/downloads/nagioscore/releases/nagios-4.3.1.tar.gz
# wget https://nagios-plugins.org/download/nagios-plugins-2.1.4.tar.gz
4. 解壓縮
# tar xvzf nagios-4.3.1.tar.gz
5. 切換目錄
# cd nagios-4.3.1
6. 開始編譯
# ./configure –with-command-group=nagcmd
General Options:
————————-
Nagios executable: nagios
Nagios user/group: nagios,nagios
Command user/group: nagios,nagcmd
Event Broker: yes
Install ${prefix}: /usr/local/nagios
Install ${includedir}: /usr/local/nagios/include/nagios
Lock file: ${prefix}/var/nagios.lock
Check result directory: ${prefix}/var/spool/checkresults
Init directory: /etc/init.d
Apache conf.d directory: /etc/apache2/sites-available
Mail program: /bin/mail
Host OS: linux-gnu
IOBroker Method: epoll
Web Interface Options:
————————
HTML URL: http://localhost/nagios/
CGI URL: http://localhost/nagios/cgi-bin/
Traceroute (used by WAP):
Review the options above for accuracy. If they look okay,
type ‘make all’ to compile the main program and CGIs.
7. 進行安裝
# make all
# make install
You can continue with installing Nagios as follows (type ‘make’
without any arguments for a list of all possible options):
make install-init
– This installs the init script in /etc/init.d
make install-commandmode
– This installs and configures permissions on the
directory for holding the external command file
make install-config
– This installs sample config files in /usr/local/nagios/etc
# make install-init
/usr/bin/install -c -m 755 -d -o root -g root /etc/init.d
/usr/bin/install -c -m 755 -o root -g root daemon-init /etc/init.d/nagios
*** Init script installed ***
# make install-commandmode
/usr/bin/install -c -m 775 -o nagios -g nagcmd -d /usr/local/nagios/var/rw
chmod g+s /usr/local/nagios/var/rw
*** External command directory configured ***
# make install-config
/usr/bin/install -c -m 775 -o nagios -g nagios -d /usr/local/nagios/etc
/usr/bin/install -c -m 775 -o nagios -g nagios -d /usr/local/nagios/etc/objects
/usr/bin/install -c -b -m 664 -o nagios -g nagios sample-config/nagios.cfg /usr/local/nagios/etc/nagios.cfg
/usr/bin/install -c -b -m 664 -o nagios -g nagios sample-config/cgi.cfg /usr/local/nagios/etc/cgi.cfg
/usr/bin/install -c -b -m 660 -o nagios -g nagios sample-config/resource.cfg /usr/local/nagios/etc/resource.cfg
/usr/bin/install -c -b -m 664 -o nagios -g nagios sample-config/template-object/templates.cfg /usr/local/nagios/etc/objects/templates.cfg
/usr/bin/install -c -b -m 664 -o nagios -g nagios sample-config/template-object/commands.cfg /usr/local/nagios/etc/objects/commands.cfg
/usr/bin/install -c -b -m 664 -o nagios -g nagios sample-config/template-object/contacts.cfg /usr/local/nagios/etc/objects/contacts.cfg
/usr/bin/install -c -b -m 664 -o nagios -g nagios sample-config/template-object/timeperiods.cfg /usr/local/nagios/etc/objects/timeperiods.cfg
/usr/bin/install -c -b -m 664 -o nagios -g nagios sample-config/template-object/localhost.cfg /usr/local/nagios/etc/objects/localhost.cfg
/usr/bin/install -c -b -m 664 -o nagios -g nagios sample-config/template-object/windows.cfg /usr/local/nagios/etc/objects/windows.cfg
/usr/bin/install -c -b -m 664 -o nagios -g nagios sample-config/template-object/printer.cfg /usr/local/nagios/etc/objects/printer.cfg
/usr/bin/install -c -b -m 664 -o nagios -g nagios sample-config/template-object/switch.cfg /usr/local/nagios/etc/objects/switch.cfg
*** Config files installed ***
Remember, these are *SAMPLE* config files. You’ll need to read
the documentation for more information on how to actually define
services, hosts, etc. to fit your particular needs.
8. 安裝 Nagios Web interface:
# make install-webconf
/usr/bin/install -c -m 644 sample-config/httpd.conf /etc/apache2/sites-available/nagios.conf
if [ 1 -eq 1 ]; then
ln -s /etc/apache2/sites-available/nagios.conf /etc/apache2/sites-enabled/nagios.conf;
fi
*** Nagios/Apache conf file installed ***
9. 建立密碼
# /usr/bin/htpasswd -c /usr/local/nagios/etc/htpasswd.users nagiosadmin
New password:
Re-type new password:
Adding password for user nagiosadmin
10. 安裝 Nagios plugins:
切換目錄
# cd ..
解壓縮
# tar xvzf nagios-plugins-2.1.4.tar.gz
切換目錄
# cd nagios-plugins-2.1.4
進行編譯
# ./configure –with-nagios-user=nagios –with-nagios-group=nagios
安裝
# make
# make install
11. 修改收件者
# sed -i ‘s/nagios@localhost/xxxxx@gmail.com/’ /usr/local/nagios/etc/objects/contacts.cfg
12. 開啟 rewrite / cgi 功能
# a2enmod rewrite
Enabling module rewrite.
To activate the new configuration, you need to run:
service apache2 restart
# a2enmod cgi
AH00558: apache2: Could not reliably determine the server’s fully qualified domain name, using 127.0.1.1. Set the ‘ServerName’ directive globally to suppress this message
Enabling module cgi.
To activate the new configuration, you need to run:
service apache2 restart
13. 重新啟動 Apache Web Server
# systemctl restart apache2.service
14. 檢查 Nagios 設定檔
# /usr/local/nagios/bin/nagios -v /usr/local/nagios/etc/nagios.cfg
Nagios Core 4.3.1
Copyright (c) 2009-present Nagios Core Development Team and Community Contributors
Copyright (c) 1999-2009 Ethan Galstad
Last Modified: 02-23-2017
License: GPL
Website: https://www.nagios.org
Reading configuration data…
Read main config file okay…
Read object config files okay…
Running pre-flight check on configuration data…
Checking objects…
Checked 8 services.
Checked 1 hosts.
Checked 1 host groups.
Checked 0 service groups.
Checked 1 contacts.
Checked 1 contact groups.
Checked 24 commands.
Checked 5 time periods.
Checked 0 host escalations.
Checked 0 service escalations.
Checking for circular paths…
Checked 1 hosts
Checked 0 service dependencies
Checked 0 host dependencies
Checked 5 timeperiods
Checking global event handlers…
Checking obsessive compulsive processor commands…
Checking misc settings…
Total Warnings: 0
Total Errors: 0
Things look okay – No serious problems were detected during the pre-flight check
15. 啟動 Nagios Server
# /etc/init.d/nagios start
[….] Starting nagios (via systemctl): nagios.serviceFailed to start nagios.service: Unit nagios.service not found.
failed!
如果出現錯誤訊息,進行下面修改
備份原檔
# mv /etc/init.d/nagios /etc/init.d/nagios.$(date +%F)
複製 /etc/init.d/skeleton 成為 /etc/init.d/nagios
# cp /etc/init.d/skeleton /etc/init.d/nagios
# vim /etc/init.d/nagios
把以下二行刪除
DESC=”Description of the service”
DAEMON=/usr/sbin/daemonexecutablename
改成
DESC=”Nagios”
NAME=nagios
DAEMON=/usr/local/nagios/bin/$NAME
DAEMON_ARGS=”-d /usr/local/nagios/etc/nagios.cfg”
PIDFILE=/usr/local/nagios/var/$NAME.lock
更改檔案執行權限
# chmod +x /etc/init.d/nagios
或
# mv /etc/init.d/nagios /etc/init.d/nagios.$(date +%F)
# vim /etc/systemd/system/nagios.service
[Unit]
Description=Nagios
BindTo=network.target
[Install]
WantedBy=multi-user.target
[Service]
User=nagios
Group=nagios
Type=simple
ExecStart=/usr/local/nagios/bin/nagios /usr/local/nagios/etc/nagios.cfg
# systemctl enable /etc/systemd/system/nagios.service
Created symlink from /etc/systemd/system/multi-user.target.wants/nagios.service to /etc/systemd/system/nagios.service.
# systemctl start nagios.service
16. 啟動 Nagios Server
# /etc/init.d/nagios start
* Starting Nagios nagios [ OK ]
17. 建立用來存其它偵測主機的目錄
# mkdir /usr/local/nagios/etc/conf.d
# sed -i ‘/#cfg_dir=/usr/local/nagios/etc/routers/acfg_dir=/usr/local/nagios/etc/conf.d’ /usr/local/nagios/etc/nagios.cfg

在 Ubuntu 16.04 上安裝 Cacti monitor 模組後,一片空白,檢查 Apache Log 發現有下面的錯誤訊息
# grep error /var/log/apache2/error.log
PHP Fatal error: Uncaught Error: Call to undefined function split() in /usr/share/cacti/site/plugins/monitor/monitor.php:34nStack trace:n#0 {main}n thrown in /usr/share/cacti/site/plugins/monitor/monitor.php on line 33
[@more@]在網路上搜尋了一下,找到
Cacti • View topic – Blank page plugin monitor
How to make Cacti’s Plugin Monitor works on PHP 7
這二篇,似乎是新版本的 PHP 7.x 不支援 split 函數,要改用 explode 函數。
1. 先備份原檔
# mv /usr/share/cacti/site/plugins/monitor/monitor.php /usr/share/cacti/site/plugins/monitor/monitor.php.$(date +%F)
2. 下載修改完成的檔案
# wget https://2blog.ilc.edu.tw/wp-content/uploads/sites/985/25793/25793-3792019.zip -P /usr/share/cacti/site/plugins/monitor
3. 解壓縮
# unzip /usr/share/cacti/site/plugins/monitor/25793-3792019.zip
4. 修改 /usr/share/cacti/site/plugins/monitor/monitor.php 中的設定
# vim /usr/share/cacti/site/plugins/monitor/monitor.php
改成您的設定,共有二行
$link = mysqli_connect(“localhost”, “帳號”, “密碼”, “資料庫名稱”);
5. 重新瀏覽就可以看到畫面了!
