
行政公文用的到
利用 PulledPork 來更新 Snort Rule
參考網站:
Setting up Snort – Part 4 – Installing PulledPork · Don Mizutani
How To Install Snort NIDS On CentOS 7 | Unixmen
# yum install git
# git clone https://github.com/shirkdog/pulledpork.git
# cd pulledpork/
# cp pulledpork.pl /usr/local/bin
# chmod +x /usr/local/bin/pulledpork.pl
# cp -v etc/*.conf /etc/snort
‘etc/disablesid.conf’ -> ‘/etc/snort/disablesid.conf’
‘etc/dropsid.conf’ -> ‘/etc/snort/dropsid.conf’
‘etc/enablesid.conf’ -> ‘/etc/snort/enablesid.conf’
‘etc/modifysid.conf’ -> ‘/etc/snort/modifysid.conf’
‘etc/pulledpork.conf’ -> ‘/etc/snort/pulledpork.conf’
# mkdir /etc/snort/rules/iplists
# touch /etc/snort/rules/iplists/default.blacklist[@more@]
安裝所須套件
# yum install perl-libwww-perl perl-Crypt-SSLeay perl-Sys-Syslog perl-Archive-Tar perl-LWP-Protocol-https
Test pulledPork Configuration
# /usr/local/bin/pulledpork.pl -V
修改設定檔 /etc/snort/pulledpork.conf
# egrep -v ‘^#|^$’ /etc/snort/pulledpork.conf
rule_url=https://www.snort.org/reg-rules/|snortrules-snapshot.tar.gz|Oinkcode
rule_url=https://snort.org/downloads/community/|community-rules.tar.gz|Community
rule_url=http://talosintelligence.com/feeds/ip-filter.blf|IPBLACKLIST|open
rule_url=https://snort.org/downloads/community/|opensource.tar.gz|Opensource
ignore=deleted.rules,experimental.rules,local.rules
temp_path=/tmp
rule_path=/etc/snort/rules/snort.rules
local_rules=/etc/snort/rules/local.rules
sid_msg=/etc/snort/etc/sid-msg.map
sid_msg_version=1
sid_changelog=/var/log/sid_changes.log
sorule_path=/usr/local/lib/snort_dynamicrules/
snort_path=/sbin/snort
config_path=/etc/snort/snort.conf
distro=RHEL-6-0
black_list=/etc/snort/rules/iplists/default.blacklist
IPRVersion=/etc/snort/rules/iplists
snort_control=/usr/bin/snort_control
enablesid=/etc/snort/enablesid.conf
dropsid=/etc/snort/dropsid.conf
disablesid=/etc/snort/disablesid.conf
modifysid=/etc/snort/modifysid.conf
version=0.7.3
進行更新
# /usr/local/bin/pulledpork.pl -c /etc/snort/pulledpork.conf -l
https://github.com/shirkdog/pulledpork
_____ ____
`—-, )
`–== / PulledPork v0.7.3 – Making signature updates great again!
`–==/
.-~~~~-.Y|_ Copyright (C) 2009-2016 JJ Cummings
@_/ / 66_ cummingsj@gmail.com
| _(“)
/-| ||’–‘ Rules give me wings!
_ _
~~~~~~~~~~~~~~~~~~~~~~~~~~~~~~~~~~~~~~~~~~~~~~~~~~~~~~~~~~~~~~
Checking latest MD5 for snortrules-snapshot-2990.tar.gz….
They Match
Done!
Checking latest MD5 for community-rules.tar.gz….
They Match
Done!
IP Blacklist download of http://talosintelligence.com/feeds/ip-filter.blf….
Reading IP List…
Checking latest MD5 for opensource.tar.gz….
They Match
Done!
Blacklist version is unchanged, not updating!
Writing /var/log/sid_changes.log….
Done
No Rule Changes
No IP Blacklist Changes
Done
Please review /var/log/sid_changes.log for additional details
Fly Piggy Fly!
加入工作排程
# crontab -e
01 04 * * * /usr/local/bin/pulledpork.pl -c /etc/snort/pulledpork.conf -l > /dev/null 2>&1
Adobe PDF Reader XI 11.0.20 修正檔


Adobe Acrobat Reader DC 2017.009.20044 更新檔


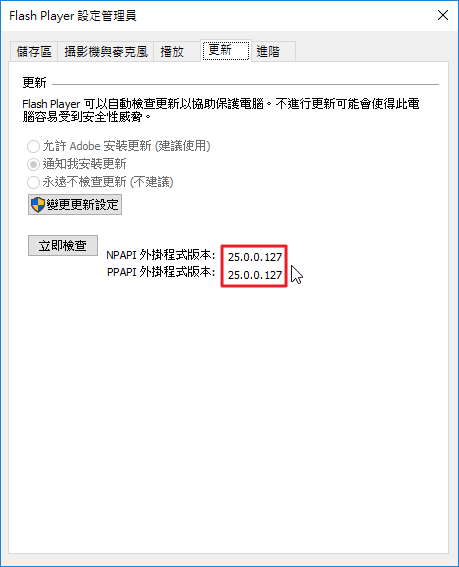
Adobe Flash Player 25.0.0.148

檢查安裝版本:https://www.adobe.com/tw/software/flash/about/
https://get.adobe.com/tw/flashplayer/[@more@]
Windows 7 平台
Internet Explorer:
http://fpdownload.adobe.com/get/flashplayer/pdc/25.0.0.148/install_flash_player_ax.exe
Windows 8 / 8.1 / 10 / Server 2012 / Server 2012 R2 要從 Windows Update 更新
All Other Browsers(Firefox…):
http://fpdownload.adobe.com/get/flashplayer/pdc/25.0.0.148/install_flash_player.exe
Google Chrome(Opera)
http://fpdownload.adobe.com/get/flashplayer/pdc/25.0.0.148/install_flash_player_ppapi.exe
Mac 平台:
http://fpdownload.adobe.com/get/flashplayer/pdc/25.0.0.148/install_flash_player_osx.dmg
在 CentOS 7.x 上安裝 snort
snort 官方網站:https://www.snort.org/

1. 下載官方網站提供套件:
# wget https://www.snort.org/downloads/snort/daq-2.0.6-1.centos7.x86_64.rpm
# wget https://www.snort.org/downloads/snort/snort-2.9.9.0-1.centos7.x86_64.rpm
[@more@]參考網站:
浮雲雅築: [研究] Snort 2.9.8.0 安裝 + 快速安裝程式 (CentOS 7.2 x64)
2. 安裝套件
# yum install libpcap-devel libdnet-devel libnghttp2-devel
如果沒有先安裝上述套件,直接安裝 daq 和 snort 會出現錯誤訊息
# rpm -ivh daq-2.0.6-1.centos7.x86_64.rpm
error: Failed dependencies:
libpcap.so.1()(64bit) is needed by daq-2.0.6-1.x86_64
# rpm -ivh snort-2.9.9.0-1.centos7.x86_64.rpm
error: Failed dependencies:
libdnet.so.1()(64bit) is needed by snort-1:2.9.9.0-1.x86_64
libnghttp2.so.14()(64bit) is needed by snort-1:2.9.9.0-1.x86_64
libpcap.so.1()(64bit) is needed by snort-1:2.9.9.0-1.x86_64
libsfbpf.so.0()(64bit) is needed by snort-1:2.9.9.0-1.x86_64
3. 進行安裝
# rpm -ivh daq-2.0.6-1.centos7.x86_64.rpm snort-2.9.9.0-1.centos7.x86_64.rpm
4. 註冊並下載 rules
https://www.snort.org/downloads/#rule-downloads
5 解壓縮 rules
# tar xvzf snortrules-snapshot-2990.tar.gz -C /etc/snort
6. 產生黑/白名單
# cp /etc/snort/snort.conf /etc/snort/snort.conf.$(date +%F)
# sed -i ‘s|../rules|rules|’ /etc/snort/snort.conf
# touch /etc/snort/rules/white_list.rules /etc/snort/rules/black_list.rules
或
# sed -i “s|var BLACK_LIST_PATH|#var BLACK_LIST_PATH|” /etc/snort/snort.conf
# sed -i “/var BLACK_LIST_PATH/avar BLACK_LIST_PATH /etc/snort/rules” /etc/snort/snort.conf
# touch /etc/snort/rules/white_list.rules /etc/snort/rules/black_list.rules
# sed -i “s|var WHITE_LIST_PATH|#var WHITE_LIST_PATH|” /etc/snort/snort.conf
# sed -i “/var WHITE_LIST_PATH/avar WHITE_LIST_PATH /etc/snort/rules” /etc/snort/snort.conf
7. 修改設定檔 /etc/snort/snort.conf
# sed -i ‘s/^dynamicdetection/#dynamicdetection/’ /etc/snort/snort.conf
或
# mkdir -p /usr/local/lib/snort_dynamicrules
8. 檢查設定檔是否正確
# snort -T -c /etc/snort/snort.conf
……
Snort successfully validated the configuration!
Snort exiting
9. 啟動 snort
# systemctl start snortd
or
# /etc/init.d/snortd start
10. 檢查啟動狀態
# /etc/init.d/snortd status
● snortd.service – SYSV: snort is a lightweight network intrusion detection tool that currently detects more than 1100 host and network vulnerabilities, portscans, backdoors, and more.
Loaded: loaded (/etc/rc.d/init.d/snortd; bad; vendor preset: disabled)
Active: active (running) since Fri 2017-02-24 21:57:01 CST; 6s ago
Docs: man:systemd-sysv-generator(8)
Process: 429 ExecStart=/etc/rc.d/init.d/snortd start (code=exited, status=0/SUCCESS)
CGroup: /system.slice/snortd.service
mq435 /usr/sbin/snort -A fast -b -d -D -i eth0 -u snort -g snort -c /etc/snort/snort.conf -l /var/log/snort
Feb 24 21:57:01 fb snort[435]: Preprocessor Object: SF_DNS Version 1.1 <Build 4>
Feb 24 21:57:01 fb snort[435]: Preprocessor Object: SF_SIP Version 1.1 <Build 1>
Feb 24 21:57:01 fb snort[435]: Preprocessor Object: SF_SSLPP Version 1.1 <Build 4>
Feb 24 21:57:01 fb snort[435]: Preprocessor Object: SF_IMAP Version 1.0 <Build 1>
Feb 24 21:57:01 fb snort[435]: Preprocessor Object: SF_DCERPC2 Version 1.0 <Build 3>
Feb 24 21:57:01 fb snort[435]: Preprocessor Object: SF_GTP Version 1.1 <Build 1>
Feb 24 21:57:01 fb snort[435]: Preprocessor Object: SF_POP Version 1.0 <Build 1>
Feb 24 21:57:01 fb snort[435]: Preprocessor Object: SF_SMTP Version 1.1 <Build 9>
Feb 24 21:57:01 fb snort[435]: Preprocessor Object: SF_SDF Version 1.1 <Build 1>
Feb 24 21:57:01 fb snort[435]: Commencing packet processing (pid=435)
# ps aux | grep snort | grep -v grep
snort 435 0.0 80.3 810840 421080 ? Ssl 21:57 0:00 /usr/sbin/snort -A fast -b -d -D -i eth0 -u snort -g snort -c /etc/snort/snort.conf -l /var/log/snort
Proxmox – 解決在 LXC 無法啟動 OpenVPN
在 Proxmox LXC 安裝 OpenVPN,並設定完成啟動後,出現下面的錯誤訊息
# systemctl status openvpn@server.service
● openvpn@server.service – OpenVPN connection to server
Loaded: loaded (/lib/systemd/system/openvpn@.service; enabled; vendor preset: enabled)
Active: failed (Result: exit-code) since Mon 2017-02-20 19:17:06 CST; 6s ago
Docs: man:openvpn(8)
https://community.openvpn.net/openvpn/wiki/Openvpn23ManPage
https://community.openvpn.net/openvpn/wiki/HOWTO
Process: 1585 ExecStart=/usr/sbin/openvpn –daemon ovpn-%i –status /run/openvpn/%i.status 10 –cd /etc/openvpn –script-security 2 –config /etc/openvpn/%i.conf –writepid /run/openvpn/%i.pid (code=exited, st
Main PID: 1586 (code=exited, status=1/FAILURE)
Feb 20 19:17:06 vpn systemd[1]: Starting OpenVPN connection to server…
Feb 20 19:17:06 vpn systemd[1]: openvpn@server.service: PID file /run/openvpn/server.pid not readable (yet?) after start: No such file or directory
Feb 20 19:17:06 vpn systemd[1]: Started OpenVPN connection to server.
Feb 20 19:17:06 vpn systemd[1]: openvpn@server.service: Main process exited, code=exited, status=1/FAILURE
Feb 20 19:17:06 vpn systemd[1]: openvpn@server.service: Unit entered failed state.
Feb 20 19:17:06 vpn systemd[1]: openvpn@server.service: Failed with result ‘exit-code’.[@more@]參考網站:
Setup OpenVPN on Proxmox LXC – Hungred Dot Com
登入 LXC 後
# cd /dev
# mkdir net
# mknod net/tun c 10 200
# chmod 0666 net/tun
# ls -l /dev/net/tun
crw-rw-rw- 1 root root 10, 200 Feb 20 19:24 /dev/net/tun
或直接寫在 /etc/rc.local 之中
# vim /etc/rc.local
加入下面幾行
mkdir /dev/net
mknod /dev/net/tun c 10 200
chmod 0666 /dev/net/tun
OpenVPN 可以正常執行
# systemctl status openvpn@server.service
● openvpn@server.service – OpenVPN connection to server
Loaded: loaded (/lib/systemd/system/openvpn@.service; enabled; vendor preset: enabled)
Active: active (running) since Mon 2017-02-20 19:24:33 CST; 18s ago
Docs: man:openvpn(8)
https://community.openvpn.net/openvpn/wiki/Openvpn23ManPage
https://community.openvpn.net/openvpn/wiki/HOWTO
Process: 1600 ExecStart=/usr/sbin/openvpn –daemon ovpn-%i –status /run/openvpn/%i.status 10 –cd /etc/openvpn –script-security 2 –config /etc/openvpn/%i.conf –writepid /run/openvpn/%i.pid (code=exited, st
Main PID: 1601 (openvpn)
CGroup: /system.slice/system-openvpn.slice/openvpn@server.service
mq1601 /usr/sbin/openvpn –daemon ovpn-server –status /run/openvpn/server.status 10 –cd /etc/openvpn –script-security 2 –config /etc/openvpn/server.conf –writepid /run/openvpn/server.pid
Feb 20 19:24:33 vpn systemd[1]: Starting OpenVPN connection to server…
Feb 20 19:24:33 vpn systemd[1]: openvpn@server.service: PID file /run/openvpn/server.pid not readable (yet?) after start: No such file or directory
Feb 20 19:24:33 vpn systemd[1]: Started OpenVPN connection to server.
server.pid 沒有找不到
# ls -l /var/run/openvpn/server.pid
-rw-r–r– 1 root root 5 Feb 20 19:24 /var/run/openvpn/server.pid
# ls -l /run/openvpn/server.pid
-rw-r–r– 1 root root 5 Feb 20 19:24 /run/openvpn/server.pid
執行 OpenVPN 後產生的 tun0 介面
# ifconfig tun0
tun0 Link encap:UNSPEC HWaddr 00-00-00-00-00-00-00-00-00-00-00-00-00-00-00-00
inet addr:10.1.0.1 P-t-P:10.1.0.2 Mask:255.255.255.255
UP POINTOPOINT RUNNING NOARP MULTICAST MTU:1500 Metric:1
RX packets:0 errors:0 dropped:0 overruns:0 frame:0
TX packets:0 errors:0 dropped:0 overruns:0 carrier:0
collisions:0 txqueuelen:100
RX bytes:0 (0.0 B) TX bytes:0 (0.0 B)
Proxmox – 解決在 CentOS 7 上啟動 fail2ban 出現的錯誤訊息
啟動 fail2ban 出現錯誤訊息
# systemctl status fail2ban
● fail2ban.service – Fail2Ban Service
Loaded: loaded (/usr/lib/systemd/system/fail2ban.service; enabled; vendor preset: disabled)
Active: failed (Result: start-limit) since Fri 2017-02-17 12:46:16 CST; 2min 55s ago
Docs: man:fail2ban(1)
Process: 972 ExecStart=/usr/bin/fail2ban-client -x start (code=exited, status=255)
Feb 17 12:46:16 NPC11 systemd[1]: Failed to start Fail2Ban Service.
Feb 17 12:46:16 NPC11 systemd[1]: Unit fail2ban.service entered failed state.
Feb 17 12:46:16 NPC11 systemd[1]: fail2ban.service failed.
Feb 17 12:46:16 NPC11 systemd[1]: fail2ban.service holdoff time over, sche…t.
Feb 17 12:46:16 NPC11 systemd[1]: start request repeated too quickly for f…ce
Feb 17 12:46:16 NPC11 systemd[1]: Failed to start Fail2Ban Service.
Feb 17 12:46:16 NPC11 systemd[1]: Unit fail2ban.service entered failed state.
Feb 17 12:46:16 NPC11 systemd[1]: fail2ban.service failed.
Hint: Some lines were ellipsized, use -l to show in full.
檢查 /var/log/message 中的紀錄
# grep -i fail2ban /var/log/message
Feb 17 04:46:15 NPC11 systemd: Starting Fail2Ban Service…
Feb 17 04:46:15 NPC11 fail2ban-client: ERROR There is no directory /var/run/fail2ban to contain the socket file /var/run/fail2ban/fail2ban.sock.
Feb 17 04:46:15 NPC11 systemd: fail2ban.service: control process exited, code=exited status=255
Feb 17 04:46:15 NPC11 systemd: Failed to start Fail2Ban Service.
Feb 17 04:46:15 NPC11 systemd: Unit fail2ban.service entered failed state.
Feb 17 04:46:15 NPC11 systemd: fail2ban.service failed.
看起來似乎是在 /var/run/fail2ban 目錄下找不到 fail2ban.sock 這一個檔案
[@more@]解決方式:
1. 建立目錄
# mkdir /var/run/fail2ban
2. 重新啟動 fail2ban 就正常了!
# systemctl enable fail2ban.service;systemctl start fail2ban.service
Scratch 課程教學網站
參考網頁:
http://dr9.nksh.tp.edu.tw/account/manual/ubuntu/
在 Ubuntu 16.04 下安裝
Step1:安裝必要套件
# apt-get update
# apt-get install python-pip
# pip install django==1.9.2
# apt-get install python-pip python-dev libpq-dev postgresql postgresql-contrib nginx
# apt-get install python-lxml
# pip install XlsxWriter
# pip install python-docx
# apt-get install libjpeg-dev
# pip install Pillow
# apt-get build-dep python-psycopg2
# pip install psycopg2
# pip install dj-static[@more@]
Step2 : 下載專案
# cd /var/www
# apt-get install git
git clone http://github.com/jeankao/scratch
Step3 : 設定資料庫
# su – postgres
psql
CREATE DATABASE scratch;
CREATE USER scratch WITH PASSWORD ‘1234’;
GRANT ALL PRIVILEGES ON DATABASE scratch TO scratch;
q
exit
# cd /var/www/scratch
# python manage.py migrate
# python manage.py createsuperuser
填入資料:admin, xxx@test.ilc.edu.tw, 密碼:xxxx
# python manage.py runserver 0.0.0.0:8000
測試網站:http://server_domain_or_IP:8000
Step4 : Deploy 網站
# pip install uwsgi
# mkdir -p /etc/uwsgi/sites
# vim /etc/uwsgi/sites/scratch.ini
————————————Start
[uwsgi]
project = scratch
base = /var/www/scratch
chdir = /var/www/scratch
module = scratch.wsgi:application
master = true
processes = 5
socket = 127.0.0.1:8001
chmod-socket = 664
vacuum = true
————————————End
# vim /etc/systemd/system/uwsgi.service
————————————Start
[Unit]
Description=uWSGI Emperor service
[Service]
ExecStartPre=/bin/bash -c ‘mkdir -p /var/run/uwsgi; chown www-data:www-data /var/run/uwsgi’
ExecStart=/usr/local/bin/uwsgi –emperor /etc/uwsgi/sites
Restart=always
KillSignal=SIGQUIT
Type=notify
NotifyAccess=all
[Install]
WantedBy=multi-user.target
————————————End
# vim /etc/nginx/sites-available/scratch
————————————Start
server {
listen 80;
server_name 127.0.0.1;
access_log /var/log/nginx/access.log;
error_log /var/log/nginx/error.log;
location = /biconcave {
return 404;
}
location /static/ {
root /var/www/scratch;
}
location /media/ {
root /var/www/scratch;
}
location / {
uwsgi_pass 127.0.0.1:8001;
include /var/www/scratch/uwsgi_params;
uwsgi_param SCRIPT_NAME ”;
}
}
————————————-End
Step5 : 啟動相關服務
# ln -s /etc/nginx/sites-available/scratch /etc/nginx/sites-enabled
# service nginx configtest
# systemctl daemon-reload
# systemctl start uwsgi
# service nginx start
在 Ubuntu 16.04 上安裝 OpenVAS
參考網頁:
openvas 8 vulnerability scanner : Mohammad Razavi
Install OpenVAS 8 on Ubuntu 16.04
How to Install OpenVAS Vulnerability Scanner on Ubuntu 16.04 – Vultr.com
用開源工具檢查主機漏洞 自建OpenVAS弱點掃描 – 技術專欄 – 網管人NetAdmin
新增 OpenVAS 儲存庫
# apt install software-properties-common
# apt-get install python-software-properties
# add-apt-repository ppa:mrazavi/openvas
OpenVAS is a framework of several services and tools offering a comprehensive and powerful vulnerability scanning and vulnerability management solution.
Homepage: http://www.openvas.org/
* Openvas 9 BETA is now available *
To install openvas 8, install the “openvas” package from this ppa. It is only tested on ubuntu 14.04 trusty and 16.04 xenial.
You have to update openvas scripts/data after installation with the following commands:
sudo apt-get install sqlite3
sudo openvas-nvt-sync
sudo openvas-scapdata-sync
sudo openvas-certdata-sync
sudo service openvas-scanner restart
sudo service openvas-manager restart
sudo openvasmd –rebuild –progress
Login into https://localhost:443 with “admin” as username and password.
In case of “Secure Connection Failed” in firefox, use chromium.
To enable pdf reports:
sudo apt-get install texlive-latex-extra –no-install-recommends
To install openvas-nasl utility:
sudo apt-get install libopenvas8-dev
*** Openvas 9 BETA ***
A set of new packages for openvas 9 BETA is now included. If you prefer to install them, you just have to install “openvas9” package instead of “openvas”. Then, update scripts/data with the following commands:
sudo apt-get install sqlite3
sudo greenbone-nvt-sync
sudo greenbone-scapdata-sync
sudo greenbone-certdata-sync
sudo service openvas-scanner restart
sudo service openvas-manager restart
sudo openvasmd –rebuild –progress
Please note that the default port number of the web interface for the new packages are changed to 4000. So, to access the web interface for version 9, go to https://localhost:4000
You can change the web interface port number by modifying /etc/default/openvas-gsa. Then, restart its service by issuing “sudo service openvas-gsa restart”.
More info: https://launchpad.net/~mrazavi/+archive/ubuntu/openvas
Press [ENTER] to continue or ctrl-c to cancel adding it
gpg: keyring `/tmp/tmp_ss7i1fn/secring.gpg’ created
gpg: keyring `/tmp/tmp_ss7i1fn/pubring.gpg’ created
gpg: requesting key 4AA450E0 from hkp server keyserver.ubuntu.com
gpg: /tmp/tmp_ss7i1fn/trustdb.gpg: trustdb created
gpg: key 4AA450E0: public key “Launchpad PPA for Mohammad Razavi” imported
gpg: Total number processed: 1
gpg: imported: 1 (RSA: 1)
OK
[@more@]2. 更新套件庫
# apt-get update
3. 安裝 OpenVAS
# apt install openvas
4. 安裝其它相關套件
# apt install sqlite3
# apt-get install texlive-latex-extra –no-install-recommends
# apt-get install libopenvas8-dev
5. 進行更新
# /usr/sbin/openvas-nvt-sync
# /usr/sbin/openvas-scapdata-sync
# /usr/sbin/openvas-certdata-sync
6. 啟動服務
# service openvas-scanner restart
# service openvas-manager restart
修改 /etc/init.d/openvas-gsa
# vim /etc/init.d/openvas-gsa
把
DAEMON_ARGS=”
修改成
DAEMON_ARGS= –listen “OpenVAS’IP”
# service openvas-gsa restart
# /usr/sbin/openvasmd –rebuild –progress
7. 開啟防火牆
# ufw allow https
8. 設定管理密碼
# /usr/sbin/openvasmd –user=admin –new-password=<new-password>
9. 建立憑證
# /usr/bin/openvas-mkcert-client
This script will now ask you the relevant information to create the SSL client certificates for OpenVAS.
Client certificates life time in days [365]: 3650
Your country (two letter code) [DE]: TW
Your state or province name [none]: Yilan
Your location (e.g. town) [Berlin]: TouCheng
Your organization [none]: Elementary School
Your organizational unit [none]:
**********
We are going to ask you some question for each client certificate.
If some question has a default answer, you can force an empty answer by entering a single dot ‘.’
*********
Client certificates life time in days [3650]:
Country (two letter code) [TW]:
State or province name [Yilan]:
Location (e.g. town) [TouCheng]:
Organization [Elementary School]:
Organization unit []:
e-Mail []: t850008@gmail.com
Generating RSA private key, 4096 bit long modulus
…………….++
……….++
e is 65537 (0x10001)
You are about to be asked to enter information that will be incorporated
into your certificate request.
What you are about to enter is what is called a Distinguished Name or a DN.
There are quite a few fields but you can leave some blank
For some fields there will be a default value,
If you enter ‘.’, the field will be left blank.
—–
Country Name (2 letter code) [DE]:State or Province Name (full name) [Some-State]:Locality Name (eg, city) []:Organization Name (eg, company) [Internet Widgits Pty Ltd]:Organizational Unit Name (eg, section) []:Common Name (eg, your name or your server’s hostname) []:Email Address []:Using configuration from /tmp/openvas-mkcert-client.18290/stdC.cnf
Check that the request matches the signature
Signature ok
The Subject’s Distinguished Name is as follows
countryName :PRINTABLE:’TW’
stateOrProvinceName :ASN.1 12:’Yilan’
localityName :ASN.1 12:’TouCheng’
organizationName :ASN.1 12:’Elementary School’
commonName :ASN.1 12:’om’
emailAddress :IA5STRING:’xxxx@gmail.com’
Certificate is to be certified until Mar 11 15:06:51 2027 GMT (3650 days)
Write out database with 1 new entries
Data Base Updated
Your client certificates are in /tmp/openvas-mkcert-client.18290 .
You will have to copy them by hand.
# cp /tmp/openvas-mkcert-client.18290/key_om.pem /var/lib/openvas/private/CA/clientkey.pem
# cp /tmp/openvas-mkcert-client.18290/cert_om.pem /var/lib/openvas/CA/clientcert.pem