
參考網頁:
openvas 8 vulnerability scanner : Mohammad Razavi
Install OpenVAS 8 on Ubuntu 16.04
How to Install OpenVAS Vulnerability Scanner on Ubuntu 16.04 – Vultr.com
用開源工具檢查主機漏洞 自建OpenVAS弱點掃描 – 技術專欄 – 網管人NetAdmin
新增 OpenVAS 儲存庫
# apt install software-properties-common
# apt-get install python-software-properties
# add-apt-repository ppa:mrazavi/openvas
OpenVAS is a framework of several services and tools offering a comprehensive and powerful vulnerability scanning and vulnerability management solution.
Homepage: http://www.openvas.org/
* Openvas 9 BETA is now available *
To install openvas 8, install the “openvas” package from this ppa. It is only tested on ubuntu 14.04 trusty and 16.04 xenial.
You have to update openvas scripts/data after installation with the following commands:
sudo apt-get install sqlite3
sudo openvas-nvt-sync
sudo openvas-scapdata-sync
sudo openvas-certdata-sync
sudo service openvas-scanner restart
sudo service openvas-manager restart
sudo openvasmd –rebuild –progress
Login into https://localhost:443 with “admin” as username and password.
In case of “Secure Connection Failed” in firefox, use chromium.
To enable pdf reports:
sudo apt-get install texlive-latex-extra –no-install-recommends
To install openvas-nasl utility:
sudo apt-get install libopenvas8-dev
*** Openvas 9 BETA ***
A set of new packages for openvas 9 BETA is now included. If you prefer to install them, you just have to install “openvas9” package instead of “openvas”. Then, update scripts/data with the following commands:
sudo apt-get install sqlite3
sudo greenbone-nvt-sync
sudo greenbone-scapdata-sync
sudo greenbone-certdata-sync
sudo service openvas-scanner restart
sudo service openvas-manager restart
sudo openvasmd –rebuild –progress
Please note that the default port number of the web interface for the new packages are changed to 4000. So, to access the web interface for version 9, go to https://localhost:4000
You can change the web interface port number by modifying /etc/default/openvas-gsa. Then, restart its service by issuing “sudo service openvas-gsa restart”.
More info: https://launchpad.net/~mrazavi/+archive/ubuntu/openvas
Press [ENTER] to continue or ctrl-c to cancel adding it
gpg: keyring `/tmp/tmp_ss7i1fn/secring.gpg’ created
gpg: keyring `/tmp/tmp_ss7i1fn/pubring.gpg’ created
gpg: requesting key 4AA450E0 from hkp server keyserver.ubuntu.com
gpg: /tmp/tmp_ss7i1fn/trustdb.gpg: trustdb created
gpg: key 4AA450E0: public key “Launchpad PPA for Mohammad Razavi” imported
gpg: Total number processed: 1
gpg: imported: 1 (RSA: 1)
OK
[@more@]2. 更新套件庫
# apt-get update
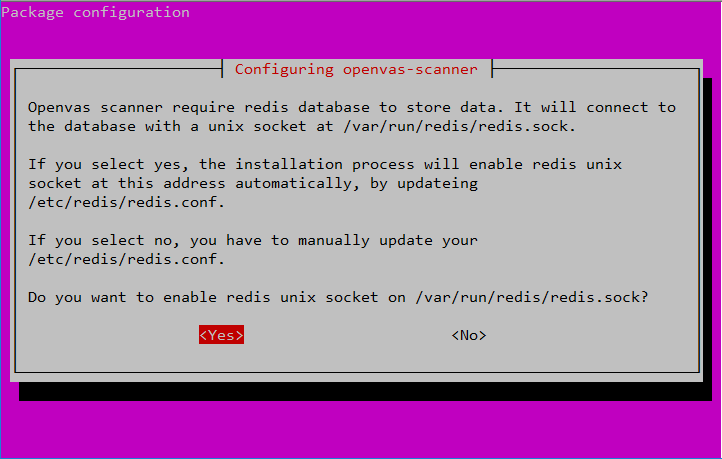
3. 安裝 OpenVAS
# apt install openvas
4. 安裝其它相關套件
# apt install sqlite3
# apt-get install texlive-latex-extra –no-install-recommends
# apt-get install libopenvas8-dev
5. 進行更新
# /usr/sbin/openvas-nvt-sync
# /usr/sbin/openvas-scapdata-sync
# /usr/sbin/openvas-certdata-sync
6. 啟動服務
# service openvas-scanner restart
# service openvas-manager restart
修改 /etc/init.d/openvas-gsa
# vim /etc/init.d/openvas-gsa
把
DAEMON_ARGS=”
修改成
DAEMON_ARGS= –listen “OpenVAS’IP”
# service openvas-gsa restart
# /usr/sbin/openvasmd –rebuild –progress
7. 開啟防火牆
# ufw allow https
8. 設定管理密碼
# /usr/sbin/openvasmd –user=admin –new-password=<new-password>
9. 建立憑證
# /usr/bin/openvas-mkcert-client
This script will now ask you the relevant information to create the SSL client certificates for OpenVAS.
Client certificates life time in days [365]: 3650
Your country (two letter code) [DE]: TW
Your state or province name [none]: Yilan
Your location (e.g. town) [Berlin]: TouCheng
Your organization [none]: Elementary School
Your organizational unit [none]:
**********
We are going to ask you some question for each client certificate.
If some question has a default answer, you can force an empty answer by entering a single dot ‘.’
*********
Client certificates life time in days [3650]:
Country (two letter code) [TW]:
State or province name [Yilan]:
Location (e.g. town) [TouCheng]:
Organization [Elementary School]:
Organization unit []:
e-Mail []: t850008@gmail.com
Generating RSA private key, 4096 bit long modulus
…………….++
……….++
e is 65537 (0x10001)
You are about to be asked to enter information that will be incorporated
into your certificate request.
What you are about to enter is what is called a Distinguished Name or a DN.
There are quite a few fields but you can leave some blank
For some fields there will be a default value,
If you enter ‘.’, the field will be left blank.
—–
Country Name (2 letter code) [DE]:State or Province Name (full name) [Some-State]:Locality Name (eg, city) []:Organization Name (eg, company) [Internet Widgits Pty Ltd]:Organizational Unit Name (eg, section) []:Common Name (eg, your name or your server’s hostname) []:Email Address []:Using configuration from /tmp/openvas-mkcert-client.18290/stdC.cnf
Check that the request matches the signature
Signature ok
The Subject’s Distinguished Name is as follows
countryName :PRINTABLE:’TW’
stateOrProvinceName :ASN.1 12:’Yilan’
localityName :ASN.1 12:’TouCheng’
organizationName :ASN.1 12:’Elementary School’
commonName :ASN.1 12:’om’
emailAddress :IA5STRING:’xxxx@gmail.com’
Certificate is to be certified until Mar 11 15:06:51 2027 GMT (3650 days)
Write out database with 1 new entries
Data Base Updated
Your client certificates are in /tmp/openvas-mkcert-client.18290 .
You will have to copy them by hand.
# cp /tmp/openvas-mkcert-client.18290/key_om.pem /var/lib/openvas/private/CA/clientkey.pem
# cp /tmp/openvas-mkcert-client.18290/cert_om.pem /var/lib/openvas/CA/clientcert.pem