

主要是更新 KB3210721
[@more@]KB3210721 x86 下載
http://download.windowsupdate.com/c/msdownload/update/software/secu/2016/12/windows10.0-kb3210721-x86_c87226c3031f2c70a534aff9eaf3cf5daa8057cd.msu
Windows 10 1607 更新至 14393.693

 [@more@]
試用 Banana Pi M3 – Ubuntu minimal 16.04 上安裝 no-ip2
為了管理方便,所以在家裡的 Banana Pi M3 上加裝 no-ip2
因為套件庫中沒有 noip 套件,所以要自行編譯安裝
參考網站:
How To Install No-ip2 On Ubuntu 12.04 LTS In Order To Host Servers On A Dynamic IP Address
How to Install the Linux Dynamic Update Client on Ubuntu
1. 安裝編譯相關套件
# apt-get install build-essential checkinstall[@more@]2. 下載 no-ip2 官網程式
# cd /usr/local/src/
# wget http://www.no-ip.com/client/linux/noip-duc-linux.tar.gz
3. 解壓縮
# tar xf noip-duc-linux.tar.gz
4. 切換目錄
# cd noip-2.1.9-1
5. 進行安裝
# make install
Please enter the login/email string for no-ip.com abc@ilc.edu.tw
Please enter the password for user ‘abc@ilc.edu.tw’ ***********
Only one host [bplinux.sytes.net] is registered to this account.
It will be used.
Please enter an update interval:[30]
Do you wish to run something at successful update?[N] (y/N) N
New configuration file ‘/tmp/no-ip2.conf’ created.
mv /tmp/no-ip2.conf /usr/local/etc/no-ip2.conf
設定檔位置:/usr/local/etc/no-ip2.conf
6. 建立開機啟動檔
# vim /etc/init.d/noip2
#! /bin/sh
### BEGIN INIT INFO
# Provides: no-ip2
# Required-Start: $local_fs $remote_fs $network $syslog $named
# Required-Stop: $local_fs $remote_fs $network $syslog $named
# Default-Start: 2 3 4 5
# Default-Stop: 0 1 6
# Short-Description: Start/stop no-ip2
### END INIT INFO
case “$1” in
start)
echo “Starting no-ip2”
/usr/local/bin/noip2
;;
stop)
echo -n “Shutting down no-ip2”
for i in `noip2 -S 2>&1 | grep Process | awk ‘{print $2}’ | tr -d ‘,’`
do
noip2 -K $i
done
;;
*)
echo “Usage: $0 {start|stop}”
exit 1
esac
exit 0
7. 更改檔案執行權限
# chmod 755 /etc/init.d/noip2
8. 執行 no-ip2
# /etc/init.d/noip2 start
Starting no-ip2
# ps aux | grep noip2 | grep -v grep
nobody 1605 0.0 0.0 2036 628 ? Ss 05:12 0:00 /usr/local/bin/noip2
9. 設定開機時執行
# sed -i ‘/export/ an#Starting no-ip2…n/etc/init.d/noip2 start’ /etc/rc.local
或
# update-rc.d noip2 defaults
10. 如果不需要編譯套件也可以移除
# apt-get remove –purge binutils build-essential checkinstall cpp cpp-5 dpkg-dev fakeroot file g++ g++-5 gcc gcc-5 libalgorithm-diff-perl libalgorithm-diff-xs-perl libalgorithm-merge-perl libasan2 libatomic1 libc-dev-bin libc6-dev libcc1-0 libdpkg-perl libfakeroot libfile-fcntllock-perl libgcc-5-dev libgomp1 libisl15 libmagic1 libmpc3 libstdc++-5-dev libubsan0 linux-libc-dev make manpages manpages-dev patch
試用 Banana Pi M3 – 擴展 /root 分割區
因為有的系統本身並沒有提供擴展 /root 分割區的的工具,所以改使用 GParted 來進行處理。
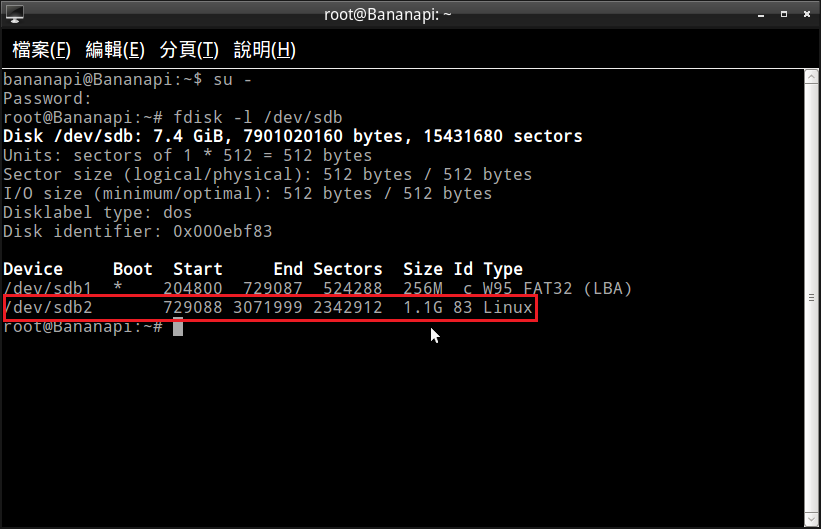
MicroSD 卡有 8G,但主要的 /root 分割區只用到 1.1G
# fdisk -l /dev/sdb
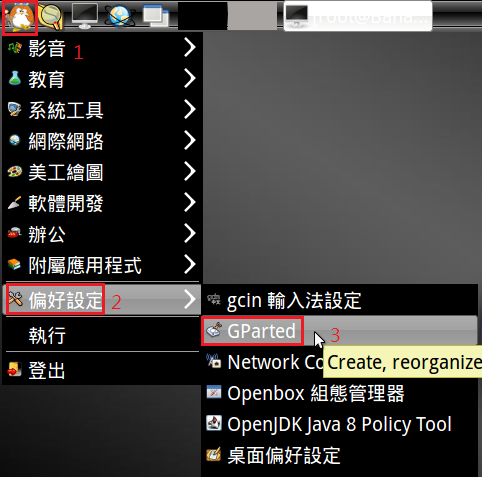
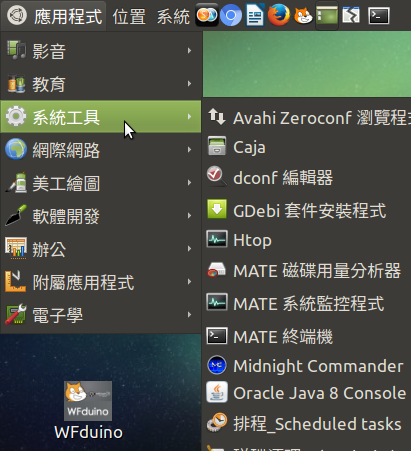
[@more@]執行 偏好設定 / GParted
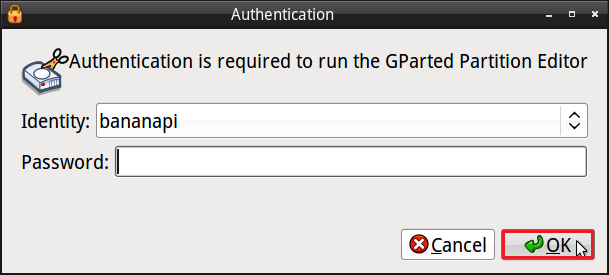
輸入 bananapi 使用者的密碼,並按 OK
點選右上角來切換不同的磁碟機
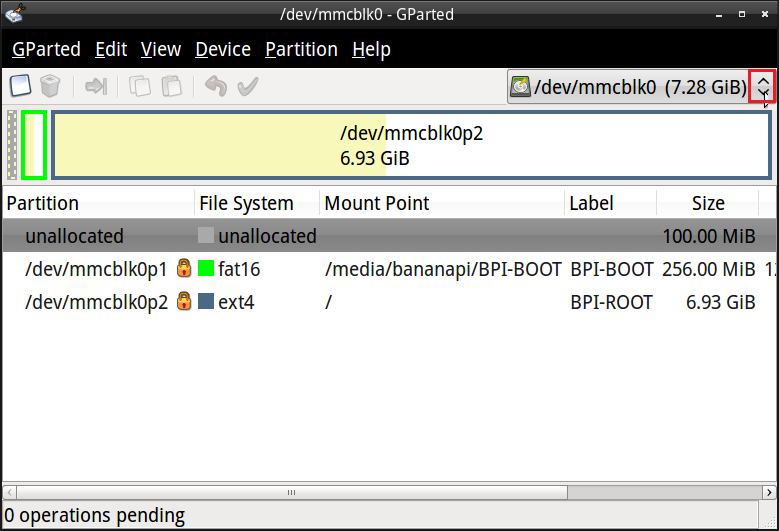
選擇要處理的磁碟機
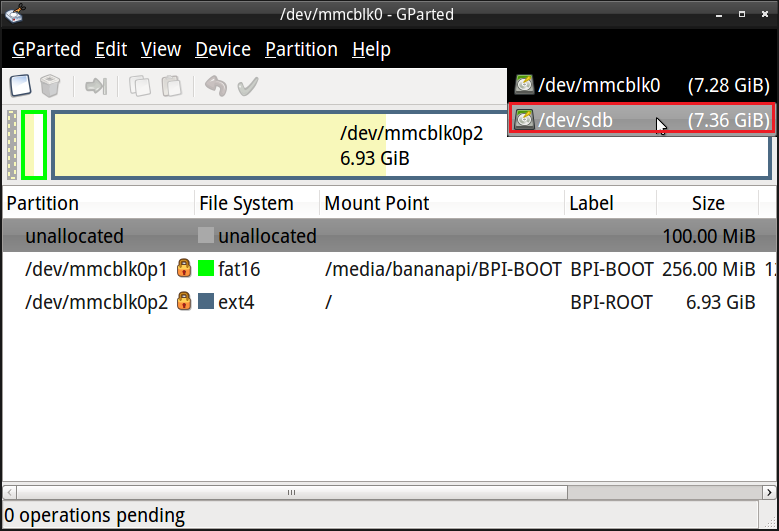
後面有 5.89G 仍未使用,有的系統可能要先 umount 原本的分割區才能 ReSize

選擇 Partition / Resize/Move
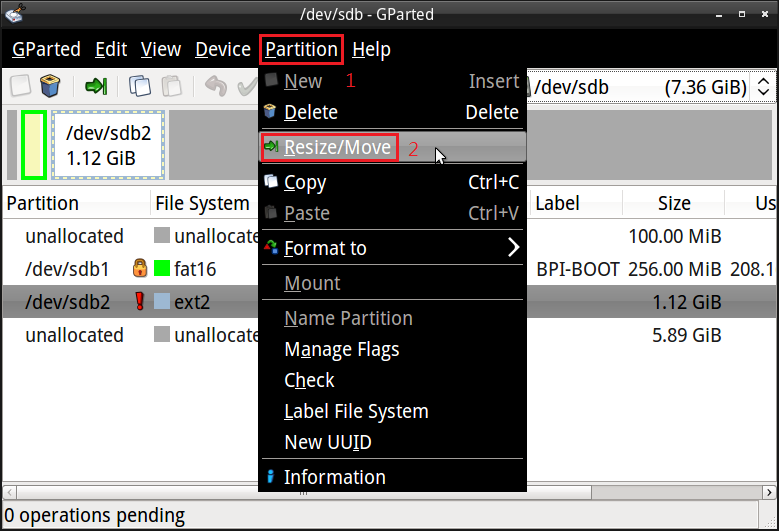
選擇分割區最後的黑色箭頭拉到最後面
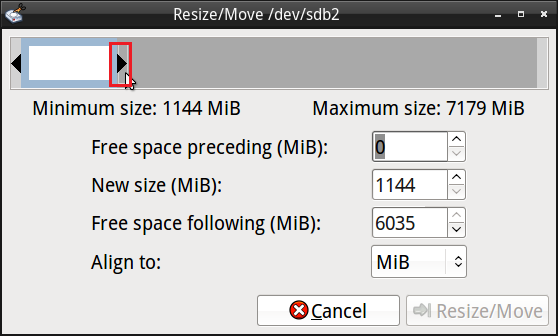
選擇 Resize/Move

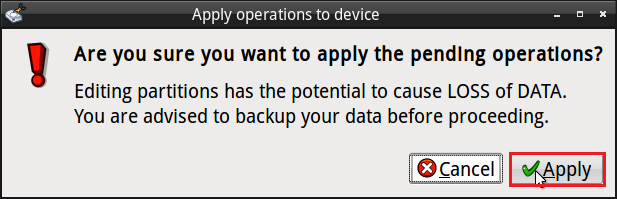
選擇 Apply 讓設定生效
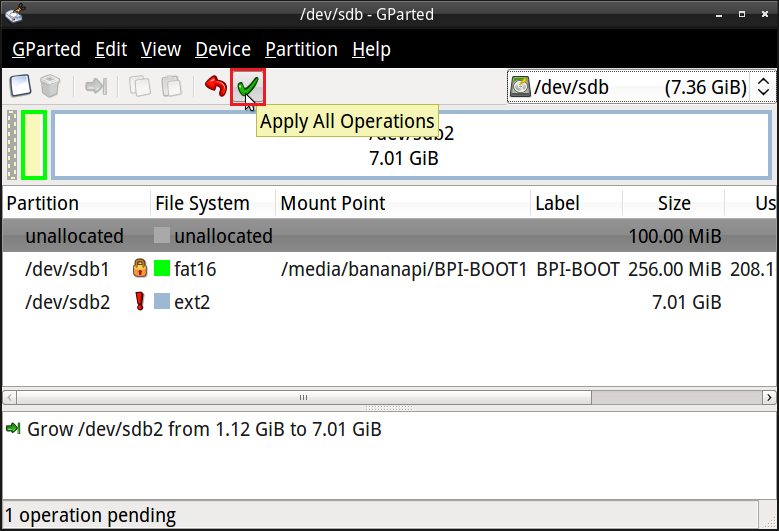
選擇 Apply 讓設定生效
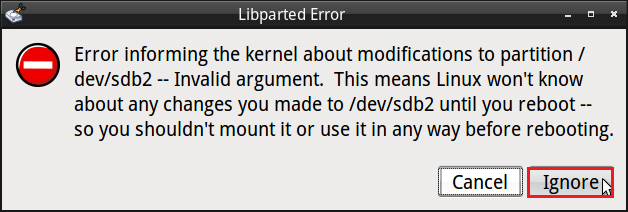
選擇 Ignore
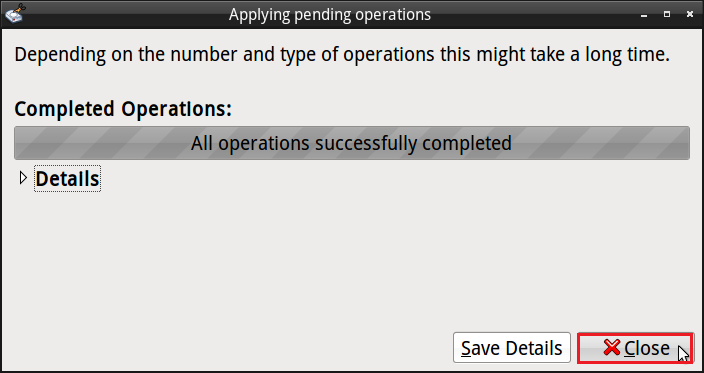
選擇 Close
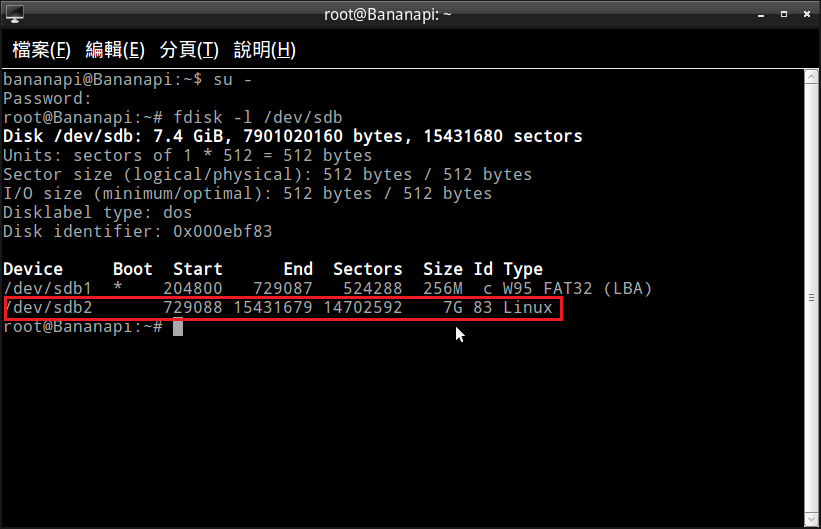
重新開機後,/root 分割區已經擴展到 7G
# fdisk -l /dev/sdb
原本的磁碟空間使用狀況
# df -h
Filesystem Size Used Avail Use% Mounted on
/dev/root 1.1G 997M 72M 94% /
devtmpfs 750M 0 750M 0% /dev
tmpfs 1006M 0 1006M 0% /dev/shm
tmpfs 1006M 18M 989M 2% /run
tmpfs 5.0M 0 5.0M 0% /run/lock
tmpfs 1006M 0 1006M 0% /sys/fs/cgroup
tmpfs 1006M 8.0K 1006M 1% /tmp
用製作好的 MicroSD 開機後 執行 resize2fs
# /sbin/resize2fs /dev/mmcblk0p2
resize2fs 1.42.13 (17-May-2015)
Filesystem at /dev/mmcblk0p2 is mounted on /; on-line resizing required
old_desc_blocks = 1, new_desc_blocks = 1
The filesystem on /dev/mmcblk0p2 is now 1814784 (4k) blocks long.
處理完後磁碟空間的使用狀況
# df -h
Filesystem Size Used Avail Use% Mounted on
/dev/root 6.9G 1.2G 5.5G 17% /
devtmpfs 750M 0 750M 0% /dev
tmpfs 1006M 0 1006M 0% /dev/shm
tmpfs 1006M 18M 989M 2% /run
tmpfs 5.0M 0 5.0M 0% /run/lock
tmpfs 1006M 0 1006M 0% /sys/fs/cgroup
tmpfs 1006M 8.0K 1006M 1% /tmp
Linux 下壓縮程式比較
原檔
$ ls -l UNUBeaconLogo128.png
-rw-r–r– 1 bananapi bananapi 25102 10月 12 17:16 UNUBeaconLogo128.png
使用 zip 格式
壓縮
# zip UNUBeaconLogo128.png.zip UNUBeaconLogo128.png
解壓縮
# unzip UNUBeaconLogo128.png.zip[@more@]
使用 7z 格式
壓縮
# 7z a UNUBeaconLogo128.png.7z UNUBeaconLogo128.png
解壓縮
# 7z x UNUBeaconLogo128.png.7z
使用 gz 格式
壓縮(壓縮後原檔會不見)
# gzip UNUBeaconLogo128.png
解壓縮(解壓縮後壓縮檔會不見)
# gzip -d UNUBeaconLogo128.png.gz
# gunzip UNUBeaconLogo128.png.gz
使用 xz 格式
壓縮(壓縮後原檔會不見)
# xz -z UNUBeaconLogo128.png
解壓縮(解壓縮後壓縮檔會不見)
# xz -d UNUBeaconLogo128.png.xz
# unxz UNUBeaconLogo128.png.xz
綜合比較:在預設的情況下,不特別加上壓縮參數
$ ls -l UNUBeaconLogo128.png*
-rw-r–r– 1 bananapi bananapi 25102 10月 12 17:16 UNUBeaconLogo128.png
-rw-rw-r– 1 bananapi bananapi 11322 12月 24 13:54 UNUBeaconLogo128.png.7z
-rw-r–r– 1 bananapi bananapi 11378 10月 12 17:16 UNUBeaconLogo128.png.gz
-rw-r–r– 1 bananapi bananapi 11244 10月 12 17:16 UNUBeaconLogo128.png.xz
-rw-rw-r– 1 bananapi bananapi 11529 12月 24 13:54 UNUBeaconLogo128.png.zip
xz > 7z > gz > zip
gz / bz2 / xz 搭配 tar 使用
壓縮
# tar cjzf filename.tar.gz dirname
# tar cvjf filename.tar.bz2 dirname
# tar cvJf filename.tar.xz dirname
解壓縮
# tar xjzf filename.tar.gz
# tar xvjf filename.tar.bz2
# tar xvJf filename.tar.xz
Linux 下 7z 的使用方式
CentOS 7.x 安裝
# yum install epel-release
# yum update
# yum install p7zip
Arch Linux 安裝
# pacman -S p7zip
Ubuntu / Debian
# apt-get install p7zip-full
或
# apt-get install p7zip[@more@]CentOS 可用指令 7za
Arch Linux / Debian / Ubuntu 可用指令 7z / 7za
常用參數
壓縮
# 7z a 壓縮檔名.7z 要壓縮的檔案或目錄1 要壓縮的檔案或目錄2
解壓縮
# 7z x 壓縮檔名.7z
或
# 7z e 壓縮檔名.7z
x 和 e 差別,如果建立壓縮檔時有包含目錄,則 x 會依照原本壓縮時的樣子來還原,e 會建立原來的空目錄名稱,並把檔案解開在目錄名稱的外面
原則上會建議使用 x
列出壓縮檔的內容
# 7z l 壓縮檔名.7z
解壓縮時指定目錄
# 7z x 壓縮檔名.7z -o目錄位置
# 7z x 123.7z -o/tmp
更多的參數
# 7z –help
<Commands>
a : Add files to archive
b : Benchmark
d : Delete files from archive
e : Extract files from archive (without using directory names)
h : Calculate hash values for files
i : Show information about supported formats
l : List contents of archive
rn : Rename files in archive
t : Test integrity of archive
u : Update files to archive
x : eXtract files with full paths
試用 Banana Pi M3 – 利用網路來備份或還原 Image
因為 Banana Pi 的 USB 只有二個,通常一個用來接滑鼠,另一個用來接鍵盤,如果要備份時,就要另外用 SATA 排線接 SATA 的硬碟,或者直接改用無線的鍵鼠組,就可以多一個 USB 來外接備份的設備(USB 隨身碟或硬碟),有些不太方便,所以直接透過區域網路上的其他 Sever,會方便許多。
一、.使用 Samba
1. 安裝 cifs-utils 套件
# apt-get install cifs-utils
2. 建立掛載目錄
# mkdir /mnt/bpi-samba
3. 進行掛載(使用者 abc,密碼 123456,Samba Server 192.168.1.13)
# mount.cifs -o username=”abc”,password=”123456″ //192.168.1.13/abc /mnt/bpi-samba[@more@]二、使用 SSH
1. 安裝 sshfs 套件
# apt-get install sshfs
2. 建立掛載目錄
# mkdir /mnt/bpi-sshfs
3. 進行掛載(使用者 abc,SSH Server 192.168.1.13)
# sshfs abc@192.168.1.13:/home/abc /mnt/bpi-sshfs
abc@192.168.1.13’s password:
如果要不用輸入密碼,可以參考:
[超易] 兩行指令搞定 Linux SSH登入免密碼 – LinXblog
三、使用 FTP
1. 安裝 curlftpfs
# apt-get install curlftpfs
2. 建立掛載目錄
# mkdir /mnt/bpi-ftp
3. 進行掛載(使用者 abc,密碼 123456,FTP Server 192.168.1.13)
# curlftpfs ftp://abc:123456@192.168.1.13 /mnt/bpi-ftp
卸載目錄
# umount /mnt/bpi-ftp
試用 Banana Pi M3 – 關於 Image
參考網站:
夢幻天地blog: zip dd做映像檔pv秀進度
這是二個從官方下載下來的 Image
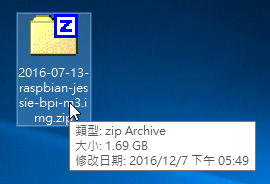
1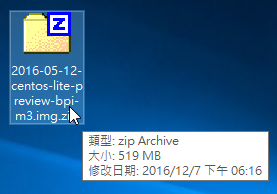
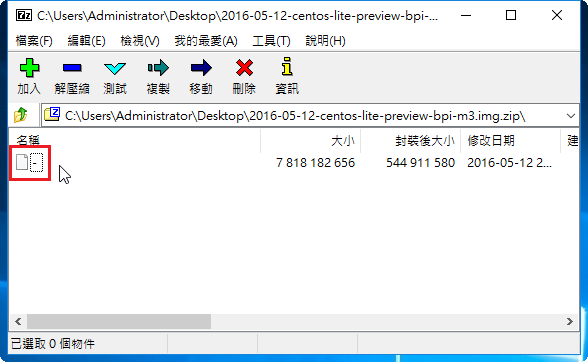
使用 7-Zip 開啟後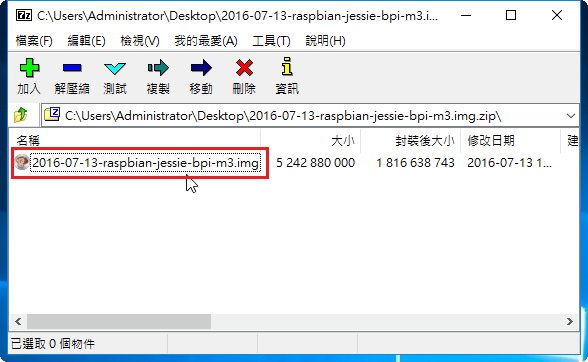
 [@more@]img 檔的部份 解開後可以在 Windows 系統中使用 Win32 Disk Imager 來進行燒錄
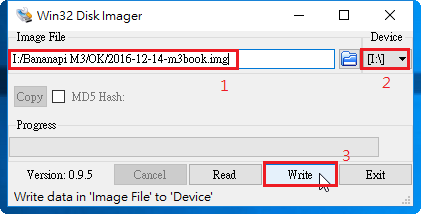
至於 CentOS Lite 可能要到 Linux 中來進行燒錄 of= 後面接的是要燒錄的 MicroSD 卡的設備名稱
# unzip -p 2016-05-12-centos-lite-preview-bpi-m3.img.zip | pv | dd of=/dev/sdb bs=10M status=noxfer
或是直接使用 Banana Pi 中的 bpi-copy 指令來進行燒錄
# bpi-copy 2016-05-12-centos-lite-preview-bpi-m3.img.zip /dev/sdb
備份的方式,在 Windows 系統上也是使用 Win32 Disk Imager 來進行備份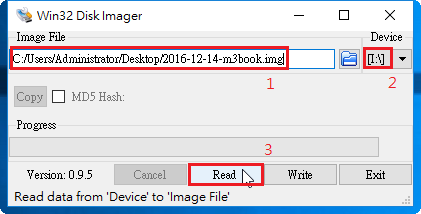
在 Linux 或 Banana Pi 下
# dd if=/dev/sdb of=/mnt/bpi/2016-12-12-centos-lite-preview-bpi-m3.img bs=1M
不過使用 Win32 Disk Imager 及 dd 製作出來的 Image 都會有些大,因為它的大小就是使用的 MicroSD 卡的大小,比如用 16G 的 MicroSD 卡,製作出來的 Image 就會是 16G,哪怕系統只用到 2G,所以要進行 Image 的壓縮。
壓縮 Image
# dd if=/dev/sdb bs=1M | pv | zip 2016-12-12-centos-lite-preview-bpi-m3.img.zip –
壓縮前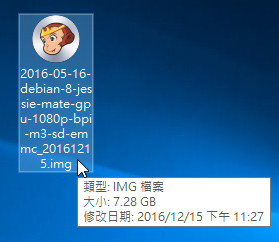
壓縮後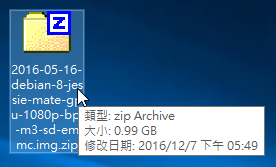
不過使用這種方式來壓縮,就會無法使用 Windows 系統中的 Win32 Disk Imager 來進行還原燒錄,對於剛使用 Banana Pi 的使用者會有些困擾!
試用 Banana Pi M3 – 試用新北市 bpi-m3-mate1604-0709
下載網站:ftp://163.20.108.15/ftp/bpim3/bpi-m3-mate1604-0709.zip
感謝新北團隊的製作,這一個版本是我使用過 Ubuntu Mate 最沒有問題的版本,官網上下載下來的版本,最後在做 apt-get upgrade 通通都陣亡了![@more@]
順手修改了一下,移除一些自己不用的軟體
# apt-get update
移除 fcitx
# apt-get remove –purge fcitx
移除 cheese 攝影機及 brasero 燒錄程式
# apt-get remove –purge cheese brasero
移除 hexchat 網路清談、pidgin 聊天、thunderbird 信件軟體
# apt-get remove –purge hexchat pidgin thunderbird
移除 Apache、PHP、MySQL
# apt-get remove –purge apache2 php mysql
移除多餘語言套件
# apt-get remove –purge $(dpkg -l | grep language | awk ‘{print $2}’ | grep ^language | egrep -v ‘zh-hant|en|selector’)
改用 gcin
# apt-get install gcin
更新到最新版本
# apt-get upgrade
不過不知道為什麼,這一個版本好像有點大,我試過用三片的 16G MicroSD(ADATA/TOSHIBA/Transcend),都一直無法燒錄 Image 成功,後來直接改用 32G 的才沒有問題。
OpenVPN Client 端設定
參考網頁:
CentOS 7 install OpenVPN @ 回憶……! :: 痞客邦 PIXNET ::
How To Set Up an OpenVPN Server on Ubuntu 16.04 | DigitalOcean
複製 OpenVPN Server 以下的這四個檔案至 OpenVPN Client Devices 上。
/etc/openvpn/easy-rsa/keys/ca.crt
/etc/openvpn/easy-rsa/keys/client.crt
/etc/openvpn/easy-rsa/keys/client.key
/etc/openvpn/easy-rsa/keys/ta.key
因為檔案比較多,為了使用者設定的方便,所以整合成一個 .ovpn 檔[@more@]建立存放檔案的目錄
# mkdir ~/openvpn_client_files
切換目錄
# cd /etc/openvpn/easy-rsa/keys/
複製 Client 端所需檔案
# cp ca.crt client.crt client.key ta.key ~/openvpn_client_files
建立 Client 端基本設定檔
# vim ~/openvpn_client_files/base.conf
client
dev tun
proto tcp
remote server_IP_address 1194
user nobody
group nogroup
persist-key
persist-tun
remote-cert-tls server
comp-lzo
verb 3
cipher AES-128-CBC
auth SHA256
key-direction 1
參考 How To Set Up an OpenVPN Server on Ubuntu 16.04 | DigitalOcean 建立 .ovpn 的 Script 檔
# vim ~/openvpn_client_files/make_config.sh
#!/bin/bash
# First argument: Client identifier
KEY_DIR=~/openvpn_client_files
OUTPUT_DIR=~/openvpn_client_files
BASE_CONFIG=~/openvpn_client_files/base.conf
cat ${BASE_CONFIG}
<(echo -e ‘<ca>’)
${KEY_DIR}/ca.crt
<(echo -e ‘</ca>n<cert>’)
${KEY_DIR}/${1}.crt
<(echo -e ‘</cert>n<key>’)
${KEY_DIR}/${1}.key
<(echo -e ‘</key>n<tls-auth>’)
${KEY_DIR}/ta.key
<(echo -e ‘</tls-auth>’)
> ${OUTPUT_DIR}/${1}.ovpn
更改檔案權限
# chmod 700 ~/openvpn_client_files/make_config.sh
切換目錄
# cd ~/openvpn_client_files
進行製作
# ./make_config.sh client
檢查是否有產生整合的設定檔
# ls -l ~/openvpn_client_files/*.ovpn
-rw-r–r– 1 root root 9860 12月 23 22:15 client.ovpn