使用 OpenVPN Acess Server Client 端

輸入 https://IP:943/ 連線畫面
Connect 透過 Web Browser 連上 VPN Server
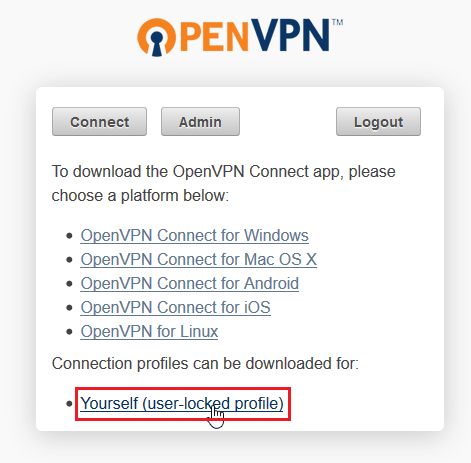
Login 下載使用者可以使用的 Client 程式,或直接下載 設定檔 client.ovpn

[@more@]可以下載 整合好的 *.msi 檔下載下來安裝

下載下來的檔案

安裝完成可以在桌面上看到 OpenVPN Connect 圖示

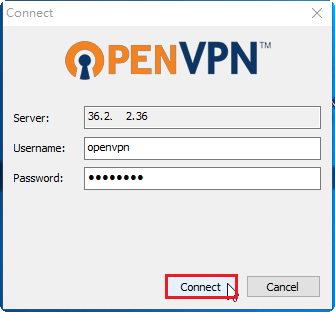
程式會自動帶出 Server IP 資訊,輸入帳號及密碼,按 Connect 即可!

選擇 Yes

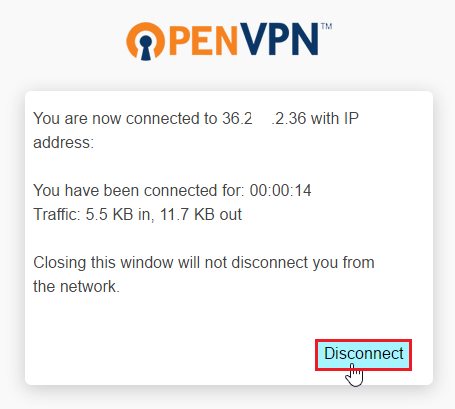
已正常連線,下方也可以看到一個 OpenVPN 的圖示,亮綠色的燈

如果要斷線,選擇 OpenVPN 圖示,並按滑鼠右鍵

選擇 Exit 即可

透過網頁來連線

也可以下載各個平台的 Client 端程式自行安裝

如果系統已有安裝 OpenVPN 程式,可以直接下載設定檔 client.ovpn

將 client.ovpn 複製到 C:Program FilesOpenVPNconfig 即可以使用原來的 OpenVPN 程式進行連線

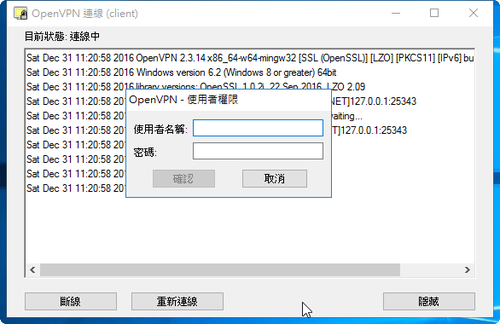
連線時會要求輸入帳號及密碼

試用 OpenVPN Acess Server

OpenVPN Acess Server 除了可以使用 Web 介面來進行管理及設定外,也可以使用命令式的指令來進行管理。
# /usr/local/openvpn_as/bin/ovpn-init
Detected an existing OpenVPN-AS configuration.
Continuing will delete this configuration and restart from scratch.
Please enter ‘DELETE’ to delete existing configuration:

輸入 DELETE 可以刪除目前的設定檔,重新設定

以下改用 Web 介面來進行管理及設定
以 Firefox 連線為例
選擇 進階 / 新增例外網站 / 取得憑證 / 確認安全例外


[@more@]帳號 openvpn 密碼是之前所設定的密碼

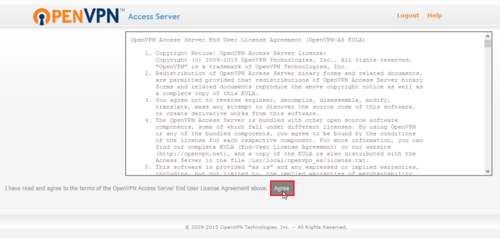
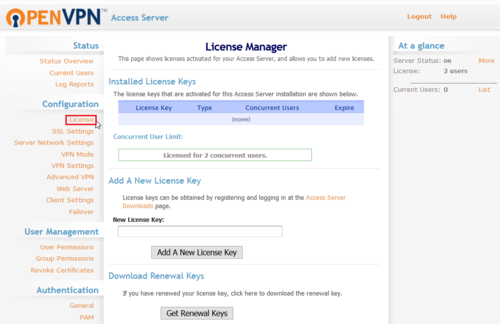
軟體授權

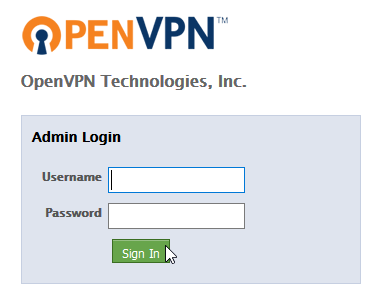
登入畫面

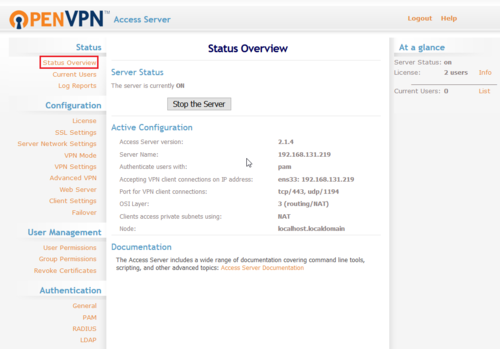
功能說明
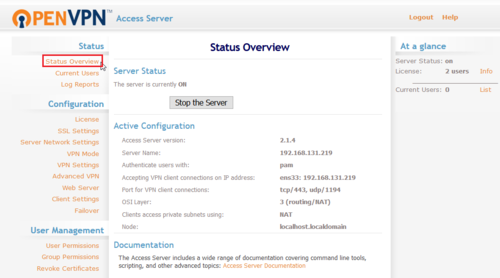
Status / Status Overview(系統狀態概述)

Status / Current Users(目前線上使用者)

Status / Log Reports(Log 報表)

Configuration / License(授權管理)

Configuration / SSL Settings(SSL 設定)

Configuration /  Server Netwok Settings(伺服器網路設定)

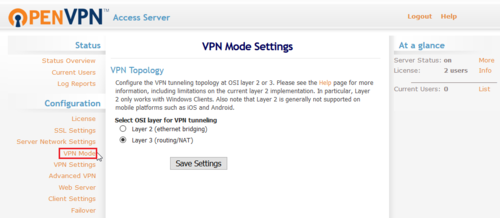
Configuration / VPN Mode(VPN 的模式 Bridge or Route)

Configuration / VPN Settings(VPN 設定)

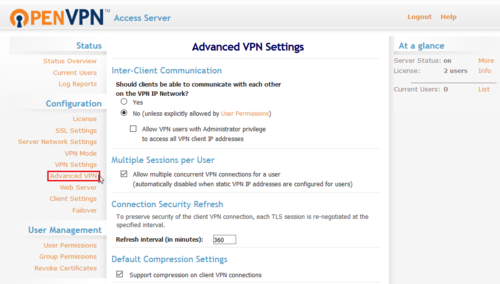
Configuration / Advanced VPN(VPN 進階設定)

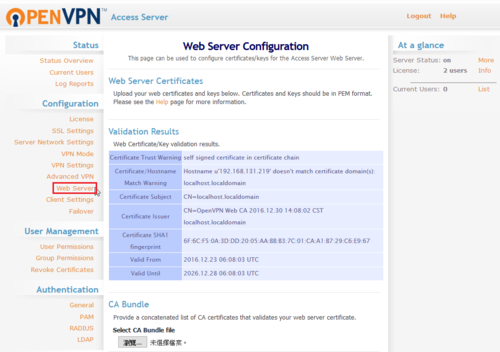
Configuration / Web Server(網路伺服器)

Configuration / Client Settings(使用者端設定)

Configuration / Failover(故障轉移)

User Management / User Permissions(使用者權限)

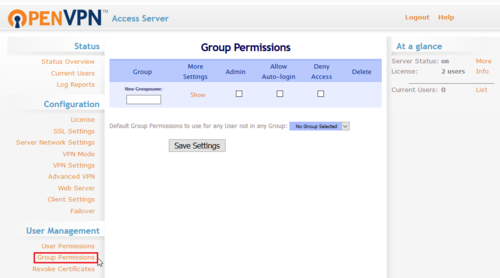
User Management / Group Permissions(群組權限)

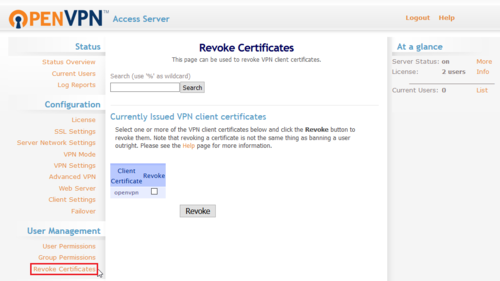
User Management / Revoke Certificates(撤銷憑證)

Authentication / General(設定認證的方式)

Authentication / PAM(使用 PAM 系統帳號做認證)

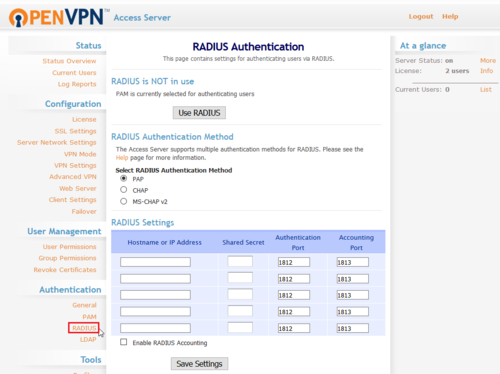
Authentication / RADIUS(使用 RADIUS 做認證)

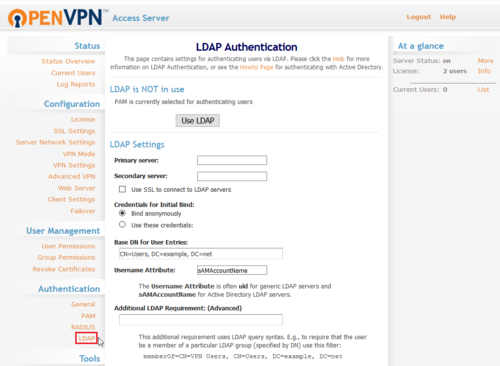
Authentication / LDAP(使用 LDAP 做認證)

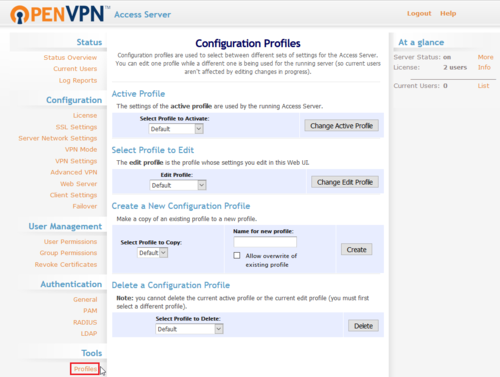
Tools / Profiles 設定

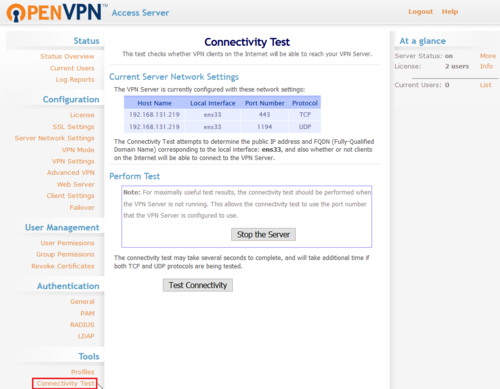
Tools / Connectivity Test(測試網路連線狀態)

安裝 OpenVPN Acess Server

如果 VPN 的使用者不多,又不想花太多的時間安裝及設定 OpenVPN 或是 OpenConnect,則可以考慮改用 OpenVPN Access Server,底下簡稱 OpenVPN AS。
OpenVPN AS 是由開發 OpenVPN 的公司所開發的商業性版本,提供了簡單的 Web 設定介面,安裝完成之後幾乎就已經設定完成,防火牆的部分也會自動完成,非常容易使用,但免費的版本,只能同時提供二個 Client 端連線。

Access Server Overview 官方網站:
https://openvpn.net/index.php/access-server/overview.html
[@more@]支援的作業系統版本

CentOS
6.x
http://swupdate.openvpn.org/as/openvpn-as-2.1.4-CentOS6.i386.rpm
http://swupdate.openvpn.org/as/openvpn-as-2.1.4-CentOS6.x86_64.rpm
7.x
http://swupdate.openvpn.org/as/openvpn-as-2.1.4-CentOS7.x86_64.rpm

Ubuntu 16.04
http://swupdate.openvpn.org/as/openvpn-as-2.1.4b-Ubuntu16.i386.deb
http://swupdate.openvpn.org/as/openvpn-as-2.1.4b-Ubuntu16.amd_64.deb

Debian 8
http://swupdate.openvpn.org/as/openvpn-as-2.1.4-Debian8.i386.deb
http://swupdate.openvpn.org/as/openvpn-as-2.1.4-Debian8.amd_64.deb

3. 進行下載及安裝,以 CentOS 7.3 1611 x64 為例
# wget http://swupdate.openvpn.org/as/openvpn-as-2.1.4-CentOS7.x86_64.rpm

4. 進行安裝
# rpm -ivh openvpn-as-2.1.4-CentOS7.x86_64.rpm

The Access Server has been successfully installed in /usr/local/openvpn_as
Configuration log file has been written to /usr/local/openvpn_as/init.log
Please enter “passwd openvpn” to set the initial
administrative password, then login as “openvpn” to continue
configuration here: https://192.168.131.219:943/admin
To reconfigure manually, use the /usr/local/openvpn_as/bin/ovpn-init tool.

Access Server web UIs are available here:
Admin  UI: https://192.168.131.219:943/admin
Client UI: https://192.168.131.219:943/

192.168.131.219 是安裝時的主機 IP

5. 系統新增二個帳號
# tail -2 /etc/passwd
openvpn:x:1000:1000::/home/openvpn:/sbin/nologin
openvpn_as:x:1001:1001::/home/openvpn_as:/sbin/nologin

6. 設定 openvpn 管理帳號的密碼
# passwd openvpn
更改使用者 openvpn 的密碼。
新 密碼:
再次輸入新的 密碼:
passwd:所有驗證 token 都已成功更新。

建置使用帳號及密碼認證的 OpenConnect Server – 1

建置方式可以參考以下二篇文章:
頭城國小資訊組 | 在 Ubuntu 16.04.1 Server 上建置 OpenConnect SSL VPN Server
頭城國小資訊組 | 在 CentOS 7.x 上建置 OpenConnect SSL VPN Server

本來一直都是直接使用 key 來做認證,但在手機及平板上沒有對應的程式可以使用,所以改用帳號及密碼來做認證,OpenConnect Server 可以同時使用 key 及帳號密碼認證。
1. 修改 /etc/ocserv/ocserv.conf 設定檔
# vim /etc/ocserv/ocserv.conf
取消使用憑證認證
# sed -i ‘s/^auth = “certificate”/#auth = “certificate”/’ /etc/ocserv/ocserv.conf
在 auth 認證區段加入
auth = “plain[passwd=/etc/ocserv/ocpasswd]”[@more@]2. 建立帳號及密碼
# /usr/bin/ocpasswd -c /etc/ocserv/ocpasswd test
Enter password:
Re-enter password:

3. 測試有沒有建立使用者
# grep tces /etc/ocserv/ocpasswd | awk -F: ‘{print $1}’
test

4. 重新啟動 OpenConnect Server
# systemctl restart ocserv

5. 檢查系統是否有正常啟動
# systemctl status ocserv

建置使用帳號及密碼認證的 OpenVPN Server – 1

參考網站:
OpenVPN System Based On User/Password Authentication with mysql & Day Control (shell script)- Debian ~ Mr.TUM’s Blog

參考網站中,OpenVPN 和 MySQL 分別屬於不同主機,在這裡改用同一主機。

1. 安裝 MySQL Server
# apt-get install mariadb-server[@more@]2. 設定 root 密碼及一些安全性上的設定
# /usr/bin/mysql_secure_installation
還未設定 root 密碼,所以直接按 Enter 鍵
Enter current password for root (enter for none):
OK, successfully used password, moving on…

Setting the root password ensures that nobody can log into the MariaDB
root user without the proper authorisation.

設定 MySQL root 密碼
Set root password? [Y/n]
New password:
Re-enter new password:
Password updated successfully!
Reloading privilege tables..
 … Success!

By default, a MariaDB installation has an anonymous user, allowing anyone
to log into MariaDB without having to have a user account created for
them.  This is intended only for testing, and to make the installation
go a bit smoother.  You should remove them before moving into a
production environment.

移除匿名使用者
Remove anonymous users? [Y/n]
 … Success!

Normally, root should only be allowed to connect from ‘localhost’.  This
ensures that someone cannot guess at the root password from the network.

取消 root 可以遠端登入
Disallow root login remotely? [Y/n]
 … Success!

By default, MariaDB comes with a database named ‘test’ that anyone can
access.  This is also intended only for testing, and should be removed
before moving into a production environment.

移除 測試的資料庫
Remove test database and access to it? [Y/n]
 – Dropping test database…
 … Success!
 – Removing privileges on test database…
 … Success!

Reloading the privilege tables will ensure that all changes made so far
will take effect immediately.

重新載入資料表權限
Reload privilege tables now? [Y/n]
 … Success!

Cleaning up…

3. 建立 openvpn 資料庫,並建立一個使用者及設定密碼來進行管理
# /usr/bin/mysql -u root -p
MariaDB [(none)]> CREATE DATABASE openvpn;
MariaDB [(none)]> GRANT ALL ON openvpn.* TO ‘pi’@”%” IDENTIFIED BY ‘123456’;
MariaDB [(none)]> FLUSH PRIVILEGES;
MariaDB [(none)]> exit;

4. 改用 pi 使用者來建立 openvpn 相關資料庫設定
# /usr/bin/mysql -u pi -p

5. 開啟 openvpn 資料庫
MariaDB [(none)]> USE openvpn;

6. 建立 user 資料表

CREATE TABLE IF NOT EXISTS `user` (
    `user_id` varchar(32) COLLATE utf8_unicode_ci NOT NULL,
    `user_pass` varchar(32) COLLATE utf8_unicode_ci NOT NULL DEFAULT ‘1234’,
    `user_mail` varchar(64) COLLATE utf8_unicode_ci DEFAULT NULL,
    `user_phone` varchar(16) COLLATE utf8_unicode_ci DEFAULT NULL,
    `user_online` tinyint(1) NOT NULL DEFAULT ‘0’,
    `user_enable` tinyint(1) NOT NULL DEFAULT ‘1’,
    `user_start_date` date NOT NULL,
    `user_end_date` date NOT NULL,
PRIMARY KEY (`user_id`),
KEY `user_pass` (`user_pass`)
) ENGINE=MyISAM DEFAULT CHARSET=utf8 COLLATE=utf8_unicode_ci;

7. 建立 log 資料表
CREATE TABLE IF NOT EXISTS `log` (
    `log_id` int(10) unsigned NOT NULL AUTO_INCREMENT,
    `user_id` varchar(32) COLLATE utf8_unicode_ci NOT NULL,
    `log_trusted_ip` varchar(32) COLLATE utf8_unicode_ci DEFAULT NULL,
    `log_trusted_port` varchar(16) COLLATE utf8_unicode_ci DEFAULT NULL,
    `log_remote_ip` varchar(32) COLLATE utf8_unicode_ci DEFAULT NULL,
    `log_remote_port` varchar(16) COLLATE utf8_unicode_ci DEFAULT NULL,
    `log_start_time` timestamp NOT NULL DEFAULT CURRENT_TIMESTAMP,
    `log_end_time` timestamp NOT NULL DEFAULT ‘0000-00-00 00:00:00’,
    `log_received` float NOT NULL DEFAULT ‘0’,
    `log_send` float NOT NULL DEFAULT ‘0’,
PRIMARY KEY (`log_id`),
KEY `user_id` (`user_id`)
) ENGINE=MyISAM  DEFAULT CHARSET=utf8 COLLATE=utf8_unicode_ci;
8. 建立使用者資料
INSERT INTO `user` (
    `user_id`, `user_pass`, `user_mail`, `user_phone`,
    `user_online`, `user_enable`, `user_start_date`, `user_end_date`
)
VALUES (
    ‘test’, ‘123456’, ‘test@test.com’,
    ‘+66815447514’, 0, 1, ‘2012-01-01’, ‘0000-00-00’
);

9. 顯示資料庫中的資料表
MariaDB [openvpn]> show tables;
+————————–+
| Tables_in_openvpn |
+—————————+
| log                              |
| user                            |
+—————————-+
2 rows in set (0.00 sec)

10. 列出 user 資料表中的使用者資料
MariaDB [openvpn]> select user_id,user_pass from user;
+———-+—————-+
| user_id | user_pass   |
+———-+—————–+
| test       | 123456        |
+———-+—————–+
1 row in set (0.00 sec)

11. 退出資料庫
MariaDB [openvpn]> exit;

12 . 建立 Script 檔目錄 /etc/openvpn/script
# mkdir /etc/openvpn/script

13. 建立 /etc/openvpn/script/config.sh
# cat etc/openvpn/script/config.sh
#!/bin/bash
##Dababase Server
HOST=’127.0.0.1′
#Default port = 3306
PORT=’3306′
#Username
USER=’pi’
#Password
PASS=’123456′
#database name
DB=’openvpn’

14. 建立 /etc/openvpn/script/test_connect_db.sh
# cat /etc/openvpn/script/test_connect_db.sh
#!/bin/bash
. /etc/openvpn/script/config.sh
##Test Authentication
username=$1
password=$2
user_id=$(mysql -h$HOST -P$PORT -u$USER -p$PASS $DB -sN -e “select user_id from user where user_id = ‘$username’ AND user_pass = ‘$password’ AND user_enable=1 AND user_start_date != user_end_date AND TO_DAYS(now()) >= TO_DAYS(user_start_date) AND (TO_DAYS(now()) <= TO_DAYS(user_end_date) OR user_end_date=’0000-00-00′)”)
##Check user
[ “$user_id” != ” ] && [ “$user_id” = “$username” ] && echo “user : $username” && echo ‘authentication ok.’ && exit 0 || echo ‘authentication failed.’; exit 1

15. 建立 /etc/openvpn/script/login.sh
# cat /etc/openvpn/script/login.sh
#!/bin/bash
. /etc/openvpn/script/config.sh
##Authentication
user_id=$(mysql -h$HOST -P$PORT -u$USER -p$PASS $DB -sN -e “select user_id from user where user_id = ‘$username’ AND user_pass = ‘$password’ AND user_enable=1 AND user_start_date != user_end_date AND TO_DAYS(now()) >= TO_DAYS(user_start_date) AND (TO_DAYS(now()) <= TO_DAYS(user_end_date) OR user_end_date=’0000-00-00′)”)
##Check user
[ “$user_id” != ” ] && [ “$user_id” = “$username” ] && echo “user : $username” && echo ‘authentication ok.’ && exit 0 || echo ‘authentication failed.’; exit 1

16. 建立 /etc/openvpn/script/connect.sh
# cat /etc/openvpn/script/connect.sh
#!/bin/bash
. /etc/openvpn/script/config.sh
##insert data connection to table log
mysql -h$HOST -P$PORT -u$USER -p$PASS $DB -e “INSERT INTO log (log_id,user_id,log_trusted_ip,log_trusted_port,log_remote_ip,log_remote_port,log_start_time,log_end_time,log_received,log_send) VALUES(NULL,’$common_name’,’$trusted_ip’,’$trusted_port’,’$ifconfig_pool_remote_ip’,’$remote_port_1′,now(),’0000-00-00 00:00:00′,’$bytes_received’,’$bytes_sent’)”
##set status online to user connected
mysql -h$HOST -P$PORT -u$USER -p$PASS $DB -e “UPDATE user SET user_online=1 WHERE user_id=’$common_name'”

17. 建立 /etc/openvpn/script/disconnect.sh
# cat /etc/openvpn/script/disconnect.sh
#!/bin/bash
. /etc/openvpn/script/config.sh
##set status offline to user disconnected
mysql -h$HOST -P$PORT -u$USER -p$PASS $DB -e “UPDATE user SET user_online=0 WHERE user_id=’$common_name'”
##insert data disconnected to table log
mysql -h$HOST -P$PORT -u$USER -p$PASS $DB -e “UPDATE log SET log_end_time=now(),log_received=’$bytes_received’,log_send=’$bytes_sent’ WHERE log_trusted_ip=’$trusted_ip’ AND log_trusted_port=’$trusted_port’ AND user_id=’$common_name’ AND log_end_time=’0000-00-00 00:00:00′”

18. 更改 Script 檔案權限
# chmod 755 /etc/openvpn/script/*.sh

19. 修改 /etc/openvpn/server.conf  設定檔
# vim /etc/openvpn/server.conf
加入以下設定
username-as-common-name
client-cert-not-required
auth-user-pass-verify /etc/openvpn/script/login.sh via-env

# 設定使用者登入及登出時要做的動作
##script connect-disconnect
script-security 3 system
client-connect /etc/openvpn/script/connect.sh
client-disconnect /etc/openvpn/script/disconnect.sh

20. 測試 MariaDB SQL Server 可否正常連線(帳號/密碼:test / 123456)
# /etc/openvpn/script/test_connect_db.sh test 123456
user : test
authentication ok.

如果是上面的訊息,則是連線成功!

21. 設定 OpenVPN Client 端 *.ovpn
加入以下設定
auth-user-pass
reneg-sec 0

22. 重新啟動 OpenVPN Server
# systemctl restart openvpn@server.service

23. 列出使用者的登入資料
MariaDB [openvpn]> select user_id,log_trusted_ip,log_remote_ip,log_start_time,log_end_time from log;
+———-+——————–+———————+——————————+—————————–+
| user_id | log_trusted_ip | log_remote_ip | log_start_time             | log_end_time              |
+———-+——————–+———————+——————————+——————————+
| test        | 1.162.15.9      | 10.8.0.6             | 2016-12-29 09:27:32 | 2016-12-29 10:27:36 |
+———-+——————–+———————+——————————+——————————+

建置使用帳號及密碼認證的 OpenVPN Server

參考網站:
CentOS7 搭建OpenVPN | HuaChao’s Blog

之前的設定可以參考  頭城國小資訊組 | 試用 Banana Pi R1 – Ubuntu minimal 16.04 上安裝 OpenVPN,這裡只針對剩餘的部份做修改
1. 修改 /etc/openvpn/server.conf 設定檔
     auth-user-pass-verify 指定要認證的程式碼,及使用何種帳密傳遞的方式
     client-cert-not-required
     username-as-common-name
# echo -e “n# 使用帳號密碼做認證nscript-security 3 systemnauth-user-pass-veri
fy /etc/openvpn/checkpsw.sh via-envn;client-cert-not-requirednusername-as-comm
on-name” >> /etc/openvpn/server.conf
[@more@]2. 建立密碼檢查程式
# vim /etc/openvpn/checkpsw.sh

#!/bin/sh
###########################################################
# checkpsw.sh (C) 2004 Mathias Sundman <mathias@openvpn.se>
#
# This script will authenticate OpenVPN users against
# a plain text file. The passfile should simply contain
# one row per user with the username first followed by
# one or more space(s) or tab(s) and then the password.

PASSFILE="/etc/openvpn/psw-file"
LOG_FILE="/etc/openvpn/openvpn-password.log"
TIME_STAMP=`date "+%Y-%m-%d %T"`

###########################################################

if [ ! -r "${PASSFILE}" ]; then
  echo "${TIME_STAMP}: Could not open password file "${PASSFILE}" for reading." >> ${LOG_FILE}
  exit 1
fi

CORRECT_PASSWORD=`awk '!/^;/&&!/^#/&&$1=="'${username}'"{print $2;exit}' ${PASSFILE}`

if [ "${CORRECT_PASSWORD}" = "" ]; then 
  echo "${TIME_STAMP}: User does not exist: username="${username}", password="${password}"." >> ${LOG_FILE}
  exit 1
fi

if [ "${password}" = "${CORRECT_PASSWORD}" ]; then 
  echo "${TIME_STAMP}: Successful authentication: username="${username}"." >> ${LOG_FILE}
  exit 0
fi

echo "${TIME_STAMP}: Incorrect password: username="${username}", password="${password}"." >> ${LOG_FILE}
exit 1

3. 更改檔案權限
# chmod +x /etc/openvpn/checkpsw.sh

4. 建立密碼檔 /etc/openvpn/psw-file
格式:帳號 密碼
# cat /etc/openvpn/psw-file
test 123123

5. 檢查 /etc/openvpn/server.conf 設定檔是否正確
# openvpn –config /etc/openvpn/server.conf

6. 重新啟動 OpenVPN Server
# systemctl restart openvpn@server.service

7. 修改使用端檔案 xxx.ovpn 加入下面幾行
resolv-retry infinite
nobind
auth-user-pass
auth-nocache
mute-replay-warnings
ns-cert-type server
reneg-sec 0

8. 測試

經過測試,似乎帳號認證無法與憑證認證併存!?

解決 OpenVPN Server 無法正常執行的問題

一直執行好好的 OpenVPN Server 突然無法啟動,出現錯誤的訊息。
# systemctl start openvpn@server.service
Job for openvpn@server.service failed because the control process exited with error code. See “systemctl status openvpn@server.service” and “journalctl -xe” for details.
# journalctl -xe |  grep Error
Options error: In [CMD-LINE]:1: Error opening configuration file: /etc/openvpn/server.srvice.conf

仔細查看設定檔 /etc/openvpn/server.conf 似乎沒有什麼特別[@more@]使用 OpenVPN 本身程式進行檢查
# openvpn –config /etc/openvpn/server.conf
Options error: –dh fails with ‘dh2048.pem’: No such file or directory
Options error: –ca fails with ‘ca.crt’: No such file or directory
Options error: –cert fails with ‘server.crt’: No such file or directory
Options error: –key fails with ‘server.key’: No such file or directory
Options error: –tls-auth fails with ‘ta.key’: No such file or directory
Options error: Please correct these errors.
Use –help for more information.

看起來是憑證和金鑰的位置找不到,重新指定後就正常了!

OpenConnect Client – Android 手機篇

這裡以 Android 手機為例
1. 在 Google Play 商店搜尋 Cisco AnyConnect,選擇 安裝
[@more@]
2. 選擇 接受

3. 安裝中

4. 選擇 開啟

5. 選擇 OK

6. 選擇 連線

7. 選擇 新增新的 VPN 連線…

8. 輸入伺服器位址

9. 選擇 完成

10. 選擇 右上角功能,再選擇 Settings

11. 預設 封鎖不信任的伺服器

把它取消

12. 把 AnyConnect VPN 的鈕往右邊移動

13. 選擇 繼續

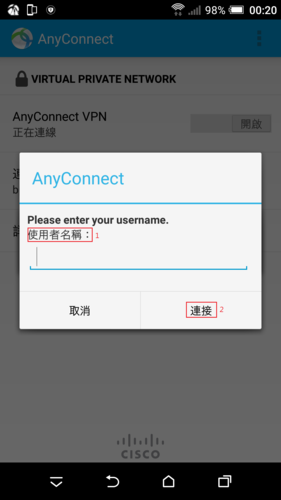
14. 輸入 使用者名稱

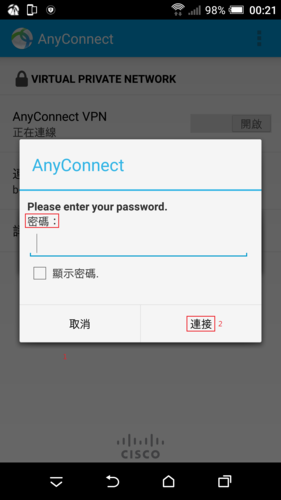
15. 輸入 密碼

16. 選擇 確定

17. 已連線成功,畫面上方會出現一個鎖頭,代表現在在 VPN 模式

17. 如果要關閉,請把 開啟 往左邊移動