解決 ProFTPD Server 執行時出錯誤的訊息

在 FreeBSD 上執行時偶爾出現如下的錯誤訊息
# /usr/local/sbin/proftpd
2016-06-26 10:56:58,850 freebsd proftpd[730]: warning: unable to determine IP address of ‘freebsd’
2016-06-26 10:56:58,850 freebsd proftpd[730]: error: no valid servers configured
2016-06-26 10:56:58,850 freebsd proftpd[730]: fatal: error processing configuration file ‘/usr/local/etc/proftpd.conf’

看錯誤訊息似乎和 IP 有關,因為目前是使用 DHCP Server 自動取得 IP[@more@]修改 /usr/local/etc/proftpd.conf 設定檔,加入下面一行
IP 請設定成 Server 目前使用的 IP
# vim /usr/local/etc/proftpd.conf
DefaultAddress                  192.168.1.13

重新啟動後就正常了!
# /usr/local/sbin/proftpd &

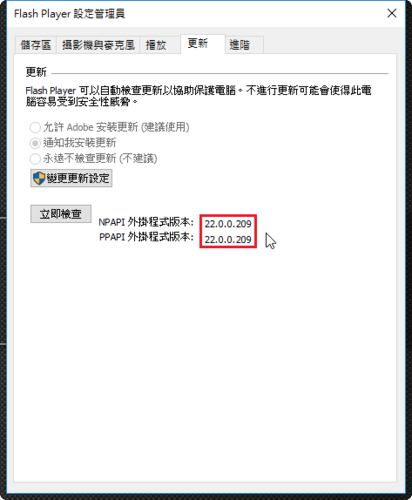
Adobe Flash Player 22.0.0.209


檢查安裝版本:https://www.adobe.com/tw/software/flash/about/
                             https://get.adobe.com/tw/flashplayer/
[@more@]Windows 7 平台
Internet Explorer:
http://fpdownload.macromedia.com/get/flashplayer/current/licensing/win/install_flash_player_22_active_x.exe
Windows 8 / 8.1 / 10 / Server 2012 / Server 2012 R2 要從 Windows Update 更新

All Other Browsers(Firefox,Safari & Opera):
http://fpdownload.macromedia.com/get/flashplayer/current/licensing/win/install_flash_player_22_plugin.exe

Google Chrome
http://fpdownload.macromedia.com/pub/flashplayer/latest/help/install_flash_player_ppapi.exe

Mac 平台:
http://fpdownload.adobe.com/get/flashplayer/pdc/22.0.0.209/install_flash_player_osx.dmg

在 FreeBSD 上安裝 ProFTPD Server

在 FreeBSD 上安裝和 FreeNAS 及 NAS4Free 相同的 FTP Server。
1. 安裝 ProFTPD Server
# pkg install proftpd

2. 設定檔位置 /usr/local/etc/proftpd.conf
# grep -v -E ‘^#|^$’ /usr/local/etc/proftpd.conf
ServerName                      “ProFTPD Default Installation”
ServerType                      standalone
DefaultServer                   on
ScoreboardFile          /var/run/proftpd/proftpd.scoreboard
Port                            21
UseIPv6                         on
Umask                           022
MaxInstances                    30
CommandBufferSize       512
User                            nobody
Group                           nogroup
DefaultRoot ~ !
AllowOverwrite          on
<Limit SITE_CHMOD>
  DenyAll
</Limit>
  ### We want clients to be able to login with “anonymous” as well as “ftp”
  # UserAlias                   anonymous ftp
  ### Limit the maximum number of anonymous logins
  # MaxClients                  10
  ### We want ‘welcome.msg’ displayed at login, and ‘.message’ displayed
  ### in each newly chdired directory.
  # DisplayLogin                        welcome.msg
  # DisplayFirstChdir           .message
  ### Limit WRITE everywhere in the anonymous chroot
  # <Limit WRITE>
  #   DenyAll
  # </Limit>[@more@]3. 修改 /etc/rc.conf,設定開機時啟動
# vim /etc/rc.conf
加入下面一行
proftpd_enable=”YES”

# echo ‘proftpd_enable=”YES”‘ >> /etc/rc.conf

4. 啟動 ProFTPD Server
# /usr/local/sbin/proftpd &

5. 檢查 FTP Server 是否有正常啟動
# netstat -an | grep *.21
tcp46      0      0 *.21                   *.*                    LISTEN

在 FreeBSD 搜尋檔案

在 Unix-Like 系統搜尋檔案,可以用 find 指令,不過一般人可能會更習慣使用 locate 指令。
# find / -name proftpd.conf
/var/etc/proftpd.conf

但使用 locate 指令時卻出現下面的訊息
# locate proftpd.conf
locate: Command not found.

# locate proftpd.conf
locate: database too small: /var/db/locate.database
Run /usr/libexec/locate.updatedb[@more@]解決方式:
1. 安裝 findutils 套件
# pkg install findutils

更新檔案資訊
# /usr/local/bin/gupdatedb

搜尋檔案
# /usr/local/bin/glocate proftpd.conf
/var/etc/proftpd.conf

2. 改使用 locate.updatedb 指令(使用 root 身份來執行會有 Security Risk)
# /usr/libexec/locate.updatedb
>>> WARNING
>>> Executing updatedb as root.  This WILL reveal all filenames
>>> on your machine to all login users, which is a security risk.
# locate proftpd.conf
/var/etc/proftpd.conf

檔案資料庫
# ls -l /var/db/locate.database
-rw-r–r– 1 nobody wheel 1475158 6月 26 10:31 /var/db/locate.database

在 FreeBSD 安裝 Samba4

參考文章:Samba 4.1 on FreeBSD 10.1 · GitHub
1. 搜尋可用的套件
# pkg search samba | grep ^samba
samba-nsupdate-9.8.6_1         nsupdate utility with GSS-TSIG support
samba-virusfilter-0.1.3_1      On-access anti-virus filter for Samba
samba36-3.6.25_3               Free SMB and CIFS client and server for Unix
samba36-libsmbclient-3.6.25_2  Shared lib from the samba package
samba36-nmblookup-3.6.25       NetBIOS Name lookup tool
samba36-smbclient-3.6.25       Samba “ftp-like” client
samba41-4.1.22_2               Free SMB/CIFS and AD/DC server and client for Unix
samba42-4.2.11                 Free SMB/CIFS and AD/DC server and client for Unix
samba43-4.3.8                  Free SMB/CIFS and AD/DC server and client for Unix

2. 直接安裝最新的版本
# pkg install samba43

************************************************************
Message from trousers-tddl-0.3.10_7:
To run tcsd automatically, add the following line to /etc/rc.conf

tcsd_enable=”YES”

You might want to edit /usr/local/etc/tcsd.conf to reflect your setup.

To use TPM, add your_account to ‘_tss’ group like following:

# pw groupadd _tss -m your_account
Message from cyrus-sasl-2.1.26_12:
You can use sasldb2 for authentication, to add users use:

        saslpasswd2 -c username

===============================================================================
Message from samba43-4.3.8:
===============================================================================

How to start: http://wiki.samba.org/index.php/Samba4/HOWTO

* Your configuration is: /usr/local/etc/smb4.conf

* All the relevant databases are under: /var/db/samba4

* All the logs are under: /var/log/samba4

* Provisioning script is: /usr/local/bin/samba-tool

For additional documentation check: http://wiki.samba.org/index.php/Samba4

Bug reports should go to the: https://bugzilla.samba.org/

===============================================================================[@more@]3. 建立 /usr/local/etc/smb4.conf
    設定檔是從 NAS4Free 取得,再稍做修改
# vim /usr/local/etc/smb4.conf
[global]
encrypt passwords = yes
netbios name = freebsd
workgroup = HOME
server string = FreeBSD Server
security = user
dns proxy = no
strict locking = no
read raw = yes
write raw = yes
oplocks = yes
max xmit = 65535
deadtime = 15
getwd cache = yes
unix charset = UTF-8
time server = yes
max log size = 100
logging = syslog
loglevel = 1
load printers = no
printing = bsd
printcap cache time = 0
printcap name = /dev/null
disable spoolss = yes
dos charset = CP950
smb passwd file = /var/etc/private/smbpasswd
private dir = /var/etc/private
passdb backend = tdbsam
idmap config * : backend = tdb
idmap config * : range = 10000-39999
aio read size = 1024
aio write size = 1024

[t850008]
comment = t850008
path = /home/t850008
writeable = yes
printable = no
hide dot files = yes
guest ok = no
inherit permissions = yes
inherit acls = yes

4. 測試設定檔是否正確
# /usr/local/bin/testparm
Load smb config files from /usr/local/etc/smb4.conf
Processing section “[t850008]”
Loaded services file OK.
Server role: ROLE_STANDALONE

Press enter to see a dump of your service definitions

# Global parameters
[global]
        dos charset = CP950
        workgroup = HOME
        server string = FreeBSD Server
        security = USER
        smb passwd file = /var/etc/private/smbpasswd
        private dir = /var/etc/private
        logging = syslog
        max log size = 100
        max xmit = 65535
        time server = Yes
        deadtime = 15
        load printers = No
        printcap cache time = 0
        printcap name = /dev/null
        disable spoolss = Yes
        dns proxy = No
        idmap config * : range = 10000-39999
        idmap config * : backend = tdb
        aio read size = 1024
        aio write size = 1024
        strict locking = No

[t850008]
        comment = t850008
        path = /home/t850008
        read only = No
        inherit permissions = Yes
        inherit acls = Yes

5. 修改 /etc/rc.conf 啟動設定檔
# vim /etc/rc.conf
加入下面這一行設定
samba_server_enable=”YES”

# echo ‘samba_server_enable=”YES”‘ >> /etc/rc.conf

6. 啟動 Samba Server
# /usr/local/etc/rc.d/samba_server start
Performing sanity check on Samba configuration: OK
Starting nmbd.
Starting smbd

7. 檢查 Samba Server 是否有正常啟動
# netstat -an | grep -E ‘137|138|139|445’
tcp4       0      0 *.139                  *.*                    LISTEN
tcp4       0      0 *.445                  *.*                    LISTEN
tcp6       0      0 *.139                  *.*                    LISTEN
tcp6       0      0 *.445                  *.*                    LISTEN
udp4       0      0 *.138                  *.*
udp4       0      0 *.137                  *.*

8. 設定使用者密碼
# /usr/local/bin/pdbedit -a t850008
new password:
retype new password:
Unix username:        t850008
NT username:
Account Flags:        [U          ]
User SID:             S-1-5-21-1407030253-4189778233-248147614-1000
Primary Group SID:    S-1-5-21-1407030253-4189778233-248147614-513
Full Name:            User &
Home Directory:       freebsdt850008
HomeDir Drive:
Logon Script:
Profile Path:         freebsdt850008profile
Domain:               FREEBSD
Account desc:
Workstations:
Munged dial:
Logon time:           0
Logoff time:          日, 00  1月 1900 00:00:00 CST
Kickoff time:         日, 00  1月 1900 00:00:00 CST
Password last set:    日, 26  6月 2016 09:59:39 CST
Password can change:  日, 26  6月 2016 09:59:39 CST
Password must change: never
Last bad password   : 0
Bad password count  : 0
Logon hours         : FFFFFFFFFFFFFFFFFFFFFFFFFFFFFFFFFFFFFFFFFF

在 FreeBSD 安裝 grive 同步檔案到 Google Drive

參考網頁:
Grive2 — YourcmcWiki
GitHub – vitalif/grive2: Google Drive client with support for new Drive REST API and partial sync

1.安裝所需套件
# pkg install git cmake boost-libs yajl libgcrypt pkgconf cppunit libbfd
[@more@]2. 下載 grive Source Code
# git clone https://github.com/vitalif/grive2

3. 進行編譯
# cd grive2
# mkdir build
# cd build
# cmake ..

4. 進行安裝
# make -j4
# make install
[ 73%] Built target grive
[ 79%] Built target btest
[ 96%] Built target unittest
[100%] Built target grive_executable
Install the project…
— Install configuration: “”
— Installing: /usr/local/bin/grive
— Set runtime path of “/usr/local/bin/grive” to “”
— Installing: /usr/local/share/man/man1/grive.1

解決 FreeBSD pkg 安裝軟體時出現的錯誤訊息

在 FreeBSD 使用 pkg 安裝 cmake 軟體時出現下面的錯訊息
Fetching cmake-3.5.0.txz: 100%    3 MiB   3.5MB/s    00:01
pkg: cached package cmake-3.5.0: size mismatch, fetching from remote
Fetching cmake-3.5.0.txz: 100%    3 MiB   3.5MB/s    00:01
pkg: cached package cmake-3.5.0: size mismatch, cannot continue[@more@]解決方式:
1. 刪除 /var/cache/pkg 目錄下所有檔案
# rm -rf /var/cache/pkg/*

2. 強制再更新一次套件庫
# pkg update -f

讓 FreeBSD 終端機可以輸入中文

原本的 FreeBSD 無法輸入中文

可以正常顯示中文

[@more@]解決方式:
1. shell 是 bash
修改 /etc/profile
# vim /etc/profile
加入下面三行
  export LC_CTYPE=en_US.ISO8859-1
  export LC_ALL=zh_TW.UTF-8
  export LANG=zh_TW.UTF-8

2. shell 是 csh
修改 /etc/csh.cshrc
# vim /etc/csh.cshrc
加入下面三行
  setenv LC_CTYPE en_US.ISO8859-1
  setenv LC_ALL zh_TW.UTF-8
  setenv LANG zh_TW.UTF-8

3. 重新啟動電腦或登出後重新登入,即可生效!