NAS4Free 預設管理密碼是 nas4free,更改方式
1. 選擇 系統 / 一般設定

[@more@]2. 選擇 密碼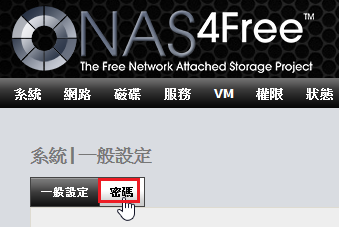
3. 更改密碼,這裡也會一併更改 SSH Server 預設的 root 密碼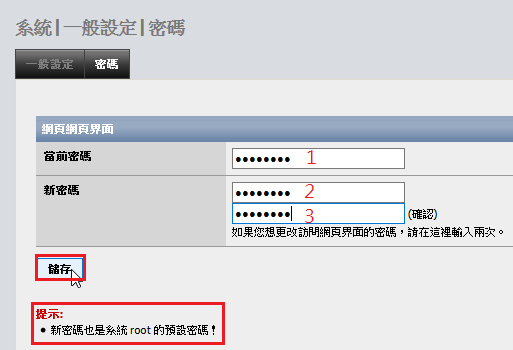
5.

全新的繁體中文 WordPress 網站《宜蘭部落格教育平台 網站》
NAS4Free 預設管理密碼是 nas4free,更改方式
1. 選擇 系統 / 一般設定
[@more@]2. 選擇 密碼
3. 更改密碼,這裡也會一併更改 SSH Server 預設的 root 密碼
5.
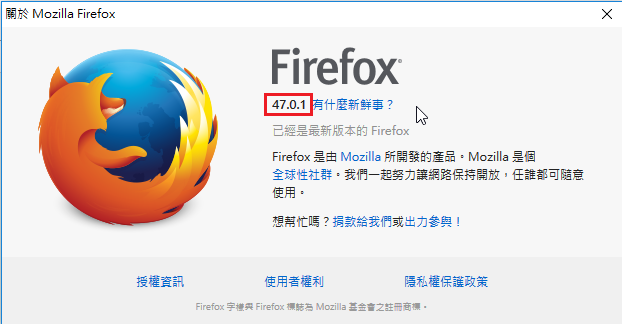
可以從 說明 / 關於 Firefox(A) 升級
 [@more@]
直接下載新的版本安裝
Windows 版本:
x86 版本
http://ftp.mozilla.org/pub/firefox/releases/47.0.1/win32/zh-TW/Firefox%20Setup%2047.0.1.exe
x64 版本
http://ftp.mozilla.org/pub/firefox/releases/47.0.1/win64/zh-TW/Firefox%20Setup%2047.0.1.exe
Mac 版本:
http://ftp.mozilla.org/pub/firefox/releases/47.0.1/mac/zh-TW/Firefox%2047.0.1.dmg
安裝 NAS4Free 時是使用 DHCP Server,直接取得 IP,如果想要更換成其它固定的 IP 設定方法。
1. 原先的 IP 是 192.168.1.250,選擇 2 Configure Network IP Address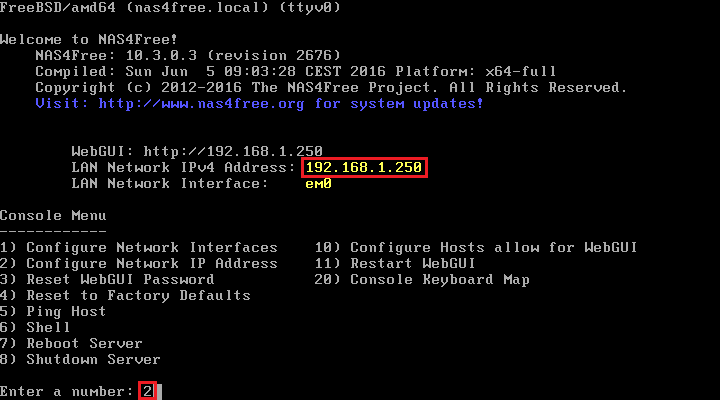
[@more@]2. 不使用 DHCP Server 取得 IP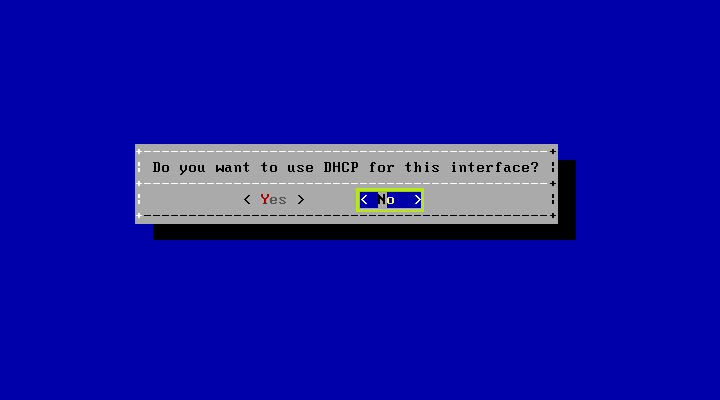
3. 設定要使用的 IP
4. 設定子網路遮罩 Subnet mask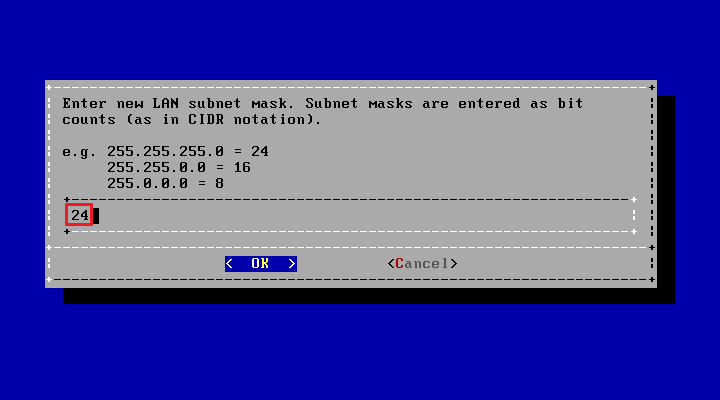
5. 設定 Gateway
6. 設定 DNS Server
7. 不設定 IPv6
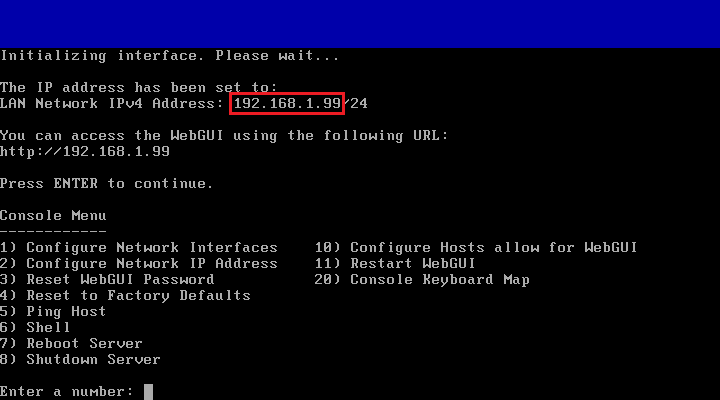
8. IP 已經改成 192.168.1.99
參考網頁:
Grive2 — YourcmcWiki
GitHub – vitalif/grive2: Google Drive client with support for new Drive REST API and partial sync
1.安裝所需套件
# apt-get install git cmake build-essential libgcrypt11-dev libyajl-dev libboost-all-dev libcurl4-openssl-dev libexpat1-dev libcppunit-dev binutils-dev pkg-config
2. 下載 grive Source Code
# git clone https://github.com/vitalif/grive2
Cloning into ‘grive2’…
remote: Counting objects: 3914, done.
remote: Total 3914 (delta 0), reused 0 (delta 0), pack-reused 3914
Receiving objects: 100% (3914/3914), 1.05 MiB | 364.00 KiB/s, done.
Resolving deltas: 100% (2565/2565), done.
Checking connectivity… done.[@more@]3. 進行編譯
# cd grive2
# mkdir build
# cd build
# cmake ..
— Found libgcrypt: -lgcrypt
— Boost version: 1.55.0
— Found the following Boost libraries:
— program_options
— filesystem
— unit_test_framework
— regex
— system
— Found libbfd: /usr/lib/libbfd.so
— Found CppUnit: /usr/lib/x86_64-linux-gnu/libcppunit.so
— Could NOT find ZLIB (missing: ZLIB_LIBRARY ZLIB_INCLUDE_DIR)
— Found PkgConfig: /usr/bin/pkg-config (found version “0.28”)
— checking for module ‘yajl’
— found yajl, version 2.1.0
— Building unitary tests along with the library and the binary
— Boost version: 1.55.0
— Found the following Boost libraries:
— program_options
— Configuring done
— Generating done
— Build files have been written to: /root/grive2/build
4. 進行安裝
# make -j4
# make install
Install the project…
— Install configuration: “”
— Installing: /usr/local/bin/grive
— Installing: /usr/local/share/man/man1/grive.1
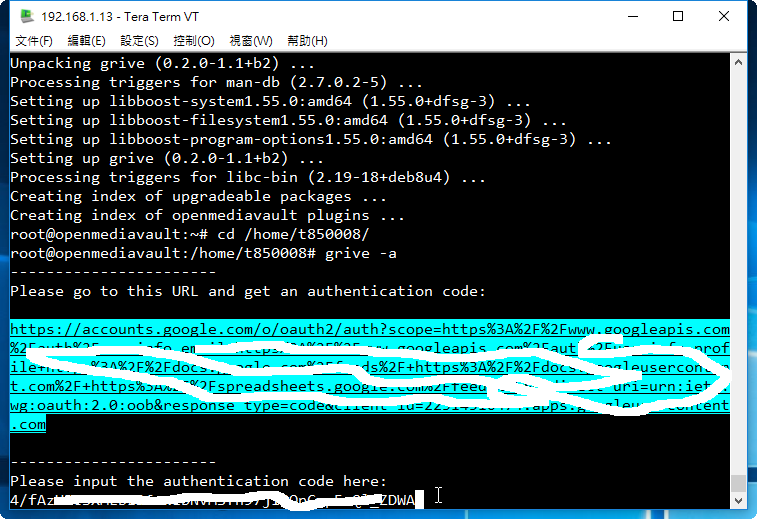
5. 取得 Google Drive 授權碼
# cd /home/t850008
# /usr/local/bin/grive -a
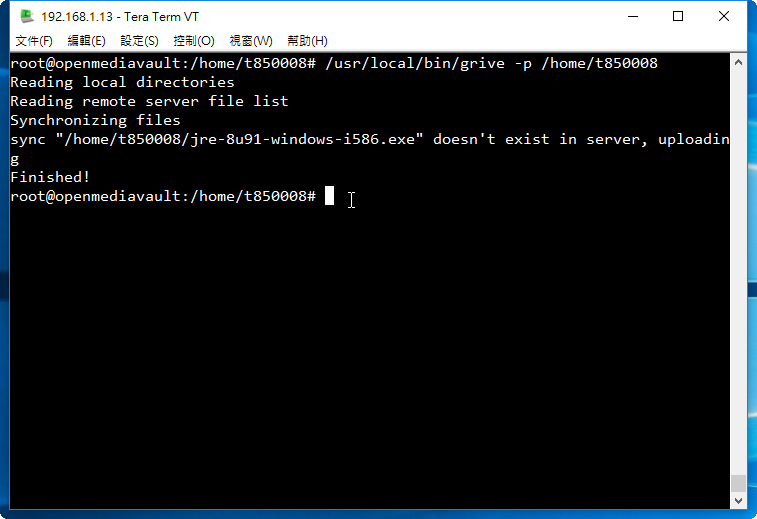
6. 進行同步
# /usr/local/bin/grive -p /home/t850008
7. 進行工作排程
# crontab -e
*/5 * * * * /usr/local/bin/grive -p /home/t850008 > /dev/null 2>&1
參考文件:在 Linux 中使用 Grive 指令工具同步 Google 雲端硬碟(Drive)上的檔案 – G. T. Wang
1. 安裝 grive
# apt-get update
# apt-get install grive
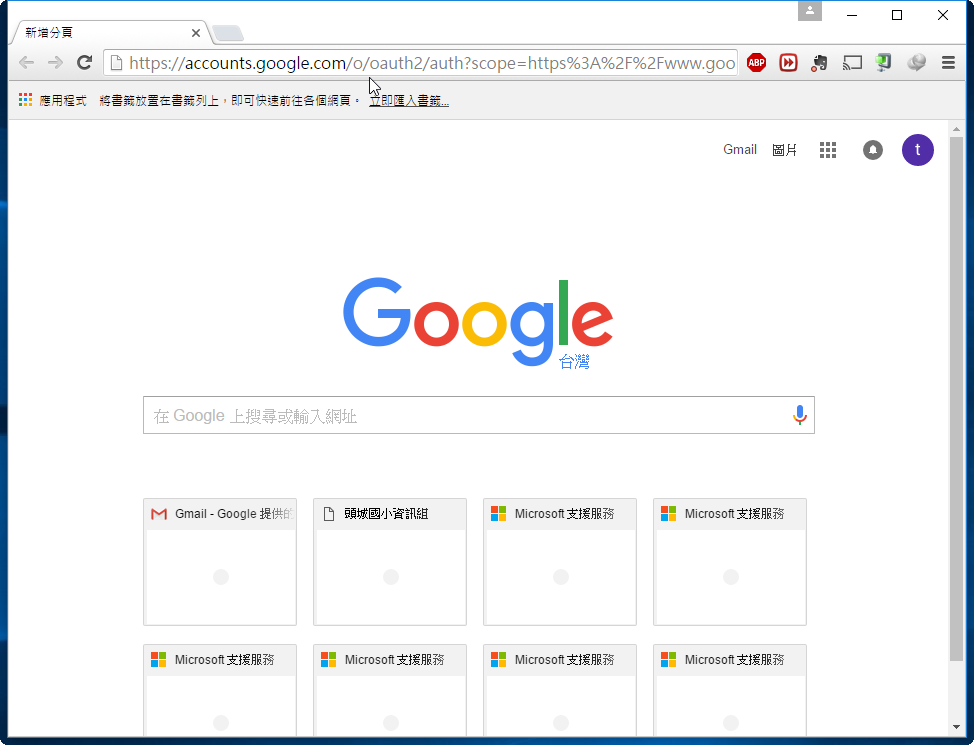
2. 先開啟瀏覽器登入到要同步的 Google Drive 帳號:
[@more@]3. 切換到要同步的目錄,並進行設定
# cd /home/t850008
# grive -a
4. 在下方產生網址

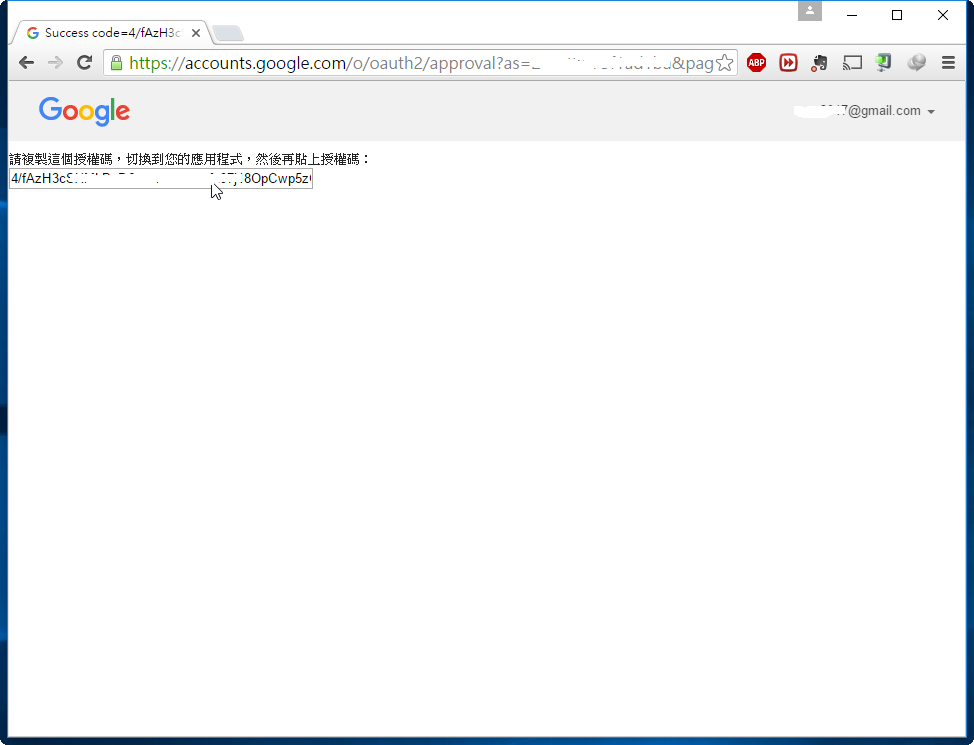
5. 將產生的網址,貼到瀏覽器網址列,按 Enter 鍵執行
6. 選擇 允許
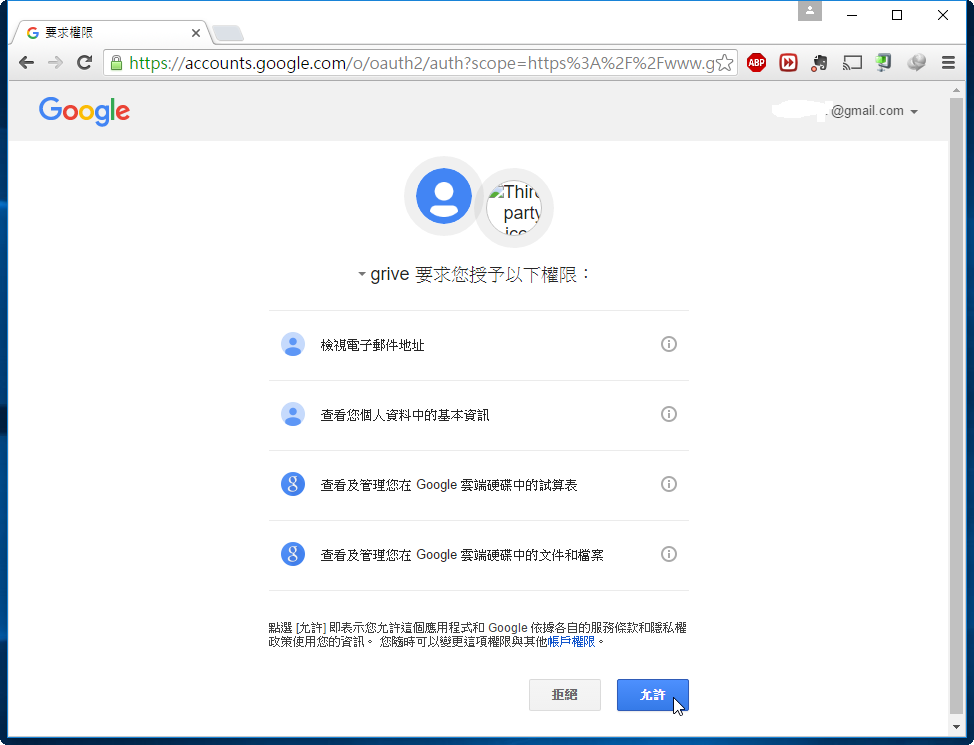
7. 將產生的 授權碼 複製起來
8. 將產生的 授權碼 貼在下方,按 Enter 鍵執行
9. 執行畫面
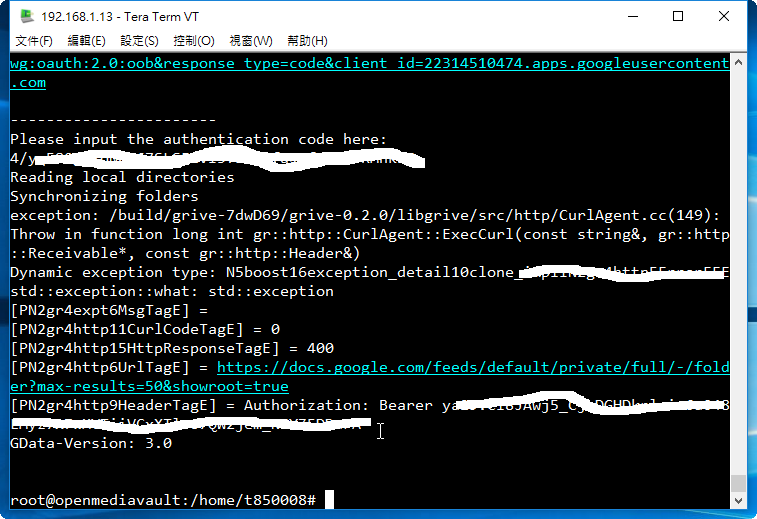
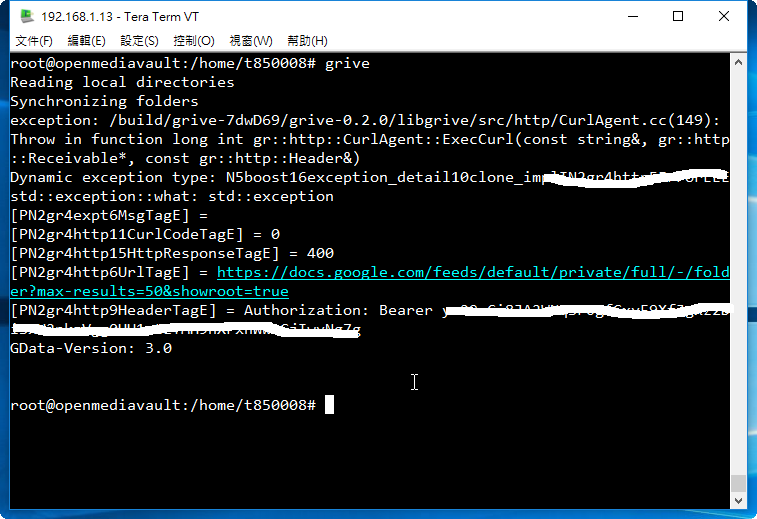
10. 執行 grive 進行同步,但無法同步
11. 移除 grive
# apt-get remove –purge grive
參考網頁:Change admin password in CLI – OpenMediaVault
1. 以 root 身份登入 SSH Server,並執行 omv-firstaid。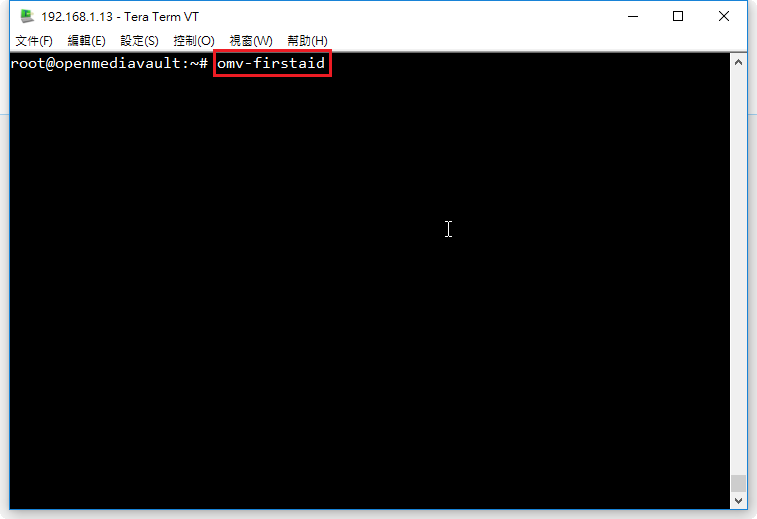 [@more@]2. 選擇 3. Change WebGUI administrator password
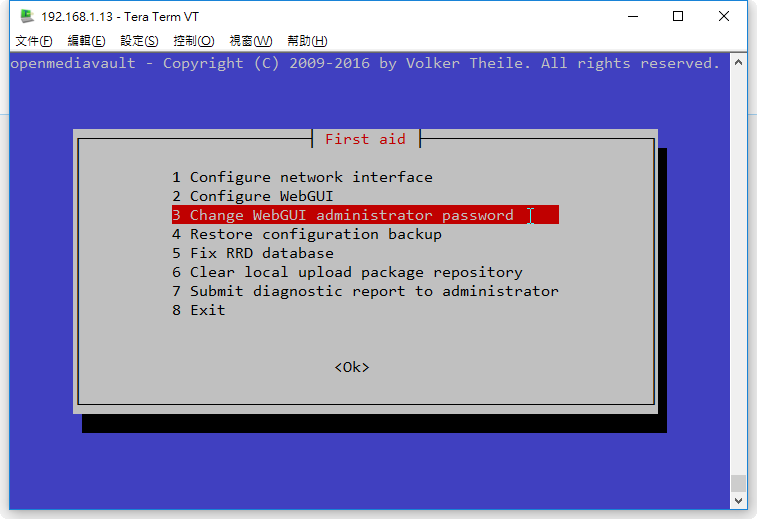
3. 輸入新的管理者密碼
4. 再次輸入管理者密碼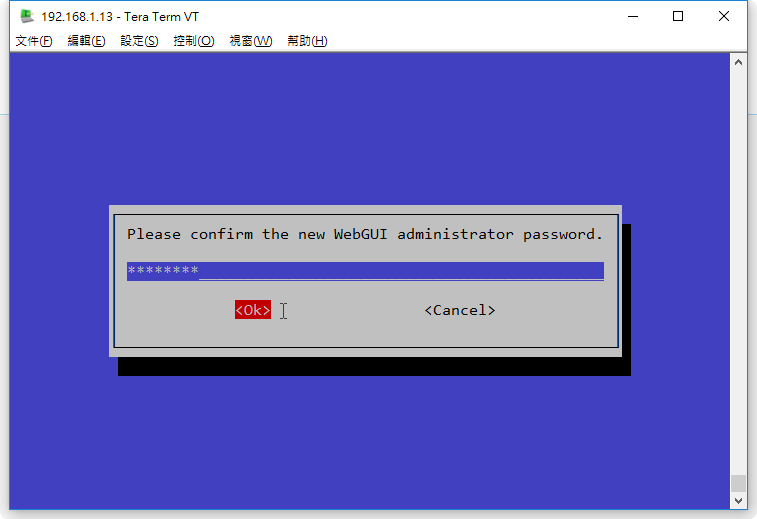
NAS4Free 下載網站:https://sourceforge.net/projects/nas4free/files/
1. 開機畫面 [@more@]2. 文字介面功能表
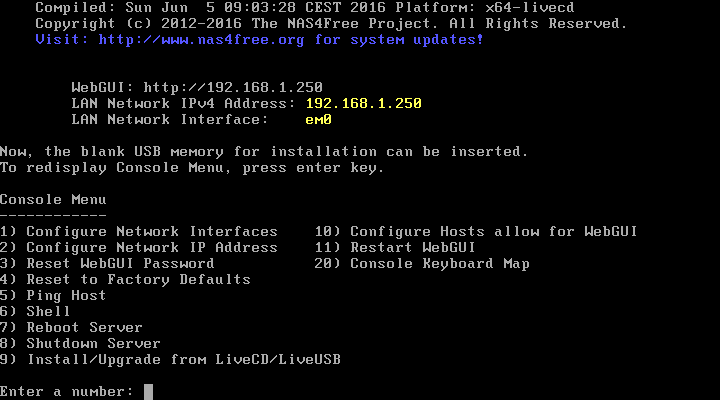
3. 選擇 9,Install/Upgrade from LiveCD/LiveUSB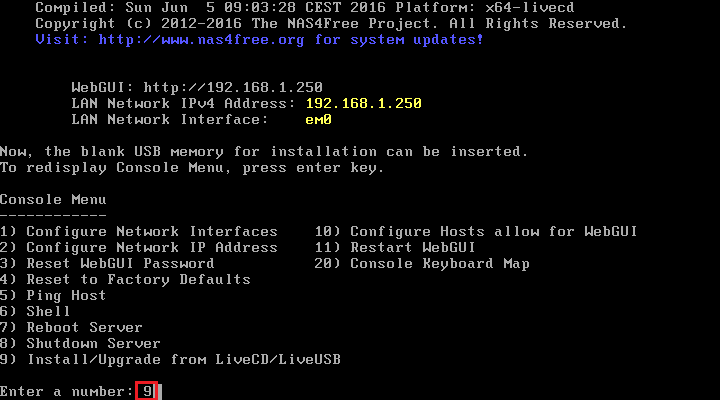
4. 視所需功能來選擇, Install ‘Full’ OS/MBR on HDD/SSD + DATA + SWAP
5. 硬碟分成三個部分 OS / SWAP / DATA
6. 光碟機 cd0
7. 硬碟 da0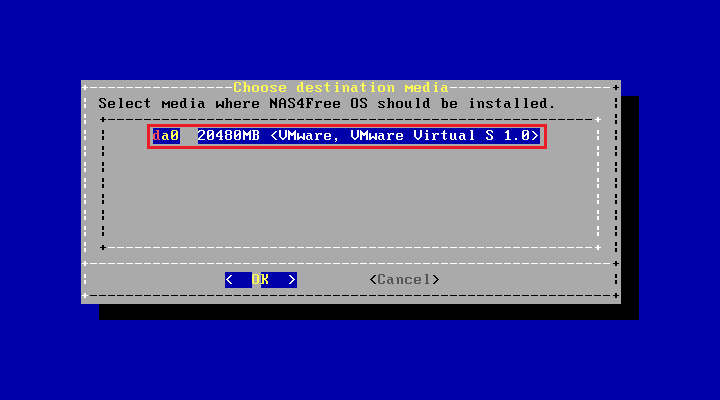
8. OS 分割區大小,這裡依預設值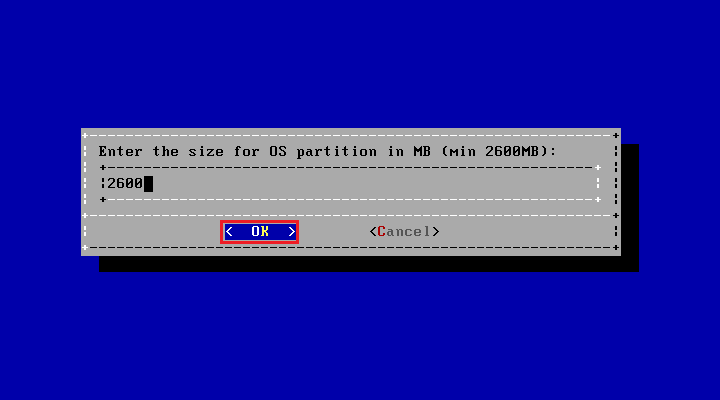
9. SWAP 分割區大小,這裡依預設值
10. 硬碟分割及安裝系統
11. 安裝完畢,按 Enter 鍵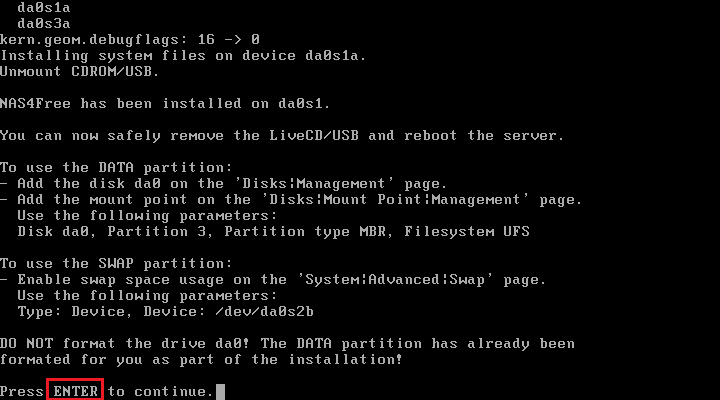
12. 選擇 7,Reboot Server
13. 選擇 Yes 重新開機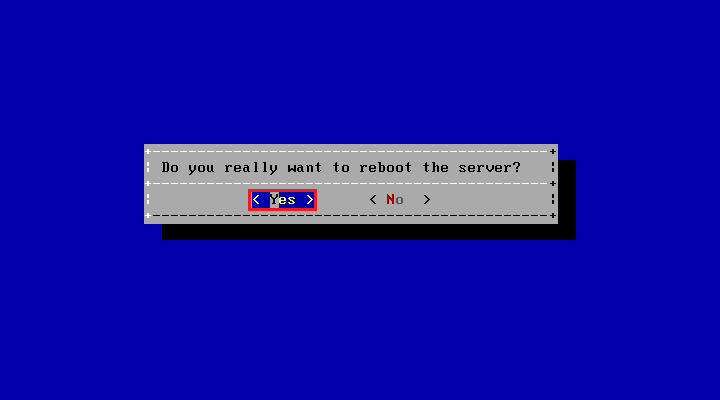
14. 預設帳號密碼 admin / nas4free
15. 英文管理介面
16. 選擇 System / General 
17. 將語言由 English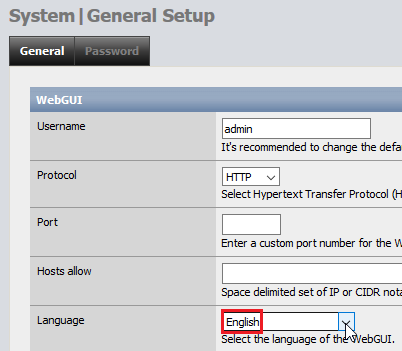
18. 改成 Chinese(Traditional) 將時區改成 Asia/Taipei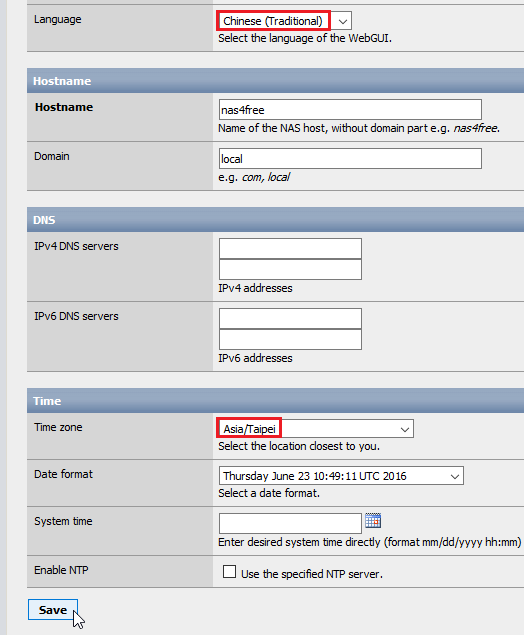
19. 管理介面已經改成正體中文
20.
OpenMediaVault 下載網頁:https://sourceforge.net/projects/openmediavault/files/
1. 光碟開機畫面,請選擇 Install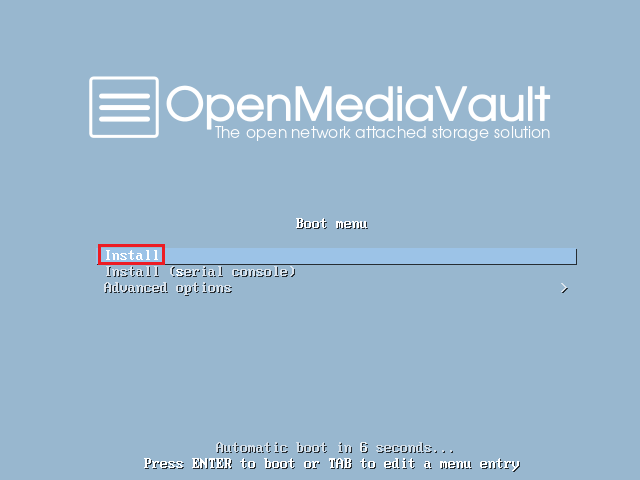 [@more@]2. 安裝時使用的語言
3. 選擇 Other
4. 設定亞洲 Asia
5. 設定國家 Taiwan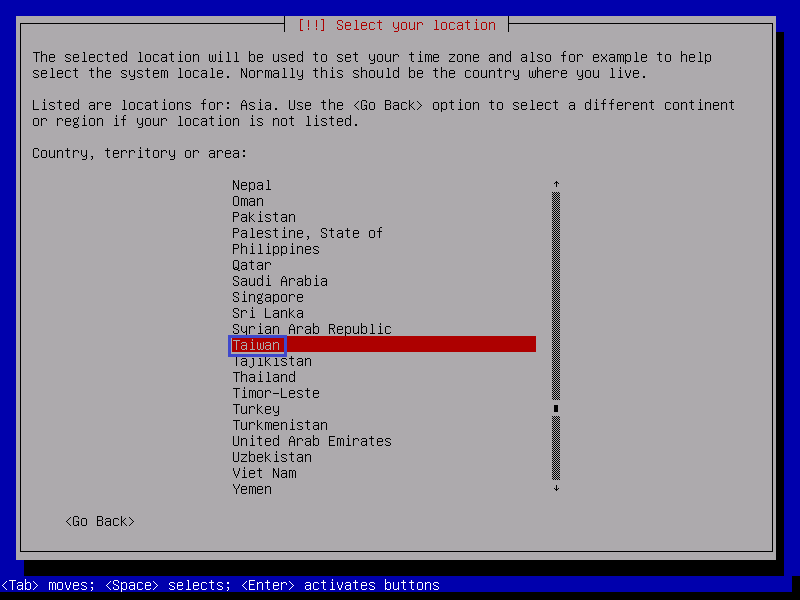
6. 設定 default locale
7. 設定鍵盤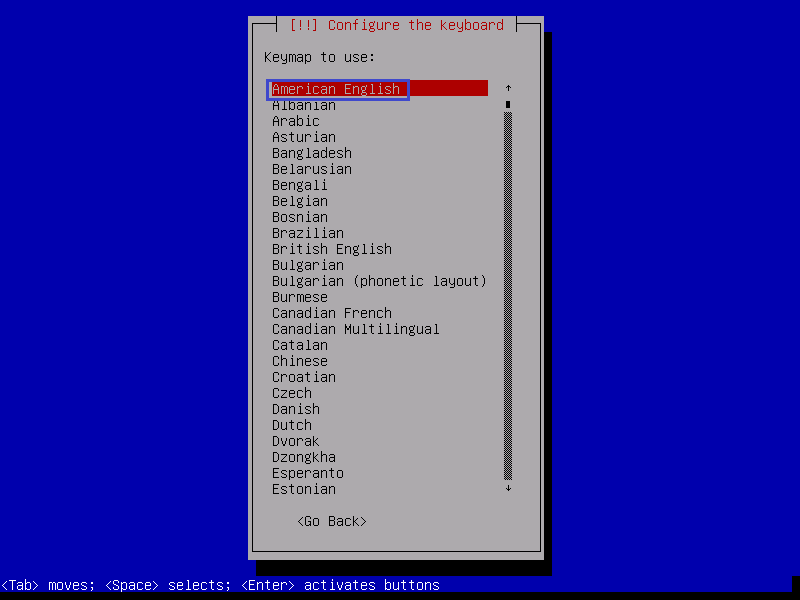
8. 設定 Host name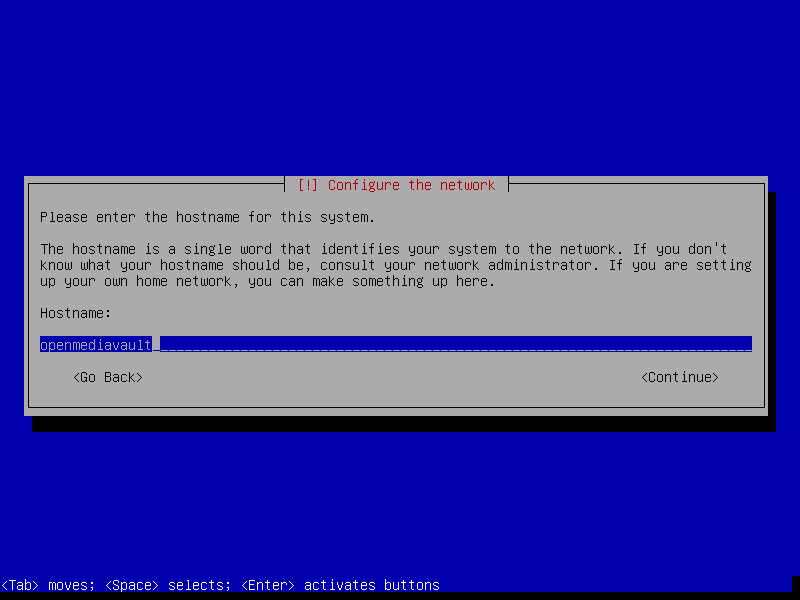
9. 設定 Domain name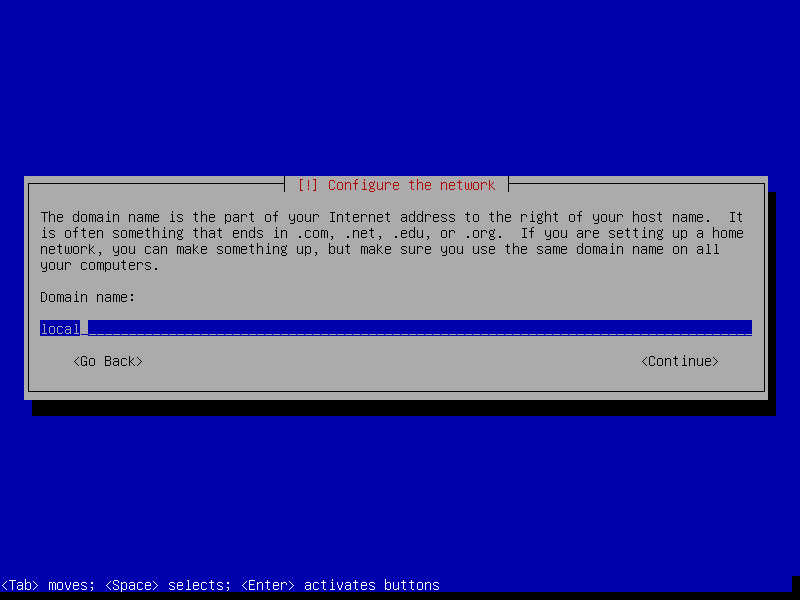
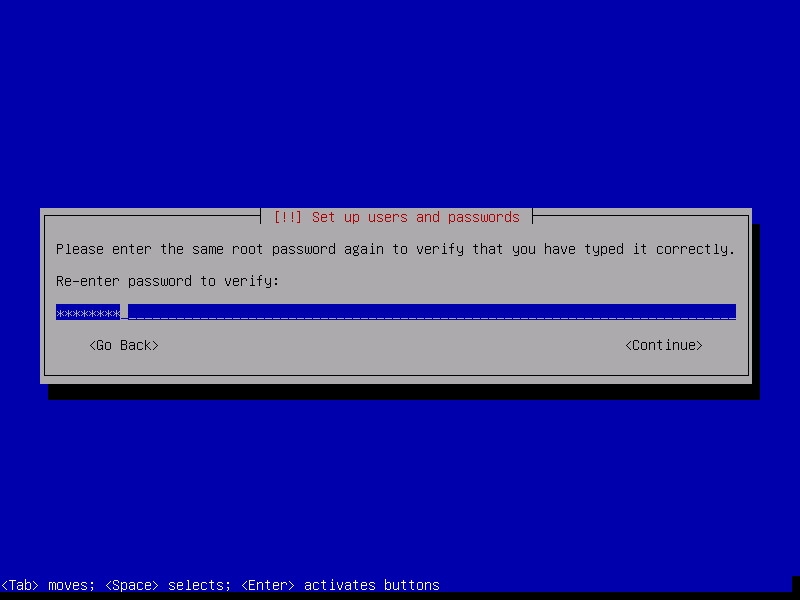
10. 設定 root 管理者密碼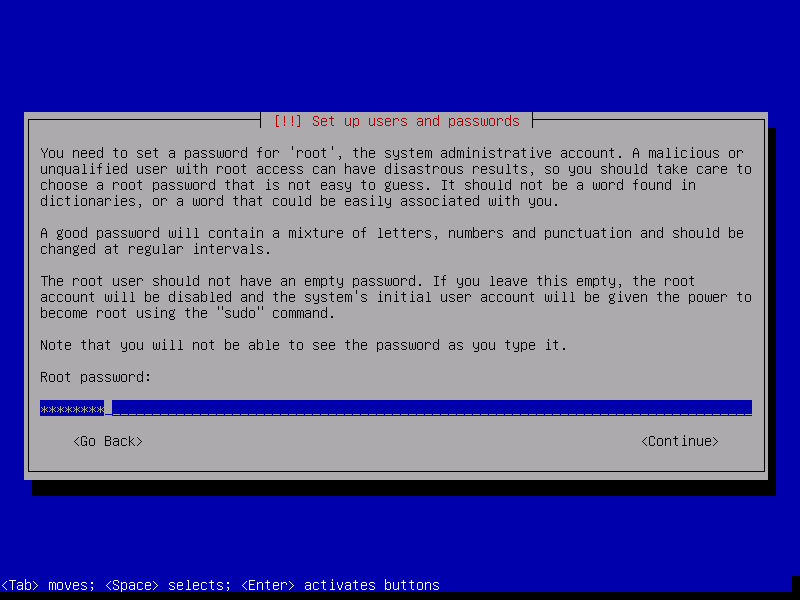
11. 複製系統到硬碟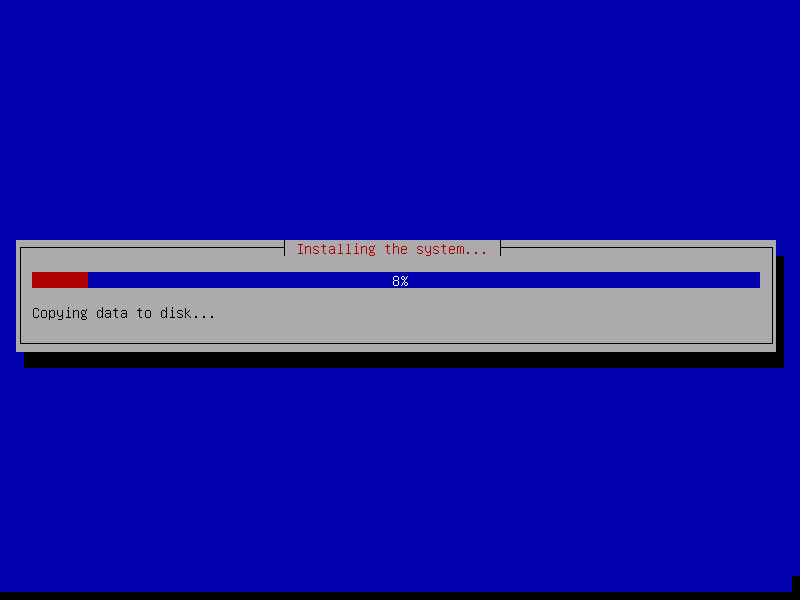
12. 設定套件更新站台所在國家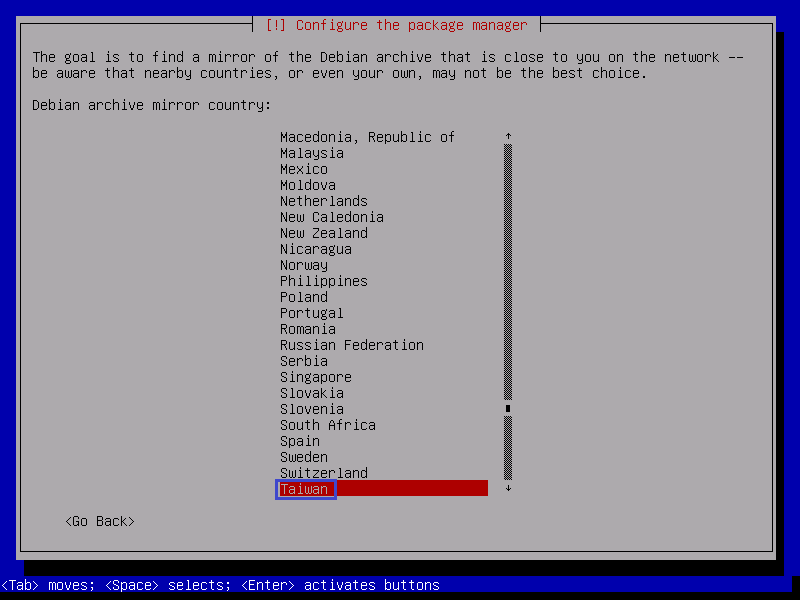
13. 設定套件更新站台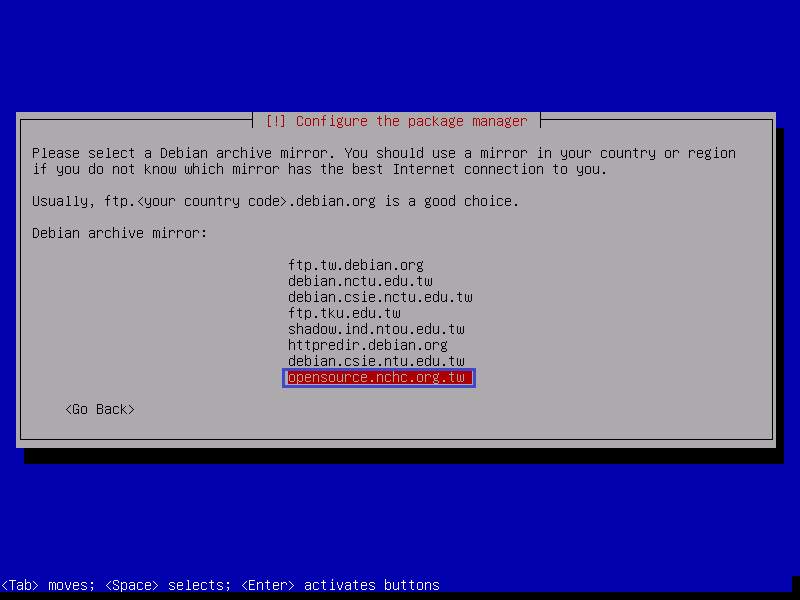
14. 設定是否使用 Proxy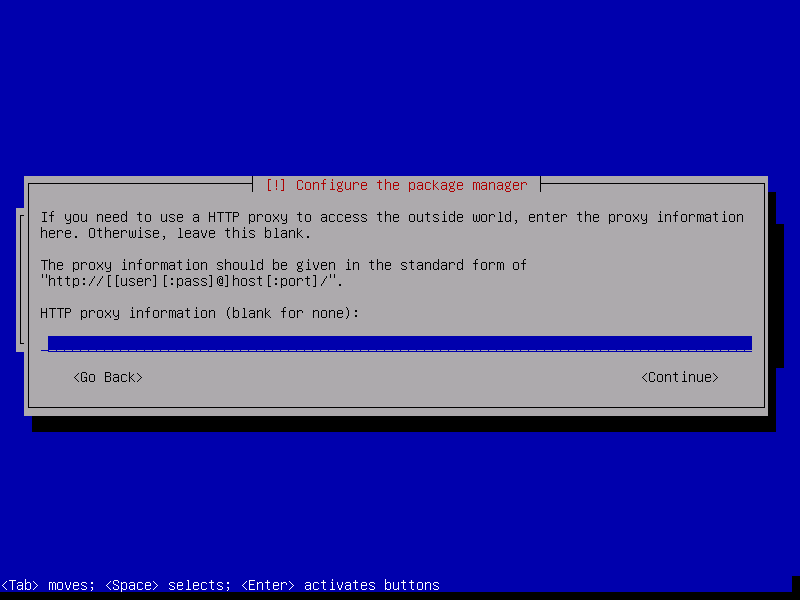
15. 設定 apt
16. 安裝 GRUB
17. 設定系統環境
18. 安裝完成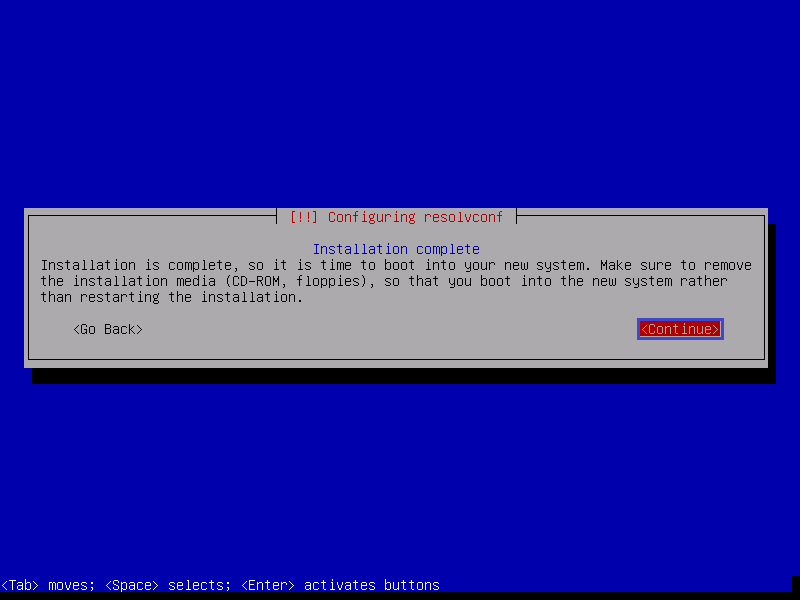
19. 系統的 IP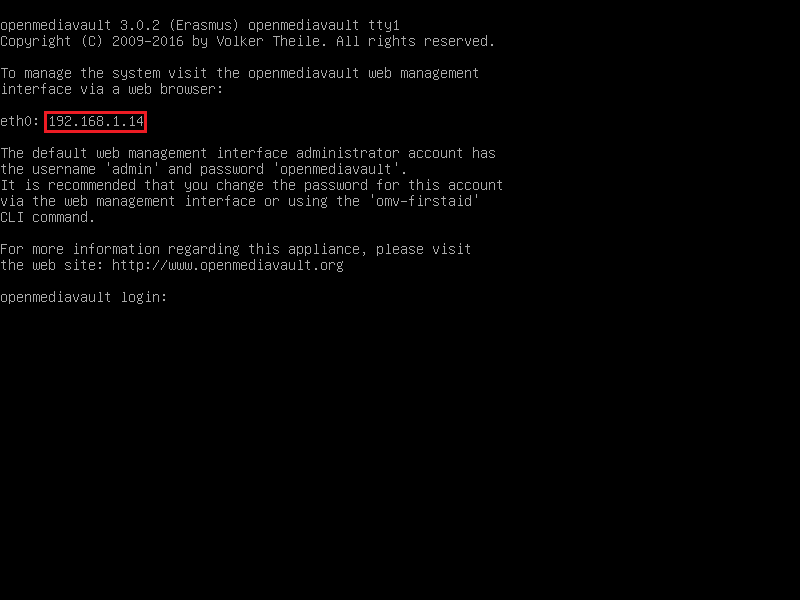
20. 預設登入的帳號及密碼:admin / openmediavault
21. 中文化的管理介面
22.
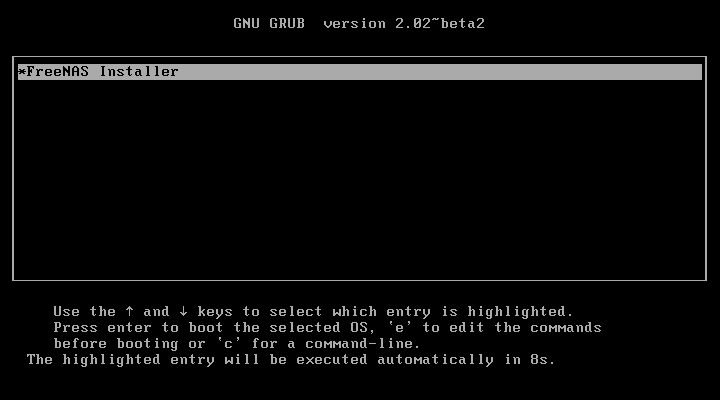
FreeNAS 下載網站:http://www.freenas.org/download/
1. 光碟開機畫面
[@more@]2. 選擇 Install/Upgrade
3. 選擇安裝的硬碟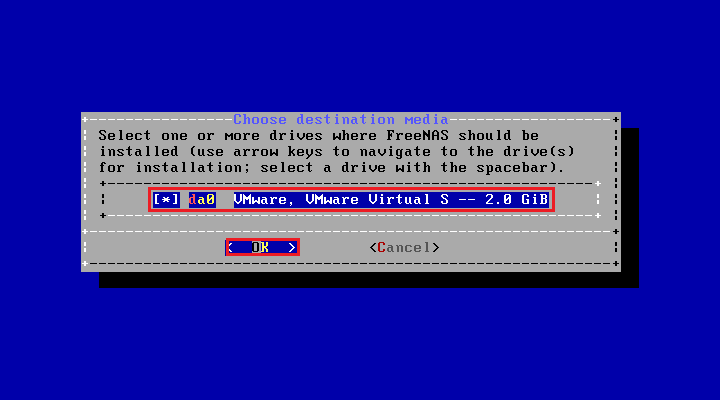
4. 硬碟資料將會被清除警告
5. 設定管理者密碼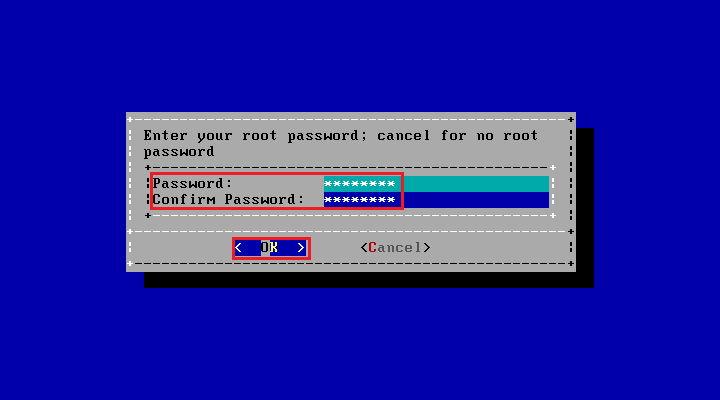
6. 硬碟分割及複製系統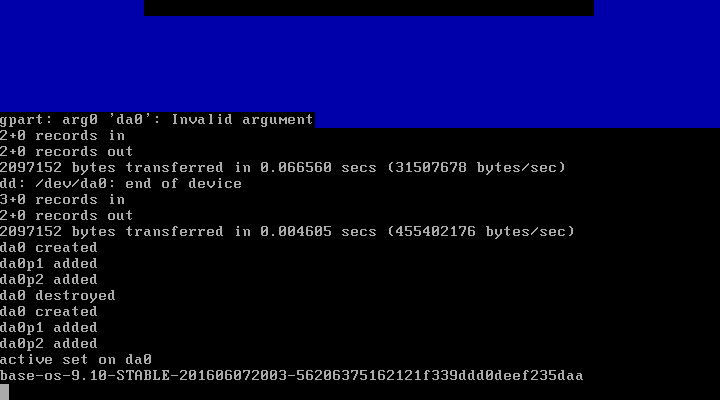
7. 系統安裝完畢
8. 選擇 Reboot System
9. 系統 IP
10. 系統登入畫面 root / 設定的管理者密碼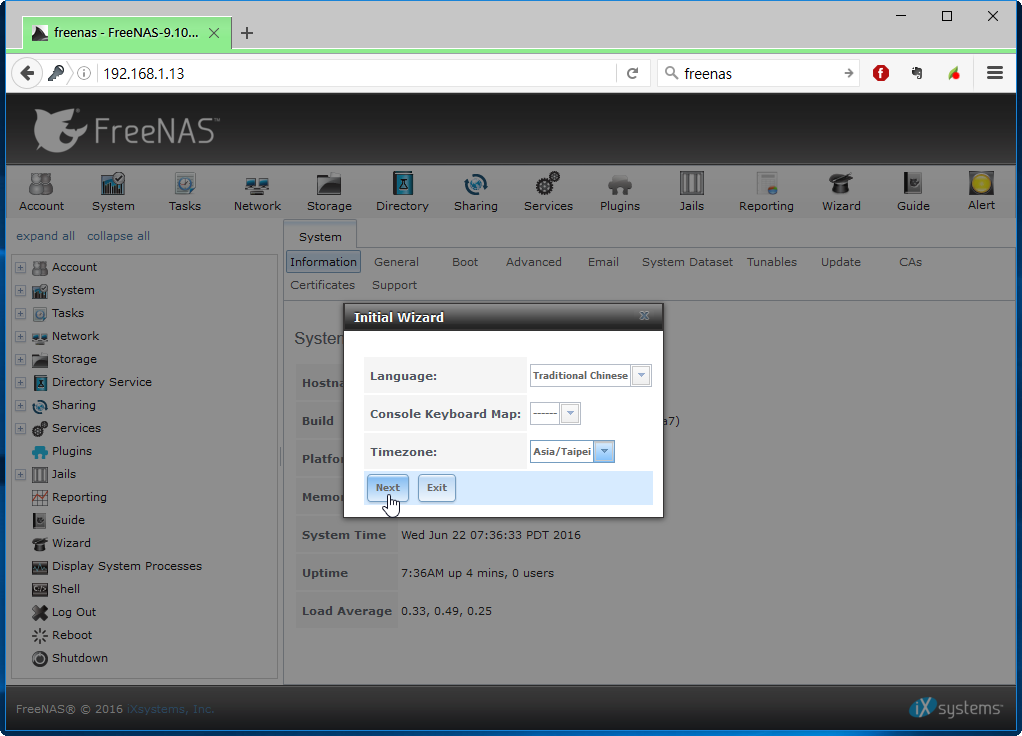
11. 管理畫面
因為家裡用的 Synology DS411j 已經用一段時間,空間也快要爆滿,加上速度也有些緩慢,所以想要換一台新的 NAS Server。但是在網路上搜尋了一下,發現現在的 NAS Server 其實系統都很弱,記憶體也很小,隨便拿一台四、五年前的電腦,都比這些 NAS Server 都還要強,NAS Server 可能比較強的地方就是比較省電,和系統可能有經過廠商的整合,對於一般使用者來說,可能比較容易上手。但對我來說,除了比較省電之外,整合過的系統未必符合自己的需要。所以想要用自己目前已經很少用的電腦來測試一下,再做打算。[@more@]目前在網路上找到的系統共有三套:FreeNAS / OpenMediaVault / NAS4Free…,關於這些過往可以參考:利用 FreeNAS 打造儲存設備(1)-歷史篇
1. FreeNAS:base on FreeBSD
官方網站:http://www.freenas.org/
FreeNAS 教學網站:
利用 FreeNAS 打造儲存設備
舊PC搭配免費的FreeNAS也能搖身一變為NAS主機(上)
舊PC搭配免費的FreeNAS也能搖身一變為NAS主機(下)
2. OpenMediaVault:base on Debian
官方網站:http://www.openmediavault.org/
OpenMediaVault 教學網站:
免費打造NAS儲存環境 實戰建置OpenMediaVault – 專題報導 – 網管人NetAdmin
3. NAS4Free:base on FreeBSD
官方網站:http://www.nas4free.org/
NAS4Free 教學網站:
老 PC 也有春天 之 我要變 NAS – NAS4Free 安裝篇 ~ IT 技術家
NAS4free安裝與使用
鳥毅的Blog: FreeNAS vs NAS4Free
除了 NAS4Free 未實際安裝外,安裝了 FreeNAS 和 OpenMediaVault 這二套系統來做測試,這二套都有正體中文的介面
FreeNAS Web GUI
OpenMediaVault Web GUI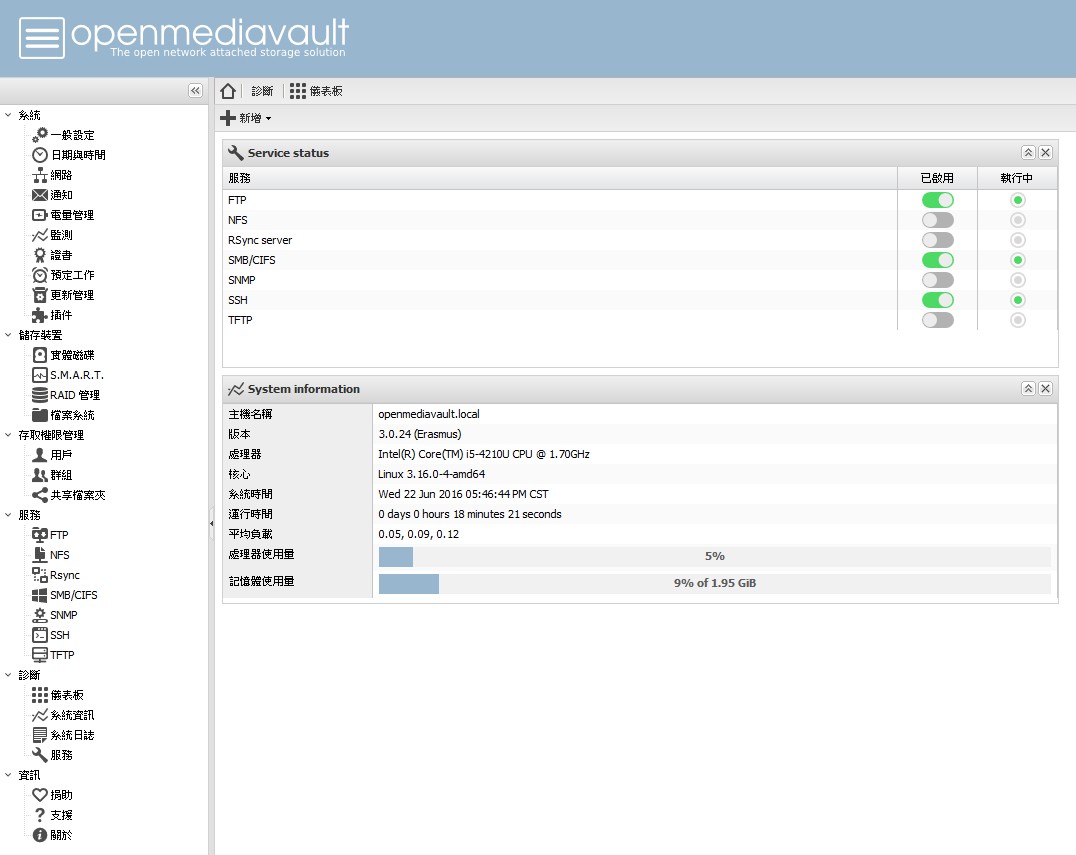
但因為 FreeNAS 是採用 FreeBSD,而 OpenMediaVault 是採用 Debain 8 Jessie,因為個人對 FreeBSD 涉獵研究已經是很多年前的事了,所以比較沒那麼的熟悉,但 Debain Linux 則是相對很熟悉,幾乎每天都會用到,所以就決定採用 OpenMediaVault 了,也因為 Debian Linux 可以客製化自己的系統,在功能 / 效能 / 系統安全上達到一定的平衡。