解決 CentOS 7.x arm Cubie Truck 啟用 autofs 服務時出現的錯誤訊息

在 Cubie Truck CentOS 7.x arm 啟用 autofs 服務時出現下面的錯誤訊息:
# grep auto /var/log/messages
automount[9370]: lookup_read_master: lookup(nisplus): couldn’t locate nis+ table auto.master

檢查 autofs 執行狀態
# systemctl status autofs
● autofs.service – Automounts filesystems on demand
   Loaded: loaded (/usr/lib/systemd/system/autofs.service; enabled; vendor preset: disabled)
   Active: active (running) since Fri 2016-01-08 17:25:19 CST; 6s ago
  Process: 9662 ExecStart=/usr/sbin/automount $OPTIONS –pid-file /run/autofs.pid (code=exited, status=0/SUCCESS)
 Main PID: 9664 (automount)
   CGroup: /system.slice/autofs.service
           mq9664 /usr/sbin/automount –pid-file /run/autofs.pid

Jan 08 17:25:19 bk systemd[1]: Starting Automounts filesystems on demand…
Jan 08 17:25:19 bk automount[9664]: lookup_read_master: lookup(nisplus): couldn’t locate nis+ table auto.master
Jan 08 17:25:19 bk systemd[1]: Started Automounts filesystems on demand.[@more@]解決方式:
參考文章:Linux : automount: lookup_read_master: couldn’t locate nis+ table auto.master | ITechLounge.net

1. 備份原檔
# cp /etc/auto.master /etc/auto.master.$(date +%F)

2. 將 /etc/auto.master 中的 +auto.master 前面的 + 移除
# sed -i ‘s/+auto.master/auto.master/’ /etc/auto.master

3. 重新啟動 autofs 服務
# systemctl restart autofs

修正 Cacti Monitor Module 無法顯示正確的偵測失敗時間

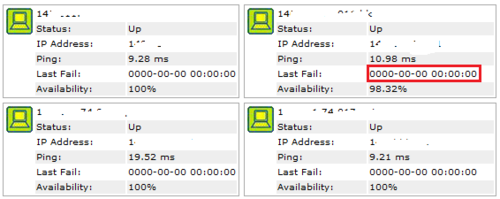
安裝完 Cacti 的 Monitor Module 後發現無法顯示正確的偵測失敗時間

顯示的日期及時間都是 0000-00-00 00:00:00[@more@]底下文章參考:Cacti • View topic – [SOLVED] Monitor v1.3-1 plugin – last fail not working

OS:Debian 8

1. 先找到 functions.php
# locate functions.php
/usr/share/cacti/site/lib/functions.php

CentOS
/usr/share/cacti/lib/functions.php

2. 先備份原檔
# cp /usr/share/cacti/site/lib/functions.php /usr/share/cacti/site/lib/functions.php.$(date +%F)

3. 進行修改
# vim /usr/share/cacti/site/lib/functions.php

$hosts[$host_id][“status_fail_date”] = ‘0000-00-00 00:00:00’;
$hosts[$host_id][“status_rec_date”] = ‘0000-00-00 00:00:00’;
修改成
if ($hosts[$host_id][“status_fail_date”] == “”){
$hosts[$host_id][“status_fail_date”] = ‘0000-00-00 00:00:00’;}
if ($hosts[$host_id][“status_rec_date”] == “”){
$hosts[$host_id][“status_rec_date”] = ‘0000-00-00 00:00:00’;}

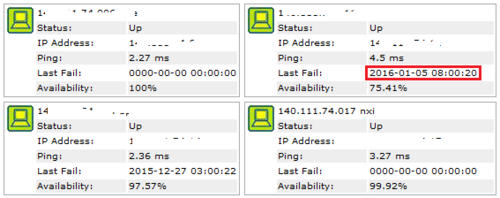
之後就可以正常顯示了!

IPv4 及 IPv6 的連線順序 – Windows 篇

Windows 平台也有這樣的問題,尤其是在連政府單位網頁時,常常有學校的行政人員向我反應連線速度非常緩慢,之前我的直覺就是,這應該是 IPv6 的問題,所以解決的方式有二個,一個是把 Windows 的 IPv6 關閉,另一個則是先用 nslookup 查出網站的 IP,然後再以 IP 連線。
關閉 IPv6

先查詢 IP

[@more@]解決方式:參考 使用 IPv6 DualStack 連線速度變慢 @ 黃昏的甘蔗 :: 隨意窩 Xuite日誌

1. 以系統管理者身份執行 命令提示字元,查詢連線順序
    netsh interface ipv6 show prefixpolicies
    IPv4 ::ffff:0:0/96 的順序是 35

這時候系統是以 IPv6 為優先,以 ping www.ilc.edu.tw 為例

2. 修改順序,讓 IPv4 優先,數字越大,優先性愈高
    netsh interface ipv6 set prefixpolicy ::ffff:0:0/96 60 4

這時候再 ping www.ilc.edu.tw 就是以 IPv4 為優先

改回來
netsh interface ipv6 set prefixpolicy ::ffff:0:0/96 35 4

IPv4 及 IPv6 的連線順序 – Linux 篇

因為上級的要求,所以學校的電腦絕大部都會設定有 IPv6,尤其是 Server 的部分。但這造成一個問題,就是電腦在網路連線時,常常會以 IPv6 為優先連線,如果對方有提供 IPv6 的相關資訊。
如:Debain / Ubuntu 更新時的 free.nchc.org.tw
# host free.nchc.org.tw
free.nchc.org.tw has address 211.73.64.9
free.nchc.org.tw has IPv6 address 2001:e10:3c00:8::e274

所以在做 apt-get update 連線時,會先以 IPv6 連線,等到 IPv6 無法連線時,再改以 IPv4 連線,但這一個過程中,已耗費了一些時間。
# apt-get update
0% [Connecting to free.nchc.org.tw (2001:e10:3c00:8::e274)]

….
Ign http://free.nchc.org.tw trusty/multiverse Translation-en_US
Ign http://free.nchc.org.tw trusty/restricted Translation-en_US
Ign http://free.nchc.org.tw trusty/universe Translation-en_US
Reading package lists… Done[@more@]解決方式:參考 使用 IPv6 DualStack 連線速度變慢 @ 黃昏的甘蔗 :: 隨意窩 Xuite日誌
在 Linux 中,以 Ubuntu 14.04.1 Server 為例
1. 備份設定檔 /etc/gai.conf
# cp /etc/gai.conf /etc/gai.conf.$(date +%F)

2. 修改 /etc/gai.conf
# vim /etc/gai.conf
加入下面的設定
label ::1/128       0
label ::/0          1
label 2002::/16     2
label ::/96         3
label ::ffff:0:0/96 4
precedence  ::ffff:0:0/96       60
precedence  ::1/128       50
precedence  ::/0          40
precedence  2002::/16     30
precedence ::/96          20

3. 進行測試,系統就會直接以 IPv4 連線,速度就會就多了!
# apt-get update
Ign http://free.nchc.org.tw trusty InRelease
Hit http://free.nchc.org.tw trusty-updates InRelease
Hit http://free.nchc.org.tw trusty-backports InRelease
Hit http://free.nchc.org.tw trusty-security InRelease
Hit http://free.nchc.org.tw trusty Release.gpg

客製化 CentOS 7.2-1511 x86 Server 安裝光碟

順手完成 CentOS 7.2-1511 x86 Server 安裝光碟
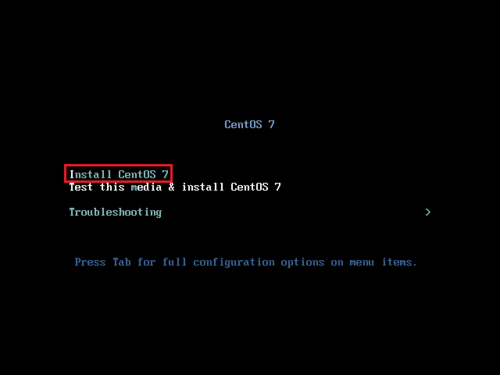
取消時間倒數,預設為 Install CentOS 7

預設只要三個步驟:分割硬碟、設定網路、設定 root 密碼。
客製化內容:
1. 預設安裝 Apache Web Server / PHP / MariaDB SQL Server,並啟動 Apache Web Server 及 MariaDB SQL Server
2. 新增一些 Apache Web Server 的安全性設定
3. MariaDB MySQL Server 修改成 UTF-8 的使用環境
4. 修改 php 設定,包含:上傳的檔案大小到 200M,時區改成 Asis/Taipei……等等。
5. 套件更新到 2016_01_01
6. 每天早上 6 點對時

crontab 工作排程的寫法

普通的用法
分 時 日 月 星期幾 命令
如:
# 每天早上 03:30 備份資料到 NAS
30 3 * * * /usr/local/bin/backuptonas > /dev/null 2>&1
# 每 5 分鐘檢查一次 Squid Proxy Server 的狀態
*/5 * * * * /usr/local/bin/check_squid > /dev/null 2>&1

另外一些比較特別的用法,參考:實用 crontab 寫法 | Linux 技術手札
@reboot: 在每次開機時執行。
@yearly: 等同 0 0 1 1 * 寫法,即每年一月一日零時零分。
@annually: 與 @yearly 相同。
@monthly: 在每月一號零時零分執行。
@weekly: 在星期天零時零分執行。 Run once a week, “0 0 * * 0″.
@daily: 每天零時零分。
@midnight: 與 @daily 相同。
@hourly: 每小時零分執行。

在 Cubie Truck 上安裝 CentOS 7.2.1511 arm 版

本文章參考:Raspberry Pi 的基礎 – 安裝 CentOS 7 for ARM ~ IT 技術家
沒有使用原本 Cubie Truck 內建的 Nand 記憶體,改用 T-Flash 記憶卡。
登入帳號及密碼:root / centos

1. 登入之後,先修改密碼
# passwd
Changing password for user root.
New password:
Retype new password:
passwd: all authentication tokens updated successfully.[@more@]

2. 查看內附的說明檔
# cat ~/README
== CentOS 7 userland ==

If you want to automatically resize your / partition, just type the following (as root user):
touch /.rootfs-repartition
systemctl reboot

3. 擴展 root 分割區
# touch /.rootfs-repartition

4. 重新啟動電腦
# systemctl reboot

原本的 T-Flash 記憶卡分割
# df -h
Filesystem      Size  Used Avail Use% Mounted on
devtmpfs        980M     0  980M   0% /dev
tmpfs          1005M     0 1005M   0% /dev/shm
tmpfs          1005M   17M  989M   2% /run
tmpfs          1005M     0 1005M   0% /sys/fs/cgroup
/dev/mmcblk0p3  2.0G  746M  1.1G  41% /
/dev/mmcblk0p1  283M  134M  134M  51% /boot
tmpfs           201M     0  201M   0% /run/user/0

擴展之後
# df -h
Filesystem      Size  Used Avail Use% Mounted on
devtmpfs        982M     0  982M   0% /dev
tmpfs          1007M     0 1007M   0% /dev/shm
tmpfs          1007M   17M  991M   2% /run
tmpfs          1007M     0 1007M   0% /sys/fs/cgroup
/dev/mmcblk0p3  6.3G  747M  5.3G  13% /
/dev/mmcblk0p1  283M  134M  134M  51% /boot
tmpfs           202M     0  202M   0% /run/user/0

5. 更新套件
# yum -y update

6. 安裝一些常用但缺少的套件
# yum install vim mlocate which bind-utils ntpdate

7. 設定時區及對時
原本的時區
# date
Thu Jan  1 08:23:09 CST 1970

把時區改成 Asia/Taipei
# /usr/bin/timedatectl set-timezone Asia/Taipei

更改之後
# date
Fri Jan  1 20:10:36 CST 2016

對時
# /usr/sbin/ntpdate -s time.stdtime.gov.tw
# /usr/sbin/hwclock -w

加入工作排程
# echo “0 6 * * * /usr/sbin/ntpdate -s time.stdtime.gov.tw > /dev/null 2>&1;/usr/sbin/hwclock -w > /dev/null 2>&1” >> /var/spool/cron/root

8. 設定語系
# /usr/bin/localectl set-locale LANG=en_US.utf8
檢查設定
# /usr/bin/localectl status
   System Locale: LANG=en_US.utf8
       VC Keymap: n/a
      X11 Layout: n/a