Adobe PDF Reader XI 11.0.11 修正檔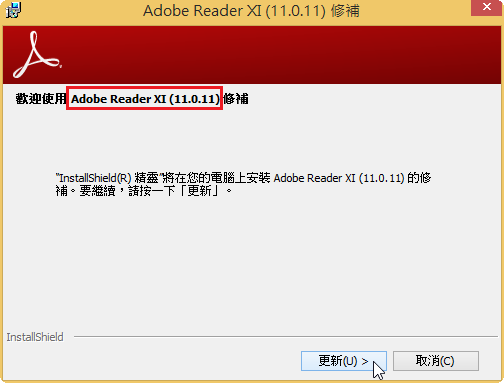 [@more@]下載路徑:
Windows 版本
ftp://ftp.adobe.com/pub/adobe/reader/win/11.x/11.0.11/misc/
執行 AdbeRdrUpd11011.msp 即可
更新完成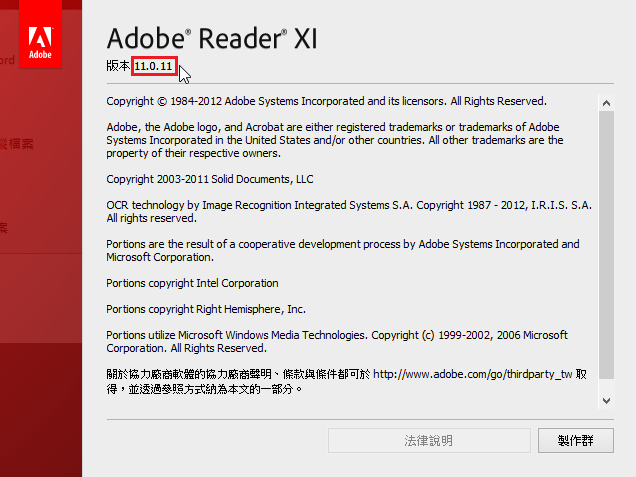
Mac 版本:
ftp://ftp.adobe.com/pub/adobe/reader/mac/11.x/11.0.11/misc/

全新的繁體中文 WordPress 網站《宜蘭部落格教育平台 網站》
Adobe PDF Reader XI 11.0.11 修正檔[@more@]下載路徑:
Windows 版本
ftp://ftp.adobe.com/pub/adobe/reader/win/11.x/11.0.11/misc/
執行 AdbeRdrUpd11011.msp 即可
更新完成
Mac 版本:
ftp://ftp.adobe.com/pub/adobe/reader/mac/11.x/11.0.11/misc/
Adobe Flash Player 17.0.0.188
檢查安裝版本:https://www.adobe.com/tw/software/flash/about/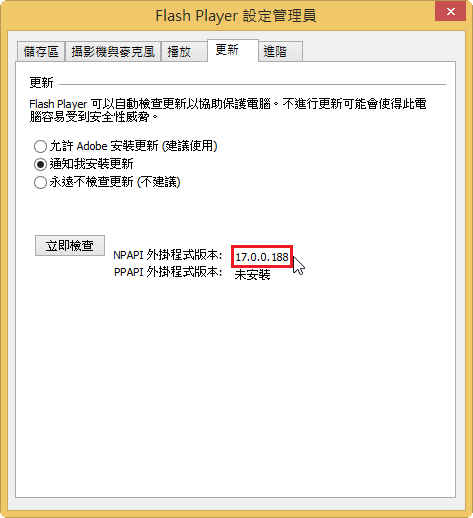 [@more@]Windows 平台
Internet Explorer:
http://fpdownload.macromedia.com/get/flashplayer/current/licensing/win/install_flash_player_17_active_x.exe
Windows 8.1
https://www.microsoft.com/zh-TW/download/details.aspx?id=47146
https://www.microsoft.com/zh-TW/download/details.aspx?id=47069
All Other Browsers(Firefox,Safari & Opera):
http://fpdownload.macromedia.com/get/flashplayer/current/licensing/win/install_flash_player_17_plugin.exe
Mac 平台
http://fpdownload.adobe.com/get/flashplayer/pdc/17.0.0.188/install_flash_player_osx.dmg
Scratch 2.0 Offline Editor v435.2 
下載網址:https://scratch.mit.edu/scratch2download/
Windows 版本
Mac 版本
Linux 版本
Ubuntu 14.04.2 Desktop i386 光碟要處理的部分就會比較多一些。
1. 切換成 root
$ sudo su –
2. 安裝 squashfs-tools 套件
# apt-get install squashfs-tools
3. 建立 Trusty 目錄
# mkdir Trusty
4. 掛載 iso 光碟
# mount -o loop ubuntu-14.04.2-desktop-i386.iso Trusty
5. 複製 Trusty 目錄成 iso.Trusty 以進行修改作業
# cp -af Trusty iso.Trusty[@more@]
6. 搬移 iso.Trusty/casper/filesystem.squashfs 到現在的目錄之下
# mv iso.Trusty/casper/filesystem.squashfs .
7. 解開 filesystem.squashfs
# unsquashfs -d os.Trusty filesystem.squashfs
8. 複製原本系統使用的 /etc/apt/sources.list
# cp /etc/apt/sources.list /root/os.Trusty/etc/apt
9. chroot 到 os.Trusty 目錄之下,前置字元改成 /# 代表在 chroot 之下
# chroot ./os.Trusty
10. 掛載目錄
/# mount -t proc none /proc
/# mount -t sysfs none /sys
/# mount -t devpts none /dev/pts
11. 增加 DNS Server 設定
/# echo “nameserver 168.95.1.1” > /etc/resolv.conf
11. 修改套件庫來源及更新套件庫
/# cd /etc/apt
/# sed -ri ‘s/tw.archive.ubuntu.com/free.nchc.org.tw/g’ sources.list
/# sed -ri ‘s/archive.ubuntu.com/free.nchc.org.tw/g’ sources.list
/# sed -ri ‘s/security.ubuntu.com/free.nchc.org.tw/g’ sources.list
/# apt-get update
13. 處理中文環境
/# sed -i ‘$azh_TW.UTF-8 UTF-8’ /var/lib/locales/supported.d/zh-hant
/# locale-gen zh_TW.UTF-8
/# update-locale LANG=zh_TW.UTF-8
/# update-locale LANGUAGE=zh_TW.UTF-8
14. 安裝 Gnome 傳統介面
/# apt-get install gnome-session-fallback
15. 移除遊戲
/# apt-get remove –purge aisleriot gnome-mahjongg gnome-mines gnome-sudoku gnomine
16. 移除 amazon
/# apt-get remove –purge unity-webapps-common
17. 移除 simple-scan
/# apt-get remove –purge simple-scan
18. 移除 empathy
/# apt-get remove –purge empathy empathy-common nautilus-sendto-empathy
19. 移除 thunderbird
/# apt-get remove –purge thunderbird thunderbird-gnome-support thunderbird-locale-en thunderbird-locale-en-us
20. 移除 onboard / orca
/# apt-get remove –purge onboard onboard-data gnome-orca
21. 移除 brasero
/# apt-get remove –purge brasero brasero-cdrkit libbrasero-media3-1 rhythmbox-plugin-cdrecorder
22. 移除 ibus
/# apt-get remove –purge ibus
23. 安裝字形
/# apt-get install fonts-arphic-bkai00mp fonts-arphic-bsmi00lp fonts-wqy-microhei fonts-wqy-zenhei ttf-wqy-microhei ttf-wqy-zenhei xfonts-wqy fonts-droid
24. 安裝思源字型(參考網頁:Ubuntu 安裝思源字體)
/# mkdir -p /tmp/noto
/# cd /tmp/noto
/# wget http://www.google.com/get/noto/pkgs/Noto-hinted.zip
/# unzip Noto-hinted.zip
/# mkdir /usr/share/fonts/truetype/noto
/# mv *.otf /usr/share/fonts/truetype/noto
/# wget -O fonts.conf https://gist.githubusercontent.com/ingramchen/21533bbfc0d2dead94a7/raw/c750592f750cb446f6a6a19d75892c7d2fb5395f/gistfile1.xml
/# mkdir -p /etc/skel/.config/fontconfig
/# cp fonts.conf /etc/skel/.config/fontconfig/fonts.conf
25. 安裝中文語系
/# apt-get install language-pack-zh-hant language-pack-zh-hant-base language-pack-gnome-zh-hant language-pack-gnome-zh-hant-base language-selector-common language-selector-gnome
26. 安裝 gcin
/# apt-get install gcin gcin-chewing
27. 安裝 ubuntu-restricted-extras 套件
/# apt-get install ubuntu-restricted-extras
28. 安裝 vim / leafpad 編輯器
/# apt-get install vim leafpad
29. 安裝 shutter 擷圖軟體
/# apt-get install shutter
30. 安裝 Chromium 瀏覽器及 Flash Player
/# apt-get install chromium-browser chromium-browser-l10n
/# apt-add-repository ppa:skunk/pepper-flash
/# apt-get update
/# apt-get install pepflashplugin-installer
/# sed -i ‘$a. /usr/lib/pepflashplugin-installer/pepflashplayer.sh’ /etc/chromium-browser/default
or
/# apt-get install pepperflashplugin-nonfree
/# update-pepperflashplugin-nonfree –install
31. 安裝壓縮及解壓縮工具
/# apt-get install rar unrar p7zip p7zip-full p7zip-rar xarchiver unar unrar-free
32. 安裝 gnome-tweak-tool
/# apt-get install gnome-tweak-tool
33. 安裝 unity-tweak-tool 及 GLX-Dock
/# apt-get install unity-tweak-tool cairo-dock
34. 安裝 kolourpaint
/# apt-get install kolourpaint4 kde-l10n-zhtw
35. 安裝 add-apt-repository 指令
/# apt-get install software-properties-common python-software-properties
36. 安裝 LibreOffice 正體中文語系及圖庫
/# apt-get install libreoffice-help-zh-tw libreoffice-l10n-zh-tw openclipart-libreoffice openclipart-png
37. 安裝 smplayer 和 parole
/# apt-get install mplayer mplayer-fonts smplayer mplayer-skins mplayer-skin-blue parole
38. 安裝 variety 自動切換背景
/# add-apt-repository ppa:peterlevi/ppa
/# apt-get update
/# apt-get install variety
39. 安裝 CompizConfig Settings Manager
/# apt-get install compizconfig-settings-manager
40. 安裝晶片卡讀卡機所需程式
/# apt-get install pcscd
41. 把煩人的浮動式輸入法工具列的顯示時間從 10 秒改為 3 秒(參考網頁:[教學] Ubuntu 14.04的調校 [論壇 – Ubuntu基本設定] | Ubuntu 正體中文站)
/# cp /usr/share/glib-2.0/schemas/org.freedesktop.ibus.gschema.xml /usr/share/glib-2.0/schemas/org.freedesktop.ibus.gschema.xml.bak
/# sed -i ‘s/10000/3000/g’ /usr/share/glib-2.0/schemas/org.freedesktop.ibus.gschema.xml
/# glib-compile-schemas /usr/share/glib-2.0/schemas
42. 把 vorbis、flac、mp3 檔的預設播放程式改為 Totem(參考網頁:[教學] Ubuntu 14.04的調校 [論壇 – Ubuntu基本設定] | Ubuntu 正體中文站)
/# sed -i ‘s/ogg=rhythmbox/ogg=totem/g ; s/flac=rhythmbox/flac=totem/g ; s/mp3=rhythmbox/mp3=totem/g ; s/mpeg=rhythmbox/mpeg=totem/g ; s/vorbis=rhythmbox/vorbis=totem/g’ /etc/gnome/defaults.list
43. 取消 Ubuntu 登入時的訪客作業階段
/# echo allow-guest=false | tee -a /usr/share/lightdm/lightdm.conf.d/50-ubuntu.conf
44. 不提示更新
/# sed -i ‘/Package-Lists/s/1/0/’ /etc/apt/apt.conf.d/10periodic
/# sed -i ‘s/Prompt=lts/Prompt=never/’ /etc/update-manager/release-upgrades
45. 關畢錯誤回報
/# sed -i ‘s/enabled=1/enabled=0/g’ /etc/default/apport
46. 善後工作
/# apt-get autoremove
/# apt-get autoclean
/# apt-get clean all
47 . 取消掛載目錄
/# umount -l /proc /sys /dev/pts
48. 退出 chroot
/# exit
49. 進行打包
# rm -rf iso.Trusty/casper/filesystem.squashfs
# mksquashfs os.Trusty iso.Trusty/casper/filesystem.squashfs
50. 切換目錄
# cd iso.Trusty
51. 產生 iso 光碟
# mkisofs -r -V “Ubuntu 14.04.2 LTS” -J -l -b isolinux/isolinux.bin -c isolinux/boot.cat -no-emul -boot-load-size 4 -boot-info-table -o ../ubuntu-14.04.2-desktop-i386_0418.iso .
備註:
加入 ezgo 套件庫來源
# wget -O – http://ezgo.goodhorse.idv.tw/apt/ezgo/ezgo.gpg.key | apt-key add –
# echo “deb http://ezgo.goodhorse.idv.tw/apt/ezgo/ ezgo12 main” >> /etc/apt/sources.list.d/ezgo.list
# apt-get update
參考文件:Franklin ezgo 打包技術初窺探
1. 切換成 root
$ sudo su –
2. 安裝 squashfs-tools 套件
# apt-get install squashfs-tools
3. 建立 myPrecise 目錄
# mkdir myPrecise
4. 掛載 iso 光碟
# mount -o loop myPrecise2015_0420.iso myPrecise[@more@]
5. 複製 myPrecise 目錄成 iso.myPrecise 以進行修改作業
# cp -af myPrecise iso.myPrecise
6. 搬移 iso.myPrecise/casper/filesystem.squashfs 到現在的目錄之下
# mv iso.myPrecise/casper/filesystem.squashfs .
7. 解開 filesystem.squashfs
# unsquashfs -d os.myPrecise filesystem.squashfs
8. chroot 到 os.myPrecise 目錄之下,前置字元改成 /# 代表在 chroot 之下
# chroot ./os.myPrecise
9. 掛載目錄
/# mount -t proc none /proc
/# mount -t sysfs none /sys
/# mount -t devpts none /dev/pts
10. 增加 DNS Server 設定
/# echo “nameserver 168.95.1.1” > /etc/resolv.conf
11. 切換到 /etc/apt 目錄之下
/# cd /etc/apt
12. 修改套件庫來源
/# sed -ri ‘s/tw.archive.ubuntu.com/free.nchc.org.tw/g’ sources.list
/# sed -ri ‘s/archive.ubuntu.com/free.nchc.org.tw/g’ sources.list
/# sed -ri ‘s/security.ubuntu.com/free.nchc.org.tw/g’ sources.list
13 . 更新套件庫
/# apt-get update
14. 移除遊戲
/# apt-get remove –purge aisleriot gnome-games-data gnome-sudoku gnomine mahjongg
15. 移除 Apache OpenOffice
/# apt-get remove –purge openoffice-calc openoffice-core01 openoffice-debian-menus openoffice-ure openoffice.org-hyphenation
16. 安裝 LibreOffice
/# apt-get install libreoffice libreoffice-l10n-zh-tw
/# apt-get install libreoffice-style-crystal libreoffice-style-hicontrast libreoffice-style-oxygen
17. LibreOffice 功能表修改
/# rm -rf /etc/skel/.local/share/applications/openoffice4-*
/# rm -rf /etc/skel/.local/share/applications/libreoffice*
/# cd /usr/share/applications
/# cp libreoffice-base.desktop libreoffice-calc.desktop libreoffice-draw.desktop libreoffice-impress.desktop libreoffice-math.desktop libreoffice-writer.desktop /etc/skel/.local/share/applications
18. 移除 gimp
/# apt-get remove –purge gimp gimp-data gimp-data-extras gimp-help-common gimp-help-en gimp-resynthesizer libgimp2.0
19. 移除 inkscape
/# apt-get remove –purge inkscape-trunk
/# rm -rf /etc/skel/.local/share/applications/inkscape.desktop
20. 移除 Empathy
/# apt-get remove –purge empathy empathy-common nautilus-sendto-empathy
21. 移除 Gwibber
/# apt-get remove –purge gwibber gwibber-service gwibber-service-facebook gwibber-service-identica gwibber-service-twitter libgwibber-gtk2 libgwibber2
22. 移除 Pidgin
/# apt-get remove –purge pidgin pidgin-data pidgin-libnotify
/# rm -rf /etc/skel/.local/share/applications/pidgin.desktop
23. 移除 skype
/# apt-get remove –purge skype skype-bin
24. 移除 Brasero
/# apt-get remove –purge brasero brasero-cdrkit libbrasero-media3-1 rhythmbox-plugin-cdrecorder
25. 移除 k3b
/# apt-get remove –purge k3b k3b-data libk3b6 libk3b6-extracodecs
/# rm -rf /etc/skel/.local/share/applications/kde4-k3b.desktop
/# rm -rf /etc/skel/.local/share/applications/alacarte-made-3.desktop
26. 移除 network-manage 及設定
/# apt-get remove –purge network-manager network-manager-gnome network-manager-pptp network-manager-pptp-gnome
/# mv /etc/resolv.conf /run/resolvconf
/# ln -s /run/resolvconf/resolv.conf /etc/resolv.conf
27. 安裝 chromium 瀏覽器及 Flash
/# apt-get install chromium-browser chromium-browser-l10n chromium-codecs-ffmpeg
/# apt-add-repository ppa:skunk/pepper-flash
/# apt-get update
/# apt-get install pepflashplugin-installer
/# sed -i ‘$a. /usr/lib/pepflashplugin-installer/pepflashplayer.sh’ /etc/chromium-browser/default
28. 安裝 Adobe PDF Reader
/# add-apt-repository “deb http://archive.canonical.com/ precise partner”
/# apt-get update
/# apt-get install acroread
29. 安裝 shutter 擷圖軟體
/# apt-get install shutter
30. 安裝 vim 和 leafpad 編輯器
/# apt-get install vim leafpad
31. 安裝自動切換背景軟體 variety
/# apt-get install variety
32. 不提示更新
/# sed -i ‘/Package-Lists/s/1/0/’ /etc/apt/apt.conf.d/10periodic
/# sed -i ‘s/Prompt=lts/Prompt=never/’ /etc/update-manager/release-upgrades
33. 善後工作
/# apt-get autoremove
/# apt-get autoclean
/# apt-get clean all
34 . 取消掛載目錄
/# umount -l /proc /sys /dev/pts
35. 退出 chroot
/# exit
36. 進行打包
# rm -rf iso.myPrecise/casper/filesystem.squashfs
# mksquashfs os.myPrecise iso.myPrecise/casper/filesystem.squashfs
37. 切換目錄
# cd iso.myPrecise
38. 產生 iso 光碟
# mkisofs -r -V “myPrecise” -J -l -b isolinux/isolinux.bin -c isolinux/boot.cat -no-emul -boot-load-size 4 -boot-info-table -o ../myPrecise2015_0511.iso .
39. 進行驗證


參考網頁:凍仁的筆記: 停用 Ubuntu 擾人的更新和升級通知
使用 Ubuntu 12.04 Mac Style 時,常會跳出可以升級的通知 [@more@]處理方式:
1. 備份原檔
$ sudo cp /etc/update-manager/release-upgrades /etc/update-manager/release-upgrade.$(date +%F)
2. 修改設定檔
$ sudo sed -i ‘s/Prompt=lts/Prompt=never/’ /etc/update-manager/release-upgrades
原本 Clonezilla 的選單是進入之後才顯示要備份或是還原

心想,如果可以在開機選單上直接選擇備份或是還原,應該會更好!
 [@more@]底下參考:在ubuntu系統的grub2新增選單如下 – Google 網上論壇
1. Linux Live 開機,這裡以 ezgo 12 為例

2. 做法和之前相同,不再複述
$ sudo su –
# mkdir /mnt/sd3;mount /sda3 /mnt/sda3
3. 修改 Grub 設定檔,加入下面設定,紅色是在同一行
# vim /mnt/sda3/EFI/boot/grub.cfg
menuentry “Clonezilla live – Backup Windows 7 / 8.1” –users User{
search –set -f /live/vmlinuz
linux /live/vmlinuz boot=live username=user config components noswap edd=on nomodeset nodmraid noeject locales=zh_TW.UTF-8 keyboard-layouts=NONE ocs_prerun=”sudo ntfs-3g /dev/sda2 /home/partimag” ocs_live_run=”/usr/sbin/ocs-sr -q2 -c -j2 -rm-win-swap-hib -z1p -i 2000 -sc -p true saveparts Windows_Backup sda1″ ocs_live_extra_param=”” ocs_live_batch=”no” live-media-path=/live bootfrom=/dev/sda3 vga=788 ip= quiet nosplash i915.blacklist=yes radeonhd.blacklist=yes nouveau.blacklist=yes vmwgfx.enable_fbdev=1
initrd /live/initrd.img
}
menuentry “Clonezilla live – Restore Windows 7 / 8.1” –users User{
search –set -f /live/vmlinuz
linux /live/vmlinuz boot=live username=user config components noswap edd=on nomodeset nodmraid noeject locales=zh_TW.UTF-8 keyboard-layouts=NONE ocs_prerun=”sudo ntfs-3g /dev/sda2 /home/partimag” ocs_live_run=”/usr/sbin/ocs-sr -e1 auto -e2 -c -t -r -j2 -k -p true restoreparts Windows_Backup sda1″ ocs_live_extra_param=”” ocs_live_batch=”no” live-media-path=/live bootfrom=/dev/sda3 vga=788 ip= quiet nosplash i915.blacklist=yes radeonhd.blacklist=yes nouveau.blacklist=yes vmwgfx.enable_fbdev=1
initrd /live/initrd.img
}
menuentry “Clonezilla live – Restore Default Windows 7 / 8.1” –users User{
search –set -f /live/vmlinuz
linux /live/vmlinuz boot=live username=user config components noswap edd=on nomodeset nodmraid noeject locales=zh_TW.UTF-8 keyboard-layouts=NONE ocs_prerun=”sudo ntfs-3g /dev/sda2 /home/partimag” ocs_live_run=”/usr/sbin/ocs-sr -e1 auto -e2 -c -t -r -j2 -k -p true restoreparts Windows_Default_Backup sda1″ ocs_live_extra_param=”” ocs_live_batch=”no” live-media-path=/live bootfrom=/dev/sda3 vga=788 ip= quiet nosplash i915.blacklist=yes radeonhd.blacklist=yes nouveau.blacklist=yes vmwgfx.enable_fbdev=1
initrd /live/initrd.img
}
4. 重新開機之後開機選單

一、
1. 進行備份動作

2. 輸入帳號及密碼

3. 確認要進行備份

4. 備份中

5. 備份完成後決定要的動作

二、
1. 進行還原動作

2. 輸入帳號及密碼
3. 確認還原


4. 還原中

為了防止使用者誤觸 Clonezilla live 的還原選單,所以要在 Clonezilla live 的還原選單上加上密碼。
參考網頁:24.3. GRUB 2 Password Protection
修改方式:
1. 以 Linux Live CD 開機,這裡以 EzGO 12 xfce 為例
選擇 在不需要安裝的情況下試用 ezgo 12(T)[@more@]2. 開啟 終端機模擬程式
3. 切換成 root 身份
$ sudo su –
4. 建立掛載目錄及掛載 Clonezilla 所在分割區
# mkdir /mnt/sda3;mount /dev/sda3 /mnt/sda3
5. 修改 Grub 設定檔
# vim /mnt/sda3/EFI/boot/grub.conf
加上三個部份
第一部份,設定使用者及密碼
set superusers=”User”
password User 123456
第二部份,Windows 7 不用輸入使用者及密碼
在 menuentry 加上 –unrestricted
第三部分,Clonezilla live 加上使用者及密碼的選項
在 menuentry 加上 –users User 
6. 修改完畢後重新開機,要使用 Clonezilla live 做還原時,要輸入使用者及密碼
