試用了 Xfce 的版本後,也順道測試了 KDE 的版本
光碟開機畫面 [@more@]啟動系統中
進入 KDE 桌面環境
安裝第三方軟體畫面,這裡先選 取消,安裝到硬碟之後才進行安裝
可以在 ezgo 工具箱 執行
ezgo 工具箱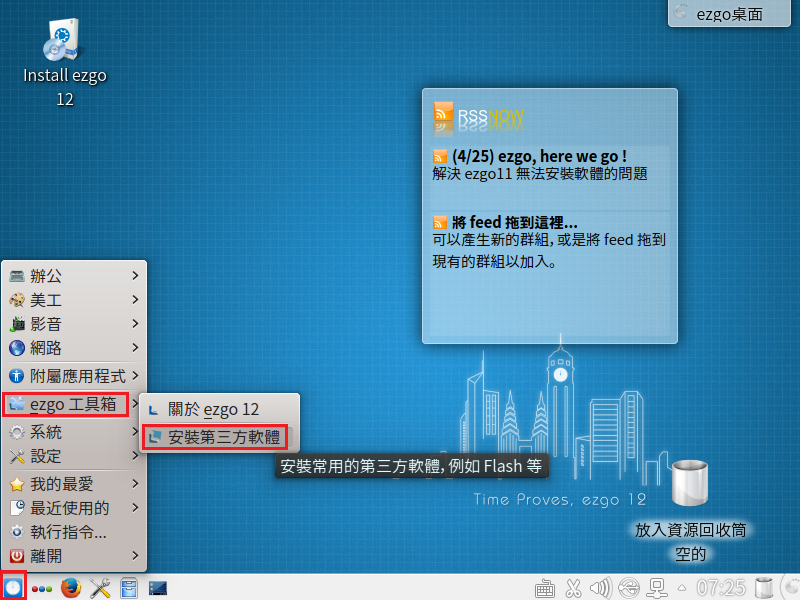
進行安裝到硬碟
安裝畫面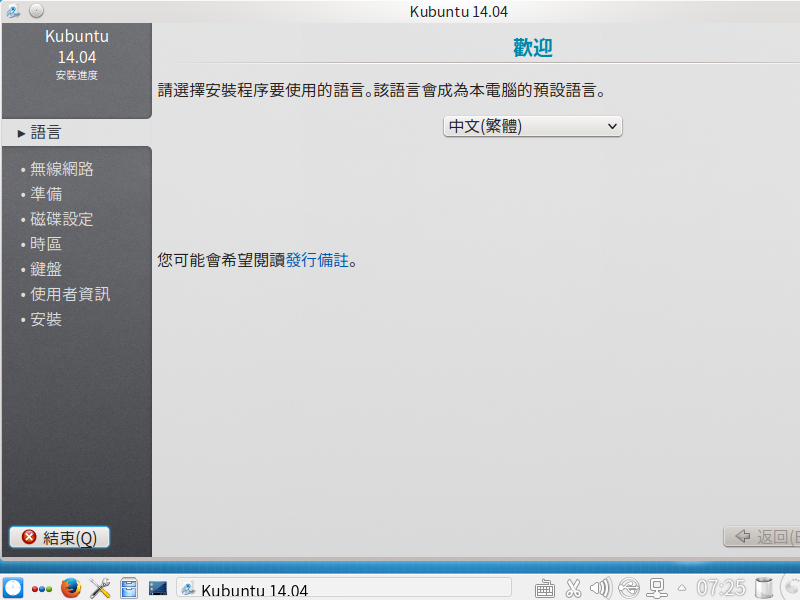


安裝完成,重新啟動電腦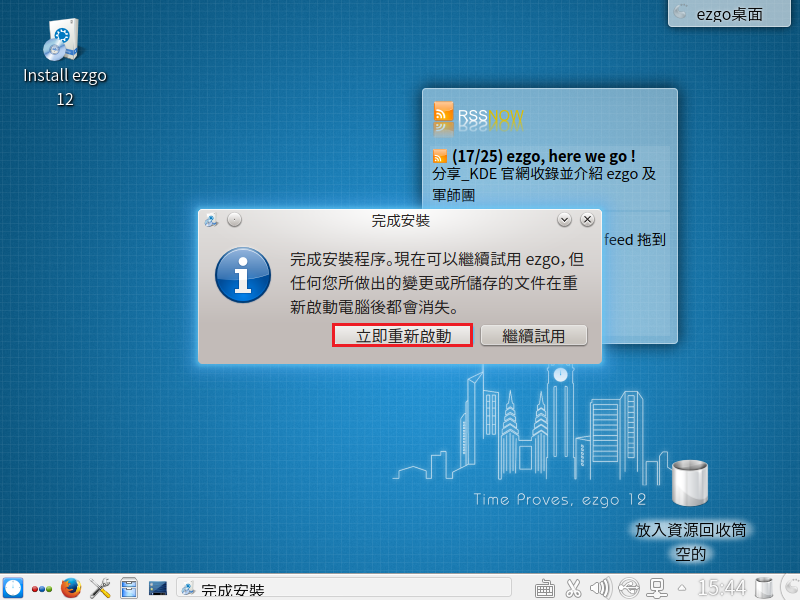
整體感覺:
1. 開機的速度比起 Xfce 較慢
2. 安裝第三方軟體的功能可以使用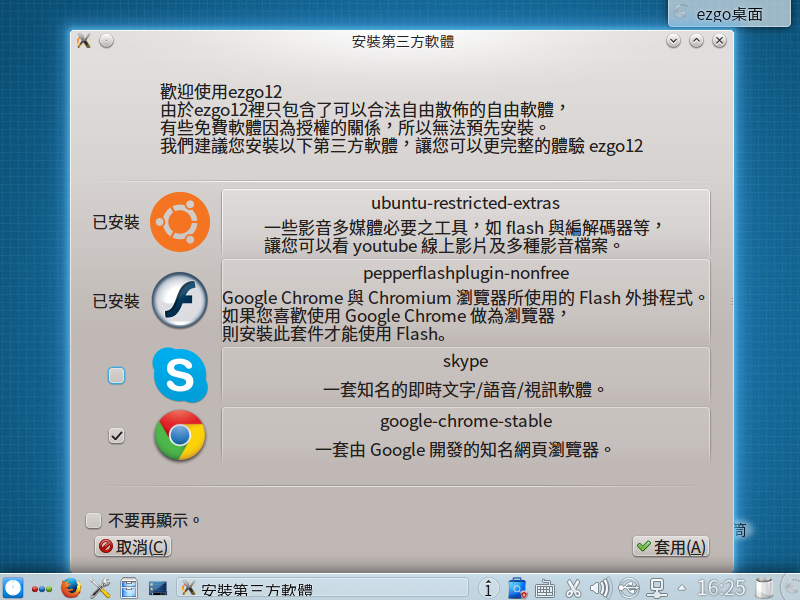
3. 安裝完成已經有中文輸入法可以使用 ibus
缺點:
1. 安裝第三方軟體的 Google Chrome 無法使用

全新的繁體中文 WordPress 網站《宜蘭部落格教育平台 網站》
試用了 Xfce 的版本後,也順道測試了 KDE 的版本
光碟開機畫面[@more@]啟動系統中
進入 KDE 桌面環境
安裝第三方軟體畫面,這裡先選 取消,安裝到硬碟之後才進行安裝
可以在 ezgo 工具箱 執行
ezgo 工具箱
進行安裝到硬碟
安裝畫面
安裝完成,重新啟動電腦
整體感覺:
1. 開機的速度比起 Xfce 較慢
2. 安裝第三方軟體的功能可以使用
3. 安裝完成已經有中文輸入法可以使用 ibus
缺點:
1. 安裝第三方軟體的 Google Chrome 無法使用
有一台舊的 Ubuntu 10.04 Server LTS,因為支援期只到 2015-04,所以趁有時間來升級一下!
# do-release-upgrade
Checking for a new ubuntu release
Done Upgrade tool signature
Done Upgrade tool
Done downloading
authenticate ‘precise.tar.gz’ against ‘precise.tar.gz.gpg’
extracting ‘precise.tar.gz’
[@more@]正在讀取快取
正在檢查套件管理員
繼續執行於 SSH 中?
此連線階段似乎是在 ssh 下執行。目前不建議在 ssh
連線下進行升級,因為若發生失敗將會較難以修復。
若您繼續,一個額外的 ssh 背景程序將會啟動在 ‘1022’
連接埠。
您想要繼續嗎?
繼續 [yN] y
啟動後備 sshd 中
為在失敗時更易進行修復,一個後備 sshd
將在‘1022’埠被啟動。如果使用中的 ssh
有任何問題,您仍可以連接後備的 sshd 。
若您有執行防火牆,您可能需要暫時開啟此連接埠。由於此動作存在潛在危險,系統不會自動執行。您可以這樣開啟連接埠:
「iptables -I INPUT -p tcp –dport 1022 -j ACCEPT」
若要繼續請按 [ENTER]
Reading package lists… Done
Building dependency tree
Reading state information… Done
Building data structures… Done
WARNING: Failed to read mirror file
Hit http://tw.archive.ubuntu.com lucid Release.gpg
Hit http://tw.archive.ubuntu.com lucid-updates Release.gpg
Hit http://tw.archive.ubuntu.com lucid Release
Hit http://tw.archive.ubuntu.com lucid-updates Release
Hit http://tw.archive.ubuntu.com lucid/main Packages
Hit http://tw.archive.ubuntu.com lucid/restricted Packages
正在計算所有的更動
正在計算所有的更動
要開始升級嗎?
2 個已安裝套件不再受 Canonical
支援。您仍可以取得來自社群的支援。
即將移除 11 個套件。 即將安裝 176 個新套件。
即將升級 423 個套件。
要下載共309 M。 依照您的連線速率,此下載將要約 1
分鐘 的時間。
安裝升級可能會花上幾個鐘頭。一旦下載完成,程序便無法取消。
繼續 [yN] 詳情 [d]y
中間一大段過程………
系統升級完成。
需要重新開機
需要重新開機才能完成升級。
如果您選擇「y」系統將會重新開機。
繼續 [yN]y
重新開機後,已經升級到 12.04.
Welcome to Ubuntu 12.04.5 LTS (GNU/Linux 3.2.0-74-generic-pae i686)
* Documentation: https://help.ubuntu.com/
System information as of Fri Jan 9 14:54:20 CST 2015
System load: 0.41 Processes: 77
Usage of /: 8.0% of 72.05GB Users logged in: 0
Memory usage: 17% IP address for eth0: 192.168.1.22
Swap usage: 0%
Graph this data and manage this system at:
https://landscape.canonical.com/
New release ‘trusty‘ available.
Run ‘do-release-upgrade‘ to upgrade to it.
還可以繼續升級到 14.04,不過暫且就先到這裡!
參考網頁:
gentoo configure ipv6 and ipv4 dual stack |
Gentoo IPv6 Setup
1. 修改網路設定
# vim /etc/conf.d/net
#For Static IP
config_eth0=(
“192.168.53.98 netmask 255.255.255.0”
“2001:288:a229:4:d1:2ff:fe42:5c8f/64”
)
routes_eth0=( “default gw 192.168.53.254” )
dns_servers_eth0=( “168.95.1.1 140.111.66.1” )
[@more@]
2. 重新啟動系統
# syunc;sync;sync;sync;shutdown -r now
3. 查看網路設定
# ifconfig eth0 | egrep ‘inet|inet6’
inet 192.168.53.98 netmask 255.255.255.0 broadcast 192.168.53.255
inet6 2001:288:a229:4:d1:2ff:fe42:5c8f prefixlen 64 scopeid 0x0<global>
inet6 fe80::d1:2ff:fe42:5c8f prefixlen 64 scopeid 0x20<link>
4. 進行測試
# ping6 -c 4 2001:288:a201::66:96
PING 2001:288:a201::66:96(2001:288:a201::66:96) 56 data bytes
64 bytes from 2001:288:a201::66:96: icmp_seq=1 ttl=125 time=4.52 ms
64 bytes from 2001:288:a201::66:96: icmp_seq=2 ttl=125 time=1.97 ms
64 bytes from 2001:288:a201::66:96: icmp_seq=3 ttl=125 time=9.01 ms
64 bytes from 2001:288:a201::66:96: icmp_seq=4 ttl=125 time=1.81 ms
# ping6 -c 4 www.kame.net
PING www.kame.net(2001:200:dff:fff1:216:3eff:feb1:44d7) 56 data bytes
64 bytes from 2001:200:dff:fff1:216:3eff:feb1:44d7: icmp_seq=1 ttl=49 time=39.9 ms
64 bytes from 2001:200:dff:fff1:216:3eff:feb1:44d7: icmp_seq=2 ttl=49 time=41.7 ms
64 bytes from 2001:200:dff:fff1:216:3eff:feb1:44d7: icmp_seq=3 ttl=49 time=41.3 ms
64 bytes from 2001:200:dff:fff1:216:3eff:feb1:44d7: icmp_seq=4 ttl=49 time=38.8 ms
ezgo 12 下載網址:http://ezgo.westart.tw/ezgo12/download.php
共分成 Xfce/KDE 二個桌面環境、推廣版(All in one)/基本版(Basic)、64位元/32位元等版本 [@more@]底下稍為試用了 ezgo 12 Xfce Basic x86 版
光碟開機畫面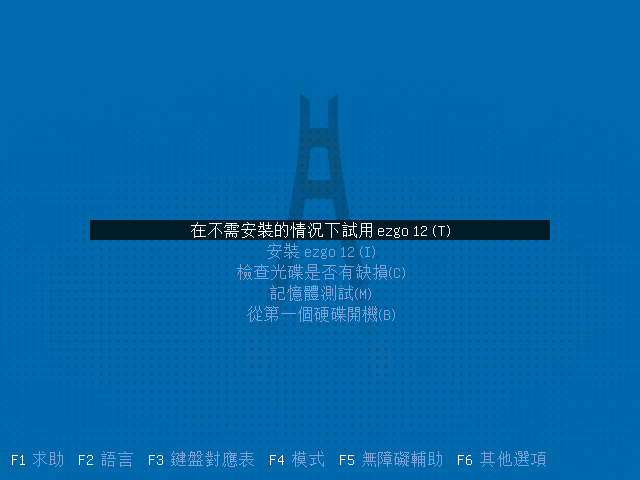
開機畫面
可以安裝第三方軟體的畫面
也可以在 ezgo 工具箱中執行

設定值
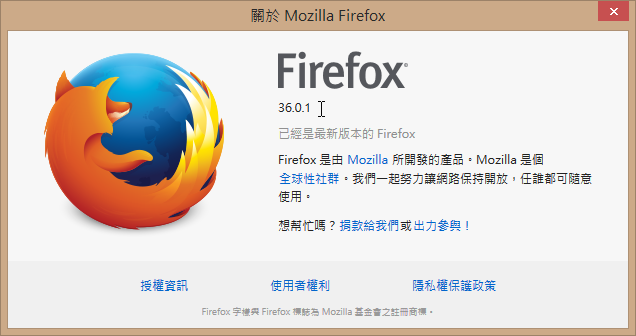
內定安裝 Firefox,版本算蠻新的,最新的版本是 36.0.1 版
底下試著安裝到硬碟
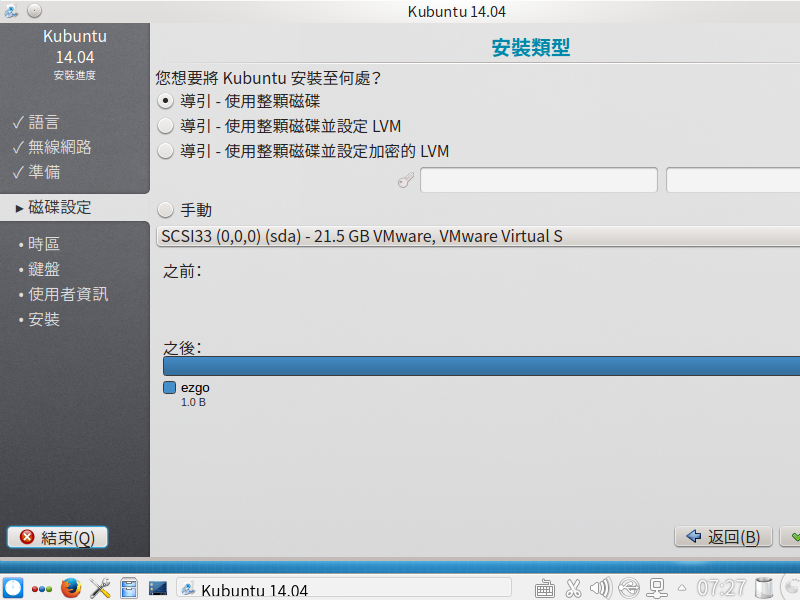
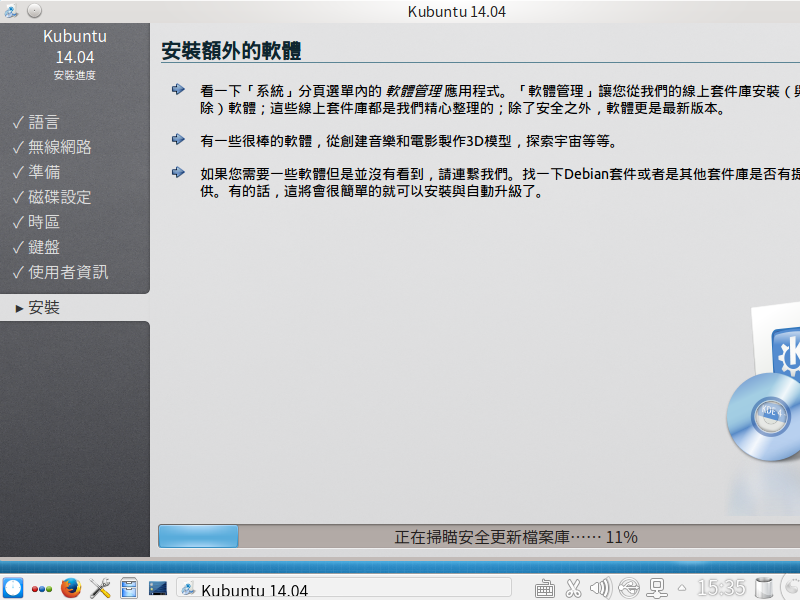
可以順道安裝更新及第三方軟體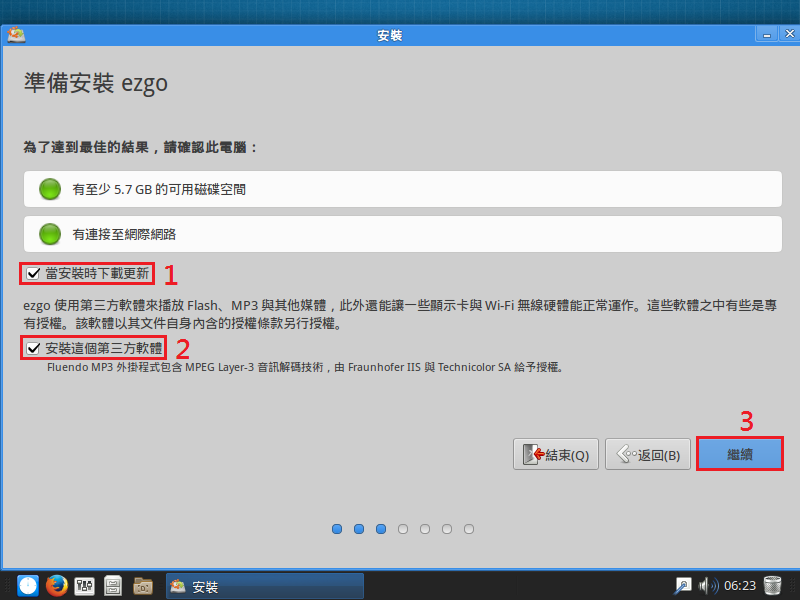
安裝類型
確認硬碟分割的方式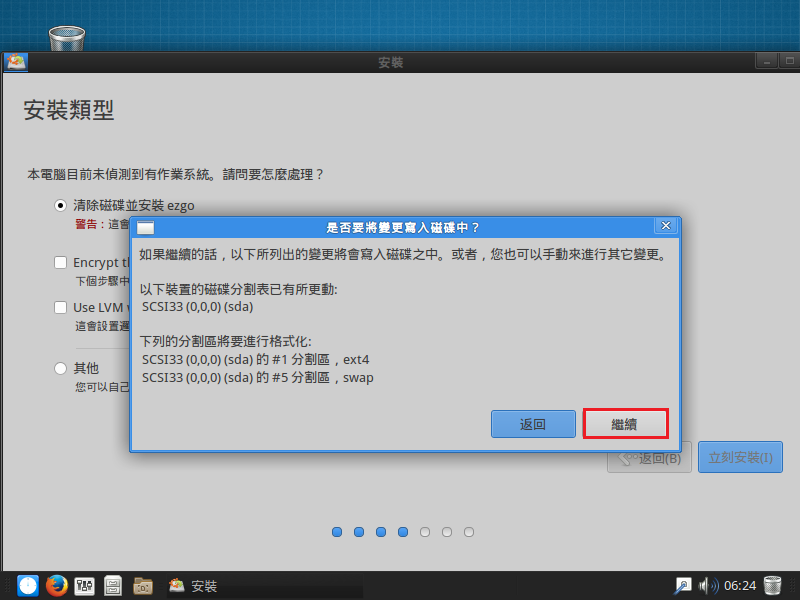
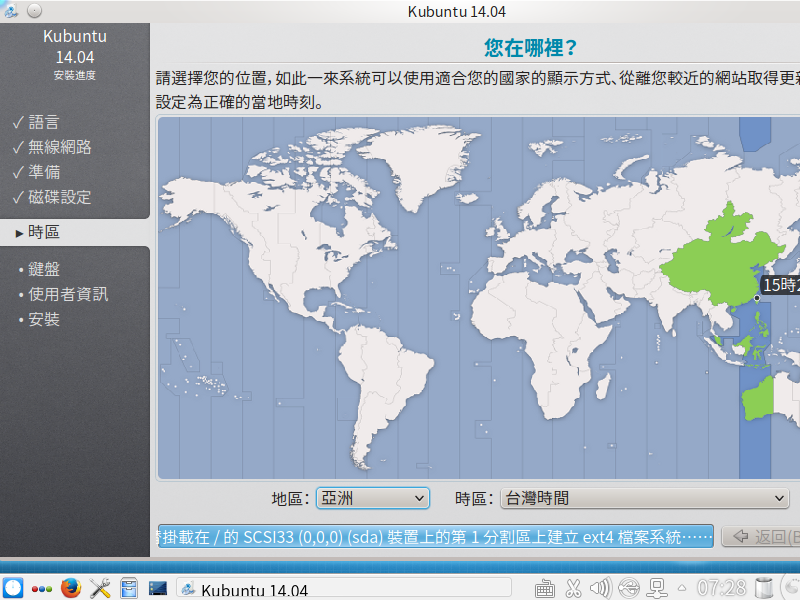
時區
鍵盤設定
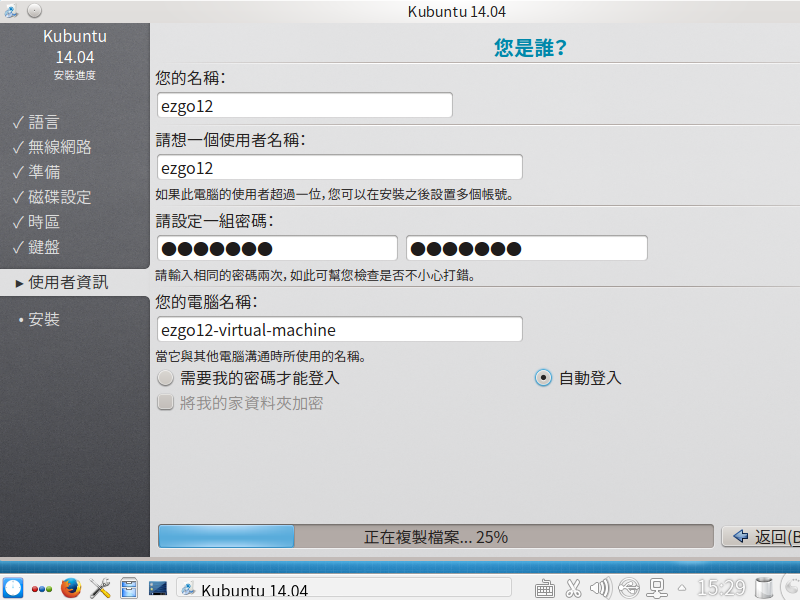
帳號及密碼設定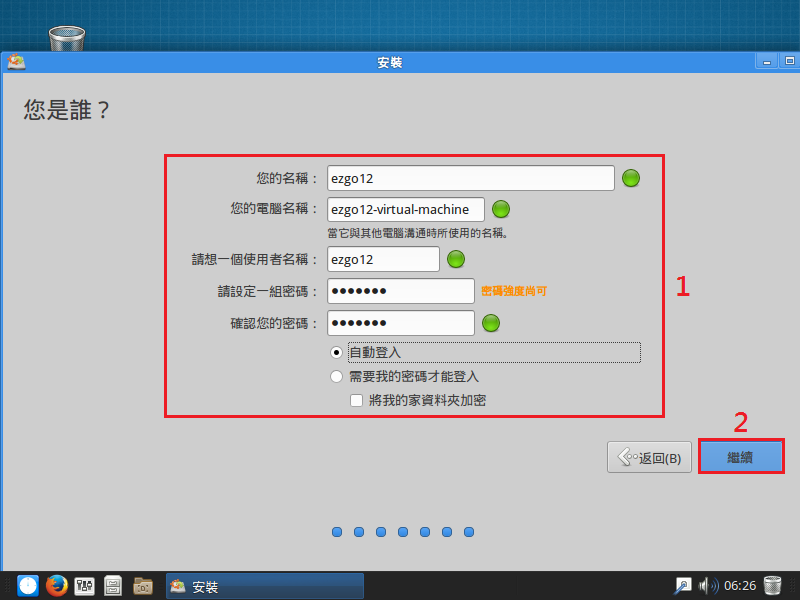
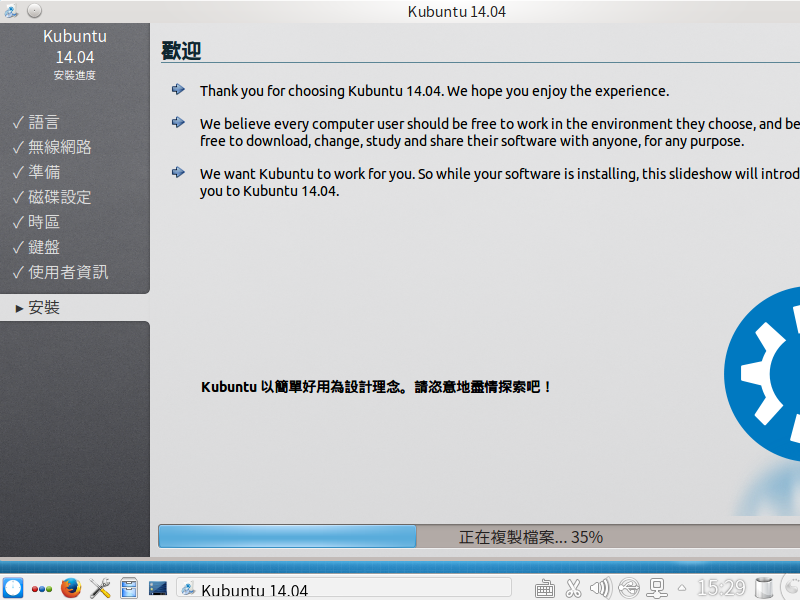
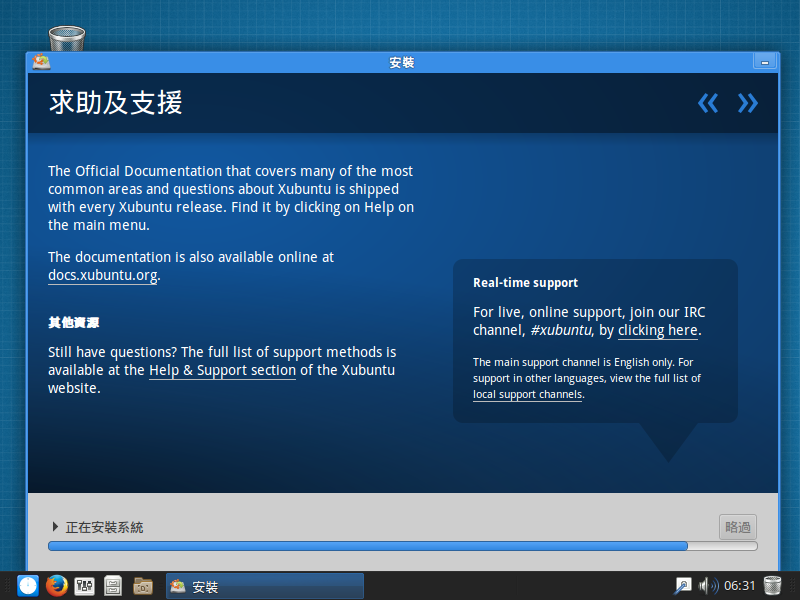
安裝畫面
安裝完成,重新啟動電腦
按 Enter 鍵
開機之後的更新
安裝 ibus 後可以輸入中文
整體感覺:
優點:
1. 畫面整體美感不錯,執行速度非常快
2. 採用基本安裝,可視自己的需求再安裝所需套件
3. 系統 base on Ubuntu 14.04 LTS Xubuntu 長期支援版,可以使用很久,不用常常換版本
可以改進的地方:
1. 安裝第三方軟體的工具似乎沒有用,因為要利用它來安裝 Google Chrome 都不能安裝
2. 既然是中文版本,安裝完成之後應該要有中文輸入法可以使用,我試過安裝 hime 好像無法輸入中文,後來改安裝 ibus 才有中文輸入法可以使用。
Scratch 2.0 Offline Editor v433 新版本
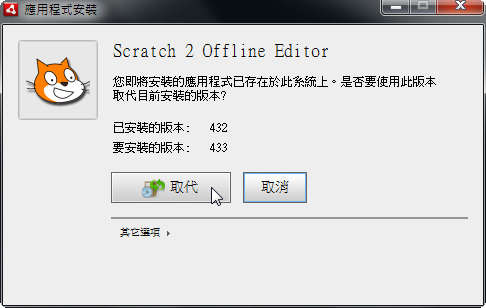 [@more@]Scratch Offline Editor 下載網頁:
http://scratch.mit.edu/scratch2download/
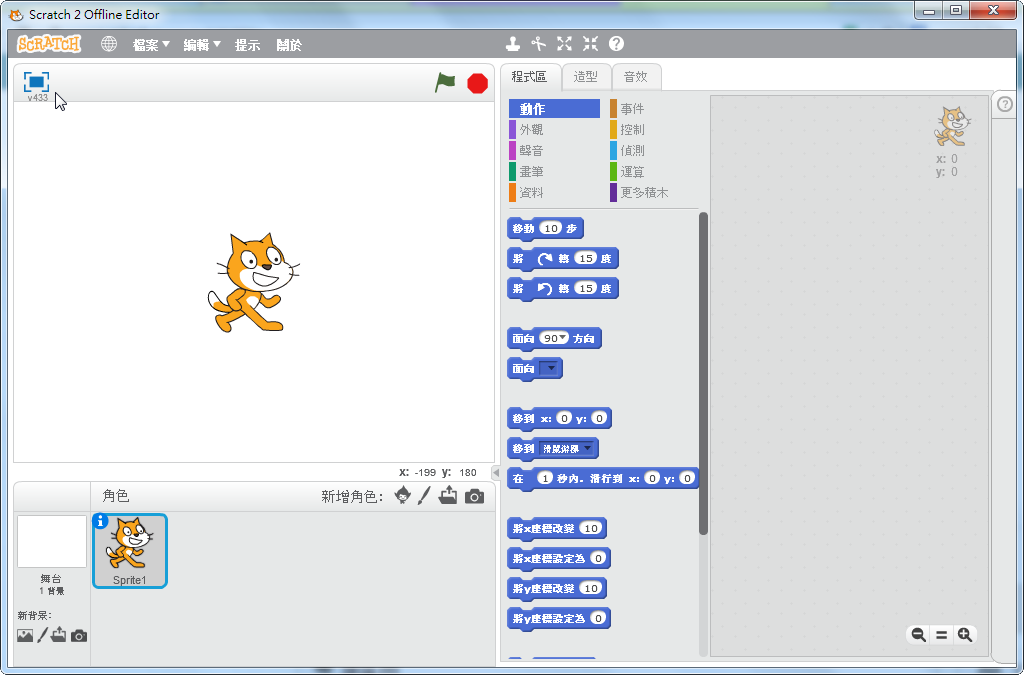
執行畫面
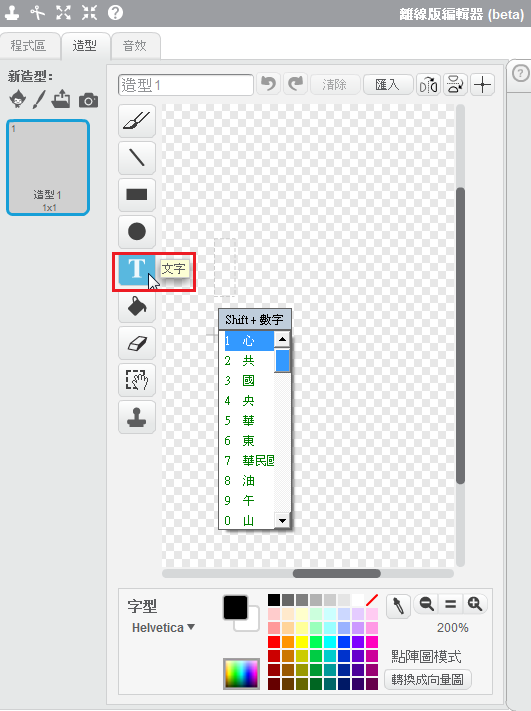
目前仍有的問題:
1. 功能表中仍有部分是英文的,需要再做處理
2. 編輯器中的 文字工具,無法輸入中文
參考網頁:
Installing LAMP (Linux, Apache, MySQL, PHP and PhpMyAdmin) in Gentoo Linux
Installing Apache, MySQL, PHP in Gentoo Server | S V N Labs Softwares
LAMP Server on Gentoo – Linode Guides & Tutorials
同步套件庫
# emerge –sync
更新整個系統
# emerge –update world
安裝 Apache Web Server
# emerge apache[@more@]預設網頁根目錄 /var/www/localhost/htdocs/
底下更改成 /var/www/html
# cp /etc/apache2/vhosts.d/default_vhost.include /etc/apache2/vhosts.d/default_vhost.include.$(date +%F)
# sed -i ‘s|/var/www/localhost/htdocs|/var/www/html|’ /etc/apache2/vhosts.d/default_vhost.include
# mv /var/www/localhost/htdocs /var/www/html
cgi 目錄由 /var/www/localhost/cgi-bin 改成 /var/www/cgi-bin
# sed -i ‘s|/var/www/localhost/cgi-bin|/var/www/cgi-bin|’ /etc/apache2/vhosts.d/default_vhost.include
# sed -i ‘s|/var/www/localhost/cgi-bin|/var/www/cgi-bin|’ /etc/apache2/vhosts.d/00_default_ssl_vhost.conf
取消 Indexes 目錄顯示
# sed -i ‘s/Options Indexes/Options -Indexes/’ /etc/apache2/vhosts.d/default_vhost.include
將使用者網頁目錄由 public_html 改成 www
# sed -i ‘s/public_html/www/’ /etc/apache2/modules.d/00_mod_userdir.conf
增加網頁目錄中的 index 設定
# sed -i ‘s/DirectoryIndex index.html index.html.var/DirectoryIndex index.php index.html index.htm index.html.var/’ /etc/apache2/modules.d/00_default_settings.conf
取消 Deny from all 設定
# vim /etc/apache2/modules.d/00_default_settings.conf
<Directory />
Options FollowSymLinks
AllowOverride None
Order deny,allow
# Deny from all
</Directory>
將 ServerSignature On 改成 ServerSignature Off
# sed -i ‘s/ServerSignature On/ServerSignature Off/’ /etc/apache2/modules.d/00_default_settings.conf
啟動 Apache Web Server,如果出現下面的訊息
# /etc/init.d/apache2 start
* Starting apache2 …
apache2: apr_sockaddr_info_get() failed for lemaker
* start-stop-daemon: failed to start `/usr/sbin/apache2′ [ !! ]
* ERROR: apache2 failed to start
請在 /etc/hosts 加入一行
# vim /etc/hosts
127.0.0.1 lemaker
設定開機時啟動 Apache Web Servr
# rc-update add apache2 default
安裝 MySQL Server
# emerge dev-db/mysql
啟動 MySQL Server
# /etc/init.d/mysql start
* Checking mysqld configuration for mysql … [ ok ]
* Starting mysql …
* You don’t appear to have the mysql database installed yet.
* Please run `emerge –config =dev-db/mysql-5.5.40` to have this done…
* ERROR: mysql failed to start
如果出上面的錯誤訊息
# emerge –config =dev-db/mysql-5.5.40
Configuring pkg…
* Please provide a password for the mysql ‘root’ user now, in the
* MYSQL_ROOT_PASSWORD env var or through the /root/.my.cnf file.
* Avoid [“‘_%] characters in the password
>(輸入您要設定的 MySQL Server 密碼)
* Retype the password
>(再次輸入您要設定的 MySQL Server 密碼)
* Creating the mysql database and setting proper
* permissions on it …
* Command: ‘/usr/share/mysql/scripts/mysql_install_db’ ‘–basedir=/usr’ –loose-skip-grant-tables –loose-skip-host-cache –loose-skip-name-resolve –loose-skip-networking –loose-skip-slave-start –loose-skip-ssl –loose-skip-log-bin –loose-skip-relay-log –loose-skip-slow-query-log –loose-skip-external-locking –loose-skip-log-slave-updates –user=mysql –loose-skip-innodb ‘–datadir=///var/lib/mysql’ ‘–tmpdir=///tmp/’
* Starting mysqld …
* Command //usr/sbin/mysqld –loose-skip-grant-tables –loose-skip-host-cache –loose-skip-name-resolve –loose-skip-networking –loose-skip-slave-start –loose-skip-ssl –loose-skip-log-bin –loose-skip-relay-log –loose-skip-slow-query-log –loose-skip-external-locking –loose-skip-log-slave-updates –user=mysql –loose-skip-innodb –user=mysql –log-warnings=0 –basedir=//usr –datadir=///var/lib/mysql –max_allowed_packet=8M –net_buffer_length=16K –default-storage-engine=MyISAM –socket=//var/run/mysqld/mysqld16101.sock –pid-file=//var/run/mysqld/mysqld20041.pid
* –tmpdir=///tmp/ [ ok ]
* Setting root password … [ ok ]
* Loading “zoneinfo”, this step may require a few seconds … … [ ok ]
* Stopping the server …
* Done
MySQL Server 的一些安全性設定
# /usr/bin/mysql_secure_installation
設定開機時啟動 MySQL Server
# rc-update add mysql default
MySQL Server 設定檔
/etc/mysql/my.cnf
安裝 PHP
# USE=”apache2 mysql mysqli php cli cgi pam ssl xml xml2 berkdb innodb jpeg png pcre session unicode” emerge ‘dev-lang/php’
# vim /etc/conf.d/apache2
APACHE2_OPTS=”-D DEFAULT_VHOST -D INFO -D SSL -D SSL_DEFAULT_VHOST -D LANGUAGE -D PHP5″
PHP 設定檔
/etc/php/apache2-php5.5/php.ini
PHP 一些設定
# sed -i ‘s/allow_url_fopen = On/allow_url_fopen = Off/’ /etc/php/apache2-php5.5/php.ini
# sed -i ‘s/expose_php = On/expose_php = Off/’ /etc/php/apache2-php5.5/php.ini
# sed -i ‘s/upload_max_filesize = 2M/upload_max_filesize = 500M/’ /etc/php/apache2-php5.5/php.ini
# sed -i ‘s/post_max_size = 8M/post_max_size = 500M/’ /etc/php/apache2-php5.5/php.ini
# sed -i ‘s/session.cookie_httponly =/session.cookie_httponly = 1/’ /etc/php/apache2-php5.5/php.ini
# sed -i ‘s/;date.timezone =/date.timezone = Asia/Taipei/’ /etc/php/apache2-php5.5/php.ini
# sed -i ‘s/max_execution_time = 30/max_execution_time = 300/’ /etc/php/apache2-php5.5/php.ini
# sed -i ‘s/max_input_time = 60/max_input_time = 600/’ /etc/php/apache2-php5.5/php.ini
重新啟動 apache Web Server
# /etc/init.d/apache2 restart
因為想要直接從文字介面來修改網路設定,所以移除 network-manager 相關套件
$ sudo apt-get remove –purge network-manager network-manager-gnome network-manager-pptp network-manager-pptp-gnome
重新啟動網路時出現
$ sudo /etc/init.d/networking restart
* Reconfiguring network interfaces… RTNETLINK answers: No such process
resolvconf: Error: /etc/resolv.conf isn’t a symlink, not doing anything.
resolvconf: Error: /etc/resolv.conf isn’t a symlink, not doing anything.
[ OK ][@more@]根據下面網頁解決問題:
誤刪/etc/resolv.conf [論壇 – 新手村] | Ubuntu 正體中文站
搬移檔案
$ sudo mv /etc/resolv.conf /run/resolvconf
建立連結
$ sudo ln -s /run/resolvconf/resolv.conf /etc/resolv.conf
重新啟動網路就不會出現錯誤的訊息了!
也可以用底下網頁介紹的方式
【浪費人生】resolvconf: Error: /etc/resolv.conf isn’t a symlink, not doing anything. | [leave] for me
$ sudo dpkg–reconfigure resolvconf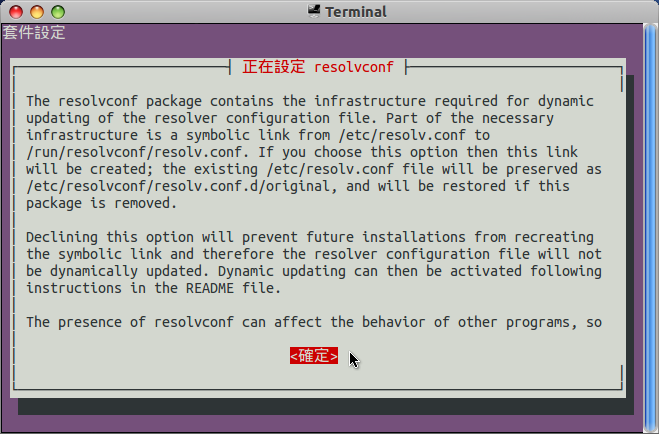
安裝 logwatch
# emerge –ask logwatch
These are the packages that would be merged, in order:
Calculating dependencies… done!
[ebuild N ] dev-perl/Carp-Clan-6.40.0-r1 USE=”{-test}”
[ebuild N ] dev-perl/Sys-CPU-0.540.0-r1
[ebuild N ] dev-perl/Sys-MemInfo-0.910.0-r1
[ebuild N ] virtual/mailx-1
[ebuild N ] virtual/cron-0
[ebuild N ] dev-perl/DateManip-6.410.0 USE=”{-test}”
[ebuild N ] dev-perl/Tie-IxHash-1.230.0 USE=”{-test}”
[ebuild N ] dev-perl/Bit-Vector-7.200.0-r1
[ebuild N ] dev-perl/Date-Calc-6.300.0-r1
[ebuild N ] sys-apps/logwatch-7.4.0_p170-r1
Would you like to merge these packages? [Yes/No]y[@more@]1. 備份原設定檔 /usr/share/logwatch/default.conf/logwatch.conf
# cp /usr/share/logwatch/default.conf/logwatch.conf /usr/share/logwatch/default.conf/logwatch.conf.$(date +%F)
2. 進行修改
# sed -i ‘s/MailTo = root/MailTo = xxxx@gmail.com/’ /usr/share/logwatch/default.conf/logwatch.conf
# sed -i ‘s/MailFrom = Logwatch/MailFrom = Logwatch@nxi.test.ilc.edu.tw/’ /usr/share/logwatch/default.conf/logwatch.conf
# sed -i ‘s/Output = stdout/Output = mail/’ /usr/share/logwatch/default.conf/logwatch.conf
# sed -i ‘s/Detail = Low/Detail = Med/’ /usr/share/logwatch/default.conf/logwatch.conf
3. 執行 logwatch 測試是否能收到信件
# /usr/sbin/logwatch.pl
列出系統可以升級的套件
# emerge -pv world | grep “[ebuild U ]” | awk ‘{print $4}’ | awk -F ‘/’ ‘{print $2}’
procps-3.3.9-r2
列出系統已安裝套件
# emerge -pv world | grep “[ebuild R ]” | awk ‘{print $4}’ | awk -F ‘/’ ‘{print $2}’ | head
xz-utils-5.0.8
bzip2-1.0.6-r6
gnuconfig-20140212
which-2.20-r1
baselayout-2.2
patch-2.6.1
os-headers-0
file-5.21
net-tools-1.60_p20130513023548
coreutils-8.21[@more@]利用 gmail 來寄信
1. 安裝 ssmtp 及 mailx
# emerge ssmtp mailx
2. 備份原設定檔 /etc/ssmtp/ssmtp.conf
# cp /etc/ssmtp/ssmtp.conf /etc/ssmtp/ssmtp.conf.$(date +%F)
3. 修改設定檔 /etc/ssmtp/ssmtp.conf
# vim /etc/ssmtp/ssmtp.conf
#root=postmaster
# The place where the mail goes. The actual machine name is required
# no MX records are consulted. Commonly mailhosts are named mail.domain.com
# The example will fit if you are in domain.com and you mailhub is so named.
mailhub=smtp.gmail.com:587
# Where will the mail seem to come from?
#rewriteDomain=y
# The full hostname
#hostname=root-chroot-copy
# 寄件者帳號
AuthUser=xxxx@gmail.com
# 寄件者密碼
AuthPass=xxxx
UseSTARTTLS=YES
FromLineOverride=yes #enables to use mail -r option
4. 更改檔案權限
# chmod 0600 /etc/ssmtp/ssmtp.conf
5. 建立 Script
# cat /usr/lcoal/bin/check-update
#!/bin/bash
emerge -pv world | grep “[ebuild U ]” | awk ‘{print $4}’ | awk -F ‘/’ ‘{print $2}’ > /tmp/$(date +%F)
if [ -s /tmp/$(date +%F) ] ;then
mail -s “Gentoo Linux Updates Available” xxxx@gmail.com < /tmp/$(date +%F)
rm -rf /tmp/$(date +%F)
else
rm -rf /tmp/$(date +%F)
fi
6. 更改檔案執行權限
# chmod 700 /usr/lcoal/bin/check-update
7. 排程(每 3 小時執行一次)
# crontab -l
0 3 * * * /usr/lcoal/bin/check-update